Congested Canna Rhizomes Can Lead To Poor Flowering – Divide Them With This Guide


Reviewed By DAN ORI

Dan has over 27 years’ under his belt caring for plants and gardens. Working as a Horticultural Instructor and Consultant, he draws on a diverse range of experience that includes working as a Head Gardener, Tree Surgeon, Garden Centre Trouble Shooter, and writer of academic papers. Dan has a Level 3 Diploma in Horticulture and is currently a candidate for the RHS’s most prestigious award – The Master of Horticulture.
Contributions From EMILY CUPIT

Emily is a Gardening Writer, Photographer and Videographer from Derbyshire, UK. She is the Founder of Emily's Green Diary - a community of more than 75,000 people who share in her gardening journey.
IN THIS GUIDE
Bringing a touch of the tropics to your cloudy garden in Old Blighty, tall Cannas are brilliant plants to position at the rear of the bed to serve as a spectacular backdrop.
Their large wavy leaves are usually bright green but quite often occur in variegated forms or in russet tones.
This foliage, pretty in and of itself, frames erect flower stalks.
The bilaterally-symmetric flowers are quite unique in their shapes and forms.
It is probably fitting that the flowers of an exotic plant frequently can seem rather like the ruffled wings of some small exotic bird!

Cannas grow from rhizomes – these rhizomes multiply by growing child rhizomes that are attached to the parent rhizomes.
Over time, the rhizomes – particularly the parent rhizome – will suffer from congestion and the growing plants will become undesirably dense while probably also not blooming as well as they used to.
| Difficulty | Medium |
| Equipment Required | Gardening gloves, secateurs or hedge shears, gardening fork, gardening trowel or hand spade, sharp knife, sterilising liquid, sulphur powder (optional) |
| When To Divide | October |
You can avoid these problems, give the rhizomes breathing room, space out the plants, and get new ones in the bargain by lifting and dividing them in autumn.
Doing so every four years would be just about right.
You can lift and divide Cannas by following these steps:
- Sterilise all cutting implements.
- Shear down the plants.
- Gently loosen the soil and carefully dig into it.
- Carefully lift out the rhizome.
- Break or cut the rhizome appropriately and correctly.
This process is explained in more depth below.
Canna rhizomes should be lifted and divided in mid-autumn or after their leaves have withered and they are entering dormancy.
1) Sterilise Implements
Sterilise your secateurs or hedge shears and a sharp knife.
You may use a rubbing alcohol solution, bleach solution or hand sanitiser.
Put on your gardening gloves.
2) Cut Back The Plant
Using the secateurs or hedge shears cut all foliage and stalks from the Canna down to 4-6cm from the soil.
The next step is best accomplished when the soil is not wet and is dryish.
3) Loosen & Remove Soil
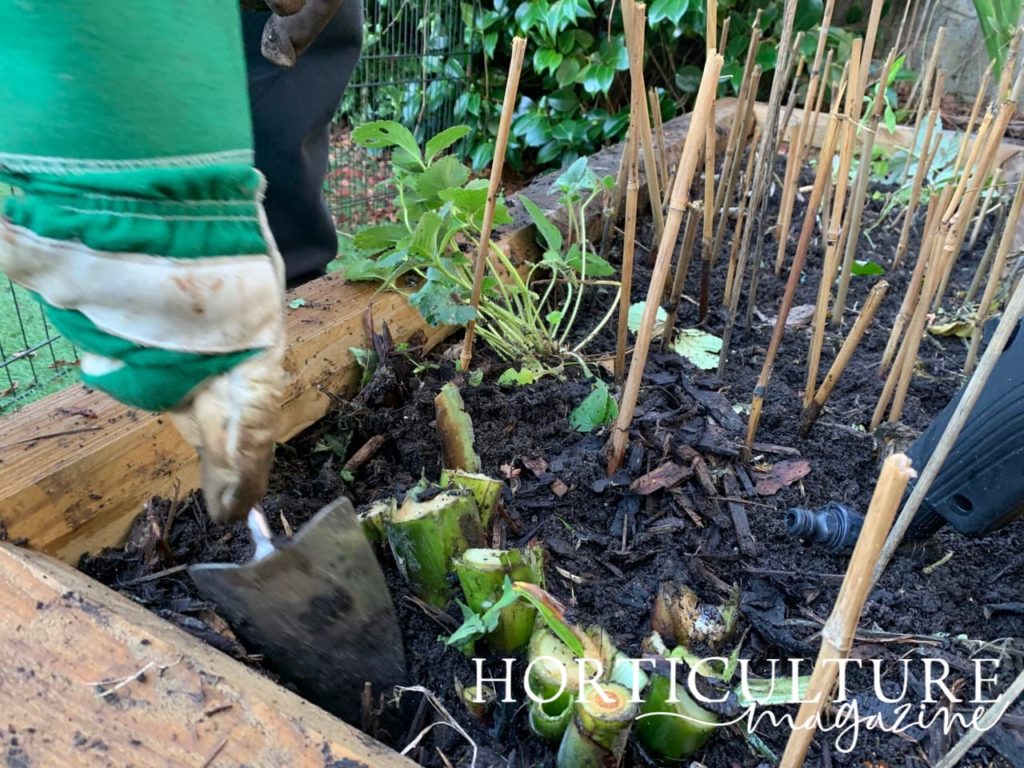
Use a gardening fork and gardening trowel or hand spade to gently loosen and remove the soil.
Using the stems and stalks as a guide as to the location of the rhizome, start about 30 centimetres away from it, and ‘excavate’.
Be careful not to strike the rhizome or the roots.
Consider using softish plastic gardening tools, rather than traditional metal ones, for this activity.
4) Dig Down Deeper
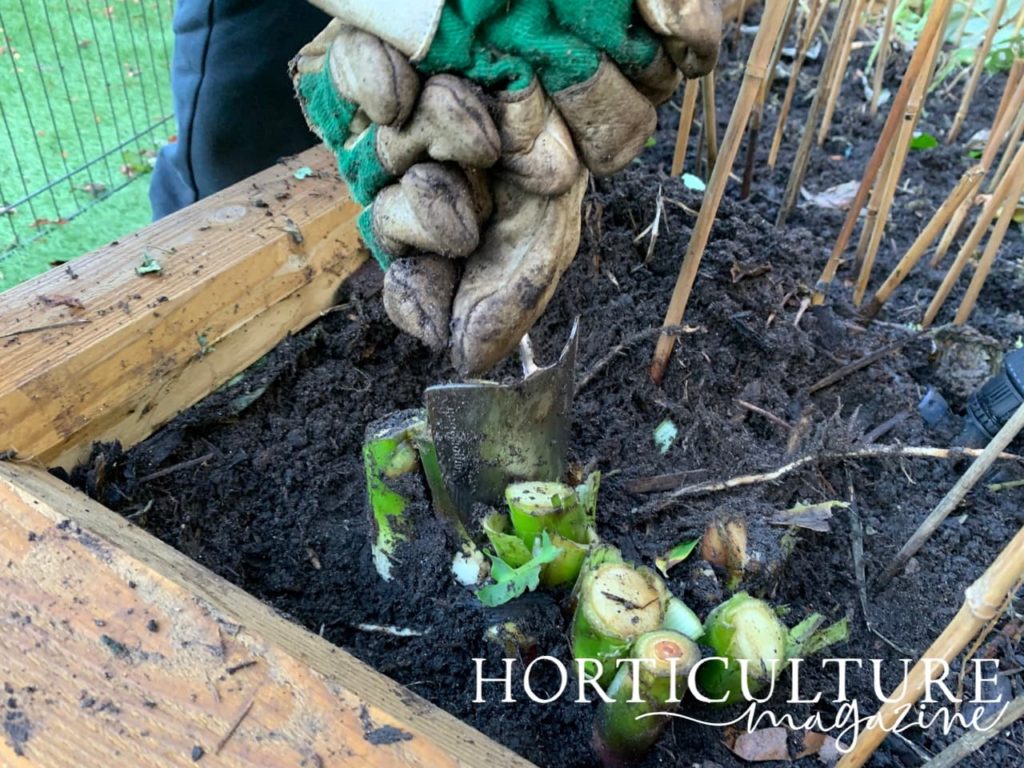
When the rhizome is exposed, loosen and dig into the soil a little deeper and a little closer around the rhizome – it will need to be removed with its roots intact.
At this point take special care not to injure the roots.
5) Lift The Rhizome
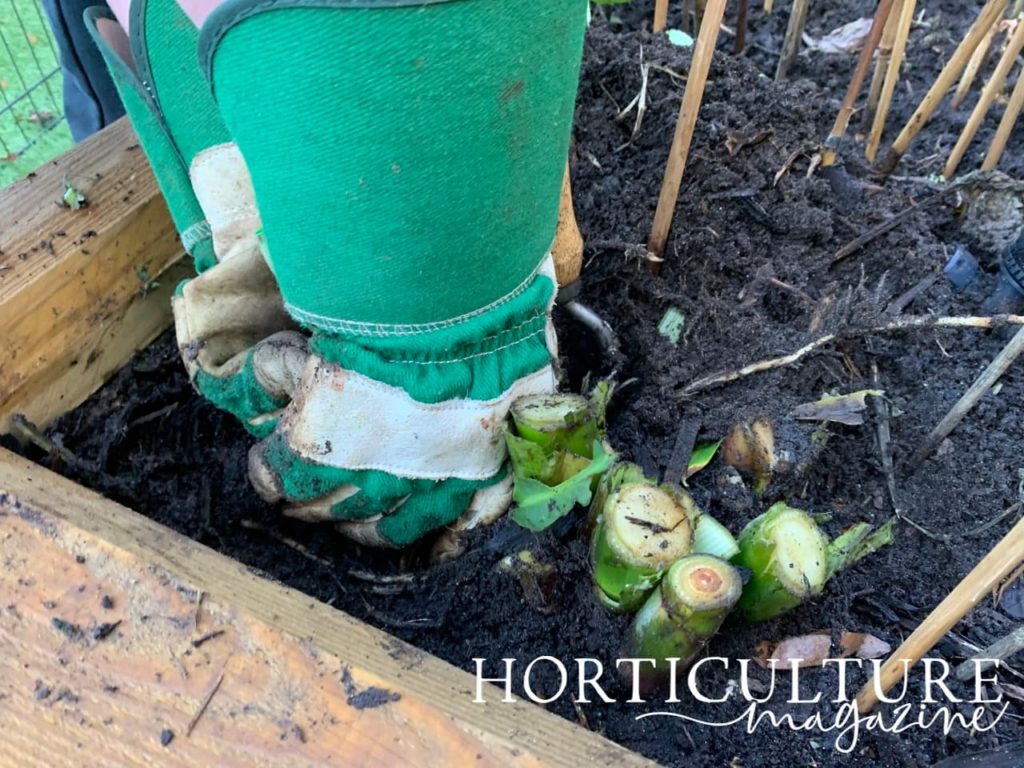
As soon as you are able to do so, using your (gloved) hands push into the soil, gently wiggle the rhizome and work it loose, and lift it up with its roots intact.
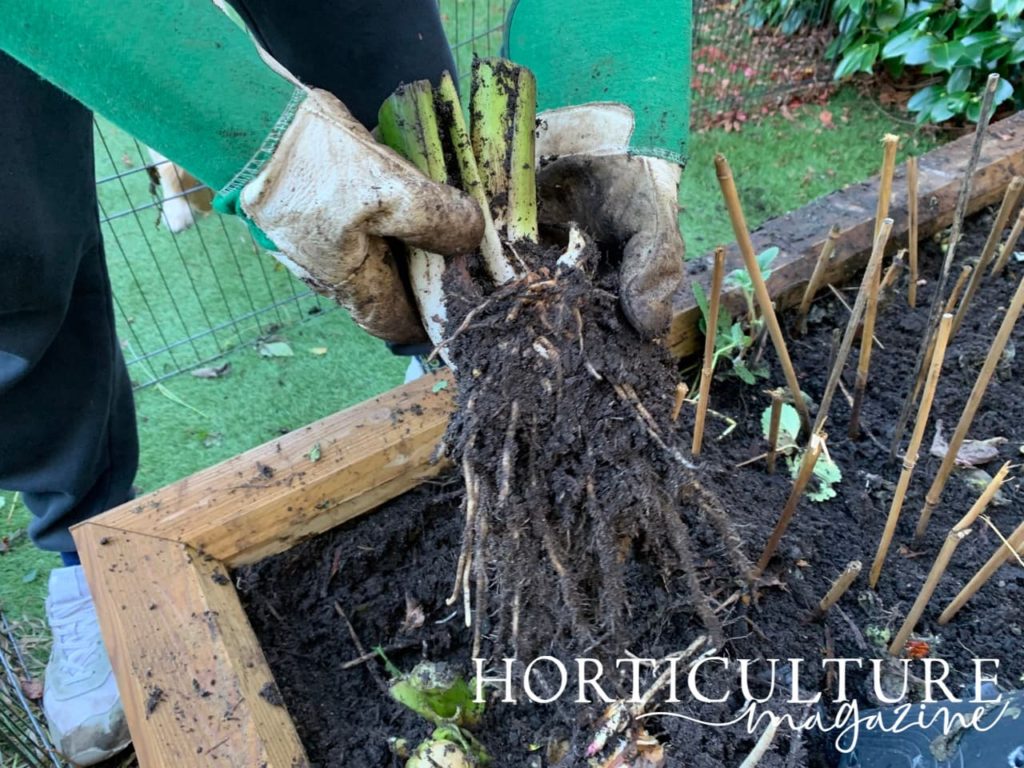
Gently clean the soil off it – do not rub it harshly.
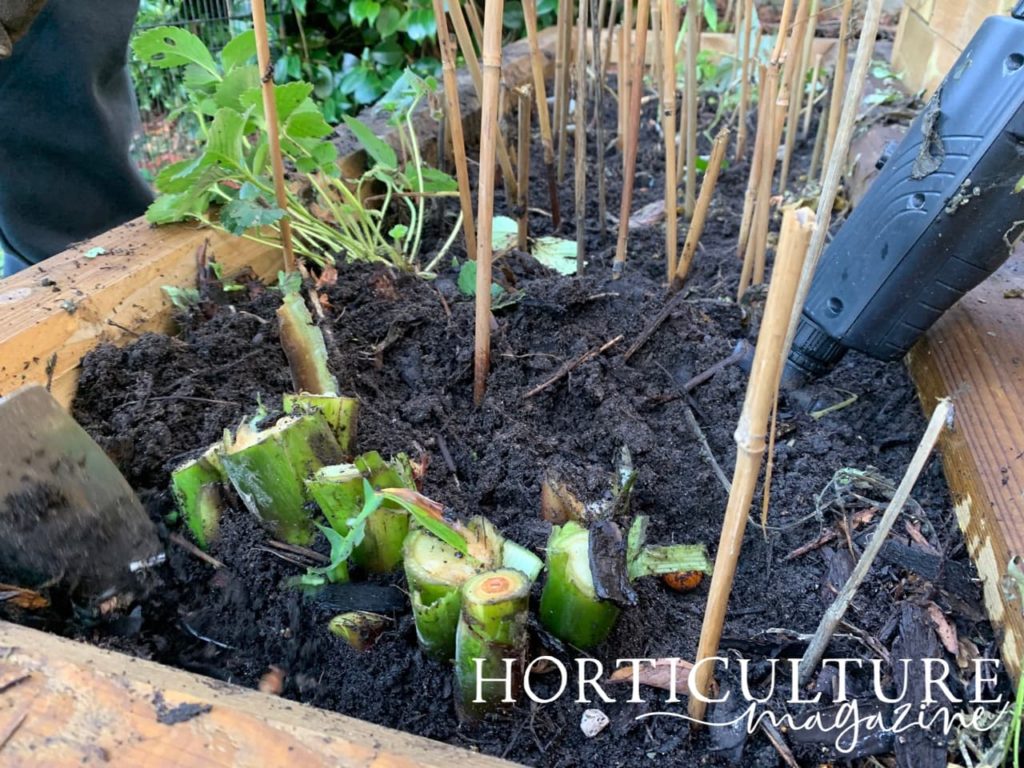
6) Break / Cut The Rhizome
Break the rhizome cleanly if you are able, or cut it with the sharp knife you’ve sterilised, at the junctures where the children are growing from the parent.

Break or cut such that each divided piece has at least one eye and preferably two, and (only) some roots.
7) Disinfect The Rhizomes
Pre-emptively disinfect the rhizomes to ward off any diseases.
Sprinkle a touch of sulphur powder, or brush the bleach solution with your (ungloved) fingers, on the freshly-broken or -cut surfaces of the rhizome.
Now the divided Canna rhizomes are all set for re-planting or storage as the case may be.