Any Of These 3 Methods Will Work To Grow New Gerbera Plants Say Gardeners

Chris is a gardening writer and nature enthusiast. He graduated from Oxford Brookes University in 2022 with an MA in Psychology. Chris works with the Leeds Green Action Society, helping their food cooperative by growing various fruit and vegetables on their two allotments in Hyde Park, Leeds.
Reviewed By COLIN SKELLY

Colin is a Horticulturist and Horticultural Consultant with experience in a range of practical and managerial roles across heritage, commercial and public horticulture. He holds the Royal Horticultural Society’s Master of Horticulture award and has a particular interest in horticultural ecology and naturalistic planting for habitat and climate resilience.
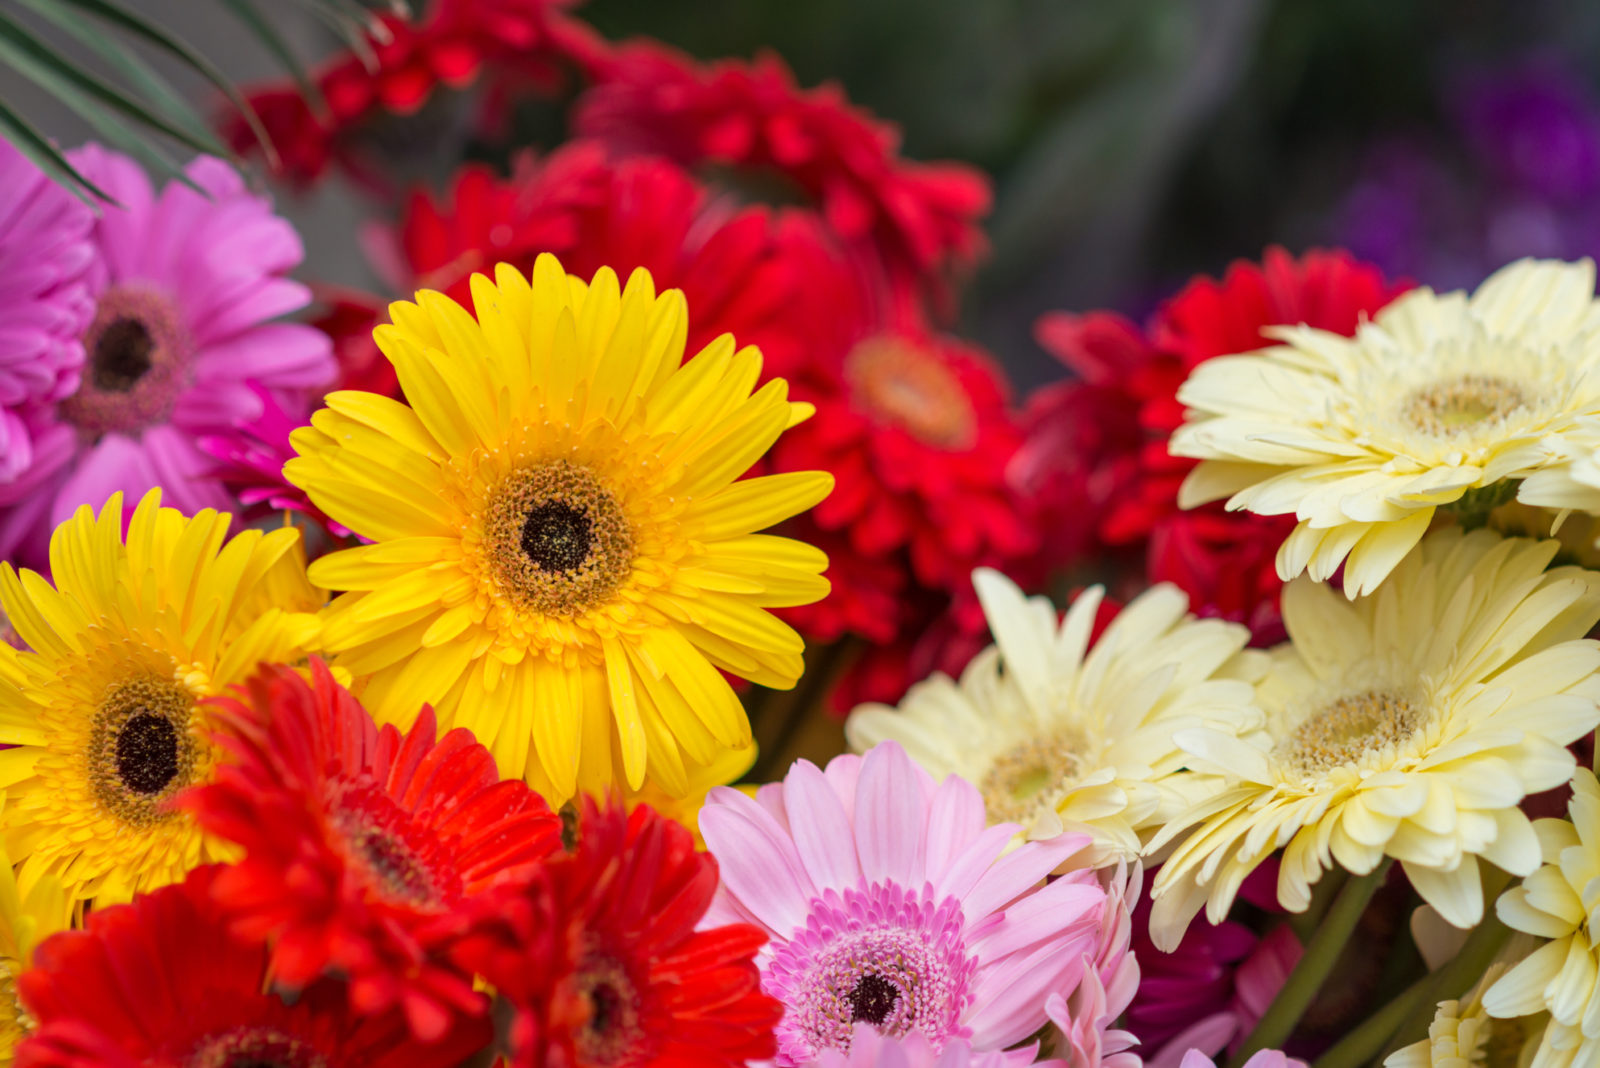
Gerberas can really bring a bit of magic to the landscape of your garden.
This showy plant can make a real statement on its own or, thanks to the huge range of colours they come in, blend beautifully when set amongst other plants.
Gerberas originally hail from Africa and Asia but were introduced in the United Kingdom in 1878 and have since been cultivated and refined, becoming a firm favourite among British gardeners.1The origin of the gerbera. (2018, November 29). De Zuidplas. Retrieved March 16, 2023, from https://www.de-zuidplas.nl/en/news/680-the-origin-of-the-gerbera
Gerberas have no scent, but what they lack in smell they make up in beauty, so it’s hardly surprising that they are a popular plant to propagate – who wouldn’t want to fill their garden with more of these impactful plants?
Propagation in the plant world is the process of growing new plants by planting seeds, cutting or other parts of the plant.
When it comes to gerberas there are three main ways to do this, which we will outline in detail in the rest of this article, so keep reading.
Propagating gerberas isn’t too difficult, however, aftercare is crucial to the survival of the plant.
| Difficulty | Easy |
| Equipment Required | By seed: seeds, sharp sand, seed compost, pot or container, propagator or sunny windowsill. Dividing clumps: garden fork, sharp knife, compost. Taking basal cuttings: secateurs, pot or container, sharp sand, compost, propagator. |
| When To Propagate | By seed: February-March Dividing clumps: March-April Taking basal cuttings: March |
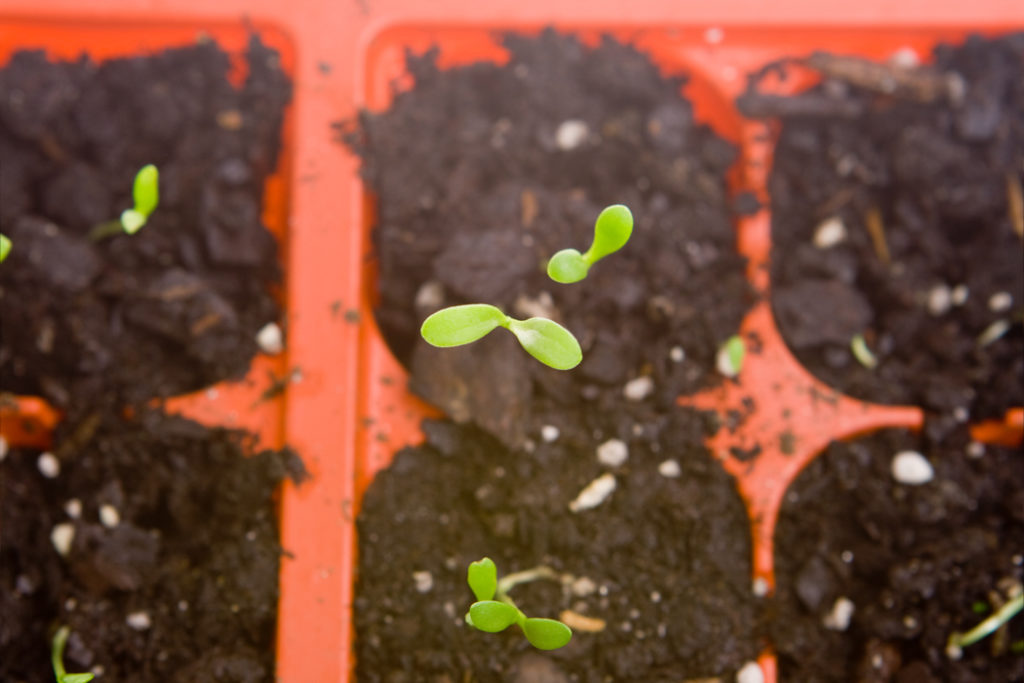
1) Propagation By Seed
You should sow gerbera seeds in either February or March.
Germination rates will decline with age so be sure to use fresh seeds.
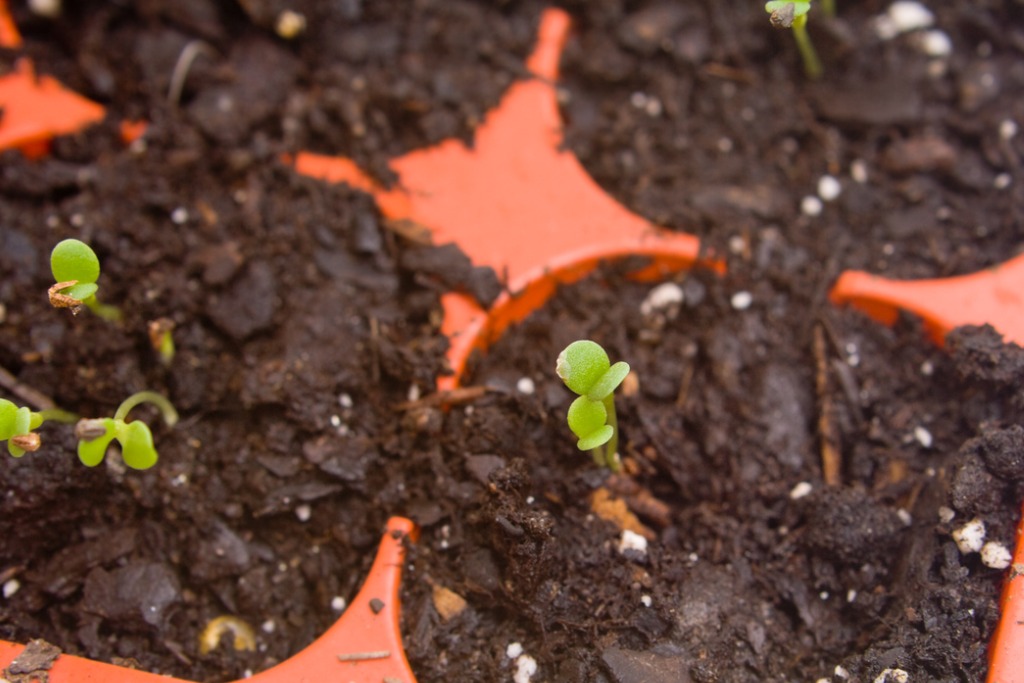
It’s also worth noting that if you choose to use seeds from a named cultivar, your gerberas may not look like their parent plant.
- Fill a pot or container with seed compost and add sharp sand – this will improve drainage.
- Sprinkle the seeds sparingly, ensuring they are set vertically with the feathery end pointing upwards. Gerbera seeds need light to germinate so don’t bury them too deeply.
- To germinate, gerbera seeds require a temperature of about 20-25°C, so place the pot or container on a sunny windowsill or in a propagator. You can expect germination to take place within 2-3 weeks.
When it comes to aftercare, it’s important to know that young gerberas are vulnerable to rotting, so be careful when watering to avoid heavily saturated compost.
You can expect your gerberas to flower 4-6 months after sowing.
2) Propagation By Division
“Division is my preferred method for propagating Gerberas,” shares Master Horticulturist Colin Skelly.
“I am usually only looking to make up for any that were lost over winter and division can provide stock young plants quite quickly.
“I have found that timing is crucial as the plants need to have started into active growth but not too long as the plantlets will need time to establish before potting on.”
The best time to propagate gerberas by dividing clumps is in March or April.
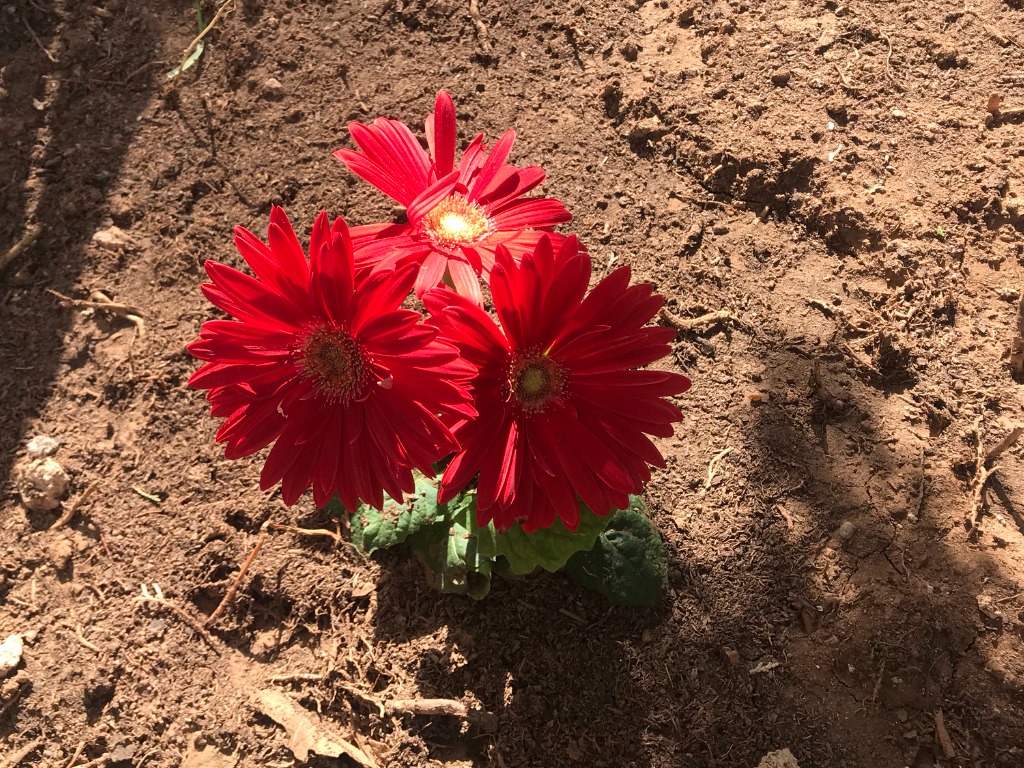
Once you see the first signs of new growth on large, healthy plants you can start the process.
- Using a garden fork, gently lift the plant. Limit root damage by working out from the crown’s centre.
- Shake off any excess soil, leaving the roots clearly visible.
- Using a sharp knife cut the crown into 4-5 pieces. Each piece should have lots of roots and at least one growth bud.
- Plant the divisions in either a pot or container or straight into a new part of the garden. If you are planting in a pot, mix compost into the soil.
Aftercare is straightforward, simply water the plants, taking care not to make the soil soggy.
Water them regularly, because if they dry out, they will struggle to re-establish.
3) Propagation By Cuttings
The best time to propagate by taking basal cutting is in spring (from late March) when the new shoots emerge from the crown.
- Using a pair of secateurs, get as close to the crown as possible and cut off a strong, sturdy shoot, right down at the base.
- Plant your cutting in a pot or container with sharp sand and compost. This will help with drainage and encourage healthy root growth.
- Place in a propagator until the plant has established strong roots.
As for the aftercare, follow the same rule of thumb as with the other methods of propagation and water the plants carefully without letting the soil get drenched.
Once the plants have established themselves, you can either repot them or replant them in the garden.
And that is everything you need to know about propagating gerberas.
Whichever method you choose, if you follow our easy steps you can’t go wrong!