Growing Hops With Mike Barker And His Specialist Nursery – Tips From A Seasoned Grower


Reviewed By COLIN SKELLY

Colin is a Horticulturist and Horticultural Consultant with experience in a range of practical and managerial roles across heritage, commercial and public horticulture. He holds the Royal Horticultural Society’s Master of Horticulture award and has a particular interest in horticultural ecology and naturalistic planting for habitat and climate resilience.
Contributions From MIKE BARKER

Mike Barker is an expert with 30 years of experience growing hops and the Owner of the specialist nursery Essentially Hops, based in Canterbury, UK.
Hops are one of the key components in beer and cultivating your own varieties can not only be a hugely rewarding endeavour in itself, but it can also help to unlock unique aromas that will set your flavour apart from others.
While many gardeners might have you believe that growing hops is a challenging task, this climbing plant shouldn’t pose too many problems in the right conditions and with the right level of care and attention, especially if you’re already a seasoned horticulturist.
In this guide, we’ve collaborated with Mike Barker, Owner of the specialist nursery Essentially Hops.
“Strongly associated with Kent, hops are a herbaceous perennial which can have a substantial productive life,” says Mike.
Every part of the plant’s annual growing cycle involves a high amount of physical and horticultural attention, which makes them a huge challenge to grow.
“The crop is now a small minority crop in the UK, which means access to the right herbicides, fungicides and insecticides are very restricted.
“Having said all that, standing in a hop garden that is close to harvest is one of my favourite places on the farm.”
When divided into distinct stages the practice of growing hops should become easier and more achievable for anyone with the required levels of effort and focus.
Hops Overview
| Botanical Name | Humulus lupulus |
| Common Name(s) | Hops |
| Plant Type | Perennial Climber / Vine |
| Native Area | Europe & Asia |
| Hardiness Rating | H6 |
| Foliage | Deciduous |
| Flowers | Yellow |
| When To Sow | May, June |
| Harvesting Months | August, September |
Sunlight
Preferred
Full Sun or Partial Shade
Exposure
Sheltered
Size
Height
4 – 8M
Spread
1.5 – 2.5M
Bloom Time
Summer
Soil
Preferred
Chalk, clay, loam
Moisture
Moist but well-drained
pH
Any
Hops (botanical name Humulus lupulus) is native to much of the Northern Hemisphere – stretching from the UK and Spain to Siberia in the East.1Humulus lupulus. (n.d.). Kew Royal Botanic Gardens. Retrieved March 17, 2023, from https://powo.science.kew.org/taxon/urn:lsid:ipni.org:names:303502-2
It is a climbing plant and uses long, flexible shoots known as ‘bines’ to attach itself to (and grow up) structures.
Hops has been known to climb up to 6m in height – which can certainly pose challenges when it comes to harvesting season!2Growing Hops in the Backyard. (n.d.). Rutgers Cooperative Research & Extension. Retrieved March 17, 2023, from https://www.canr.msu.edu/uploads/234/71501/fs992%20Growing%20Hops%20Rutgers%20University.pdf
As a perennial, it should return yields for many years once established (decades even) so it is a steady, productive contributor to any garden space.
“I grow hops as an ornamental climber rather than for cropping,” says Colin Skelly, a Horticultural Consultant.
“Planted next to a trellis on a shed, once it has reached the top it continues its climb up into adjacent trees.
“This creates a verdant atmosphere in late summer and is cut back in late autumn once the foliage has died back.”
How To Grow Hops
The first step in growing hops is acquiring the rhizomes from which they’ll grow, as Mike shares.
“Hop sets are usually sold as bare root specimens and are 2 years old and look small, but don’t be fooled, as they can grow into quite a beast and overwhelm neighbouring plants.”
Rhizomes are harvested in March and April, though depending on your geographical location and the variety you wish to plant, it may make sense to pre-order your rhizomes as early as January.
You should be aware that different varieties have many different characteristics, so spend some time reading up on the attributes of the hops available to you and make your selection according to your own preferences.
Once you’ve acquired your rhizomes, you should remove them from their packaging, wrap them in a damp kitchen towel and store them in the fridge until you are ready to plant.
Where To Grow
In the meantime, you can prepare the area by selecting a corner of the garden which receives plentiful sunshine – so ideally, a south-facing location.
“Hops will always do better if planted directly into the ground,” says Mike.
“[These plants] need fertile and well-draining soil, preferably out of the wind but with good light. If you want to grow them in a pot, just make sure they’re fed and watered correctly.”
Since hops are climbing plants, they’ll need something to support their growth.

Most home growers prop a trellis or other support against the side of the house, then use twine to allow for different bines to scale it.
If you want to grow your hops against a trellis or house, Mike recommends choosing the varieties ‘Cobbs’, ‘Fuggle’ or ‘Bramling Cross’ for the best results.
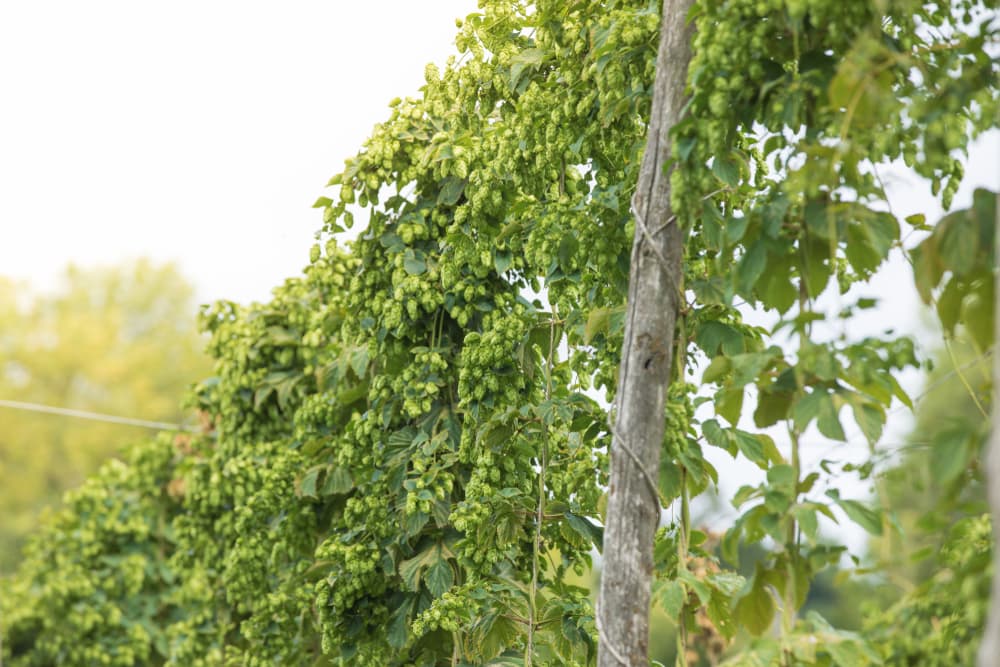
In the image above, many twines have been attached to standing supports, though this arrangement is perhaps more suitable for a commercial outfit.
Soil Requirements
Once you have selected an appropriate location for your hop plants, you should aerate the soil to ensure it offers good drainage.

While it is possible to use fertilisers to boost its nutrient content, it’s preferable to use good quality compost and plenty of organic matter to mulch it.
This will ensure your rhizomes are happy and healthy.
Planting Rhizomes
You should look to plant your rhizomes in spring, after the winter has passed and there is no danger of another hard frost – since this could kill your plants before they have even taken root.
On the other hand, avoid planting any later than May, as this could have an adverse effect on the quality of the hops you grow.
Locate each rhizome at a distance of around three feet from its neighbour to allow it to grow independently and prevent the varieties (and their individual flavours) from becoming mixed together.

Dig a hole between 6-12 inches deep and place the rhizome inside, then cover it with compost and mulch.
When positioning the rhizome in its hole, try and orient it horizontally so that the buds will emerge vertically.
However, if you’re unsure of what this means or can’t figure out where the buds are likely to sprout, don’t worry about it too much.
Rhizomes will grow however they’re placed as long as they have access to the right conditions and receive sufficient TLC.
Hops Plant Care
The first shoots which emerge after planting are known as “bull shoots”.
If you wish to encourage additional growth in your hop plants, you can trim these back immediately to enhance production.

Having said that, it’s not a necessary step in the process and you’ll still enjoy great hops by omitting it, so don’t worry if you’re forgetful or lazy.
By summer, you should begin to see a significant amount of growth from your rhizomes.
Training
Once the plant reaches over a foot in height, you should begin training the bines to climb the trellis.
You can do this by wrapping the bines carefully around your twine or trellis in a clockwise (never anticlockwise) direction.

You may need to continue training them for a few days consecutively until they grasp what they’re supposed to do – but from this point on, they’ll climb independently and at an impressive rate.
“If your stems have very few laterals bearing cones, you can improve this with training, by selecting just a few shoots to grow in April or May,” explains Mike.
Watering
Hops are thirsty little plants and require frequent watering.
In the UK, it might not be necessary to supplement the rainfall that most parts of the country regularly receive, though it certainly can be during the height of summer.
Check the soil surrounding your hop plants regularly and if it’s dry to the touch, give it a good drink.
You want to aim for a moist but not sodden consistency at all times.
Mike Barker argues that it is also important that the plant has a good supply of Potassium – you can use a high-potassium feed to encourage good growth.
Pruning
After a couple of months of growth, it’s advisable to trim the leaves off the bottom three feet of the plant.
This will prevent any bacteria or fungi in the soil from attacking your plant and inhibiting its growth.
Other than that, hops should perform well enough when left to their own devices.
Common Problems
Mike argues you should keep an eye out for pests and diseases, particularly powdery/downy mildew, which is common with hops.
“Other problems include Red Spider Mite and the Hop Damson Aphid.
“Red Spider is very difficult to detect, as it is microscopic and often the web is the only indication before symptoms of attack occur.
“You can treat with predators which is probably the best option for the amateur grower.
“Aphids can be stripped off or treated with soapy water…Normal aphicides will not work.”
Mike also implores growers to watch out for poor growth after the plant has been put in the ground, as the root system may be under attack from beetle larvae.
Slugs are also said to love hop shoots and can be deterred with the usual methods.