Pruning Photinia Can Help With Disease Prevention: How To Give Them A Spring Trim


Reviewed By COLIN SKELLY

Colin is a Horticulturist and Horticultural Consultant with experience in a range of practical and managerial roles across heritage, commercial and public horticulture. He holds the Royal Horticultural Society’s Master of Horticulture award and has a particular interest in horticultural ecology and naturalistic planting for habitat and climate resilience.
IN THIS GUIDE
If you want a low-maintenance, hardy and colourful shrub, look no further than photinia and its varieties – the vast majority of which are evergreen shrubs.
Some photinia varieties are trees and a few are deciduous shrubs and in this guide, I will explain how to prune evergreen shrubs, like Photinia ‘Red Robin’.
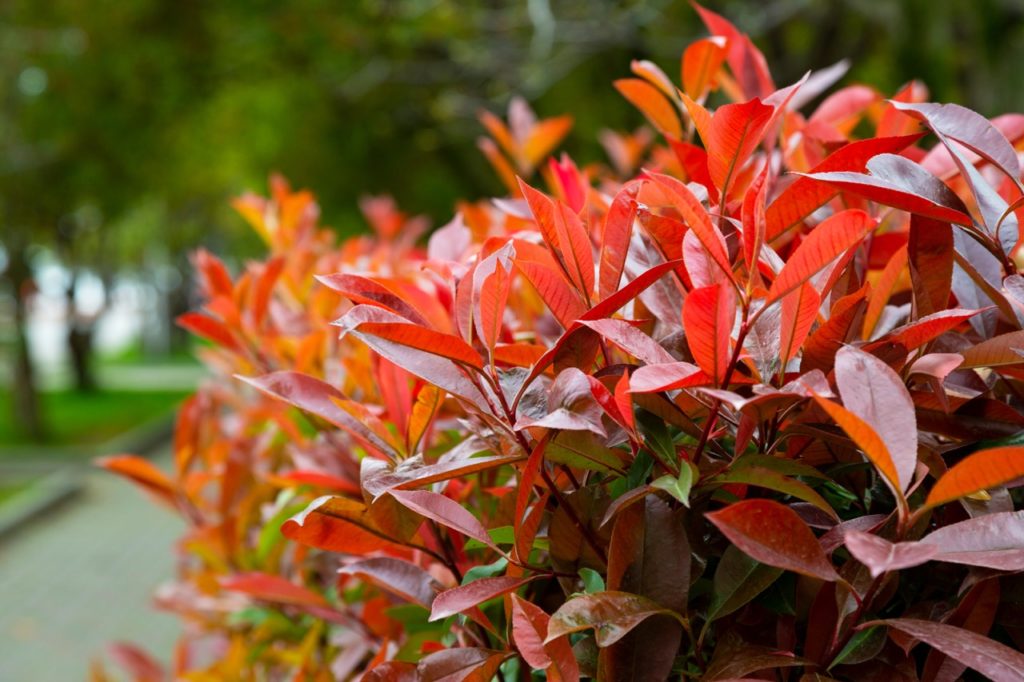
While many members of the Plant Kingdom are renowned for their autumn colours, photinia brings a new twist and is prized for its spring and summer foliage colours, with its young leaves displaying eye-catching tones of reds and pinks.
Like most evergreen shrubs, photinias do not need to be pruned as such.
They grow in a naturally pleasing form, but with minimal trimming for size and shape, and to take out stray, protruding stems, pruning can be a good idea.
| Difficulty | Easy |
| Equipment Required | Gardening gloves, secateurs or pruning shears |
| When To Prune | Spring or autumn |
Why Prune Photinia?
The first objective is disease prevention.
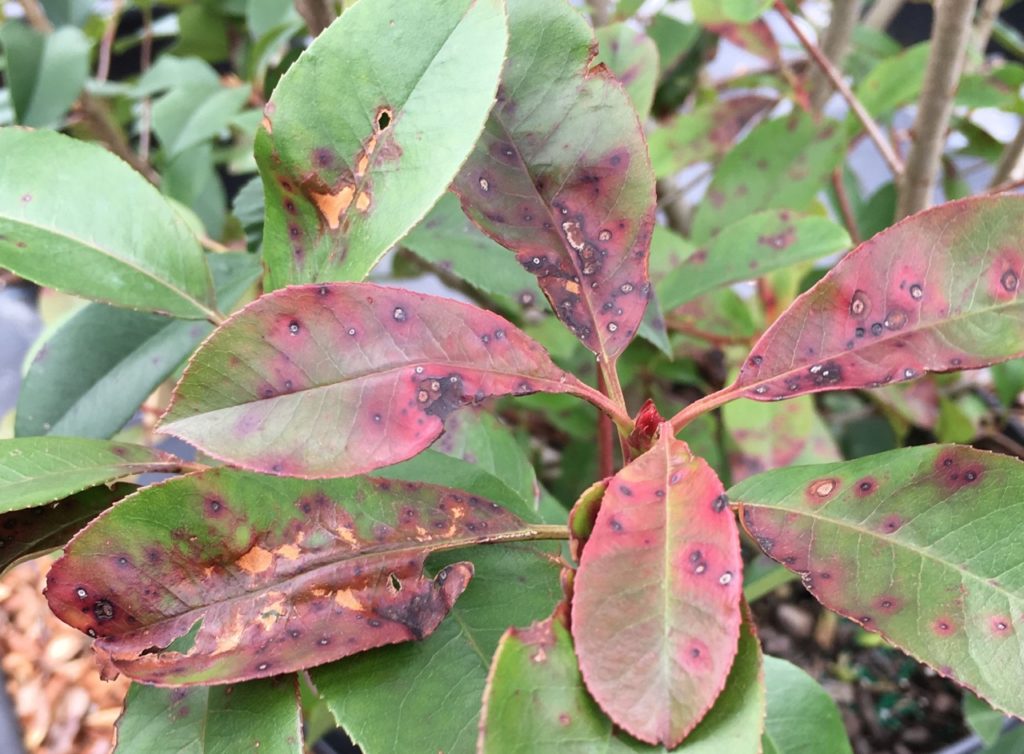
Photinia × fraseri cultivars, of which ‘Red Robin’ is one, are very susceptible to leaf spot which is a fungal disease.
Correct pruning in the interior of the bush during the autumn and winter seasons will significantly reduce the chances of the plant succumbing to this disease.
In addition, a few photinia varieties are renowned for the eye-catching and exciting colours of emerging foliage and young leaves.
Correct trimming on the stem tips during spring will stimulate fresh foliage and with it, those charming, exciting colours.
It’s important to be aware that it is this very foliage, the fresh young leaves that are so colourful and desirable, that is most susceptible to that worrisome leaf spot.
When To Prune Photinia
The spring trim, as stated above, gives rise to those colourful young leaves that photinia is prized for.
However, this bush also produces clusters or sprays of little flowers of a rich creamy colour, in the late spring and early summer, which are also a delightful sight.

These flowers will appear only on untrimmed stems, so you have a choice to make between colourful foliage or creamy flowers.
The first phase of pruning is generally done in late autumn to early winter, with the second being carried out in mid-spring.
We explain these two phases below in more detail.
Preparation Before Pruning
Make sure to sterilise your tools before any type of pruning, especially with photinia as it is so susceptible to leaf spot.
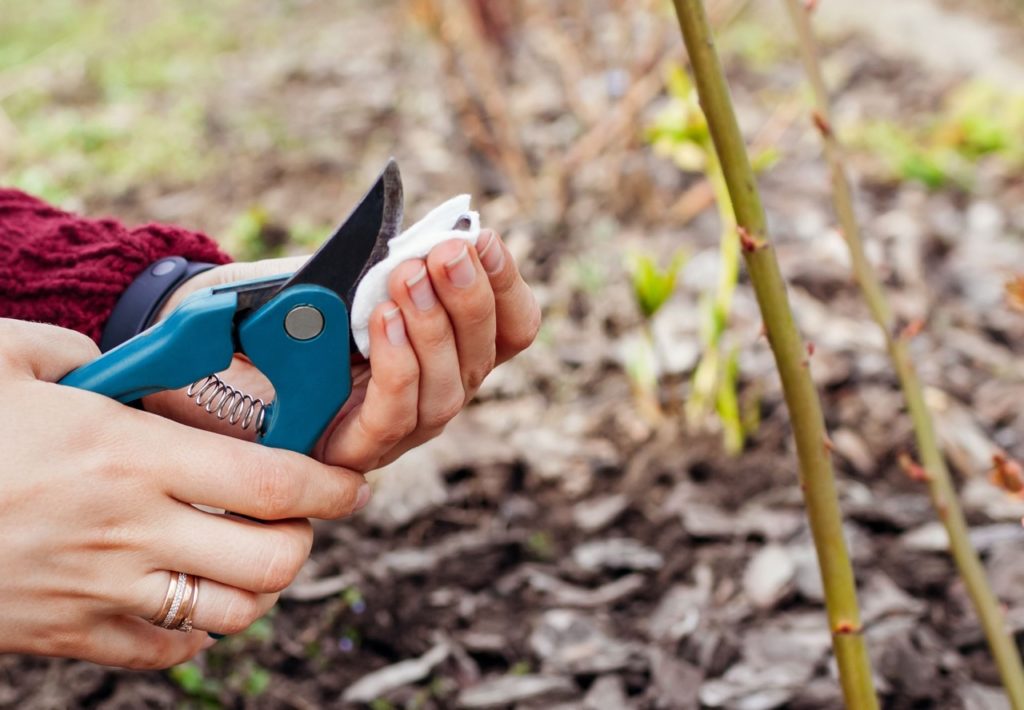
Diluted rubbing alcohol, a solution of bleach, or readily-available hand sanitiser (with sufficient alcohol content) are all very good sterilising agents.
We suggest you wear gardening gloves before undertaking any pruning tasks.
Autumn-Winter Pruning For Disease Prevention
The aim of this pruning is to ensure that the lower part and interior of the bush are not dense and congested because if it is, it has to be opened up.
“I would tend to open up Photinia that are in partial shade or have suffered from leaf spot,” shares Colin Skelly, a Master Horticulturist.
“This will optimise air movement and light penetration. This should help to maintain the health of the shrub.
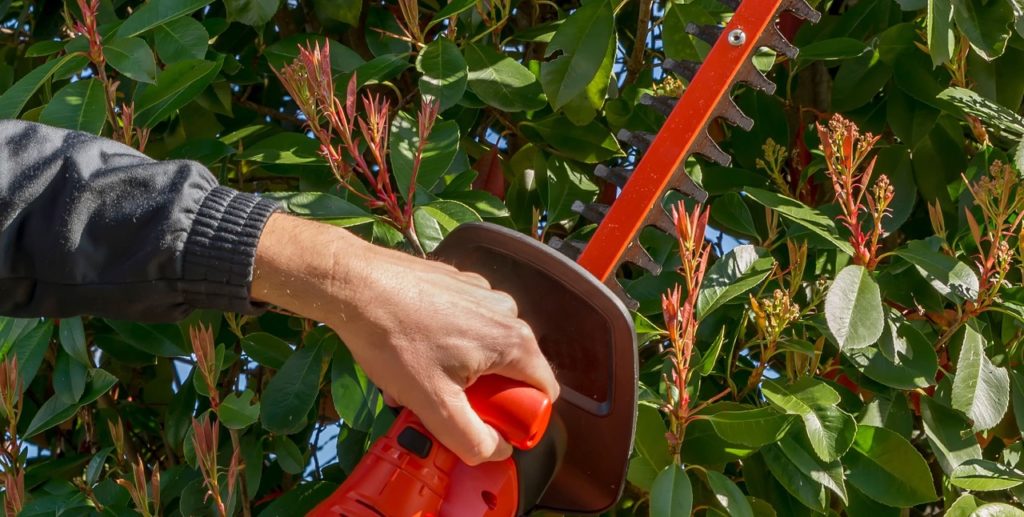
“Asides from plant health, Photinia can be shaped, so don’t be afraid to get stuck in. Avoid hedge cutters or shears, though, to maintain the attractive foliage.”
From the bottom and interior of the bush, select stems to eliminate.
The first to go should be those that are dead and diseased.
You should also prune branches that are touching and rubbing against others, choosing to eliminate the one that is older or misshapen.
Finally, prune to open up space in the interior of the bush to permit sunlight to reach it and enhance air circulation.
If you choose to carry out this task on an annual basis you shouldn’t have to prune many branches at all, but if you begin to prune a neglected or congested bush, you may need to remove up to a third of the stems.
Spring Trimming For Foliage Colours
The second phase of trimming is best done in mid-spring or later if you live in a very cold region, as a subsequent frost may well blight fresh growth.
The aim is to trim shoots and new branches by 10-18cm.
This will trigger fresh growth that will bring about those delightful foliage colours.
I strongly recommend that powered hedge trimmers not be used at all and that you only use hand gardening tools (with sharp blades) for trimming photinias.
Trim protruding and straggly branches by a greater length whilst trimming tidy shoots by smaller lengths.
If you would like the bush to bear flowers, trim only about 50% of the branches and shoots in this fashion.
During spring trimming, you may as well try to give a gentle upward taper to the bush.
Such a taper will allow sunlight to reach all the way down the bush, and sunlight plays a big part in keeping plant diseases at bay.