

Growing
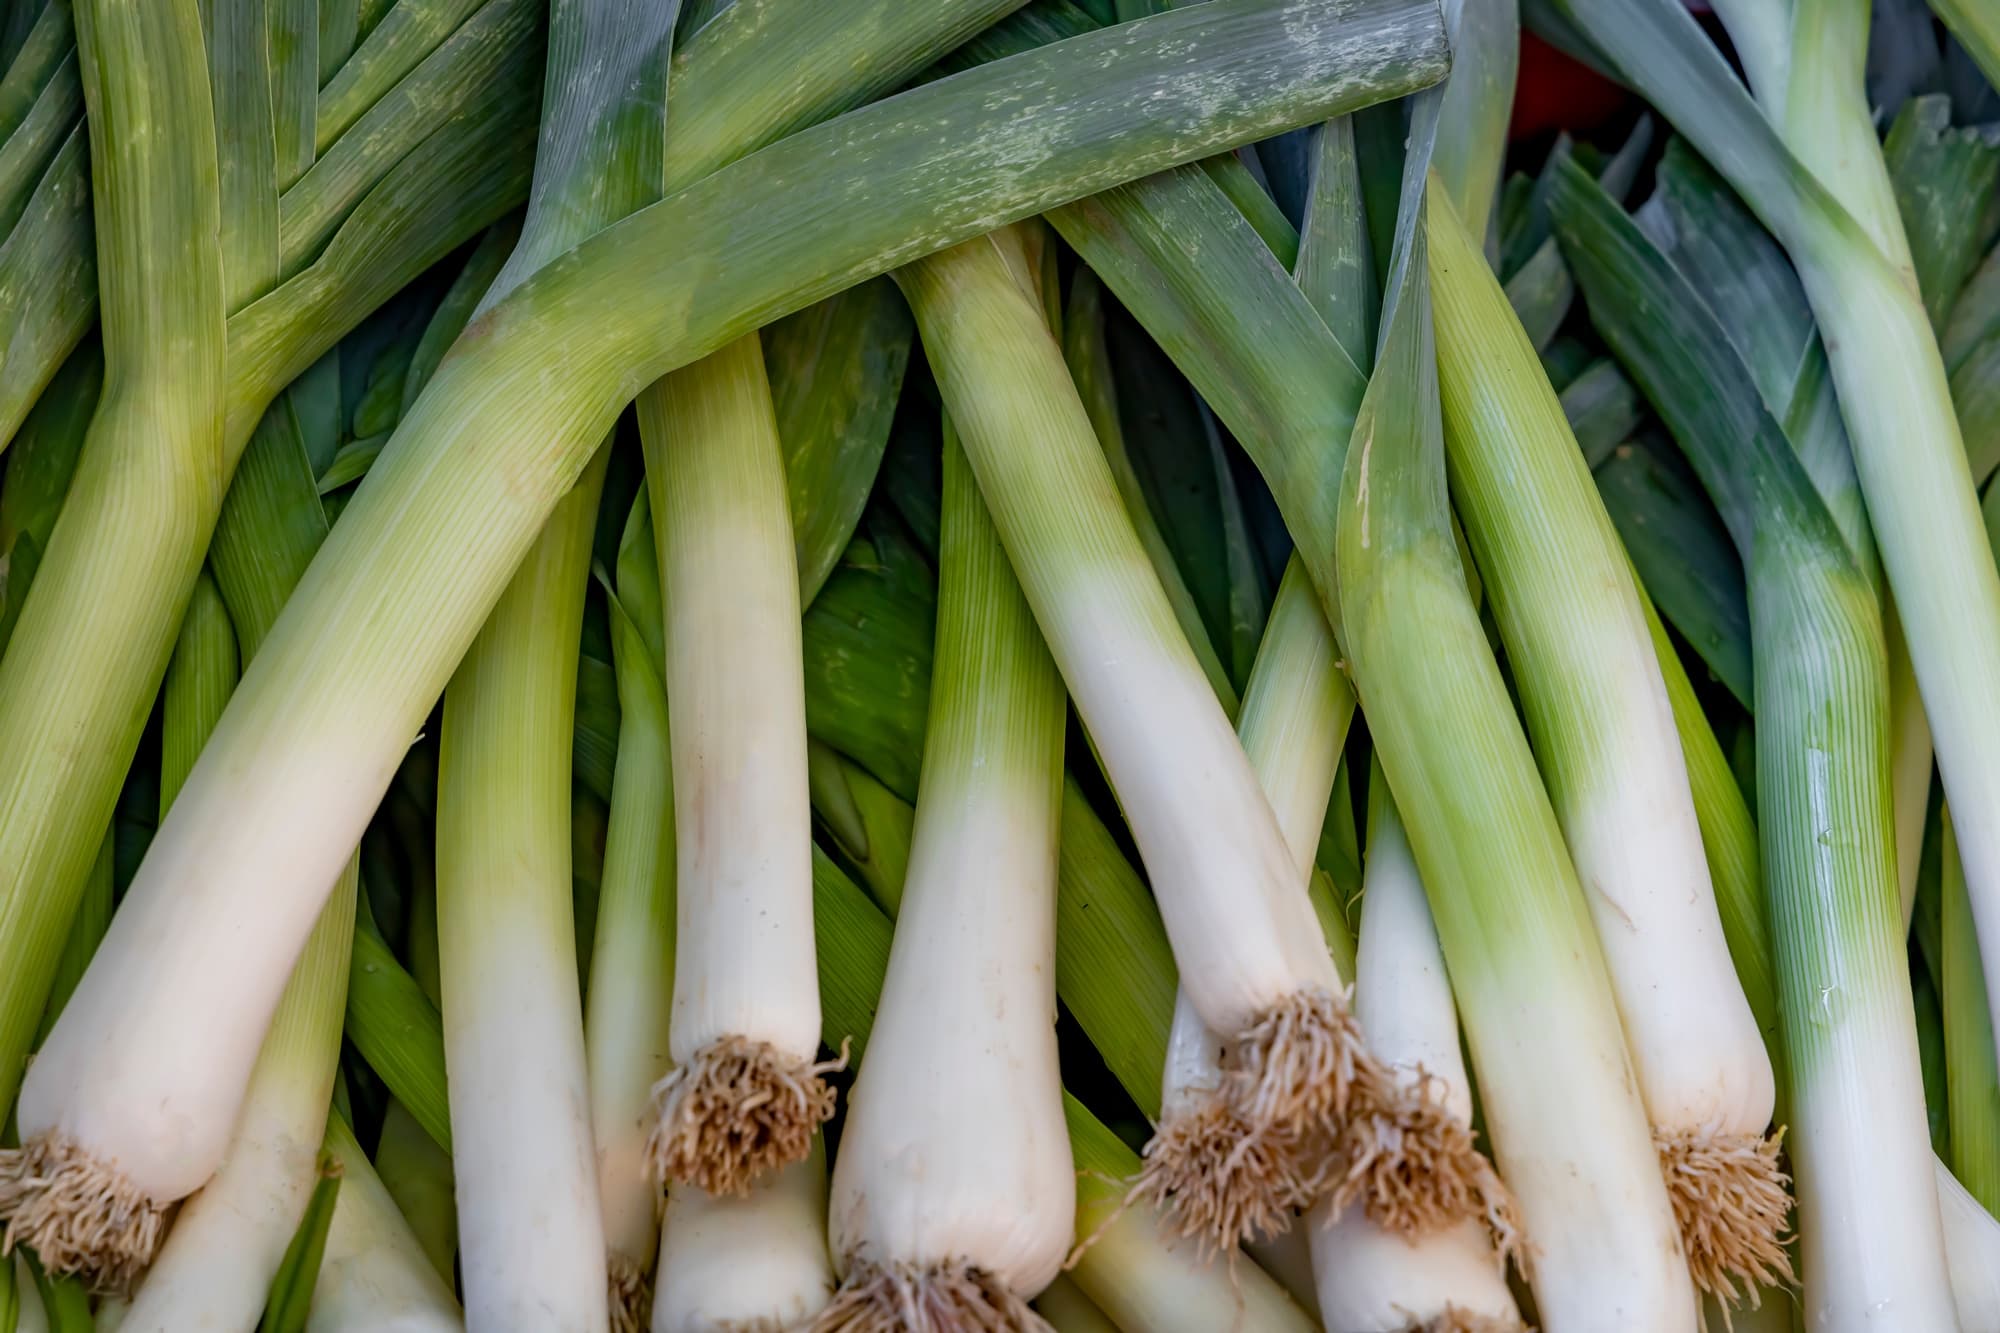

Transplant Your Leeks Like This To Get Them Off To The Best Possible Start
IN THIS GUIDE 1) Prepare Your Growing Area 2) Make Planting Holes 3) Lower Into Holes 4) Water In Well 5) Add Organic Mulch 6) Consider Protection Whether you purchase young plants or grow your own from seed, one important thing to understand about leeks is how to transplant them into their final growing positions in your garden. Getting things right when it comes to transplanting leeks is important because it ensures that the leeks get off to the best possible start, which makes it more likely that you will obtain a good harvest of well-sized veg later in the year. Leeks are transplanted into a garden between April and June. When exactly you will transplant leeks into their final growing positions will depend on when and where they were sown, and, of course, on the conditions where you live. To transplant leeks: Prepare your growing area in a position that gets plenty of sun. Use a wooden handle or stick to make planting holes wider than the young leek plants. Lower one leek at a time into each of these holes. Water well so the holes fill back in with soil. Add an organic mulch around your plants. Consider adding cover such as netting to protect your plants while they are small. Difficulty Easy Equipment Required Wood handle or stick, cover 1) Prepare Your Growing Area Leeks like a position in full sun, with a moist yet free-draining, rich and fertile growing medium enriched with plenty of organic matter. Make sure that you prepare the vegetable patch, raised bed or deep container for your leeks so that they provide these conditions before you begin the transplantation process. 2) Make Planting Holes Using a wooden handle or a stick of a similar width, make holes in your prepared growing area to provide spaces for your young leeks to be planted. This method helps ensure that your leeks can expand, as they should widen up ready for harvesting later in the year. The holes should be around 15-20cm deep and 15cm apart, though you can space leeks more closely if you want to harvest them as baby leeks while they are still relatively small. 3) Lower Into Holes Once you have made your holes, lower one of your young leeks into one, making sure that the roots are down in the base of the hole by moving your hand with a slight twisting motion. 4) Water In Well Carefully making sure that you do not wash the tops of the young leeks below the soil, water the plants in well, filling each hole with water. Done correctly, the holes should refill with soil and hold your young leeks gently in position. 5) Add Organic Mulch To maintain fertility in your growing area, it is a good idea to add a mulch of homemade compost or another fine organic material around your leeks. The mulch will also help conserve soil moisture and suppress weeds. 6) Consider Protection Birds and other creatures can sometimes peck or uproot young leek plants from the ground. So, if this is a problem where you live, you might like to cover your leeks with cloches, row covers, netting or some other form of protection. “When my leeks first go into the ground, I do find that the odd one gets pulled out by birds,” shares Colin Skelly, a Master Horticulturist. “However, I don’t find that netting is worthwhile because the birds don’t tend to persist and, at this stage, you can just pop the leeks back in the ground. “If it was more of a problem, I would use netting, but it would come off as soon as the leeks were sufficiently rooted.”
Learn more
Sow Leek Seeds In Batches Between February And June - Gardener Shares How
IN THIS GUIDE Choosing A Variety When To Sow Leeks Where To Grow Leeks Indoor Sowing Outdoor Sowing Leeks are a wonderful vegetable to grow in the UK and, fortunately, they are not too challenging to grow from seed either. Sow leek seeds in batches between February and June and you can potentially harvest and eat leeks from late-August right through winter – to February the following year. The process of growing leeks from seed is very easy, as we explain in the guide below. Difficulty Easy Equipment Required Seeds, seed tray or pot, growing medium When To Sow February to June When To Plant Out April to June Choosing A Variety Before you can sow leek seeds you will need to determine which variety you would like to grow. There are many named cultivars to choose from. Some cultivars that have received an RHS Award of Garden Merit (AGM) include: ‘Autumn Giant Porvite’ ‘Blauwgroene Winter’ ‘Cairngorm’ ‘Jolant’ ‘Longbow’ ‘Krypton’ ‘Mammoth Blanch’ ‘Oarsman’ ‘Porbella’ ‘Stamford’ When choosing a variety, remember that some are suited to harvesting before the frosts set in, others are suited for winter growing, whilst others still mature late and are suited to harvesting in late winter and early spring. When To Sow Leeks Leek seeds can be sown indoors from February to June or outside from March to June. Sowing earlier will provide you with leeks in late summer and early autumn, and later sowing can potentially see you right through the winter months. It is a great idea to prolong the harvesting period by sowing leek seeds successionally in smaller batches over this period, in order to make sure you can enjoy homegrown leeks over as much of the year as possible. Where To Grow Leeks Leeks can be grown in the ground, in raised beds or in large, deep containers, as long as the soil or growing medium is moist but free-draining, fertile and rich in organic matter. The more rich and fertile the soil or growing medium, the better your leeks will grow. Plan to grow them in your vegetable garden, in an area with a reasonable amount of sun, and combine them with other vegetables and companion plants for the best results. Indoor Sowing When sowing leeks indoors, you should first prepare your seed trays or small pots. These should be filled with a good quality, peat-free potting compost. Place the leek seeds on the surface of this growing medium, then cover them over very lightly so that they are covered by a few millimetres of the potting mix. If growing in small blocks or modules, sow a single seed per block or module. “I sow my leeks in small modules in February, being careful to label the different cultivars,” shares Master Horticulturist Colin Skelly. “I use succession sowing and a selection of cultivars to harvest from autumn to late winter, so if I get the labels wrong, I’m in trouble. “These get thinned and then planted out into the garden as early as I can.” Once the leek seeds germinate and are large enough to handle, pot up those grown in seed trays into individual small pots. The young leeks can then be planted out into their final growing position in your garden when they are 15-20cm in height and, ideally, are approaching pencil thickness. Outdoor Sowing Alternatively, if you wish to grow a lot of leeks and do not have space to start them indoors, you might consider sowing leeks into a prepared seed bed outdoors that has been well composted or manured and raked to a fine tilth. It is best not to directly sow leeks into your main growing area, as they will take up a lot of space early in the growing season that can be used for other quick crops. Sow your seeds thinly in rows, around 15cm apart, around 1 cm deep in the seed bed area. Then, transplant your young leeks to your vegetable garden in early summer. Once you have leeks in your growing areas, be sure to tend them well over the summer and autumn months and you should be rewarded with a successful leek harvest later in the year.
Learn more
Leeks Grow In Harmony With Veg, Herbs And Flowers - These Are Their Best Companions
IN THIS GUIDE Vegetable Companions Herb Companions Flowering Companions Bad Companions Additional Considerations References Choosing companion plants for leeks and using leeks as a companion plant for other crops, can be beneficial in many ways. When we use companion plants, we are looking to promote healthy plant growth and create a functioning ecosystem in which plants and wildlife work together, with us, in harmonious balance. When choosing companion plants for leeks, we need to remember the growing conditions they require and find other plants that like the same or similar growing conditions. Our aim is also to increase the number of beneficial interactions and boost yield overall, without adversely affecting any plants through excessive competition. Thankfully, leeks grow well alongside a wide range of other plants. As alliums (members of the onion family), they can help (through their scent) to repel, confuse or distract a number of pest species. However, they can also themselves be troubled by pests and planting certain plants nearby can help deal with these specific pest issues. Vegetable Companions Cabbage (And Other Brassicas) Leeks, like other members of the onion family, can be wonderful companions for cabbage and other members of their plant family such as broccoli, kale and kohlrabi. The leeks may help repel, confuse or distract common cabbage pests like whiteflies and cabbage white butterflies. Beetroots & Chard Beetroots and chard also grow nicely alongside both brassicas and leeks. Leeks may help to deter aphids and flea beetles that might plague your beetroot crop. The beetroots also help leeks as their roots break up the soil and potentially create a more free-draining situation. Celery Celery can also help break down and loosen soil for leeks, while leeks can help to protect your celery from pests such as leaf miners and carrot root flies. You might also choose to grow leeks in rotation with other alliums such as bulb onions or garlic. Keeping these close to one another can help make crop rotation easier. However, remember that these crops share pests, so plant other companions between and among them to mask their scents, and don’t grow them too close, even when they are in the same bed. Herb Companions Many aromatic herbs can also help mask the scent of leeks and some of their other vegetable companions and keep them free from pests. Try lavender, rosemary or thyme around the edges of your bed. Some even argue (albeit anecdotally) that certain herbs like rosemary and thyme can actually improve the taste of leeks growing close by. Just remember that leeks like more moisture than these Mediterranean herbs. Flowering Companions A number of other flowering plants can also be beneficial for leeks and their vegetable companions when grown close by. “I often cook leeks in combination with herbs, but I’ve never yet tried growing them together to see if they have a beneficial impact on each other,” shares Colin Skelly, Master Horticulturist. “I’ve always found that leeks next to brassicas work well, so perhaps there is a positive association, although not enough to deter cabbage white butterflies in my experience!” Some may help with repelling, confusing or distracting pests, while others can be particularly beneficial because they attract beneficial predatory insects to help keep pest numbers down. Calendula, French marigolds and Borage are three great companion plants that will help leeks as well as many other plants in your vegetable garden and can be wonderful throughout your kitchen garden. Bad Companions While leeks can work well with the above and also with a number of other plants, there are certainly some combinations that are best avoided. Peas Peas make bad companions for leeks because they are said to have allelopathic effects on one another – i.e. they stunt each other’s growth.1 Beans The same is true for beans and other legumes that you might grow in your vegetable garden. Of course, you should also avoid planting leeks with other plants that do not like the same conditions, as caring for each will become incredibly difficult. Additional Considerations Companion planting is often said to be beneficial in a garden and some beliefs of gardeners have been borne out in scientific studies. However, it is important to realise that there is still a lot that we do not understand about plant interactions, so often, in companion planting, we do not always know how efficacious certain combinations will be. However, by experimenting with different plant combinations that may work, making educated guesses and avoiding known bad combinations, we can often achieve far better yields and results in our gardens than we could do by planting in mono-crop beds. We can also help improve things for wildlife that shares our space too, by boosting the diversity of plants growing where we live. References 1. Evenari, M. (1961). Chemical influences of other plants (allelopathy). Retrieved March 21, 2023, from https://link.springer.com/content/pdf/10.1007/978-3-662-11209-0_6.pdf
Learn more
Trap Crops And Dynamic Accumulators - The Flowers You Should Be Planting With Vegetables
IN THIS GUIDE 1) Comfrey 2) English Lavender 3) Sweet Pea 4) Daisy 5) Thyme 6) Cosmea 7) Marigold 8) Dwarf Perennial Lupin 9) Fennel 10) White Clover 11) Borage 12) Sunflower 13) Sweet Alyssum 14) Chamomile 15) Garden Nasturtium References If you’re growing vegetables in your garden, you might be wondering which flowering plants would work well if grown next to them. Growing flowering plants as companions to vegetables can offer a range of benefits, which, depending on the plant, can include: Boosting pollinator numbers Deterring pests such as aphids and spider mites Acting as ‘trap crops’ by attracting pests that will then ignore your vegetable crop Providing beneficial nutrients – either as dynamic accumulators, or as fertilisers which can be turned into ‘tea’ or ‘chopped and dropped’ Offering shade or beneficial soil conditions through their foliage or roots In this guide, we share fifteen plants that will provide some or all of these benefits in your vegetable plot: 1) Comfrey BOTANICAL NAME: Symphytum officinale HARDINESS RATING: H7 PLANT TYPE: perennial FLOWERS: pink, purple and creamy yellow FLOWERING SEASON(S): spring / summer Symphytum officinale, or comfrey, is a highly beneficial plant to grow with your vegetables. Although often grown as a stand-alone perennial, comfrey makes a great addition to a vegetable garden, as when it flowers, it can attract a range of pollinators to your garden. It is a favourite of Permaculture gardeners due to the many holistic benefits it provides in the garden.1 Growing comfrey means you can harvest the leaves to make comfrey tea, which can be used as an organic fertiliser for the plants in your vegetable patch that love potash – like tomatoes for example. There are endless benefits to growing comfrey varieties next to your vegetables, but keep in mind that this plant can grow quite large, so be sure to keep it in check by cutting back regularly – ideally before setting seed as Comfrey is a prolific self-seeder. 2) English Lavender BOTANICAL NAME: Lavandula angustifolia HARDINESS RATING: H5 PLANT TYPE: shrub / herb FLOWERS: purple FLOWERING SEASON(S): summer English lavender is famed for attracting bees and other pollinators, as anyone who has grown it can attest. However, its aromatic qualities are also useful for deterring some pests that might otherwise munch on your veg; it is especially useful when planted next to brassicas (such as cabbage and broccoli) to deter pests such as cabbage white butterfly. Lavender loves the sun and will do best when grown in a sheltered position with well-draining soil. 3) Sweet Pea BOTANICAL NAME: Lathyrus odoratus HARDINESS RATING: H3 PLANT TYPE: annual / climber FLOWERS: purple, pink, red blue and white FLOWERING SEASON(S): summer / autumn A nitrogen-fixing plant, Lathyrus odoratus, also known as sweet pea, is an annual shrub that will help brassicas and other leafy greens get the nutrients they need naturally.2 Sweet peas are also great plants for pollinators, producing purple flowers in the summer and autumn months, and can be grown against a trellis with climbing vegetables, like runner beans, that also like the same growing conditions. 4) Daisy BOTANICAL NAME: Bellis perennis HARDINESS RATING: H7 PLANT TYPE: perennial FLOWERS: white and pink tinges with yellow centres FLOWERING SEASON(S): spring / summer Daisies are a great choice for growing in your vegetable bed if you are limited in space. Growing to only 10cm in height and spread, these tiny perennials can cope well in a range of conditions and will attract beneficial insects to the plants growing around them. I’d recommend planting daisies around the base of your larger vegetables so they can also act as a ground cover plant and help deter weeds. 5) Thyme BOTANICAL NAME: Thymus vulgaris HARDINESS RATING: H5 PLANT TYPE: shrub / herb FLOWERS: pink and white FLOWERING SEASON(S): summer Thyme is a fragrant shrub that is said to help repel aphids, cabbage moths and other related pests from your brassicas. However, there are another few reasons that you might consider growing thyme in your garden – one of them being that they can enhance the flavour of many of your vegetables. This may be simply anecdotal, but when planted next to tomatoes, shallots, potatoes and many other delicious crops, thyme is said to improve the taste. We’ll leave that for you to decide! 6) Cosmea BOTANICAL NAME: Cosmos bipinnatus HARDINESS RATING: H3 PLANT TYPE: annual FLOWERS: white, red and pink FLOWERING SEASON(S): summer / autumn With their white and pink fragrant flowers appearing throughout the summer and autumn months, cosmos are great companion plants for a range of vegetables. By planting cosmos next to tomatoes, squash and a range of other vegetables, pollinators will frequent these plants too, resulting in a typically larger yield which can then be harvested readily.3 If you fancy brightening up your vegetable plot, why not try planting cosmea next to some beetroots, as their brightly coloured blooms will stand out against the green and purple foliage of this commonly grown garden vegetable. 7) Marigold BOTANICAL NAME: Calendula officinalis HARDINESS RATING: H5 PLANT TYPE: annual / biennial FLOWERS: orange FLOWERING SEASON(S): summer / autumn Marigolds are a great plant for your vegetable garden for many reasons. Like the others on this list, they are pollinator-friendly, but they are also effective plants for attracting pests like slugs and snails. Feeding on marigolds keeps these pests well away from your leafy greens. They are also relatively low-maintenance plants and can grow well in a range of conditions, so will be easily sown in garden beds with a range of different veggies. 8) Dwarf Perennial Lupin BOTANICAL NAME: Lupinus nootkatensis HARDINESS RATING: H6 PLANT TYPE: perennial FLOWERS: white, pink, purple and blue FLOWERING SEASON(S): summer A member of the Legume genus, Lupinus nootkatensis is another nitrogen-fixing plant that will help the plants growing closest to it to grow. Lupins are a great choice for short veggies that need some shade to grow best, such as lettuce – as their abundance of upright purple flowers and bushy green foliage can provide all the shelter they need. I’ve chosen this specific dwarf variety of lupin because although it is 1.5m tall, it shouldn’t spread any further than 1m, leaving plenty of room in your vegetable beds for productive crops. 9) Fennel BOTANICAL NAME: Foeniculum vulgare HARDINESS RATING: H5 PLANT TYPE: perennial / herb FLOWERS: yellow FLOWERING SEASON(S): summer Fennel is a perennial herb that is not usually recommended for companion planting at all. However, it is an excellent pollinator and is good at repelling flies, particularly carrot flies that can damage the roots of carrots, parsnips and celery.4 Do not let this plant go to seed, as it will germinate freely and can be a prolific spreader once established. 10) White Clover BOTANICAL NAME: Trifolium repens HARDINESS RATING: H7 PLANT TYPE: perennial FLOWERS: white and pink FLOWERING SEASON(S): spring / summer White clover is most commonly planted in vegetable gardens as a living mulch that can prevent common weeds, retain moisture in the ground and fix nitrogen from the atmosphere, enriching the soil.5 Although it is technically a weed, this plant can also bring beneficial pollinators to your vegetable patch. I’d recommend planting white clover after your vegetables are already established to prevent it stealing nutrients that might benefit your crops. 11) Borage BOTANICAL NAME: Borago officinalis HARDINESS RATING: H5 PLANT TYPE: herb / annual FLOWERS: blue FLOWERING SEASON(S): summer The leaves from borage, a relative of comfrey, can also be harvested and used in organic fertilisers, chopped and dropped directly onto the soil and grown as green manures. It is said to grow well and benefit companion veggies that thrive in conditions with high levels of Potassium, such as peas, cucumbers and beans.6 12) Sunflower BOTANICAL NAME: Helianthus annuus HARDINESS RATING: H4 PLANT TYPE: annual FLOWERS: yellow or red with brown centres FLOWERING SEASON(S): summer Sunflowers are beloved by gardeners and pollinators, and they can be a treat in your vegetable patch too! They are a great choice for planting alongside tall, climbing veggies like cucumbers, peas and corn that will need some support from stakes or a trellis when growing in your garden. In fact, these vegetables can even grow around your sunflowers and assist in supporting each other as they both grow taller. Not only that, you can harvest the sunflower seeds at the end of their flowering season and use them in your salads with the greens you’ve just grown them with. 13) Sweet Alyssum BOTANICAL NAME: Lobularia maritima HARDINESS RATING: H3 PLANT TYPE: annual / perennial FLOWERS: white FLOWERING SEASON(S): summer If aphids are a problem in your vegetable patch, growing sweet alyssum nearby might be an easy fix. This short-lived perennial produces clusters of white flowers that attract predatorial insects such as ladybirds – known for feeding on aphids and other pests. With a single ladybird able to devour up to 50 aphids each day, your leafy greens should be safer and less likely to be targeted by these frustrating, sap-sucking pests.7 14) Chamomile BOTANICAL NAME: Chamaemelum nobile HARDINESS RATING: H7 PLANT TYPE: herb / perennial FLOWERS: yellow and white FLOWERING SEASON(S): summer Chamomiles are not just attractive herbs – this hardy perennial attracts pollinators, enriches the soil with nutrients to encourage more rapid growth and can be used as ground cover to keep the soil moist. Chamomile really is a delight for all of your leafy greens. 15) Garden Nasturtium BOTANICAL NAME: Tropaeolum majus HARDINESS RATING: H3 PLANT TYPE: annual / climber FLOWERS: yellow, red and orange FLOWERING SEASON(S): summer / autumn Tropaeolum majus, more commonly known as garden nasturtium, is commonly used as a companion plant in many garden displays. However, you should also consider growing this colourful climber in your vegetable patches too. Nasturtiums not only look lovely when planted in between rows of peppers, cucumber and leafy greens, but they can also act as a trap crop, luring slugs and snails to protect surrounding crops. I have used this alongside many of my garden plants and it’s quite surprising how quickly the stems and foliage can attract and be covered by aphids. Don’t let this put you off however – surrounding plants are usually completely ignored as this is a prized treat for many garden pests! Hopefully, this list of 15 companion plants for your vegetable garden will have given you enough to work from – there are undoubtedly many more flowers that can add a whole host of benefits! References 1. Abel, A. (2020, May 22). How Permaculture Practices Can Help You Mentally and Physically During Isolation. The Permaculture Research Institute. Retrieved March 15, 2023, from https://www.permaculturenews.org/2020/05/22/how-permaculture-practices-can-help-you-mentally-and-physically-during-isolation/ 2. Wagner, S. (2011). Biological Nitrogen Fixation. The Nature Education Knowledge Project. Retrieved March 15, 2023, from https://www.nature.com/scitable/knowledge/library/biological-nitrogen-fixation-23570419/ 3. Nicole, W. (2015). Pollinator Power: Nutrition Security Benefits of an Ecosystem Service. Environmental Health Perspectives, 123(8), 123–210. https://doi.org/10.1289/ehp.123-a210 4. Carrot Root Fly. (n.d.). Bayer Crop Science UK. Retrieved March 15, 2023, from https://cropscience.bayer.co.uk/threats/pest-and-slugs/carrot-root-fly/ 5. Mathieu, H., & Howatson, S. (2020, June 8). Using clover to drive performance with reduced Nitrogen inputs. AHDB. Retrieved March 15, 2023, from https://ahdb.org.uk/events/using-clover-to-drive-performance-with-reduced-nitrogen-inputs 6. Diagnosing potassium deficiency in field peas. (2015, May 13). Department of Primary Industries and Regional Development: Agriculture and Food. Retrieved March 15, 2023, from https://www.agric.wa.gov.au/mycrop/diagnosing-potassium-deficiency-field-peas 7. Nair, A., & Mauch, T. (2022, January 31). Attract Beneficial Insects by Growing Sweet Alyssum. Iowa State University: Extension and Outreach. Retrieved March 15, 2023, from https://www.extension.iastate.edu/news/attract-beneficial-insects-growing-sweet-alyssum
Learn more
Growing Pak Choi From Seed: Provide Consistent Warmth To Prevent Bolting
IN THIS GUIDE 1) Find A Spot For Sowing 2) Sow Pak Choi Seeds 3) Water Consistently 4) Thin Out Seedlings Pak Choi, also called Bok Choy, is a staple green used in Korean cooking, but you don’t have to prepare Korean dishes to enjoy this veggie, as it’s also delicious in stir-fries, salads and soups. This vegetable, especially when young, is prone to bolting in very warm or very cold weather, or when there is a sudden and sharp change. Though a few new cultivars have been bred to be bolt-resistant, relatively stable temperatures within a range of 12-25°C are most suitable, meaning it’s best grown in the late spring or early summer or late summer to early autumn in the UK. No matter which variety you choose, you can sow and grow tasty Pak Choi by following these steps: Find a suitable location for sowing and cultivate to a shallow depth. Sow your Pak Choi seeds indoors in late winter, or sow directly outdoors after the last frost. Water consistently to avoid issues with bolting. Thin out the seedlings so that plants are placed between 12-14cm apart. This process is explained in more depth below. Difficulty Medium Equipment Required Secateurs and gardening gloves When To Sow April – July 1) Find A Spot For Sowing For any Pak Choi, choose a position in full sun that is sheltered and does not have a north-facing aspect. The soil should be of a rich, fertile type, and a mixed loam is best. Cultivate it to a shallow depth and amend with some well-rotted manure or organic compost. It is not necessary to feed Bok Choy, though you can mix a small quantity of balanced slow-release fertiliser such as blood, fish and bone into the soil at the time of sowing seeds. The soil should drain very well and have a pH of slightly alkaline to neutral. 2) Sow Pak Choi Seeds Sow seeds soon after the last frost when the ground is workable and the soil has lost its chill. Seeds should be spaced depending on your variety and at what stage you intend to harvest the veggie. Sow seeds thinly 2cm deep. You could begin by spacing seeds 3-4cm apart if you intend to harvest semi-mature or mature Pak Choi. If you intend to harvest your plants at the baby stage, you could place seeds more closely together. Cover lightly with soil but do not pack it in. “Pak Choi crops are a magnet to slugs and snails, so I would advise some protection is put in place to prevent attack from molluscs,” adds Roy Nicol, a Master Horticulturist. “The soil can be treated with slug nematodes a week or so before sowing; snails also avoid ground treated in this way.” 3) Water Consistently Pak Choi does best in soil that is consistently moist but not soggy. Dry soil, especially in summer can trigger bolting. Accounting for rain, water the plants twice a week with 1-1.5cm of water. Try to water at soil level and in the early or mid morning. 4) Thin Out Seedlings When the seedlings reach 5-6cm tall, it is time to thin them out. Cut every alternate seedling at soil level with secateurs. This first round of thinning should result in seedlings spaced apart by 6-8cm. After about 3 weeks, thin a second time so that the plants are spaced apart by about 12-14cm. After another three weeks, if you intend to harvest plants at maturity, do the last round of thinning, spacing the plants 20-25cm apart.
Learn more
Courgette Plants At The End Of Season Are Good For Compost - Don't Collect The Seeds
IN THIS GUIDE Removing For Space Composting Old Plants Other Uses Your courgette plants will stop producing at the end of the growing season once the first frosts arrive. Before they do, you can consider letting a mature fruit grow to produce seeds that you might sow next year. Remember that they can cross-pollinate with other courgettes, squash, and cucurbits, so they won’t come true from seed. “Collecting seed from F1 hybrids should be avoided as poor quality plants result from open pollination of these plants,” advises Roy Nicol, a Master Horticulturist. With that being the case, once the colder weather arrives and your plants begin to die back, you may be wondering what to do with your courgettes at the end of the season. In this guide, we share some reasons for the removal of courgette plants and several ways you can make use of the dead plants in your garden. Removing For Space I often remove courgette plants from my garden before they begin to die back and sometimes when they are still productive. The reason for this is that I grow my courgettes in a polytunnel where space is often limited. Because of this, I sometimes clear out some summer crops a little early so that I can grow plants in this space over the winter months too. After this, I add the dead plants into my composting system. Composting Old Plants Whether or not you should compost courgette plants depends on whether they are healthy or not. If the plants show signs of diseases like mildew, then it is not always a good idea to add them to your composting heap, as this may increase the spread of diseases throughout your garden. It may also be a bad idea to compost a plant with a bad bug infestation since the bugs might overwinter in the soil or in your compost heap and cause problems in your garden next year. If, however, your plant is healthy and not showing any signs of pests or disease, then you can certainly compost the leaves and stems of your plants. There are several different ways in which you can allow your courgettes to break down and return their nutrients to the system. One idea is simply to add them to your composting heap or bin. It is a good idea to chop up the stems on larger plants so that they break down more quickly. However, chopping and dropping and then leaving the plant material to compost in your vegetable garden can also be beneficial for a couple of reasons. The soil in your garden should never be left bare over the winter months. To protect it from nutrient loss and erosion and to maintain a healthy soil ecosystem, adding mulch, like old, chopped courgette plants, in autumn is an excellent idea. You can then replenish this with compost or other organic matter before planting in the spring. Other Uses If you keep chickens in your garden, then give the old courgette plants to your chickens. They won’t just enjoy eating any green leaves, but can also pick off any pests that might remain. If plants are diseased then I recommend burying these in a hole or trench in a part of your garden that is as far removed from your food-producing areas as possible. Planting comfrey or other plants that can be chopped and dropped nearby means you can still regain the nutrients for your edible garden by utilising this as mulch – without worrying about pests or diseases.
Learn more
Why Tomatoes Aren't Worth Overwintering: Here's What To Do At The End Of Season
IN THIS GUIDE Overwintering Old Plants Can You Compost Old Tomato Plants? How To Dispose Of Diseased Plants Tomato plants will only remain productive for so long in a British garden, and at the end of the growing season, the plants will usually begin to die back. Though these are perennial plants in warmer climes, when growing outdoors or in a polytunnel or greenhouse in the UK, they are typically treated as annual plants. Many new gardeners wonder what to do with old tomato plants once they have finished harvesting their fruit. Overwintering Old Plants If your tomato plants are still in peak health, green and lush looking, then there is the possibility that you might be able to overwinter those plants in a greenhouse or in a light, bright spot inside your home. To do so, you will need to either take your tomato plants and place them in a frost-free and bright location that remains above 5°C. Care for the plant over winter by keeping the medium moist. Tomatoes will not fruit over the winter, but the plants will be sturdy and get off to a good head start in spring if cared for correctly. You can either use overwintered plants for cuttings or grow them to produce fruit once more the following year, though the former is generally more effective. “I would not recommend trying to overwinter tomatoes, as seeds germinate quickly and easily,” explains Horticultural Consultant Dan Ori. “The longer you keep tomato plants in colder and wetter conditions, the more likely you will be to have blight and mould issues that you carry into the next growing year.” Can You Compost Old Tomato Plants? There is one big question when it comes to dealing with old tomato plants that you are not overwintering – to compost or not to compost. The answer to this question depends on two things: The health of your old tomato plant. The composting method you use. If your plant has any signs of pest infestation or disease, then it is not a good idea to add it to your general composting system. Tomato plants can often succumb to a range of fungal and bacterial diseases, so composting your plants can often spread those fungal or bacterial diseases around other parts of your garden and transmit them to other plants. If your plant is healthy and shows no signs of disease, then you can consider adding it to your composting system. However, whether or not it is a good idea to do so will also depend on which type of composting you do. If you have a typical cold composting heap or bin, one thing to note is that thick stems on a tomato plant can take a long time to break down. Another thing to remember is that seeds can remain viable in the finished compost which can lead to small tomato plants popping up all over the place. So, if you do decide to compost in a typical cold composting home composting system, make sure you chop up the stalks well before adding them and avoid placing any fruits with seeds into the heap. If you have a proper hot composting system, where temperatures get much higher within the compost, then you can compost old plants – seeds and all. How To Dispose Of Diseased Plants The most ecologically sound and sensible way to dispose of plants that have signs of fungal or bacterial infection is to avoid adding them to your general waste bin. Instead, you should dig a deep hole in a corner of your garden and bury your old plant materials, where they can break down below the soil and return their nutrients to the soil. As long as this trench or hole is not where you want to grow your vegetables in the future, diseases will not typically be an issue. Plant comfrey or another plant nearby that is good at gathering nutrients from the soil and you can chop and drop its leaves as mulch, taking advantage of the nutrients the old tomato plant contains.
Learn more
Carrots Are Susceptible To These 6 Common Issues Says Ed Bowring
IN THIS GUIDE 1) Carrot Fly 2) Aphids 3) Carrot Tops Turning Green 4) Forking 5) Sclerotinia Rot 6) Rodents A firm favourite for home growers, carrots are a biennial vegetable but are usually grown as annuals, as they are harvested in the same season. Carrots grow well here in the UK, although there are some pests and diseases that can try and get to your crop before you do. The most common issues gardeners can experience when growing carrots include: Carrot fly Aphids Carrot tops turning green Carrots forking Stored carrots rotting Rodents See our guidelines for dealing with each of these common problems below. 1) Carrot Fly Carrot flies are possibly the biggest threat and problem for home gardeners when growing carrots. Small and black, the adult flies don’t actually cause any damage, but the female lays her eggs in the carrots’ soil which hatch into larvae that eat the roots and lead to the carrots rotting. Attracted by the scent of the carrots’ foliage when handled and thinned, prevention is important, as once these pests are present near your carrots, there is little to be done. Preventative methods can include growing resistant varieties, covering the crop with a layer of fine fleece or installing barriers at a minimum height of 75cm around the growing site. Sowing thinly can also be of benefit, as this will reduce the need for thinning the carrots. “If you are forced to thin them, this can be done in the evening to reduce the likelihood of attracting the root fly,” Peter Lickorish, a Master Horticulturist, recommends. You can also try growing your carrots near alliums, as these are strong smelling and said to help mask the carrots’ aroma. 2) Aphids Aphids can also be troublesome when growing carrots and are especially prevalent during warm dry spells. Attacking carrots, parsnips and parsley, the carrot-willow aphid feeds off the sap of the foliage, weakening the carrots and sometimes transmitting the motley dwarf virus, which can cause the leaves to turn red and stunt the carrots’ growth. If aphids are identified, they can be controlled by squishing by hand, encouraging predators such as ladybirds and hoverflies through bug hotels and, if a severe infestation is present, the use of plant oil or fatty acid sprays suitable for edible crops. 3) Carrot Tops Turning Green Later in the growing season or when harvesting, you may find that the tops of your carrots have turned green. Albeit unsightly, this is nothing to worry about and has simply been caused by the top of the carrot being exposed to sunlight during the growing period. To avoid green tops developing during the season, the carrots can be earthed up with a thin layer of soil to ensure any light can’t get to the roots. 4) Forking Even though carrots forking isn’t caused by a pest or disease, it can still be an issue when growing carrots. Carrots’ forking can be caused by either the ground being too stony or the level of nitrogen in the soil being too high. Before sowing carrots, it is advisable to prepare the ground by removing any rocks or stones. If adding any compost or well-rotted manure to the soil, make sure to do this several months prior to planting, so that the high levels of nitrogen in the manure can reduce naturally before the carrots are grown. If you garden on particularly stony soil, it can be advisable and less laborious to grow carrots in pots or containers, as the soil can be chosen to specifically suit them and be stone free to prevent any forking. The forking of carrots thankfully doesn’t affect their quality or taste so they can be eaten as normal, but it may mean that they are slightly trickier to peel and prepare. 5) Sclerotinia Rot Usually affecting only stored carrots after harvesting, sclerotinia rot is a fungal disease encouraged by wet weather, but it can sometimes attack a crop whilst still growing. If stored carrots are affected, the carrots develop a white fluffy mould which effectively destroys the crop. If this fungal disease attacks a crop whilst still in the soil it can lead to the foliage and tops turning yellow and subsequently rotting. “Raised beds are a good place to grow carrots, as they can lift the plants above the flight path of the carrot fly and improve drainage, which helps avoid other problems relating to rot,” says Peter. “I like to recommend the cultivar ‘Flyaway’ for carrot fly resistance, as it’s virtually unforgettable!” Although uncommon for the home grower, if sclerotinia rot is identified in the garden, the carrots and any diseased material must be lifted and destroyed as there are no treatments available for home growers. Crop rotation should be practised to prevent this from happening in your future harvests. 6) Rodents All sorts of furry critters will want to eat your carrots, and in this instance, prevention is definitely the best option. Keep your garden tidy, making sure to not leave piles of wood or other material that rodents can nest in. Erecting a barrier around your carrots is another good way to prevent their premature demise. Many options are available, and the best ones will vary depending on the specific rodent visitation you’re experiencing.
Learn more
How To Practice Successional Sowing For Carrots Between February And July
IN THIS GUIDE 1) Prepare The Sowing Area 2) Sow Your Seeds 3) Water The Seedlings 4) Ongoing Plant Care Carrots are delicious vegetables that I would argue taste even better when you grow them in your own garden rather than buy them from a supermarket. You can sow early varieties as early as February until April and maincrop varieties from late April to early July. In most regions of the UK where the weather does not become overly warm, successional sowing can be practised for carrots. You can sow carrots by following these steps: Prepare the soil on the ground for sowing. Sow the carrot seeds. Water the seedlings regularly. Care for the carrot seedlings as they grow. This process is explained in more depth below. Difficulty Medium Equipment Required Gardening gloves, shovel, hoe, rake and fork When To Sow February to July 1) Prepare The Sowing Area About a month before you intend to sow carrot seeds, prepare the sowing area. Select a spot that is in full sun and gets plenty of shelter. Carrots must be grown in light, powdery soil that is well-drained and free of stones, roots and any such impediments. Hard, stony ground will cause forking and restricted growth. Clear the soil to about 25cm, though the depth depends on the particular cultivars you intend to grow. Mix in well-rotted manure or compost to 25-30% of the volume of the natural soil. For carrots, goat manure is best and you should not use chicken manure. Till the prepared ground with a hoe or rake and then water it well before sowing. “For early sowings, you could pre-heat the soil slightly with a sheet of black plastic,” says Peter Lickorish, a Lecturer at Bradford College in Horticulture. 2) Sow Your Seeds About a month after you have prepared the ground, you can sow your carrot seeds. Sow seeds about 1cm deep and 2-3cm apart. Seeds are best sown in rows, which should be spaced apart by about 20cm. “If you’re struggling to sow thinly, there is an art to it, so try thoroughly mixing seed with an equal volume of sand before sowing,” says Peter. “You can then see more clearly how thinly you are sowing.” Lightly cover seeds with soil and pat down, making sure that you do not completely pack in the soil. A heavy, prolonged shower will dislodge and may even wash away the tiny seeds, so avoid sowing carrot seeds when heavy rains are expected or temporarily cover the sowed area with canvas or sackcloth. “For February sowing, a cloche or fleece cover will be needed to protect the seeds and seedlings,” Peter adds. 3) Water The Seedlings Lightly water the seeds every other day, accounting for rain, until they germinate. Earlies typically germinate in about 2 weeks whilst maincrop varieties take 3 weeks. However, germination may occur up to a week earlier or later than expected. Decrease the frequency of watering to once every 3 days or so after the carrots germinate. After a couple of weeks, water only occasionally, and if there is rainfall you need not water at all. With carrots, a little water goes a long way. 4) Ongoing Plant Care Carrots must be weeded regularly as they do not compete well with weeds. Small weeds can be uprooted easily, but if a weed is large and overgrown, it may be better to snip it off near the base. After the seedlings have grown, thin them to 6-7cm apart, making sure to water the ground well before thinning. While thinning, try not to disturb the adjacent root. You can use a mini plastic gardening fork to prise the plant up with one hand while you pull with the other. “Thinning in the evening is preferable as it is less likely to lure in carrot root flies,” advises Peter. After thinning, apply a shallow layer of organic mulch. As the carrots grow and the shoulders emerge from the ground, apply a layer of mulch once again to cover them. Such mulching is necessary to prevent the carrots from greening.
Learn more


