

Growing
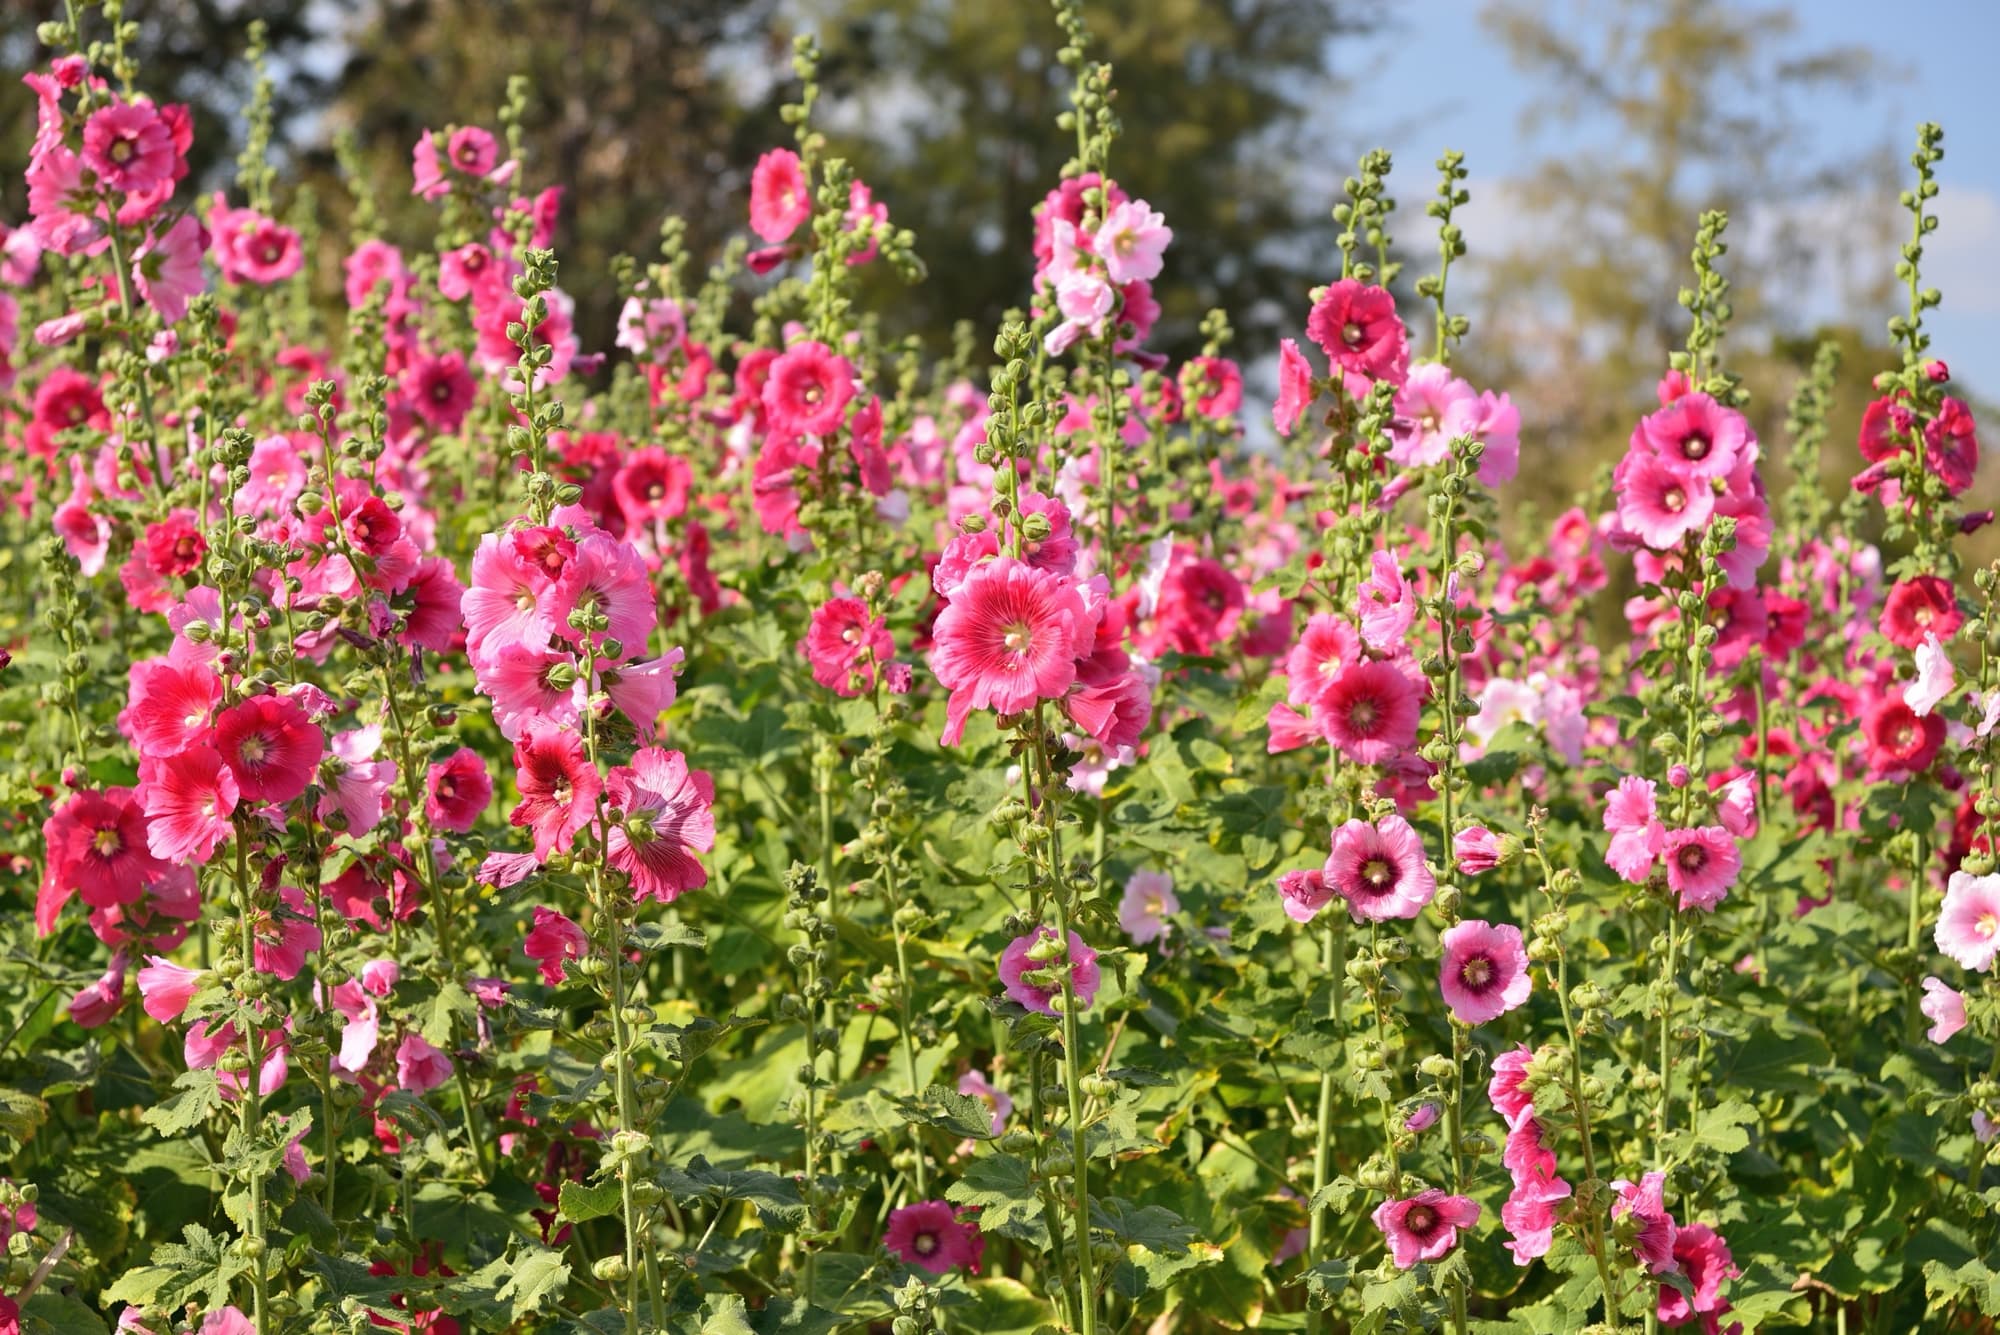

Beautiful Hollyhocks In Pots - Follow These 7 Steps To Success
IN THIS GUIDE Can You Grow Hollyhocks In Pots? 1) Choose A Wide & Deep Container 2) Use A Moist, Mulched Growing Medium 3) Replace After Flowering 4) Tie In Supports 5) Water Well (But Don’t Overwater!) 6) Watch Out For Rust 7) Cut Back The Flowering Stalks Hollyhocks are popular cottage garden border plants. However, if you are limited in the space you have available and still want to grow these popular plants, then you might wonder whether hollyhocks are an option for a container garden. Difficulty Medium Equipment Required Large container, growing mix, suitable support Can You Grow Hollyhocks In Pots? Hollyhocks are certainly not the best nor easiest option for container cultivation. If you can grow them in the ground then this is definitely the easier option and will lead to much better results. The problem is that hollyhocks are tall plants. They have deep tap roots as well as lateral roots that like to spread out below the ground. So, finding a container large enough to support healthy root growth can certainly be a challenge. While you can potentially grow hollyhocks in a very large container, such as a 50-gallon drum or an old whisky barrel, the results may still be patchy and poor. Where possible, it is certainly better to grow hollyhocks in the ground or to choose more suitable plants for your container garden. Container-grown hollyhocks will also certainly require a lot more work and attention than those growing in the ground, especially when it comes to watering. If you do decide to grow hollyhocks in a container, then that container needs to be as large as possible, ideally very deep and with decent width too. You will also need to carefully consider the variety of hollyhock that you choose; opt for a shorter dwarf variety rather than one that can grow 2m or taller. 1) Choose A Wide & Deep Container Ideally, your container should be, at the very least, 60cm wide and more than 1m deep. Any container that is smaller than this will not allow the extensive and deep roots of the hollyhock to grow as they should. If roots cannot form healthily, then the plant will be stunted, fail to thrive and flowering will be diminished. You could potentially use a suitable barrel or butt in which to grow hollyhocks if you want them in your container garden. Remember that you may need to think about some support for the hollyhocks if you live in a windy location. Your barrel or butt will need to be placed against a wall or fence in a very sheltered spot. It must also have good drainage at the base. 2) Use A Moist, Mulched Growing Medium Filling your large container will be the next challenge if you do decide to grow hollyhocks in this way rather than in the ground. Hollyhocks need moist but well-drained soil. A peat-free soil, loam-based potting mix or a homemade equivalent with plenty of organic matter may work. If you are growing hollyhocks in containers, you will need to add fertility by laying mulch at the top of the container around the base of the plant each year. 3) Replace After Flowering Hollyhocks are short-lived perennials, but it is generally best to replace the plants once they flower because they are prone to a fungal infection called rust. Sow or pot them up in the spring of one year and they will flower in the summer of the following year. If you have grown your hollyhocks from seed, you will have started your seeds indoors in April or May. Pot-grown plants can be planted out in June, through the summer or in early autumn. 4) Tie In Supports If you are absolutely determined to grow hollyhocks and can only do so in containers, be prepared to keep a close eye on your plants. Remember that you may need some support to which you can tie in your hollyhocks as they grow, especially if you are growing a taller cultivar or live in an area where gusty winds may be a problem. Make sure that you position your containers in a suitable spot in full sun, ideally in a sheltered south or west-facing spot against a sunny wall or fence. “Hollyhocks will rapidly increase in height just before flowering,” says Master Horticulturist Peter Lickorish. “This is the vulnerable stage! I use a metre-long cane, inserted to a third of its depth, and tie the emerging stem loosely to this. I use a figure eight knot of garden string.” 5) Water Well (But Don’t Overwater!) Hollyhocks growing in the ground typically need to be kept moist and watered when young and while they become established in order to grow strong and healthy roots. However, when growing in a container, you will likely have to continue to water regularly to keep the growing medium moist (but not waterlogged) during the growing season. Do not overwater though, and keep the water off the leaves, making sure that excess water can always drain away freely. You may struggle to get water to the roots effectively when growing hollyhocks in a container. Make sure that you do not just water the surface, but water deeply so water seeps out of the bottom of the barrel or the other large container you have used. Hollyhocks typically won’t need feeding other than with the mulches of organic matter or compost that you add to the surface after planting. 6) Watch Out For Rust Remain vigilant for rust, as this fungal infection is very common on hollyhocks. Remove any badly affected material promptly to avoid severe infections. 7) Cut Back The Flowering Stalks After hollyhocks flower in their second year, you can cut the flowering stalks back to the base or you can wait for the seeds to develop and then collect them. It is often best to treat hollyhocks as biennials and discard or replace them with seedlings after they flower, but they can last for a couple more years if rust does not take them out. With all this said – though theoretically possible, growing hollyhocks in containers is certainly not something that I would recommend. There are plenty of other cottage garden favourites that I’d argue are much better suited to container cultivation.
Learn more
Self-Seeding Hollyhocks Are Easy To Propagate From Seed: Just Follow These Steps
IN THIS GUIDE When To Sow Hollyhocks 1) Prepare An Area For Sowing Indoors 2) Sow Your Hollyhock Seeds 3) Prick Out & Pot On 4) Plant Out The Hollyhock Seedlings Sowing Hollyhocks Outdoors Hollyhocks are cottage garden favourites that can add height and drama to mixed borders, brightening up your beds with their cheerful, blousy blooms. They are short-lived perennials, but due to fungal problems, hollyhocks are often best treated as biennials. Hollyhocks are relatively easy to grow yourself from seed and, in many UK gardens in a suitable spot, will self-seed readily. To grow hollyhocks from seed, you can either sow seeds indoors between April and May or sow outside directly where they are to grow in May or June. To propagate hollyhocks from seed: Prepare a sowing area indoors, with a seed tray filled with seed-starting compost. Sow the hollyhock seeds. Prick out and pot on hollyhock seedlings when they are large enough to handle. Harden off and plant out indoor-sown hollyhocks in June. Read on for more detail on the methods that you might employ in your garden. Difficulty Easy Equipment Required Seeds, pots or trays, growing medium, heated propagator (optional) When To Sow April to May When To Plant Out June When To Sow Hollyhocks Hollyhock seeds can either be sown indoors in April or May or directly sown where you will grow them in your garden in May or June. Though the former option has more stages to it and involves a little more work, it is generally the best option in the UK, as directly sowing seeds often means losses to pests like slugs and snails. That said, if you have lighter soils and can provide the optimal conditions, sowing outside directly can work just fine. 1) Prepare An Area For Sowing Indoors If you decide to sow hollyhocks indoors, then you can do so in seed trays or modules on a sunny windowsill. However, you will find that germination rates are better if you can keep temperatures consistent and between 16-21°C until the seedlings emerge. With a heated propagator, germination will typically be a little quicker, but this is not essential for these plants to grow successfully from seed. Prepare your area for seed sowing, making sure that you have your seed flats, seed trays or other containers in place, filling them with a suitable peat-free, seed-starting compost. 2) Sow Your Hollyhock Seeds Place the hollyhock seeds on the surface of the moist but well-drained growing medium. Cover them over lightly with a little more of the same medium. 3) Prick Out & Pot On Once the seeds germinate and the seedlings begin to grow, prick out each seedling and pot it up into its own individual pot. Then, leave the seedlings to grow until it is time to transplant them into your garden. 4) Plant Out The Hollyhock Seedlings In late May or early June, begin the process of hardening off your indoor-sown hollyhock seedlings to acclimatise them to outdoor growing conditions. When the time comes, select a suitable spot for planting, then plant your seedlings in the garden once the weather has warmed reliably, which is typically in June. Sowing Hollyhocks Outdoors Alternatively, if you prefer, you can select a suitable spot in your garden and directly sow your hollyhock seeds so that they will germinate in the same location where they will then continue to grow. Sow in holes or drills, aiming for an eventual spacing of around 60cm between each of your hollyhock plants. Remember, when growing hollyhocks from seed, not all will come true to their parent plant. Hollyhocks will not bloom in their first, but rather in their second year. Though some can self-seed readily in the right location, you will need to sow seeds over two years to make sure that you have hollyhock blooms in your garden annually over the years to come. Gardening expert Dan Ori explains how he uses a simple approach to sowing hollyhocks outside in autumn: “As hollyhocks survive the winter in the UK and can self-seed, I encourage this process during autumn border maintenance. “Around early autumn the seed-heads on hollyhocks turn brown, as I weed and cut back perennials in my borders I brake and shake the seed-heads on to the freshly weeded ground, I then mulch the borders and let the seeds do the rest.”
Learn more
Transplant Shock And Underwatering: 6 Common Reasons For Drooping Sunflowers
IN THIS GUIDE 1) Blooms Dying Back 2) A Lack Of Support 3) A Lack Of Water 4) Pests Or Diseases 5) Transplant Shock 6) Phoma Black Stem References Sunflowers are among the most commonly grown plants in the UK. Many people find those big disc-shaped flowers not only follow the sun but, in a way, resemble it. In fact, on tall varieties, those bright yellow rays against a blue sky are a sight to uplift a dispirited heart. However, sunflowers also give gardeners all over the world cause for concern, as every now and again they droop! Sunflowers can droop for any one of a variety of reasons, including: Blooms dying back in their natural lifecycle. A lack of support. A lack of water. Pests or diseases. Transplantation shock. Phoma black spot. Underneath we take you through these reasons so you can have the best chance at rectifying the issue. 1) Blooms Dying Back Sometimes, what you are worried about is not a drooping plant but a dying flower. You need not do anything other than harvest the seeds at the appropriate time or deadhead the fading flower. 2) A Lack Of Support Some types of sunflowers are top-heavy, meaning their stems are not strong enough to keep erect under the weight of big flower heads, so they droop. This reason for drooping is normal. All you need do is provide support to the plant by inserting a stake or cane into the ground and loosely tying the stem to it, especially at its upper half. Gardening Expert Dan Ori tells us secure but loose is the way to tie sunflowers, particularly near the top as the plant will want to adjust its position towards the sun throughout the day. This process is called phototropism. For specific instructions please see our guide on how to support tall plants. 3) A Lack Of Water Sunflowers are thirsty plants and insufficient water will cause drooping and wilting. This problem, provided you have caught it in good time, is not really a problem at all. Simply give the plants a thorough watering with cool water in the morning, watering at the soil line. We only hope that you are not discovering this problem and its cure on a hot, sunny afternoon! If you are, use cold water or wait until late evening. Keep the affected plants properly hydrated. 4) Pests Or Diseases Sunflowers are mainly trouble-free plants. However, they can occasionally succumb to pests and diseases, especially when conditions are sub-optimal. Crowding, a closed-in growing spot, overwatering, damp foliage and weeds increase the odds of pest attacks and disease. The specific pest infestation or disease will have to be diagnosed and, if possible, treated. 5) Transplant Shock Sunflowers do not take well to transplanting for a multiplicity of reasons. Even if you have been especially careful, sunflower roots are not adaptive to new conditions and resent being disturbed. Another factor is a sudden change in environmental conditions as a result of little or no hardening off. There is not much you can do except keep the plant well-hydrated and keep your fingers crossed. If you have suddenly transplanted the sunflowers from a partially shaded spot to a spot in full sun, arranging a temporary barrier to provide shade during the afternoons may help. Going forward I suggest that you sow seeds directly in open ground or, if you’re not too deep into summer, why not do it now? 6) Phoma Black Stem Phoma black stem is a fungal disease that can strike sunflowers.1 Waterlogging due to overwatering, poor-draining soil, consistently damp foliage or overcrowding are contributing factors. Unfortunately, there is no known cure.2 The afflicted plants will have to be uprooted and disposed of. This fungus often lives in the soil, so it would be wise to clear the ground and grow something robust in that spot instead in the future. References 1. Phoma Black Stem. (n.d.). National Sunflower Association. Retrieved April 14, 2023, from https://www.sunflowernsa.com/growers/diseases/phoma-black-stem/ 2. Phoma Black Stem / Phomopsis Stem Canker. (2019, July 22). University of Nebraska-Lincoln. Retrieved May 22, 2023, from https://cropwatch.unl.edu/plantdisease/sunflower/phoma/phomopsis
Learn more
Only Harvest The Seeds From A Sunflower Head When The Petals Start To Wither
IN THIS GUIDE 1) Observe The Flowers 2) Protect The Flower Heads 3) Snip Off The Flowers 4) Dry Them 5) Extract The Seeds 6) Store The Seeds Some people love the open, uncomplicated look of popping yellow sunflowers, whilst others love their seeds as food to snack on. Why not have your cake and eat it too? Give easy-to-grow sunflowers a patch in your garden, enjoy the sight of the charming, bright yellow flowers and then harvest the seeds to munch on! You could even extract sunflower oil or make sunflower butter from the seeds – or you may simply sow them the following year. Before you get that far, you need to know how to harvest these seeds. The simple process is as follows: Keep an eye on the sunflower heads. Protect the flower heads from birds and bad weather, using netting if necessary. Snip off the flower heads using scissors or secateurs. Dry the flowers by laying them on a sheet of newspaper for roughly ten days. Extract the seeds from the dried flowerheads. Store the seeds in a dry (preferably airtight) location. Each stage of this process is described below. Difficulty Easy Equipment Required Paper bag, string, newspaper, wide container When To Harvest 70-120 days after sowing 1) Observe The Flowers When those big, brilliant blooms start to fade and wither, you need to start a close watch on the yellowing, browning flowers. You see, those drying flower heads are nature-made bird feeders! If you don’t make your move in time, common garden birds will devour the seeds. What you will need to do is described in the following step but the first line of action is to be vigilant. You will need to begin your watch from 70-120 days after sowing the seeds depending on the variety you’re growing. When the petals of a flower head have withered and are falling off, it is wilted at a downward angle and the rear of the flowerhead (where the calyx joins it) has yellowed, or as soon as you spot birds pecking, proceed to the following step. 2) Protect The Flower Heads As it is better to allow the seeds to ripen on the plant and not harvest them prematurely, it is necessary to protect the seeds in the flower head from those greedy birdies. Loosely cover the flowerhead with netting or a paper or cheesecloth bag (not a plastic bag!) and tie or clip the opening to the stem. It is, of course, possible that a particularly naughty and smart bird may peck at and tear the bag to get at those tasty seeds, but if that happens, give credit to your avian rival! You will need to take this step for each flowerhead in its own turn. If you are lucky enough to live in a region where birds ignore wilted sunflowers and their seeds, you can skip this tedious step but keep in mind that whatever seeds come loose and fall off will be lost. 3) Snip Off The Flowers For a precisely-timed harvest, remove the paper bag to inspect the withered flower head every few days, otherwise, simply skip the inspection and harvest the flower head about ten days after you covered it. If the rear of the flower head is yellowy-brown in colour, the florets in the central disc have withered or fallen off and the seeds are exposed and look plump, they are ready to harvest. Seeds may be striped black and cream or be entirely brownish-black; both types are edible but the former is definitely tastier. Snip off the stalk about 25cm beneath the flower head. Be gentle and careful when cutting because a jerk will dislodge seeds that have dried and are coming loose. 4) Dry Them Bring each flower head indoors, with a bag on if you had tied one, to a storage room that is clean, dry, and well-ventilated. Remove the bag, tie a string to the stalk and suspend the flowerhead from a rafter or spread a newspaper on a table and lay the flower head on it. Leave some space between adjacent flower heads. Do not put them on a sheet of plastic. If you opt for the former style, you may want to put a plastic tub or another container beneath the suspended flower stalks to catch any falling seeds. If you opt for the latter style, be sure that there are no mice, insects or other pests in your storeroom! Leave each flower head for about ten days, after which the seeds will be ready to harvest. 5) Extract The Seeds Lay a sheet of newspaper on the floor and put a pail or any wide, broad container on it. Hold a flower head above the pail and firmly brush it with your fingers to extract the seeds. You may rub two flower heads against one another or pull apart a flowerhead to dislodge the seeds. After you are done, sift through the seeds and pick out any extraneous matter, as you will likely find dried florets and small bits of the withered flower among the seeds. If you are certain that your storeroom is free of mice and other pests, lay a sheet of newspaper on a table and spread the seeds on that for drying. The seeds should not be touching each other. If your storeroom is not certain to be free of pests, then put only a handful of seeds in a mesh bag and suspend that with a piece of string from a rafter. Use as many mesh bags as needed. If you use the newspaper sheet style, 24 hours is enough. If you use the mesh-bag style, jiggle the bags every six hours or so to re-arrange the seeds, and allow 2-3 days for drying. This final drying step is important because moist seeds will become mouldy or start to rot. 6) Store The Seeds Sunflower seeds can be put in paper envelopes or bags, which should be tightly closed and kept in the crisper or kept in a dry, airtight jar. But why store those tasty and nutritious seeds? Just start to munch on them, raw or roasted. But if you store the seeds, do check on them about once a fortnight in case any have gone mouldy, as these can affect the other seeds they are stored with. “Do not roast or eat all your seeds, as you will want some to sow in the ground next spring!” shares Master Horticulturist Dan Ori. “You can store them in a paper bag just the same, and I then put my paper bags in a tin and place them in a cupboard indoors.”
Learn more
Grow Impatiens ‘Busy Lizzies’ As Ideal Bedding Plants By Following These Guidelines
IN THIS GUIDE Overview Common Varieties How To Grow Busy Lizzies Planting Impatiens Busy Lizzies Plant Care Reviving A Dying Impatiens Plant References Busy Lizzies are a shade garden standard and a byword for bedding that produces heaps of charming warm-toned blooms. Impatiens produce masses of colourful little flowers during summer and are a brilliant bedding plant, even more so if your garden is blighted by shade, as these tender little plants will tolerate shady conditions well. As floriferous as these popular annuals are, they also have seriously pretty foliage. Impatiens leaves are very shapely, of an elliptic to lanceolate form, usually slightly serrated and are a rich green shade. Overview Botanical Name Impatiens Common Name(s) Impatiens, Busy Lizzie, Patience Plant, Sultana Plant Type Perennial (annual in temperate regions) Native Area East Africa Hardiness Rating H1B / H1C Foliage Evergreen Flowers Open disk-shaped flower with 5 petals, often notched and overlapping, in tones of orange, red, pink and white, 3-5cm across When To Plant April Although Impatiens are not really annuals, they are effectively annuals in the UK and Europe and are treated as such because they cannot tolerate low temperatures. In their native habitat of eastern Africa, they are actually evergreen perennials.1 Of a bushy, mounding habit that is naturally compact, Impatiens make terrific container plants too. Their small sizes mean small containers, and what better way to keep these herbaceous evergreens going until the following season than by simply bringing the little pots indoors? Gardening expert Dan Ori recommends starting again each year with standard walleriana types as it can be difficult to keep these looking healthy year on year: “More susceptible to cold and dying out, the New Guinea Impatiens actually overwinter in the house well.” Outdoors or indoors, these plants won’t require deadheading as they are self-cleaning.2 Common Varieties Over the past couple of decades, Impatiens in the UK have been struck by a widespread epidemic of downy mildew, specifically, Impatiens Downy Mildew (IDM).3 The devastation was so great that many gardens had to cull their Impatiens and the plant began to be given up on.4 Horticulturists have since developed Impatiens hybrids and cultivar series with resistance to downy mildew.5 In this transitional phase, the classic varieties are available for gardeners alongside the newer series that are mildew-resistant, but I focus on the latter in this guide. The species plant can grow anything from 15-60cm tall with the spread a shade narrower. It bears 5-petalled flowers from 3-5cm in diameter wide which usually occur in shades of pink, purple, orange, red and white. The following series are claimed to be downy mildew-resistant and are available in the UK. I. Accent Series These cultivars are ultra-compact plants growing to only 20cm tall and wide. The flowers are in standard hues, about 5cm across and have a darker eye. Blooming starts earlier and continues for longer. I. SunStanding Series The SunStanding series subsumes various cultivars. These cultivars may be grown under any exposure, in full shade to full sun. I. SunStanding Jazzy Series The Jazzy family features flowers that are very big at about 6cm. Moreover, it has variegated leaves that are yellow in the centre and green at the borders. I. walleriana Imara Series This is an award-winning series with well-branched plants from 25-30cm. The flowers’ hues are especially brilliant and vibrant. I. SunStanding Helios Series These cultivars are a great buy for home gardeners. Although the flowers are not as big as Jazzy’s, it produces them in greater profusion and even has bi-coloured blooms. How To Grow Busy Lizzies Busy Lizzies are easily and often grown from both seeds and cuttings. Impatiens seeds should not be sown directly outdoors in the UK as the favourable season is too short for the plants to mature and flower. Start seeds indoors in trays or small pots about two months before the expected last frost. If you sow in small pots then you will not have to pot on seedlings. Use a seed-starting mix for trays and potting compost amended with perlite or grit for pots. Sow seeds sparsely, 1-1.5cm deep. Dampen the medium and cover the tray or pots with clear polythene or plastic wrap to create humid conditions. The covering should have only a few small perforations. The temperature should range between 20-25°C; dampen daily. After seedlings emerge remove the covering and shift the trays or pots to a spot where they get a couple of hours of morning sunlight, or diffused or filtered sunlight later in the day; otherwise keep them under grow lights. I find that even strong sunlight coming in through patterned glass or frosted glass becomes diffused perfectly for plant-growing purposes. These plants are also super-easy to propagate via softwood cuttings. Hardiness To turn around that term ‘Fully Hardy,’ one might label Impatiens ‘Fully Tender.’ They are rated at H1B and H1C, meaning that the minimum temperatures they can tolerate are, respectively, 10°C and 5°C. So, let alone freezing temperatures or frost, if the mercury dips to even the single digits, the temperature can kill these plants. Though Busy Lizzies are not thought of as houseplants, the truth is that – with only a bit of effort – they make excellent potted plants for the home. Preferred Aspect Though different Impatiens series and cultivars have somewhat varying sun-shade preferences, all will do wonderfully well in partial shade, which is the most suitable position for them. Impatiens should be sited in a sheltered spot. Preferred Soil & Drainage Soil should retain moisture yet drain very well. It should also be fairly rich but not dense. So perhaps Busy Lizzies are a bit fussy about soil! Start with a sandy loam and incorporate grit, perlite, or both to ensure excellent drainage. Mix in organic compost in a 1:3 ratio with the loam and you’re good to go. If you think the soil will dry out very quickly or if you are planting in full sun, then do amend with vermiculite. Planting Impatiens Though you may plant on Impatiens that you have grown from seed or propagated from cuttings, keep in mind that they are conveniently bought as plugs or small potted plants from nurseries and even garden centres. Impatiens may be planted outdoors after the last frost. It would do well to wait until the soil has warmed up to decrease the likelihood of transplant shock and to get the plants off to a good start. In most regions of the UK this would mean sometime in April. For soil considerations please see section Preferred Soil and Drainage. Before planting Busy Lizzies outdoors, harden them by putting the pots outdoors in the morning for four days or so for increasing periods of time. The transplant hole should be about the same depth as the pot and twice as wide. Space the plants by about 30cm. Gently spread out the roots when transplanting. When you backfill the hole ensure that the soil level is no higher on the main stem than it was in the pot. Water in the plant. Please be aware that these plants’ roots are rather delicate so herewith a ‘Handle with Care’ advisory! Busy Lizzies Plant Care Impatiens need regular watering. Do not allow the soil to stay dry, especially in hot weather. At the same time, they also cannot stand waterlogged soil. As they are tender evergreen perennials, open-ground plantings will die in late autumn but you can keep potted plants going year-round by bringing them indoors or moving them to the conservatory, if you have one. For care guidelines if Impatiens are grown as houseplants, please see section Overwintering. A big advantage that these flowering plants have is that they are self-cleaning, so there is no deadheading task. Previously I would pinch the growing tips to head off legginess and ensure compactness but newer cultivars have such a fine bushy and compact habit that even this may not be necessary. Busy Lizzies benefit from fertilising but do not feed them with a balanced formula as it will result in excessive stem and foliage growth. Use a phosphor- and potash-oriented formulation designed for maximising blooms. A slow-release or controlled-release fertiliser (of the above type of formulation) for flowering plants would be perfect. Watering How much water Impatiens need is strongly dependent on their position and the current temperature, besides the amount of rain. For example, if they are sited in full shade and you are experiencing cool days, then a weekly or bi-weekly watering will probably be enough, and if it has rained, then no watering at all. But if they are positioned in full sun and you are having a heat wave and a dry spell, you will need to water them daily. As a general rule, water open-ground Impatiens generously, allow the top centimetre or two of the soil to dry out, and then water again. Overwintering If you choose to overwinter your Busy Lizzies, you need to grow them in containers in the first place. Containers should have drainage holes. Bring them indoors before the temperature falls to the single digits. ‘ Reverse-harden them first. As far as sunlight is concerned, all they’ll need is a few hours of morning sunlight or diffused or filtered sunlight at any time of the day. What is more important indoors are temperature and humidity. A very suitable temperature range is between 13-22°C, and this should not pose any problem indoors. As for humidity, typical indoor humidity is not sufficient for Impatiens plants. Humidity needs to be between 50-70% so a humidifier will prove very useful. To start with you could keep the pots on damp pebbles or orchid trays, mist the plants every other day, and see how it goes. “You are more likely to cause Downy Mildew problems with misting, so watering should be enough,” advises Dan Ori. Water in strict moderation as the plants are not growing actively and water will not dry out as much indoors as it did outdoors. Water sufficiently to make the soil just moist and allow the soil to dry out before watering again. Keep plants away from cold drafts and heating systems. Companion Planting One of the attractions of Busy Lizzies is their willingness and ability to play bridesmaid to the divas among flowering plants. A profusion of uncomplicated Impatiens blooms in bright tones and that rich green foliage in a compact, tidy shape make for a perfect backdrop to taller flowering plants that feature complex, richly-hued blooms. On the other hand, as Impatiens can flourish in shady areas, they become the star attractions when paired with, comparatively duller, foliage-centric evergreens and hedging. For the former type of companion planting, Aquilegia or Columbine is a great choice. Others include Iris and Camellia. I do think that someone should pair Oriental Lily with Busy Lizzies. For the latter type, Ferns and Hostas will be livened up with patches of Busy Lizzies. For entirely different types of effects, try tall, elegant Delphinium among merry little Impatiens, and Hydrangea and Impatiens as ‘pari passu’ companions. Common Problems Impatiens flowers are not only edible, they have a pleasant sweet-vegetal taste. And that is the main ‘common problem’ because everything from voles to deer love to snack on these plants. There is no getting around the reality that if such herbivores are found in your locality, you will have to set up traps or, much better, deterrents and repellants. Like many similar plants, Busy Lizzies can be attacked by aphids and wine weevils. As mentioned, legacy varieties are very vulnerable to downy mildew. Reviving A Dying Impatiens Plant To try to revive a dying Impatiens plant, you need to find out why your plant might be dying. Keep in mind that open-ground Impatiens will die in late autumn because they cannot survive winter in the UK. If a plant is dying during the favourable season, examine the foliage, from which it will be readily apparent if the plant has been afflicted by downy mildew or attacked by herbivores. If you observe a fine whitish down-like coating on the leaves, usually on the undersides, it is downy mildew. If the leaves have been nibbled at and are hole-ridden, you will have to set traps, deterrents or repellants for whatever herbivores are damaging the plant. Outdoors or indoors, Impatiens are susceptible to over and underwatering. In both cases, the trouble will manifest initially as drooping leaves, but in most plants, the result of dry soil will be drooping leaves, while root rot will lead to leaf wilt starting from the upper and outer leaves and progressing downward and inward. Simply check the soil to see if it is dry or soaked and think back to whether and how the plant was watered during the past 10-14 days. While a plant dying from lack of water is easy to save if you act quickly enough, the same cannot be said for a plant affected by root rot. References 1. Impatiens. (n.d.). San Diego Zoo Animals & Plants. Retrieved May 18, 2023, from https://animals.sandiegozoo.org/plants/impatiens 2. Russ, K., & Polomski, R. (2017b, August 26). Impatiens. Home & Garden Information Center | Clemson University, South Carolina. Retrieved May 17, 2023, from https://hgic.clemson.edu/factsheet/impatiens/ 3. Impatiens downy mildew / RHS Gardening. (n.d.). Royal Horticultural Society. Retrieved May 18, 2023, from https://www.rhs.org.uk/disease/impatiens-downy-mildew 4. Impatiens. (n.d.-b). University of Florida, Institute of Food and Agricultural Sciences. Retrieved May 18, 2023, from https://gardeningsolutions.ifas.ufl.edu/plants/ornamentals/impatiens.html 5. Lonnee, D. (2021, May 19). New Downy Mildew Resistant Impatiens Cultivars. Minnesota State Horticultural Society. Retrieved May 18, 2023, from https://northerngardener.org/new-downy-mildew-resistant-impatiens-cultivars/
Learn more
"I Use A Net To Catch The Seeds" - Euphorbia Propagation Advice From Darren Evans
IN THIS GUIDE 1) Growing Euphorbias From Seed 2) Propagating From Softwood Cuttings 3) Dividing Euphorbias References Euphorbias are varied plants that like a wide range of conditions and differ greatly in their growth habit and appearance. Some are great for growing outdoors in gardens in the UK, while others are prized as houseplants or for greenhouse growing. Euphorbias are propagated in a number of different ways. They can be: Grown from seed. Propagated by means of softwood cuttings. Propagated by division. Whichever method you are looking at for the particular type of euphorbia that you want to grow, the job is typically one to undertake in the spring. Difficulty Easy to medium Equipment Required Euphorbia seeds (sowing), suitable growing medium, gardening gloves, pots, garden fork (dividing) When To Propagate Spring 1) Growing Euphorbias From Seed Species types of Euphorbia can be grown from seed, as Darren Evans from Pugh’s Cacti explains: “Euphorbias have male and female plants and, once pollinated, produce a seed that explodes to scatter their seeds,” he says. “In my greenhouse, I use a net to catch the seeds, tying the net around the plant until the seeds appear.” However, it is important to remember that cultivars will not come true to seed. In other words, the baby plants you grow will not necessarily resemble the parent plant and can differ in their growth habit or colour. This is typically the method used to grow annual Euphorbias like E. marginata and some other species. When To Sow The seeds from many Euphorbias can be collected when the seed capsules turn brown. These seeds can then be sown in autumn or in spring. Sowing Euphorbia Seeds Collect or source your euphorbia seeds. Prepare a seed tray and your growing medium. Soak your euphorbia seeds for a few hours before sowing to improve results. Sow seeds on the surface of a seed-starting growing medium and lightly cover them with more of the growing medium. Be patient as germination can take several months, especially in cooler conditions. Wearing gloves, pot on as needed. Often, plants will then be ready to plant out in a couple of years. 2) Propagating From Softwood Cuttings Another option with some Euphorbias is to propagate an existing plant by means of softwood cuttings. Shrub-like Euphorbias, including those with biennial stems that grow one year before flowering the next, can be propagated by means of softwood cuttings. Some Euphorbias that are suited to this method of propagation include E. characias and related plants E. mellifera and E. myrsinites. When To Take Softwood Cuttings Softwood cuttings from Euphorbias are best taken in the early spring. You should select the short shoots that emerge at the base for this purpose. Growing Euphorbia From Softwood Cuttings Select young, pliable green shoots from the base of the plant in early spring. Remove 5-10cm of the shoot, cutting the young shoots from the plant just above the ground, as close to the base as possible. Pinch out the tip of the softwood cutting with snips. Dip the base into a rooting hormone for the best chances of successful rooting. Pot up cuttings into containers filled with cuttings compost, watering well but making sure excess water can drain away freely. Grow on in a warm location, out of direct sunlight until the roots form well. After 2-4 weeks, cuttings should have rooted and be ready to harden off and pot on. 3) Dividing Euphorbias A final option suitable for the propagation of certain Euphorbias is to lift and divide your plants to obtain more of the same for your garden. This is by far the easiest way to propagate Euphorbia and it is suited to a large number of these plants. The euphorbias that are suited to propagating in this way are those that are herbaceous and clump-forming. When To Divide The best time to divide most Euphorbia that can be propagated in this way is in the spring, just as the plants come into growth in the early spring, or just after flowering in late spring for the earliest flowering types. How To Divide Euphorbia Lift a mature clump-forming herbaceous Euphorbia from the soil with a garden fork. Give the clump a gentle shake to remove clods of soil, so the roots can be seen clearly. Ease the plant apart to create several sections of root with a little top growth. These sections or divisions can be potted up or planted elsewhere in your garden. It is important to remember that different methods of propagation are suited to different types of Euphorbia, so it is important to choose a propagation method that is suited to the specific euphorbia that you have chosen to grow. This is a genus of over 2,000 species of plants – each of which has its own specific growing requirements.1 References 1. Euphorbia L. (n.d.). Kew Royal Botanic Gardens. Retrieved April 6, 2023, from https://powo.science.kew.org/taxon/urn:lsid:ipni.org:names:327729-2#children
Learn more
Prune Euphorbia Soon After Flowers Fade In Early Autumn, Argue These Experts
IN THIS GUIDE Do You Need To Prune Euphorbia? Prune Once Flowers Fade Pruning Evergreen Euphorbias Pruning Euphorbias With Biennial Stems Pruning Herbaceous Perennial Types Euphorbias are varied plants within the same genus that can require rather different growing conditions and care. When thinking about any element of euphorbia care, it is important to consider which specific type and variety you are growing. Understanding the specific environmental preferences and needs of your specific euphorbia can be important when it comes to placement, watering and more. Pruning is another key area where there are no general rules and we need to look more specifically in order to determine what to do. Difficulty Medium Equipment Required Secateurs, pruning shears or gardening scissors, gardening gloves When To Prune Summer or autumn Do You Need To Prune Euphorbia? Whether or not you need to prune Euphorbias very much depends on which type and variety you are growing. Some euphorbias do not need to be cut back or pruned at all, whilst others will perform best if pruned or cut back correctly. Euphorbia is a large genus including some plants which are shrub-like with a permanent framework of branches; some which are herbaceous plants. With such a varied group of plants, it is certainly important to distinguish between the different types so that you do not follow the wrong pruning guidelines. Within this one guide, it would be difficult to cover the hundreds of euphorbias that might be grown individually. Fortunately, many of the Euphorbia commonly grown in British gardens can be divided into three different groups for their pruning requirements. Prune Once Flowers Fade Timings will also very much depend on which euphorbia you are growing. However, with many Euphorbias, the time for pruning is either once the flowers fade or soon thereafter. With some types, the processes of pruning and deadheading are pretty much one and the same. So, while the details vary somewhat, the pruning of Euphorbias generally takes place in the late summer or autumn months. Pruning Evergreen Euphorbias Certain evergreen Euphorbias typically just need to be trimmed back immediately after flowering. This type of pruning pertains to: E. amygdaloides E. ‘Blackbird’ E. mellifera E. x pasteurii E. ‘Redwing’ Pruning in the case of these Euphorbias is simply deadheading and, other than removing the spent flowers and the upper portions of the flowering stems, no further cutting back or pruning is required. To cut back these Euphorbias, wait until the bracts surrounding the flowers turn completely brown, then remove the tops of the flowering stems, cutting back to the first ring of leaves below. Pruning Euphorbias With Biennial Stems Some types of Euphorbia produce biennial stems. In other words, they have two different types of shoots: those that grew the previous season on which flowers will form and those that grew during the present growing season. These types include: E. characias E. x martini E. myrsinites E. rigida The idea is that you should cut down the growth of the previous season, on which the flowers form. Cut these back to the ground in the late summer or autumn but leave the present season’s growth in place, as this will flower next year. Pruning Herbaceous Perennial Types When it comes to the herbaceous perennial Euphorbias, flowers are deadheaded once they fade. The euphorbias include: E. cyparissias E. epithymoides E. griffithii E. palustris E. sikkimensis E. villosa E. wallichii The whole of the plant is then cut to the ground later. You can cut back the entire plant to ground level before the first frosts or let the dead stems stand over the winter months to benefit wildlife, before cutting back early in the spring before new growth begins to emerge. “When pruning Euphorbia, long sleeve tops, gloves and washing your hands afterwards are recommended as the sap is phototoxic (activated by sunlight),” shares Master Horticulturist Dan Ori. These simple tips above should help you make sure that you prune, cut back or deadhead your Euphorbias correctly and do not do any harm to your plants.
Learn more
Highlighting 14 Excellent Euphorbia Varieties From This Diverse Group Of Plants
IN THIS GUIDE 1) E. amygdaloides var. robbiae 2) E. characias 3) E. cornigera 4) E. griffithii 5) E. hypericifolia 6) E. ingens 7) E. lathyris 8) E. mellifera 9) E. milii 10) E. myrsinites 11) E. oblongata 12) E. palustris 13) E. schillingii 14) E. sikkimensis Euphorbias are generally divided into those that are suitable for outdoor cultivation in the UK and those that are commonly grown as houseplants or in greenhouses in our climate. These are very varied plants, and though they share a genus, they can differ greatly in their appearance, growth habits and needs. One of the first things that you will have to decide when choosing a Euphorbia to grow is where you will be growing it. E. milii Even among Euphorbias that can be grown outside, there are many differences in the environmental conditions that different species and cultivars within this genus prefer. Some do best in full sun and free-draining conditions, while others will do best in consistently moist soil positioned in partial shade. Another important thing to think about is the size to which a particular species and cultivar of Euphorbia will grow, as they can differ greatly in this respect too. Some are larger herbaceous perennials or shrubs, whilst some are low-growing ground cover plants. E. obesa “A great Euphorbia to try is Euphorbia obesa,” says Darren Evans from Pugh’s Cacti. “It grows slowly and produces a dome shape that flowers along its ribs. E. eritrea “Euphorbia eritrea is another variety to try. It grows fast and can reach 15 feet in height, as it does in our nursery.” Linked with the size of a Euphorbia are its growth habits and the general details of its appearance. In these respects too Euphorbia can be an incredibly diverse group. E. epithymoides With all that said, here are some of my favourite varied euphorbias that might be considered by gardeners in the UK. 1) E. amygdaloides var. robbiae COMMON NAME(S): Mrs Robb’s bonnet HARDINESS RATING: H6 FOLIAGE: evergreen FLOWERING SEASON(S): spring / summer SUNLIGHT: any SOIL REQUIREMENTS: loam, sand, clay; any pH SIZE: 0.1-0.5m in height, 1-1.5m spread Also known as Mrs Robb’s Bonnet, this Euphorbia is a perennial evergreen that grows to around 50cm tall. It forms rosettes of deep green leaves and bears large, rounded sprays of yellowy-green flowers in the spring and summer. “We always use plants like E. amygdaloides var. robbiae that are great for filling in spots under trees,” shares Garden Designer Tom Simpson. This is a good choice for areas of dry shade, though it can also grow in partial shade or full sun. It will do best in moist but well-drained or well-drained soil. 2) E. characias COMMON NAME(S): Mediterranean spurge HARDINESS RATING: H4 FOLIAGE: evergreen FLOWERING SEASON(S): winter / spring SUNLIGHT: full sun SOIL REQUIREMENTS: loam, sand, clay; any pH SIZE: 1-1.5m in height, 1-1.5m spread Mediterranean spurge is a great plant for pollinators. It is a perennial that is evergreen and grows to around 1.5m tall. It has biennial stems, which are leafy in their first year and flowers in their second, becoming bare over the lower part of the stem. The flowers are prolific, borne in the spring in large cylindrical heads made up of petal-like bracts around tiny bright yellowy-green flowers. This is a short-lived perennial that often self-seeds when placed in the right location. Grow in well-drained soil in full sun in a sheltered spot. 3) E. cornigera COMMON NAME(S): horned spurge HARDINESS RATING: H5 FOLIAGE: deciduous FLOWERING SEASON(S): summer SUNLIGHT: full sun / part shade SOIL REQUIREMENTS: loam, sand, clay; any pH SIZE: 0.5-1m in height, 0.5-1m spread Horned spurge has an RHS Award of Garden Merit and is another good choice for a pollinator-friendly garden. This is a spreading perennial which grows around 75cm tall. It has slightly reddish stems with dark green leaves and bears bright yellow flowers in the summer. This Euphorbia is best grown in full sun or part shade, in moist but well-drained soil. 4) E. griffithii COMMON NAME(S): Griffith’s spurge HARDINESS RATING: H7 FOLIAGE: deciduous FLOWERING SEASON(S): summer SUNLIGHT: part shade SOIL REQUIREMENTS: clay or loam; any pH SIZE: 0.5-1m in height, 0.5-1m spread Griffith’s spurge is a vigorous perennial with a spreading habit which can have a height and spread of up to 1m or so. It has lanceolate leaves which turn red and yellow in the autumn months and bears clusters of red, orange or yellow flowers at the beginning of summer. This is a Euphorbia that does best in part shade in moist yet free-draining soil. It will tend to do best in clay or loam soil, with an east or west-facing aspect. It is H7 hardy and is among the hardiest plants to grow, coping even in the coldest regions in extreme winter temperatures. “I find E. griffithii one of the best garden Euphorbias due to its hardiness and autumn colour,” shares Master Horticulturist Dan Ori. “I recommend planting it in a border with other plants that give red and yellow autumn colour like Acers and also try mixing in dark green-leaved evergreens with plants like Aucuba japonica ‘Rozannie’.” 5) E. hypericifolia HARDINESS RATING: H2 FOLIAGE: evergreen FLOWERING SEASON(S): spring / summer / autumn SUNLIGHT: full sun / part shade SOIL REQUIREMENTS: sand, loam, clay; any pH SIZE: 0.1-0.5m in height, 0.1-0.5m spread This is a tender Euphorbia that is best grown undercover indoors or in a greenhouse. It can also be placed outdoors in a mild, sheltered and sunny position with light, free-draining conditions. It is a good choice for hanging baskets or a container garden. This is a small evergreen perennial, with tiny dark green leaves and tiny white flowers which are borne from spring to autumn. However, this plant is only H2 hardy and won’t survive outdoors year-round. 6) E. ingens COMMON NAME(S): candelabra tree HARDINESS RATING: H2 FOLIAGE: evergreen FLOWERING SEASON(S): autumn / winter SUNLIGHT: full sun SOIL REQUIREMENTS: sand or clay; any pH SIZE: 12m in height, 8m spread Though it can grow to around 15m in height when fully grown, these cacti-like succulent plants are commonly much smaller and are commonly grown in containers. Ridged and with spines along their broad succulent stems, they can, when mature, produce greenish-yellow flowers followed by reddish or purple fruits. Requiring a free-draining and sheltered position in full sun, this Euphorbia is H2 hardy. It is usually grown as a houseplant indoors. “My E. ingens takes over a significant part of my greenhouse as the spines make it too hazardous for the house,” shares Dan. “It handles low temperatures well but does not like cold and damp conditions.” 7) E. lathyris COMMON NAME(S): caper spurge HARDINESS RATING: H5 FOLIAGE: evergreen FLOWERING SEASON(S): spring / summer SUNLIGHT: full sun / part shade SOIL REQUIREMENTS: chalk, sand, clay; any pH SIZE: 1-1.5m in height, 0.1-0.5m spread Also sometimes referred to as E. crucifolia and commonly known as caper spurge; this is an annual or biennial Euphorbia species. It will typically reach around 1.2m in height. Its leaves are around 15cm long and they extend directly sideways out of unbranched stems. In late spring and early summer, these plants have small yellow-green blooms that are followed by triple seed heads that turn brown as they mature. This Euphorbia likes moist but well-drained or well-drained soil in full sun or partial shade. 8) E. mellifera COMMON NAME(S): honey spurge HARDINESS RATING: H3 FOLIAGE: semi-evergreen FLOWERING SEASON(S): spring SUNLIGHT: full sun / part shade SOIL REQUIREMENTS: loam, sand, clay; any pH SIZE: 1.5-2m in height, 2-2.5m spread E. mellifera is another more tender Euphorbia that can be grown outdoors in some locations in summer but usually requires an indoors or undercover, frost-free spot in winter. It is a domed shrub with bright green lance-like leaves with paler veins down their centres and brownish flower heads which are borne in the late spring. This option requires well-drained soil in a sheltered location in full sun. It is H3 hardy so may be grown outdoors year-round only in the mildest, coastal locations in the south of the British Isles. 9) E. milii COMMON NAME(S): crown of thorns HARDINESS RATING: H1B FOLIAGE: evergreen FLOWERING SEASON(S): summer SUNLIGHT: full sun SOIL REQUIREMENTS: loam, sand, clay; any pH SIZE: 0.5-1m in height, 0.1-0.5m spread This Euphorbia, often also referred to as Crown of thorns, Christ plant, or Christ thorn, is a large evergreen plant with leathery oval leaves and clusters of small yellow flowers with vibrant bright red bracts. It requires well-drained conditions in full sun and is most commonly grown indoors or in a greenhouse year-round, though it may also be placed out into a sheltered position in a garden in summer. The hardiness rating for this Euphorbia is H1B. 10) E. myrsinites COMMON NAME(S): broad-leaved glaucous spurge HARDINESS RATING: H5 FOLIAGE: evergreen FLOWERING SEASON(S): spring SUNLIGHT: full sun SOIL REQUIREMENTS: all soil types; any pH SIZE: 0-0.1m in height, 0.1-0.5m spread Also known as broad-leafed glaucous spurge, this Euphorbia is an evergreen perennial which has trailing leafy stems with bright green leaves and, in spring, yellow-green flower clusters that are 10cm across. This ground cover plant grows only around 10cm tall but can spread over 40-50cm wide. Grow this plant in full sun in well-drained soil. It can cope with a sheltered or exposed location and is H5 hardy. 11) E. oblongata COMMON NAME(S): Balkan spurge HARDINESS RATING: H5 FOLIAGE: deciduous FLOWERING SEASON(S): spring / summer / autumn SUNLIGHT: part shade SOIL REQUIREMENTS: chalk or sand; any pH SIZE: 0.5-1m in height, 0.1-0.5m spread Balkan spurge is a clump-forming herbaceous plant with dark green stems, which turn red in autumn, and flat heads of yellow flowers that are 15cm wide and bloom over a long period between spring and autumn. This Euphorbia is best placed in a dappled shade somewhere it will receive sun for part of the day. Though it is perennial, it is most commonly grown as an annual and will readily self-seed in moist but well-drained, humus-rich soil where it is happy. So, you might see this plant popping up in your garden year after year. 12) E. palustris COMMON NAME(S): marsh spurge HARDINESS RATING: H7 FOLIAGE: deciduous FLOWERING SEASON(S): spring SUNLIGHT: full sun SOIL REQUIREMENTS: clay or loam; any pH SIZE: 0.5-1m in height, 0.5-1m spread E. palustris, also known as marsh spurge, is a herbaceous perennial which will grow up to around 90cm tall. It has vibrant mid-green leaves which often turn yellow or orange in autumn and bears terminal clusters of greenish-yellow blooms in the late spring. As the name suggests, this is an unusual Euphorbia in that it will do best not in free-draining conditions like so many of this genus, but instead will thrive in permanently moist soil. It will thrive in clay or loam in full sun and is H7 hardy. 13) E. schillingii COMMON NAME(S): Schilling spurge HARDINESS RATING: H5 FOLIAGE: deciduous FLOWERING SEASON(S): summer / autumn SUNLIGHT: part shade SOIL REQUIREMENTS: chalk or sand; any pH SIZE: 0.5-1m in height, 0.1-0.5m spread This is a herbaceous perennial with erect stems that hold green leaves with white veins down their middles and broad clusters of vivid yellow flowers in the summer and into autumn. These Euphorbias grow best in partial shade in moist but well-drained soil that is rich in organic matter. 14) E. sikkimensis COMMON NAME(S): Sikkim spurge HARDINESS RATING: H5 FOLIAGE: deciduous FLOWERING SEASON(S): summer SUNLIGHT: full sun / part shade SOIL REQUIREMENTS: all soil types; any pH SIZE: 1-1.5m in height, 0.5-1m spread Sikkim spurge is an upright herbaceous perennial which has narrow leaves on stems that are a pinkish colour when young. The flowers, borne in loose heads in late summer, are bright yellow in hue. It needs moist but well-drained soil and is H5 hardy. There are, of course, many more species besides those listed above and there are also many cultivars of different species to contend with when making your choice. The above just serves to show how much variety there is in this genus, how many Euphorbias there are to choose from and just how different they can be.
Learn more
Euphorbia: How To Grow Plants In This Diverse Genus With Advice From Darren Evans
IN THIS GUIDE Overview How To Grow Euphorbia Euphorbia Planting Euphorbia Plant Care Euphorbia is a genus of plants that can offer a lot to gardeners. Hugely diverse, this genus provides plants of a range of shapes and sizes for a wide range of locations, indoors and outside in a garden. Across our Euphorbia guides, we’ve collaborated with Darren Evans, Plant Manager at Pugh’s Cacti. “I love Euphorbias as they can be weird and wonderful,” he says. “Some are classed as succulents but have spines that resemble a cactus, so it’s the best of both worlds.” Overview Botanical Name Euphorbia Common Name(s) Spurge Plant Type Annual / Perennial / Shrub / Succulent Native Area Broad range Hardiness Rating Varies considerably Foliage Diverse range Flowers Small flowers often in colourful bracts When To Plant Varies Euphorbias can be useful and attractive plants. One of the most important things to understand about Euphorbias, or ‘spurges’ as they are sometimes known, is that they differ greatly in their characteristics and growing requirements, so it is important to choose carefully. There are Euphorbias that are annuals, perennials, shrubs, succulents and even some that love moist conditions. Euphorbia poissonii ‘Variegata’ “With succulent euphorbias, you give them attention at certain times of the year and after that, you can just leave them to do their thing and flourish,” shares Darren. “They can be easy to grow with a simple compost mix, plenty of light and regular watering when required. “In return, they will reward you with beautiful flowers, elegant spines and wonderful shapes.” There is a euphorbia for full sun and for shade, for use as a houseplant and as much hardier plants for year-round outdoor cultivation. How To Grow Euphorbia Selecting the right Euphorbia for the conditions where you want it to grow is the first and most important step in growing them successfully where you live. Hardiness When it comes to hardiness, plants within this genus range from tender to fully hardy, even in the UK during the coldest winters. It can be helpful then to separate Euphorbias into garden Euphorbias (those hardy enough to grow outside) and indoor or greenhouse Euphorbias, which are not hardy enough to remain outside through the year and must be cultivated as houseplants or undercover. Tender houseplant Euphorbias can be small balls or large branched shrubs. E. characias These typically grow well in sun-baked conservatories throughout the year, though they can often be placed outside during the peak of summer. Popular poinsettias are a member of this group and are commonly grown around Christmas. Other examples are E. milii, E. milii var. splendens, E. horrida, and E. obesa. Typically succulent in form and resembling cacti, these bear little resemblance to Euphorbias commonly grown outside in a garden. Preferred Aspect Garden euphorbias are all hardy enough to be grown outdoors in UK gardens. However, even these plants differ greatly from one another. These Euphorbias can be subdivided again into those that like to be grown in full sun and those that love shade. E. characias subsp. wulfenii Sun-loving spurges are mostly either herbaceous perennials that die back in winter and send up new growth each spring or have a permanent shrubby framework of branches. There are also some annual Euphorbias for full sun that complete their lifecycles in a single year. Some examples of sun-loving spurges include E. characias, E. griffithii, E. mellifera, E. palustris and E. rigida. “My favourite Euphorbia is E. mellifera, also known as honey spurge,” says Master Horticulturist Colin Skelly. “It will grow to around 2m tall and wide when thriving and can be grown in full sun or partial shade and in a range of soil types as long as free draining. “It is loved by pollinators and has a pleasant fragrance. It can be pruned back in spring if needed. It is frost-hardy in all but the coldest parts of the UK.” Most of these really do best with excellent drainage and won’t tolerate waterlogging at all, but E. griffithii and E. palustris are content in damp soil. E. lathyris Annuals include E. lathyris, E. marginata, and E. oblongata. E griffithii can also cope well with dappled shade and E. amygdaloides and E. amygdaloides var. robbiae are also Euphorbias that are tolerant of dappled shade. These Euphorbias will not like soil that dries out too excessively and in some cases in full sun, the flowers and leaves of these plants can scorch. Sun-loving Euphorbias will tend to do best with a south-facing aspect, while those that thrive in partial or dappled shade do well with an east or west-facing aspect. Preferred Soil & Drainage Garden Euphorbias differ not only in their sunlight requirements but also in their preferred soil type and soil conditions. Some Euphorbias, such as E. cornigera and E. schillingii, will grow well in most soil types as long as they do not become waterlogged. Euphorbia schillingii Euphorbia such as E. characias subsp. wulfenii and E. rigida do best in sandy soils that are free-draining. Among those that grow well in part shade, E. amygdaloides var. robbiae is a good choice for dry shade, while E. palustris is an example of one Euphorbia that can work in damp soils. It is, of course, important to make sure that you understand the needs of the particular Euphorbia that you are trying to grow before selecting and preparing a planting site. Euphorbia Planting Euphorbias are commonly sold as potted plants, either as smaller plants in spring or larger plants that are often in flower in summer or early autumn. Mostly, these plants come in 1 or 2-litre pots, though sometimes plants in 9cm wide pots are available. Garden Euphorbias are best planted out in a garden in the spring, once the weather begins to warm. This is the best time for planting because it allows the plants to establish quickly while the soil is relatively moist and put on plenty of growth during warmer weather. E. neriifolia To plant a Euphorbia in the soil, simply dig a hole larger than the existing roots of the plant, place the plant in this hole, firm the soil back around it and water it in well. In many cases, the addition of organic mulch around the plant can be beneficial. Some Euphorbias are suited to container growing. These can thrive in the free-draining conditions that a suitable container can provide. Mix a potting medium with three-parts loam-based compost to one-part grit to keep these plants happy. Euphorbia Plant Care Euphorbias require very different care depending on the specific types and varieties you have chosen and where they are growing. Euphorbia marginata ‘Pursh’ Some take a lot more time and effort, while others can be relatively low-maintenance and easy plants to grow. Watering Garden Euphorbias typically need to be watered well during establishment for their first couple of growing seasons, after which natural rainfall will typically be sufficient, as the plants can often have reasonable drought tolerance. However, if you are growing euphorbias in containers, indoors or outside, watering will be a job that you will have to continue to undertake throughout the year from spring to autumn. The goal is typically to make sure that the growing medium remains moist yet not waterlogged and never dries out completely during the growing season. Feeding Euphorbias tolerate poor fertility rather well and they do not typically need to be fed at all. E. milii In fact, feeding can be counterproductive because plants that are in too rich a soil or growing medium can become leggy. Common Problems Euphorbias are often blissfully trouble-free plants. However, they can develop a number of minor issues, especially if environmental conditions or care were not quite right. Common problems include root rot (when grown in wet soils), powdery mildews, rust diseases and aphids.
Learn more


