

Growing

This Is How To Nurture Astrophytum With Six Interesting Varieties To Grow
IN THIS GUIDE Overview Astrophytum Varieties How To Grow Astrophytum Astrophytum Care Guidelines References Astrophytum is a genus with several different species of perennial cacti to grow in a greenhouse under glass or in bright, filtered light indoors. While more commonly grown as houseplants in the UK, these cacti may also sometimes be grown outside in a suitably warm, sunny, sheltered spot where temperatures do not fall below freezing. Overview Botanical Name Astrophytum Common Name(s) Monk’s Hood Cactus Plant Type Perennial cactus Native Area South America Hardiness Rating H2 Foliage Evergreen Flowers Solitary, funnel-shaped flowers followed by berries that are red or green When To Sow March to April There are six accepted species within the Astrophytum genus, all of which hail from arid regions of South America, particularly Mexico.1 These species are all cacti, specially adapted to survive with low water availability and periods of drought. Their stems are spherical in form, ribbed or columnar and they have woolly, occasionally spiny areoles. Their flowers, borne in summer, are funnel-shaped and solitary. These flowers can, in optimal conditions, be followed by red or green berries. Astrophytum Varieties The six species of Astrophytum are: A. asterias A. capricorne A. caput-medusae A. coahuilense A. myriostigma A. ornatum The most commonly grown species in the UK are A. ornatum, A. myriostigma and A. capricorne, all of which have an Award of Garden Merit from the RHS. How To Grow Astrophytum Astrophytums are typically grown indoors here, as it can be challenging to give the plants the warmth and dry conditions they require outdoors in our climate. In order to grow these cacti successfully, you need to mimic as closely as possible the conditions that these plants would experience in the wild in their native range. Growing Conditions If you are growing Astrophytum outdoors, they need as sunny, warm and sheltered a spot as possible and though they can cope with relatively cold temperatures, they cannot cope with temperatures that fall below freezing at any time. Indoors, they should be kept in a location where they are not exposed to extreme temperature fluctuations or cold draughts. Sunlight Outdoors, these cacti will need a location in full sun. Indoors, they prefer a location in bright but filtered light. Soil Preference These cacti need free-draining conditions, which is one of the most important elements to remember when growing these plants. The soil must be sharply drained, poor and slightly alkaline in pH. When growing in pots, a free-draining loam-based potting mix with sharp sand mixed in to improve drainage should be used or you can select and purchase a proprietary blend specifically designed for growing cacti. Astrophytum Care Guidelines Like most other cacti, these plants can be very forgiving when it comes to care that leaves something to be desired. These plants can be tolerant of a fairly high level of neglect. Watering Astrophytum should only be watered once the growing medium has become dry in spring, summer and early autumn. In the winter months, it should be left alone completely and not watered at all. Horticultural expert Dan Ori explains that timing on the first water in spring can be tricky for many of us to understand as it is more about daylight than temperature: “Based on the sunshine coast of Sussex, I get suitable daylight from early March to start watering, but you could be weeks later in Scotland, which is why I normally tell people to start watering at Easter whenever it falls.” It is important to reduce and then cease watering while the plant approaches and then enters its dormant state. When you are watering from spring to early autumn, it is important to water deeply and well each time you do water. Don’t water too often, but when you do water, give it a good soak so that the roots of the plant are able to take up all the water they need. Propagation Astrophytum are typically propagated by seed. The seeds are sown in the early spring indoors or under cover. It is typically necessary to use a heat mat or heated propagator as the seeds must be kept consistently at 21°C for germination to take place successfully. Common Problems Though Astrophytums are generally disease-free, there are certain common houseplant pests that can become an issue for these plants. Scale insects and mealybugs, for example, can potentially become problems when you are growing these cacti indoors. References 1. Astrophytum Lem. (n.d.). Kew Botanic Gardens. Retrieved July 24, 2023, from https://powo.science.kew.org/taxon/urn:lsid:ipni.org:names:30001394-2
Learn more
12 Amazing Aloe Varieties Chosen For Your Home By Elizabeth Waddington
IN THIS GUIDE 1) A. arborescens ‘Variegata’ 2) A. bakeri 3) A. brevifolia 4) A. descoingsii 5) A. haworthioides 6) A. ‘Lizard Lips’ 7) A. polyphylla 8) A. rauhii ‘Snowflake’ 9) A. somaliensis 10) A. striatula 11) A. variegata 12) A. vera Aloes are popular sculptural succulent houseplants that are easy to grow in containers and are prized for the appearance of their spiral rosettes of succulent leaves. Aloes are typically grown as houseplants in the UK, but hardiness varies and some can be placed outside in a suitable spot – at least during the warmer part of the year. They are easy to grow in containers using a cactus compost or another good quality peat-free mix – with sharp sand or grit added to improve the drainage. You cannot go too far wrong when growing any Aloe if you provide it with free-draining, frost-free conditions and ensure that the surroundings are not too humid. The best-known is perhaps Aloe vera, which is grown not only for its visual appeal but also for its various uses in natural produce, but there are plenty of others to consider. Here are some interesting and highly regarded Aloe varieties to grow. 1) A. arborescens ‘Variegata’ COMMON NAME(S): variegated candelabra aloe HARDINESS RATING: H1C FOLIAGE: yellow and green FLOWERS: red This perennial forms rosettes of succulent, toothed, sword-like leaves that are mid-green, and striped with a pale yellow. Occasionally, this plant also produces red, tubular flowers held erect in terminal racemes. 2) A. bakeri COMMON NAME(S): baker aloe HARDINESS RATING: H1B FOLIAGE: white and green FLOWERS: orange and red Also known as ‘Baker Aloe’, this perennial succulent grows to around 20cm tall, forming mats of dark green rosettes made up of narrow leaves which are speckled with white. The plant also sometimes boasts reddish-orange racemes of flowers. 3) A. brevifolia COMMON NAME(S): short-leaved aloe HARDINESS RATING: H2 FOLIAGE: green, silver and grey FLOWERS: red Short-leaved aloe is the common name for this variety – it is a mat-forming perennial succulent. It forms rosettes of spreading, toothed, triangular leaves and its 4cm flowers are red and are also carried in racemes above these rosettes of leaves. 4) A. descoingsii COMMON NAME(S): descoings aloe HARDINESS RATING: H1B FOLIAGE: white and green FLOWERS: orange Descoings aloe is a mini variety that forms low clumps of just 6cm. It has greyish-green succulent leaves with toothed margins and white speckles. When placed on a sunny windowsill, it can produce a flower stalk in spring and summer and bear urn-shaped flowers of a dark orange hue. 5) A. haworthioides COMMON NAME(S): haworthia-leaved aloe HARDINESS RATING: H1C FOLIAGE: green FLOWERS: orange Haworthia-leaved aloe is small but fast-growing. It reaches around 10cm in height with its rosettes of succulent leaves, which are dark green, lanceolate and covered with soft, white, hair-like spines. In addition to this, its flowering stems, with their tubular orange flowers in late summer, can reach around 30cm tall. 6) A. ‘Lizard Lips’ COMMON NAME(S): aloe ‘lizard lips’ HARDINESS RATING: H1B FOLIAGE: green, cream and white FLOWERS: orange Growing to around 15cm tall and 20cm in diameter, this aloe forms rosettes of tapered leaves in green, with interesting patterns in lighter green and creamy white edges with little white teeth. Tall spikes form in the summer, bearing tubular orange flowers. 7) A. polyphylla COMMON NAME(S): many-leaved aloe HARDINESS RATING: H3 FOLIAGE: green Known as the many-leaved aloe, this option is prized for its spiral form. The fleshy leaves form a pronounced spiral pattern. They have white or pale green spines along the edges and single brown spines at their upper tips. The flowers which appear on a branching spike in spring are typically red with greenish-yellow tips but can vary in hue. 8) A. rauhii ‘Snowflake’ COMMON NAME(S): snowflake HARDINESS RATING: H1B FOLIAGE: green and brown FLOWERS: pink and red This rather rare succulent is stemless and evergreen. It forms rosettes of lanceolate leaves with a grey-green hue that have lighter green patterns upon them and little white teeth along their sides. The leaves are sometimes flushed brown when exposed to strong direct sun. The flowers, borne in summer on 30cm high stalks, are of a pinkish-red colour. 9) A. somaliensis COMMON NAME(S): Somalian aloe HARDINESS RATING: H1B FOLIAGE: green and white (variegated) FLOWERS: pink and red Somalian Aloe has attractive variegated leaves like the above, which are green with lighter green patterning and light green to white teeth along the edges of each one. In the late summer, this aloe sends up spikes that can be 60-80cm in height, bearing tubular flowers in pale pink to red hues. 10) A. striatula COMMON NAME(S): striped-stemmed aloe HARDINESS RATING: H3 FOLIAGE: green FLOWERS: yellow Known as stripe-stemmed aloe, this evergreen succulent has scrambling, bushy stems that, as the name suggests, are striped with light and dark green. The leaf sheaths are also striped in the same way. Dramatic racemes of vivid yellow flowers with orange stems protruding from them form on spikes around 40cm tall in the summer months. 11) A. variegata COMMON NAME(S): partridge-breasted aloe HARDINESS RATING: H1C FOLIAGE: green and white (variegated) FLOWERS: red and orange Also known as partridge-breasted aloe, Aloe variegata is a familiar houseplant to some. It grows around 20cm tall, forming rosettes of its stiff, fleshy, dark-green leaves that are banded distinctively with broadly horizontal white stripes. Racemes of flowers form in the summer, which are salmon-red in colour. “This is my favourite Aloe as it’s robust and revives well from over and under-watering, as well as possessing an attractive variegation that looks painted on by a fine brush,” explains Master Horticulturist Dan Ori. 12) A. vera COMMON NAME(S): Barbados aloe HARDINESS RATING: H1C FOLIAGE: green FLOWERS: green and yellow Last but certainly not least, the most common Aloe of all is Aloe vera, also known to some as Barbados Aloe. It can grow up to around 60cm tall, forming rosettes of fleshy, lance-shaped leaves with spiny edges. The flowers when these form are greenish-yellow and are around 3cm in length. These are held above the leaf rosettes in racemes that can reach around 90cm in height. There are plenty of other Aloes and related succulents to grow, but in the list above, you should find some ideas with which you can expand your houseplant collection.
Learn more
Living Stones Plants Can Be Grown From Seed: Focus On Light And Warmth
IN THIS GUIDE 1) Find A Suitable Spot For Sowing 2) Prepare The Pots & Growing Medium 3) Sow The Seeds 4) Wait For Your Living Stones To Germinate 5) Water The Emerging Seedlings If you like succulents but don’t care for thorns, then Lithops is for you. This plant looks like a pair of little oval stones set close together; the colour is usually grey, brown or green, with some texturing or a single daub. It is no surprise then, that these plants are known as ‘Living Stones’. These plants have tiny seeds that are very much like coarse sand, so you will be sowing sand-like seeds in a sandy medium to grow small stones. You can enjoy the procedure of growing Lithops from seed by following these steps: Arrange the preliminaries for sowing, with a particular focus on getting the right temperature. Prepare the pots with well-draining, coarse soil. Sow the tiny Lithop seeds carefully, making sure they have enough light exposure to germinate properly. Wait for germination to occur – ensuring consistently moist conditions. Water the seedlings frequently before potting on the following summer. Each stage of this process is explained in more depth below. Difficulty Medium Equipment Required Gardening gloves, seeds, pots, growing medium When To Sow April 1) Find A Suitable Spot For Sowing Just as some seeds need light to germinate and some need dark, Lithops seeds are fussy about the temperature they need to germinate, as well as the season. Most varieties of Lithops seeds need a temperature between 19-24°C to germinate and are best sown during April. Find a spot by a window where they will get ample indirect bright light for several hours, but no direct sunlight. Otherwise, set up grow lights or any artificial light of the appropriate intensity. 2) Prepare The Pots & Growing Medium It is difficult to sow Lithops seeds in a controlled manner as you usually would and that’s because they are so tiny. Therefore, it is the best option to sow them in pots. Use small 9cm pots with drainage holes at the base. Succulents are best started and rooted in very well-draining coarse soil that is not organically rich, and Lithops is no exception. 3) Sow The Seeds First, dampen the compost. To sow tiny seeds in a controlled manner, I take a stiff piece of cardboard and sprinkle seeds on it. Holding the cardboard stiffly in one hand and with a table knife in the other, carefully separate and push off seeds, scattering and spacing them over each pot. Lightly dab down so that the seeds are just lodged into the medium. Do not try to push the seeds in – they need light to germinate. Take as many clear polythene sheets of the appropriate size as you have pots. Make only two or three punctures in each sheet, and cover each pot to lock in humidity. Fasten the sheets around the edges of the pots; you could use rubber bands or clips. 4) Wait For Your Living Stones To Germinate Every morning remove the polythene sheet, spray the medium to moisten it well and replace the sheet. The medium should be kept continuously moist. Repeat this step until you see the seedlings sprout up. This may take anything from 4-20 days, depending on the species and conditions. 5) Water The Emerging Seedlings When you see seedlings in a pot, remove the polythene sheet. Continue keeping the medium moist as before for two to three months. Thereafter, reduce the frequency and volume of watering by dropping it down to every other day. As the plants grow, continue to reduce the frequency of watering while keeping the medium moist. “Lithops seeds respond to seasonal moisture to germinate but then enter a dry season, so try to avoid overwatering seedlings as this will cause them to rot,” shares Colin Skelly, a Horticultural Consultant. The following summer the new, maturing living stones may be potted on. When potting on, you may use a somewhat more nutrient-rich compost and then start to feed the plants.
Learn more
Growing Lithops: 'They Look So Much Like Rocks And Then Flower So Impressively'
IN THIS GUIDE Overview Lithops Varieties How To Grow Lithops Lithops Care Guidelines References Even by the laid-back standards of succulents, Lithops take cool to a whole new level, as these evergreen plants look like a pair of stones. They often have a translucent or dappled appearance, which is pretty enough, and then they burst into flower. If you’re a gardener who also likes to collect unusual stones and has an interest in geology, Lithops is just the plant for you. “I have found Lithops to be a great way to introduce children to succulents,” shares Master Horticulturist Colin Skelly. “They are a great way to explain adaptation because they look so much like rocks and then flower so impressively.” Overview Botanical Name Lithops Common Name(s) Living stones, flowering stones, pebble plants Plant Type Perennial succulent Native Area South-east Africa Hardiness Rating H2 Foliage Evergreen Flowers Somewhat daisy-like; wide-open form with narrow rays and central ‘tuft’ When To Plant April These evergreen succulents mimic stones and, as a result, grazing herbivores in their native habitat of South-Eastern Africa safely pass them by.1 These apparent stones are actually specialised leaves which occur in pairs that are separated by a slit. By looking at Lithops, you wouldn’t guess that it is an evergreen, because quite a number of these living stones are grey or brown in colour. They have translucent windows on the upper surface to let in sunlight that look like blotches, dapples or mottling which, for the gardener’s purposes, make the plant more decorative. However, the decorative value of Lithops does not end with this foliage. In early autumn, they produce wide-open flowers that often bear a resemblance to common daisies. Relative to the plants’ small size, the 3-4cm wide flowers look quite large. Lithops Varieties There are 38 species and many more cultivars in the Lithops genus, and virtually all of them can be grown as houseplants in temperate regions, including the UK.2 Though all varieties are tender plants with a hardiness rating of only H2, if grown as houseplants in the UK and Europe, they are considered low maintenance. This is one of the reasons that all the following species, among others, have been awarded the RHS’s Award of Garden Merit. L. karasmontana Beige with red-ochre mottling, bearing white flowers with a yellow centre. L. lesliei Of a brownish hue with olive-green mottling and white or yellow flowers. L. dorotheae Beige with olive-green mottling, red-ochre markings and yellow flowers. L. salicola Greenish-grey with a darker blotch that is sometimes marbled bearing white flowers. L. olivacea Dull green with an olive-green blotch with bright yellow flowers that have a medial white ring. These plants typically reach a mere 3-4cm in height, with a 5-6cm spread. Over time, some species can and do become bigger. In all cases, the bulk of the plant is beneath the soil, where it is considerably bigger than what you may expect. How To Grow Lithops In the UK you should grow Lithops in containers. The plants should be kept outdoors during the warm weather when the temperature is consistently above 12°C and indoors during the rest of the year. Otherwise, you can grow them as houseplants all year round. However, they do need several hours of direct sunlight. Preferred Conditions In a nutshell, Lithops prefer sunny skies, a dryish climate and sandy-to-rocky free-draining soil. The aspect of the pots should preferably be south-facing but east or west-facing will also be fine. Though technically Lithops should be sited in a sheltered spot, this is not a strict instruction. This is because these potted plants would not be kept outdoors in the UK during the cold weather and their very low rise and stubby profiles make them impervious to strong winds. Sunlight In the UK, Lithops will thrive in full sun, with several hours of direct sunlight, outdoors or indoors. When kept outside, potted Lithops must not be exposed to a scorching sun during very hot weather, even in the UK. Note that sunlight is necessary for this plant to flower. Soil Requirements Lithops do best in free-draining media that is pebbly and sandy with little organic content. The simplest and most error-free way to go about it is to obtain a high-quality commercial cactus potting mix and amend it in moderation with grit, perlite or both. Otherwise, you would have to make your own cactus medium but be sure that it is neither overly rich nor moisture-retentive. In very warm and humid climates, you can add fungicide powder or solution to the growing medium to stave off fungal diseases, but this is not strictly necessary in the UK as long as you do not keep potted Lithops outdoors during hot, muggy weather or in cold, humid conditions. The soil pH should be in the slightly acidic to neutral range. Pots should be made of terracotta or clay and have multiple drainage holes. Watering Watering Lithops is a bit more complicated than watering other succulents. This plant should be watered like other succulents, but only during spring and from late summer to October-November, which are its periods of active growth. Water so that the medium is made damp all the way down, then water again after the medium has become dry and stayed dry for a couple of days. How frequently you water depends on the temperature, exposure and the type of pot. Sometimes, these plants go dormant and do not grow actively during the summer. If, during the summer, the plants are kept in a warm spot with little sun, then they should be watered sparingly, but if they are kept outdoors and get full sun, then they should be watered periodically. Allow the soil to dry out before rewatering. A good indicator of when to water is the living stones themselves. If they look full and plump, all is well, but if they appear wrinkled or as if they are shrivelling, they need a drink. Do not water these plants in winter. Start watering again as soon as the new pair of leaves have taken the place of the old, shrivelled ones. Growing From Seed Lithops are typically grown from seed. The process is not exactly easy, but it is quite a reliable way to grow this plant. Seeds should be sown in trays or pots and the best time to do so is April. They need bright, indirect light and high humidity to germinate. Make sure to water the seedlings more than you water mature plants. Lithops Care Guidelines Repotting Living stones grow very slowly, they do not drain the medium of nutrients, their roots are fragile and they are prone to transplant shock. All these are very good reasons not to repot Lithops as you would other plants. Once they are all set in a pot, they are good for twenty years or more. If you need to repot a Lithops plant for whatever reason, the best time to do so is in the middle of summer. Before potting on Lithops, water the plant and be aware that these plants have fragile roots and are prone to transplant shock. Propagating ‘Living Stones’ are propagated by two methods, by seed and by offset division. In April they may be grown from seeds, as outlined above. Alternatively, when an offset has matured and looks like a viable plant, it may be divided and potted on, thereby becoming a new plant. Common Problems As with other succulents, root rot is a common problem if living stones are grown in moist, water-retentive soil or if they are overwatered. If the soil is kept moist during winter, which is a no-no, the older pair of leaves will not shrivel away and you’ll end up with an awkward plant with a double pair of leaves, the new on top of the old, which will give rise to knock-on problems. In the UK, they may be attacked by two pests, aphids and mealybugs. Aphids do not pose too serious a problem, but mealybugs are difficult to catch early and are not easy to eradicate. In the UK, Lithops are generally disease free. References 1. Rewald, B., Eppel, A., Shelef, O., Hill, A. B., Degu, A., Friedjung, A., Rachmilevitch, S., & Bell, E. M. (2012, March). Hot desert environments. CABI eBooks. Retrieved June 16, 2023, from https://doi.org/10.1079/9781845938147.0196 2. Lithops N.E.Br. (n.d.). Kew Botanic Gardens. Retrieved June 20, 2023, from https://powo.science.kew.org/taxon/urn:lsid:ipni.org:names:16237-1
Learn more
Fixing Leggy Kalanchoe Plants - Keep An Eye Out For These Warnings Signs
IN THIS GUIDE About Kalanchoes Early Warning Signals How To Fix The Problem 1) Trim Correctly 2) Move The Plant Say Goodbye To Legginess! References Where light is concerned, Kalanchoes can be quite fussy. When it’s too bright, the plant can wilt or get leaf scorch, but when it’s too dark, that’s when the real trouble begins and the plants may become leggy. Simply put, insufficient light causes a Kalanchoe to stretch toward the weak or transient light source and it does so by elongating its stems as the days pass. Ergo, legginess. Be aware that even if a poorly-lit room is well-lit from a single strong source of light, such as a single window or single set of grow lights, a Kalanchoe’s growth may well be biased towards that light source. Since Kalanchoes are usually treated as indoor plants, their light needs can go unmet. So, let’s look into how you may be able to catch the onset of legginess before it really begins, and what to do about it if you’re a little too late. About Kalanchoes Kalanchoes are succulents with shimmering green leaves and an abundance of small, rigid, long-lasting flowers in bright pinks, oranges and reds. The word Kalanchoe technically refers to a Botanical genus.1 This genus includes many dozens of species but only a few of these are grown by gardeners, perhaps the most widely grown being K. blossfeldiana. These are informally subsumed within the same generic name – Kalanchoe.2 Because these denizens of the tropics are not tolerant of the cold, they are commonly grown as houseplants in the UK, and, of course, that’s where the trouble begins – sub-optimal light. Early Warning Signals Before your Kalanchoe actually becomes a leggy, unsightly mess, it may well send out a few early warning signals, and these will occur most likely in the following order: Multiple growing tips will point towards the light source. The upper leaves will start to curl downward though note this can occur due to lack of water or sun-scorch too. The leaves will lose their rich green shade and adopt a sickly yellowish colour. Plant growth overall will become unbalanced, becoming biased toward the light source. Keep an eye open for these signs so that you make that proverbial stitch in time. How To Fix The Problem What you need to do is to correctly trim the leggy plant and shift it to a spot where it gets the right kind of light and the right amount of light. 1) Trim Correctly Sterilise a pair of secateurs to trim the plant. Target those stems that are straggly, sagging or dangling off the rim of the pot. These will have open stems between sets of leaves. Trim off anything from one-third to two-thirds of the lengths of such stems, cutting to just above a pair of leaves which are near the centre of the plant. The section that is left behind should still have at least one set of leaves. Do not discard the trimmings – Kalanchoes propagate easily from cuttings! Those stems that are getting elongated but are not exactly leggy don’t need to be trimmed. Simply pinch or cut off the tips to halt further elongation. Kalanchoes can re-flower surprisingly soon after a trim. 2) Move The Plant Put the trimmed Kalanchoe in a spot where it gets a little direct sunlight and plenty of indirect light from multiple sides. A spot where the plant gets a few hours of morning sunlight in a spacious, well-lit room with multiple windows is ideal. You can utilise gauze curtains (to diffuse harsh, direct sunlight) and reflective materials in your room, such as windowpanes and glass cabinets, to best position that struggling Kalanchoe. Be careful not to reflect bright light back at a Kalanchoe or scorching will occur. If all else fails, there are always grow lights, under which Kalanchoes do very well. If you take this route, we have a hot tip for you in the final section. Finally, do not suddenly move the plant from a dark or low-light spot to a sunlit spot. Make the adjustment gradually, similar to the process of hardening. Say Goodbye To Legginess! The remedial course of action spelt out above will bush-ify your leggy Kalanchoe in good time. To summarise, only a few hours of early morning direct sunlight, ample indirect sunlight, non-directed diffused lighting and protection from the afternoon sun or harsh sunlight will work wonders for Kalanchoes. Here’s a final tip. I had this problem with my trailing Crassulas and thought up an easy preventive: simply rotate the pot (in the same direction) by a quarter circle once or twice a week or do so every time you water the plant. This way, even if there is a single strong source of light, the ill effects will be reduced or ameliorated. “Even with good light levels, these plants will eventually become leggy, so I tend to prune them – following the advice above – twice a year,” explains Peter Lickorish, a Horticultural Consultant. “For mine, I do this after the spring flowering, with a harder prune in late spring. I then do a light prune again in late summer, after any re-flowering over the summer.” References 1. Petruzzello, M. (1999, May 4). Kalanchoe | Description, Major Species, & Facts. Encyclopedia Britannica. Retrieved March 29, 2023, from https://www.britannica.com/plant/kalanchoe 2. Kalanchoe: An Overview. (n.d.). Science Direct; Elsevier BV. https://doi.org/10.1016/b978-0-12-437651-9.50022-1
Learn more
7 Common Cacti Problems And Solutions Shared By Nursery Growers
IN THIS GUIDE 1) Overwatering Or Poor Drainage 2) Underwatering 3) A Lack Of Light 4) Excessive Brightness 5) High Humidity 6) Cold & Wet Winter Conditions 7) Sap-Sucking Pests There are many cacti that can be grown as houseplants in the UK and even a few that are hardy enough to be grown outdoors in our climate. These are fascinating plants adapted to dryland or desert growing conditions. It is the ways in which these plants have adapted to low rainfall environments that dictate how they are cared for and where they are best grown. Whichever cacti you are growing and wherever they are placed, it is important to pay attention to the needs of these plants and to understand what they require. Most of the most common problems and issues when growing cacti are caused by: Overwatering or poor drainage. Underwatering. A lack of light. Excessive brightness. High humidity. Cold and wet conditions in winter. Sap-sucking pests. As you can see, many of these problems and issues can easily be avoided or tackled by placing a cactus in the right spot and caring for it correctly. Read on for a more in-depth discussion of the different things that can cause problems with these plants and their subsequent solutions. 1) Overwatering Or Poor Drainage “I grew up in California amongst vineyards, orchards and cactuses,” says Alley Marie Jordan, a garden historian. “Instead of a hedge like most UK houses have, we marked our garden with cactus walls and palm trees. “In California, you have to search for shade and water access, whereas in the UK you plant for good drainage and look for sun!” Since cacti are adapted to very dry environments, some of the most common problems relate to overwatering or poor drainage. It is important to make sure you do not overwater a cactus because this can damage the plant roots, cause growth to be stunted, lead to blistering and rot can set in. These plants require free-draining conditions and as well as making sure that you do not overwater, you also need to make sure that drainage is excellent at all times. “This can be achieved by generously mixing horticultural grit with compost and ensuring drainage holes are present and not likely to clog up,” shares Master Horticulturist Peter Lickorish. Excess water must always be able to drain away freely, otherwise, when left in standing water or boggy conditions, the roots can often rot. When thinking about how much water plants need, you should always consider the native environment of the plants you are watering, as Daniel Jackson, the Owner of Ottershaw Cacti, explains: “Their native environments are often very dry, such as the bright and hot lands of South Africa and Mexico, not the naturally soggy lands of Surrey!” The amount and frequency of rainfall in their native range will help you understand how much water they will require and the frequency with which they should be watered. “Only water after the soil has dried out and reduce this in the winter months,” says Darren Evans, the Plant Manager at Pugh’s Cacti. 2) Underwatering However, do not think that because cacti come from desert environments, they do not need to be watered at all. Of course, cacti can be very drought tolerant, but they do need some water. Under-watering cacti can lead to shrivelling and the growth of the plant may slow considerably or the new growth might be misshapen. “Increase watering as the weather warms in spring and only reduce watering in the Autumn,” advises David Ennals, Owner of Coach House Cacti. 3) A Lack Of Light If cacti do not get enough light, they can also end up being weak and misshapen. Indoors, cacti will generally need a bright spot, but one out of direct light. Outdoors, hardy cacti will typically need a sunny spot that is as warm and sheltered as possible. “We often get asked ‘why does my plant look like this?’ and it’s usually due to insufficient light levels on a window sill inside the house,” Tom Adkin & Giulia Consolandi from Piccolo Plants Nursery share. “Look into the natural environment that the plant would grow in and you will soon find the perfect spot for it.” 4) Excessive Brightness Cacti generally need a bright location when grown indoors but can encounter problems in intense direct sun. Too much sun is one potential cause of a problem known as cactus corky scab. This problem causes brown spots to arise on the skin of the plant, which gradually form into calluses or scabs shrunken into the surface. Move the plant out of intense sunlight and the problem may resolve itself. 5) High Humidity Cactus corky scab can also be caused by high humidity, so it is important to work out whether too much bright sunlight or too high a humidity level is to blame. Reducing humidity within your home might allow you to solve this problem when growing cacti as houseplants in our humid climate. “For this reason, some combinations of houseplants just do not work well, such as cacti and most orchids, because the humidity cannot be at the right level to please both,” says Peter. 6) Cold & Wet Winter Conditions “After the growing season, cacti are usually ready for a rest, so, during the winter months, require time to recover and get through the colder months,” says Darren. “Because of this, make sure indoor-grown cacti are not kept by a radiator or heater throughout the winter. “As a general rule, keep your cacti at around 10°C from November to February.” For hardy cacti that are grown outside in the garden, cold temperatures can cause dieback on the plants and create patches of discolouration on their skin. However, the main problem for gardeners who have cacti outside over the winter months is not the cold, but the wet. Even cacti that can withstand colder temperatures will often need to be protected or brought indoors due to the high levels of precipitation in the winter months. Growing under a porch may be the solution. “Balancing moisture and temperature is important,” shares Peter. “Remember that cold air can hold less moisture, so the relative humidity increases. This could be a real problem for overwintering cacti, so remember to select somewhere dry and keep humidity low through ventilation. “However, avoid draughts. In a greenhouse, opening up the doors and vents on a warm winter day can help remove residual moisture. In a larger greenhouse, low vents or louvres could be opened slightly to circulate air, but keep cacti on shelving away from draughts.” 7) Sap-Sucking Pests This final category of problem is a little different to all of the above because this is a problem that can arise regardless of where you place a cactus and the care you provide. A number of sap-sucking insects can potentially take an interest in cacti and can cause a serious problem in larger numbers. These can include scale insects, red spider mites and mealybugs, all of which can be common problems when growing indoors or under cover in a greenhouse or polytunnel. The key thing is to remain vigilant and nip any pest problems on houseplants in the bud before they get out of hand. Treatments based on oils and soaps, sold for houseplants, can work well. These key problems and issues listed above are not uncommon when growing cacti, but are largely easily avoided. As long as you place cacti in the right environment and provide the right environmental conditions, you should still find that even though issues can arise, these plants are incredibly forgiving and relatively easy to grow.
Learn more
This Is Where You Should Keep Your Aloe To Help It Survive Winter Successfully
IN THIS GUIDE Where To Place Aloe During Winter Watering Aloe In Winter Does Aloe Need To Be Fed In Winter? Aloe vera is a popular houseplant and is very easy to grow. It can be placed out into a garden in summer or kept indoors all year round but cannot survive winter outdoors in most of the UK. The good news is that even if you’re not always the most careful and conscientious houseplant gardener, Aloe vera can take some neglect and withstand even the least green-fingered of attendants. In winter, the care required by these plants is even lower and less demanding than it is during the summer months. However, while you won’t need to do much when caring for an Aloe vera plant in winter, you will have to make sure that you place it in a suitable location. Below, we’ll clarify where to place an Aloe vera in winter and confirm what you do and do not have to do when you have one of these plants in your home during the colder months of the year. Where To Place Aloe During Winter Aloe vera plants can be placed outside in a garden for summer or kept indoors even during the warmest part of the year. However, over the coldest months, they do need to be kept indoors or under cover in a frost-free and relatively warm location. “They require some heat in winter,” says Les Pearcy, Chairperson for the Haworthia Society. “I grow my Aloe plants in a greenhouse which is kept a few degrees above 0°C, but this means that I tend to keep them dry in the colder months.” Temperature Aloe vera needs temperatures that do not regularly drop below 10°C and 5°C is their absolute minimum. The temperatures should ideally be a little warmer than this and care should be taken to position Aloe vera so that the temperatures in the vicinity do not fluctuate too greatly. This means that you should not place an Aloe vera in a cold draft or too close to a heat source. Make sure you do not place your plant too close to an oven, stove or radiator and look out for cold draughts from windows and doors. Light Requirements These plants also need a good amount of light, which can sometimes be challenging to provide during the winter months. When not using grow lights, it is important to make sure that you place an Aloe vera on a bright windowsill or another sunny spot over the winter months. Humidity It is best to keep an eye on the humidity; around 40% is ideal for your Aloe vera plant. An Aloe vera will not enjoy being in too humid an environment in your home but nor should you allow humidity to drop too low in winter. “Signs that the humidity is too high include browning of the leaves, which can eventually turn mushy, or raised white spots on leaves, known as oedema,” shares Master Horticulturist Peter Lickorish. Watering Aloe In Winter Overwatering an aloe in winter is one of the most common mistakes that people make. It is always important to remember that Aloe vera has only very modest water needs in summer and requires even less water over the winter months. Over the winter, an Aloe will not grow and enters a state of dormancy. It will only need watering around once a month, maybe even less. Simply begin watering more frequently again in the spring. Does Aloe Need To Be Fed In Winter? Aside from checking the plant and watering very occasionally, Aloe will be the ultimate low-maintenance houseplant over the winter months. You do not need to feed it through the coldest part of the year and will only need to worry about this and other potential jobs in the spring when the plant returns to active growth.
Learn more
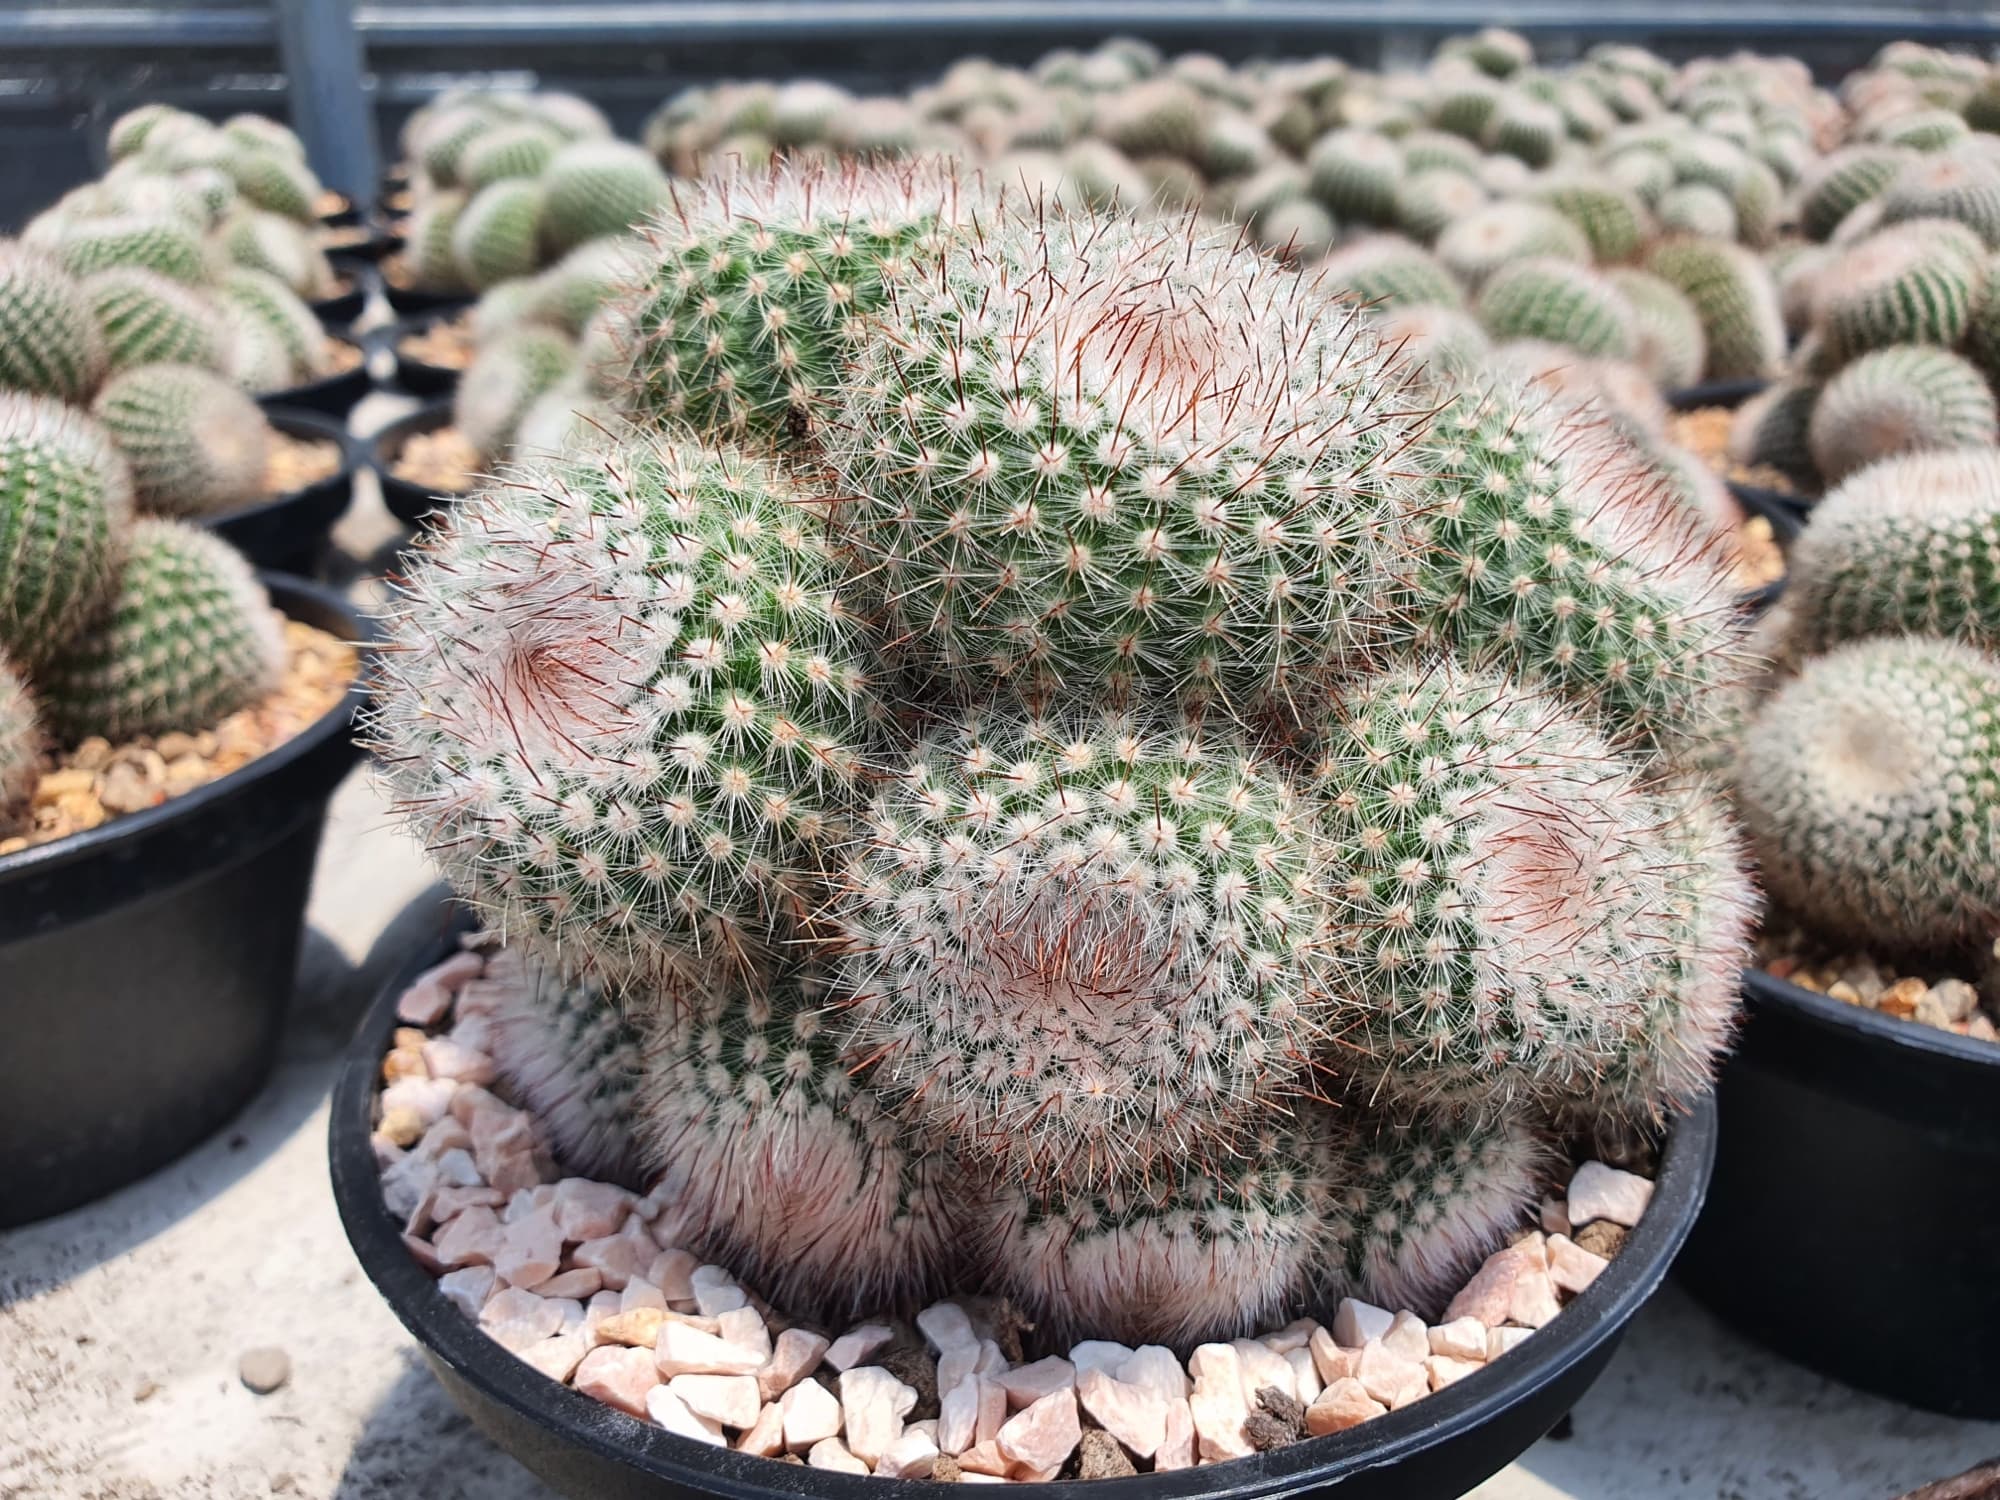
Spiny Mammillaria - Why This Is David Ennals' Favourite Cacti (And How To Grow Yours)
IN THIS GUIDE Overview How To Grow Mammillaria Mammillaria Care Guidelines Mammillaria Varieties References Mammillaria is a family of cacti, with around 200 species and varieties.1 These are popular houseplants in temperate climates like the UK, which is far from their native range. “My absolute favourite cacti has to be mammillaria,” shares David Ennals, Owner of Coach House Cacti. “The patterns of spination make them very attractive and most forms are low-growing, bunching plants which produce rings of small flowers, usually from April through to May.” Overview Botanical Name Mammillaria Common Name(s) Pincushion Cacti Plant Type Cacti Native Area Mexico and the South-Western US Hardiness Rating H2 Foliage Evergreen Flowers Funnel-shaped flowers When To Plant Year-round undercover This is a large and diverse genus, with species that differ quite a lot in their appearance and features. The variations along with what can be extremely attractive flowers make a number of these cacti popular with those who enjoy growing cacti and succulents in their homes. Many of the Mammillaria cacti are considered to be among the easiest cacti to grow. However, not all are easy to grow and some within this genus are said to be among the most difficult cacti to cultivate. How To Grow Mammillaria When it comes to growing Mammillarias, as when growing any other cacti or succulents, the key is to make sure that you provide the right growing conditions for these plants. These are typically plants that are grown inside the home or in a heated greenhouse, though some are suited to outdoor summer cultivation in an area that receives low rainfall. Growing Conditions Temperatures are a key consideration when thinking about where pincushion cacti will be able to grow. These plants tend to be H2 hardy, which means that they can cope with low temperatures of 1-5°C but cannot withstand freezing temperatures. This generally means that they must be grown indoors or under cover in most parts of the UK. “Ideally, these plants should be kept between 5-10°C throughout the winter months as they enter a period of dormancy,” explains David. When grown indoors, they need bright, filtered light in an area with low humidity. Soil Preference These plants are cacti, so looking at their natural native habitat gives us all the clues we need to understand the conditions that they require when it comes to the growing medium. Mammillaria requires a cactus potting compost for the best results as this will be formulated to give them the free-draining conditions that they require. “I recommend not using multipurpose or moisture-retentive composts (high percentage peat or coir),” shares Dan Ori, a Master Horticulturist. “I make my own peat-free mix, but there are lots of good cacti composts available from garden centres and online retailers.” Mammillaria Care Guidelines Mammillaria cacti can be, as mentioned above, some of the easiest cacti to cultivate as houseplants. However, it is important to understand that some species can be much pickier and harder to grow. Sunlight Most of the time, these plants require bright light with some filtration to protect the plants from the hot sun in summer. It is important to make sure that they get enough light or certain problems can begin to creep in. Watering While these cacti are in active growth, they should be watered moderately and care should be taken to allow excess water to drain away freely to avoid excess saturation of the growing medium. “Water throughout the growing season but only after the compost has dried out,” David says. “Use half-strength tomato fertiliser every 4 waterings.” During the winter dormancy period, it is important not to water excessively. In fact, these cacti won’t need much water at all over the coldest part of the year and the growing medium should be allowed to dry out almost entirely. “Keep them dry during the winter in a cool, frost-free room or well-insulated greenhouse,” adds David. Propagating Some Mammillaria can be propagated by seed, which should be sown in the early spring (March or early April). You will likely need a heated propagator, as the seeds require temperatures between 19-24°C for successful germination. A somewhat easier way to propagate new pincushion cacti is by means of offsets. The offsets produced around the base of the cacti can often be separated and potted up independently in their own separate containers, where they can then expand your collection of cacti and continue to grow. Common Problems Most of the problems that arise when growing these cacti are caused by an issue with their environmental conditions. Like many other plants commonly kept indoors as houseplants, Mammillaria can also be attacked by mealybugs and other pests. Mammillaria Varieties Many Mammillarias are available to purchase by the home grower. Some that have been given an Award of Garden Merit by the RHS (indicating a high level of suitability to grow in the UK) are: M. bocasana M. candida M. compressa M. elongata M. geminispina M. hahniana M. petersonii M. plumosa M. pringlei M. surculosa This is by no means every available option, but these AGM-awarded cacti are among the best options to consider if you would like to grow this plant in your home. References 1. Mammillaria (Pincushion Cactus). (n.d.). North Carolina Extension Gardener Plant Toolbox. Retrieved May 4, 2023, from https://plants.ces.ncsu.edu/plants/mammillaria/
Learn more
Spectacular Stonecrops - Niamh Mullally's Top Sedum Varieties
IN THIS GUIDE 1) S. acre 2) S. album 3) S. dasyphyllum 4) S. kamtschaticum (Reclassified as Phedimus kamtschaticus) 5) S. spectabile ‘Marchant’s Best Red’ 6) S. sieboldii ‘Mediovariegatum’ (Reclassified as Hylotelephium sieboldii) 7) S. morganianum 8) S. adolphii 9) S. reflexum (reclassified as Petrosedum rupestre) 10) S. × rubrotinctum 11) S. spathulifolium ‘Cape Blanco’ 12) S. spathulifolium ‘Purpureum’ 13) S. spectabile ‘Herbstfreude’ (reclassified as Hylotelephium spectabile) 14) S. telephium ‘Vera Jameson’ (Reclassified as Hylotelephium telephium) 15) S. telephium ‘Xenox’ (Reclassified as H. telephium) References Sedums, also known as stonecrops, are a number of different species of plants that are characterised by their succulent foliage. Aside from being succulents, sedums can vary significantly when it comes to their type, size and physical appearance. The Sedum genus currently boasts 476 species, although some Sedum (26 in fact) have been recategorised in the Hylotelephium and other genera.1 Across our guides, we have collaborated with Niamh Mullally, the owner of the specialist plant nursery Southwold Succulent Co. Although Niamh is a grower of lots of succulents, some of her favourite varieties to grow are sedums. “S. sieboldii f. variegatum is hard to beat aesthetically with its blue and pink colouration. “With a semi-trailing habit, it’s wonderfully used in a hardy succulent hanging basket for summer interest.” Sedum sieboldii f. variegatum “Another favourite of mine is Sedum takesimense ‘Atlantis’, an award-winning variegated tri-colour sedum with extremely pretty pink new spring foliage,” says Niamh. “In summer, the variation turns green and cream with exceptionally beautiful yellow flowers. An exceptionally hardy and low-maintenance variety.” A number of species formerly referred to as Sedums have now been reclassified as Hylotelephium and Rhodiola. Here are some of the sedums that you might grow in a garden that are still classified within this genus: 1) S. acre COMMON NAME(S): biting stonecrop HARDINESS RATING: H7 FOLIAGE: evergreen FLOWERS: yellow SIZE: 0-0.1m in height, 0.1-0.5m spread Also known as biting stonecrop, this mat-forming succulent has fleshy little leaves and yellow five-petalled flowers which bloom between May and July and are beloved by bees. This is a sedum that is native to the UK, naturally growing in dunes, dry grassland and in cracks between rocks. It can be a great choice for many drier, sunny gardens. It grows to around 10cm tall. 2) S. album COMMON NAME(S): white stonecrop HARDINESS RATING: H4 FOLIAGE: evergreen FLOWERS: white SIZE: 0-0.1m in height, 0.1-0.5m spread White stonecrop also grows to around 10cm tall and is native to the UK. It has fleshy cylindrical foliage, which takes on a reddish hue in autumn, and star-like white flowers in the summer. A well-drained and alkaline or neutral soil is needed to grow this sedum, which also prefers full sun and as sheltered a position as possible. It is drought tolerant, but only H4 hardy. 3) S. dasyphyllum COMMON NAME(S): corsican stonecrop HARDINESS RATING: H6 FOLIAGE: evergreen FLOWERS: white SIZE: 0-0.1m in height, 0.1-0.5m spread Corsican stonecrop is another succulent which grows around 12cm tall and spreads around 20cm wide. Perfect for a south-facing position in full sun, it will thrive even in poor soil and can tolerate drought. Small white flowers like stars appear above the glaucous, blue-green leaves in early summer. This sedum is a great choice for the cracks between paving stones in a sunny and sheltered spot, or even as a lawn substitute in the hottest and driest of gardens. 4) S. kamtschaticum (Reclassified as Phedimus kamtschaticus) COMMON NAME(S): orange stonecrop HARDINESS RATING: H5 FOLIAGE: semi-evergreen FLOWERS: gold / yellow SIZE: 0-0.1m in height, 0.1-0.5m spread The orange stonecrop is a semi-evergreen perennial with bright green leaves and starry golden-yellow flowers in late summer. It is a good choice for rockeries or for placement between paving stones in a garden. This sedum also likes well-drained and alkaline or neutral soil in full sun and is drought tolerant, making it a good choice for lower rainfall areas. 5) S. spectabile ‘Marchant’s Best Red’ COMMON NAME(S): sedum ‘Marchant’s Best Red’ HARDINESS RATING: H7 FOLIAGE: deciduous FLOWERS: pink / red SIZE: 0.5-1m in height, 0.5-1m spread A deciduous type, this perennial sedum grows around 60cm tall. It has yellowy-green leaves, with stems that are strongly flushed with red. It bears grey-green buds which open to reveal pink flowers in late summer and autumn. The stems and flower heads remain interesting and attractive long into winter when the flower heads are a deep red-brown and the stems are brownish-grey. Place this sedum in full sun in well-drained soil. 6) S. sieboldii ‘Mediovariegatum’ (Reclassified as Hylotelephium sieboldii) COMMON NAME(S): stonecrop ‘Misebaya-nakafu’ HARDINESS RATING: H3 FOLIAGE: semi-evergreen FLOWERS: pink SIZE: 0-0.1m in height, 0.1-0.5m spread This is a herbaceous or semi-evergreen perennial type of sedum. It has red stems and grey-green leaves with central cream areas. The flowers are borne in terminal clusters at the ends of stalks around 10cm tall and are rose-pink in hue. Grow in a sheltered position in full sun or partial shade in a well-drained alkaline or neutral soil. 7) S. morganianum COMMON NAME(S): burro’s tail HARDINESS RATING: H1C FOLIAGE: evergreen FLOWERS: purple SIZE: 0.1-0.5m in height, 0.1-0.5m spread This sedum, also known as burro’s tail, is one to grow indoors rather than in the garden. “Sedum morganianum is fantastic as a hanging basket in a conservatory or trailing from a pot on a shelf (assuming its in a bright spot),” shares Master Horticulturist Colin Skelly. “They also can be propagated easily from leaves. Just remove from the stem and lay on top of a tray of grit and they will begin to root.” It is not hardy enough to survive out in the garden year-round and only has a hardiness rating of H1C. It is grown indoors or under glass in a mixture of 3-parts loam-based compost, 1-part leaf mould and 2-parts horticultural grit. It also needs full light and good ventilation to thrive. Its beautiful trailing stems of blue-green leaves and small clusters of star-like reddish-purple flowers make this a good houseplant choice. 8) S. adolphii COMMON NAME(S): coppertone stonecrop HARDINESS RATING: H2 FOLIAGE: evergreen FLOWERS: white SIZE: 0.1-0.5m in height, 0.1-0.5m spread This is another tender sedum which has a hardiness rating of H2 and is typically grown indoors as a houseplant or under glass. It does best when grown in a specific succulent potting mix, in full light but out of the hot, direct sun. The fleshy leaves of this sedum are arranged around trailing, rooting stems. The foliage is green but becomes orange in hot, bright and dry conditions. These plants also bear small white star-shaped flowers in the spring in domed clusters. 9) S. reflexum (reclassified as Petrosedum rupestre) COMMON NAME(S): reflexed stonecrop HARDINESS RATING: H5 FOLIAGE: evergreen FLOWERS: yellow SIZE: 0.1-0.5m in height, 0.1-0.5m spread A native sedum that is wonderful for wildlife, this option has blue-green foliage and bears bright lemon-yellow star-shaped flowers in the summer months. Fast-growing and robust, it is a great option for ground cover in more arid areas with full sun and well-drained soil. This option grows around 20cm tall with a spread of around 60cm. It is a hardy perennial plant that should thrive in the right situation over many years. 10) S. × rubrotinctum COMMON NAME(S): jelly bean plant HARDINESS RATING: H3 FOLIAGE: evergreen FLOWERS: yellow SIZE: 0.1-0.5m in height, 0.1-0.5m spread Referred to by a number of different common names, such as the jelly-bean plant, banana cactus and Christmas cheer, this sedum is commonly grown as a houseplant in the UK. However, it is H3 hardy and can survive in a warm, sunny and sheltered spot outside as long as it is protected from frost. This is a low-growing perennial succulent which grows around 20cm tall. It has banana-shaped leaves 2cm long arranged in spirals around its spreading stems. These leaves are bright green with red tips which may sometimes turn a deeper bronze hue in summer. 11) S. spathulifolium ‘Cape Blanco’ COMMON NAME(S): spoon-leaved stonecrop ‘Cape Blanco’ HARDINESS RATING: H6 FOLIAGE: evergreen FLOWERS: yellow SIZE: 0-0.1m in height, 0.1-0.5m spread Low-growing and spreading, this stonecrop, sometimes referred to as the spoon-leaved stonecrop, has purple-tinged greyish-green leaves and starry yellow flowers carried in small clusters above the leaves. This sedum can do well in a sheltered spot in full sun, in moist but well-drained soil. 12) S. spathulifolium ‘Purpureum’ COMMON NAME(S): purple spoon-leaved stonecrop HARDINESS RATING: H5 FOLIAGE: evergreen FLOWERS: yellow SIZE: 0-0.1m in height, 0.1-0.5m spread Another highly regarded spoon-leaved sedum, this option grows to around 10cm high and creates low mats of evergreen foliage. The leaves on this option are not green but rather a purplish red, with some white blooming. The flowers, borne in terminal clusters in the summer, are bright yellow in colour. This option should be grown in full sun or partial shade, in a well-drained alkaline or neutral soil. 13) S. spectabile ‘Herbstfreude’ (reclassified as Hylotelephium spectabile) COMMON NAME(S): stonecrop ‘Herbstfreude’ HARDINESS RATING: H7 FOLIAGE: deciduous FLOWERS: pink SIZE: 0.5-1m in height, 0.1-0.5m spread An attractive perennial forming clumps around 60cm in height, this ‘sedum’ (now Hylotelephium) has glaucous leaves with a deep green hue and prolifically bears flat terminal clusters of blooms in early autumn. Herbstfreude translates from German as ‘autumn joy’ – and you’ll rarely see a plant more aptly named. The flowers form from green-pink buds, which open to pale pink flowers. These flowers deepen as time goes on to pink then turn a russety, brownish-red hue. Grow this plant in well-drained alkaline or neutral soil in full sun and good airflow. This species is tough, drought resistant and H7 hardy – and will grow well even in an exposed location. 14) S. telephium ‘Vera Jameson’ (Reclassified as Hylotelephium telephium) COMMON NAME(S): stonecrop ‘Vera Jameson’ HARDINESS RATING: H5 FOLIAGE: deciduous FLOWERS: pink SIZE: 0.1-0.5m in height, 0.1-0.5m spread This mound-forming ‘sedum’ (now Hylotelephium) is a herbaceous perennial which forms clumps up to 30cm high. It has spreading stems, oval succulent leaves and bears rounded clusters of pretty little star-like pink flowers in the late summer or early autumn. Like the above, it needs a position in full sun with well-drained soil that is alkaline or neutral. It can cope with an exposed location and is H5 hardy. 15) S. telephium ‘Xenox’ (Reclassified as H. telephium) COMMON NAME(S): orpine ‘Xenox’ HARDINESS RATING: H7 FOLIAGE: deciduous FLOWERS: pink SIZE: 0.1-0.5m in height, 0.1-0.5m spread This mound-forming ‘sedum’ (now Hylotelephium) grows around 0.5m in height. It has beautiful greenish-purple leaves that transform into a dark purple shade as they mature. In mid to late summer, pretty pink heads of flowers appear above the foliage, opening from bright red buds. Grow in full sun in well-drained, alkaline or neutral soil. Of course, these options just scratch the surface of this genus, which has so many useful plants for water-wise planting schemes. The above sedums (and reclassified plants formerly known as sedums) are just some of those that you might consider. References 1. Sedum (n.d.). Kew Plants of the World Online. Retrieved October 7, 2023, from https://powo.science.kew.org/taxon/urn:lsid:ipni.org:names:30001444-2#children
Learn more


