

Growing

Watering Your Aloe Plant? Don't Make This All Too Common Mistake
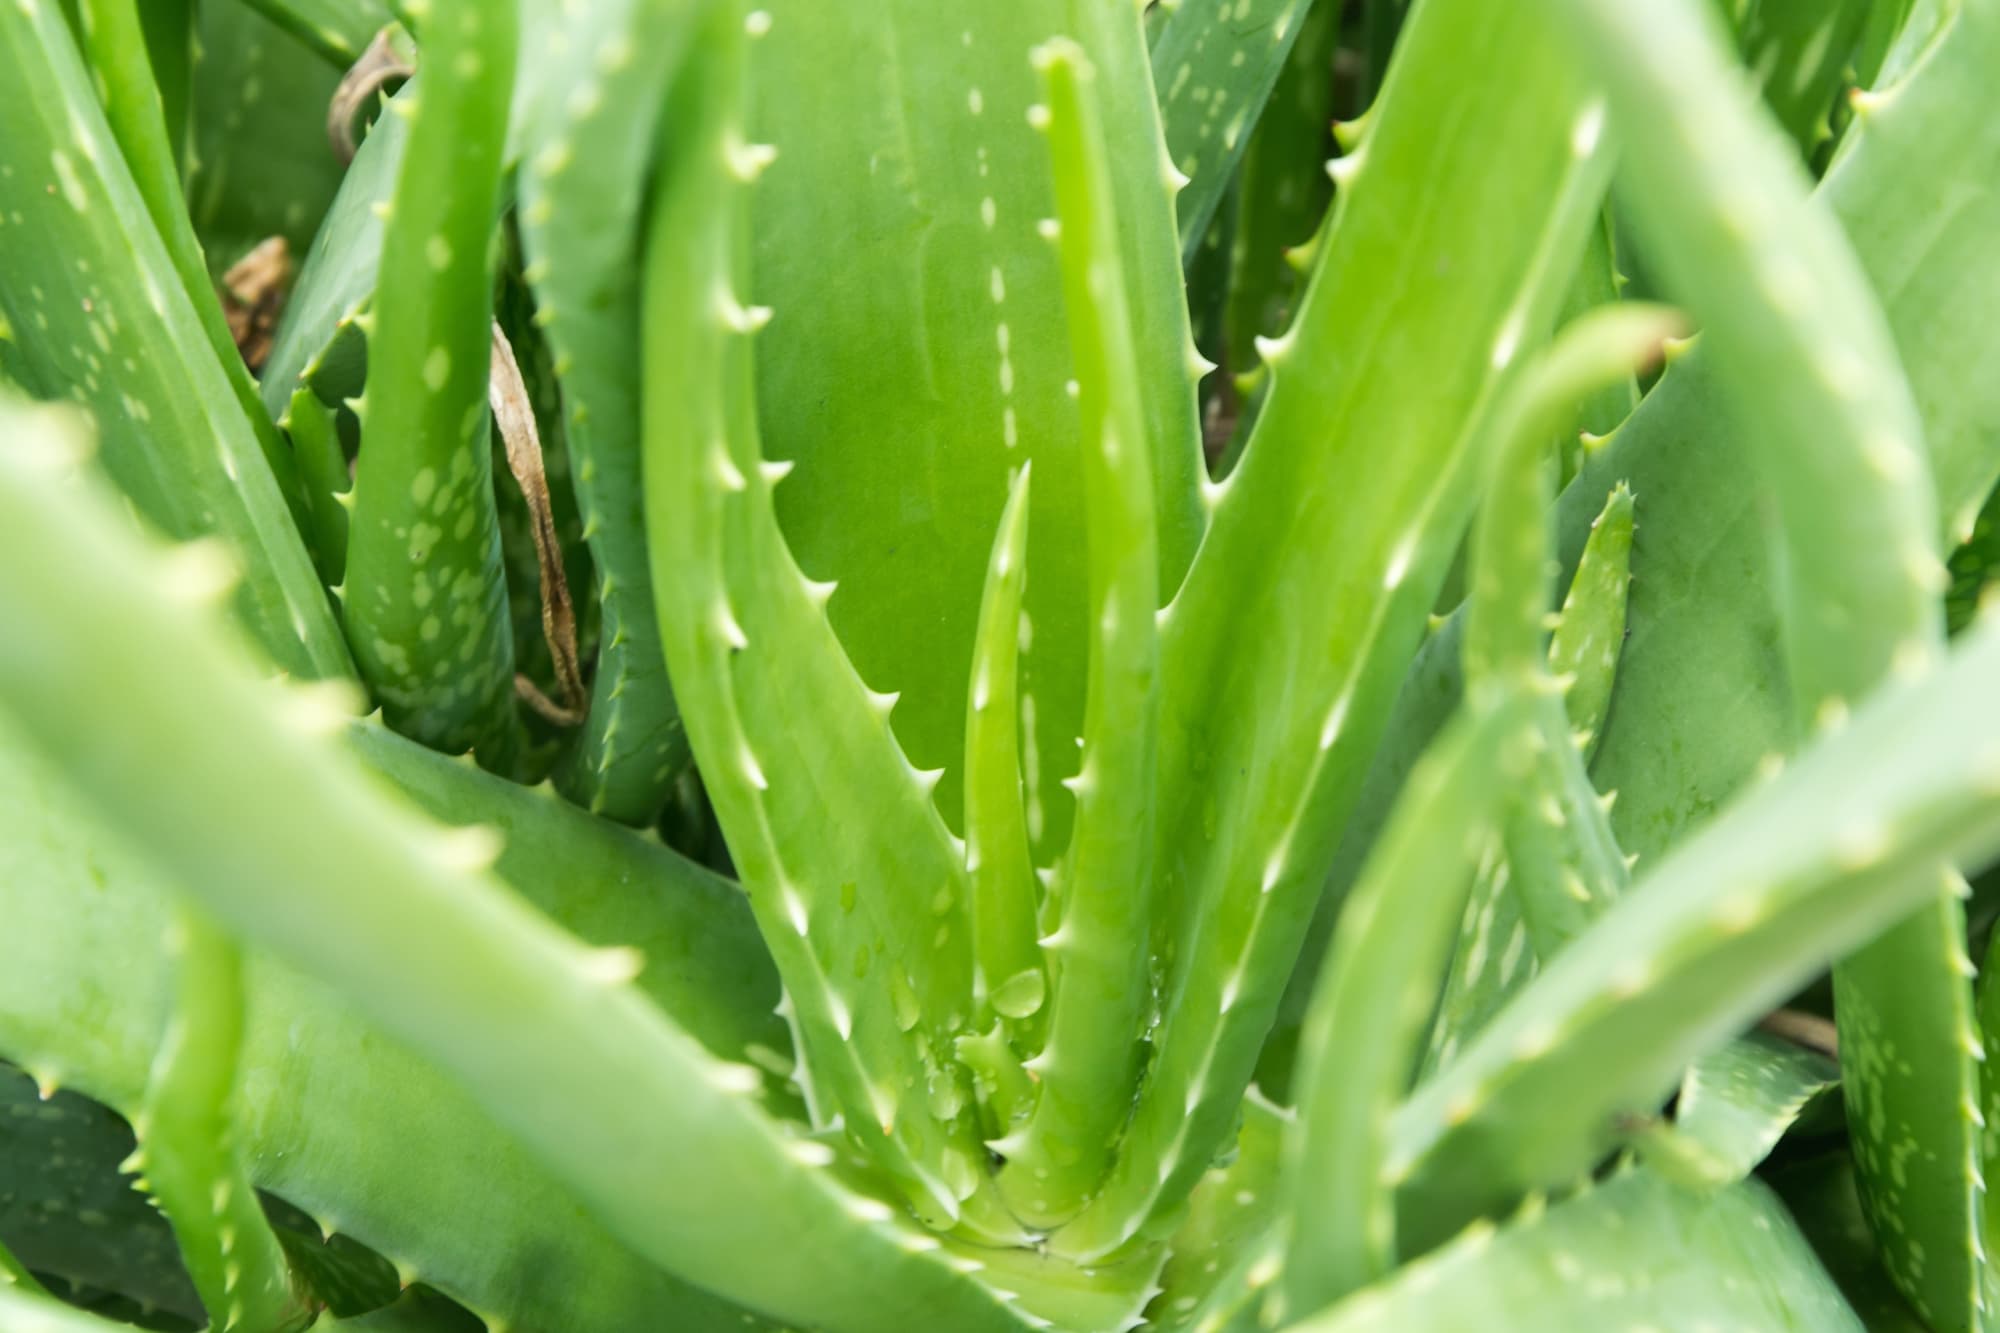
IN THIS GUIDE When To Water Aloe How Often Should You Be Watering Aloe? Signs Of Underwatering Signs Of Overwatering How To Water Aloe Correctly Aloe vera is a plant that is relatively easy to grow as a houseplant in the UK. It is pretty tolerant of some neglect and can handle someone who might not always remember to water it in a timely fashion. “When a plant isn’t growing or has died, the normal reason will be you’ve either watered it too much or not enough,” shares Les Pearcy from The Haworthia Society. “It is a mistake to think that they do not need watering because they are desert plants, however, an Aloe sitting in wet compost can easily lose its roots which will allow fungal diseases to set in.” Here are the basic watering guidelines for Aloe vera that you need to know: Aloe vera should be watered when the top few centimetres of the growing medium feel dry. Water Aloe vera more in summer and less in winter. How frequently you will water depends on a number of factors including temperature, humidity and light levels. There are signs to look out for that will tell you if you have watered too little or too much (see below). Water Aloe vera from above with rainwater where possible. “Watering is done for most the year, more in the warmer summer months and much less in winter,” adds Les. “This is very dependent on the growing conditions. Plants on a windowsill will probably want a bit more water in the winter months than those growing in a greenhouse. “Always allow the compost to dry out before watering again.” If you pop your Aloe container in a bowl, any water that drains from the bottom will collect, and soak slowly back into the soil. This is a good way of ensuring the plant has enough water: simply leave it to soak for 10-15 minutes each time you water, then discard any water that hasn’t been absorbed. With A. vera, vibrant green and a noticeable firmness when pushed indicate a healthy plant, full of gel. If your Aloe begins to droop, feels mushy to the touch, or develops crackly, dry, brown sections, this is an indication that you may not be watering enough. Let’s take a closer look at the watering guidelines to help you make sure you don’t make any mistakes. Difficulty Easy Equipment Required Watering can, aloe plant When To Water Every 1-2 weeks in summer, once a month in winter When To Water Aloe Aloe vera is a succulent plant that, once established, is very tolerant of drought. However, this does not mean that you should make the mistake of thinking that it does not need watering at all. Like most plants, even drought-tolerant ones, Aloe vera does need sufficient water to survive. “Watering, either too much or too little, is one of the most common issues I see with those growing succulents,” shares David Ennals, the Owner of Coach House Cacti. It is important to water when the growing medium is dry and to provide sufficient water so that the plant can replenish its reserves. Remember, as a succulent, the plant stores water within its tissues as a means of coping with prolonged dry periods in those areas where it grows naturally. It is best to water Aloe vera plants earlier in the day rather than later so that any water splashed onto the plant has the opportunity to dry off before the temperatures fall. How Often Should You Be Watering Aloe? “Like most succulent plants, water aloe more during the warmer months and less in winter, making sure they are in a free-draining compost,” says Les. As a rough rule of thumb, you might expect to water an Aloe vera kept as a houseplant indoors every week or two during the summer months, but far less frequently, perhaps only once a month, in the winter. However, it is not possible to give precise timings for when and how often to water an Aloe vera plant because this will be different for each location and each home. How frequently you will need to water your plant will depend on temperatures, humidity levels and how much sunlight the plant is receiving where it is placed in your household. The higher the temperatures, the lower the humidity and the brighter and sunnier the location, the more water these plants will typically require. So, rather than relying on the timings mentioned online or sticking to a strict watering regime, it is important to look and learn from the plants themselves to see whether you are watering correctly or whether some adjustment is required. Signs Of Underwatering If your Aloe vera is not getting enough water, the leaves will often become wrinkled and may shrivel up and turn a little yellow or brown on the ends. Signs Of Overwatering If an Aloe vera has been over-watered, its leaves may turn pale or yellowish and may ultimately become mushy and brown. You can also look at the growing medium and its feel, appearance and weight. If the growing medium is light and looks or feels dry, then it may be time to water once more. The key is to make sure that we add sufficient water without saturating the growing medium or leaving it waterlogged. Excess water must always be able to drain away freely. How To Water Aloe Correctly Water Aloe vera plants from above, to the surface of the compost, rather than bottom watering, as these plants can be susceptible to problems caused by mineral build-up in the growing medium. Always use rainwater where possible or filtered or distilled water if only treated tap water is available. “I like to use a watering can with a very long, narrow spout and no rose for watering cacti and succulents, including A. vera,” shares Peter Lickorish, a Horticultural Consultant. “This avoids the problem of heavy glugs of water compacting compost, squashing out air and reducing its ability to drain. “Also, it allows water to be directed to the compost, rather than accumulating on the leaves of the plant, where it can encourage rotting.” These are fairly tolerant plants and you can generally get away with some mistakes when watering them. However, make sure that you address any problems as quickly as you can to keep your Aloe happy and healthy.
Learn more
Delosperma Growing Advice From The Experts - 'They Require Little Care Once Established'
IN THIS GUIDE Overview Common Varieties How To Grow Delosperma Planting Guidelines Ongoing Delosperma Care References Delospermas, also known as ‘ice plants’, are grown as garden plants or in a greenhouse in the UK. There are 170 different species within this genus, some of which are attractive ornamental plants for gardens or for growing under cover.1 “I love growing Delospermas because of the annual food they provide for our pollinators,” shares Niamh Mullally from Southwold Succulent Co. “They can survive droughts and require little care from us once established.” Overview Botanical Name Delosperma Common Name(s) Ice Plant Plant Type Perennial Succulent Native Area East and South Africa Hardiness Rating H1B to H6 Foliage Evergreen Flowers Varies When To Plant Sow in spring, plant out anytime Delosperma hail mostly from eastern and southern Africa, so they can be ideal for a drought-tolerant planting scheme in hot and dry gardens.2 They are also frequently grown as houseplants indoors in the UK and in other cooler temperate regions. “I love the breadth of choice within this genus and the fact that the plant and the flower somehow don’t seem to match!” shares Peter Lickorish, a Horticultural Consultant. “Their cascading habit makes these a great choice for hanging baskets, where watering can be a challenge. “I’ve seen Delosperma nubigenum used to great effect as ground cover in a very narrow border near a driveway, where little else would grow well – other than weeds! “Remember to check that surfaces do not camber too much towards these plants when choosing a planting spot, lest waterlogging could occur.” Delosperma cooperi ‘Jewel of Desert Ruby’ If you are interested in growing these succulent plants in your garden, you will first have to narrow down your options and decide which Delosperma you would like to grow. There are options hardy enough to remain in milder gardens throughout the year, with hardiness ratings between H4 and H6, and some much more tender varieties that need to be grown as houseplants in our climate. Common Varieties Some of the most common Delosperma varieties to grow in gardens here in the UK are: D. aberdeenense (AGM) This is a low-growing evergreen shrub with succulent leaves and small, daisy-like flowers with a purple or pinkish-purple hue. It is H3 hardy. D. congestum A mat-forming perennial succulent with leaves that flush reddish in winter and bright white and yellow flowers like daisies in the summer months. This plant is H4 hardy and the cultivar ‘Gold Nugget’ is among our favourites. D. cooperi This species is H4 hardy and has succulent leaves and deep pink or purple flowers which bloom in mid and late summer. D. lavisiae (AGM) A little succulent growing to only 8cm tall with bright pink flowers which form from late spring to early autumn. It is H6 hardy. D. nubigenum A perennial succulent with leaves that go bronze in winter and flowers that have a lemon-yellow hue. This species is H5 hardy. D. sutherlandii (AGM) A H4 hardy succulent growing to 10-15cm tall, with prolific pinkish-purple flowers that have yellow eyes and are borne in summer. How To Grow Delosperma It is important to understand the environmental needs of these plants and to provide them with the conditions that they require when choosing where to grow them in your garden. Preferred Environment Delosperma typically requires as much sunlight as possible, so should be positioned in full sun. A sheltered and south-facing location will be ideal and allow you to stand a better chance of overwintering hardier types successfully. “One of the most common problems I see with succulents is that people don’t place them in the sunniest spot if they grow them in the house,” shares Peter Bint, the Secretary of the British Cactus and Succulent Society. “Delosperma and other succulents must be on a window sill with a southerly aspect, not on a table in the middle of the room.” Whether or not you can grow ice plants outdoors will depend on precisely where you live and on which variety you are growing. As we have already discovered above, Delospermas can vary greatly in the temperatures that they can cope with and have very different hardiness ratings. In less mild areas and with more tender types, it is likely that Delosperma will fare better within a greenhouse or polytunnel structure. Soil Requirements For these succulents, the most important requirements are related to the soil or growing medium. It must be free-draining if you wish to grow these plants successfully. If you are growing in pots, the soil or the growing medium must be light and not retain too much moisture or become waterlogged. Creating sufficiently free-draining conditions for Delosperma is the main challenge when growing these plants in our climate and waterlogged conditions are the main cause of these plants failing to thrive over the winter months when grown in UK gardens. Planting Guidelines Pot-grown plants can be planted out at any time, though spring is really the best time to plant them out in your garden. These plants might be good choices for greenhouse or polytunnel growing, or for a xeriscaping or low-water-use scheme in the garden alongside other succulents and reasonably drought-tolerant plants. They fare well in a gravel garden. Plant your Delosperma in a hole that is the same depth as the existing root system and a little wider or into a container filled with light and free-draining growing medium. Ongoing Delosperma Care These succulent plants are relatively easy to grow as long as you have selected the right growing position and should not take up too much of your time or attention. Sunlight These plants will thrive in full sun, so when you are choosing where best to place them, you should make sure that you place them in as sunny and sheltered a spot as possible. Watering As previously mentioned, these are not plants that can tolerate any level of waterlogging at all. This is something to remember not only when choosing where to position them but also is something to keep in mind while watering. It is always important to make sure that you do not overwater and that when you do, excess water can always drain away freely. Pruning Generally speaking, Delosperma will not need any pruning at all. Propagating Delospermas are typically propagated either by sowing the seeds or by taking softwood cuttings in spring. Seeds should be sown on the top of the growing medium because light is required for germination to take place. Cuttings can be taken throughout much of the summer, as well as in spring, but softwood cuttings taken earlier tend to root more successfully. Mature plants can also sometimes be divided. This is another propagation method to consider and, again, is something to do in the spring. Common Problems By far the biggest and most common problems when growing ice plants of this kind are issues relating to overwatering or poor drainage. Waterlogging can cause rotting and a range of other problems for these plants and avoiding this is generally the number one concern when growing them. Aphids, mealybugs and several other common pests can also occasionally become an issue when growing these plants. However, on the whole, problems tend to be related to unsuitable growing conditions. So, if you have a problem, look carefully at the situation to work out what might not be ideal and you will usually find the root cause of the issue. References 1. Delosperma. (n.d.). Kew Royal Botanic Gardens. Retrieved April 12, 2023, from https://powo.science.kew.org/taxon/urn:lsid:ipni.org:names:30416604-2#children 2. Delosperma nubigenum. (n.d.). Missouri Botanical Garden. Retrieved April 12, 2023, from https://www.missouribotanicalgarden.org/PlantFinder/PlantFinderDetails.aspx?taxonid=275482&isprofile=0&
Learn more
Cacti Growers Reveal Why They Love Echeveria - Including Their Top Growing Tips
IN THIS GUIDE Overview Echeveria Care Guidelines Propagation Common Types How To Grow Echeveria Common Problems References Echeverias are popular houseplants that can also potentially be grown outside in a garden over the summer months here in the UK. These succulent perennials cannot cope with frost or very wet conditions, but they are relatively easy to grow and can often be quite trouble-free plants to consider. “I love the ease at which you can propagate the plants along with the different shapes, colours and textures that provide continued interest,” says Daniel Jackson from Ottershaw Cacti, when discussing why he loves growing Echeverias. “Once you have a succulent, you never need to be without it!” Overview Botanical Name Echeveria Plant Type Succulent / Perennial Native Area Central and South America Hardiness Rating H2 Foliage Evergreen Flowers Urn-shaped flowers borne in panicles When To Plant April to September Echeverias are succulent plants, which means that they have adaptations to drought or very dry conditions that allow them to store water in their stems and leaves.1 These plants are native to Mexico and to Central and South America and this can help us understand the hot and dry and sunny conditions in which they will thrive.2 Typically grown in containers, Echeverias are a great choice for houseplants and can be grown successfully even by those who may not be the best of plant parents and who may be prone to neglecting their plants. Fortunately, these succulents can thrive on neglect, coping well in drought or if you forget to water them. Echeveria can also cope with being placed outdoors in summer in areas where rainfall is not too high. They are sometimes used in summer carpet bedding schemes or in a container garden outdoors. “I love to see succulents growing vertically – such as in gaps in walls and risers in outdoor steps, or in small frames mounted on walls,” shares Peter Lickorish, a Master Horticulturist. “They’re among few plants which can cope well with life on their side and it helps stop water puddling in their middle.” Soil Requirements Therefore, you need to think about restricted watering and making sure that the growing medium or soil in which they are placed is sufficiently free-draining, but does not dry out altogether for too long. A sandy and slightly acidic soil is closest to conditions in the plants’ native range and is ideal when growing Echeveria in the ground. A free-draining and light potting mix with plenty of added grit or horticultural sand is essential when growing in containers. “Pot up into a gritty compost,” says Daniel. “I use 60% John Innes No. 2 and 40% horticultural grit. “This mix helps to get rid of the water quickly, allowing the plant to take up what it needs and giving time for its roots to dry out quickly.” Sunlight Make sure that you plant Echeveria, both inside and outside in summer, in as sunny, warm and sheltered a spot as possible. “Give your echeverias as much light as possible, as most succulents love all the UV they can get because it brings out their colours and helps keep their shape compact,” says Daniel. Of course, we cannot exactly replicate the native environment of these plants indoors or in our British gardens. However, by thinking about water, drainage and soil, we can keep these plants happy even in our very different environments. Echeveria Care Guidelines Echeverias are, as mentioned above, a good choice for even the most neglectful houseplant owners because they are drought-tolerant and will survive even when the care leaves a little to be desired. Watering Even if you forget to water as frequently as you should, Echeverias will generally survive in spite of your neglect. In fact, overwatering can be far more of a problem for these and other succulents, so it is important not to overwater and to make absolutely sure that waterlogged conditions do not develop. Always allow the growing medium to dry out before you water it once more. “Succulents store water in their leaves and the plants draw on the water stored to survive,” explains Darren Evans from Pugh’s Cacti. “These plants also require dormant periods over winter and water should be stopped to prevent rotting. “If the leaves start to wrinkle, then give a small amount of water and allow the soil to dry out.” “Echeverias don’t like water sitting in the crown of the plant as this will rot,” he adds. “I use a straw to blow the water out after watering from above.” Pruning Echeverias do not require pruning. However, you can remove any damaged or faded foliage by simply peeling these back and away from the rest of the plant. After the flowers fade, you can also cut back the flower stems to the base. Repotting Echeverias can cope with growing in a small space, even in the crack between paving slabs or in very small pots. Do not pot up too quickly, but repot when the plant fills the pot entirely and before the roots block any drainage holes at the base of a container. Propagation “They are so easy to propagate once you understand that any cuttings need to dry out (properly callous over) before being introduced to gritty compost,” says Daniel. “This process could take at least 10 days in a cool spot away from everything.” As Daniel mentions, Echeveria can easily be propagated by separating offsets that form around the parent plant. These offsets can simply be carefully removed from their present location and planted into a new location or their own individual pots. Echeverias can also be propagated by means of leaf cuttings, which can be taken any time over the spring or summer months. “Echeverias and Crassula do well with propagating from leaf cuttings,” Darren shares. “Carefully pull a leaf off the stem, ensuring it retains the curve shape of the stem in the leaf. “Place this on some compost and in 2-3 weeks it should start sprouting roots, followed by tiny leaves. “Plant this in a small pot and allow it to grow on. Only water the cutting once it has been potted up or until the original leaf has dried up.” Simply break off a healthy leaf from an existing plant and place it into a pot of peat-free cuttings potting mix. Leave it in a sunny place and a new plant should soon begin to form from the base. “After potting into the compost, do not water for another 3-4 days just in case you have damaged the roots and the water causes infection,” warns Daniel. Common Types Some interesting and highly regarded Echeverias to consider growing include: E. agavoides E. ‘Blue Frills’ E. secunda f. secunda ‘Compton Carousel’ E. elegans E. ‘Perle Von Nürnberg’ E. secunda var. glauca E. ‘Taurus’ As you explore these and many other different Echeverias, you will discover how much variety there is in their shape, form and colouration. How To Grow Echeveria Echeveria is a relatively easy plant to grow, but if you would like to grow this plant, it is important to understand the conditions that it requires. Among the most important environmental factors are light, water and the growing medium. Echeverias will do best in conditions that resemble their native home as closely as possible. So, you should be looking to replicate an arid desert environment as closely as you can inside your home. Common Problems The most common problems when growing Echeverias arise due to problems with overwatering or poor drainage. Although these succulents can cope with a lot, they really cannot cope with saturated soil for too long. As with other houseplants, pests like mealybugs can also sometimes become a problem, so these are something else to watch out for when growing these plants. Reviving A Dying Plant The first step in trying to save a dying echeveria plant is identifying the cause of the issue. If there is a problem with the environmental conditions such as poor drainage or waterlogging, then repotting or moving the plant to a more suitable location may allow the plant to recover. If there has been a problem with the care of the plant, amending your own practices could also allow a plant to come back from the brink. Always try these things before giving up on your plant altogether. Even plants showing signs of severe water stress may be propagated from some of their upper leaves as cuttings. References 1. The Editors of Encyclopaedia Britannica. (2023, February 23). Succulent | Definition, Facts, & Examples. Encyclopedia Britannica. Retrieved April 3, 2023, from https://www.britannica.com/plant/succulent 2. Echeveria secunda. (n.d.). North Carolina State Extension Gardener Plant Toolbox. Retrieved April 3, 2023, from https://plants.ces.ncsu.edu/plants/echeveria-secunda/
Learn more
"I Use A Net To Catch The Seeds" - Euphorbia Propagation Advice From Darren Evans
IN THIS GUIDE 1) Growing Euphorbias From Seed 2) Propagating From Softwood Cuttings 3) Dividing Euphorbias References Euphorbias are varied plants that like a wide range of conditions and differ greatly in their growth habit and appearance. Some are great for growing outdoors in gardens in the UK, while others are prized as houseplants or for greenhouse growing. Euphorbias are propagated in a number of different ways. They can be: Grown from seed. Propagated by means of softwood cuttings. Propagated by division. Whichever method you are looking at for the particular type of euphorbia that you want to grow, the job is typically one to undertake in the spring. Difficulty Easy to medium Equipment Required Euphorbia seeds (sowing), suitable growing medium, gardening gloves, pots, garden fork (dividing) When To Propagate Spring 1) Growing Euphorbias From Seed Species types of Euphorbia can be grown from seed, as Darren Evans from Pugh’s Cacti explains: “Euphorbias have male and female plants and, once pollinated, produce a seed that explodes to scatter their seeds,” he says. “In my greenhouse, I use a net to catch the seeds, tying the net around the plant until the seeds appear.” However, it is important to remember that cultivars will not come true to seed. In other words, the baby plants you grow will not necessarily resemble the parent plant and can differ in their growth habit or colour. This is typically the method used to grow annual Euphorbias like E. marginata and some other species. When To Sow The seeds from many Euphorbias can be collected when the seed capsules turn brown. These seeds can then be sown in autumn or in spring. Sowing Euphorbia Seeds Collect or source your euphorbia seeds. Prepare a seed tray and your growing medium. Soak your euphorbia seeds for a few hours before sowing to improve results. Sow seeds on the surface of a seed-starting growing medium and lightly cover them with more of the growing medium. Be patient as germination can take several months, especially in cooler conditions. Wearing gloves, pot on as needed. Often, plants will then be ready to plant out in a couple of years. 2) Propagating From Softwood Cuttings Another option with some Euphorbias is to propagate an existing plant by means of softwood cuttings. Shrub-like Euphorbias, including those with biennial stems that grow one year before flowering the next, can be propagated by means of softwood cuttings. Some Euphorbias that are suited to this method of propagation include E. characias and related plants E. mellifera and E. myrsinites. When To Take Softwood Cuttings Softwood cuttings from Euphorbias are best taken in the early spring. You should select the short shoots that emerge at the base for this purpose. Growing Euphorbia From Softwood Cuttings Select young, pliable green shoots from the base of the plant in early spring. Remove 5-10cm of the shoot, cutting the young shoots from the plant just above the ground, as close to the base as possible. Pinch out the tip of the softwood cutting with snips. Dip the base into a rooting hormone for the best chances of successful rooting. Pot up cuttings into containers filled with cuttings compost, watering well but making sure excess water can drain away freely. Grow on in a warm location, out of direct sunlight until the roots form well. After 2-4 weeks, cuttings should have rooted and be ready to harden off and pot on. 3) Dividing Euphorbias A final option suitable for the propagation of certain Euphorbias is to lift and divide your plants to obtain more of the same for your garden. This is by far the easiest way to propagate Euphorbia and it is suited to a large number of these plants. The euphorbias that are suited to propagating in this way are those that are herbaceous and clump-forming. When To Divide The best time to divide most Euphorbia that can be propagated in this way is in the spring, just as the plants come into growth in the early spring, or just after flowering in late spring for the earliest flowering types. How To Divide Euphorbia Lift a mature clump-forming herbaceous Euphorbia from the soil with a garden fork. Give the clump a gentle shake to remove clods of soil, so the roots can be seen clearly. Ease the plant apart to create several sections of root with a little top growth. These sections or divisions can be potted up or planted elsewhere in your garden. It is important to remember that different methods of propagation are suited to different types of Euphorbia, so it is important to choose a propagation method that is suited to the specific euphorbia that you have chosen to grow. This is a genus of over 2,000 species of plants – each of which has its own specific growing requirements.1 References 1. Euphorbia L. (n.d.). Kew Royal Botanic Gardens. Retrieved April 6, 2023, from https://powo.science.kew.org/taxon/urn:lsid:ipni.org:names:327729-2#children
Learn more
Prune Euphorbia Soon After Flowers Fade In Early Autumn, Argue These Experts
IN THIS GUIDE Do You Need To Prune Euphorbia? Prune Once Flowers Fade Pruning Evergreen Euphorbias Pruning Euphorbias With Biennial Stems Pruning Herbaceous Perennial Types Euphorbias are varied plants within the same genus that can require rather different growing conditions and care. When thinking about any element of euphorbia care, it is important to consider which specific type and variety you are growing. Understanding the specific environmental preferences and needs of your specific euphorbia can be important when it comes to placement, watering and more. Pruning is another key area where there are no general rules and we need to look more specifically in order to determine what to do. Difficulty Medium Equipment Required Secateurs, pruning shears or gardening scissors, gardening gloves When To Prune Summer or autumn Do You Need To Prune Euphorbia? Whether or not you need to prune Euphorbias very much depends on which type and variety you are growing. Some euphorbias do not need to be cut back or pruned at all, whilst others will perform best if pruned or cut back correctly. Euphorbia is a large genus including some plants which are shrub-like with a permanent framework of branches; some which are herbaceous plants. With such a varied group of plants, it is certainly important to distinguish between the different types so that you do not follow the wrong pruning guidelines. Within this one guide, it would be difficult to cover the hundreds of euphorbias that might be grown individually. Fortunately, many of the Euphorbia commonly grown in British gardens can be divided into three different groups for their pruning requirements. Prune Once Flowers Fade Timings will also very much depend on which euphorbia you are growing. However, with many Euphorbias, the time for pruning is either once the flowers fade or soon thereafter. With some types, the processes of pruning and deadheading are pretty much one and the same. So, while the details vary somewhat, the pruning of Euphorbias generally takes place in the late summer or autumn months. Pruning Evergreen Euphorbias Certain evergreen Euphorbias typically just need to be trimmed back immediately after flowering. This type of pruning pertains to: E. amygdaloides E. ‘Blackbird’ E. mellifera E. x pasteurii E. ‘Redwing’ Pruning in the case of these Euphorbias is simply deadheading and, other than removing the spent flowers and the upper portions of the flowering stems, no further cutting back or pruning is required. To cut back these Euphorbias, wait until the bracts surrounding the flowers turn completely brown, then remove the tops of the flowering stems, cutting back to the first ring of leaves below. Pruning Euphorbias With Biennial Stems Some types of Euphorbia produce biennial stems. In other words, they have two different types of shoots: those that grew the previous season on which flowers will form and those that grew during the present growing season. These types include: E. characias E. x martini E. myrsinites E. rigida The idea is that you should cut down the growth of the previous season, on which the flowers form. Cut these back to the ground in the late summer or autumn but leave the present season’s growth in place, as this will flower next year. Pruning Herbaceous Perennial Types When it comes to the herbaceous perennial Euphorbias, flowers are deadheaded once they fade. The euphorbias include: E. cyparissias E. epithymoides E. griffithii E. palustris E. sikkimensis E. villosa E. wallichii The whole of the plant is then cut to the ground later. You can cut back the entire plant to ground level before the first frosts or let the dead stems stand over the winter months to benefit wildlife, before cutting back early in the spring before new growth begins to emerge. “When pruning Euphorbia, long sleeve tops, gloves and washing your hands afterwards are recommended as the sap is phototoxic (activated by sunlight),” shares Master Horticulturist Dan Ori. These simple tips above should help you make sure that you prune, cut back or deadhead your Euphorbias correctly and do not do any harm to your plants.
Learn more
Highlighting 14 Excellent Euphorbia Varieties From This Diverse Group Of Plants
IN THIS GUIDE 1) E. amygdaloides var. robbiae 2) E. characias 3) E. cornigera 4) E. griffithii 5) E. hypericifolia 6) E. ingens 7) E. lathyris 8) E. mellifera 9) E. milii 10) E. myrsinites 11) E. oblongata 12) E. palustris 13) E. schillingii 14) E. sikkimensis Euphorbias are generally divided into those that are suitable for outdoor cultivation in the UK and those that are commonly grown as houseplants or in greenhouses in our climate. These are very varied plants, and though they share a genus, they can differ greatly in their appearance, growth habits and needs. One of the first things that you will have to decide when choosing a Euphorbia to grow is where you will be growing it. E. milii Even among Euphorbias that can be grown outside, there are many differences in the environmental conditions that different species and cultivars within this genus prefer. Some do best in full sun and free-draining conditions, while others will do best in consistently moist soil positioned in partial shade. Another important thing to think about is the size to which a particular species and cultivar of Euphorbia will grow, as they can differ greatly in this respect too. Some are larger herbaceous perennials or shrubs, whilst some are low-growing ground cover plants. E. obesa “A great Euphorbia to try is Euphorbia obesa,” says Darren Evans from Pugh’s Cacti. “It grows slowly and produces a dome shape that flowers along its ribs. E. eritrea “Euphorbia eritrea is another variety to try. It grows fast and can reach 15 feet in height, as it does in our nursery.” Linked with the size of a Euphorbia are its growth habits and the general details of its appearance. In these respects too Euphorbia can be an incredibly diverse group. E. epithymoides With all that said, here are some of my favourite varied euphorbias that might be considered by gardeners in the UK. 1) E. amygdaloides var. robbiae COMMON NAME(S): Mrs Robb’s bonnet HARDINESS RATING: H6 FOLIAGE: evergreen FLOWERING SEASON(S): spring / summer SUNLIGHT: any SOIL REQUIREMENTS: loam, sand, clay; any pH SIZE: 0.1-0.5m in height, 1-1.5m spread Also known as Mrs Robb’s Bonnet, this Euphorbia is a perennial evergreen that grows to around 50cm tall. It forms rosettes of deep green leaves and bears large, rounded sprays of yellowy-green flowers in the spring and summer. “We always use plants like E. amygdaloides var. robbiae that are great for filling in spots under trees,” shares Garden Designer Tom Simpson. This is a good choice for areas of dry shade, though it can also grow in partial shade or full sun. It will do best in moist but well-drained or well-drained soil. 2) E. characias COMMON NAME(S): Mediterranean spurge HARDINESS RATING: H4 FOLIAGE: evergreen FLOWERING SEASON(S): winter / spring SUNLIGHT: full sun SOIL REQUIREMENTS: loam, sand, clay; any pH SIZE: 1-1.5m in height, 1-1.5m spread Mediterranean spurge is a great plant for pollinators. It is a perennial that is evergreen and grows to around 1.5m tall. It has biennial stems, which are leafy in their first year and flowers in their second, becoming bare over the lower part of the stem. The flowers are prolific, borne in the spring in large cylindrical heads made up of petal-like bracts around tiny bright yellowy-green flowers. This is a short-lived perennial that often self-seeds when placed in the right location. Grow in well-drained soil in full sun in a sheltered spot. 3) E. cornigera COMMON NAME(S): horned spurge HARDINESS RATING: H5 FOLIAGE: deciduous FLOWERING SEASON(S): summer SUNLIGHT: full sun / part shade SOIL REQUIREMENTS: loam, sand, clay; any pH SIZE: 0.5-1m in height, 0.5-1m spread Horned spurge has an RHS Award of Garden Merit and is another good choice for a pollinator-friendly garden. This is a spreading perennial which grows around 75cm tall. It has slightly reddish stems with dark green leaves and bears bright yellow flowers in the summer. This Euphorbia is best grown in full sun or part shade, in moist but well-drained soil. 4) E. griffithii COMMON NAME(S): Griffith’s spurge HARDINESS RATING: H7 FOLIAGE: deciduous FLOWERING SEASON(S): summer SUNLIGHT: part shade SOIL REQUIREMENTS: clay or loam; any pH SIZE: 0.5-1m in height, 0.5-1m spread Griffith’s spurge is a vigorous perennial with a spreading habit which can have a height and spread of up to 1m or so. It has lanceolate leaves which turn red and yellow in the autumn months and bears clusters of red, orange or yellow flowers at the beginning of summer. This is a Euphorbia that does best in part shade in moist yet free-draining soil. It will tend to do best in clay or loam soil, with an east or west-facing aspect. It is H7 hardy and is among the hardiest plants to grow, coping even in the coldest regions in extreme winter temperatures. “I find E. griffithii one of the best garden Euphorbias due to its hardiness and autumn colour,” shares Master Horticulturist Dan Ori. “I recommend planting it in a border with other plants that give red and yellow autumn colour like Acers and also try mixing in dark green-leaved evergreens with plants like Aucuba japonica ‘Rozannie’.” 5) E. hypericifolia HARDINESS RATING: H2 FOLIAGE: evergreen FLOWERING SEASON(S): spring / summer / autumn SUNLIGHT: full sun / part shade SOIL REQUIREMENTS: sand, loam, clay; any pH SIZE: 0.1-0.5m in height, 0.1-0.5m spread This is a tender Euphorbia that is best grown undercover indoors or in a greenhouse. It can also be placed outdoors in a mild, sheltered and sunny position with light, free-draining conditions. It is a good choice for hanging baskets or a container garden. This is a small evergreen perennial, with tiny dark green leaves and tiny white flowers which are borne from spring to autumn. However, this plant is only H2 hardy and won’t survive outdoors year-round. 6) E. ingens COMMON NAME(S): candelabra tree HARDINESS RATING: H2 FOLIAGE: evergreen FLOWERING SEASON(S): autumn / winter SUNLIGHT: full sun SOIL REQUIREMENTS: sand or clay; any pH SIZE: 12m in height, 8m spread Though it can grow to around 15m in height when fully grown, these cacti-like succulent plants are commonly much smaller and are commonly grown in containers. Ridged and with spines along their broad succulent stems, they can, when mature, produce greenish-yellow flowers followed by reddish or purple fruits. Requiring a free-draining and sheltered position in full sun, this Euphorbia is H2 hardy. It is usually grown as a houseplant indoors. “My E. ingens takes over a significant part of my greenhouse as the spines make it too hazardous for the house,” shares Dan. “It handles low temperatures well but does not like cold and damp conditions.” 7) E. lathyris COMMON NAME(S): caper spurge HARDINESS RATING: H5 FOLIAGE: evergreen FLOWERING SEASON(S): spring / summer SUNLIGHT: full sun / part shade SOIL REQUIREMENTS: chalk, sand, clay; any pH SIZE: 1-1.5m in height, 0.1-0.5m spread Also sometimes referred to as E. crucifolia and commonly known as caper spurge; this is an annual or biennial Euphorbia species. It will typically reach around 1.2m in height. Its leaves are around 15cm long and they extend directly sideways out of unbranched stems. In late spring and early summer, these plants have small yellow-green blooms that are followed by triple seed heads that turn brown as they mature. This Euphorbia likes moist but well-drained or well-drained soil in full sun or partial shade. 8) E. mellifera COMMON NAME(S): honey spurge HARDINESS RATING: H3 FOLIAGE: semi-evergreen FLOWERING SEASON(S): spring SUNLIGHT: full sun / part shade SOIL REQUIREMENTS: loam, sand, clay; any pH SIZE: 1.5-2m in height, 2-2.5m spread E. mellifera is another more tender Euphorbia that can be grown outdoors in some locations in summer but usually requires an indoors or undercover, frost-free spot in winter. It is a domed shrub with bright green lance-like leaves with paler veins down their centres and brownish flower heads which are borne in the late spring. This option requires well-drained soil in a sheltered location in full sun. It is H3 hardy so may be grown outdoors year-round only in the mildest, coastal locations in the south of the British Isles. 9) E. milii COMMON NAME(S): crown of thorns HARDINESS RATING: H1B FOLIAGE: evergreen FLOWERING SEASON(S): summer SUNLIGHT: full sun SOIL REQUIREMENTS: loam, sand, clay; any pH SIZE: 0.5-1m in height, 0.1-0.5m spread This Euphorbia, often also referred to as Crown of thorns, Christ plant, or Christ thorn, is a large evergreen plant with leathery oval leaves and clusters of small yellow flowers with vibrant bright red bracts. It requires well-drained conditions in full sun and is most commonly grown indoors or in a greenhouse year-round, though it may also be placed out into a sheltered position in a garden in summer. The hardiness rating for this Euphorbia is H1B. 10) E. myrsinites COMMON NAME(S): broad-leaved glaucous spurge HARDINESS RATING: H5 FOLIAGE: evergreen FLOWERING SEASON(S): spring SUNLIGHT: full sun SOIL REQUIREMENTS: all soil types; any pH SIZE: 0-0.1m in height, 0.1-0.5m spread Also known as broad-leafed glaucous spurge, this Euphorbia is an evergreen perennial which has trailing leafy stems with bright green leaves and, in spring, yellow-green flower clusters that are 10cm across. This ground cover plant grows only around 10cm tall but can spread over 40-50cm wide. Grow this plant in full sun in well-drained soil. It can cope with a sheltered or exposed location and is H5 hardy. 11) E. oblongata COMMON NAME(S): Balkan spurge HARDINESS RATING: H5 FOLIAGE: deciduous FLOWERING SEASON(S): spring / summer / autumn SUNLIGHT: part shade SOIL REQUIREMENTS: chalk or sand; any pH SIZE: 0.5-1m in height, 0.1-0.5m spread Balkan spurge is a clump-forming herbaceous plant with dark green stems, which turn red in autumn, and flat heads of yellow flowers that are 15cm wide and bloom over a long period between spring and autumn. This Euphorbia is best placed in a dappled shade somewhere it will receive sun for part of the day. Though it is perennial, it is most commonly grown as an annual and will readily self-seed in moist but well-drained, humus-rich soil where it is happy. So, you might see this plant popping up in your garden year after year. 12) E. palustris COMMON NAME(S): marsh spurge HARDINESS RATING: H7 FOLIAGE: deciduous FLOWERING SEASON(S): spring SUNLIGHT: full sun SOIL REQUIREMENTS: clay or loam; any pH SIZE: 0.5-1m in height, 0.5-1m spread E. palustris, also known as marsh spurge, is a herbaceous perennial which will grow up to around 90cm tall. It has vibrant mid-green leaves which often turn yellow or orange in autumn and bears terminal clusters of greenish-yellow blooms in the late spring. As the name suggests, this is an unusual Euphorbia in that it will do best not in free-draining conditions like so many of this genus, but instead will thrive in permanently moist soil. It will thrive in clay or loam in full sun and is H7 hardy. 13) E. schillingii COMMON NAME(S): Schilling spurge HARDINESS RATING: H5 FOLIAGE: deciduous FLOWERING SEASON(S): summer / autumn SUNLIGHT: part shade SOIL REQUIREMENTS: chalk or sand; any pH SIZE: 0.5-1m in height, 0.1-0.5m spread This is a herbaceous perennial with erect stems that hold green leaves with white veins down their middles and broad clusters of vivid yellow flowers in the summer and into autumn. These Euphorbias grow best in partial shade in moist but well-drained soil that is rich in organic matter. 14) E. sikkimensis COMMON NAME(S): Sikkim spurge HARDINESS RATING: H5 FOLIAGE: deciduous FLOWERING SEASON(S): summer SUNLIGHT: full sun / part shade SOIL REQUIREMENTS: all soil types; any pH SIZE: 1-1.5m in height, 0.5-1m spread Sikkim spurge is an upright herbaceous perennial which has narrow leaves on stems that are a pinkish colour when young. The flowers, borne in loose heads in late summer, are bright yellow in hue. It needs moist but well-drained soil and is H5 hardy. There are, of course, many more species besides those listed above and there are also many cultivars of different species to contend with when making your choice. The above just serves to show how much variety there is in this genus, how many Euphorbias there are to choose from and just how different they can be.
Learn more
Euphorbia: How To Grow Plants In This Diverse Genus With Advice From Darren Evans
IN THIS GUIDE Overview How To Grow Euphorbia Euphorbia Planting Euphorbia Plant Care Euphorbia is a genus of plants that can offer a lot to gardeners. Hugely diverse, this genus provides plants of a range of shapes and sizes for a wide range of locations, indoors and outside in a garden. Across our Euphorbia guides, we’ve collaborated with Darren Evans, Plant Manager at Pugh’s Cacti. “I love Euphorbias as they can be weird and wonderful,” he says. “Some are classed as succulents but have spines that resemble a cactus, so it’s the best of both worlds.” Overview Botanical Name Euphorbia Common Name(s) Spurge Plant Type Annual / Perennial / Shrub / Succulent Native Area Broad range Hardiness Rating Varies considerably Foliage Diverse range Flowers Small flowers often in colourful bracts When To Plant Varies Euphorbias can be useful and attractive plants. One of the most important things to understand about Euphorbias, or ‘spurges’ as they are sometimes known, is that they differ greatly in their characteristics and growing requirements, so it is important to choose carefully. There are Euphorbias that are annuals, perennials, shrubs, succulents and even some that love moist conditions. Euphorbia poissonii ‘Variegata’ “With succulent euphorbias, you give them attention at certain times of the year and after that, you can just leave them to do their thing and flourish,” shares Darren. “They can be easy to grow with a simple compost mix, plenty of light and regular watering when required. “In return, they will reward you with beautiful flowers, elegant spines and wonderful shapes.” There is a euphorbia for full sun and for shade, for use as a houseplant and as much hardier plants for year-round outdoor cultivation. How To Grow Euphorbia Selecting the right Euphorbia for the conditions where you want it to grow is the first and most important step in growing them successfully where you live. Hardiness When it comes to hardiness, plants within this genus range from tender to fully hardy, even in the UK during the coldest winters. It can be helpful then to separate Euphorbias into garden Euphorbias (those hardy enough to grow outside) and indoor or greenhouse Euphorbias, which are not hardy enough to remain outside through the year and must be cultivated as houseplants or undercover. Tender houseplant Euphorbias can be small balls or large branched shrubs. E. characias These typically grow well in sun-baked conservatories throughout the year, though they can often be placed outside during the peak of summer. Popular poinsettias are a member of this group and are commonly grown around Christmas. Other examples are E. milii, E. milii var. splendens, E. horrida, and E. obesa. Typically succulent in form and resembling cacti, these bear little resemblance to Euphorbias commonly grown outside in a garden. Preferred Aspect Garden euphorbias are all hardy enough to be grown outdoors in UK gardens. However, even these plants differ greatly from one another. These Euphorbias can be subdivided again into those that like to be grown in full sun and those that love shade. E. characias subsp. wulfenii Sun-loving spurges are mostly either herbaceous perennials that die back in winter and send up new growth each spring or have a permanent shrubby framework of branches. There are also some annual Euphorbias for full sun that complete their lifecycles in a single year. Some examples of sun-loving spurges include E. characias, E. griffithii, E. mellifera, E. palustris and E. rigida. “My favourite Euphorbia is E. mellifera, also known as honey spurge,” says Master Horticulturist Colin Skelly. “It will grow to around 2m tall and wide when thriving and can be grown in full sun or partial shade and in a range of soil types as long as free draining. “It is loved by pollinators and has a pleasant fragrance. It can be pruned back in spring if needed. It is frost-hardy in all but the coldest parts of the UK.” Most of these really do best with excellent drainage and won’t tolerate waterlogging at all, but E. griffithii and E. palustris are content in damp soil. E. lathyris Annuals include E. lathyris, E. marginata, and E. oblongata. E griffithii can also cope well with dappled shade and E. amygdaloides and E. amygdaloides var. robbiae are also Euphorbias that are tolerant of dappled shade. These Euphorbias will not like soil that dries out too excessively and in some cases in full sun, the flowers and leaves of these plants can scorch. Sun-loving Euphorbias will tend to do best with a south-facing aspect, while those that thrive in partial or dappled shade do well with an east or west-facing aspect. Preferred Soil & Drainage Garden Euphorbias differ not only in their sunlight requirements but also in their preferred soil type and soil conditions. Some Euphorbias, such as E. cornigera and E. schillingii, will grow well in most soil types as long as they do not become waterlogged. Euphorbia schillingii Euphorbia such as E. characias subsp. wulfenii and E. rigida do best in sandy soils that are free-draining. Among those that grow well in part shade, E. amygdaloides var. robbiae is a good choice for dry shade, while E. palustris is an example of one Euphorbia that can work in damp soils. It is, of course, important to make sure that you understand the needs of the particular Euphorbia that you are trying to grow before selecting and preparing a planting site. Euphorbia Planting Euphorbias are commonly sold as potted plants, either as smaller plants in spring or larger plants that are often in flower in summer or early autumn. Mostly, these plants come in 1 or 2-litre pots, though sometimes plants in 9cm wide pots are available. Garden Euphorbias are best planted out in a garden in the spring, once the weather begins to warm. This is the best time for planting because it allows the plants to establish quickly while the soil is relatively moist and put on plenty of growth during warmer weather. E. neriifolia To plant a Euphorbia in the soil, simply dig a hole larger than the existing roots of the plant, place the plant in this hole, firm the soil back around it and water it in well. In many cases, the addition of organic mulch around the plant can be beneficial. Some Euphorbias are suited to container growing. These can thrive in the free-draining conditions that a suitable container can provide. Mix a potting medium with three-parts loam-based compost to one-part grit to keep these plants happy. Euphorbia Plant Care Euphorbias require very different care depending on the specific types and varieties you have chosen and where they are growing. Euphorbia marginata ‘Pursh’ Some take a lot more time and effort, while others can be relatively low-maintenance and easy plants to grow. Watering Garden Euphorbias typically need to be watered well during establishment for their first couple of growing seasons, after which natural rainfall will typically be sufficient, as the plants can often have reasonable drought tolerance. However, if you are growing euphorbias in containers, indoors or outside, watering will be a job that you will have to continue to undertake throughout the year from spring to autumn. The goal is typically to make sure that the growing medium remains moist yet not waterlogged and never dries out completely during the growing season. Feeding Euphorbias tolerate poor fertility rather well and they do not typically need to be fed at all. E. milii In fact, feeding can be counterproductive because plants that are in too rich a soil or growing medium can become leggy. Common Problems Euphorbias are often blissfully trouble-free plants. However, they can develop a number of minor issues, especially if environmental conditions or care were not quite right. Common problems include root rot (when grown in wet soils), powdery mildews, rust diseases and aphids.
Learn more
Expert Cacti Growers Swear By These 8 Watering Tips For Happy Plants
IN THIS GUIDE 1) Cacti Are Adapted To Need Less Water 2) All Cacti Differ In Their Water Needs 3) Water When The Growing Medium Feels Dry 4) Provide Minimal Water Over Winter 5) Use Rainwater Where Possible 6) Ensure The Water Is At A Suitable Temperature 7) Make Sure Excess Water Can Drain Away 8) Never Let Water Sit At The Base Of Containers References Cacti are, of course, drought-tolerant desert plants, which have minimal water requirements. However, it is important to remember that this does not mean that they do not need any water at all. “Cacti are a challenge because they originate from vastly different areas of the world, but you’ll soon discover they will tolerate a lot of bad habits in horticulture,” explains Peter Bint from the BCSS. “They are very forgiving as long as ill-treatment is not too prolonged.” Though these plants have adapted to survive for relatively long periods in very dry conditions, they do still need some water to survive. Here are some top-level watering guidelines to help you make sure that you are caring for your cacti correctly: Cacti have special adaptations which reduce the amount of water they use. Cacti all have certain requirements, but different cacti differ in their water needs. Typically, water only when the surface of the growing medium feels dry to the touch from April to October. With most cacti, stop watering or provide only minimal water from November to March. Use rainwater to water cacti where possible. Ensure that the water is tepid and not too cold. Make sure excess water can always drain away freely. Never leave any standing water at the base of containers. We delve into each of these in further detail below – 1) Cacti Are Adapted To Need Less Water Mostly native to the Americas, cacti are found in arid environments.1 “Understanding the watering regime is critical for this group of plants,” says Daniel Jackson, the owner of Ottershaw Cacti. “They are native to very dry and bright climates and this is what you are looking to replicate in the UK.” They are plants that have adapted to live in very dry locations, including some of the driest places on earth. These plants have evolved to conserve water and survive in such challenging environments, such as the stems that have adapted to store water. Cacti also frequently have spines rather than leaves, which help prevent water loss. Cacti typically have short growing seasons and long periods of dormancy and are able to quickly react to any periods of rainfall and take full advantage of them. Like other succulent plants, cacti also employ the CAM mechanism as part of photosynthesis and transpire at night to reduce water loss significantly.2 “Most people tend to over care for cacti plants and unfortunately, overwatering them at the wrong time will cause them to rot,” says Dirk Himschoot from the Desert Plant Society of Vancouver. “It is a good rule to let the soil completely dry out before watering again to replicate their native conditions.” 2) All Cacti Differ In Their Water Needs “People say ‘cacti and succulents don’t need water’, but this isn’t the case, as they are living plants and need water to survive,” says Darren Evans, the Plant Manager at Pugh’s Cacti. However, while all cacti share certain water-saving techniques and adaptations, it is important to understand that different cacti differ in their water needs. It is important that you understand the specific environment in which the cactus you are growing would naturally be found, as this can give you clues about the plant’s water requirements. For example, does the cactus come from a true desert environment or does it come from a semi-arid environment where, while infrequent, a bit more rain does fall? “There are many misconceptions about cacti and succulents that are held by people,” says Peter. “They say that they grow in deserts so they don’t need water, but this isn’t true at all. “Cacti grow in semi-desert and even more lush places and need regular water when in growth, but the soil should be mildly moist and able to dry out between waterings.” 3) Water When The Growing Medium Feels Dry Though cacti can differ somewhat in their watering needs throughout the year, many cacti that are commonly grown as houseplants or which are placed outdoors in British gardens in summer, are going to need more water between April and October while they are in active growth. “When watering, drench the cacti so the compost is completely wet, then drain any retained water in a saucer or plant pot, and finally let your succulent dry right out,” says Daniel. “This may take 10-14 days depending on where you have put it. “Remember, a hot bright spot will dry out quicker than a cool dull location.” However, always check the growing medium with a finger before watering any cacti, even during this time, as their water use will obviously differ depending on the light levels and temperatures to which they are exposed. You should aim to water from April to October whenever the surface of the growing medium feels dry. You do not want the growing medium to dry out excessively during this time but neither do you want to create excessively moist conditions. “It is better to stand the pots in water and allow the soil to absorb moisture,” advises Peter. “Watering from overhead does not moisten the middle of the potting mix so root growth could become uneven.” 4) Provide Minimal Water Over Winter Most cacti will enter a period of dormancy over the winter months and should be allowed to rest during this time. “To prevent the loss of your cactus, stop watering in the colder months to allow the cactus to go dormant,” says Darren. This means ceasing watering altogether or only providing minimal watering during this period, which is typically between November and March, as Peter shares: “There are hardly any cacti that need water between mid-October and mid-March. “If they look a little shrivelled in December, January or February, then a small amount of water can be applied; just enough to dampen the lower soil in the pot which will feed the roots and prevent them from dying which is important.” Allowing the cacti to have this period of rest should promote flowering. However, there are exceptions to this. Orchid cacti should still be watered when the medium is dry through the coldest months and winter-flowering cacti, such as the Christmas cactus, should be watered regularly in winter and given their rest period in the summer months. “Don’t water your cacti the same as you would other houseplants,” warns Colin Skelly, a Horticultural Consultant. “Keep an eye on the soil moisture; if it is moist to touch in the first 2-3cm, then don’t water. This is especially true in winter when active growth will be less and root rot is most likely.” 5) Use Rainwater Where Possible The water you use to water your cacti can be just as important as how much water you provide and how frequently. Unfortunately, tap water can cause the build-up of mineral salts that can be detrimental to the plants, so, where possible, it is always best to use rainwater to water your plants. 6) Ensure The Water Is At A Suitable Temperature Whether you can use rainwater or not, another thing to think about when growing cacti is that they can be sensitive if the water used is too hot or too cold. The water should be tepid before it is used in order to avoid any ill effects. 7) Make Sure Excess Water Can Drain Away Cacti, of course, require free-draining conditions and you should have kept this in mind when choosing your containers and potting mix. “Cacti should be grown in free-draining compost, as this would be their natural substrate,” says David Ennals from Coach House Cacti. Always make sure that the pot and the medium allow for good drainage and that excess water can always drain away freely. Waterlogging should never occur. 8) Never Let Water Sit At The Base Of Containers “Never leave your plant standing in water; drain it off and replace it on its saucer after watering,” says David. Check the saucer or tray below your pots when growing cacti. After watering, make sure that any excess water that has ended up at the base of containers is tipped away and not left in place as standing water can cause problems with waterlogging and raise humidity levels detrimentally. “One of the most common problems I see is people not letting their cacti dry right out before watering again,” says Daniel. “It is counterintuitive to many people to keep the plant so dry, but if their roots sit wet for too long, they simply rot and the plant is likely to die. “The defining characteristic of a succulent is that it stores water and its roots want to sit dry.” Remember, when it comes to watering cacti, less is often more. Killing it with kindness is one of the biggest problems when it comes to watering cacti kept as houseplants in a home. So, water only when the medium is in danger of entirely drying out. References 1. Cacti – National Wildlife Federation. (n.d.). https://www.nwf.org/Educational-Resources/Wildlife-Guide/Plants-and-Fungi/Cacti 2. Rabas, A. R., & Martin, C. E. (2003). Movement of Water from Old to Young Leaves in Three Species of Succulents. Annals of Botany, 92(4), 529–536. https://doi.org/10.1093/aob/mcg171
Learn more
BCSS Member David Ennals Shares 23 Flowering Cactus Plants He Loves Most
IN THIS GUIDE Expert Chosen Varieties 1) Christmas Cactus 2) Common Winter Cactus 3) Dwarf Turks Cap Cactus 4) Orchid Cactus 5) Texas Rainbow Cactus 6) Klapper’s Hedgehog Cactus 7) Scheer’s Hedgehog Cactus 8) Black Lace Cactus 9) Silver Ball Cactus 10) Glory Of Texas 11) Peanut Cactus 12) Pond Lily Cactus 13) Easter Cactus 14) Bottle Cactus 15) Rose Pincushion 16) Owl’s Eye Pincushion 17) Ladyfinger Cactus 18) Wine-Fragrant Chin Cactus 19) Purple Prickly Pear 20) Wheel Cactus 21) Bishop’s Mitre 22) Silver Torch 23) Ground Master References Cacti are, of course, associated with spines and thorns, but many varieties produce pretty and vibrant flowers that can really steal the show. The only question is about cactus flower shapes, sizes and colours! “There’s cacti that can be grown to match most situations, from windowsill, to conservatory, to outdoors in the summer months,” suggests Master of Horticulture Colin Skelly. We interviewed several expert cacti growers for this guide, including: David Ennals – Owner of Coach House Cacti Dirk Himschoot – President of the Desert Plant Society of Vancouver “The form and variety of cacti make me passionate about growing them,” says David. “I also love the art of propagation and enjoy the challenge of raising these plants from seed. “The flowers are uplifting too!” Cactus plants can be quite fussy and demanding but not when it comes to ongoing care. What they are particular about is their environmental conditions, including sun, soil and humidity. An outdoor cactus requires very little care if these are met in a once-and-for-all fashion. So if you’d like a challenge trying to grow a thorny, spiny plant with lovely flowers in your backyard. Expert Chosen Varieties We asked David Ennals to share his favourite varieties of cacti. “There is such a vast variety of forms, so it completely depends on whatever floats your boat!” says David. “Most people grow them for their flowers, but I tend to like the ones with strong supination, such as Ferocactus and Stenocactus.” Mammillaria beneckei “However, my favourite genus has to be Mammillaria.” Dirk also has a soft spot for this genus: “Mammillaria and Gymnocalycium are my favourite cacti, as they tend to flower at an early age.” However, he loves growing most cacti varieties for the same reasons. “When neglected, cacti still survive and look good,” he says. Gymnocalycium mihanovichii “They are water friendly but you do not need to water every day. Just once a week in the growing season, once a month in the summer and once every 2-3 months in winter.” If these choices aren’t enough for you, keep reading for our detailed list below. I have made it a point to include at least one species from a dozen cactus genera, from which two ‘major’ ones, Mammillaria and Echinocereus, are represented by four varieties each. I’d encourage you to explore the genus of whatever flowering cactus strikes your fancy. 1) Christmas Cactus BOTANICAL NAME: Schlumbergera × buckleyi HARDINESS RATING: H1B FLOWERS: pink and red FLOWERING SEASON(S): winter SUNLIGHT: part shade SOIL REQUIREMENTS: sand or loam; acidic to neutral pH SIZE: 0.1-0.5m in height, 0.5-1m spread RHS Award of Garden Merit The Christmas cactus has overtly jointed segments with its colour varying from a dull greyish-green to a glossy bright green. This popular plant is a favourite for indoor cultivation. Initially upright, it spreads and trails like a cascading plant you might see in a hanging basket. During winter and over the Christmas period, it bears pendent flowers that are tiered and have flared petals in shades of pink, red or purple. This plant is a recipient of the RHS Award of Garden Merit. 2) Common Winter Cactus BOTANICAL NAME: Schlumbergera truncata HARDINESS RATING: H1B FLOWERS: purple, pink and red FLOWERING SEASON(S): autumn / winter SUNLIGHT: part shade SOIL REQUIREMENTS: sand or loam; acidic to neutral pH SIZE: 0.1-0.5m in height, 0.5-1m spread Somewhat similar to but not the same as the Christmas cactus, the common winter cactus’ segments are less jagged and its thorns are a little smaller. It too is a top choice for indoor containers and also has a trailing, cascading habit. In late autumn and early winter, it produces flowers somewhat similar to those of the Christmas Cactus in the shades of pink, orange and red. 3) Dwarf Turks Cap Cactus BOTANICAL NAME: Melocactus matanzanus HARDINESS RATING: H1B FLOWERS: pink FLOWERING SEASON(S): summer SUNLIGHT: part shade SOIL REQUIREMENTS: sand or loam; acidic to neutral pH SIZE: 0-0.1m in height, 0-0.1m spread Only growing to around 8cm tall, Turk’s Cap cactus is spherical and a slow-grower. It has long, pronounced thorns arranged in a star shape. In late spring and early summer, it bears a curious flower that is oblong and curved, with floral growth that has fine hairs that resemble fur in hues ranging from mid-pink to a deep red. This endangered cactus can be a challenge to grow.1 4) Orchid Cactus BOTANICAL NAME: epiphyllum HARDINESS RATING: H1B FLOWERS: varies FLOWERING SEASON(S): spring / summer SUNLIGHT: part shade SOIL REQUIREMENTS: sand or loam; any pH SIZE: 0.1-0.5m in height, 0.5-1m spread Featuring very long segments with flat, smooth surfaces and capable of growing to great heights, the flowers of the orchid cactus come in various different forms depending on the hybrid. They flower for only a few days during the end of spring to early summer. However, the blooms are big, fragrant and come in brilliant tones of pink, yellow and red, so it’s well worth growing despite the short blooming time. 5) Texas Rainbow Cactus BOTANICAL NAME: Echinocereus dasyacanthus HARDINESS RATING: H1C FLOWERS: yellow FLOWERING SEASON(S): spring SUNLIGHT: full sun SOIL REQUIREMENTS: sand or loam; any pH SIZE: 0.1-0.5m in height, 0-0.1m spread Usually having only one stem, the Texas rainbow cactus reaches less than 40cm in height, so its 10cm flowers look very big in comparison. These are elongated and conical-shaped and are gradated yellow in colour and appear from stems that vary from pinkish to light brown. Although the cactus is spiny, its big, sunny yellow flowers are fragrant and have a long blooming season that covers the months through spring. 6) Klapper’s Hedgehog Cactus BOTANICAL NAME: Echinocereus klapperi HARDINESS RATING: H1C FLOWERS: orange and red FLOWERING SEASON(S): summer SUNLIGHT: full sun SOIL REQUIREMENTS: sand or loam; any pH SIZE: 0-0.1m in height, 0-0.1m spread Many clumping stems and long thorns characterise Klapper’s hedgehog cactus. These spiny stems have a variable colour, appearing light grey or green all over. During summer, this cactus produces flowers that are funnel-shaped with a prominent pistil jutting up. The colours are in vibrant tones of orange and red. 7) Scheer’s Hedgehog Cactus BOTANICAL NAME: Echinocereus scheeri HARDINESS RATING: H2 FLOWERS: pink, purple and red FLOWERING SEASON(S): spring SUNLIGHT: full sun SOIL REQUIREMENTS: sand or loam; any pH SIZE: 0.1-0.5m in height, 0.1-0.5m spread Scheer’s hedgehog cactus consists of oblong stems and a clumping form that appear rather like canes. Light green in colour, they are ridged and have long, sharp thorns all along the ridges. The colour of the stems is varied, from dull to rich, dark green. Just as variable are the colours of the trumpet-shaped flowers, which are borne in spring and may be pink, fuchsia, purple or even orange. This cactus is a recipient of the RHS Award of Garden Merit. 8) Black Lace Cactus BOTANICAL NAME: Echinocereus reichenbachii HARDINESS RATING: H2 FLOWERS: pink and purple FLOWERING SEASON(S): spring / summer SUNLIGHT: full sun SOIL REQUIREMENTS: sand or loam; any pH SIZE: 0.1-0.5m in height, 0.1-0.5m spread Black lace cactus comprises of a very dark green columnar stem that can look like an elongated egg, reaching up to 35cm tall. The prominent ribs, often curving, bear equally prominent areoles and spines. From mid-spring to early summer it produces attractive funnel-shaped flowers that are 8cm wide. They are of a purple shade, usually a vivid magenta-purple. A recipient of the RHS Award of Garden Merit. 9) Silver Ball Cactus BOTANICAL NAME: Parodia scopa subsp. scopa HARDINESS RATING: H2 FLOWERS: yellow FLOWERING SEASON(S): summer SUNLIGHT: full sun SOIL REQUIREMENTS: sand or loam; acidic to neutral pH SIZE: 0.1-0.5m in height, 0-0.1m spread Very aptly named, the silver ball cactus looks the part because its stem is ball-shaped and has a silvery appearance due to the densely-packed, very fine, silvery spines and their areoles. It may exist as a single plant or in a cluster. During summer it produces bright yellow salver-shaped flowers with reddish eyes and is another recipient of the RHS Award of Garden Merit. 10) Glory Of Texas BOTANICAL NAME: Thelocactus bicolor HARDINESS RATING: H1C FLOWERS: purple FLOWERING SEASON(S): summer SUNLIGHT: full sun SOIL REQUIREMENTS: sand or loam; any pH SIZE: 0.1-0.5m in height, 0-0.1m spread Yet another plant on this list to receive the RHS AGM, Glory of Texas consists of a solitary spherical or ovoid stem that is rich green and is covered with sharp spines. As it is no more than 20cm high, its 8cm wide flowers look even larger than they are. Borne during summer, they are funnel-shaped to salver-shaped and of a rich magenta-purple hue with a yellowy-red centre. 11) Peanut Cactus BOTANICAL NAME: Echinopsis chamaecereus HARDINESS RATING: H3 FLOWERS: orange and red FLOWERING SEASON(S): summer SUNLIGHT: full sun SOIL REQUIREMENTS: sand or loam; any pH SIZE: 0-0.1m in height, 0.1-0.5m spread The peanut cactus has oblong segments of a dark green shade with a picture perfect number and arrangement of thorns. Its multiple stems have a mat-forming habit and, during summer, it produces funnel-shaped to salver-shaped flowers. Measuring about 6cm in diameter, they are a vibrant vermilion hue. With a hardiness rating of H3, it is relatively hardy for a cactus, which is perhaps why it also has RHS AGM status. 12) Pond Lily Cactus BOTANICAL NAME: Nopalxochia phyllanthoides HARDINESS RATING: H1C FLOWERS: pink FLOWERING SEASON(S): summer SUNLIGHT: full sun SOIL REQUIREMENTS: sand or loam; acidic pH SIZE: 0.1-0.5m in height, 0.1-0.5m spread Of a semi-erect form but classified as bushy, pond lily cactus reaches up to 40cm in height. The stems are dark green, flattish, and, unusally for cacti, not spiny at all. It bears copious flowers during summer. These many-petalled blooms are salver-shaped and of a lotus-pink hue. 13) Easter Cactus BOTANICAL NAME: Hatiora gaertneri HARDINESS RATING: H1B FLOWERS: pink FLOWERING SEASON(S): spring SUNLIGHT: full sun SOIL REQUIREMENTS: sand or loam; acidic to neutral pH SIZE: 0.1-0.5m in height, 0.1-0.5m spread With segmented stems that are arching and well-branched, the Easter Cactus has a sprawling yet graceful quality about it. The flattened stems are a rich green shade which perfectly sets off its vivid scarlet flowers which this floriferous cactus often bears in profusion in late spring and early summer. “My favourite plant really does depend on what is happening at that time, but at the moment it is my Easter Cactus,” shares jane Perrone, a Houseplant Expert. “It has just finished flowering and was covered in these gorgeous red flowers. I love Florist’s cacti in general.” They are funnel-shaped and measure about 7cm. Another recipient of the RHS AGM. 14) Bottle Cactus BOTANICAL NAME: Hatiora salicornioides HARDINESS RATING: H1B FLOWERS: orange and yellow FLOWERING SEASON(S): spring SUNLIGHT: full sun SOIL REQUIREMENTS: sand or loam; any pH SIZE: 0.1-0.5m in height, 0.1-0.5m spread The bottle cactus is aptly named, with each of its jointed, narrow segments shaped like an upside-down bottle! It has a bushy, often spreading, habit and is densely branched which causes the longer stems to dangle and droop. In late spring and early summer, it bears tiny 1.5cm wide flowers at the tips of young stems that are funnel-shaped and orange or yellow in colour. 15) Rose Pincushion BOTANICAL NAME: Mammillaria zeilmanniana HARDINESS RATING: H2 FLOWERS: pink and purple FLOWERING SEASON(S): summer SUNLIGHT: full sun SOIL REQUIREMENTS: sand or loam; any pH SIZE: 0-0.1m in height, 0.1-0.5m spread Rose pincushion is a neat-looking cactus that consists of several clustered spherical stems with a ring of little flowers, quite like a wreath, atop each plump stem. The stems are only several centimetres high and wide and have an abundance of fine, long thorns. Just as abundant are the wee 2cm flowers which are of a purple-pink hue. Though summer is the prime blooming season, this cactus flowers at other times of the year too. 16) Owl’s Eye Pincushion BOTANICAL NAME: Mammillaria parkinsonii HARDINESS RATING: H2 FLOWERS: pink and yellow FLOWERING SEASON(S): spring / summer SUNLIGHT: full sun SOIL REQUIREMENTS: sand or loam; any pH SIZE: 0.1-0.5m in height, 0.1-0.5m spread Similar to the cactus listed above, owl’s eye pincushion is made up of tightly packed clumps of ball-like stems that, though green, appear greyish because of the profusion of long white spines. Stems are about 15cm high and wide. In spring, this cactus bears several tiny little flowers atop each stem that are usually rich yellow or bright pink. Another RHS AGM recipient. 17) Ladyfinger Cactus BOTANICAL NAME: Mammillaria elongata HARDINESS RATING: H2 FLOWERS: pink and yellow FLOWERING SEASON(S): summer SUNLIGHT: full sun SOIL REQUIREMENTS: sand or loam; any pH SIZE: 0.1-0.5m in height, 0.1-0.5m spread In summer, the ladyfinger cactus bears very small, cup-shaped flowers from its rounded stem. Although they are usually pink with yellow tinges, what makes this cactus quite unusual is that sometimes the colour is cream or white. 18) Wine-Fragrant Chin Cactus BOTANICAL NAME: Gymnocalycium tillianum HARDINESS RATING: H2 FLOWERS: pink and red FLOWERING SEASON(S): summer SUNLIGHT: full sun SOIL REQUIREMENTS: sand or loam; any pH SIZE: 0-0.1m in height, 0-0.1m spread Neither fragrant or wine, wine-fragrant chin cactus is a little delight and has been awarded with RHS AGM status. It is a solitary ball of a greyish-green hue with pronounced longitudinal ridges which have long, sharp thorns. This ball is up to 12cm across. In summer, it produces funnel-shaped flowers measuring about 5cm in diameter that are often a bright pink shade. 19) Purple Prickly Pear BOTANICAL NAME: Opuntia macrocentra HARDINESS RATING: H1C FLOWERS: yellow and red FLOWERING SEASON(S): spring / summer SUNLIGHT: full sun SOIL REQUIREMENTS: sand or loam; any pH SIZE: 0.5-1m in height, 0.5-1m spread From the same genus as the very well-known prickly pear, we feature two lesser-known species. First up is the purple prickly ear. Like most other members of the genus, it has jointed flattish ovoid segments and a bushy form. It bears somewhat cup-shaped flowers that are yellow with a bright red centre. The story here is about the stem segments as they are usually a greyish-rose shade of purple, which is rare among cacti. 20) Wheel Cactus BOTANICAL NAME: Opuntia robusta HARDINESS RATING: H1C FLOWERS: yellow FLOWERING SEASON(S): spring SUNLIGHT: full sun / part shade SOIL REQUIREMENTS: sand; alkaline to neutral pH SIZE: 0.5-1m in height, 0.5-1m spread Also from the same genus as the prickly pear is Opuntia robusta. It too is of a bushy habit and the stems consist of jointed flattish ovoid segments that are usually a wonderful, eye-pulling, rich shade of green. This one’s funnel-shaped blooms are of a brilliant, vibrant yellowy-orange hue. 21) Bishop’s Mitre BOTANICAL NAME: Astrophytum myriostigma HARDINESS RATING: H2 FLOWERS: yellow FLOWERING SEASON(S): summer SUNLIGHT: full sun SOIL REQUIREMENTS: sand or chalk; alkaline to neutral pH SIZE: 0.1-0.5m in height, 0-0.1m spread Consisting of 5-7 segments in a star shape, the charm is that each segment is shaped quite like a bishop’s hat! Something that is equally charming and uncommon, this cactus lacks any thorns. It is a dull greyish-green and rises to 15-20cm in height, producing 5cm wide yellow flowers throughout the summer months. The RHS Award of Garden Merit has been awarded to this cactus. 22) Silver Torch BOTANICAL NAME: Cleistocactus strausii HARDINESS RATING: H2 FLOWERS: red FLOWERING SEASON(S): summer SUNLIGHT: full sun SOIL REQUIREMENTS: sand or loam; any pH SIZE: 1-1.5m in height, 0.5-1m spread Tall, columnar stems that grow to 1-1.5m and branch from ground level, silver torch is a cactus you might see in a Western film. The profusion of fine thorns are arranged in neat vertical lines along the stems. During summer, it produces a plethora of tubular flowers ranging up and down the stems that are of a dramatic deep, rich red hue. This cactus is a recipient of the RHS Award of Garden Merit. 23) Ground Master BOTANICAL NAME: Echinocactus texensis HARDINESS RATING: H4 FLOWERS: pink and red FLOWERING SEASON(S): spring / summer SUNLIGHT: full sun SOIL REQUIREMENTS: sand or loam; alkaline to neutral pH SIZE: 0-0.1m in height, 0.1-0.5m spread The ground master has only one solid barrel-shaped stem set deep in the soil, which is heavily ridged and projects hard, sharp thorns. The stem, when fully grown, is about 20-30cm and is flattish at the top. In summer, it produces bell-shaped blooms that have a frilly, ruffled appearance. They are usually in a pastel shade of pink with which the red throat and yellow stamens make a pretty contrast. References 1. Thornton, B. (2007, January). Nichols Turk’s Head Cactus Conservation. Friends of Ironwood Forest. Retrieved March 15, 2023, from https://ironwoodforest.org/about/the-monument/nature/nichols-turks-head-cactus
Learn more


