

Growing
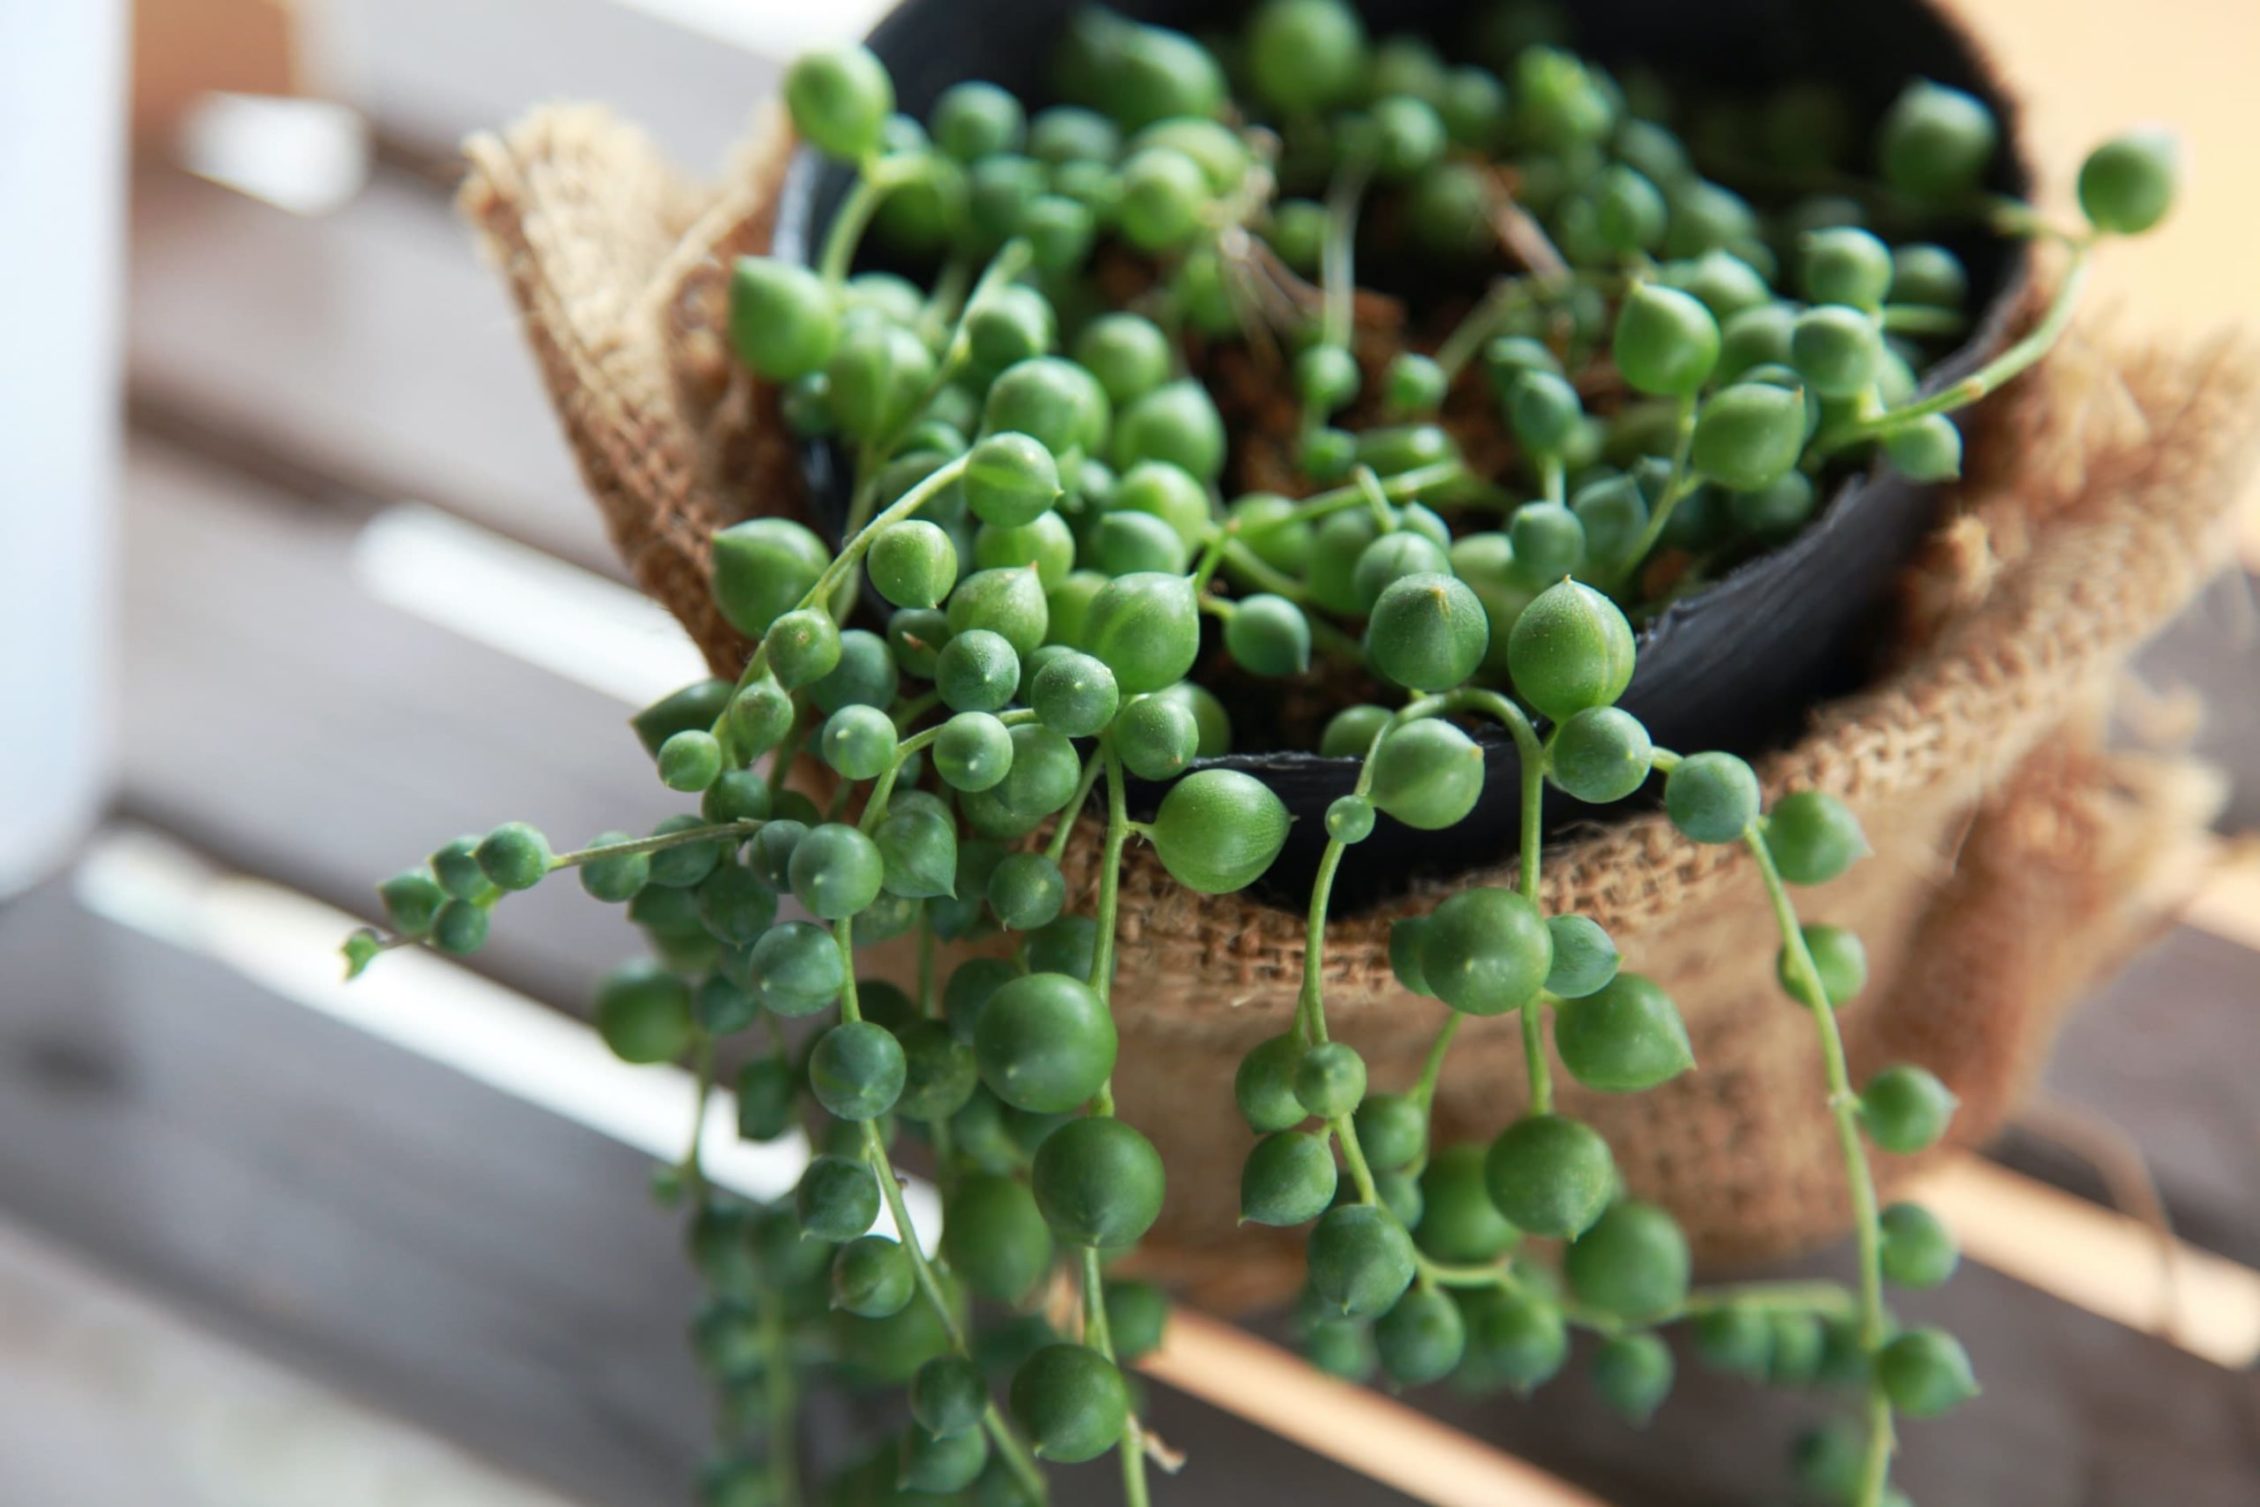

Kalanchoe Succulents Make A Great Choice For Houseplant Lovers: How To Grow Yours
IN THIS GUIDE Overview Kalanchoe Varieties Where To Grow Kalanchoe Kalanchoe Succulent Care Propagating Kalanchoe References Growing Kalanchoe succulents can be a great choice for houseplant lovers, since they require little expertise. You don’t need to be the most green-fingered of people to give it a go. There are some excellent varieties to choose from and they are all relatively simple to propagate and grow. “I’m a big fan of kalanchoe,” shares Garden Blogger Michael Perry. “This is a plant that is succulent and has lovely flowers on it. It will also perform outdoors with up to 4 months of flowering. “It really isn’t demanding when it comes to watering and will forgive a lot of mistakes, even when it gets hot and dry.” Overview Botanical Name Kalanchoe Common Name(s) Flaming Katy / Widow’s Thrill Plant Type Succulent Native Area Madagascar & Tropical Africa Hardiness Rating H1A Foliage Varied succulent leaves Flowers Some cultivars bear vibrant flowers in many colours When To Sow Year-Round Flowering Months April, May, June, July, August, September Kalanchoes are beautiful houseplants to enhance the interiors of your home, as Master Horticulturist Colin Skelly explains: “When I’m asked for a recommendation of a houseplant, I will often suggest a Kalanchoe. “They are great fun to grow and you can progress from easier species to greater challenge. “They are also easy to propagate and a great source of potted gifts for friends and family.” In order to understand how to care for any houseplant, it can be useful to delve a little into their native environment and the conditions in which they naturally thrive. Kalanchoe plants are a genus in the Crassulaceae family.1 There are around 150 different species within this genus, most of which are shrubs or herbaceous perennials.2 They are tropical succulent flowering plants that are mostly native to Madagascar and large regions of tropical Africa.3 A number of different plants within the Kalanchoe genus are commonly cultivated as houseplants, or used in succulent or rock gardens in warmer climes. They are popular for their drought tolerance and ability to survive in low-water conditions. They are typically popular houseplants because of their attractive and interesting flowers and foliage, and because they are pretty easy to care for and grow. Kalanchoe Varieties If you are interested in growing Kalanchoe, you might be wondering which species and variety to choose. Here are some of the popular options that you might like to consider: K. blossfeldiana Flaming Katy comes in many different hues. This is the Kalanchoe plant most commonly grown as a houseplant. It is sometimes called ‘Flaming Katy’, or ‘Panda Plant’. This species has large flower heads that come in a range of hues. Naturally, these Kalanchoe will bloom in the spring, though they can be forced to flower at any time throughout the year. K. porphyrocalyx The pretty purple, pendant flowers on this type of Kalanchoe give it its popular name ‘Pearl Bells’. This is another attractive variety that looks rather delicate with its bell flowers and slender leaves. K. manginii This species also has bell-shaped flowers, though somewhat larger ones – it also has fleshy leaves. While most Kalanchoes are relatively unfussy when it comes to humidity levels, this one needs moist air to flower successfully. K. pinnata Kalanchoe pinnata with tiny plantlets forming K. pinnata has fleshy green leaves and forms tiny plantlets around the edges of the parent plant. K. beharensis The best thing about this species is its large, lush and velvety leaves that shimmer a soft silvery green. Where To Grow Kalanchoe Kalanchoe can be grown outdoors in USDA planting zones 10-12 (RHS Hardiness Zones H1B – H3). Temperature & Sunlight Since the UK lies within USDA Zones 6-9, this means that it is not usually possible, except in the most dramatically mild of gardens, to grow these plants outdoors. These plants need plenty of sunlight and warmth, so it is best to position them in a room which is light and bright. However, it is best to avoid placing them on south-facing window sills or in direct sunlight. When in direct sunlight, the leaves can scorch, and the plant may not bloom. The good news is that when it comes to temperature and humidity, Kalanchoe plants are not too fussy. As long as the temperature fluctuations within the room in which it is placed are not too extreme, these plants will thrive at a range of temperatures between around 12-27°C. Soil Requirements As a succulent, kalanchoe needs a growing medium that does not contain too much moisture. It is also important to choose a pot or container that will wick excess water away more easily. A clay pot filled with 50% potting soil and 50% grit will be suitable; make sure there is good drainage at the base of the pot. In terms of the size of the container, what is required will depend on the size of the specimen, but mature single plants are usually grown in pots around 17-18cm in diameter. Alternatively, two or three plants can be clustered together and grown in one pot of around 21-22 inches in diameter. Do not choose a pot overly large for your plant, as this could make problems with waterlogging and excess moisture more likely. Kalanchoe Succulent Care Kalanchoe, like many other succulents, are plants that you can ‘kill with kindness’. The biggest mistake you can make is watering them too much. These are plants that can, to a certain extent, thrive on neglect – so if you are someone who is not that good about remembering to water your houseplants, this could be a good choice for you. These plants should only be watered well every few weeks or so over most of the year – and even less over the winter months. Between waterings, you should let the plant dry out entirely. To check to see whether you need to water, stick your finger into the growing medium – if there is any moisture there at all, hold off a few more days before watering. To prevent problems such as root rot, watering too little is always better than watering too much. Remember, like other succulents, Kalanchoe stores water in its leaves to see it through a drought. The only other care that will be required for best results is fertilisation. You should only ever use an organic plant feed, and never overdo fertilisation – especially when it comes to nitrogen. Like other flowering plants, a fertiliser that is rich in potassium will help boost blooms. Apply a fertiliser with balanced NPK (nitrogen, phosphorus, potassium) a couple of times over the growing season. How To Get Kalanchoe To Flower Some people have issues when trying to get their Kalanchoe to bloom again once the initial flowers have faded. Kalanchoes are photoperiodic. In other words, they bloom in reaction to light and require dark periods to flower repeatedly.4 It may be that they have not received the requisite amount of darkness. Make sure they get 12-14 hours of darkness every night for a couple of months over the winter and they should bloom again the following spring. If you want to ‘force’ your kalanchoe – in other words – get it to bloom for a specific time such as Christmas, for example, you need to ‘trick’ the plant into thinking that it has come through winter and into spring. Minimise watering and make sure the plant has 14 hours of darkness and 10 hours of light each day for a minimum of 6 weeks before the desired bloom time (to send it into dormancy). As soon as you see flower buds, you should move the plant back to a brighter spot and start watering as usual. Remove the spent flowers to make sure the plant does not put energy into sustaining spent blooms, and to encourage new buds to form. In the right conditions, and usually without much effort on your part, having Kalanchoe plants in your home should allow you to enjoy bright blooms for up to 6 months of the year. Propagating Kalanchoe One of the reasons that succulents like Kalanchoe are so popular to grow is that, once you have one, it is incredibly easy to propagate your plant and increase your houseplant stock. If you know someone who has a Kalanchoe plant that you admire, you might even be able to ‘steal’ a little stem segment to propagate a new plant from it for yourself. All you have to do is take a stem segment from a mature plant, let it ‘cure’ or dry out for a few days, then place it into a pot with a suitable growing medium. Hold off watering and it should root within around 4 weeks or so.5 With some varieties, you can simply remove and plant the plantlets that form around the parent plant. References 1. Rhodiola (Rhodiola rosea L.). (n.d.). Science Direct. https://doi.org/10.1016/b978-0-12-812491-8.00052-7 2. Kalanchoe. (n.d.). Plants of the World Online. Retrieved June 27, 2023, from https://powo.science.kew.org/taxon/urn:lsid:ipni.org:names:30060186-2#children 3. Trinklein, D. (2017, January 5). Kalanchoe: The Versatile Houseplant. Integrated Pest Management: University of Missouri. Retrieved March 20, 2023, from https://ipm.missouri.edu/MEG/2017/1/Kalanchoe/ 4. Currey, C., & Erwin, J. (2011). Photoperiodic Flower Induction of Several Kalanchoe Species and Ornamental Characteristics of the Flowering Species. Hortscience, 46(1), 35–39. https://doi.org/10.21273/hortsci.46.1.35 5. Davenport, M. (2007, April 20). Kalanchoe. Home & Garden Information Center. Retrieved March 20, 2023, from https://hgic.clemson.edu/factsheet/kalanchoe/
Learn more
Here's What These Sedum Growers Argue Are The Most Essential Rules For Thriving Plants
IN THIS GUIDE Overview How To Grow Sedum Planting Sedum Care Common Problems Sedum – or stonecrop – is a popular succulent. They’re resistant to heat, drought, and other harsh conditions, making them great plants for beginners. One of the reasons this plant is so popular is its enormous versatility in appearance. Some varieties sport jelly-bean-like buds, while others have hugely flamboyant yellow flowers which seem to paint sunshine right across your garden. “Sedum is a large genus with a huge variety of species that include types for succulent collectors through to hugely popular garden favourites,” shares Master Horticulturist Colin Skelly. “As a garden perennial, they are tough, drought tolerant when established and provide beautiful late summer flowers.” For this guide, we’ve worked with some of the most experienced sedum growers in the UK: Ray Stephenson – Editor and Chairman of The Sedum Society. Niamh Mullally – Owner of Southwold Succulent Co. “The palette of colours, especially on the evergreen varieties, makes me particularly passionate about growing sedums,” says Niamh. “Once established, maintenance is minimal, and they have a great capacity to thrive in droughts and survive harsh winter conditions.” Overview Botanical Name Sedum Plant Type Succulent Native Area Mostly northern hemisphere; Africa and South America Hardiness Rating Various Foliage Succulent leaves and stems Flowers Various When To Sow April, May Flowering Months June, July, August, September, October Although the sedum genus also includes annual and biennial plants, the majority of popular varieties are perennial. Before choosing your Sedum variety, bear in mind the wide range of potential aesthetics. Researching the varieties available, and understanding what each will look like throughout its lifetime, is a key part of choosing the right Stonecrop for your garden. This is especially true if you’re planning to create a succulent display or rock garden, something along the lines of the image above. Whatever variety you choose, you can expect carpets of colour from yellows and oranges, to reds and pinks – and even turquoises, blues and greys. How To Grow Sedum Sedum doesn’t grow as large as some other plants. The maximum height for the varieties above is about 0.5m, although many will be smaller. People enjoy Stonecrops for their mat-forming tendencies – giving you low, wide spreads of colour and visual interest. “Grow Sedums in your garden for a drought-proof, bug-proof, windproof, hardy, late-summer spectacular in full sun on average soil,” says Katherine Crouch, an award-winning garden designer. “Neither fussy nor invasive, you can split your sedum every three years and it won’t splay.” If after reading this far you’ve decided to introduce a Sedum to your garden, here’s what you need to know. Hardiness Each of the varieties above has a hardiness rating of H5 or higher, meaning they can survive down to -10°C – or pretty much everything a British winter can throw at them. Several varieties are rated H6 or H7, meaning they’ll still manage down to below -20°C. Soil Requirements “I recommend John Innes no 3,” says Niamh. “When combined with perlite, it’s sufficiently free-draining whilst being a permanent planting medium.” All the varieties above will do just fine in sand or loam, with others being happy in chalk or clay as well. They’re generally not fussy about pH, with most varieties accepting alkaline or neutral soil. A couple can manage acidic, too – best to check the specific needs of the variety you choose. The most important thing when planting a Sedum is the moisture level. “Concentrate on your soil mix. Never use multi-purpose compost and make sure it’s free draining before you plant,” warns Niamh. Your soil should be well-drained, but this isn’t a plant that will grow well in waterlogged or even overly moist soils. Planting Most Stonecrop varieties require full sunlight to thrive, although a few can make do in partial shade. All of those above will grow well while facing south, but beyond that, there’s no hard-and-fast rule for which direction your Stonecrop should face. Some in our list are quite versatile, being able to cope with three or even four directions. Others are fussier, and will only grow their best in a south-facing aspect. Our advice is to look at specific information for the variety of Stonecrop you’re planning to plant. Plant Out In Spring The best time to plant a Stonecrop is spring, after the risk of frost has passed and before summer starts to heat up. Make sure to plant out in the correct soil conditions, as newly-planted Stonecrops will be most liable to damage. Planting Out When planting from seed, leave at least 15cm of space between each plant. Also make sure to read up on your variety, because certain ones need more space – sometimes up to 60cm. If you’re growing from a division taken from another Sedum plant, ensure the whole root ball is covered by soil. The hole should be deep enough that the entire root ball is buried just below the surface. Cuttings are even more straightforward: just place the cutting in the hole and cover it over. If soil conditions are correct, then your plant should take root easily. Sedum Care Newly planted Stonecrop plants need a bit of TLC to become properly established. Keep a careful eye on the soil moisture levels, making equally sure that they don’t stay too wet or get too dry. Once your plant is established, you don’t need to be quite so vigilant about moisture levels. Sedums are succulents, after all: a type of plant noted for its ability to weather drought and retain water for dry spells. Sedums will appreciate a layer of compost being added to the soil once a year. Avoid anything too high in nitrogen, as this can cause wilting. If you’re growing your sedums in a container, Niamh has the following advice: “In Suffolk, I use 40% soil to 60% perlite for my growing medium. This ratio can be increased to 20/80 if you’re in a wetter area. “Keep a bag of horticultural grit in your shed or greenhouse. The grit level may drop after a harsh winter and a top-up in springtime will revive your containers.” Pruning Stonecrops can be safely pruned back to keep them from getting unruly. If you’re planning to prune, deadhead after flowering. There’s no need to do this, however, and the choice is purely aesthetic. Some gardeners prefer to leave the fading flowers to add a bit of extra colour. Common Problems Stonecrops are relatively well-behaved when it comes to pests. However, Ray explains that the problems that might face sedums vary massively depending on the variety. “Some varieties need specialised horticulture, whilst others are difficult to kill. You need to know the requirements of the one you are growing.” Take the usual garden precautions, and you should be able to avoid spending your whole life battling pests and infestations. As we’ve said throughout this guide: your best bet is to look at specifics for the type(s) you’ll be planting in your garden. Some are renowned for being pest-free, while others have slightly higher tendencies of attracting certain critters. Knowing which precautions you should take can help you to avoid problems before they arise. Here’s what to look out for: Glasshouse Whitefly This is a sap-feeding insect that likes to suck the life-giving nectar out of all sorts of plants. Sadly, certain varieties of Stonecrop are on their preferred menu. Sometimes you’ll see the insects themselves – small, with white wings. Other times you may notice their calling card – sticky residue on your plants. Once whiteflies establish themselves, they can be hard to remove. Deliberately introducing small wasps is one way to control this pest (you can order them online). Alternatively, certain organic sprays can bring them under control. The best way to avoid whiteflies is to keep on top of weeding, and checking bought plants for any signs of infestation before planting them out. Aphids These fellas also like to suck sap, and are also attracted to certain varieties of Stonecrop. As with whiteflies, you’ll usually be able to see aphids with the naked eye – they’re small and green, and hang around on the leaves of plants they’re feasting on. If your Stonecrop looks weak or generally unhealthy and you can’t see any aphids, take a closer look – sometimes they lurk out of sight. Small amounts of aphids can be tolerated, but if they start to get out of control, certain pesticides can be used to remove them. The health of your plant is the benchmark of whether an infestation is getting out of control. Glasshouse Red Spider Mite Yet another bug that will help itself to the sap from your Stonecrop’s leaves, the glasshouse red spider mite is worth keeping an eye out for. The symptoms will be similar to previous pests in this list: an unhealthy plant with stunted growth, with a possibly mottled appearance. This mite thrives in warm conditions, so an outdoor plant will probably be safe in winter. If your Sedum is growing in a greenhouse, keep a lookout all year round. Removing infected plants immediately is a good way to prevent further spread; otherwise, predatory mites and certain types of pesticides offer effective control.
Learn more
Money Plant Growing Tips Featuring Experienced Grower Ralph Behrmann
IN THIS GUIDE Overview Habitat & Growing Conditions Planting Plant Care Cleaning Money Plant Leaves Pruning Propagation Common Problems References Crassula ovata (AKA ‘Money Plant’) is a succulent evergreen originating from Eastern South Africa.1 It grows in a wide latitude of conditions, is easy to care for, and is long-lived. Bearing shiny, chunky leaves and inflorescences of pretty white or pinkish flowers, this attractive ornamental is low-maintenance and high-decor – no wonder it is such a popular houseplant the world over. In this guide we interview and feature Ralph Behrmann, an experienced grower and supplier at Clouds Hill Succulents. Overview Botanical Name Crassula ovata Common Name(s) Jade Plant, Money Plant, Friendship Tree Plant Type Succulent Native Area Eastern South Africa Hardiness Rating H2 Foliage Evergreen succulent leaves Flowers Small, white When To Plant / Repot Spring – Autumn Money Plant, Jade Plant, Penny Plant, Lucky Plant, Friendship Tree, Dollar Plant, Silver Dollar Plant, Kerky Bush – all these names, most of them suggesting prosperity and fortune, identify one and the same plant, Crassula ovata. An evergreen shrub that is as sturdy in constitution as it is in appearance, this plant can tolerate varying sun-shade balance, dry weather, and even drought conditions, and is super-easy to propagate. It is equally easy to grow and care for both outdoors and indoors, and its versatility extends even to being the plant of choice for learning bonsai: its toughness allows it to withstand rough pruning and its natural attributes make for a lovely miniaturised tree. However, the majority of Jade Plants grown by gardeners are neither outdoor plants nor bonsai but are potted houseplants. Potted specimens typically attain heights of between 45-75cm but in their native habitat, C. ovata can grow as tall as 2m. When plants get a lot of sunlight the leaves develop an eye-catching red edging, specifically a deep ruby-red shade. Conversely, if nights are long and the overall temperature is on the cool side but the plant gets sufficient sunlight, older specimens will bloom in winter – though this is unusual in indoor potted plants. When it does, the inflorescences are lush – each one is about 5cm both in length and diameter and bears a profusion of short-lived but charming flowers. These are star-shaped with lanceolate petals and are white, pink, white with pink tinges, or cream. Habitat & Growing Conditions C. ovata itself is hardy to RHS H1C (USDA Zone 11) but some cultivars are hardy to lower zones; for example, Gollum and E.T.’s Fingers are hardy to RHS Zone H3 (USDA Zone 9). They do best in warm and dry climates – think Arizona – and in their native South Africa they are often found growing among dense vegetation, primarily succulents, in valleys and in lonely clusters on stony hillsides.2 In damp soil or humid climes they are susceptible to stem rot and fungal diseases, as Ralph explains: “From the feedback I get from my customers, poor water management is a huge problem. Many people want to give water to a plant every day, whereas this shouldn’t happen.” “More humid environment such as bathrooms works well only for epiphytic succulents, such as rhipsalis or peperomias. “Crassulas need a place in the house where the air humidity is not too high and definitely do not require misting” – helping to expel a common myth of crassula plant care. In areas such as the UK which are typically below their designated hardiness zone, Money Plant and its cultivars cannot survive cold weather outdoors and effectively become annuals. However, plants will survive the winter if they are brought indoors and the temperature drops no lower than 10°C. Planting Chinese Money Plant can be planted around the year but it is not advisable to do so in the winter because this is the plant’s dormant season. Growing the plant in winter, especially in unfavourable zones or climates like the UK, may prove troublesome. It is smart to plant it between mid-spring and mid-summer, which is plumb in the middle of this succulent’s active growing season, to facilitate strong rooting and fast growth. Plant Care Temperature & Sunlight “Most succulents are not only adapted to sunlight, they also need a sufficient amount of it in order to thrive”, says Ralph, when discussing the importance of light and succulents. This sporting plant will make do with virtually any mix of sun and shade provided that the afternoon sun is not too hot or direct. The ideal sun-shade mix is about four hours of morning sun and the rest in shade. The ideal temperature ranges for C. ovata are 20-25°C during the day and 12-15°C during the night. “In the summer months, placing your Crassula ovata outside will expose it to higher light levels, which will cause the plant’s leaves to take on vibrant red colouration,” advises Expert Horticulturist Colin Skelly. “Just be careful to make sure the plant does not get too ‘baked’ or, almost as likely, too wet in an English summer! “Make sure to bring it back inside before temperatures fall in autumn.” Soil Requirements This plant requires a rich soil mix that drains well – make that very well. A sandy loam with compost, and including gravel and perlite in the topsoil, is ‘right on the money’. The pH may fall anywhere from moderately acidic to slightly alkaline, with 6.0 being perfect. Because of the way Money Plants grow and use nutrients in the soil it is almost a necessity to repot containerised plants in fresh soil about every three years. Watering In the spring and summer growing season they should be watered freely but let the soil dry out completely before watering again – even consistently moist soil is a no-no. Winter is Jade Plants’ dormant season and during these three or four months, the plant should be watered infrequently and with little water so that its soil remains drier for longer spells than in summer. Bottom watering your plants during this period can help – so that soil is not left wet and waterlogged – but your plant is able to suck up water when needed through its roots. These lengthier dry periods in the winter combined with some bright sun and mostly deep shade in the day and cool nights are the triggers that bring mature plants, especially outdoor ones, to flower. Even mature plants do not flower annually but about once every three years. Feeding Though fertilising is not necessary, to feed plants organically compost can be mixed into the soil, and in spring and summer they can be fed with a diluted 10-10-10 liquid fertiliser every two months; alternatively, in early-spring add the appropriate amount of a balanced controlled-release fertiliser to the soil. Tricolour cultivar Cleaning Money Plant Leaves You can clean Money Plant leaves with water using two methods but in either case, do make sure that the water is at room temperature; it should not be either hot or cold. The less time-consuming method is to use a spray bottle or a pinched hose to emit a gentle jet or spray of water on the money plant’s leaves, taking care to wash the undersides of the leaves as well. Another method is to hand clean the plant: Put a small amount of mild, organic liquid soap in a basin of water, and with a soft cotton cloth, gently rub the soapy water on the leaves, including their undersides. Then use plain water and a different cloth for a wipe-off to get rid of the soapy residue. Cleaning leaves not only keeps the plant looking fresh and pretty, it also prevents infestation and disease. Pruning Pruning C. ovata is not necessary; do so if you have a specific reason. You can prune faded, dried-out flowers and browned or dead branches and leaves for aesthetic reasons. If your Jade Plant is in a small pot and you wish to limit its size or if you wish to sculpt an outdoor or indoor specimen, you can prune it. Annually pruning branches, especially emerging ones, will result in the plant becoming less bushy and developing a stout main stem or ‘trunk’. To prune, use a sharp pair of secateurs that have been disinfected. Prune a branch either by cutting it at a node or flush along its parent branch. Be mindful that when a branch is pruned at a node, more often than not two new branches will sprout from the node immediately underneath. At most, prune 20% of the plant’s branches and no more. It is advisable to prune in spring or summer to promote quick recovery. Propagation “Propagating succulents from cuttings is a secure form to replicate an existing plant” explains Ralph from Clouds Hill Succulents. “The plant you grow from a cutting will always look like the mother plant, whilst growing plants from seeds can be a bit of a shot in the dark”. However, C. ovata roots so strongly that when leaves or stems of outdoor specimens in favourable climates break and fall on the ground, they often root and become new plants in two to three weeks. As such, one can conclude that it is very easy to propagate this plant: Simply twist and pull a leaf so that it, along with its stalk, detaches cleanly from the stem. Let it sit in a dry and warm room for two or three days. Then place the leaf in loose favourable soil, gently pressing the stalk but a few millimetres under the surface. After a day put only some drops of water. Leaves should root in about four weeks. You can also cut off a small length of the stem using sharp and disinfected secateurs. Allow it a period of two to three days in a dry and warm room so that the plant can heal and to reduce the chances of rot. Then gently insert the cut end of the cutting into a favourable soil mix – stem cuttings should root in about three weeks. Though cuttings can be taken and rooted year-round, it is best and easiest to do so in the summer. Common Problems Though C. ovata in the main are free of diseases and infestations, the one pest that poses a threat is the mealybug. Compounding the problem, should such an infestation occur it cannot be treated with any of the usual insecticidal soaps or oils, even organic ones. The reason is that Jade Plants (like almost all other succulents) are hypersensitive to (organic or other) insecticides and their foliage can suffer serious adverse effects. One way to eliminate mealybugs is by pruning. If you spot an infestation that is localised in a small portion of the plant, you can prune that part using the technique described above. Alternatively, clean off the infestation. Soak cotton buds or a small cloth in rubbing alcohol and gently rub the infested surfaces so as to kill and wipe off the mealybugs. You will need to repeat this cleaning and disinfestation every day for several days, even up to two weeks, until all the mealybugs are gone. Continue for a few days even after no mealybugs are visible so as to do away with any larvae and newly-hatched insects. If your plant is outdoors you could fight fire with fire by simply letting loose beneficial insects that prey upon mealybugs. Release ladybugs, lacewings, and mealybug destroyers. Yellowing Leaves The most common cause of yellowed leaves is overwatering, which can lead to more serious problems including death. Immediately and significantly reduce watering, both in amount and frequency, and allow the soil to dry out before re-commencing watering. If you have not been overwatering then that would indicate that the soil is not draining well. In this case, you would need to transplant the Money Plant into a favourable soil mix that is well-drained. Overexposure to harsh direct sun can also turn a Money Plant’s leaves yellow because such exposure causes the plant to produce different pigments for protection from sunlight and UV rays. In such cases put up a barrier to shield it from the sun except for two hours in the morning until it recovers, or, if the plant is containerised, simply move it to a location where it gets no more than two hours of morning sun. If yellowed leaves are limp, soft, soggy, or falling off, then the cause is overwatering. If yellowed leaves exhibit no other symptoms or ill-effects, then the cause is too much sun. References 1. Crassula ovata (Mill.) Druce. (n.d.). Kew Royal Botanic Gardens. Retrieved March 28, 2023, from https://powo.science.kew.org/taxon/urn:lsid:ipni.org:names:273350-1 2. Crassula ovata (jade plant). (2022, January 7). CABI Compendium. https://doi.org/10.1079/cabicompendium.113574
Learn more


