

Growing
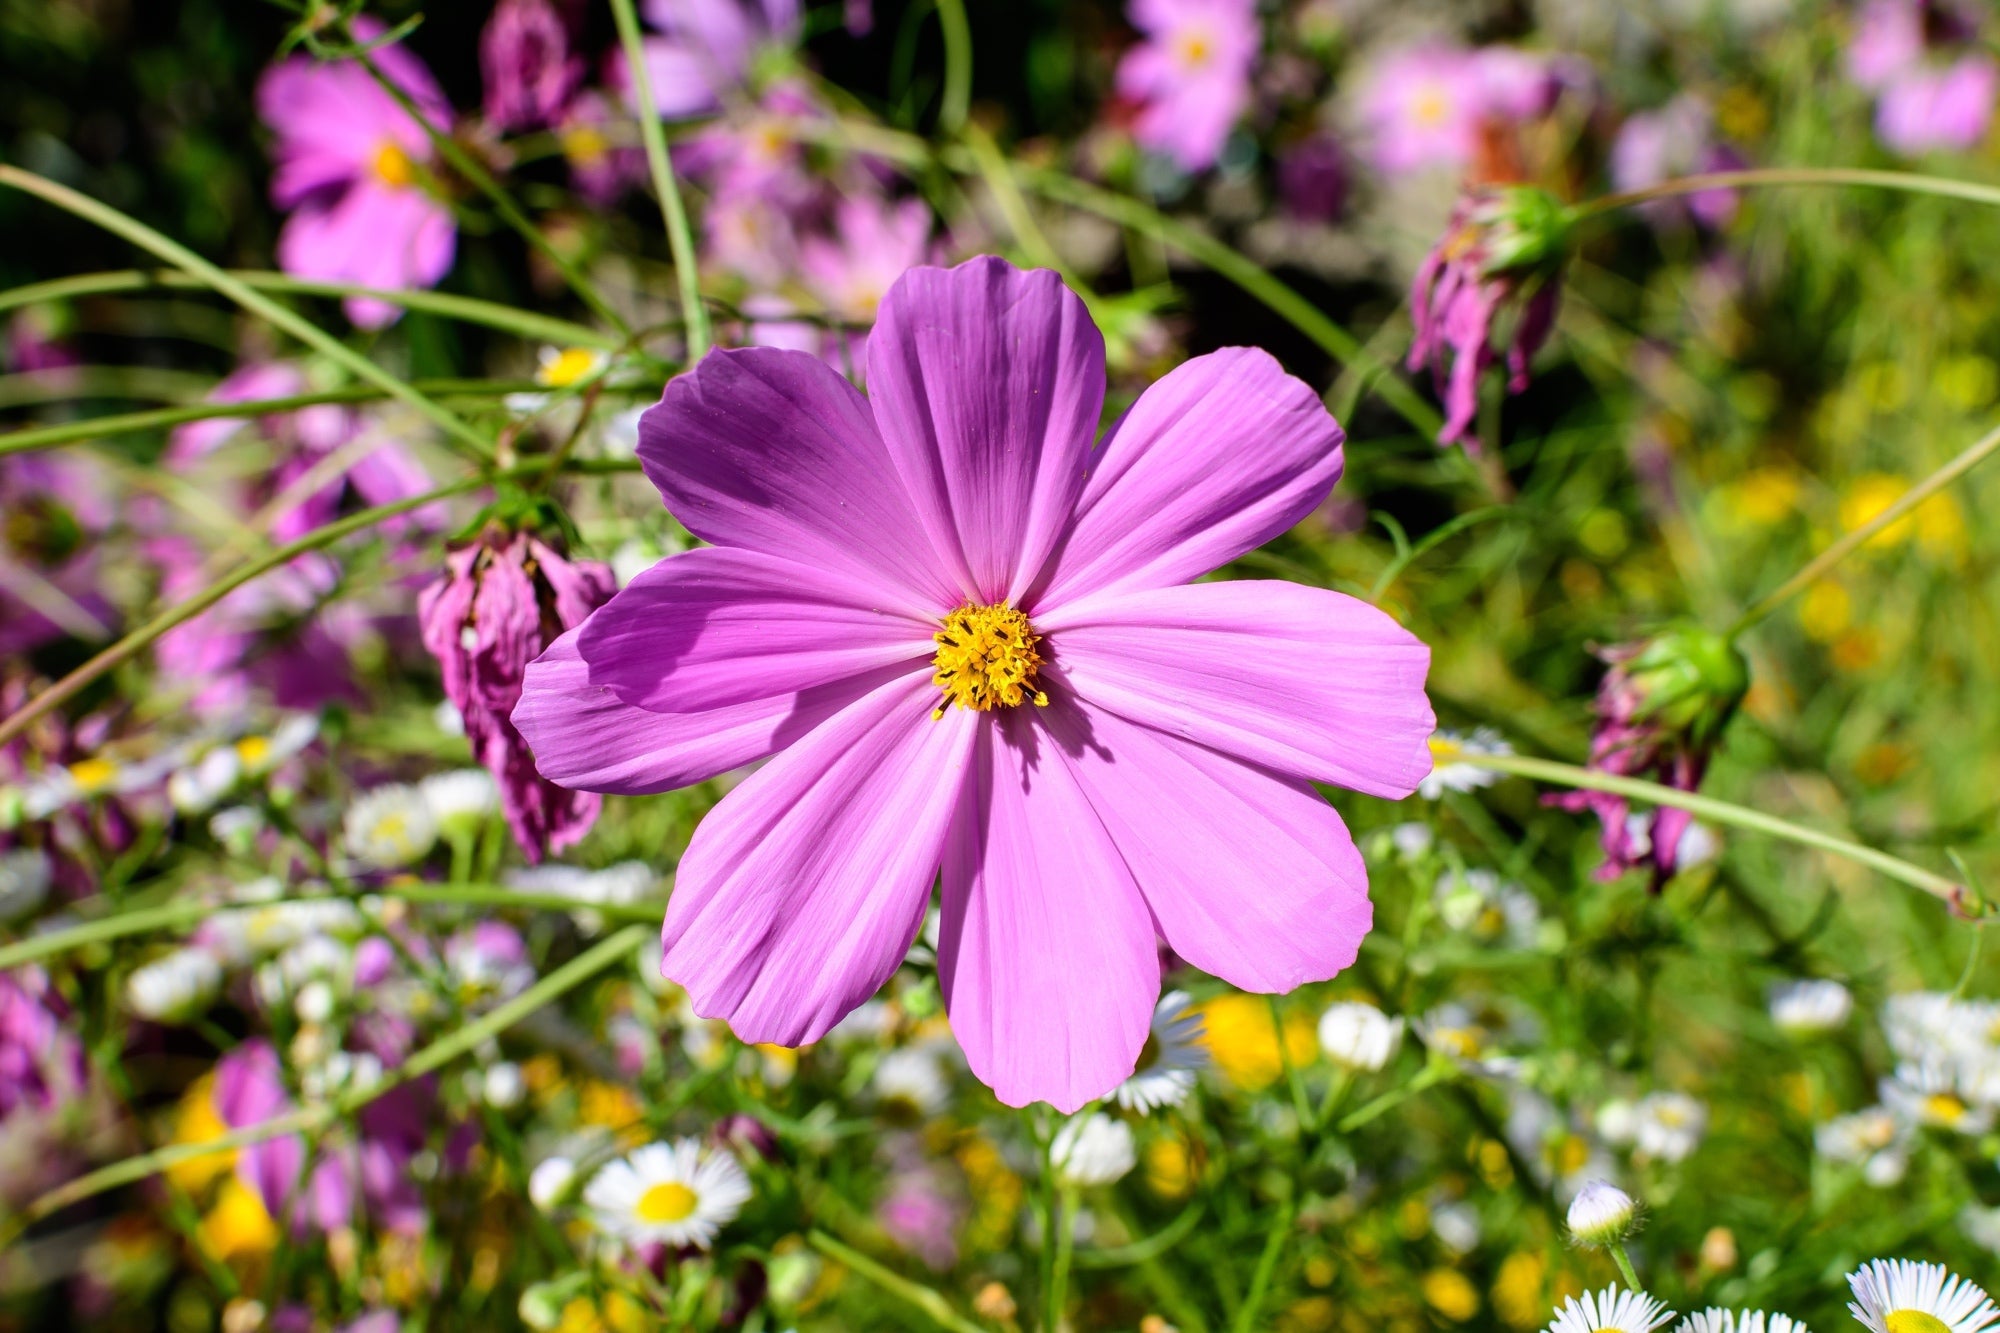

Emily Cupit's Trusted 5 Step Process For Sowing Cosmos Seeds Each Year
IN THIS GUIDE 1) Source Or Collect Your Seeds 2) Decide Where To Grow Your Cosmos 3) Sow The Seeds 4) Prick Out & Pot On If Required 5) Harden Off & Plant Out Cosmos are herbaceous flowering plants that belong to a Mexico-native genus. The most common cosmos to grow in British gardens is C. bipinnatus, also known as cosmea or garden cosmos. This is a half-hardy annual tolerating light frosts with daisy-like blooms in a range of hues that is, luckily, relatively easy to grow from seed. To grow cosmos from seed: Choose which cosmos you will grow and source or collect the seeds. Decide where to grow your cosmos – and if you’d like to grow indoors before transplanting or grow them directly outdoors. Sow seeds outdoors between March and May – or potentially even earlier if you are growing indoors. If you have sown your seeds indoors, prick out and pot on your seedlings. Harden off and plant out your cosmos seedings after the risk of frost has passed. Read on for a more detailed description of the steps above. Difficulty Easy Equipment Required Seeds, seed trays or pots, growing medium When To Sow March to May When To Plant Out April to May 1) Source Or Collect Your Seeds First of all, you should decide which cosmos variety you would like to grow. You can choose from lots of named varietals. When you are trying to decide which cosmos you would like, you should, of course, think about the colour and form of the blooms. However, you should also consider how tall the variety will grow, since some grow much taller than others. Many cosmos are compact and grow to only around 30cm in height, while others can grow to around 1m. Cosmos seeds are widely available online and in garden centres. If you or someone you know has some attractive cosmos, you might also be able to save seeds from those plants to sow the following year. 2) Decide Where To Grow Your Cosmos Cosmos are a useful and versatile flower that can be grown in a range of settings. They will do well in moist but free-draining soil. It is best to grow them in full sun, though they do not mind too much about the soil pH or about exposure. Cosmos can work well in many beds and borders and can be a great addition to a prairie scheme or cottage garden. You might also consider growing cosmos as a companion plant in your annual kitchen garden, as many varieties are great for drawing in bees and other pollinators. 3) Sow The Seeds Sow your cosmos seeds in spring. They can either be sown indoors in March or April or they can be sown outdoors once the last frost date has passed where you live. If you are sowing indoors, which is generally the better option here to protect from pests like slugs, place the seeds on top of your seed tray or pots that are filled with suitable seed compost. Cover them over with a little layer of the medium. For best germination, keep temperatures at around 16°C. An indoor propagator can be handy, though a simple zip-lock bag can also be used to help keep seedlings warm and humidity high. If you’d prefer to directly sow your seeds outdoors, you can sow thinly in rows or broadcast cosmos seeds into a prepared bed in a suitable location. 4) Prick Out & Pot On If Required If you have sown the cosmos seeds outdoors, then you simply have to wait and care for your cosmos as they grow. If you’ve sown cosmos seeds inside, then you should prick out the seedlings from their seed trays or pots once they are big enough to deal with and pot them on. 5) Harden Off & Plant Out Then, once there is no longer any risk of frost where you live, you can harden off your cosmos, slowly acclimatising them to the outdoor conditions, before you plant them out into their final growing positions. “As the plants grow, pinching out the growing shoots after three or four pairs of leaves have formed, helps to create bushier plants with more flowers,” shares Roy Nicol, a Master Horticulturist. Once you have your cosmos in a suitable location in your garden, they may well self-seed, so you can enjoy these flowers in your garden over a number of years and won’t necessarily have to start from scratch and sow new seeds each spring.
Learn more
Marigolds Make Amazing Companion Plants - Here's Why You Should Grow Them
IN THIS GUIDE Why Marigolds Make Great Companion Plants 1) Attracting Beneficial Wildlife 2) Trap Crop 3) Pest Repellent 4) Reduce Nematodes 5) Chopped & Dropped 6) Additional Yields 7) Ground Cover References Tagetes marigolds are attractive flowers which bloom over a relatively long period in the summer garden. There are several different types to choose from that can be grown as annuals in a UK garden. One of the great things about them is that they are pretty easy to grow from seed, fairly low-maintenance and, when positioned in the right location, they will readily self-seed and pop up again each year rather than having to be sown anew each spring. Marigolds, especially certain French marigolds, also make excellent companion plants. They can be beneficial companions for almost every crop you might grow in your kitchen garden. Why Marigolds Make Great Companion Plants French marigolds, Tagetes patula, are commonly planted in vegetable gardens because they are known to be excellent companions for a wide range of crops that are grown alongside them. The main reasons that marigolds make great companion plants is that they: Attract beneficial insects to the space. Serve as a trap crop for certain pests. Help to repel certain pest species with a secretion of limonene. May help to reduce harmful nematodes in the soil. Can be used as a chop-and-drop plant to maintain soil health. Provide a number of additional yields. Create good ground cover without increasing competition too much. We explain each of these benefits in more detail below. 1) Attracting Beneficial Wildlife Marigolds bloom over a relatively long period, providing nectar for a wide range of bees, butterflies and other pollinators. Many marigolds are therefore an excellent flower to draw pollinators into your vegetable garden where they are needed for the pollination of insect-pollinated crops. “Marigold ‘Burning Embers’ is one of my favourite varieties because the pollinators love it,” shares Ann-Marie Powell, a Garden Designer and TV Personality. “If you get the pollinators into your veg plot or patch, they will pollinate your vegetable flowers for you so you get higher yields.” Some insect-pollinated crops in a food-producing garden that could benefit from having marigolds nearby, for this reason, are tomatoes, peppers, squash, courgettes, cucumbers, as well as many fruit trees, cane fruits and berry bushes. Marigolds also attract insects that prey on pest species, such as ladybirds, hoverflies, lacewings and parasitic wasps. These keep down populations of aphids and can keep an ecosystem balanced so you don’t experience too much damage to your crops. This means that any crops bothered by aphids or other insect pests eaten by these predatory insects could benefit from having marigolds growing close by. 2) Trap Crop Marigolds can also potentially be used as a trap crop for several pest species. Trap crops attract the attention of pests, thereby keeping them off more valuable crop species in your garden. Marigolds can, in particular, be a beneficial trap crop for slugs. When placed around the edge of a kitchen garden bed as a sacrificial trap crop, they will draw slugs to them. Though some plants may be lost, you can collect slugs up before they threaten your other plants (if they are not picked off by other wildlife you should be attracting to your space). “Fascinatingly, chemicals exuded by the roots of Tagetes minuta have been shown to repel weeds such as couch grass and bindweed,” adds Master Horticulturist Peter Lickorish. 3) Pest Repellent French marigolds may also repel certain pest species. There is some evidence that suggests, for example, that they may help, at least partially, to keep cabbage moths away. Studies have also shown that the limonene they excrete can help somewhat in repelling whiteflies from the area.1 So, marigolds may be a beneficial companion for brassica (cabbage family crops) and any plants bothered by whiteflies for these reasons. 4) Reduce Nematodes One other way that marigolds are said to be useful as a companion plant is due to their ability to kill off nematodes in the soil that can pose a problem for crops. There are both beneficial and detrimental nematodes in garden soil. These are tiny, thread-like organisms and there are many nematodes that we need – and many that may become a problem for home growers. Marigolds produce compounds known as nematicides in their roots, but things are not quite as simple and clean-cut as some people believe.2 When certain nematodes attack certain French marigolds, they are killed off in that specific location and see a reduction in their numbers, but we cannot usually determine which nematodes we have in our soil, nor whether the marigolds we grow will truly be effective against them. Marigolds might also excrete a chemical that can repel nematodes in the surrounding area, though scientific consensus is lacking at present on whether or not this is the case. The science is currently inconclusive about whether companion planting with marigolds can help with nematode issues for nearby plants. What we do know, however, is that plants that follow marigolds immediately after them in rotation are less likely to be struck by nematode problems (such as root rot), especially when the marigolds’ roots are left in the ground after they have been growing in a particular area for 3-4 months. Certain varieties produce more of the nematicides and therefore can be more effective where this is a concern. They work best when planted closely spaced in a block. 5) Chopped & Dropped There is some evidence to suggest that marigolds chopped and dropped on the surface of the soil when the growing season comes to an end may also help with nematode issues. Dead plant matter won’t kill nematodes, but can promote healthy populations of soil biota that can help keep harmful nematode numbers lower overall. Also, since marigolds laid as mulch on the soil improve the soil health, this is also of benefit more broadly for a wide range of crops and other plants. 6) Additional Yields Marigolds also provide us with additional yields, which is another reason why they make a good companion plant to include in your vegetable gardens. Not only are they beneficial for other crops, they can also provide us with edible petals that can be used as a garnish. Scented French marigolds yield an essential oil that is used in perfumery and many types make wonderful cut flowers for home displays. 7) Ground Cover Marigolds also make good almost universal companion plants in a vegetable garden because when planted between or around other crops, they cover the soil, protecting it, conserving moisture and suppressing weeds. In doing so, they don’t take up too much water or nutrients that could affect the growth of other plants growing close by. They are not heavy feeders, so won’t introduce too much competition into your growing areas. Of course, you always still have to take sunlight, water and space requirements into account when planning where to put marigolds. As you can see from the above, marigolds can be a near-universal companion plant for your kitchen garden, so it is a great idea to grow them in a number of different polyculture combinations. Just make sure that your marigolds still get plenty of sun through the summer and they should thrive, helping other nearby plants to do the same. References 1. How the humble marigold outsmarts a devastating tomato pest. (2019, March 1). Newcastle University: Press Office. Retrieved March 21, 2023, from https://www.ncl.ac.uk/press/articles/archive/2019/03/whiteflieslimonene/ 2. Kruger, R., Dover, K., McSorley, R., & Wang, K. (2019, December 2). Marigolds (Tagetes spp.) for Nematode Management. University of Florida. Retrieved March 21, 2023, from https://edis.ifas.ufl.edu/publication/NG045
Learn more
Tagetes Marigolds Are Easily Grown From Seed - And Can Flower In As Little As 60 Days
IN THIS GUIDE Choosing A Variety When To Sow Tagetes Sowing Indoors Direct Sowing When we talk about marigolds in the UK, we might be talking about a number of different plants. Marigolds such as French and African marigolds are members of the Tagetes genus, but Calendula (Calendula officinalis) are also referred to as ‘Pot Marigolds’ here in the UK. In this guide, we are talking about Tagetes marigolds, which luckily, are very easy to sow. Difficulty Easy Equipment Required Seeds, seed tray, pots, growing medium When To Sow March to May When To Plant Out May to July Choosing A Variety There are several different types of marigolds that you might grow in your garden. The first thing that you will have to think about if you are considering growing these annuals from seed is which species and variety you would like to grow. French Marigolds You might consider: French marigolds (T. patula) African marigolds (T. erecta) Signet marigolds (T. tenuifolia) There are, of course, plenty of named varieties that you might choose within each of these categories. How you set about planting Marigold seeds is very much dependent on two factors: your geographical region and the Marigold type, viz. T. erecta versus T. patula – ‘African Marigold’ versus ‘French Marigold’. This is because T. patula cultivars come into flower within only 60 days while T. erecta cultivars usually need at least 75 days and even up to 100 to bloom. In conjunction with that, consider your region’s growing season – in the north and Midlands it will be shorter than in the south-west of the country. In most regions you should be able to plant T. patula cultivar seeds directly outdoors and enjoy a long blooming season. With T. erecta cultivars, your region’s growing season will dictate whether you can plant seeds outdoors or whether you should start them indoors. So, for example, in Leeds, with an average growing season of 163 days, if you sow seeds directly outdoors (not that we recommend it) you can enjoy T. patula Marigolds for three months but it would be a waste to sow T. erecta directly outdoors. When To Sow Tagetes When you will sow your marigolds will depend on whether you plan to sow them indoors or sow them directly where they are to grow in your garden. Typically, marigolds are sown between March and May. When planting indoors, you should aim to sow towards the beginning of this time period, and outdoor sowing should be carried out only after you pass the last frost date in your area. Refer back to the guidelines above and the different marigold types to plan when best to sow yours. Sowing Indoors If you decide to sow your marigold seeds indoors, prepare a seed tray or other containers filled with good quality compost that is rich, moist yet free-draining. A seed-starting compost is ideal. Scatter the marigold seeds over the surface of the growing medium, then cover them lightly (to a depth of around 5mm) with a little of your growing medium. The seeds should germinate relatively quickly, as long as you keep the trays or pots in a warm place. Marigold seeds do not need direct light to germinate but they do need the right temperature, and humidity is preferable. Soil temperature should hover around 21°C for the seeds to germinate. You can introduce humidity by covering (but not sealing) the pots with cling film or shrink wrap. You can usually expect them to germinate in 5-7 days or so. Once the seedlings are around 4-5cm tall, prick them out and pot them on into their own individual containers and grow them in a frost-free location until all risk of frost has passed in your area. Once all risk of frost has passed, you can harden off then plant out your young marigolds in the garden in a sheltered position that gets plenty of full sun. They should begin to bloom within a matter of weeks. Direct Sowing If you decide to sow marigold seeds outside where they are to grow, then you should make sure that you do so after the risk of frost has passed in your area. In late spring, prepare the area for sowing by clearing weeds and raking the soil level. “When sowing outdoors, especially in drifts, I find something called the stale seedbed technique very useful,” shares Master Horticulturist Peter Lickorish. “This means preparing the ground thoroughly a few weeks before you intend to sow, including forking and then raking to consolidate. “This gives a few weeks for any weed seeds, brought to the surface by your hard work, to germinate. “These can be lifted carefully, with minimal disturbance, and the ground can be sown into. “It should reduce the number of weed seeds which germinate later and then interlope among a drift of marigolds.” If planting into a bed or border, top dress this with well-rotted homemade compost. If you wish to grow marigolds in containers, fill these with a peat-free multipurpose mix, making sure that the soil is moist before planting. Just like when sowing indoors, cover the seeds only lightly. They should germinate well and relatively quickly. You can then simply thin the seedlings that emerge to give a final spacing of 10-20cm, depending on the specific variety that you have chosen to grow. They should also flower within weeks of sowing as long as they are in the right position and cared for correctly.
Learn more
6 Tips When Growing Cornflowers In Pots From Horticulturist Peter Lickorish
IN THIS GUIDE 1) Select A Non-Synthetic Container 2) Use Organic, Sandy Loam 3) Sow Before The Last Frost 4) Avoid Potting Up Or Transplanting 5) Limit Plants Per Pot For Greatest Effect 6) Keep Containers In Full Sun Cornflowers are annuals that display double-form, narrow-petalled, somewhat ruffled flowers of a deep blue tone. Besides the blue tones of the species plant, white, pink, purple and red flowers, often with darker centres, are also available. Regardless of the array of colours, these annuals are very easy to grow in containers or in the open ground. So can you grow cornflowers in pots? The answer is yes – and to great effect. Granted, this flower is best suited to cottage gardens and wildflower meadows, but if you live in a high-rise apartment, cornflowers will look brilliant in a pot on the balcony. Even if you have a garden, there’s no reason why you can’t grow cornflowers in pots. Difficulty Easy Equipment Required Pot or container(s), compost and sandy loam, a trowel 1) Select A Non-Synthetic Container Firstly, be sure that the container has drainage holes, as this plant needs excellent drainage. We suggest that the container is not made from a synthetic material – terracotta or clay is preferred. As you would be sowing cornflower seeds in their first and last pot, as we explain later, be sure to choose a container of the appropriate size. For the species plant or varieties of similar dimensions, a pot 30-35cm tall with a depth of 15L should be good enough. For dwarf varieties, choose an appropriately smaller pot. 2) Use Organic, Sandy Loam Soil for cornflowers should be slightly enriched sandy loam. Simply enrich a sand-based loam with some organic compost in a mix of around 1 part compost to 4 parts loam. If the compost is too rich, plants will become tall and leggy. It is essential for container-bound cornflowers to be rooted in soil that drains very well, so start with a layer of pebbles or gravel, then a layer of grit and also incorporate grit or perlite into the soil. Firm the compost down well, and top up, otherwise it will sink later on. The optimum soil pH for cornflowers is slightly alkaline to neutral. 3) Sow Before The Last Frost If you want to get off to an early start and are able to keep the containers indoors in a sunny spot for a month or so after seedlings emerge, sow seeds 2-3 weeks before the last anticipated frost. Otherwise, if you want to keep the pots outdoors to begin with, sow seeds about a week after the last frost. Sow 2-3 seeds in small pots and thin to one about three weeks after germination. For larger pots, broadcast loosely across the top of the compost. Moisten the medium, then nudge seeds into the surface and cover with a fine layer of the soil, around 1-1.5cm deep. This cover provides the darkness needed for germination. Do not pack it firmly. Moisten well after sowing and keep the medium moist. 4) Avoid Potting Up Or Transplanting Cornflowers are usually unfussy, vigorous plants, but if there’s one thing they are quite disagreeable to, it’s being transplanted. Besides, the species plant and most varieties are fast-growing annuals that don’t really need an early start, but, if you intend to grow them in pots, you can give them one by keeping the pots indoors until the season allows you to move them out. So, one way or another, you do not need to pot up or transplant cornflowers, and I’d suggest that you avoid doing so. 5) Limit Plants Per Pot For Greatest Effect For small pots, I’d suggest you go with one per pot, as although some varieties top out at 30cm, I think this plant looks best on its own. However, you could plant 4 or so in a wide enough planter to great effect, as Master Horticulturist Peter Lickorish shares: “I like to grow cornflowers in a trough with a mixture of cultivars for maximum interest. In fact, a trough of cornflowers was what ignited my interest in gardening as a 7-year-old. “It’s all the more rewarding if you save the seeds afterwards. Troughs also lend themselves to mini meadows, so you could sow poppies, cosmos and other annuals too.” I’d recommend that you try lining up 6 clay pots, with a blue cornflower plant in each, along the front wall of a dwelling or on a porch for a magnificent display. 6) Keep Containers In Full Sun Keep the containers in a location that receives full sun. Although afternoon shade is the next best option, any more shade will cause these sun-worshippers to struggle. Where watering is concerned, aim to keep the medium moist, allowing it to just dry out between waterings. Water in moderation but do so twice a week, or more often in hot and dry weather. Deadhead regularly to keep the blooms coming. “Once plants have reached 10-15cm high, I recommend pinching out the top growing point to encourage them to thicken up and, ultimately, produce more flowers,” says Peter. “The flowers may be slightly smaller, but in the long run, I find it’s worth it.” Though you do not need to fertilise cornflowers, doing so will certainly make for healthier plants with more profuse blooms. If you wish to fertilise the plants, about 6 weeks after the plants have germinated, feed them with an all-purpose liquid fertiliser at about 75% of the recommended strength. Keep feeding at intervals of 4-6 weeks.
Learn more
Sowing Cockscomb: This Plant Lives Out Its Entire Lifecycle Within A Year
IN THIS GUIDE When To Sow Celosia 1) Sow Cockscomb Seeds 2) Provide The Right Care 3) Transplant Seedlings 4) Harden Off 5) Plant Outdoors Celosia, or ‘Cockscomb’, is a bold and vibrant plant used to bring a splash of colour to gardens. This plant isn’t challenging to grow from seed and doing so is actually a reliable way to liven up your garden. As an annual plant, this is a process that will need to be done each year – as the plant lives out its entire lifecycle (germination to setting seed) within a one-year timeframe. Here’s a brief overview of the process: Sow your seeds indoors, preferably in seed-starting compost. Keep your seedlings at a consistent temperature and moisture level to encourage growth. Thin out your seedlings when they’re established to prevent them from competing for nutrients. Harden them off to get them ready for their journey outdoors. Plant out into your garden and wait for them to bloom. Let’s take a look in a little more depth. Difficulty Easy Equipment Required Seeds, compost, seed tray When To Sow February to April When To Plant Out Late May to June When To Sow Celosia In the UK you’ll need to sow your celosia seeds indoors for them to grow to a sufficient size within the year. February through to April is probably the best time to do this. 1) Sow Cockscomb Seeds The first step is to plant your seeds in compost. Lay out a layer of compost to fill the depth of a seed tray, then press the seeds lightly onto the surface and just cover with either compost or vermiculite. For best results choose a seed-starting compost, as this has the right balance of nutrients to facilitate healthy growth. “As Celosia seeds can be susceptible to fungal infections, it’s important to ensure equipment including the seed tray is clean before starting and the seedlings are not over-watered and allowed to dry out between waterings,” says Roy Nicol, Master Horticulturist. 2) Provide The Right Care Seeds need conditions to be just right in order to grow big and strong, which is one of the main reasons for planting them indoors. It’s much easier to control temperature and moisture levels inside. For best results, keep the temperature between 15-20°C as consistently as possible. A heated propagator can help to achieve desired results. Use a spray bottle to spritz the top layer of soil every other day, as this will keep the moisture levels in the right range. 3) Transplant Seedlings When your seedlings are starting to become established you’ll want to thin them out a little to give them space to grow. Keeping them bunched up will hinder their ability to thrive and will reduce the final size of your Celosia, as well as create ideal conditions for ‘damping off’. Prepare another seed tray by putting out a layer of compost, then gently move the seedlings out of the first tray. Leave a gap of 5cm between each seedling in this new one so they have space to grow. 4) Harden Off Hardening off ensures that your seedlings are ready for the harsher conditions in the outdoors of the UK. Skip this step at your peril, as a seedling that hasn’t been hardened off is more likely to die when you plant it out. Be aware that hardening off can take a couple of weeks, so make sure to incorporate this step into your daily schedule. I’d recommend making a note of it somewhere, either in your garden planning book or a calendar. Leave the tray of seedlings outside for a couple of hours during the day, in a sheltered and shady spot. Bring them indoors again that night. Repeat this for a few days, extending the time spent outdoors for an hour or so each day. 5) Plant Outdoors When your seedlings are fully established and hardened off, it’s time to plant them out. Late May or preferably June (well after the last frost) is the best time of year for this. Plant out into beds or containers of well-watered, well-drained compost. Leave a gap of at least 20cm between each young plant to ensure the adult plant has plenty of space to grow big and strong. Keep your seedlings well-watered as they grow. Celosia will be in bloom from June through October, giving you a medley of colour to enjoy in the summer months.
Learn more
Did You Know You Can Grow Celosia Indoors? Here's How You Can Maximise Its Impact
IN THIS GUIDE How Long Does Celosia Last Indoors? Indoors Celosia Care Celosia is a bold and bright annual whose blooms dazzle with their colour. Many gardeners choose the lively display of Celosia to energise their outdoor space, but guess what? You can grow them indoors, too! Growing Celosia indoors is not only possible, but it’s a great way to bring a splash of colour to your indoor spaces. Before you rush out to buy a Celosia houseplant though, let us run you through a few things you need to know. How Long Does Celosia Last Indoors? As an annual, the plant’s lifespan is something to keep in mind when growing Celosia. This isn’t a houseplant that will sit comfortably in some corner of your house, gradually growing over the years. Celosia can last for more than 9 months if cared for correctly, so even though it’s not going to be a permanent fixture in your home, it will be around long enough to make an impact. You can, however, sow some of the seeds it puts out after the flowers fade, or, if you’re not one with a green thumb, you can always head to a garden centre to buy another celosia to replace your previous one. Bear in mind that this might not be the most eco-friendly choice however. Indoors Celosia Care If you’re happy with the terms and conditions of growing celosia indoors, let’s move on to care tips. Follow the directions in this section and your plant will have the longest and healthiest life possible. Light This plant likes a sunny spot, so choose a windowsill that gets a good amount of sunlight or, if you have one, a conservatory or summer room. You can move your celosia outside during the day in warmer months if you want to give it a boost. Watering Always ensure your celosia is in a pot with good drainage so that excess water has somewhere to go once it drains out. A celosia won’t enjoy waterlogged soil any more than it will soil that’s too dry, so if the water only drains into a pot at the bottom of the plant, this may keep water levels too high. Water whenever the top couple of inches of soil doesn’t feel wet when you insert your finger. You’re looking to maintain even moisture levels throughout the soil and should avoid over- or under-watering. Temperature & Humidity In terms of temperature and humidity, celosias will do best in a room temperature range between 21-25°C. If you decide to let your plant hang outdoors during the warm months, ensure you bring it in whenever temperatures threaten to drop below these levels. Avoid rooms that regularly fall below the temperature range above, as cool temperatures will harm celosia over time. Humidity should be around 40%, which is in line with regular house levels in most cases. If it’s not the case in your home, consider a humidifier or dehumidifier, depending on whether your levels are too low or high. Fertilising Give your celosia a monthly feed of fertiliser that’s high in potassium, diluting the product by half. “Suitable fertilisers are liquid seaweed or tomato feed,” shares Roy Nicol, a Professional Gardener and Horticulturist. This will ensure bright and vibrant blooms and help your plant survive to the further reaches of its lifespan.
Learn more
Container Celosia Can Really Look Fantastic - But Don't Let Yours Become Root-Bound
IN THIS GUIDE Can You Grow Celosias In Pots? Choosing Containers Choosing Compost Potting Up Cockscomb Pot-Grown Celosia Care Celosia is a colourful and visually exciting plant that looks fantastic in any garden or outdoor space. A lot of budding gardeners ask whether it’s possible to grow this vibrant specimen in pots – so let’s take a look. Can You Grow Celosias In Pots? Short answer: yes. You’ll need to choose the right pot and the right compost, and follow some care guidelines to give your celosia the best chance to thrive, but yes, you can. You can either grow celosia in pots indoors all year round or keep them in pots outdoors to enable an easy transfer indoors once the weather cools off. The size of the celosia in pots will depend on the container size and the variety. Growing in pots means that, over time, the plant’s roots will take up more and more space, which slows the growth and, if not repotted, will eventually begin to damage the plant. Depending on your variety, you can expect a maximum size anywhere between 6-30 inches in height. Choosing Containers When choosing a pot for your celosia, bear in mind the maximum size of the plant. You should aim for something at least 20cm in diameter, and with a similar depth, as this will give the plant plenty of space to grow. The pot should have adequate drainage in the form of holes at the base. This ensures that the soil will not stay waterlogged, contributing to the ongoing health of your celosia plant. Plastic pots or those made from harder materials will be OK. “Fibre clay is a good option as it is strong, light and made from a sustainable material,” says Professional Gardener and Horticultural Consultant Roy Nicol. If you’re growing your celosia in pots outdoors, the weight of the compost and the pot combined should be enough to keep even plastic pots from blowing away in inclement weather. Choosing Compost Celosias likes potting compost with a loamy base. “Therefore, the loam-based John Innes No2 compost would be suitable,” Roy shares. If you’re using soil from your garden, these plants prefer soil with plenty of organic matter and a pH level somewhere between 6-6.5. Make sure to remove weeds and their stems if you’re using garden soil, as these opportunistic plants will happily start growing again in your pot. Avoid sandy soil with low nutrient content if possible. Potting Up Cockscomb Growing celosias in pots is easy. If you’re growing from seed, let them sprout in a propagator or somewhere warm indoors, then move the seedlings into a pot. Water gently but regularly, and fertilise once every fortnight during summer. If you’re transferring a celosia from another pot, fill it to a couple of inches below where you want the surface to be, then hollow out the centre, making a hole big enough to insert the celosia. Pat down the soil around it and then add another couple of centimetres to the surface. Water immediately and allow to drain. How Many Can You Plant Per Pot? You can grow more than one celosia per pot, but we’d recommend sticking with one at first to get a feel for how much space the plant will eventually take up. As you’ll see in the next section, root-bound celosia is something to avoid and having more than one plant in your pot will accelerate the rate at which this happens. Pot-Grown Celosia Care You should never let celosias become pot-bound, as this will hinder its ability to grow. You can check occasionally by gently pulling the celosia and its soil away from the container and seeing whether roots are visible at the edges. If they are, or if roots are ever visible from the holes in the bottom of the pot, repot the plant into a bigger pot immediately. Water regularly, allowing the soil to drain between waterings. Use your finger to feel a couple of inches below the soil before watering – if it feels wet, hold off for a little while. Pouring liquid fertiliser in your celosia pot every couple of weeks during summer will help the plant to thrive.
Learn more
Growing Nasturtium Indoors? They'll Need Bright Conditions And Free-Draining Potting Soil
IN THIS GUIDE Can You Grow Nasturtiums Indoors? Indoor Conditions Growing Nasturtiums Indoors Nasturtiums are extremely easy to grow in a garden. However, if you don’t have any outside space, you might wonder whether nasturtiums can also be grown indoors. Can You Grow Nasturtiums Indoors? Nasturtiums are easier to grow outside in a garden, but when you can provide the right indoor conditions, it is certainly possible for you to grow these useful edible and attractive flowering plants as houseplants inside your home. The best choices for indoor cultivation are smaller, dwarf plants, rather than the much larger and sprawling climbers. So, you should look out for cultivars of Tropaeolus minus. Indoor Conditions Where you place a nasturtium houseplant will be very important, as these plants require specific conditions in order to thrive. Light The most important thing that will determine the success or failure of your efforts to grow nasturtiums indoors is the light levels. When grown in a garden, nasturtiums like as sunny and bright a location as possible and the same is true when you are growing these plants inside your home. Make sure that you place nasturtiums in a bright spot where they receive natural sunlight throughout as much of the day as possible. “Think of nasturtiums as needing the same conditions as herbs; bright, warm and free-draining,” shares Master Horticulturist Colin Skelly. “A bright windowsill or conservatory should be fine as long as they don’t dry out. They could also be succession sown like herbs for use in salads.” A conservatory, if you have one, will be ideal, but a sunny room with plenty of light elsewhere in your home could also work. Your nasturtiums should be placed somewhere where they get at least 6 hours of sun per day. If you do not have a suitable windowsill, then you might need to use grow lights to grow these plants successfully indoors. Temperature Temperature is also important. When sowing the seeds for nasturtiums, the temperatures should be kept above 13°C. Luckily, this is a typically easy temperature to achieve indoors in most homes. However, it is important to place nasturtiums somewhere where they will not be exposed to excessively high temperatures, so don’t position them too close to a radiator or another heat source. High temperatures inside a home can be especially problematic if you want to eat the leaves and flowers of your plants. One of the great things about growing nasturtiums is the edible yields that you can obtain from these plants, but high temperatures can cause heat stress in the plants and this can affect their taste, making them less palatable. Humidity Another concern when growing nasturtiums indoors is humidity. Nasturtiums prefer moderate humidity, so it is important to make sure that the location where the nasturtiums are growing does not have too high or too low humidity levels. Choosing A Container Nasturtiums like free-draining conditions and cannot tolerate waterlogged soil, so it is important to make sure that any container you choose has good drainage at the base. You might grow nasturtiums in pots, window boxes or hanging containers of some kind. Choosing A Growing Medium Fill whichever container or containers you choose with a peat-free multipurpose growing medium with around one-third grit or gravel added to improve drainage. Growing Nasturtiums Indoors Once you know where you will grow nasturtiums in your home, it is time to think about the process of actually growing your plants. It is very easy to grow nasturtiums from seed and while you can also simply purchase young plants, growing from seed is a good idea. Sowing Nasturtiums are usually sown indoors between March and May in the UK. This is the same whether you are planning to transplant seedlings to the garden or pot them up into larger containers and continue to keep them indoors throughout the summer months. Sow individual seeds into small 9cm wide pots. After a couple of weeks, the seeds should have germinated successfully and you should see them growing strong. Once the plants’ roots mostly fill the pots, they can be potted up into larger containers, either on their own or alongside other plants. Watering Caring for nasturtiums grown indoors in a suitable spot should be relatively easy. The most important thing will be ensuring that you water them sufficiently, but do not overwater. Water when a probing finger can detect that the first couple of centimetres of the growing medium is dry, but make sure excess water can always drain away freely.
Learn more
Potted Nasturtiums: 'Smaller Cultivars Make An Ideal Choice For A Container'
IN THIS GUIDE Potted Nasturtium Varieties Best Pots For Tropaeolum Container Compost Potting Up Nasturtium Container Tropaeolum Care Nasturtiums are incredibly easy and attractive annual flowers to grow. They are versatile plants that can be grown in a wide range of locations. Not only do the flowers provide long-lasting, cheerful pops of colour, but these plants also have edible leaves, flower buds, flowers and seeds, and are great for attracting pollinators and aiding with pest control in an organic garden. “Smaller nasturtium cultivars make an ideal choice for a container and this is how I tend to grow them, as they get far too big grown in my garden soil,” shares Master Horticulturist Colin Skelly. “I’m particularly partial to their colourful flowers in salads.” However, if you are short on space, you might wonder whether you can grow nasturtiums in containers, and, if so, how to do so successfully. Potted Nasturtium Varieties Nasturtiums are an ideal choice for container growing. They can be a great choice for beautiful summer displays, trailing down and creating an attractively abundant effect. There are a number of different nasturtiums for you to choose from when selecting options to grow in containers. Both varieties of Tropaeolum minus and Tropaeolum majus are great for container growing. The former produces smaller, busy plants, while the latter produces climbers and trailing plants. Best Pots For Tropaeolum There are almost endless options when it comes to choosing a container for nasturtiums, though which container you should choose will depend on the details of your own particular garden and on which type and variety of nasturtium you are planning to grow. Some grow much larger and much more vigorously than others. Nasturtiums might be grown in: Simple plant pots or other reclaimed containers. Window boxes. Larger pots or planters as part of mixed container displays. The planting pockets of vertical gardens. Hanging baskets or other hanging containers. One important thing to think about is that whichever type of container you choose, these are plants that require good drainage. Though the soil in containers should remain consistently moist through the growing season, excess water should always be able to drain away freely from the base of your containers. When choosing a container, be sure to think about how large you can expect the nasturtium that you have chosen to eventually grow. Container Compost Since nasturtiums require free-draining conditions, it is a good idea to mix horticultural grit or gravel with a multipurpose peat-free potting mix or homemade equivalent in order to create your growing medium. A mix of 1/3 grit, 1/3 homemade compost and 1/3 leaf mould, loam or loamy soil can work perfectly for growing these plants. You can also simply add 1 part grit to 2 parts of a good quality peat-free potting mix that you have purchased. Potting Up Nasturtium Nasturtiums that you have purchased or those that you have grown from seed in spring should be planted into their summer containers sometime between May and August. The flowers bloom between May and October, potentially right up until the first frosts. When planting, make sure that the nasturtiums crown of leaves sits just above the surface of the soil. Firm them into place and water them in well. How Many Plants Per Pot? Nasturtiums can be grown in containers on their own but it is worthwhile thinking about how they can be combined with other summer and autumn flowering plants to create beautiful mixed container displays. How much space these plants will require will very much depend on which cultivar or cultivars you have chosen. Remember, there are smaller dwarf varieties and larger climbers to choose from. Many other flowers of the late summer and autumn make wonderful companions for nasturtiums in a mixed container display. For an edible garden, you might also create mixed displays using nasturtiums and other edible salad crops. Container Tropaeolum Care Nasturtiums are very easy to grow and care for, even when growing them in containers, which will involve a little more effort than growing them in the ground. Light & Location The first thing to think about when it comes to caring for nasturtiums in containers is where the containers should be placed. Remember that these are plants that thrive in a position in full sun. In order to make the most of the benefits of growing these wonderful plants, it is also a good idea to consider placing containers so that the nasturtiums bring benefits to other edible crops growing in containers or in beds nearby. The nasturtiums can act as a trap crop for pests and draw in a range of beneficial insects for pollination and pest control. Watering While nasturtiums growing in the ground outside rarely require watering, those growing in containers should be watered regularly throughout the growing season to keep the growing medium consistently moist. You should not feed nasturtiums. They do not need it and fertilisation can potentially encourage foliage growth at the expense of flowers. Deadheading Though not essential, deadheading your nasturtiums can prolong the blooming period and ensure the production of further flowers. Remember, however, that you can harvest flowers before they fade, as these, along with the peppery leaves, make a great addition to your salad bowl. Once these annual plants die back at the end of the growing season, you can simply remove them from the containers and add the plant material to your compost heap.
Learn more


