

Growing

Growing Camassia From Bulbs: Get That Summer Prairie Look In Your Garden
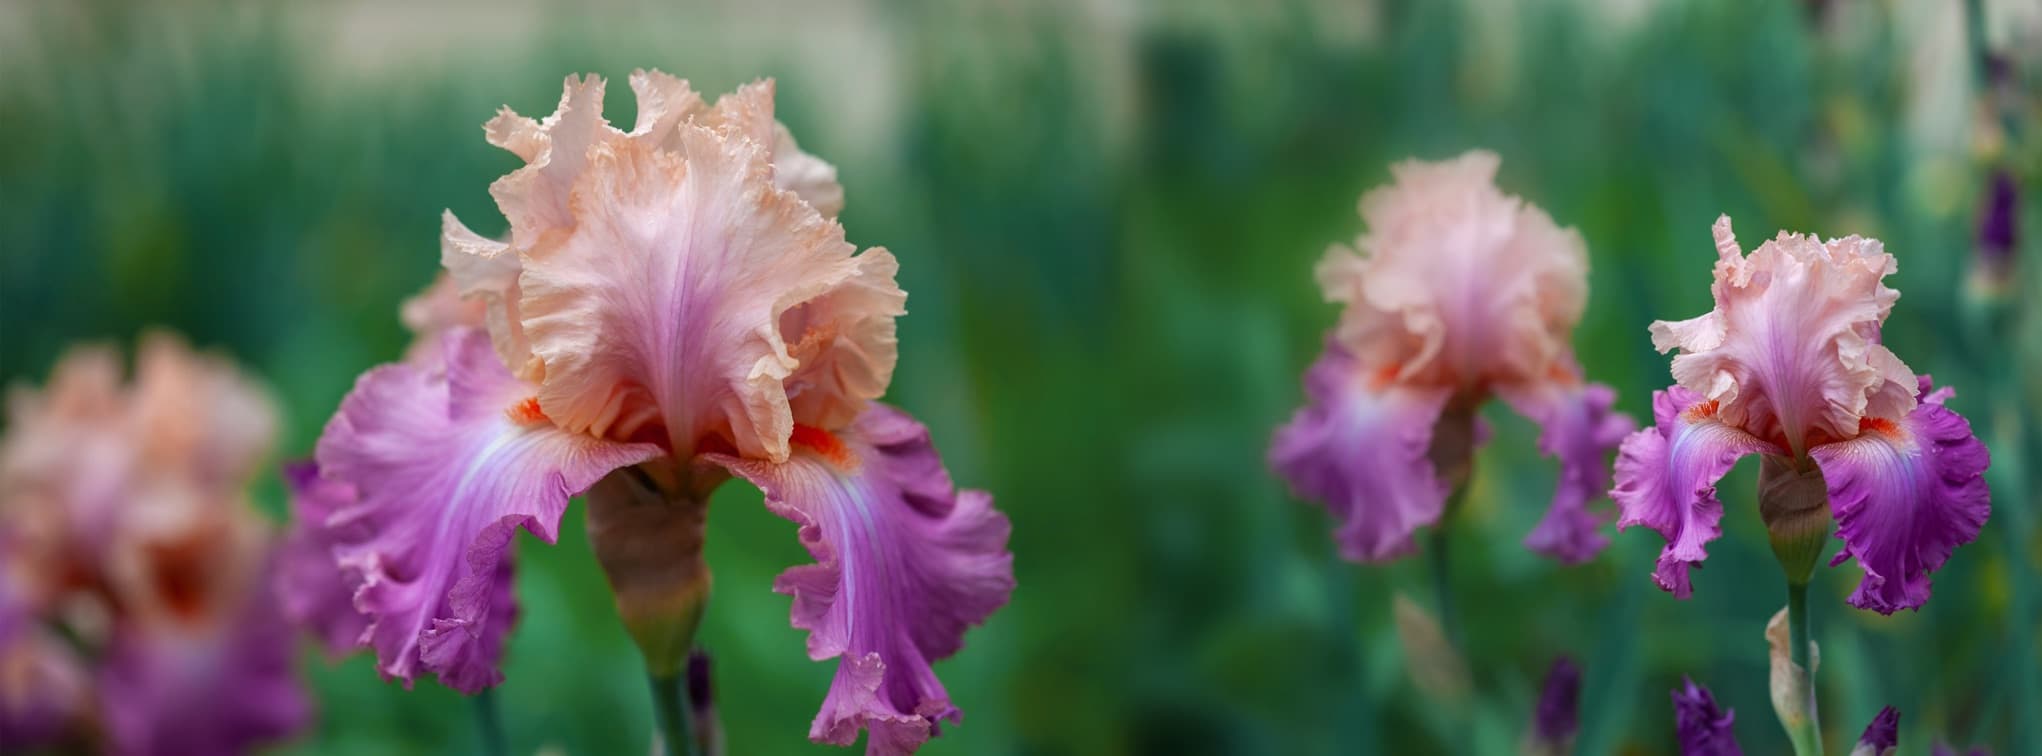
IN THIS GUIDE Overview How To Grow Camassia Plant Care Pruning Buying Camassia References Six-tepalled, star-like blooms in dense flower-laden racemes on erect stalks in pastel tones and deep shades of purples will adorn your garden if you plant a few Camassias. This very reliable, virtually no-care perennial bulb plugs that spring-to-summer transition season. It hails from the sunny prairies and moist meadows of the United States where it paints the landscape in big, broad blazes of colour.1 Camassia is a long-lived deciduous perennial that has probably flown under the radar of a goodly number of gardeners. This easy-grow and very well-behaved bulb will keep coming up year after year and naturalise in your garden, but ever so gradually and ‘tactfully’. You don’t have to worry about Camassia pulling a no-show, and you don’t have to worry about Camassia taking over your garden. Overview Botanical Name Camassia Common Name(s) Camas, Quamash, Wild Hyacinth, Camosh Plant Type Perennial Bulb Native Area Western North America Hardiness Rating H4 Foliage Deciduous; Grass-like Flowers Six-tepalled, star-shaped blossoms When To Sow September, October Flowering Months May, June Camassia, also called Camass Lily, actually originally used to be classified with Lilies in Family Liliaceae.2 After the usual Botanical shuffles and reshuffles, Camassia’s lot fell with Asparagus in Family Asparagaceae!3 And this factoid brings us to a third name for this plant – in most parts of the United States it still goes by what the pioneers called it: Camas, a phonetic simplification of the Native American name. Camassia includes all of six species and a handful of cultivars. While the species range quite widely in height, running from only about 30 centimetres all the way to 1.3 metres, all varieties – species and cultivars – have similar foliage which comprises of clumps of narrow linear leaves. This bulb starts blooming after Tulips have displayed their charms and shut up shop. Camassias light up gardens and meadows between Flowerdom’s two peak seasons, producing blooms through May and moving into June. C. leichtlinii Colours include creamy white, and shades of blue and purple from the palest lilac through to the deepest violet. The bright, sunny yellow stamens make a striking contrast on the flowers that are in brilliant hues of purple and violet. How To Grow Camassia Like most bulbous plants, the straightforward way to grow Camassia is through bulbs. It is possible to grow them from seed but that method is not a very easy way to propagate what is an easy-care plant. Also, seed-grown Camassias bloom after at least three years and even more. You should choose bulbs that are large, evenly shaped, firm to the touch, and do not show any nicks or any loss of the bark-like covering or skin. Where To Plant First off, though Camassia can be planted in containers they do not do as well as they do in open ground for various reasons. Visually too, a Camassia will look awkward in a container; furthermore, it cannot offer anything at all in autumn and winter. Camassias in bloom make a huge visual impact when they cover a sizeable area of land and, therefore, mass plantings are a great way to go. Try planting at least 15 bulbs in irregular drifts – Camassia flowers will look especially lovely on verges and slopes. They can be mixed in with other bulbs such that their respective blooming seasons segue from one to the other so that you can enjoy flowers on the same patch of land from earliest spring to the end of summer. Otherwise mix them up with spring wildflowers with which Camassias’ simple blooms will mingle well. These flowers can be utilised to create a wildflower meadow effect, as Horticultural Consultant Colin Skelly shares: “I like to plant Camassia bulbs in damp meadow gardens, filling a gap between spring and later summer flowering bulbs and perennials.” This well-behaved bulb is not remotely invasive yet naturalises wonderfully well; as such, it will give pleasure for many years and also keep springing a surprise now and again. Finally, this moisture-loving plant will do very well beside a stream or pond as long as the soil is not overly damp in autumn and winter. How To Plant Bulbs are best planted in the September through November timeframe. Water the soil moderately before digging holes. The planting depth should be two to three times the length of the bulbs. Bulbs should be spaced at least 10 centimetres, and up to 20 centimetres, apart. The pointed tip should be upwards. After filling up the hole, do not pack the soil but give the ground a good watering so that the soil is firmed up. Plant Care You don’t have to maintain these plants in any way; all you need to do is ensure the soil does not dry out during the growing season – keep it consistently moist. Indeed, one might say that Camassias thrive on neglect and moisture! Soil Requirements Though almost any soil will do for this sporting bulb, a fertile loam amended with humus is ideal. As a ‘moisture-loving’ bulbous plant Camassia does not object to damp or heavy soils in spring and summer. But when the bulb is dormant in autumn and winter, waterlogged soil can prove fatal; therefore, soil should be well drained. However, the plant prefers moist soil. As for soil pH, here too Camassia is unfussy but anything from Slightly Acidic to Slightly Alkaline will be just right. Preferred Aspect A location where the plants get full sun, or full sun in the morning and filtered or dappled sun in the afternoon is best – partial shade will do. Mulching & Feeding Fertilising is strictly optional. C. leichtlinii ‘Alba’ Every couple of years the soil may be amended with some humus or a light sprinkling of bone meal may be worked into the soil though it must not be allowed to make contact with the bulb or stem. If you anticipate a hard frost in winter, apply a good layer of mulch. Pruning Cut back stalks after the flowers are spent. Allow the leaves to yellow and do not prune or cut back as the foliage synthesises energy to replenish the bulb. It is this store of energy that sets up the bulb to push up stalks and to produce flowers the following year. Leaves should be cut back only after they have turned brown and withered. As a rule, Camassia bulbs should not be disturbed. However, if you have decided to separate and divide offsets, this can be done end of autumn to early winter when the bulb is dormant but before winter chill sets in. One of the big positives of Camassias is that they are not known to suffer from any particular pests or diseases. Buying Camassia ‘Blue Melody’ A large selection of these plants may well not be available at your neighbourhood nursery but a few of the popular varieties will likely be on display. Both potted plants and bulbs are usually in stock at several, though not very many, online stores. Buying bulbs is the better option. If you can find a merchant that sells a mix of 20 to 30 bulbs of several different varieties, then that would be a great buy. References 1. Camassia. (n.d.). North Carolina Extension Gardener Plant Toolbox. Retrieved March 13, 2023, from https://plants.ces.ncsu.edu/plants/camassia/ 2. Camassia scilloides (Wild Hyacinth) Liliaceae. (n.d.). Lake Forest College. Retrieved March 13, 2023, from https://www.lakeforest.edu/academics/majors-and-minors/environmental-studies/camassia-scilloidesand160(wild-hyacinth)-liliaceae 3. Camassia. (n.d.-b). Pacific Bulb Society. Retrieved March 13, 2023, from https://www.pacificbulbsociety.org/pbswiki/index.php/Camassia
Learn more
Should You Dig Up Your Dahlia Tubers? Experts Offer Their Advice For Overwintering
IN THIS GUIDE Winter Protection Overwintering Dahlias In The Garden 1) Mulching Dahlia Tubers 2) Additional Protection For Overwintering Dahlias Lifting & Storing Dahlia Tubers Indoors 1) Lifting Dahlia Tubers 2) Cleaning & Prepping For Overwintering 3) Drying Tubers 4) Storing Tubers References Dahlias are beautiful flowers that many love to have in their gardens, but how can you overwinter them successfully? It is all well and good being able to grow dahlias successfully in your garden, but it is important to know what to do with your dahlias over winter to make sure that you can keep hold of them. “This last winter has seen a lot of people lose some, if not all, of their valuable dahlia collection,” shares David Hall, Manager of Halls of Heddon, a specialist plant nursery for dahlias. “Temperatures were much colder than we would normally expect, so the sudden drop in temperatures meant the frost penetrated the ground more deeply than usual. “Simply covering tubers with fleece, or putting a small heater on in a greenhouse, wasn’t enough when temperatures in some areas plunged to minus double figures!” Fortunately, if you overwinter them successfully, they will grow back each year. Read on for instructions to do so successfully, no matter where in the UK you live. Winter Protection In warmer and more southerly parts of the UK, dahlia tubers can frequently be overwintered successfully in your garden.1 This strategy may even work further north if you have a relatively free-draining soil and conditions do not become too waterlogged in winter. With additional protection over the winter months, you might not need to dig up your dahlia tubers for storage. In cooler and wetter parts of the UK, however, dahlia tubers must usually be lifted, cleaned, dried and stored over winter before being planted back out in the garden. Read on for more detailed information about how to overwinter dahlias successfully in the garden, or by lifting and storing them over the winter months: Overwintering Dahlias In The Garden First of all, let’s take a look at how you might be able to overwinter dahlias in your garden successfully without having to lift them out of the ground. This is a lower-maintenance option but can yield varied results. Whether or not dahlias will overwinter successfully outdoors will very much depend on the specific details of the area where you live, and even the characteristics of the particular planting spot in your garden. “Leaving tubers in the ground over winter is always a risk but if your ground is well drained it can be done,” says June Nash, Secretary for The National Dahlia Society. “If you intend to leave the tubers in, plant them a bit deeper, about 6 inches below soil level.” Bear in mind that even if you have successfully overwintered dahlias in your garden in a previous year – you could experience losses, or even lose the lot during a particularly cold winter. 1) Mulching Dahlia Tubers Mulching dahlia tubers can certainly work in the south, and has even been known to work as far north as Scotland’s central belt in a mild year. A thick organic mulch can help protect the tuber from freezing as long as the temperatures do not get excessively low. “Once the plants have been frosted, cut the plants down to ground level and cover with a further 6 inches of free-draining compost for more insulation,” says June. “In the spring this can be scraped back and left around the plant as a mulch and soil improver.” You can use a range of organic materials to mulch dahlia tubers. The most common options are dry mulches of autumn leaves, wood chip or bark. Straw or dried bracken are other options to consider. “I am lucky in the fact that I live on the south coast of England on free-draining soil, so I do not need to lift my Dahlia tubers,” shares Master Horticulturist Dan Ori. “I just add an autumn mulch over the top of cut-back Dahlias. “This gets them through winter and, if you don’t mind the smell, about 8 to 12-month-old horse manure is perfect for this job.” The mulch should be laid thickly, around 5cm thick or more, and it should entirely cover the area around the tuber waiting below the ground. This should be laid in place before hard frosts threaten, and then removed before growth commences in the spring. 2) Additional Protection For Overwintering Dahlias Where mulch is not enough to protect dahlia tubers from cold winter temperatures, additional winter protection will be required. Cloches or other protective covers could potentially be used both to shield dahlia tubers from winter cold and from excessive wet. Another thing to consider is that materials with high thermal mass (such as rocks or containers full of water, for example) can be placed around dahlias to catch and store the sun’s energy during the day and release it slowly at night when temperatures fall. In essence, what this does is create a warmer microclimate around the area where the tubers are buried in the soil. If you would like to overwinter dahlia tubers in the garden, then choosing the right site in the first place is key. Make sure you choose a location with relatively free-draining soil, in a sheltered position that does not become a frost pocket in winter. Lifting & Storing Dahlia Tubers Indoors It will not be easy to overwinter dahlia tubers outdoors in all gardens. And so for more reliable results, it can often be the best policy to lift the tubers. “All our dahlias are grown in containers to ensure the best drainage and for easy indoor storage in winter,” shares Elaine Patullo, owner of the Scottish nursery Dachshund Dahlias. “Our pots are all stacked away into lined greenhouses over winter.” If this sounds like a good option for you, here are some tips to help you make sure that your dahlia tubers make it through unscathed to spring: 1) Lifting Dahlia Tubers First of all, using a garden fork, carefully pry up the dahlia tubers from below the ground before the first hard frost. “If you don’t want to risk leaving them in, dig the tubers up when the plants have been frosted or in mid to late November if there has been no frost,” says June. Take care not to damage the tubers as you do so. “Handle carefully to avoid damage to the tuber and cut the stems back to a couple of inches,” June continues. Any damaged tubers should be discarded as these are more likely to succumb to rot in storage over the winter months. It is also usually a good idea to discard the ‘mother’ tuber (the oldest, original tuber) as this is also more likely to rot than newer parts of the plant. 2) Cleaning & Prepping For Overwintering Once you have lifted the tubers, knock off any large clumps of soil, and wash the dahlia tubers to get rid of pests, soil and debris. Cut off any remaining above-ground growth to a short length above each tuber, as Jack Gott, owner of JRG Dahlias explains: “Once you have taken your dahlia tubers from the ground, remove as much of the compost as possible. “Then, trim the hairy roots as much as possible and store them in a dry, frost-free place.” 3) Drying Tubers Next, you need to spread out the tubers on a rack, some newspaper, or another absorbent surface to dry out and ‘cure’, or you can hang them up, as June explains: “Turn the tubers upside down and leave for a couple of weeks to drain off, remove any remaining soil. “Many people pierce the stems with a screwdriver or even a drill before doing this.” They should be out of direct sunlight, in a well-ventilated location. This should take around 2-3 weeks. 4) Storing Tubers Overwintering dahlia tubers Once the tubers are dry, you should prepare a box for their storage. This can be a cardboard box, or another breathable container. This container should be filled with a just-moist medium: peat-free compost, damp sand, or damp wood shavings can all work for this purpose. Place a thin layer of this material in the base of the box, then place in the tubers carefully before covering them over with another layer of the damp medium. “They must now be stored anywhere that is frost-free, preferably a greenhouse,” says June. “Keep an eye on the tubers for any signs of rotting and cut out any damage, dust with yellow sulphur powder and let it dry again.” Store this box in a cool, dark place that remains frost-free over the winter months. A root cellar, basement or unheated garage can be a good spot. References 1. Overwintering tender plants: lifting or mulching. (n.d.). Royal Horticultural Society. Retrieved March 14, 2023, from https://www.rhs.org.uk/prevention-protection/overwintering-tender-plants-lifting-or-mulching
Learn more
Add Eucomis 'Pineapple Lilies' To Your Garden For An Exotic, Other-Worldly Feel
IN THIS GUIDE Overview How To Grow Eucomis Eucomis Care Eucomis Varieties Common Problems References Sometimes you see a plant that looks so different that it makes you pause, look carefully, and experience a renewed appreciation for the majesty and boundless creativity of nature. For me, the pineapple lily does exactly that. Maybe it’s the tight cylindrical bushel of flowers blooming atop a long, thin stem – or maybe the tuft of thick, almost succulent-looking bracts on top of that. Whatever it is, it’s hard to argue that this isn’t a striking and captivating plant. Overview Botanical Name Eucomis Common Name(s) Pineapple Lilies, Pineapple Flower Plant Type Perennial Bulb Native Area South Africa Hardiness Rating H4 Foliage Deciduous Flowers Raceme of small flowers beneath a crown of leafy bracts, which resembles a pineapple When To Sow March, April, September, October Flowering Months July, August, September So if you’re looking for something to grow that will really catch people’s eye, then look no further. Let’s begin by clarifying that pineapple lilies aren’t pineapples, and the two plants are entirely unrelated. Eucomis simply takes the common name ‘pineapple lily’ from the fact that its flowers and bracts combine to look a little bit like the tropical fruit. “Eucomis are fantastic for creating an exotic, even other-worldly, feel to the garden,” shares Colin Skelly, a Master Horticulturist. “They combine well with other exotic foliage plants or late-summer flowers like Dahlia or Crocosmia.” The genus Eucomis hails naturally from areas in Southern Africa, but has since become popular amongst gardeners around the world for its interesting aesthetic.1 Thanks to its exotic appearance and the wide range of colours you’ll find amongst its cultivars, the pineapple lily makes a great addition to any garden looking to move beyond familiar plants and play with faraway themes. How To Grow Eucomis Because of its Southern African heritage, Eucomis is used to warmer temperatures than the average UK climate allows for. With this in mind, it’s important to choose a spot that won’t expose your plant to frosts or cold weather which could harm or even kill it. If you live in the south of the UK, or abroad in a region with a similar climate, you should be fine planting your pineapple lily directly into the ground, as long as you choose the right spot. If you live in cooler regions, consider planting out your pineapple lily in a container so that you can move it somewhere warmer (perhaps even indoors) when the cold weather sets in. Whichever you go for, the right spot should be somewhere that gets full sun, and can drain well. Make sure you factor in shade from other plants, not just from fences, walls, and similar. Any shade will threaten the ability of your Eucomis to reach its full bloom potential. Planting Out Pineapple lily bulbs need to be planted fairly deep to protect them against frost damage, ideally about 15cm. Container Growing Because pineapple lilies can grow fairly high, choose a pot with enough weight and width to remain stable. A regular flowerpot will be prone to tipping when the plant reaches full height and becomes top-heavy. Plant bulbs at least 7-8cm apart – any closer than this and they will crowd each other, but you’ve got flexibility in the other direction: bigger gaps will create more spacious displays. Bulbs don’t need to be as deep in the soil when growing in a container – the tip should be just below the soil surface. Eucomis Care Watering The Eucomis UK growing season spans from April to early October, and the plant must be kept well-watered throughout. If it dries out your pineapple lily will bloom less enthusiastically and, given that the exotic bloom is one of the main draws of the plant, this outcome is best avoided! Feeding For pineapple lilies growing outdoors, fertilising each spring will encourage strong growth. A general fertiliser will do the trick. In a container, give your Eucomis a fortnightly dose of liquid feed to keep it healthy. E. vandermerwei Check the directions on the packaging to make sure the feed is suitable, and that you’re using the right dose. Pruning You’ll be pleased to hear that pineapple lilies don’t need any active pruning. All you need to do is take off dead leaves, and cut away any messy flower heads. Overwintering Eucomis comes from a climate much warmer than ours, where it never has to put up with the sort of temperatures that a UK winter brings. With this in mind, it’s important to take steps to protect the plant from the cold. You can leave pineapple lilies in the ground over winter if you live in a southern region of the UK, or somewhere with an equivalent climate. They’ll need a layer of mulch, about 10cm thick, to keep them as insulated as possible from the frigid elements. Alternatively, you can carefully pull the plant and bulb from the ground, then store somewhere warmer until next spring. A greenhouse, shed, or sideboard in your house should do the trick. If you’re growing in a container, this step is much easier – simply bring the container indoors. If you stop watering the plant your pineapple lilies will become dormant, patiently waiting for the first glugs of water and sunshine next spring. Eucomis Varieties There are several types of Pineapple Lily, ranging in colour and size. The purple-white bloom of the bicolor, or the moody red of the E. comosa, or even the hot pink of the ‘Pink Gin’ variety: each brings a different aesthetic and ambience to your garden. ‘Pink Gin’ Here are two cultivars (both awarded the RHS AGM for suitability to UK growing) to give an idea of the variety on offer: Two-Colour Pineapple Lily Botanical Name: E. bicolor Bicolor, if you didn’t guess, refers to the two colours this cultivar boasts. The green leaves around the central rosette erupt into a stunning white-purple in summer, contrasting beautifully against the brown stems that lift the flowers proudly aloft. This variety likes full sun and will do best in a south, west or east-facing aspect. It won’t do well in clayey soil, and the ground needs to be able to drain well to promote optimal growth. While fairly diminutive, the 0.5m taken up by a E. bicolor contains more than enough visual interest to make it worthwhile to grow. Giant Pineapple Lily Botanical Name: E. pallidiflora Given that the bicolor reaches around half a metre in height and width, you might expect the ‘giant’ pineapple lily to weigh in at a couple of metres, at least. As it happens, though, this cultivar reaches a maximum height of about a metre. Despite a slightly misleading name, the pallidiflora is a sight to behold. White flowers burst forth in summer and stick around until autumn, extending the visual interest of this variety beyond some other plants. As with bicolor, the pallidiflora likes full sun, well-draining soil, and no clay. It does best in a south- or east-facing aspect, and will take up to five years to reach its full height. Common Problems We’ve covered the main problems most gardeners encounter already, but let’s quickly recap those before looking at other pests and problems: Poor Flowering This can be caused by your pineapple lily getting too much shade, either from structures or other plants, as well as being left dry too often. Pick a spot in full sun with well-draining soil, and water regularly to avoid this issue. Winter Damage This plant needs extra care to keep it warm over winter, as it’s not naturalised to British winter temperatures. Either cover outdoor bulbs with a thick layer of mulch, or bring containers indoors. Pests Just like pretty much every other plant, Eucomis is prone to visitations from slugs, snails, and aphids. Each of these pests enjoys feasting on your plants, eating their foliage and threatening their ability to thrive. Physical deterrents can work against slugs or snails: a layer of fleece around the stems, for example. Or you can plant something sacrificial nearby: a plant such as Nasturtium, designed to attract their attention away from more prized flowers. With aphids, you have to monitor the plant manually to make sure no small green critters are taking residence on the leaves. If they do, they’ll suck the sap and cause aesthetic damage or, if left unchecked, leave a more lasting impact on the health of your pineapple lily. Manually removing aphids and their larvae is one option, and if they continue returning, look for a pesticide to discourage further visits. Whether you go for a standalone pineapple lily in a container, or you integrate the flower into a more comprehensive display, we assure you that visitors to your garden will turn their heads, captivated by the striking beauty of the plant. It may feel like a little more work than is required by some other plants, but trust us: It’s well worth it. References 1. Eucomis. (n.d.). Kew Royal Botanic Gardens. Retrieved March 15, 2023, from https://powo.science.kew.org/taxon/urn:lsid:ipni.org:names:24249-1
Learn more
How To Grow Ornamental Onions - These Pom Pom Shaped Flowers Suit Any Garden!
IN THIS GUIDE Overview Habitat & Growing Conditions Planting Allium Plant Care Common Problems References We have umbels loose and densely-packed, florets erect and pendent, and complementary colours of sunny yellow and vibrant purple – that’s the ornamental Allium. These plants produce bunches and clusters of tiny flowers in late spring and summer that sashay and sway in the breeze on their slender stems. They are perfect as companion plants or for mass plantings. Many Alliums flowers exude an oniony smell, just as many are in some tone of purple. And equally many species’ flowers are in the form of pom-pom-like inflorescences. “I love photographing plants with distinct seed heads such as Alilums, which can create such symmetrical compositions,” shares Molly Hollman, a Plant Photographer. Allium ‘Mount Everest’ The Allium genus includes onion, garlic, leek, shallot, chives, and what we are interested in here: pretty flowering plants that are grown as ornamentals, albeit not as central or showy ones. Alliums are actually a genus of plants whose bulbs and leaves are flavourful and edible. Some, such as the aforementioned onion and garlic, are considered purely edible plants, though many varieties certainly put out pretty flowers, whereas others are grown as flowering plants, though both the bulbs and the flowers are edible and often tasty. Overview Botanical Name Allium Common Name(s) Ornamental Onions Plant Type Bulbs Native Area Europe, Asia, Africa Hardiness Rating H6 Foliage Deciduous Flowers Small flowers on pompom umbels When To Sow October, November Flowering Months May, June Though some species of Allium have been bred purely for the edible bulbs and are not supposed to bolt (run to flower) and which species cannot be considered flowering varieties, the line dividing edible Alliums and decorative Alliums is neither hard-and-fast nor scientific; it is quite arbitrary. Allium flowering plants have a lot going for them – they are low-care to no-care, fully hardy, reliable perennials. Their flowers are definitely unusual, being florets in pom-pom-shaped and other types of inflorescences and umbels. A. flavum While some species’ inflorescences come in white and soft tones of mauve, others provide vivid and vibrant splashes of purple and pink. They attract butterflies but repel most garden pests! And though you certainly are not going to dig up a bulb to consume it, these pretty ornamentals will be a source of stems and leaves which you can use as pot-herbs to lend a leeky, shalloty flavour or that you can use as a substitute for scallions in a salad. Habitat & Growing Conditions As Alliums are native to or naturalised over a vast range of habitats, from the Northern reaches of Russia and Canada down to Northern Africa, their habitats and growing conditions vary considerably.1 A. neapolitanum Some species grow wild in dry conditions on the steppes and plateaus of Central Asia. Others grow in moister habitats in open grasslands and shady woodlands of the United States. Still others grow in meadows and fields, and are even found in fens, in Europe. Planting Where To Plant If there ever was a companion plant or a ‘co-star plant’, Allium is it. They make for superb fillers, interesting and colourful in their own rights, to be planted between, behind, and around, late spring to early summer’s leading flowering stems such as some Amaryllis, many Irises, Columbines, and Poppies. On the other hand, some Allium species, such as A. ‘His Excellency’ and A. hollandicum ‘Purple Sensation’, are excellent choices for mass plantings in view of the shape and colour of their blooms, and also the movement they bring to a garden as they sway and nod in the breeze. Other varieties that produce appealing clusters in pleasing and gentle hues are just as good for borders and edging, and for growing along the side of a porch or patio. These include A. stellatum and A. flavum. Some varieties, like A. cyaneum, are made to order for rock gardens. At the other end of the spectrum, a few varieties are unquestionably suited to architectural plantings, for example, ‘Mount Everest’ and ‘His Excellency’. It is easy to grow Allium with such plants whose foliage and flowers will conceal Allium’s fading, yellowing and dying foliage through the summer, because – as for other bulbous plants – the leaves must be left untouched so they can generate energy stores for the bulbs to regenerate after the dormant winter season. Alliums should not be grown in a windy spot, let alone a blustery one, because strong winds will tear apart the delicate inflorescences. On the other hand, a gentle wind will greatly heighten the joy of these plants as they will bob and sway merrily in the breeze. In the UK Alliums are best planted in full sun. How To Plant The ‘best’ time to plant these late spring- and early summer-blooming bulbs is early-to-mid November. Different species’ bulbs vary quite widely in size and even within a species, bulb sizes will differ. You will read some gardening how-tos advising you to plant Allium bulbs at twice the depth of the bulb’s height, and others telling you to plant at thrice the depth. Well, both are correct; the ‘right’ depth is implied by a few factors, most importantly the soil. The more loose, dry, and sand-based your soil is, the deeper you should plant a bulb, say at a depth that is thrice a given bulb’s height. The more compacted, moist, or clayey your soil is, the shallower you should plant a bulb, say twice a given bulb’s height. Water bulbs after planting and do so lightly through the winter though rainfall may well provide sufficient water. Allium Plant Care Soil Requirements Alliums are not fussy about soil or, indeed, anything else. All Alliums will be happy in a good all-round loam mix. The soil should drain well; a Slightly Acidic soil pH is preferred. “If you have heavy soil, as I do, then one option is to plant alliums into raised areas that drain more freely,” recommends RHS Master of Horticulture Colin Skelly. Sulphates The characteristic pungent odour and taste of garlic and onions, which is also present to a lesser degree in ornamental Alliums, depends upon the amounts and concentrations of sulphates in the soil. No sulphates, no pungency; high sulphates, high pungency. You can chemically control your soil’s sulphate content, though it can be a tricky business. Feeding Alliums may be fertilised just when the leaves being to show. A light feeding with 5-5-10 fertiliser or a bulb fertiliser would be beneficial. They can be fed similarly once again after the flowering season is over. At this time the plant’s water needs will increase and watering should be more regular. Cutting Back Though blooms may be deadheaded throughout the flowering season, do not cut off the foliage (unless you wish to enjoy fresh greens with your supper!). Let them wither and die. In autumn the plants can be cut down to the ground. Division Once every three years or so you may want to dig up the bulbs in late autumn so as to divide them. You can plant new ones in pots and then gift potted Alliums in spring. Some Alliums are not bulbous plants but grow from rhizomes or rhizomatous roots. These types should be dug up in spring for division which is done by carefully separating the rhizome clump with a sharp blade. Before winter sets in, though most Allium bulbs are hardy, you could cover the soil with a thin layer of leaf mulch. Common Problems Almost all Allium species that are naturalised to Europe and almost all garlics and leeks, are virtually impervious to pests. The only exceptions are onions and shallots which may fall victim to slugs. All Alliums repel rodents, deer, and harmful insects including Japanese beetle, while attracting butterflies. However, Alliums are susceptible to a couple of diseases, namely downy mildew and onion white rot. The latter is a fungal disease that is nearly impossible to treat. The harmful organisms can lie dormant and persist in the soil for many years. References 1. Allium (n.d.). Kew Royal Botanic Gardens. Retrieved March 9, 2023, from https://powo.science.kew.org/taxon/urn:lsid:ipni.org:names:30000901-2
Learn more
Tulips Growing Guide: Choose Your Bulbs, Plant Out And Overwinter Them Successfully
IN THIS GUIDE Overview Habitat & Growing Conditions How To Grow Tulips Plant Care Digging Up Tulip Bulbs Overwintering Division Common Problems References Which flower is supremely popular, comes in a diverse array of forms, and has a storied history? Answer: the tulip. This bulbous perennial plant was at the centre of that famous Dutch mania. “I love tulips and always try to plant a load of them in my garden so I have something to look forward to,” shares Lora Avedian, a Floral Artist. “The joy and freshness of bulbs pushing through the earth after winter is really just the best.” Tulips are mainstays in bouquets for the adored one or a family member, and though they are renowned for their rich hues, their forms are just as diverse and eye-catching. “With their versatility, ease of growth, and range of colours, tulips are the perfect addition to any outdoor space,” says the team at BULBi – a large online nursery for bulbous plants based in Bath, UK. Overview Botanical Name Tulipa Common Name(s) Tulips Plant Type Perennial Bulbs Native Area South-East Europe / Northern Africa / Russia / Central Asia Hardiness Rating Typically H6 Foliage Deciduous Flowers Goblet-shaped flowers in a wide range of colours When To Plant October, November Flowering Months March, April, May One of the reasons for this flower’s magnetic appeal is surely the upright stance and demure appearance of the ‘classic’ Tulip with its just-barely-open petals; another reason would be the vibrant and radiant hues in the warm band of the colour spectrum. And surely yet another reason is the way these plants usher in spring with row after row of gorgeous goblet-shaped blooms in rich colours. “Tulips are one of my favourite plants to photograph – I love them,” shares Garden Photographer Clive Nichols. “Of course, you only have a small window to take the images of them in flower, but I love how beautifully shaped they are. They make for good compositions.” As is commonly known, Tulips come in all hues and tones from white to near-black, except blue. Two or three varieties produce blooms in a medium bluish-violet, though. Not only are their colours versatile, but the team at BULBi say that tulips can also vary in shape and size, so there’s a perfect tulip for every garden display. ‘Purple Prince’ Tulips are not plants as commonly understood; they are bulbs that put out a few leaves and a flowering stem. The leaves are flat and strap-like similar to those of lilies, and this is hardly surprising because Tulips belong to the Lily Family.1 ‘Ancilla’ Though Tulips are so strongly identified with the Netherlands that one might almost say “As Dutch as a Tulip”, they are not native to the Netherlands – they are relatively recent imports but have truly been adopted by the Dutch. Today, the Netherlands is the world’s Tulip capital.2 Habitat & Growing Conditions Species Tulips are found in the steppes and hillsides of Iran, Turkey, and Central and East Asia; they also grow wild in fields and meadows.3 Most species are indigenous to temperate regions but some species are native to cold climatic zones. In the main, species Tulip habitats are dry and cool; they do not thrive in damp conditions or waterlogged soils. ‘Abu Hassan’ Cultivars are more tolerant of damp soil. Most Tulips are hardy to H6 meaning they can be grown as perennials here in the UK. “Only certain tulips will flower reliably after the first year – species tulips when grown in the right conditions, many of the cultivars in the early tulip groups and certain other named cultivars such as ‘Ballerina’ and ‘Spring Green’,” shares Roy Nicol, a Horticultural Consultant. “My advice would be to research this if repeat flowering is important to you.” How To Grow Tulips Choosing Bulbs Choose bulbs that are firm and intact without tears, and are the largest ones. Discard those that have a compromised wrapper or outer coating, that are soft anywhere, that are dry and shrivelled, or that are small. See if you can get your hands on ‘dealer’ or ‘pro’ top-size bulbs. Buy bulbs in late summer and store them in a brown paper bag or a wrapping of cotton mesh in the crisper in the fridge, though not with vegetables or fruits (particularly bulb-killing apples and pears). They can also be stored in a well-ventilated cool place such as a basement. If so, care should be taken to protect the bulbs from mice and other pests. Where To Plant Tulips differ greatly in the shape and form of the bloom, its size, the height of the stem, and the colour and also in the colours – plural. As a result, where they can be planted and how they are best shown varies quite widely. Most Tulips make excellent bedding plants, both in a single variety to multiply the effect of some intense variety, or in suitably mixed varieties. For example, 30-40 ‘Violet Beauty’ or ‘Abu Hassan’ bulbs would produce a sensational effect. ’Sweetheart’ from the Fosteriana Division In contrast, a ‘Monsella’ or ‘Groenland’ (one of the perfect Viridifloras) may be displayed in a decorative pot as a single specimen. Height (plus personal taste) are good discriminators by which to choose Tulip varieties for borders and rock gardens; medium-height varieties, preferably Singles or Doubles for the former, and short varieties in unusual forms or Division 15 species for the latter. You could use your imagination in ‘painting’ your garden with Tulips. How about a two-colour design created with ‘Catherina Single’ and ‘Queen of the Night’? Both are Single Lates. ‘Queen of the Night’ You can, of course, also mix and match Tulips with other spring flowers in harmonious or complementary colours and to set off floral forms. How To Plant Bulbs are best planted in late autumn, specifically when the soil temperature is 5-10°C. Bulbs should be planted 10-18cm deep and 10-12 cm apart. A good rule of thumb is to plant a bulb at twice to thrice the depth of its length (or height). Plant bulbs so that they are ‘pointing’ upwards – give them a good watering after planting. Now, over the winter, the bulbs will develop stores of energy to draw upon come spring, when the bulbs start to flower. During this period roots and leaves begin to develop inside the bulbs. Plant Care The ideal soil for Tulips in general is a loose loam that includes sand, gravel, and compost – the soil should drain very well. Feel free to mix in a little 5-10-10 fertiliser into the soil. Digging Up Tulip Bulbs You will usually read that Tulip bulbs should be treated as ‘annuals’ and that they must be dug up and discarded after a year, and new bulbs planted. I personally feel that the fragility of Tulip bulbs is rather exaggerated. That stated, the unfortunate truth is that Planned Obsolescence is affecting, not just the Tulip Trade, but, the Floricultural Industry as a whole. Only rank-and-file gardeners, the ultimate consumers, can bring about a change by demanding and buying reliable perennial bulbs (and non-sterile seed varieties for other plants). If you purchased a healthy, good-quality bulb, planted it correctly in good soil, and even fed it, it will continue producing flowers for years. This is especially true for certain Divisions, for example 1, 4, 5, 14 and 15. Admittedly, the same may not prove true for other Divisions, for example 7 and 10. ‘Monsella’ Tulips Though you may – or ought to – deadhead flowers, do not cut off a Tulip’s (or, in general, any bulb’s) leaves until they are totally withered and browned. Overwintering In regions that fall in USDA Zone 5 and above Tulip bulbs can be left in the ground through winter. Almost the entirety of the United Kingdom falls in USDA Zone 7 and no region falls in Zone 5 or lower. If you leave your bulbs in the ground over winter, just be sure that the soil is well-draining, spread leaf mulch thinly on the soil before winter sets in, and if there is a prolonged dry spell water the bulbs weekly. If you anticipate very cold weather or frost, spread horticultural fleece over the soil. In mid-March, feed the bulbs with a slow-release 5-10-5 and start to water again. If you leave your bulbs in the ground through the winter, you will reap a bonus. Division Each year, the bulbs will have grown offsets, which you can divide and replant as new bulbs. These small bulbs can take a couple of years to flower. After two years, either re-work the soil or shift the bulb so that it is about 20cm away, both from its own previous position and from other bulbs’ positions. Common Problems Tulips are, relatively speaking, very resistant to pests and are disease-free. Stem-And-Bulb Eelworm Unfortunately, the one pest that they are susceptible to is one of the nastiest and most damaging of all, stem-and-bulb eelworm. If you suspect an eelworm infestation you may even have to dig up a few bulbs and cut them open for inspection as to whether or not the problem is in fact eelworm. As a stem-and-bulb eelworm infestation persists in the soil and is difficult to eradicate, this pest needs to be discovered and treated early by qualified professionals. Other than that, Tulips may be attacked by aphids and slugs. Tulip bulbs are prone to bulb rot but this is a disease that can be forestalled by planting them in the right type of soil that drains well. “The Tulip Fire fungus is also a common problem and shows as scorched leaves and flowers which rot,” adds Roy. “It can be avoided by planting as late as possible (November) and not planting tulips in infected ground for at least three years.” References 1. Christenhusz, M. J. M., Govaerts, R., David, J. R., Hall, T., Borland, K., Roberts, P. S., Tuomisto, A., Buerki, S., Chase, M. W., & Fay, M. F. (2013). Tiptoe through the tulips – cultural history, molecular phylogenetics and classification ofTulipa(Liliaceae). Botanical Journal of the Linnean Society, 172(3), 280–328. https://doi.org/10.1111/boj.12061 2. Statista Research Department. (2022c, September 27). Netherlands: value import and export tulip bulbs 2021. Statista. Retrieved March 27, 2023, from https://www.statista.com/statistics/581482/value-of-the-import-and-export-of-tulip-bulbs-in-the-netherlands/ 3. Trinklein, D. (2016, October 10). Tulip: A Brief History. Integrated Pest Management. Retrieved March 27, 2023, from https://ipm.missouri.edu/MEG/2016/10/Tulip_A_Brief_History/
Learn more
Grow These 8 Lily Types With Stunning Trumpet, Oriental And Asiatic Options
IN THIS GUIDE Expert Opinion Types Of Lilies 1) Asiatic Lilies 2) Oriental Lilies 3) Orienpet Lilies 4) Trumpet Lilies 5) Canada Lilies 6) Longiflorum Lilies 7) Longiflorum Asiatic ‘LA’ Hybrid Lilies 8) Turk’s Cap Lilies Let Loose With Lilies Delicately elegant and effortlessly beautiful, lilies are one of the most recognisable flowers in the world. They’ll be right at home in any style of garden, whether it’s a country cottage or something more modern and contemporary. “From Asiatic Lilies in pots used in a formal style to Martagon Lilies grown in a woodland understory in a naturalistic style, lilies offer something for every gardening temperament and style,” says Horticultural Consultant Colin Skelly. “I use them in both of these ways but considering the options, there are many more ways I should explore.” Lilies are often regarded as a little old fashioned but, thanks to thousands of hybrid varieties that see them blooming in every imaginable colour with their own unique fragrances, they’re making a comeback in a big way. Lilies are also suitable for any garden size as they can be grown in the open ground or pots, meaning you can include them in even the most compact space. Easy to grow and maintain, lilies are extremely rewarding and are the perfect way to add a boost of beauty and colour to your garden. This plant features heavily in various cultures and religions, where their symbolism plays a prominent role. Whether you believe in the symbolism of the lily, or just enjoy their gorgeous aesthetic, they’re an undeniably excellent addition to any garden. Expert Opinion “My favourite type of lilies changes throughout the growing season,” says Lynn Slackman, the President of the North American Lily Society. “The early Martagon and Species are a sight to behold, as they are both so petite and charming. “The Trumpets and Aurelian varieties are large, commanding, and fragrant, and the interdivisional hybrids that bloom towards the end of summer bring that last bang of colour and fragrance to the garden.” Types Of Lilies With so many Lilium varieties to choose from this can be a daunting task, so we’ve done the hard work for you. We have separated the lilies into eight divisions and picked out our favourite type within each division – as well as many further choices (with an image for each!). 1) Asiatic Lilies Bred from several different types of lilies, these hybrids provide the earliest lily bloom. Their petals are often spotted and can be white, yellow, red or orange. They also make long-lasting cut flowers and are a popular choice for wedding bouquets. Their lack of fragrance means that they won’t disrupt the scent of the perfume that a bride may be wearing. Our Favourite Asiatic: Lilium ‘Grand Cru’ Brighten up your garden with the gorgeous Lilium ‘Grand Cru’ This cultivar of lily is a gorgeous, upwards facing plant with bright yellow, wide-open flowers. The grand cru blooms from early to mid-summer and is ideal as a border plant, providing a showy blast of colour which will contrast nicely with perennial plants. Growing up to four feet in height, this plant is beloved by bees and easy to grow and maintain. This cultivar will also grow reliably in containers so are perfect even within a smaller garden. More Asiatic Lilies Pink Giant Tiger Lily ‘Fata Morgana’ ‘Apricot Fudge’ ‘Must See’ ‘Stargazer’ ‘Elodie’ ‘Eyeliner’ ‘Lollypop’ ‘Yellow Bruse’ ‘Levi’ ‘Friso’ ‘Black Pearl’ 2) Oriental Lilies If you are looking to fill your garden with fragrance, then oriental lilies are the way to go. Their pretty perfume is most prevalent in the evenings and is the perfect companion for balmy evenings when you sit out on your patio or decking. This variety produces broad leaves and large exotic flowers, blooming in shades of pink, purple, white and yellow. Oriental lilies are known for their big, flamboyant personalities and bloom for an extended period of time between mid to late summer and often right through into autumn. Our Favourite Oriental: Lilium ‘Starlight Express’ This eye-catching and fragrant plant is a real showstopper with up to fifteen fabulous flowers per stem. Best grown in full sunshine this is a truly rewarding plant and is ideal for adding glorious splashes of colour to your borders. This cultivar is incredibly easy to grow and care for, and the colour and scent can transform your garden. They are also perfect for container growing and make excellent fresh cut flowers. More Oriental Lilies ‘Casablanca’ ‘Big Smile’ ‘Big Brother’ ‘Polar Star’ ‘Dizzy’ ‘Aisha’ ‘Companion’ ‘Exotic Sun’ ‘Kaveri’ ‘Marlon’ ‘Petrolia’ ‘Sorbonne’ 3) Orienpet Lilies Crossed between oriental hybrids and trumpet types, orienpet lilies are the perfect variety for your summer garden. These beautiful lilies are highly aromatic and come in a huge array of colours. Our Favourite Orienpet: L. ‘Black Beauty’ Blooming ‘Black Beauty’ The Lilium ‘Black Beauty’ is a truly spectacular garden plant and is extraordinarily vigorous. Its deep crimson flowers are embellished with thin white margins which bloom in mid-late summer. Best planted in full sun or partial shade, this lily will thrive in fertile, acidic, well-drained soil. They are resistant to disease, and much more tolerant to heat, cold and drought than many other varieties. These factors combine to give this cultivar a reputation as a real break-through in lily breeding. More Orienpet Lilies ‘Anastasia’ ‘Belladonna’ ‘Flashpoint’ ‘Nymph’ ‘Robert Swanson’ ‘Scheherazade’ 4) Trumpet Lilies Known also as Aurelian lilies, this type is prolific in appearance and colour, and are also gloriously fragrant. Named for its triumphant, trumpet-shaped flowers, this type comes in shades of pink, yellow, orange, cream and white. They are magnificently tall, easy to grow and can produce up to fifteen blooms per stalk. They have an exceptionally long flowering period and are perfect for perennial borders. Our Favourite Trumpet: L. ‘African Queen’ The queen of the lilies Delightfully fragrant the L. ‘African Queen’ certainly deserves its royal title. It’s large, apricot coloured trumpets give it a real sense of ceremony and the outer petals boast a beautiful burgundy colour, creating an air of luxury. This glorious lily is celebrated for its sensational scent and its magnificent aesthetics. Growing up to 6 feet in height, this easy-to-grow lily performs best in full sun or partial shade and, despite its grand name, is not fussy about soil types. Plant in spring or autumn and you will be rewarded with a sensationally striking display. More Trumpet Lilies ‘White Planet’ ‘Regale’ ‘Bellsong’ ‘Pink Perfection’ ‘Golden Splendor’ ‘Easter’ ‘Regale’ 5) Canada Lilies This North American native type of lily is blessed with beautiful yellow or orange petals and can grow up to four feet in height. With each stalk producing up to eight leaves per stem and up to twenty gorgeous flowers, this variety has become a firm favourite among gardeners. Best suited to woodland gardens, Canada lilies will thrive in meadow-like areas. It is worth noting, however, that while they are well-loved by gardeners, they are equally adored by rabbits and deer. If you live in a countryside setting this might not be the ideal lily type for you. Wild yellow Lilies Introduce the true colour of summer to your garden Sporting bright, fresh yellow blooms with adorable black spots, this is one of the most charming varieties of lily. That said, whilst it is easy to plant, you may end up waiting up to five years for them to come into bloom. Most Canada lilies are best grown from bulbs and prefer full sun or partial shade in slightly acidic soil. These delightful plants add charm and whimsy to your garden and bring with it the true colour of summer. 6) Longiflorum Lilies Typically known as Easter lilies, longiflorums are encouraged to bloom out of season by exposing the bulbs to the right conditions. With their trumpet-like shape and scented white blooms, this type requires a little more expertise, but are well worth the patience. After enjoying their beautiful bloom, you should introduce the bulbs into your garden where they will enjoy full sunshine and well-drained soil. Our Favourite Longiflorum: ‘Elegant Lady’ Elegant by name, elegant by nature Also known as pink easter lilies this sweetly scented plant is a joy to include in any garden. With their delicate pink petals that transcend into dusky, pink centres, these are a pleasure to behold. This cultivar is outstanding for attracting bees and butterflies, and other vital pollinators and are a perfect accompaniment to borders or patio containers. Choose a sheltered position in moist soil and watch this beauty thrive and breathe life into your garden. More Longiflorum Lilies ‘Vuvuzela’ 7) Longiflorum Asiatic ‘LA’ Hybrid Lilies Created from a combination of Asiatic and Easter lilies, this cultivar is the real “showgirl” of the bunch. What they lack in fragrance they make up for in colour, with pinks and yellows, creams and whites and almost everything in between. These lilies are an exciting crossbreed of Asiatic and Easter lilies and perform well in gardens thanks to how quickly they multiply. Our Favourite LA Hybrid: L. ‘Kentucky’ A taste of the exotic With their burnt orange complexion, sprinkled with a shower of burgundy spots, the Kentucky lily is striking to behold. Like most lilies, this variety also favours full sun to partial shade and will bring a vibrant boost to your garden. If you are keen to add a taste of the exotic to your garden, then the Kentucky lily is just what the doctor ordered. With its leopard-like patterns and colours to die for, this plant will be a focal point of your garden and will truly bring it to life. More LA Hybrid Lilies ‘Brindisi’ ‘Forza Red’ ‘Courier’ ‘Royal Sunset’ ‘Corallo’ ‘Golden Tycoon’ ‘Indian Diamond’ ‘Pink Brush’ 8) Turk’s Cap Lilies Last, but certainly not least, the Turk’s cap lily is easily recognisable by its lovely blooms which dangle down its stalks. Blossoming in colours of pink, purple, orange and red, Turk’s cap lilies are the perfect way to add a little romance into your garden. Our Favourite Turk’s Cap: Martagon Lily Beautiful and balletic Martagon lilies can grow up to nine feet in height and are the perfect way to add towering colour, texture and structure to your garden. This cultivar requires rich soil, and though they prefer full sun, they will still do well in dappled shade. This lily’s gorgeous flowers give the impression of dancing ballerinas and bring a sense of serenity and peace to any garden. More Turk’s Cap Lilies ‘Lady Alice’ ‘Henry’ ‘Scheherazade’ (again!) L. speciosum var. rubrum ‘Arabian Night’ ‘Orange Marmalade’ Let Loose With Lilies By now you should know all you need to know about the abundance of lily varieties and the many shades and colours they can provide to your garden. Lilies are surprisingly easy to grow and contribute significantly to your garden’s personality. With so many options to choose from, it’s easy to see that there is a perfect lily for any garden, no matter its size. So let loose and start planting, and soon your garden will be filled with the exquisite beauty of lilies.
Learn more
Growing Cyclamen With The Experts - These Are The Varieties And Care Tips To Get Started
IN THIS GUIDE Overview Cyclamen Varieties Planting Cyclamen Soil Requirements Where To Plant When To Plant Planting Out Plant Hardiness Cyclamen Plant Care Pruning References Cyclamen is a cute and attractive family of flowers that bring reds, pinks, purples, and whites to your outdoor spaces. They’re hardy perennials, making them popular choices for British gardeners, and, depending on the varieties you choose, they can bring colour to your garden year-round. This plant is so popular in some places that its populations have been depleted by illegal collection, making them endangered.1 By growing cyclamen in your garden you could be contributing toward the preservation of at-risk species, which is an exciting prospect.2 We have collaborated with Trevor Wiltshire from The Cyclamen Society in writing this guide. Trevor has a particular fondness for cyclamens, citing his interest in the species: “They are permanent perennials that need very little care and provide interest and colour for 11 months of the year when a wide range of species are grown”. Overview Botanical Name Cyclamen Plant Type Perennial Flower Native Area Europe / Mediterranean Hardiness Rating H1C – H4 Foliage Leaf shape varies Flowers Various, usually pink, white or purple When To Sow January, February, March, October, November, December Flowering Months January, February, March, April, May, June, August, September Cyclamen from UK garden centres – whether you buy the plant or the seed – is propagated responsibly, so you don’t need to worry about contributing to the threat wild cyclamen plants face. Cyclamen is a genus of plant that contains 24 species; all of which are perennial.3 The family is native to Europe, with some species as far-reaching as Iran and eastern Africa. While all species share the same broad colour palette, there are aesthetic differences between them. Depending on the look you’re going for, different species will appeal more than others. When choosing cyclamen for your garden, be sure to know what it will look like throughout its lifespan. These plants are perennial, meaning they’ll come back year after year. Rushing the decision, or buying seeds without researching the adult plant, could be a mistake that sticks with you for a long time. Cyclamen Varieties “I adore hardy cyclamen because they are amazing little plants for autumn into winter and early spring, often growing in quite difficult places where not much else grows, like shade under trees,” shares Garden Designer Noel Kingsbury. “They are small scale but are wonderfully indestructible and unusual little flowers.” The cyclamen genus is smaller than some other garden plants, with just 24 species. When asked about his favourites, Trevor notes: “Cyclamen coum for mid-winter colour and foliage interest, C. graecum in walls (Cornish hedges) and raised beds to give nice foliage and then good flowers in late summer. “C.hederifolium as a ‘bomb proof’ all round garden plant in shade and woodland.” Here are a few favourites to get you started: C. ‘Laser Rose’ Despite the futuristic name, this soft-pink cyclamen brings a calming energy to outdoor spaces. It thrives in partial shade, with a south, east, or west-facing aspect. It’s not fussy when it comes to soil: you can grow it in sand, clay, chalk, or loam; at most accepted pH levels. After planting it’ll take 2-5 years to reach its maximum height of about half a metre. This variety will burst forth with pink flowers in winter. C. ‘Sierra Scarlet’ These flowers have a lovely blend of crimson and vintage pink, providing an engaging splash of colour in the winter months. The variety grows quicker than the ‘Laser Rose’, taking one year to reach its full height and spread of about half a metre each. C. rhodium (Peloponnesian Cyclamen) This variety sports lantern-shaped flowers with light pink tops and rich, deep pink bottoms. They’re smaller than previous cyclamens, reaching a height and spread of about 10cm over 1-2 years. You’ll enjoy a pink explosion in springtime if you go for this variety. Planting Cyclamen This guide details how you can grow cyclamen from bulbs, or via transplanting – growing from seed is a whole different ball game, and we’ve not covered that here. You can buy young cyclamen plants from traditional garden centres, online merchants and everywhere in between. You can also buy young plants that need to be transplanted, a process which is quite easy. Soil Requirements All the varieties featured above are happy in loamy, sandy, clayey, or chalky soil. Cyclamens prefer well-drained soil but are not fussy when it comes to pH levels. Where To Plant Although different varieties flower at different times, try to avoid mixing varieties in the same area. Intuitively, this seems like a way to alternate flowering seasons and guarantee colour year-round, but what actually happens is that one variety will dominate – and eventually kill off – the other. With this in mind, you’ll want to leave about a metre between varieties. Because cyclamen is quite a low-profile plant, many gardeners use it as ground cover for roses or other taller plants. Most varieties will thrive in partial shade, with west, south, or east-facing aspects, and a bit of shelter. The space underneath a tree can often be ideal, as Horticultural Consultant Colin Skelly explains: “I tend to plant Cyclamen underneath deciduous trees or shrubs because they provide a sheltered environment in summer and winter, provide leaf mulch and a bright winter environment where they can flower whilst most other plants have died back.” Again, double-check the preferences of the varieties you’re considering incorporating into your garden. When To Plant To give your cyclamens the best shot, you’ll want to plant them in autumn, winter (if the ground allows), or early spring. These plants shouldn’t present too much of a challenge, as long as you choose a spot that’s not too sunny. Planting Out As we’re discussing either bulbs or young plants in this article, your first step when planting cyclamen is to dig a hole. Then, whack in a bit of gravel and sand at the bottom to provide drainage. Cyclamen bulbs are prone to rotting if they’re overwatered, so this is important. Next, plop the bulb at the bottom of the hole, or push down the young plant until it’s securely in the ground, then gather soil around the top and water thoroughly. It’s recommended that you wait until your bulb (or tuber) is showing roots. This helps you to distinguish the top from the bottom and improves the chance of successful growth. Plant Hardiness Amongst the varieties above, the hardiness rating varies between H1C and H4. You can grow plants with the former rating outdoors in summer, with a preferred minimum temperature range of 5-10°C. Plants rated H4 are suited to the UK climate year-round, excepting very extreme conditions. Depending on your location and needs, your ideal hardiness rating will vary. We always recommend researching the properties of the specific varieties you’re interested in, and choosing the most suitable. Cyclamen Plant Care This plant thrives with even watering and cool temperatures. It will die back out of season: the leaves will die away, and it may look like hope is lost for another year of colour, but be patient. The bulbs will flower again, and the plant will return to its former glory. Mulching in winter with leaf-mould will nourish the soil around your cyclamens and help them to grow back big and strong next year. Pruning Remove all dead plant matter during the down season for aesthetic reasons. The cyclamen family is bursting with attractive and relatively easy-to-grow plants that will bring colour and excitement to your garden. A careful selection of varieties will ensure visual interest year-round, and with a little bit of care, you should be on track for healthy and rewarding plants. We hope this cyclamen growing guide has been a useful starting point. Enjoy your gardening! References 1. Cyclamen – Cyclamen hederaefolium. (n.d.). Brickfield Spark. Retrieved March 14, 2023, from https://www.brickfieldspark.org/data/cyclamen.htm 2. Yesson, C., & Culham, A. (2006). A phyloclimatic study of Cyclamen. BMC Evolutionary Biology, 6(1), 72. https://doi.org/10.1186/1471-2148-6-72 3. Cyclamen L. (n.d.). Kew Royal Botanic Gardens. Retrieved May 15, 2023, from https://powo.science.kew.org/taxon/urn:lsid:ipni.org:names:32774-1#children
Learn more
How Experts Grow Guernsey Lilies With Tips From Two Respected Nerine Enthusiasts
IN THIS GUIDE Overview Habitat & Growing Conditions Guernsey Lily Varieties Other Nerines Guernsey Lily Benefits How To Grow Nerine Nerine Care & Maintenance Common Problems References There are many types of flowers you can plant to add great colour and interest to your garden, but few are as incredible as the Guernsey lily. The great thing about Guernsey lilies is that unlike a lot of other flower species, they’re able to easily withstand the harsh conditions of UK winters, so you don’t have to worry about them struggling to cope with colder temperatures and frost. Guernsey lilies come in a variety of colours and are perfect for growing in your garden, in pots or using the cuttings as part of a display. In this guide, we collaborate with a few respected nerine enthusiasts here in the UK: Caroline Stone – Journal Editor of ‘Amaryllids’, The Nerine and Amaryllid Society’s own published journal. Nick de Rothschild – Oversees the Exbury Nerines collection at Exbury Gardens. “Nerines are such wonderful plants for the Autumn, providing bright colour to carry us into the winter,” says Caroline. Overview Botanical Name Nerine Common Name(s) Guernsey Lily Plant Type Perennial Flower Native Area South Africa Hardiness Rating H5 Foliage Linear leaves which show after flowering Flowers Lily-like pink flowers When To Sow March, April Flowering Months September, October, November, December Let’s start by looking at the origins of the flower. Guernsey lilies, also known by their botanical name as ‘Nerine’ plants, are a type of flower that originates from South Africa.1 Although they originate from South Africa, they have been cultivated on the island of Guernsey for more than 300 years, hence their name.2 The genus Nerine, which Guernsey Lilies belong to, was first established in 1820 by Reverend William Herbert.3 Habitat & Growing Conditions Guernsey lilies are native to South Africa, which means they are best suited to a temperate climate and cannot cope with prolonged exposure to extreme heat or cold. Knowing the conditions that Guernsey lilies grow in the wild is certainly useful when you’re growing your own. They grow best when they’re not disturbed and can be grown in bunches, provided you provide adequate space between each bulb. Guernsey Lily Varieties The term ‘Guernsey Lily’ is often used to describe the various types of nerine plants, with the two most common being N. bowdenii and N. sarniensis. Below is a description of both plants – Nerine bowdenii N. bowdenii is the first type of Guernsey lily and the variety that people most often think of when they hear the name. It has distinctive bright pink flowers and does well in temperate climates. N. sarniensis The other prominent type of Guernsey lily is N. sarniensis, which shares a lot of similarities with N. bowdenii, being suited to temperate climates. The main visual difference between the two is the colour of their flowers, which are scarlet as opposed to pink. N. sarniensis is also less hardy than N. bowdenii, requiring winter protection to survive. “We have one of the finest collections of N. sarniensis in the world,” says Nick, when discussing his collection of nerines at Exbury Gardens. “These nerines produce a wondrous spectacle in October that is just amazing to observe.” Other Nerines There are some other excellent plants in the Nerine genus that allow you to add a further range of colours to your garden. “Increase the colour range of hardy nerines by growing several varieties,” says Caroline. Her recommended varieties include: N. bowdenii ‘Isabel’ N. bowdenii ‘Stefanie’ N. bowdenii ‘Ella K’ N. bowdenii ‘Bianca Perla’ N. ‘Regina’ N. ‘Wolsey’ N. ‘Dingaan’ Below are some of the best ones to try: N. bowdenii ‘Alba’ N. bowdenii ‘Alba’ has white star-shaped flowers and is excellent for use with other types of Guernsey lilies. It looks great either in a container, border or garden bed; you can also cut them to display in a vase if you want. Alba plants are hardy, so you don’t have to worry about them being exposed to wind/frost etc. in winter. You should plant them in soil that’s well-drained and in a spot that gets good exposure to the sun. N. undulata N. undulata is another beautiful variety and would be perfect planted in a sunny border, providing it gets some shelter later in the day. It will generally do best in soil that’s not too saturated. Guernsey Lily Benefits Below are some of the main benefits of growing these plants – They help to add colour and interest to your garden. They’re suitable for being planted in flower beds as well as pots and containers. They’re completely hardy, so you don’t have to worry about them getting damaged or dying during harsh weather conditions in the winter. They generally don’t suffer from any diseases or pests. They can be bought very easily. They are very easy to grow. They look great when planted together in bunches. How To Grow Nerine You have the option to grow Guernsey lilies either directly in the soil of a flower bed or border; or in containers. They do well in either growing method providing they get enough water and sunlight. “I would recommend growing nerines in a glasshouse or a frost-free greenhouse,” says Nick. “They like square, plastic 2-litre pots for the most successful flowering. I’ve found that this also is the best choice for their annual root development.” Container Growing Growing Guernsey lilies in pots or containers is quite simple, but it’s important you take the right steps at the beginning to make sure they flower well. The first step is to fill your container with soil. You don’t need to be too particular about the condition or the pH of the soil; providing it’s not too moist it will be fine. Dig a hole in the soil and place the bulb in it, leaving an inch above the top of it. If you’re planting multiple bulbs in the same container, then you should leave roughly 8-10 inches between them, so they have enough room to grow. In the UK climate, it’s usually okay to leave potted Guernsey lilies on a windowsill. This way you can ensure it gets a good amount of sunlight during the day and shade in the evening. Make sure to water the plants generously when you notice they’re growing. However, “don’t over water, as waterlogging will cause the bulbs to rot,” warns Caroline. “In the greenhouse, withhold water from N. sarniensis when they go dormant and wait until signs of growth (usually in August in the UK) before starting to water again.” You should notice foliage first beginning to appear in the spring and summer, with the flower stems appearing in autumn. Flower Beds & Borders When you’re planting Guernsey lilies in a flower bed, the same basic planting procedure mentioned above should be used. The most important part of planting Guernsey lilies outdoors is that you find the right spot for them. “If you live in coastal areas of southern or western UK, you probably have mild enough winters to grow nerines outside all year round,” says Horticulturist Colin Skelly. “I grow them at the base of south-facing walls. They flower best when they form clumps, declining only when they become tightly overcrowded (when they should be divided).” The soil where you plant them should drain well and not be susceptible to waterlogging. Nick recommends Johns Innes No. 3 for nerine bulb planting. If water gathers in the soil hours after a downpour, you should find another spot. Dig holes in the soil where you want to place your bulbs and plant them with the necks roughly an inch above soil level, as Caroline explains: “Hardy nerines (mostly N. bowdenii) are very easy to grow but you must remember to plant them so the neck of the bulb shows above the ground.” Again, if you’re planting multiple bulbs, then just be sure to leave enough space between them. Water them well after planting, as well as during dry spells and when you notice new growth. Planting Bulbs The best time to plant Guernsey lilies is in spring. Planting the bulbs at this time will give them plenty of time to get established, with the first signs of growth appearing in early autumn. Nerine Care & Maintenance Generally, Guernsey lilies are very hardy and can cope well with harsh conditions. Still, it’s not a bad idea to use mulch in the winter to prevent the soil from becoming frozen and cracking. It’s also important to avoid moving your lilies once they’ve been planted. Guernsey lilies don’t cope well with being disturbed, so you should avoid doing this unless completely necessary. It’s a good idea to add some bulb food or fertiliser when you first plant Guernsey lily bulbs as this will help to encourage growth. “Remember to divide clumps of hardy nerines when they get congested,” Caroline advises. “This will give you more bulbs to spread around your garden!” Common Problems One of the many great things about Guernsey lilies is that they’re not nearly as prone to diseases and pests as a lot of other plant species; in fact, they’re generally considered to be disease-free. Although Guernsey plants are very hardy and resistant to diseases and pests, this doesn’t mean they’re completely problem-free. “Tender nerines (N. sarniensis) need to be given winter protection such as a greenhouse – and you also need to watch out for mealybugs, which can be an issue in greenhouses,” says Caroline. “A systematic bug killer can be applied in August whe root growth is active to get rid of mealybugs,” adds Nick. N. sarniensis One problem that Guernsey lilies can suffer from is not flowering. This is usually because proper care hasn’t been taken to provide the plants with the best environment. Some rules to adhere to if you want them to flower are – 1) Plant Them In Good Soil Although Guernsey lilies are hardy plants, it’s still necessary to ensure they’re planted in soil that’s in decent condition. Soil that’s very dry and cracked or overly saturated should be avoided. 2) Allow Enough Room For The Bulb When Planting You’ll certainly want to ensure that you leave enough room when planting the bulb so it’s able to grow. Dig a hole in the soil and when placing the bulb in it, leave the top of bulb roughly an inch above soil level. 3) Water Regularly In the months after you first plant Guernsey lily bulbs, it’s vital that you make sure you water them regularly. How much you need to water your bulbs will depend on the weather and where they’re planted. If you have them in pots, then soaking them once every couple of weeks will work well. If your bulbs are planted outdoors, then you should water your plants after they’re first planted, during dry spells and when you notice any new flowers emerging. “You can also feed during the growing period with a weak tomato fertiliser,” Nick suggests. 4) Make Sure They Get Plenty Of Sunlight Sunlight is equally important for Guernsey lilies as water. You should place any plants that you have in a spot where they’ll get plenty of sunlight during the day. If you put your bulbs in pots, then you should place them on a windowsill or somewhere else where they can get sunlight. Outdoor plants should be planted in a spot where they get at least some sunlight during the day. References 1. Nerine. (n.d.-b). Kew Royal Botanic Gardens. Retrieved March 16, 2023, from https://powo.science.kew.org/taxon/urn:lsid:ipni.org:names:1561-1 2. Nerine. (n.d.-c). Royal Horticultural Society. Retrieved March 16, 2023, from https://www.rhs.org.uk/plants/nerine 3. Nerines. (2009, September 18). The Northern Echo. Retrieved March 16, 2023, from https://www.thenorthernecho.co.uk/opinion/latest/4636850.nerines/
Learn more
Use Good Drainage To Grow Perfect Daffodils Say These Narcissus Specialists
IN THIS GUIDE Overview Planting Daffodils Daffodil Care Soil & Fertilisation Preferred Aspect When Do Daffodils Bloom? Pruning Common Problems Storing Bulbs References Daffodils are among the most popular of perennial flowers, radiating, as they do, a merry innocence with their nodding friendliness, and offering – dare we say – “such a jocund company”!1 Narcissus, commonly called ‘daffodil’ in the United Kingdom and Northern USA, is a genus of long-lived perennial spring bulbs. In this guide, we’ve teamed up with: Anne Wright, Owner of Dryad Nursery. Janet Hickman, President of The American Daffodil Society. “Daffodils brighten up the spring,” says Janet, when asked why she is so passionate about growing these lovely flowering bulbs. “They are easy to grow, require no special pesticides, chemicals, or pruning techniques and are not generally troubled by deer or other garden invaders.” Daffodil flowers typically comprise of a conspicuous corona surrounded by six tepals. Flattened strap-like leaves are attached to the base of the main stem. Overview Botanical Name Narcissus Common Name(s) Daffodil Plant Type Bulb Native Area Southern Europe and North Africa Hardiness Rating H6 Foliage Herbaceous, linear leaves Flowers Recognisable flowers with trumpet or cup-like centres When To Sow September, October Flowering Months February, March, April, May When To Prune July The botanical origins of Narcissi lie in the Iberian Peninsula some 25 to 20 million years ago.2 Although the landmasses surrounding the Mediterranean Sea are prime daffodil country where the greatest diversity is found, the flower occurs naturally in most of Europe, in Northern Africa, and eastwards through to Iran. Its habitats are many and varied as daffodils grow on rocky escarpments as well as marshland, in Switzerland’s mountainous pastures and in French grasslands and woods. Although Narcissus plants were much-liked and cultivated even in Ancient Times, their popularity took off in the 16th Century when they began to be cultivated.3 Poet’s Daffodil a.k.a. ‘Pheasant’s Eye’ Then along came William Wordsworth and catapulted this hitherto humble wildflower into stratospheric fame in the early 1800s.4 Since then, varieties and cultivars of this wildflower have multiplied even more rapidly. The UK is the world’s leading producer of daffodil bulbs and is also a top-three exporter.5 Planting Daffodils Daffodil are among the easiest flowers to plant and grow, as Anne explains: “They don’t take up much space and add pleasing colours to a perennial garden.” Bulbs are usually planted from September and October, latest by November. Planted thus in autumn, they put out roots through the winter with their flowers being the voiceless heralds of spring. The bulbs should be planted with the nose up, 8-15cm deep depending on the size of the bulb and kept well-watered. “They like plenty of water while they are actively growing but dry conditions while dormant,” says Janet. Daffodil Care In view of the vast variety of daffodils and the geographical regions and terrains that they inhabit, a one-size-fits-all approach to feeding and care is not possible. Soil & Fertilisation That stated, as a general rule daffodils are perfectly content in any old soil but they thrive especially well in rich, loamy soils. Good drainage is necessary for this bulbous plant – and Anne Wright even considers it the most important factor in their care. Daffodils’ optimal soil pH range is 6.5-7.0 but they are not fussy and make do in more acidic or alkaline soils. Experts from both Dryad Nursery and the American Daffodil Society agree that fertilising your daffodils can help improve the plant’s general health. They do very well without fertiliser but if your soil is poor or the plants are not healthy, sprinkle some bone meal, special bulb fertiliser, or a feed like Growmore when the plants are flowering. Janet recommends choosing a feed that is low in nitrogen for your daffodils. Preferred Aspect Daffodils have a preference for sun but also do quite well in partial shade. “If planting in partial shade, the site may become shadier as time passes and surrounding trees and shrubs develop,” shares Colin Skelly, a Horticultural Consultant. “This may cause the daffodils to come up ‘blind’ (not flower). “Cut back to allow light to reach the foliage to allow more energy to be stored in the bulb – this should restore flowering.” The Tahiti Daffodil Daffodils should be watered regularly in spring and autumn. They take the summer ‘off’ – going dormant and should not be watered during this season. When Do Daffodils Bloom? Daffodils begin to bloom as early as February. Most species and cultivars bloom in March and April, with some putting out flowers in early May. May is the month that Montreaux, renowned for its jazz festivals, holds its annual Narcissi Festival.6 Over and above daffodils’ natural blooming cycle, as daffodil flowers are in demand in December, bulbs are manipulated by keeping them at different temperatures for varying periods of time before they are planted in a greenhouse in November for the plant to bloom in mid-December. This is called ‘forcing’. Pruning “Since it is relatively uncommon for modern hybrid daffodils to set seeds without a hybridizer’s help, deadheading is not an essential chore,” says Janet. “If deadheading for appearance’s sake, leave the stem while it is green to continue nourishing the bulb.” After the flowering season is over in May, the leaves develop reserves of energy for the bulbs. Let them be until they are wilted and dead, which will usually happen about eight weeks after flowering season, and then cut them back. “Don’t accidentally dig them up when they’re dormant!” warns Anne. “Once planted, I leave them in the ground and don’t lift and divide them for the best results.” Common Problems Daffodils are typically healthy pest- and disease-resistant plants. However, if and when they are afflicted by something, the causes can be many and widespread. Pests include the narcissus bulb fly, their larvae, nematodes, slugs and snails. They can also be infected by viruses and fungi, basal rot or other types of rot. Narcissus Bulb Fly The narcissus bulb fly, easily mistaken for a smallish bumble bee, itself does no harm. The problem is that it lays eggs in the soil from which larvae emerge and burrow into the bulb. They feed upon the bulb from within and destroy it. You can make your soil larva-resistant by packing it tightly, mulching it, and using insect nets. Remove and discard infested bulbs to prevent the infestation from spreading. Nematodes If your bulbs are infested with nematodes, for severe infestations you will be best off disposing of the infested bulbs and also quarantining the patch of soil where the infestation occurred. Fungal Issues “Basal rot caused by the fungus Fusarium oxysporum can destroy or damage bulbs, especially in any ground that stays too wet,” says Janet. If your bulb has basal rot, you will have to throw it away. One of the best ways to practice the prevention principle is to buy bulbs from reputable and established growers and sellers, to plant only the biggest bulbs, to plant bulbs that have no wounds, mould, or discolouration, and to ensure that your soil is not waterlogged and is well-drained. Ensuring good gardening habits is also important to prevent the spread of disease, Janet explains: “Take care when disinfecting tools and pick daffodils by snapping the stem rather than cutting them, as this can help prevent the spread of viruses that affect the blooms or leaves.” Storing Bulbs If you are planning to store bulbs dug up from the soil, first trim the roots by snipping off their unattached, free-running parts. Then sun dry the bulbs for about 12 hours and store them in a dry room for a further 12 hours as it is important that they be free of dampness. Regardless of whether the bulbs have been dug up or are freshly-bought, store them in a cool, dry, and dark room. The optimal temperature is between 16-18°C with a margin of, say, three degrees. Keep them in a mesh bag so that the bulbs are exposed to air. If you live in a warm climate and do not have a climate-controlled room, store the bulbs in the fridge’s crisper but do not keep any fruit, especially apples, in the same fridge. Do Daffodil Bulbs Multiply In The Ground? Yes, they produce offsets or ‘daughter’ bulbs, and over time clumps of bulbs are formed. This is known as cloning. Image Credit: Dietmar Rabich, Licence The daughter bulbs are smaller and are positioned right beside the parent bulb which initially nourishes the ‘daughter’. As the bulbs multiply, after some years too many bulbs end up occupying a relatively small area of soil. When this happens the bulbs need to be dug up and separated. References 1. Wordsworth, W. (n.d.). daffodils. Retrieved March 14, 2023, from https://www.sccs.swarthmore.edu/users/01/jillyb/daffodils.htm 2. New data on daffodils of the Narcissus nevadensis complex (Amaryllidaceae) in SE Spain: (n.d.). Phytotaxa. Retrieved March 14, 2023, from https://www.biotaxa.org/Phytotaxa/article/view/phytotaxa.371.2.8 3. Rowallane Garden. (n.d.). National Trust. Retrieved March 14, 2023, from https://www.nationaltrust.org.uk/visit/northern-ireland/rowallane-garden 4. I Wandered Lonely as a Cloud by William Wordsworth. (n.d.). Poetry Foundation. Retrieved March 14, 2023, from https://www.poetryfoundation.org/poems/45521/i-wandered-lonely-as-a-cloud 5. Why don’t we grow daffodils in Wales? (2013, April 19). North Wales Live. Retrieved March 14, 2023, from https://www.dailypost.co.uk/business/business-news/dont-grow-daffodils-wales-2914445 6. The narcissus forecasting. (n.d.). Narcisses. Retrieved March 14, 2023, from https://www.narcisses.com/
Learn more


