

Growing

Roy Nicol On Winter Flowering Bulbs (And When To Plant Them)
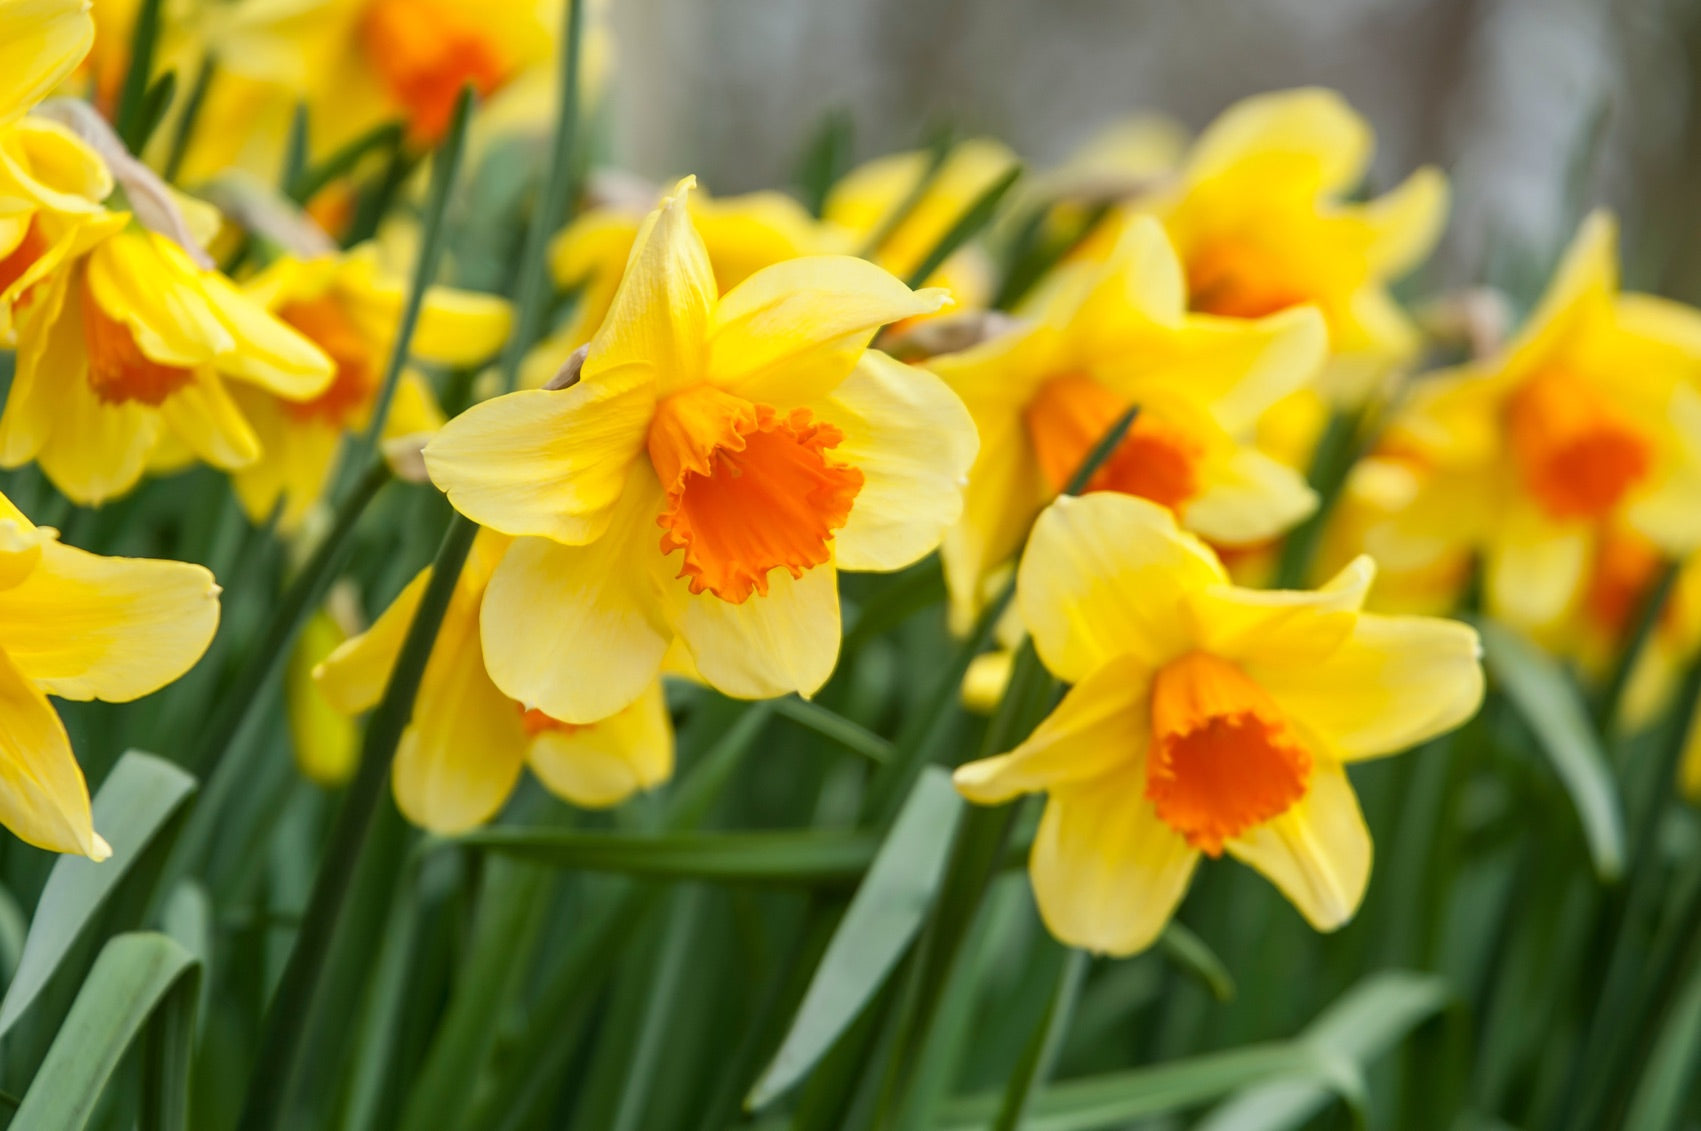
IN THIS GUIDE Selecting Winter Flowering Bulbs 1) Glory of the Snow (Forbes’ Squill) 2) Crocus 3) Eastern Cyclamen 4) Daffodils 5) Early Bulbous Iris 6) Siberian Squill 7) Snowdrops 8) Winter Aconite Winter flowering bulbs can provide a much-needed splash of colour and a mite of cheer to an otherwise drab display during the colder months of the year. Characterised by short days and long nights, winter can become something of a slog for green-fingered enthusiasts. Not only does the inclement weather prevent you from getting your hands dirty, but it also often kills off the carefully cultivated growth that you’ve fostered throughout the year. That can leave your garden looking rather forlorn and forgotten, especially when branches are bare and lawns are covered in a blanket of snow. However, by selecting the appropriate bulbs and planting them with adequate preparation time, you can ensure that colourful blooms brighten up your garden just when it (and perhaps you!) need it the most. Selecting Winter Flowering Bulbs Thankfully, there are a wide variety of winter flowering species to choose from, all of which are far hardier than their fair-weather counterparts and will often survive the frosts of the season to surge back resilient next year. The following selection includes just some of the options open to you, all of which should be planted at least a couple of months before the first frost to give them the best chance of survival. Others will require you plant them into the soil as early as summertime to allow them to properly establish themselves. If any doubt, read the label which came with your bulbs or else ask for advice at your local gardening centre. 1) Glory of the Snow (Forbes’ Squill) BOTANICAL NAME: Chionodoxa HARDINESS RATING: H6 PREFERRED ASPECT: FULL SUN; EXPOSED OR SHELTERED WHEN TO PLANT: SEPTEMBER – OCTOBER FLOWERING MONTHS: MARCH – APRIL It’s not known as ‘Glory of the Snow’ for nothing! This starry-shaped early bloomer will unfold its delicate blue petals long before any of your spring-flowering selection consider braving the elements. Chionodoxa should be planted in early autumn (September is ideal) in well-draining soil and in full exposure to the sun. It also works decidedly well underneath deciduous trees or shrubs, since its propensity for February blooming means that it will emerge before the foliage above it has time to spring forth and block its sunlight. 2) Crocus HARDINESS RATING: H6 PREFERRED ASPECT: FULL SUN; EXPOSED OR SHELTERED WHEN TO PLANT: SEPTEMBER – OCTOBER FLOWERING MONTHS: JANUARY – MARCH Crocus bulbs are actually known as corms and produce vibrant bursts of purple, white and yellow from late winter through to mid-spring. They’re easy-going plants that can be planted anytime between August and November, thriving best in full sun and well-drained soil. They’re also a welcome source of nectar for bees and other pollinators just emerging from their hibernation cycles – but be aware that rodents also enjoy their foliage, so plant them next to less tasty offerings (like hyacinths) to deter unwanted snacking. 3) Eastern Cyclamen BOTANICAL NAME: Cyclamen coum HARDINESS RATING: H5 PREFERRED ASPECT: PART SHADE; SHELTERED WHEN TO PLANT: SEPTEMBER – OCTOBER FLOWERING MONTHS: DECEMBER – MARCH With their first flowers appearing in the depths of January, Cyclamen coum is one of the hardiest species of winter-flowering bulbs. Don’t let that fool you, though; it’s also one of the most impressive you can incorporate into your winter arrangements. The stunning variegated foliage, combining slivers of silver alongside a deep dark green, plays backdrop to the deceptively dainty pink, white and red blossoms. Plant it in September and October in moist soil, but don’t let its leaves get overly wet or they may succumb to rot. 4) Daffodils BOTANICAL NAME: NARCISSUS HARDINESS RATING: H6 PREFERRED ASPECT: ANY WHEN TO PLANT: SEPTEMBER FLOWERING MONTHS: FEBRUARY – MARCH Easily recognisable by their trumpet-like blooms and profound shades of white and yellow, daffodils come in a variety of different species which are sure to complement any existing aesthetic you have in your garden. Most of them will bloom from March onwards, but some, such as ‘February Gold’, will brave the elements even earlier. They should be planted sometime in autumn (September to November, though an earlier date will normally precipitate an earlier bloom) in full sun and well-drained soil. Once the flower show is over, deadhead the plant and allow the foliage to die back naturally so that it can re-emerge triumphant the following year. 5) Early Bulbous Iris BOTANICAL NAME: Iris reticulata HARDINESS RATING: H7 PREFERRED ASPECT: FULL SUN; EXPOSED OR SHELTERED WHEN TO PLANT: SEPTEMBER – OCTOBER FLOWERING MONTHS: FEBRUARY – MARCH Irises have long been associated with French monarchy, thanks to their starring role as the “fleur-de-lis” on many royal fripperies and fancies. While most varieties wait until summer to put on a show, certain species, like the Iris reticulata pictured above, will blossom in late winter. Regardless of variety, bulbs should be planted in the autumn months and are quite fussy about their location – it must be well-draining and in full view of the sun. Comply with those conditions, however, and you’ll be rewarded with spectacular purple and blue petals with a yellow splash in each centre in late February or early March. 6) Siberian Squill BOTANICAL NAME: Scilla siberica HARDINESS RATING: H6 PREFERRED ASPECT: ANY WHEN TO PLANT: SEPTEMBER – OCTOBER FLOWERING MONTHS: MARCH – APRIL A native of Russia and the Caucasus region, Scilla siberica knows a thing or two about withstanding wintry temperatures. Indeed, its origins in Siberia mean that it’s well-equipped to handle even the worst ravages of the British climate and will do just fine in almost all soil types. Get it in the ground from September to November to enjoy its delicately drooping bell-shaped blooms and slim, straplike leaves as early as March. It’s a willing self-seeder and will propagate into large clumps with the minimum of assistance. 7) Snowdrops BOTANICAL NAME: Galanthus nivalis HARDINESS RATING: H5 PREFERRED ASPECT: PART SHADE; EXPOSED OR SHELTERED WHEN TO PLANT: AUGUST – SEPTEMBER FLOWERING MONTHS: JANUARY – MARCH Snowdrops are the archetypal flower that springs to mind when considering bulbs that bloom in winter. With its iconic drooping white petals and dainty, slender stalks, it’s almost an image of the season itself. There are a wide variety of Galanthus available these days, with galanthophiles falling over themselves to pay top dollar for just one bulb. However, there’s no need to break the bank to get your hands on species like “Flore Pleno”, which will take root wherever you sprinkle them. Get them in the ground in October and November to enjoy a spectacular and natural-looking display come late winter. 8) Winter Aconite BOTANICAL NAME: Eranthis hyemalis HARDINESS RATING: H6 PREFERRED ASPECT: ANY WHEN TO PLANT: SEPTEMBER – OCTOBER FLOWERING MONTHS: JANUARY – FEBRUARY So, technically speaking, winter aconite is a tuber, not a bulb – but it shares many of the same characteristics and demands much the same in the way of planting and maintenance. “These fussy plants can be a little difficult to establish, which is why it might be an idea to either plant them in pots initially before transplanting them to the ground once they’ve fully taken root, or plant them ‘in the green’ in February,” recommends Horticulturist Roy Nicol. They should then deliver your reward in the shape of February or March blooms. And when it does arrive, you’ll soon see it was worth the effort. Characterised by delicate cups of brilliant yellow atop a ruff of bright green foliage, winter aconites look for all the world like buttercups enjoying a winter holiday.
Learn more
Growing Sword Lilies With Fred Miller From The Empire State Gladiolus Society
IN THIS GUIDE Overview Why Grow Gladiolus? Gladiolus Varieties Where To Grow Gladiolus Gladiolus Companion Planting Gladiolus Care Common Problems Division References Gladiolus bulbs are technically ‘corms’. Gladioli are beautiful flowers, which can look great in your garden, whether you grow them in the ground or in pots. In this article, you’ll learn when to plant the bulbs, how to plant them, and with what. We even interviewed Fred Miller from the Empire State Gladiolus Society to provide additional insight. “When planted deep enough, gladioli hold themselves upright and bloom as planned each season”, shares Fred, when asked why he is so passionate about these plants. “The many colours and sizes make them the perfect cutting flower to be used on their own in a vase or in an arrangement with other flowers”. Overview Botanical Name Gladiolus Common Name(s) Sword Lilies Plant Type Bulbs / Perennials Native Area Asia, Mediterranean, Europe, South Africa & Tropical Africa Hardiness Rating Differs by variety Foliage Deciduous Flowers Various Flowering Months June, July Plants in this genus, in the Iris family, are sometimes called ‘Sword Lilies’ and the name comes from the diminutive form of the Latin for ‘sword’.1 There are around 300 different species of Gladioli native to Asia, Mediterranean Europe, South Africa and tropical regions of Africa.2 Many species have been used in hybridisation, and now there are many, many varieties out there for gardeners to choose from.3 Today’s main hybrids used in horticulture have been obtained through the interbreeding of four or five different species. Gladiolus have sword-like leaves, and tall flower spikes with funnel-shaped blooms in a huge range of colours. They fell out of fashion for a time but are now making a resurgence. “Gladiolus is definitely making a comeback,” shares Colin Skelly, Master Horticulturist. “I like to grow some of the species, such as G. communis subsp. byzantina and G. murielae. “These are not very tall, so tend to stay upright without support and the flowers are striking without being overly blousy.” Why Grow Gladiolus? Gladioli are sometimes thought of as quite fussy and stolid as a garden choice. With a heavily floral scheme, they can sometimes create a rather old-fashioned appearance to a garden bed, border or pot. However, alongside grasses and lighter perennial blooms, they can look great and bring good contrast to a design. As well as looking good in beds, borders and containers, Gladioli also make very good cut flowers, to bring into your home. The flowers can bloom between March and August, depending on when they were planted, and which variety or varieties you are growing. You might be interested to hear that gladiolus flowers are also edible – you can use the mild-lettuce-like petals as you would use squash blossoms.4 With some varieties, the corms also have culinary uses and are considered a delicacy. Gladiolus Varieties There are a huge range of Gladioli to consider growing in a UK garden. “The many colours and sizes make them the perfect cutting flower to be used by themselves, or in an arrangement with other flowers,” argues Fred. Pink Gladiolus ‘Robinetta’ Some options to consider are: G. ‘Robinetta’ (recurvus hybrid) (AGM) G. communis subsp. byzantius (AGM) G. murielae (Abyssinian gladiolus) (AGM) G. italicus (Field gladiolus) G. papilio (butterfly sword gladiolus) G. cardinalis (waterfall gladiolus) G. tristis (evening flower) G. ‘Trader Horn’ G. ‘Charming Beauty’ G. ‘Belle de Nuit’ G. ‘Vera Lynn’ G. ‘The Bride’ G. ‘Happy Weekend’ G. nanus ‘Charm’ G. ‘Miss Green’ Of course, these are just some of the many beautiful options that you could consider growing in your garden. Where To Grow Gladiolus It is important to remember that Gladioli come from hot and sunny places – so it is important to choose a location in your garden where they will be able to enjoy a sheltered spot, with as much sunshine as possible. Gladiolus varieties can be grown in the ground in a sunny bed or border, or in a container, as long as moist yet free-draining conditions can be provided. Fred Miller explains that one of the most important factors in growing gladioli is that you buy and plant good quality corms. You can plant directly into the ground as long as there are fertile conditions and as long as the soil does not become waterlogged. If growing in the ground, be sure to add plenty of organic matter such as compost or well-rotted manure. In more northern parts of the UK, Gladioli are unlikely to overwinter successfully in the ground; it can be better to grow these in containers that can be moved undercover. However, you can also grow them in a border in summer and mulch heavily for protection, or you can lift the corms for winter storage. Gladiolus Companion Planting Gladiolus do not bring any particular benefits for other plants growing close by. But choosing the right companions for Gladioli can help you achieve an attractive display. In larger containers, for example, or in a bed or border, you might pair a number of different Gladiolus varieties. “We grow Dahlias,” says Fred. “The best part about dahlias is as you cut them, more new blooms grow, and continue throughout the growing season. We enjoy arranging them in a vase with the gladiolus.” Growing with zinnias might be another good option. You might also create a dramatic border with Gladioli and Foxtail lilies, or with Alliums, Verbena bonariensis and grasses for a lighter look. Gladiolus Care Gladiolus are not particularly difficult to care for if you grow them in the right spot. Giving them full sun and plenty of water are said to be the two most important factors for these plants. However, there are a number of other things that you have to get right to grow them successfully. Support One thing to think about is that most Gladiolus varieties will need some form of support. Usually, the plants will have to be staked before the flower spike emerges. Remember, you do not necessarily have to buy in your plant supports – you may be able to make use of branches or bamboo canes grown elsewhere in your garden. You should tie in your plants to your stakes to make sure that they do not flop over or become damaged as they grow. Watering Make sure that you water well during the growing season, especially when growing gladioli in containers. Just make sure that the water can drain freely, and the soil or growing medium is kept consistently moist, but not damp and waterlogged. Feeding For best results, feed your gladioli with an organic liquid feed while it is in flower. An organic feed suited to tomatoes will work well for gladioli too. For example, you might use a liquid feed made from comfrey for the purpose. This potassium-rich feed should encourage healthy and beautiful flowers. Common Problems Gladioli can be bothered by slugs, and also by sap-suckers like thrips and aphids. “Watch for thrips (and other pests) and be sure to keep them away from your plants”, says Fred. Taking care of wildlife in your organic garden, and boosting biodiversity can help keep pest populations under control. Make sure you attract slug-eating creatures, and predatory insects like ladybirds and lacewings to your garden to reduce the chances of these problems occurring. You should also remain vigilant, and remove affected foliage and blooms quickly when you spot an insect infestation. To avoid problems Fred Miller suggests that once the plant is done blooming, or cut, you should let the leaves grow for 6 weeks before you harvest the corms for the next growing season. Diseases Gladioli can be affected by a range of plant diseases including Botrytis Blight, Leafspot, Scab and more.5 Keeping corms healthy to avoid introducing these problems is an essential requirement for anyone growing these plants, insists Fred. “Most of us here in Central New York, USA are careful not to compost old mother corms or stalks. We either burn them or throw them out,” he says. Division Every few years, in autumn, it is best to divide mature Gladioli clumps. There are two main reasons for this – Avoiding congestion – when gladioli clumps become congested, the plants will be weaker, and flowering may reduce considerably. The plants may even stop flowering altogether. Propagating new plants – corms can be split from the clump to create new plants for a different container, or a different part of your garden. Gladiolus bulbs, or corms, can provide you with colour and interest in your garden over a number of years to come, as long as you place them in the right places and care for them correctly. All said, Gladioli can be a great choice for a long-lasting, beautiful garden. References 1. Origin and meaning of gladiolus. (n.d.). Etymonline. Retrieved March 16, 2023, from https://www.etymonline.com/word/gladiolus 2. The Editors of Encyclopaedia Britannica. (2023f, March 9). Gladiolus | Description, Species, & Facts. Encyclopedia Britannica. Retrieved March 16, 2023, from https://www.britannica.com/plant/Gladiolus 3. Chaudhary, V., Kumar, M., Sharma, S. K., Kumar, N., Kumar, V., Yadav, H. K., & Sirohi, U. (2018). Assessment of genetic diversity and population structure in gladiolus (Gladiolus hybridus Hort.) by ISSR markers. Physiology and Molecular Biology of Plants, 24(3), 493–501. https://doi.org/10.1007/s12298-018-0519-2 4. Daily home & garden tip: Fill edible gladiolus blossoms for a dramatic dish. (2011, April 30). The Oregon. Retrieved March 16, 2023, from https://www.oregonlive.com/homesandgardens/2011/04/daily_home_garden_tip_fill_edi.html 5. Gladiolus Diseases. (n.d.). Penn State Extension. Retrieved March 16, 2023, from https://extension.psu.edu/gladiolus-diseases
Learn more
10 Essential Tips For Planting Bulbs In Pots, According To Master Horticulturists
IN THIS GUIDE 1) Choose The Right Container 2) Choose An Appropriate Growing Medium 3) Choose Your Bulbs Wisely 4) Layer Bulbs For A ‘Bulb Lasagne’ 5) Plant Beautiful Bulb Combinations 6) Understand Planting Depths 7) Remember To Plant Bulbs The Right Way Up 8) Space Around A Bulb Width Apart 9) Mulch The Container 10) Use A Mesh Cover For Protection Planting bulbs in pots is a great option for beginners, and is pretty easy to do, but here are some tips to help you make sure everything goes smoothly. Plenty of bulbs are suitable for container growing – and if you make the right choices, you can enjoy longer-lasting displays of blooms and combine bulbs to beautiful effect. Planting bulbs in pots does not usually require a lot of work or effort, but here are some tips to help you get the best results possible and make all the right choices for your container garden: 1) Choose The Right Container Choosing the right containers can make a big difference to the success of your garden. Most spring bulbs like relatively free-draining conditions. It is important to choose a container that will not retain too much moisture, while still retaining enough moisture to keep your plants happy. Terracotta pots are often an excellent choice – they are more eco-friendly than plastic pots, and also provide the right conditions for many bulbs. They are also sturdier and less likely to blow over than lighter weight options when taller bulb plants are grown. 2) Choose An Appropriate Growing Medium Of course, as well as thinking about your containers and what they are made from, it is also important to think about how you fill your pots. “Always make sure that you are using the correct compost and that there is always plenty of drainage,” says Jonathan Hart from Harts Nursery. “If bulbs fail to grow, it is normally because they have become too wet in pots.” When planting bulbs, you will usually fill your containers with a good quality, peat-free potting mix of some kind. Since many bulbs like relatively free-draining conditions, it is also often a good idea to add some sand or grit to the mix to improve drainage. Make sure you use crocks to cover drainage holes at the base so that these do not become blocked and water can drain through. 3) Choose Your Bulbs Wisely Another important piece of the puzzle is choosing the right bulbs to plant – and there are many different options to choose from. The key is choosing plants that are suited to the growing conditions where you live. It is also important to think about when each of the bulbs you are considering is in bloom. By choosing the right bulbs, you can enjoy flowers over a much longer period. Think about selecting bulbs that flower in early spring, mid-spring, and towards the end of the season, for example. That way, you will have flowers for pollinators at each crucial time of the year, and also extend the period of visual appeal. 4) Layer Bulbs For A ‘Bulb Lasagne’ If you select the right combinations of bulbs, you can sometimes layer these in a single container to make a bulb lasagne. It is important, however, to make sure that you understand how to layer the bulbs correctly. “The depth of the bulb planted is related to the size of the bulb and its optimal planting depth,” shares Master Horticulturist Dan Ori. “One thing I would say is that you want to plant your taller bulbs more centrally or towards the back so as not to overwhelm smaller plants.” 5) Plant Beautiful Bulb Combinations When thinking about how to combine bulbs in a container, be sure to think not only about their blooming period and growing requirements but also about how they will look together. Careful consideration of colour, form and size can help you find great container combinations for flowering plants. You might combine tulips and daffodils, for example, or a succession of hyacinths and miniature irises. There are plenty of beautiful bulb combinations that will allow you to get plenty of value from a single container. “Planting winter interest plants over the top of autumn-planted bulbs will make the most of your pots and be far more inspiring than bare compost,” adds Dan. “I plant well-spaced pansies and viola in my winter pots as they have thin shallow roots, the bulbs soon bully their way through in the spring, and if I notice any bulbs struggling to get through, I pull out the pansy.” 6) Understand Planting Depths As well as understanding when bulbs will be in bloom, it is also important to think about the planting depth required for each particular bulb. Some bulbs (tulips for example) should be planted much more deeply than others. As a general rule, bulbs should be planted at a depth of around 3 times their own height. Though this can vary somewhat depending on which bulbs you are growing, this general guideline can help you avoid going too far wrong when planting your bulbs. 7) Remember To Plant Bulbs The Right Way Up Bulbs should be planted the right way up. This might sound obvious – but with certain bulbs it is not always easy to tell. For many bulbs, the end that faces upwards is more pointed, and the rooting base is flatter. But with some bulbs, it can be very difficult to see this clearly. If in doubt, plant bulbs on their sides if possible as they should still grow successfully in this configuration. 8) Space Around A Bulb Width Apart Spacing can also be important. When growing bulbs in a container, you will usually place bulbs more closely together than when growing them in the ground. Again, this is just a general rule of thumb, and there are exceptions, but you should generally think about spacing bulbs around their own width apart from one another. 9) Mulch The Container It can be a good idea to mulch over the top of the container after planting your bulbs. An organic mulch of compost or leaf mould will add fertility as well as retaining moisture in the container. You might also add a decorative gravel mulch, or something similar as a soil cover. 10) Use A Mesh Cover For Protection Finally, after planting bulbs in a container in autumn, you might want to think about adding some protection to protect the bulbs over the winter months. “Make sure you protect anything on the tender side from frost,” recommends Jonathan. If you have squirrels or cats in your garden, they may sometimes dig up and eat your bulbs. If you have cats or squirrels around, one solution to consider is using a piece of mesh to cover over the top of the pots containing bulbs to keep them safe. This mesh should then be removed in the spring once your plants start to emerge from the soil. As you can see from the above, planting bulbs in pots is very straightforward, and you don’t have to be very green-fingered to give it a go. Just bear the above tips in mind and you should enjoy a beautiful flowering display.
Learn more
Can't Let Go Of Summer? Here Are 17 Autumn Flowering Bulbs For Late Colour
IN THIS GUIDE 1) Meadow Saffron (Autumn Crocus) 2) Dahlias 3) Autumn Snowflake 4) Guernsey Lily 5) Winter Daffodil 6) Surprising Snowdrop 7) Begonias 8) Devil Lily 9) Cilician Cyclamen 10) Abyssinian Gladiolus 11) Lucifer 12) Striped Flowered Wood Sorrel 13) Ivy Leaved Cyclamen 14) Purpleleaf False Shamrock 15) Scarborough Lily 16) Byzantine Crocus 17) Society Garlic Autumn Can Be The Prettiest Season Spring and summer are when we traditionally expect to see bright and flamboyant blooms of colour in our gardens. Looking out of my back door now, for example, in early August, I can see sunflowers, dahlias, and zinnias swaying in the breeze; their yellows and pinks competing against each other for my attention. How to keep the colourful blooms through to autumn? Also as I look out of my back door and into the garden, it strikes me that these blooms will soon start to fade. Their colours retreating away until next summer, bringing a completely different visual palette. It’s a shame in some ways, but really it’s just the inevitable truth of gardening, and rather than mourn the passing of each flower each year, it’s a chance to think about what comes next. And if you, like me, want colour in your garden for as much of the year as possible, the answer to “what next?” is simple: a selection of bright and beautiful autumn flowers for late garden colour! “Autumn has replaced spring as my favourite season,” shares Colin Skelly, a Horticulturist with nearly 15 years of experience in the industry. “It might be an age thing, but I no longer experience a sense of loss as summer passes. “Rather, I get a new burst of excitement as the garden transitions into autumn colour and winter structure. “Autumn bulbs are a fantastic way to add another layer of interest to this transition.” In this article, we’ll look at seventeen bulbs that fit the bill for a lovely burst of late-in-the-year colour. After reading you’ll have a good idea of which bulbs to plant in your garden to help ensure that the passing of summer isn’t the end of the captivating floral displays in your prized outdoor space. Let’s begin… 1) Meadow Saffron (Autumn Crocus) BOTANICAL NAME: Colchicum autumnale RECOMMENDED VARIETIES: Autumn Queen; Pink Goblet WHEN TO PLANT: JULY – AUGUST IN BLOOM: SEPTEMBER – OCTOBER The eagle-eyed amongst you will notice that the family Colchicaceae, to which autumn ‘crocuses’ belong, isn’t the family Iridaceae, of which true crocuses are members. If you can move past this deception you’ll find an attractive flower whose September and October bloom provide a perfect backdrop for the rest of your autumnal flower display to build from. The delicate purple flower which grows around a vibrant yellow core stands just a couple of inches off the ground, and looks great amongst grasses and other low-lying greenery. These flowers prefer a well-drained spot and do best in dappled shade: imagine them growing in a little glade section under tree cover and you’ll get a good idea of their ideal growing conditions. Simply plant the bulbs 5cm deep with 15cm between each in August, and you’ll enjoy their bloom that autumn. 2) Dahlias RECOMMENDED VARIETIES: Ellon Huston; Hart’s Autumn Splendour; Autumn Lustre; Wootton Cupid (Pictured) WHEN TO PLANT: JUNE IN BLOOM: AUGUST – SEPTEMBER Another colourful bloom with plenty of versatility is the ever-popular Dahlia. If you’re looking for something with a range of colours and sizes to choose from, then you can’t go wrong with this flower. Dahlia ‘Ellen Huston’ boasts deep orange-red bloom with flowers clocking in around 9cm wide. Their distinctly autumnal colour palette will look fantastic in any late-year display. Or how about the ‘Wootton Cupid’? Similarly sized but with daintier pink flowers, these will look great alone or alongside other varieties. Then you have the yellowy ‘Cream Alva’s’, the white ‘Figurines’, or the sunburst ‘Wootton Impact’ – 15cm across with incredibly flamboyant bloom imitating bright sunlight. These few varieties represent the tiniest selection of Dahlias available for autumn displays, and we recommend getting yourself properly acquainted with the choices on offer. 3) Autumn Snowflake BOTANICAL NAME: Leucojum autumnale WHEN TO PLANT: JUNE – JULY IN BLOOM: AUGUST – OCTOBER These white lantern-like flowers which droop from intriguing red-brown stems clearly communicate the fact that they’re built to thrive in autumn. For the discerning gardener looking to send subtle signals with their displays, autumn snowflakes are a no-brainer: their entire palette evokes autumn and the absence of any green draws attention to the change in season in an unobtrusive but undeniable way. Find a spot with rich, well-drained soil and pop in a few bulbs, then sit back and enjoy the clusters of autumn snowflakes that burst forth from the ground. Combine with other autumnal blooms around their September/October bloom time and you’ll be rewarded with an appealing and attractive display. 4) Guernsey Lily BOTANICAL NAME: Nerine bowdenii WHEN TO PLANT: AFTER LAST FROST IN BLOOM: SEPTEMBER – OCTOBER Browse a list of Nerine varieties and the accompanying images are a parade of pinks, from candyfloss through to flamingo. Names like ‘Bowden Lily’ and ‘Zeal Giant’ jump out from the page, each an inviting prospect for creating autumnal colour in your garden. If you consider pink to be an indispensable part of your garden’s aesthetic, then choosing a nerine or three is a must when designing your outdoor space. There are more than ten varieties well-suited for autumn blooms, meaning the handful we’ve named above barely scratch the surface of the options available to you. Your nerines will bloom from September onwards, lending support to other bulbs in this list that bloom in and around the same month. Grow alone for a stunning pink display, or combine with other flowers for balanced and harmonious bursts of colour. 5) Winter Daffodil BOTANICAL NAME: Sternbergia lutea WHEN TO PLANT: AUGUST IN BLOOM: SEPTEMBER – NOVEMBER These yearning flowers look a little bit like crocuses, making them popular contenders for late garden colour. Sternbergia lutea, for example, also confusingly known as the winter daffodil, is a cup-shaped flower of vibrant yellow: a shade that you’d definitely expect more to belong to spring. Part of creating late colour in your garden is variety, meaning that a bold yellow can work very well alongside the purples and pinks we’ve seen so far. It’s also about establishing themes that run through the seasons, so that visual consistency exists within and between the different phases of your bloom. By using a bright yellow like Sternbergia, you can carry that spring and early summer strand of colour through to subsequent months. Doing this well will provide constant reward as you sit in your garden throughout the seasons and watch the gradual transition unfold. 6) Surprising Snowdrop BOTANICAL NAME: Galanthus reginae-olgae WHEN TO PLANT: MARCH – APRIL IN BLOOM: SEPTEMBER – NOVEMBER Some plant names are adorably evocative of the way the plant looks and behaves, and the surprising snowdrop is a perfect example. Sharing some of their appearance with autumn snowflakes, these lantern-like flowers that droop from proud stems bring a completely different colour contribution to your autumnal displays. The white flowers dangling from bright green stems would look far more fitting in a spring display – perhaps where the “surprising” part of the name comes from. With what we’ve just discussed about carrying threads of colour and shape through from one season to the next though, and it’s easy to see why we’re recommending this plant as one to consider. Find a pot with full sun or partial shade and then sit back and enjoy the show. 7) Begonias RECOMMENDED VARIETIES: Santa Cruz Sunset (Pictured) WHEN TO PLANT: AFTER LAST FROST IN BLOOM: AUGUST – SEPTEMBER There are some flowers whose names will ring bells even for the non-gardeners amongst us, and we think begonia is on that list. The beautiful and fragrant Begonia flower is enough to catch the attention of anyone who sees (or smells!) it and we’d be remiss not to include them in our list. For a selection of autumn varieties let’s start with Begonia ‘Sutherlandii’. This recipient of the RHS Award of Garden Merit – indicating particular suitability to British gardens – has dainty orangey-yellow flowers that tumble forth in early autumn. Or how about Begonia ‘Fragrant Falls’, whose larger flowers boast a palette encompassing lemon yellow, peach, rich pink, and everything in between? If your key criteria when building an autumn flower display is variety and depth of colour, then you’ll be hard-pressed to find something better suited to your needs than begonias. 8) Devil Lily BOTANICAL NAME: Lilium tigrinum WHEN TO PLANT: AFTER LAST FROST IN BLOOM: AUGUST – SEPTEMBER 9) Cilician Cyclamen BOTANICAL NAME: Cyclamen cilicium WHEN TO PLANT: AUGUST – SEPTEMBER IN BLOOM: SEPTEMBER – NOVEMBER 10) Abyssinian Gladiolus BOTANICAL NAME: Gladiolus murielae WHEN TO PLANT: AFTER LAST FROST IN BLOOM: SEPTEMBER 11) Lucifer BOTANICAL NAME: Crocosmia RECOMMENDED VARIETIES: Late Lucifer WHEN TO PLANT: AFTER LAST FROST IN BLOOM: SEPTEMBER – OCTOBER 12) Striped Flowered Wood Sorrel BOTANICAL NAME: Oxalis versicolor WHEN TO PLANT: APRIL – MAY IN BLOOM: JULY – OCTOBER 13) Ivy Leaved Cyclamen BOTANICAL NAME: Cyclamen hederifolium WHEN TO PLANT: JUNE – JULY IN BLOOM: AUGUST – OCTOBER 14) Purpleleaf False Shamrock BOTANICAL NAME: Oxalis triangularis subsp. Papilionacea WHEN TO PLANT: MAY – JUNE IN BLOOM: AUGUST – SEPTEMBER 15) Scarborough Lily BOTANICAL NAME: Cyrtanthus elatus WHEN TO PLANT: MAY – JUNE IN BLOOM: AUGUST – SEPTEMBER 16) Byzantine Crocus BOTANICAL NAME: Crocus banaticus WHEN TO PLANT: MAY – JUNE IN BLOOM: SEPTEMBER – OCTOBER 17) Society Garlic BOTANICAL NAME: Tulbaghia violacea WHEN TO PLANT: AFTER LAST FROST IN BLOOM: AUGUST – SEPTEMBER Autumn Can Be The Prettiest Season While spring and summer definitely take pole-position in the eyes of most gardeners, the onset of autumn doesn’t need to be a forlorn occasion. Far from it, in fact. There are hundreds of flowers available that will continue to bring colour and stunning aroma to your garden throughout autumn; some at the start of September to ease with the transition, others through to the first frosts and beyond! In this list we’ve rounded up just seventeen options, but as we say there are literally hundreds. The selection here is intended to give a range of colours, shapes, and seasons of interest to work with. But if you’re looking to create a rich and rewarding autumnal display, we definitely recommend getting your detective hat on and having a look at what other options are available to you. You might also want to check out this list of bulbs to plant in Autumn.
Learn more
When Should You Plant Spring Bulbs? Guidelines For 10 Common Types
IN THIS GUIDE 1) Alliums 2) Bluebells 3) Chionodoxa 4) Crocus 5) Daffodils 6) Hyacinths 7) Iris reticulata 8) Muscari 9) Snowdrops 10) Tulips References Now might be a good time to think about ordering spring bulbs, but when should you plant them? Spring bulbs are planted in the autumn – but when exactly you should plant them depends on which specific spring bulbs you have decided to grow. Some should be planted in September, but you should hold off planting others until October or even November. Here’s a table that explains when to plant various spring bulbs: Bulb UK Planting Months Planting Depth Planting Spacing Allium September – October 4x Bulb Width 10cm Bluebells September – October 8cm 10cm Chionodoxa September – October 5cm 5-8cm Crocus August – November 10cm 7.5cm Daffodils August – September 3x Bulb Height 12cm Hyacinth September – October 10cm 7.5cm Iris reticulata September – October 10-12cm 10cm Muscari (Grape Hyacinth) September – October 10cm 5-6cm Snowdrops September – October 10cm 10cm Tulips October – November 3x Bulb Height 2x Bulb Width While spring bulbs can all be planted throughout the autumn months, any time up to around 6 weeks before the first ground-freezing hard frost, most spring-flowering bulbs are best planted earlier in the season – ideally, in most cases, before the end of September. So now you understand when to plant most spring bulbs, your main consideration will be which spring bulbs you should grow. Here are some of the best options to consider: 1) Alliums Ornamental alliums are one of the spring bulbs which should be planted in early to mid-autumn. They can be planted into a sunny border with free-draining soil, or can be grown in containers. The bulbs should be planted at a depth of around four times the width of the bulb. Depending on the variety, the bulbs should be placed around 10-20cm apart. Most alliums will bloom in late spring and early summer. 2) Bluebells Native bluebells are a great choice for a woodland or part shaded garden area. These bulbs should also be sown in autumn, in well-drained soil which does not dry out. The bulbs should be planted around 8cm deep, and should spring into life in the spring. Some bluebells, however, may fare better if planted ‘in the green’ in spring, so this is something to consider. 3) Chionodoxa Chionodoxa, ‘Glory of the Snow’ should also be planted in September or October, ideally before the end of September. They look great below trees that lose their leaves in winter and can also be naturalised in a lawn. Plant the bulbs around 5cm deep, and 5-8cm apart, or aim for spacing of around 15 bulbs for every 30cm square. 4) Crocus Crocus can be planted any time between August and early November. They work well in any sunny spot in the garden, though some varieties can also cope with partial shade. Consider naturalising some in a lawn, or placing some around fruit trees, for example, to attract early pollinators. These ‘bulbs’ (technically corms) can also be planted in containers. Sow bulbs pointed end up around 10cm deep and 7.5cm apart. 5) Daffodils Daffodils and other Narcissus are amongst the best-known spring bulbs. Daffodil bulbs should be planted in early to mid-autumn, ideally before the end of September. Some bulbs can also be ‘forced’ into early bloom indoors for flowering at Christmas (the paper-white narcissus, for example). Plant daffodil bulbs to a depth of around 3 times the height of the bulb. 6) Hyacinths Another of the most popular spring bulbs, hyacinths have a distinctive scent and can be grown in the ground or in containers. They can even be grown in pots indoors. Bulbs for spring-flowering are planted outdoors or in containers in early autumn. Prepared bulbs for earlier blooms should be planted in September if you would prefer blooms over the festive season. Plant bulbs around 10cm deep, at a spacing of around 7.5cm. 7) Iris reticulata Iris reticulata – early bulb iris – is another interesting choice to consider. Mature clumps should be divided between mid-summer and early autumn and the bulbs should be planted out in well-drained soil or growing medium in full sun in the ground or in containers in September or October. 8) Muscari Muscari, grape hyacinths, are another popular choice. These are another spring bulb that should be planted in the autumn months. They should be planted to a depth of around 10cm and work well outdoors or in containers in a free-draining yet moist soil or potting mix in full sun or partial shade. 9) Snowdrops Snowdrops are another bulb to choose for very early blooms, which should emerge sometime between January and March. If you can, try to plant snowdrop bulbs before the first hard frosts in your area. Unfortunately, these bulbs can be tricky to establish, and can easily dry out. So make sure you plant them out as quickly as possible after you buy them. Alternatively, establish plants by planting them ‘in the green’ in spring. Planting Later Many of the above can still be planted out until November, through will likely perform better with earlier planting. So it is not too late to consider planting the above if you haven’t got round to it just yet. However, there is one spring bulb best planted later in the autumn: the tulip. 10) Tulips Tulips can be sown earlier but will be more susceptible to a disease called tulip fire.1 Still, make sure that get your tulips planted before the first hard frosts in your area. Tulip bulbs should be planted at a depth of at least 2-3 times the bulb’s height and at a spacing of at least twice the bulb’s width. Most spring bulbs should be planted in the autumn, mostly in early to mid-autumn if possible. Gardening expert Dan Ori reassures that if you buy bulbs late or find some you forgot about you can still plant them as long as they have not rotten or disintegrated: “I have planted all types of spring bulbs as late as January with mixed results but some of all types came up and flowered, most just flowered late. “This spring we planted some daffodil bulbs in March just to see if they would flower, and most did in early summer! All this said, I would advise sticking to the prescribed times for best results, especially with the smaller bulbs and Alliums.” So order your spring bulbs now to make sure you are prepared. References 1. Tulip Fire or Botrytis Blight. (2000, March). Integrated Pest Management. Retrieved March 27, 2023, from https://ipm.illinois.edu/diseases/series600/rpd609/
Learn more
20 Spring Flowering Bulbs With Examples From Winterbourne's April Display
IN THIS GUIDE 1) Ornamental Onion 2) Windflower 3) Bluebell 4) Crocus 5) Daffodil 6) Byzantine Gladiolus 7) Hyacinth 8) Iris 9) Grape Hyacinth 10) Snowdrops 11) Tulips 12) Snake’s Head Fritillary 13) Persian Buttercup 14) Camas Lily 15) Lily Of The Valley 16) Striped Squill 17) Dog’s Tooth Violet 18) Lily 19) Winter Aconite 20) Alpine Violet References Putting in the hard yards in autumn will help you reap a colourful and vibrant display come springtime with these bulbs. “Flower bulbs come in a range of colours, but the subtle pastels of spring bulbs are special,” says the team at BULBi, an online UK supplier of hundreds of different bulbs and tubers. “Whether you prefer a monochromatic look or a garden filled with a rainbow of colours, flower bulbs can help you achieve your vision.” In many ways, autumn is the busiest season of all for gardening enthusiasts. Fruits need to be pruned, perennials require stripping back and, for those who have trees in their garden, a carpet of crunchy fallen leaves must be swept up on a regular basis. But as well as tending to the needs of the current year, autumn is also the time to begin planning for the one to come. Bulbs are among the prime candidates for autumn planting, due to the fact that they don’t demand too much in the way of maintenance and offer a guarantee of bright colour come springtime, as the experts at BULBi share: “Another benefit of spring-flowering bulbs is their ease of growth. “They don’t require much care and are incredibly low maintenance. Simply plant them in the autumn, then sit back and enjoy the show in the spring.” Given that the bulbs are in prime condition and the soil is at its most workable following a productive summer, it’s the ideal season to roll up your sleeves and work out your display for the coming year. Thankfully, there are plenty of different bulbs to choose from, available in a wide range of flowering times, styles and colours. “We really enjoy the early spring bloomers such as Crocus, Galanthus and Eranthis hyemalis,” says the team at BULBi. “As soon as you see the first buds coming out of the ground, you know that spring is almost here. They are also ideal appetisers for bees and other insects, which is much needed at this time of year.” “I personally love growing alliums for spring flowers because they are so majestic,” says Jonathan Hart from Harts Nursery. “However, there’s nothing like having tulips in flower in the spring, as there so many different types and colours. “My personal favourite is a pink double Tulip called ‘Angelique’.” The list below represents our favourites among the multitudinous options on offer. 1) Ornamental Onion BOTANICAL NAME: ALLIUM WHEN TO PLANT: SEPTEMBER – OCTOBER FLOWERING MONTHS: APRIL – JULY BEST SITED: SUNNY AREA You might be more familiar with the allium family due to its tasty culinary members, including garlic, onion and shallot. However, there are plenty of ornamental alliums which make for impressive spring flowering plants. Though they do come in a variety of different colours and sizes, they’re most commonly distinguished by their tall, bobbing stems topped by spheres of purple flowers. Their height makes them an ideal option to plant in among sunny borders or surrounded by swaying grasses, though they’re versatile enough to make an attractive display wherever they’re positioned. 2) Windflower BOTANICAL NAME: ANEMONE WHEN TO PLANT: SEPTEMBER – OCTOBER FLOWERING MONTHS: FEBRUARY – APRIL BEST SITED: SUNNY AREA With their cup-shaped blooms, daisy-like petals and bursts of bright colour, anemones are a sight for sore eyes come springtime. They flourish best in direct sunlight or dappled shade, making them an ideal choice for beneath deciduous trees or taller plants. They’re also very compact, meaning they lend themselves well to container planting, busy borders and their edges or other areas of the garden where space is at a premium. Plant them in early autumn for a charming display of colours come early spring that’ll cut right through the doom and gloom of winter to galvanise your garden back to life. 3) Bluebell BOTANICAL NAME: Hyacinthoides non-scripta WHEN TO PLANT: SEPTEMBER – NOVEMBER FLOWERING MONTHS: MARCH – MAY BEST SITED: PARTIALLY SHADED These delicately beautiful flowers are commonly found throughout woodlands and meadows across the UK. The English variety is differentiated from its Spanish cousins by the drooping nature of the stem and the fact that all the blossoms drape aesthetically from a single side. They’re used to excelling in shaded spots, so find a darker part of your garden and brighten it up with a scattering of these bulbs between September and November. For best results, plant them in a random pattern to recreate the attractive chaos of their growth in the wild. “Try throwing them in the air and planting them where they land,” advises Master Horticulturist Peter Lickorish. 4) Crocus BOTANICAL NAME: CROCUS WHEN TO PLANT: SEPTEMBER – NOVEMBER FLOWERING MONTHS: FEBRUARY – APRIL BEST SITED: SUNNY AREA Easily distinguished by their goblet-shaped blossoms, crocuses come in a range of bold colours, with purple, yellow and white being the most common. Depending on the variety you plump for, you might even enjoy splashes of another colour in the centre of their bloom, while the petals themselves are variegated on occasion. Unlike bluebells, crocuses do not grow well with restricted sunlight, so be sure to plant them in well-draining soil and with direct UV exposure. Follow those simple rules and you’ll be rewarded with a vibrant display early on in spring. 5) Daffodil BOTANICAL NAME: NARCISSUS WHEN TO PLANT: SEPTEMBER – OCTOBER FLOWERING MONTHS: FEBRUARY – APRIL BEST SITED: SUNNY AREA In Greek mythology, Narcissus became so enamoured with his own image that he rejected all suitors and fell in love with his own reflection in a spring – with a daffodil sprouting in his place after his demise.1 One glance at the trumpet-like structure and dazzling yellow tones of the flower should clear up any confusion over the origins of that story, since daffodils are among the most flamboyant and fetching bulbs you can plant in autumn. Put them in the ground between September and October to reap a colourful reward come February to April, depending on the specific variety you settle upon. 6) Byzantine Gladiolus BOTANICAL NAME: Gladiolus communis subsp. byzantinus WHEN TO PLANT: SEPTEMBER – OCTOBER FLOWERING MONTHS: MAY – JUNE BEST SITED: SUNNY, SHELTERED AREA Most Gladioli are meant to be planted in Spring and won’t survive harsh winters here in the UK. However, Byzantine Gladioli can survive harsher climates and is therefore suitable for autumn planting. With their tall spears of clustered blossoms, gladioli are among the most sought after autumn-planted bulbs for the rear of borders or near fences and walls. However, their top-heavy structure means that they are wont to keel over under the weight of their own gorgeousness, so it might be an idea to provide support in the form of staking – especially if you plan to plant them in an area exposed to wind. They’re also a bit prissy about their own space and don’t like to compete with the roots of shrubs or trees for their nutrients, so keep these demands in mind when considering your layout. 7) Hyacinth WHEN TO PLANT: SEPTEMBER – OCTOBER FLOWERING MONTHS: MARCH – APRIL BEST SITED: ANY AREA Autumn-planted hyacinths come in two varieties: “prepared” and “unprepared”. The former are generally planted in containers or pots indoors at the start of September and kept in dark, cool rooms in order to generate a bright blossom in time for Christmas. “Unprepared” types are planted outdoors anytime during September and October, normally in borders or containers, in order to unlock an effervescent display come springtime. Whichever variety you prefer, you’ll be rewarded with incredibly pretty and dainty, often fragrant, flowerheads that perch atop chunky stems for an inimitable aesthetic. 8) Iris WHEN TO PLANT: SEPTEMBER – OCTOBER FLOWERING MONTHS: MAY – JUNE BEST SITED: SUNNY, MOIST AREA Named for the Greek goddess of the rainbow, it’s fitting that irises are available in a wide spectrum of colours.2 Their paper-like leaves and beautifully marked flowers make them hot property in the horticultural world. The fact that their species are comfortable in a variety of soil types – from moist pond margins to free-draining rockeries – means they are as versatile as they are vivacious. Bulbous irises will do best in well-drained soil and enjoy full sun, flowering in spring for a short period only. However, their association with royalty (the French fleur-de-lis, despite having the misnomer of “flower of the lily”, is actually an iris) is a testament to the beauty of their blossoms during that brief window.3 9) Grape Hyacinth BOTANICAL NAME: MUSCARI WHEN TO PLANT: SEPTEMBER – OCTOBER FLOWERING MONTHS: APRIL – MAY BEST SITED: SUNNY OR PARTIALLY SHADED SPOT Muscari are an unusual and arresting flower to plant in autumn. Small in size but big in impact, their appearance is reminiscent of a bunch of blue or purple grapes dangling from a diminutive stem, making them a bold addition to any border or arrangement. They do equally well indoors, too, so you might wish to make a windowsill display of them if you enjoy their colour and style. Just be mindful that once established, they have a tendency to propagate all by themselves – so keep an eye on them if you don’t want them to take over your garden! 10) Snowdrops BOTANICAL NAME: GALANTHUS WHEN TO PLANT: OCTOBER – NOVEMBER FLOWERING MONTHS: JANUARY – MARCH BEST SITED: PART SHADED AREA Among the earliest flowering plants available, snowdrops are usually the harbingers of spring’s arrival. Indeed, in some varieties and locations, they’ve even been observed as early as late December. Whenever the drifts of these delicately beautiful flowers begin to surface, they’re sure to catch eyes and turn heads. They’re most commonly found in woodland areas in the wild, so you can encourage their growth by replicating those conditions as closely as possible in your garden by planting them in partial or dappled shade. “Many spring-flowering bulbs which prefer shade are happiest in relatively dry shade,” says Peter. “They exploit a niche when light is available and temperatures are climbing, before the canopy of trees fully forms. “Keep this in mind when selecting plants or positioning your bulbs. “Grouping bulbs in small, odd numbers like threes and fives is usually effective.” A smattering of galanthus is also an excellent way to add a touch of natural charm to a lawn too. 11) Tulips BOTANICAL NAME: TULIPA WHEN TO PLANT: SEPTEMBER – DECEMBER FLOWERING MONTHS: MARCH – MAY BEST SITED: SUNNY AREA “Our absolute favourite is and always has been the tulip,” shares a team member from BULBi, when asked about their favourite springtime flowering bulb. “When you think of a spring garden, the tulip really can’t be missing. After all, tulips are the foundation of the spring garden.” With their distinctive cup-shaped structure and bright floral blossoms, tulips are one of the most popular bulbs to plant in autumn for good reason. They require minimal upkeep, invariably perform well in all climes and produce fantastic aesthetic results come springtime. For areas that suffer especially cold winters, it might be beneficial to plant them slightly deeper than normal (at perhaps four to five times their own height) to insulate them from the worst of the surface frost. 12) Snake’s Head Fritillary BOTANICAL NAME: Fritillaria meleagris WHEN TO PLANT: SEPTEMBER – OCTOBER FLOWERING MONTHS: APRIL – MAY BEST SITED: DAPPLED SHADE There are some plants that simply make you gasp in amazement when they flower. Snake’s head fritillary is one such variety, which takes its common name from the arrow-shaped structure and tessellated pattern of its flowers just before they bloom. Indeed, it’s the unique markings of the flowerheads which make Fritillaries such an interesting and unusual specimen for your garden display. Plant them in clusters in September or October and add a few more each autumn to ensure they stay strong and resilient year after year. “These are one of a small selection of bulbs which can tolerate seasonally waterlogged conditions,” adds Peter. 13) Persian Buttercup BOTANICAL NAME: Ranunculus asiaticus WHEN TO PLANT: SEPTEMBER – NOVEMBER FLOWERING MONTHS: APRIL – JUNE BEST SITED: SUNNY AREA Flowers of Persian buttercup come in a stunning variety of colours. 14) Camas Lily BOTANICAL NAME: CAMASSIA WHEN TO PLANT: SEPTEMBER – NOVEMBER FLOWERING MONTHS: APRIL – JUNE BEST SITED: ANY AREA With flowers in cool blues and whites, these are among the taller spring-flowering bulbs, reaching heights of a metre. 15) Lily Of The Valley BOTANICAL NAME: Convallaria majalis WHEN TO PLANT: SEPTEMBER – OCTOBER FLOWERING MONTHS: MAY – JUNE BEST SITED: PART SHADED; MOIST AREA These distinctive flowers prefer richer, moister soil than many bulbs and thrive in shade. 16) Striped Squill BOTANICAL NAME: Puschkinia scilloides WHEN TO PLANT: SEPTEMBER – OCTOBER FLOWERING MONTHS: MARCH – APRIL BEST SITED: ANY AREA These small, delicate bulbs add variety, and perhaps a frothy understorey, to any display of bulbs. 17) Dog’s Tooth Violet BOTANICAL NAME: Erythronium dens-canis WHEN TO PLANT: SEPTEMBER – OCTOBER FLOWERING MONTHS: APRIL – MAY BEST SITED: SHADED AREA “These plants, including their bulbs, do not like to dry out,” says Peter. “If you can keep them moist, they will reward you with unusual speckled foliage and jewel-like flowers.” 18) Lily BOTANICAL NAME: LILIUM WHEN TO PLANT: SEPTEMBER – EARLY OCTOBER FLOWERING MONTHS: VARIES, OFTEN SUMMER BEST SITED: SUNNY AREA They relish Autumn-planting, even though flowers tend to be from late spring and early summer onward. Their heights and colours vary widely, so choose carefully. 19) Winter Aconite BOTANICAL NAME: Eranthis hyemalis WHEN TO PLANT: SEPTEMBER – OCTOBER FLOWERING MONTHS: FEBRUARY – MARCH BEST SITED: PART SHADED AREA These very low growing plants carpet the soil in late winter with cheerful yellow flowers. 20) Alpine Violet BOTANICAL NAME: CYCLAMEN WHEN TO PLANT: SEPTEMBER – NOVEMBER FLOWERING MONTHS: VARIES BEST SITED: FULLY SHADED, MOIST AREA “Species of hardy Cyclamen can be chosen to flower almost any month of the year, producing flowers of pinks and whites and a variety of interesting, sometimes marbled, leaves,” Peter explains. References 1. Narcissus | Definition & Myth. (1998, July 20). Encyclopedia Britannica. Retrieved March 13, 2023, from https://www.britannica.com/topic/Narcissus-Greek-mythology 2. Iris – Greek Goddess of the Rainbow, Messenger of the Gods. (n.d.). Theoi Greek Mythology. Retrieved March 13, 2023, from https://www.theoi.com/Pontios/Iris.html 3. Lestz, M. (2019, March 19). French History of the Fleur de Lys: The Iris of Kings. Perfectly Provence. Retrieved May 2, 2023, from https://perfectlyprovence.co/french-history-fleur-de-lys/
Learn more
Horticulturists Share 15 Summer Flowering Bulbs You Can Plant In Spring
IN THIS GUIDE 1) Dahlias 2) Gladioli 3) Lilies 4) Crocosmia 5) Polianthes 6) Freesias 7) Agapanthus 8) Calla Lilies 9) Begonias 10) Autumn Crocus 11) Eucomis 12) Nerine 13) Jersey Lily 14) Wild Garlic 15) Japanese Anemones References Bulbs are often planted in the autumn to flower in spring, but there are many bulbs that can be planted in spring that will flower and give a stunning display, only a few months later in summer. “I love the spring because you have so much to do and get ready for the summer, like planting bulbs,” shares Kate Gould. “I then, in turn, love the summer because I get to look at everything!” Mostly originating from warmer climates, bulbs tend to need full sun to flower well and can provide some much-needed colour in the garden, when a lot of plants have passed their best. Bulbs are easy to grow and care for and when discussed often encompass corms, tubers and rhizomes, which are generally planted in a similar way and will be covered in this guide as well. We list 15 of our favourite bulbs to plant in spring below. “Many of these plants are on the difficult precipice between hardiness and tenderness,” shares Peter Lickorish, a Master Horticulturist. “Whilst free-draining soil may be sufficient for them to overwinter outdoors, the combination of cold and wet will be too much for many. “Also, remember that in containers, raised above the warmth of the soil, the roots and bulbs can be more susceptible to frost damage, especially in smaller pots.” 1) Dahlias HARDINESS RATING: H3 PLANT OUTDOORS: MID-MAY (AFTER LAST FROST) FLOWERING MONTHS: JULY – SEPTEMBER Dahlias are possibly one of the most stunning plants available to grow here in the UK and are often a firm favourite of gardeners. They can flower, with regular deadheading from mid-summer onwards, often until the first frosts in November. Available in a huge array of colours and sizes, they are equally happy when grown in a pot or container or directly in the ground. They are also very popular to grow as cut flowers, as they often grow on long stems and have a long vase life. Dahlias originate from Mexico, where they are the country’s national flower.1 Hence, it is no surprise that they prefer as much sun as they can get, a south or west-facing and sheltered aspect is ideal. From classic whites to vibrant pinks, oranges and reds and every colour in between, dahlias are obtainable in a multitude of shapes and sizes. From simple single varieties, ball and pom pom, to cactus and dinnerplate, which can be as large as their name suggests, there is one to suit every garden, balcony or terrace. However, beware, as once you’ve grown one dahlia there is a huge temptation to grow more! 2) Gladioli HARDINESS RATING: H3 PLANT OUTDOORS: MARCH – MAY FLOWERING MONTHS: JULY – SEPTEMBER When thinking of summer flowering bulbs, gladioli are often top of the list and for good reason. Also known as sword lilies due to their slender, pointed foliage, they provide great structure and style in all manner of colours during the summer months. Grown from corms and planted in spring, they are easy to care for and grow well either directly in the ground or in pots and containers. Gladioli require full sun to bloom well, but can cope with some shade. Originating from South Africa they are part of the Iridaceae family and are now grown all over the world. Gladioli do best in a moist, but well-drained soil and can be left in the ground to overwinter in the south of the UK, but may need to be lifted and stored in colder parts of the country. 3) Lilies HARDINESS RATING: VARIES PLANT OUTDOORS: SEPTEMBER – APRIL FLOWERING MONTHS: JULY – SEPTEMBER Grown for their large trumpet-shaped flowers and incredible scent, lilies look equally stunning when grown in the ground or in containers. From pink and white to orange and red, lilies are available to buy in a wide range of colours. “My favourite bulbs have to be lilies because there are so many different types to suit any garden or vase,” explains Jonathan Hart, Horticulturist from Harts Nursery. “Double lilies, giant-tree lilies, smaller pot lilies, highly-perfumed oriental lilies, brightly-coloured Asiatic lilies and shade-loving Martagon lilies are all amazing, just to name a few. “They really are a fantastic addition to the garden for beautiful flowers in the summer.” Oriental and Asiatic are two of the most commonly grown types here in the UK, often sold as bulbs that can be planted in the autumn or spring. Both varieties prefer full sun, although oriental lilies grow best in ericaceous soil, whereas Asiatic varieties thrive in alkaline or more neutral soil. Often grown in pots, they can then be moved to their pride of place when in flower and moved once finished, ready to store in an unheated greenhouse or cold frame over winter. 4) Crocosmia HARDINESS RATING: H5 PLANT OUTDOORS: APRIL – MAY FLOWERING MONTHS: JUNE – SEPTEMBER Crocosmia, or montbretia as they are also known, can provide some much-needed colour in the garden late in the summer, when many plants have gone over. Available in red, orange and yellow, their graceful flowers contrast spectacularly against their bright green foliage. Grown from corms, crocosmias originate from South Africa and grow best in a fertile and moist soil in full sun. Crocosmia will tolerate most soils, but do not like to be allowed to dry completely out which can stunt their growth and limit their flowering potential. Waterlogging will also cause rotting for these plants. Crocosmia can spread over time, but clumps can be kept to a manageable size by division, or simply by growing in containers. 5) Polianthes HARDINESS RATING: H2 PLANT OUTDOORS: MID-MAY (AFTER LAST FROST) FLOWERING MONTHS: JULY – AUGUST Polianthes are sometimes known as tuberose and produce elegant white or pink scented flowers during mid to late summer. Polianthes look great either planted in pots or in drifts in the borders. Originally from Mexico, they require full sun and a minimum temperature of 15°C and are most suited to being grown in a conservatory or greenhouse or on a sheltered terrace. Perhaps the most widely grown variety here in the UK is Polianthes tuberosa ‘The Pearl’, with its highly scented double white flowers it really is worth trying. Classed as H2 hardy, Polianthes tubers can survive cold temperatures, but will not survive being frozen, thus are best lifted and stored over winter. 6) Freesias HARDINESS RATING: H2 PLANT OUTDOORS: APRIL – MAY FLOWERING MONTHS: JUNE – SEPTEMBER Freesias are very popular here in the UK for their use as a cut flower. Available in colours including purple, orange, yellow and white they look stunning in a vase and are accompanied with a sweet scent. Grow from corms and originally from South Africa, freesias are not hardy and can be planted either in autumn for growing indoors or spring for growing outdoors. If planting outside, only plant the corms after the last chance of frost has passed, which is usually late May or June. Freesias like warm conditions, but must be grown in free-draining compost or else they tend to rot, especially when left in waterlogged or wet soils. In warmer parts of the UK, the corms can be potentially left in the ground to overwinter if protected by a good layer of mulch, but elsewhere will need to be lifted and stored over the coldest months. 7) Agapanthus HARDINESS RATING: VARIES PLANT OUTDOORS: MARCH – APRIL FLOWERING MONTHS: JUNE – SEPTEMBER Agapanthus or the African Lily as they are also known, are astonishingly beautiful perennials, which can be either deciduous or evergreen. Grown for their stunning white, blue or purple flowers which tower above their green foliage on tall straight stems. Perfect for containers, they can also be grown directly in the ground, but they do require full sun and free-draining soil. Being drought-tolerant, agapanthus are well suited to gravel and coastal gardens as they can tolerate the salty air, but need to be watered well whilst getting established in their first year. Deciduous agapanthus are usually the most hardy and can be left in the garden to over winter, however most even green varieties will need to be moved to a greenhouse to ride out the winter. Available as potted plants or bare roots, they are best planted in spring as the soils warms up. Agapanthus can cope with a little shade, but if placed in too much shade their flowering can be dramatically reduced. Agapanthus tend to grow best if their root system is restricted, which is why they can do so well in a container or pot and be moved to a prominent position when looking their best. 8) Calla Lilies HARDINESS RATING: H4 PLANT OUTDOORS: MID-MAY (AFTER LAST FROST) FLOWERING MONTHS: JUNE – JULY The Calla lily, or arum lily, is strangely not an actual lily, but is part of the Zantedeschia genus instead. Originally from South Africa, they produce exotic looking flowers and come in a wide range of colours and can be grown indoors or outdoors. Available as rhizomes, these tender plants must be overwintered out of the cold. Some of the white-flowering Zantedeschia, such as Zantedeschia aethiopica, are more hardy. Preferring a sunny site, calla lilies will cope with partial shade and need to be shaded from the strongest midday sun, which can scorch them. They also thrive when their roots are generously moist. In spring, most calla lilies need to be started off indoors until all risk of frost has past, after which and when the soil has warmed up, they can be grown in the ground or in containers outdoors. Calla lilies are hungry plants and require a rich fertile soil, a high nitrogen feed in spring and then a high potassium feed, such as a tomato feed, once flowering begins. 9) Begonias HARDINESS RATING: VARIES (OFTEN H1B) PLANT OUTDOORS: MID-MAY (AFTER LAST FROST) FLOWERING MONTHS: JULY – OCTOBER Begonias can have a bit of a reputation as being a bit old fashioned, but either way they can provide continuous colour throughout the summer, thrive in partial shade and are thus still a popular bedding plant. Begonias are available as either tuberous or fibrous varieties and being tender are often grown as annuals here in the UK. Tuberous begonias are available from early spring and require starting off in pots indoors until after all risk of frost has past, after which they can be hardened off before planting outside. Tuberous begonias are hungry plants and require fertile soil and once planted out, a weekly high potassium feed throughout the summer. Tuberous varieties are often treated as annuals, however in October once their foliage has begun to die back, they can be cut down to 5cm, and their tubers lifted to store over winter until the following spring. These can then be divided, to restrict growth and produce more stunning plants. 10) Autumn Crocus HARDINESS RATING: H5 PLANT OUTDOORS: MAY – AUGUST FLOWERING MONTHS: AUGUST – OCTOBER Autumn Crocus, or Colchicum autumnale, is an autumn-flowering plant that, while resembling a true crocus, is actually a member of the Colchicaceae plant family. It should be planted between May and August and will typically flower 6-8 weeks after planting. An area that receives full sun or part shade is ideal, though this plant is incredibly hardy. 11) Eucomis HARDINESS RATING: H4 PLANT OUTDOORS: MID-MAY (AFTER LAST FROST) FLOWERING MONTHS: JULY – SEPTEMBER While they might look a little too exotic for the UK, eucomis or ‘Pineapple Lilies’ are actually hardy enough to be planted after the last frost, before flowering throughout summer. They should flower for years once established and are great for bringing some height to a garden, usually growing around half a metre in height. Plant them in full sun, keep them well watered and ensure they aren’t crowded out by other plants. “If mulched well, they can usually be left in the ground over winter,” shares Peter. 12) Nerine HARDINESS RATING: VARIES PLANT OUTDOORS: APRIL – MAY FLOWERING MONTHS: SEPTEMBER – OCTOBER Nerine is a very late flowering bulb which has been highly hybridised with a high number of species and hybrids available.2 They prefer a hot, dry area of the garden that ideally receives full sun. For plants to bear the maximum number of flowers it’s also recommended to keep the growing medium well-watered during active growth so it doesn’t dry out, but avoid over-watering. Many types are frost tender and will need winter protection if they are to survive, while plants which last 3 years or more will likely benefit from division or repotting. 13) Jersey Lily HARDINESS RATING: H4 PLANT OUTDOORS: MARCH – APRIL FLOWERING MONTHS: SEPTEMBER – OCTOBER This next choice is actually a member of the same family as Nerines, though its flowers look a little fuller. It can be cared for in much the same way as other nerine plants, but Amaryllis belladonna is a little hardier than other types and can survive temperatures below freezing. Their hardiness down to -10°C means that you shouldn’t need to overwinter them indoors in Britain, unless you live in a particularly cold region. “If you’re undecided between an Amaryllis (Jersey lily) and a Nerine, why not combine the best of both with a x Amarine tubergenii?” asks Peter. “This is one of my favourite bulbs, with vivid pink flowers in late summer and early autumn. “It likes its bulb tips to slightly protrude from the soil.” 14) Wild Garlic HARDINESS RATING: H7 PLANT OUTDOORS: OCTOBER – MARCH FLOWERING MONTHS: JULY – SEPTEMBER Wild Garlic can actually be planted any time from late-autumn to early spring. It has a distinctive smell and prefers the shady and damp conditions found in its native woodland environment. It would be best placed in a dark garden corner or underneath the shaded canopy of a nearby tree. It is commonly foraged in the UK, with vivid fields of wild garlic at places like Ilam Park in Derbyshire.3 Varieties such as ‘Golden Fleece’ are incredibly beautiful with distinctive yellow-green foliage. 15) Japanese Anemones HARDINESS RATING: VARIES PLANT OUTDOORS: APRIL – MAY FLOWERING MONTHS: JUNE – AUGUST This last one is technically a herbaceous perennial though it is a relative of anemone bulbs that typically flower in early spring. It has attractive foliage that grows quite tall and produces beautiful white or pink flowers in the summer months. Japanese Anemones prefer areas of the garden that are fairly moist and which receive part sun – under the canopy of a tree might be an ideal location. As mentioned there are both early-flowering anemone bulbs and late-flowering perennial varieties, so be careful to choose late-flowering types if you’re looking to plant in early spring. Japanese Anemones are generally propagated by cuttings rather than seed, so you might need to buy yours from a garden centre or ask for a cutting from a friend. References 1. History. (2019, May 26). National Dahlia Society. Retrieved March 13, 2023, from https://www.dahlia-nds.co.uk/about-dahlias/history/ 2. Nerine. (n.d.). Pacific Bulb Society. Retrieved March 13, 2023, from https://www.pacificbulbsociety.org/pbswiki/index.php/nerine 3. Forage for wild garlic. (n.d.). National Trust. Retrieved March 13, 2023, from https://www.nationaltrust.org.uk/visit/countryside-woodland/places-to-forage-for-wild-garlic
Learn more
Plant A Bulb Lasagne (Layer Them In Stages) For Incredible Mixed Displays
IN THIS GUIDE The Purpose Of A Bulb Lasagne Choosing A Container Choosing Your Growing Medium When To Plant A Bulb Lasagne How To Plant Your Bulbs Aftercare Where To Place A Bulb Lasagne Choosing Plants For A Bulb Lasagne Largest / Latest Flowering Medium Sized / Mid-Flowering Small / Earliest-Flowering Planting a bulb lasagne will help you cook up the recipe for successional blooms in your garden. A ‘bulb lasagne’ is the name sometimes given to layering bulbs, either in a container or in a planter or small raised bed. Largest, latest flowering bulbs go in the deepest layer of your lasagne, with more, earlier flowers above them, up to the earliest flowering bulbs near the top. With two tiers of bulbs, this is sometimes called ‘double-decker’ planting. However, you can sometimes stretch this and have three layers (and occasionally even four). This is a simple gardening job that you can enjoy with children. It is very easy whether you are a complete gardening novice, or someone far more experienced looking to try out some new combinations or varieties of bulbs. The Purpose Of A Bulb Lasagne A mixed container of bulbs with Hyacinths, Narcissus ‘Thalia’ and Tulips Just as layering plants above the ground is a great idea to make the most of your space, so too is layering bulbs below the soil (or potting mix). Layering bulbs in the same container can help you make sure that you make the most of your space and have flowers for visual appeal (and for bees and other pollinators) over as long a period as possible. By layering spring (or summer) bulbs, corms and tubers in pots, you can ensure that the flowers bloom successionally. You can choose your bulbs carefully so that each flower is coming into bloom just as the latter begins to fade. “Growing early tulips and daffodils that are then replaced by frothy summer displays of Gypsophilia and grasses in pots is a great container garden idea,” shares Gardener Elliott Beveridge. Spring bulbs are particularly useful in a garden, because they can often provide early blooms when there are few other flowers around for pollinators. They can also fill in gaps in an ornamental planting scheme before summer flowering plants take over the display. “Never go for a single layer!” advise the experts at BULBi, a UK nursery and supplier of hundreds of bulb varieties. “At the bottom, plant the taller types like tulips, in the middle, plant bulbs like daffodils and hyacinths and, at the top layer, plant smaller varieties like crocus or muscari. “This way, you can enjoy a blooming pot all spring long!” Choosing A Container The size of container required will depend on which bulbs you would like to grow, and also, of course, how much space is available. Typically, however, the larger a container you can manage, the more effective and dramatic the display will be. Spring flowers often look best when grown in clumps or drifts with as many of them as possible. “Bulbs can rot faster in a pot,” the experts at BULBi remind us. “Make sure there is a hole in the bottom so excess water can drain away and fill the pot with hydro grains first, or, if you don’t have that in the house, shards or grit are fine too.” In terms of depth, you need to make sure that you have the space to accommodate the planting depth of the bulbs on your lowest tier, plus at least 10cm below that for their root systems. Typically, a pot or container at least 50cm deep and 30cm wide will be best. Though with some bulbs, you will not need such a sizeable container. Remember, when thinking about containers, that you do not necessarily have to buy containers for the purpose. If you use your imagination, you will soon see that there are a range of reclaimed materials and items that you could reuse in your garden. Choosing Your Growing Medium Bulbs do not require anything particularly fancy when it comes to the growing medium. A general multipurpose compost is usually fine. You can also consider making your own potting mix with ½ homemade compost and ½ garden soil, which should be fine for most spring bulbs. Just make sure that your mix is relatively free-draining, or your bulbs may rot. You can also consider adding other homemade materials like leaf mould to the mix. “It’s advisable to add potting grit, up to one part to four compost, to ensure the mix is free-draining,” shares Master Horticulturist Roy Nicol. “Avoid using a layer of grit at the bottom of the pot which creates a wet sump and prevents the lower layer of compost from draining.” When To Plant A Bulb Lasagne You should sow spring-flowering bulbs in autumn. In September or October, choose your bulbs and get a pot or container ready. One thing to note is that you do not need to leave your container bare with just bulbs under the soil during the winter months – you can consider adding winter bedding plants (like pansies, for example) to the top of the containers until the first bulbs begin to emerge in late winter or early spring. How To Plant Your Bulbs 1) Prepare Your Container Prepare your pot, container or planting hole. Place a single crock at the base of a container to cover the drainage hole and prevent compost washing out. Add a peat-free multipurpose compost mixed with potting grit to your container (make sure there are at least 10cm of potting mix below the first layer of bulbs for their roots to grow into). 2) Place Your First Layer Place your first layer of bulbs, each around bulb width apart and facing upwards. Try to identify the top and root end of each bulb. Typically the top of a bulb is pointed and the bottom (the basal plate) is flat with evidence of old roots. With some bulb types this can be challenging, however, so if you are not sure, place them on their sides and they should still grow upwards towards the light. 3) Cover And Layer Bulbs Cover these first bulbs with a thin layer of compost then place your second tier of bulbs. Try not to place the bulbs in this layer immediately above the ones below. Use a different layout pattern for each tier if possible. For example: You might plant a ring of allium bulbs. Then place daffodil bulbs in the centre of this ring for the second layer. Then add crocus around the edges of the pot. The crocus will flower first, then the daffodils, then the alliums just as these begin to fade, giving a longer-lasting display. “Even if bulbs are planted directly on top of each other, the emerging shoots from lower bulbs will find a route past bulbs above, so positioning is not critically important,” adds Roy. 4) Repeat Your Layering Repeat this stage if you are adding a third and perhaps fourth layer. Note that, as a general rule of thumb, you should aim to add your layers so that each bulb is planted at around 3 times its own height in depth. However, to ensure adequate spacing, lower-level bulbs may be planted deeper than this. So start your first tier at the right depth below the finished soil surface for the bulbs you have chosen. Make sure, also, that you layer the bulbs in the order in which they are to flower. Bury the top layer of bulbs with around 10cm of soil. Add overwintering bedding plants to the pot to make use of it over winter while bulbs are still not throwing up shoots. Aftercare As you can see from the above, it is very easy to create a bulb lasagne, you just have to bear a few simple things in mind. Make sure you keep your container moist but not soggy throughout the flowering period. Take care not to overwater, especially over winter, or rot could set in, and keep your eyes peeled for pests. “If a particularly wet period is encountered over the winter, it’s worthwhile either covering the pots or moving them under cover to prevent the bulbs from sitting in wet compost for an extended period,” shares Roy. “In early spring, they can be moved into position ready for their display.” A well-planned and not overly crowded scheme may continue to flower well in your container for two or three years, after which you will likely have to extricate your bulbs, thin them, and re-pot them in new containers. “It’s worth remembering that while many bulbs such as Daffodils & other Narcissus are perennial, most Tulips split into smaller bulbs after flowering and the display in subsequent years is not as good,” warns Roy. “I have found this is especially the case with the showy Tulips with large double or frilly flowers. “In my experience, some of the Tulips which are reliably perennial year after year are ‘Ballerina’, ‘Triumphator’ and ‘Spring Green’. “It’s also worth considering species Tulips such as Tulipa clusiana, Tulipa sylvestris and Tulipa sprengeri. If you are adding bedding plants to a container of layered bulbs, be sure to replace the top layer of compost each time you change out the bedding specimens. Where To Place A Bulb Lasagne A bulb garden is usually made in a large plant pot – the larger the pot, the greater the impact can be. But it is worthwhile considering that you could also layer bulbs in a planter or raised bed in a small garden. When choosing where to position your pot or create your bulb lasagne, it is important to think about which bulbs you will be growing (or the space available). Be sure to consider sunlight, shade and other environmental factors such as whether the soil is likely to drain well over the winter or stay consistently wet. Many spring bulbs prefer a sunny spot, but there are also bulbs suitable for more shady conditions. Choosing Plants For A Bulb Lasagne When choosing bulbs for layered planting, the first thing to think about is where they are to grow and the environmental conditions to be found there. Once you have considered the basics, you need to decide which bulbs you would like to grow. There are a number of factors which might enter into your decision. For instance, flower shape, colour and size. But one of the most important things to consider is when each of the bulbs you are considering will flower. Remember, the goal is to find different bulbs, and to plant them in layers in the same space so that they will bloom over as long a period as possible. Largest / Latest Flowering Largest, latest flowering bulbs for a bulb lasagne include: Alliums Lilies Tulips Medium Sized / Mid-Flowering Medium-sized bulbs to be planted above those might include: Daffodils & Other Narcissus Earlier Tulips Hyacinths Small / Earliest-Flowering Small, early bulbs to plant closer to the top of the soil or potting mix include: Anemones Crocus Glory of The Snow (Chionodoxa) Grape Hyacinths Miniature Irises Snowdrops Though spring-flowering bulbs are most commonly used for a bulb lasagne, you can also consider planting summer flowering bulbs, corms like gladioli or dahlia tubers, for example. A basket of bulbs ready for planting As you can see from the above, layering the bulbs correctly is the main trick to success in creating a bulb lasagne. As long as you get this right, you should be pleased with your displays. Play around with different spring-flowering bulbs to work out the perfect combinations, and have some fun thinking about new combinations of bulbs to try.
Learn more
What Do You Do With Lilies Once They’ve Flowered? Lynn Slackman Reveals All
IN THIS GUIDE Why Deadhead Lilies? What To Do When Your Lilies Are Done Flowering How To Get The Best Bloom From Your Lilies Take Good Care Of Those Lilies! There are thousands of types of lily, all bringing an individual charm to the attractive central theme. Depending on your skills and ambition as a gardener you can go for the easy-to-grow varieties you’ll find on the seed racks at your local garden centre, or you can give yourself a challenge and attempt to grow something a little more finickity. Whatever you go for, though, get it right and you’ll be rewarded with a colourful and sometimes fragrant bloom. Perhaps the archetypal lily aesthetic: white trumpet-like flowers with vivid yellow When it comes to lilies, one of the most common questions we hear from fellow gardeners is “what do you do with lilies once they’ve flowered?” It’s a good question – because while lilies won’t flower again once they’ve bloomed, there are a couple of convincing reasons to remove the flowers. Or, as it’s also known, to deadhead them. Why Deadhead Lilies? “Deadheading lilies will certainly enable the plant to direct its energy to the stem and bulbs instead of the flower,” says Lynn Slackman, from the North American Lily Society. “However, if you are a hybridiser, pollination of the flower is essential to furthering your hybridising goals.” Before we jump into showing you what to do with your lilies once they’ve finished flowering, we’ll quickly introduce deadheading, in case you’re not familiar. Put simply, deadheading is the process of removing flowers from ornamental flowering plants. Using scissors, secateurs or similar to snip each spent flower from the plant has several benefits: Some plants will grow new flowers in their place (not lilies, however!) If pollinated, seed production takes a lot of energy. Deadheading helps the plant to direct this energy elsewhere instead. With lilies, where you can reuse the bulb for next year’s growth, directing the plant’s energy into storing nutrients in the bulb is very useful. Some plants – like bushy roses, for example – leave a lot of mess as they die off. Deadheading quite literally nips this in the bud and saves you the hassle of cleaning up. What To Do When Your Lilies Are Done Flowering This all takes us back to the title, and to the question of what you should do with your lily plants once they’ve finished flowering and the bloom is starting to die off. The short answer: remove each flower as it becomes spent. “I don’t spend a lot of time deadheading in the garden but I will deadhead Lilies as they go over,” says Master Horticulturist Colin Skelly. “The flowers are so large and I grow them in pots for prominent positions, so they’d really detract from the desired effect if I didn’t.” You’ll be able to tell when it’s time because the flower will discolour and wilt. Deadheading a lily with secateurs (This is another benefit of deadheading: the vibrancy of your garden is maintained through the removal of dull, fading blooms.) To deadhead either pinch hard the stem beneath each flower and pull it off with your fingers, or cut with a sharp gardening tool like the ones we mentioned previously. Secateurs are usually best. Then simply discard the flower, either into your compost, your garden waste bin or, if you’re feeling naughty, into the general waste. When deadheading, take care not to remove any leaves along with the flower, as the plant needs all of its leaves to collect sunlight and generate energy! The effectiveness of deadheading as a way to redirect energy to the bulb is reduced if you chop the leaves off. How To Get The Best Bloom From Your Lilies If you’ve found your way to this article, perhaps you’re keen to improve the overall quality and duration of your lily bloom. There are plenty of ways to do this, and whether you’re reading at the start or the end of their time of interest, these tips will help you to enjoy a more vibrant growing season. Firstly, we recommend planting your lily bulbs out in autumn. While you can plant them out through March, you’ll see better results with earlier burial. Exact conditions depend on the variety you’re growing, but as a rule, lilies enjoy full sun or partial shade. Soil should be rich and nutritious: John Innes ericaceous fertiliser with a little controlled-release chaser will do best, as these are hungry plants! You can also feed lilies while they’re growing. Fortnightly feeds are recommended. Your lily bloom will be stronger if the plant isn’t allowed to dry out, especially in hot conditions. Be vigilant with watering, taking care to strike the balance between not over-or under-watering. Take good care and you will be adequately rewarded! Some lily varieties are of interest to aphids and other pests: keep an eye out here as well and take steps to remove any visitations as quickly as possible. Squish any lily beetles you see (or remove and relocate far away, if you’re feeling pacifist). These visitors will spare no quarter causing damage, sometimes irreparable, to your lilies. Take Good Care Of Those Lilies! Hopefully, you now have a better understanding of what to do with your lilies when they’ve finished flowering. The takeaway: deadhead them, taking care not to remove any leaves along with the flower. Do this and your plant will direct its resources toward storing energy in the bulb rather than creating new seeds, leading to a stronger and healthier bloom next year. As you get more familiar with lilies you’ll begin to get used to their rhythms and habits and, over time, you’ll achieve consistently beautiful blooms. The range of colours, shapes, and smells make this type of flower deeply rewarding to any gardener willing to invest the time and energy to get familiar. So go, grow, and enjoy!
Learn more


