

Growing

Here's How To Make Sure You Only Harvest Your Blueberries When They're Ripe
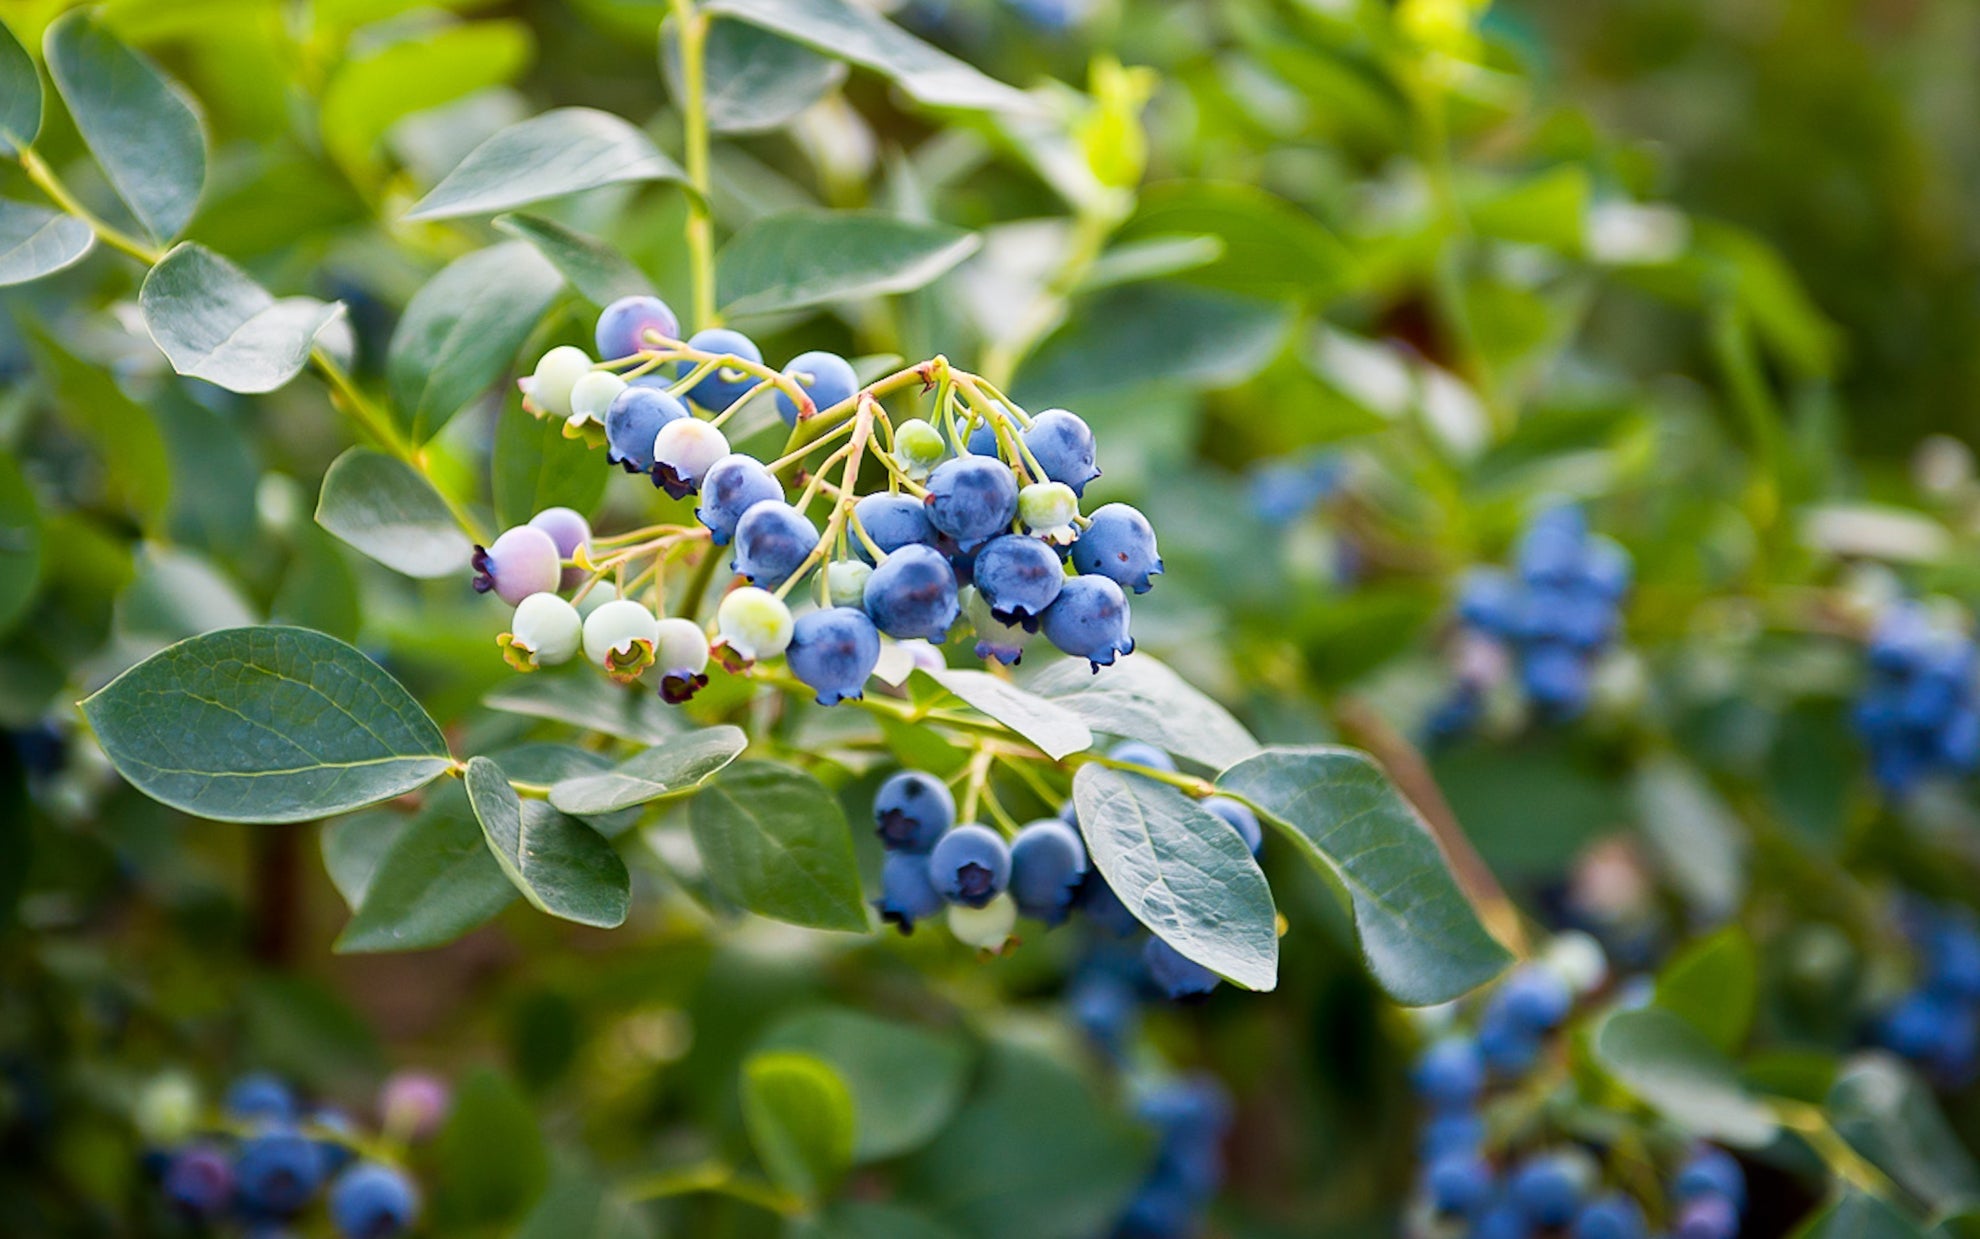
IN THIS GUIDE Which Fruit Should Be Harvested? How To Harvest Blueberries Post-Harvesting Tips References Blueberry harvesting season begins in early June and ends in late September. Your specific harvesting period will depend to a great extent on your cultivar and to a lesser extent on your region and on the climate and weather during that particular season. In this guide we explain the harvesting process in more detail. Difficulty Easy Equipment Required Gloves and goggles (both optional) When To Harvest June-September Which Fruit Should Be Harvested? Blueberries go through several stages as they ripen on the bush. Immature blueberries have a pinkish flush and are small and hard. Unripe berries will be pinkish-purple or reddish-purple. Ripe blueberries will be bigger and will present a full or swollen appearance, and will ‘give’ a bit under gentle finger pressure. They will have that familiar dull, dusky, blotchy, deep blue tone. It is these berries that you should pick. How To Harvest Blueberries As stated above, the particular month(s) that you can harvest your blueberries depend on your cultivar and a couple of other factors that are not quite as important. The harvesting itself is an ongoing and periodic task during the season, as you will pick blueberries over a span of about 4 weeks for any given cultivar. Try to pick the berries about every 3 days, the idea being to pick those berries that are just ripe, leaving the rest to mature but also not letting the fruit get over-ripe. Gently hold a ripe blueberry (or even a ripe cluster) between your forefinger and thumb and pluck it off with a twisting motion. If it does not come off the branch, it is probably not ripe. That said, some cultivars hold on to their berries a little more than others. Picking blueberries will be easier if you grasp and steady the branch with your free hand. Post-Harvesting Tips Do not wash all your blueberries after picking them. When you wash berries (or any skinless fruit) the process of ripening accelerates, so washed fruit will quickly spoil and will not keep well.1 Wash only before eating the berries. Blueberries are luscious fresh off the bush, and are equally luscious in preserves and compotes, and also in baked treats. Bear in mind that blueberries will keep in the freezer for a year, so you can certainly enjoy them until the next harvesting season comes around. “Freezing is a great way to preserve your soft fruit to enjoy during the winter months,” shares Colin Skelly, a Professional Gardener and Consultant. “I try to avoid the temptation of eating all of the fruit as I pick it from the bush and try to save about half for freezing for future use.” Remove any fruit that is dinged or soft and put small quantities – preferably in a single layer – in an airtight bag. Put a few such bags in a lightweight plastic box and put that in the freezer. References 1. Thomson, J. R. (2016, July 13). Why You Should Never Wash Your Fruit Before Refrigerating It. HuffPost UK. Retrieved March 13, 2023, from https://www.huffingtonpost.co.uk/entry/storing-summer-berries_n_5783934de4b0344d514ff10e
Learn more
Grow Blueberries In Pots To Help Create The Perfect pH And Moisture Levels
IN THIS GUIDE Are Blueberries Suitable For Pots? Sourcing Ideal Containers Potting Up Blueberry Plants Potted Blueberry Care References Blueberry shrubs not only produce delicious fruit but look great when they flower in spring and their foliage turns red in the autumn. Originating from North America, blueberries are well suited to our climate here in the UK, especially when grown in pots and containers.1 Are Blueberries Suitable For Pots? Absolutely! Blueberries have certain soil and climatic requirements that need to be met in order for them to thrive and produce the delicious fruit they are grown for. “My garden has slightly acidic soil but a low enough pH for blueberries to thrive,” says Colin Skelly, a Professional Gardener & Horticulturist with over 13 years of experience. “I grow my blueberries in pots so that I can create the perfect pH and moisture levels using ericaceous compost. “They are moisture-hungry in summer, particularly in prolonged dry spells, so a water butt would be a good idea if you don’t already have one. “This has the added bonus of collecting pH-neutral rain water.” Growing blueberries in pots is ideal as the soil can be chosen to suit their needs and the planters moved to protect them from the worst of the winter weather. Sourcing Ideal Containers There are many different varieties of blueberry available to grow here in the UK, with ‘Blue Crop’ and ‘Duke’ perhaps being the most commonly grown. The eventual size of blueberry shrubs can differ hugely depending on the variety, ranging from dwarf varieties that grow up to 1m to large bushes growing as high and wide as 3m. When choosing a container to grow blueberries in, make sure it will be able to accommodate the shrub’s eventual size and root system, but as a general rule, a 30cm diameter pot is the minimum for a newly planted shrub. “You can grow blueberries in containers, but as small plants, they don’t like to be overpotted,” says Lorraine Summers, the owner of the specialist blueberry retailer Trehane Nursery. “Plant into a container that is 2-2.5 times the volume of the pot your plant is in now. “Ensure that the pot has good drainage holes and cover the holes with coarse gravel to prevent clogging with compost.” As mentioned, blueberries require free-draining soil, so any container used will require adequate drainage holes to allow any excess water to escape freely. Remember that blueberry plants prefer moist, but well-drained ericaceous soil with an acidic pH. Potting Up Blueberry Plants Water the blueberry plant thoroughly before planting and half-fill the chosen pot or container with ericaceous compost. Remove the plant from its pot, place it in the container and backfill it with more compost, gently firming it in as you go. Ensure that the blueberry is planted at the same depth it was previously and water in well. “Ericaceous compost must be used and potting up is done every two or three years until the final container can be used, which should be of at least 50 litres capacity,” says Lorraine. How Many Can You Plant Per Pot? It is advisable to only plant one blueberry plant per pot or container, as they develop a tightly packed fibrous root system in the space they are given and do not like to be overcrowded. Even though many blueberry varieties are described as self-fertile and will produce a good crop, growing two or more varieties nearby can increase not only fruit size, but yields as well. Potted Blueberry Care Watering When it comes to watering blueberries, rainwater is the preferred choice as tap water can raise the pH of the soil. Blueberries require moist, but not wet soil and will need watering regularly, especially after planting and during the summer months when they are actively growing. Feeding Blueberry shrubs can be hungry feeders and certainly benefit from an ericaceous liquid fertiliser applied during the growing season from April to September. Overwintering Many blueberry varieties are fully hardy, but some are not and even those that are can suffer from the extremely low temperatures and wet conditions of winter. One of the many benefits of growing blueberries in containers is that they can be moved undercover or to an unheated greenhouse to avoid the worst of the winter weather. Re-Potting Blueberry shrubs can need re-potting either due to outgrowing their current container or when their soil needs refreshing, which can be every 2-3 years. If the blueberry’s roots are visible through the container’s drainage holes this is an indication that it needs re-potting into a larger pot, which can be done in either spring or autumn. To re-pot, remove the blueberry from its current container by squeezing the pot sides or if necessary, sliding an old knife down between the pot and the soil. Inspect the roots and if root-bound or severely congested, gently tease out some of the roots. Fill the bottom of the new container with fresh ericaceous compost and place the plant ensuring it is at the same depth as it was previously planted. Backfill with compost and water thoroughly. If re-potting becomes difficult due to the size of the shrub, then it can be top-dressed instead, which is when the top 5-7cm of compost is replaced each year to replenish any lost nutrients. Protecting Fruit As with blueberries grown in the ground, container-grown shrubs will need their fruit protected from any birds. As soon as the berries start to turn blue, fleece or fine netting can be placed over the shrub to form a barrier against pigeons and blackbirds who can strip the berries bare if they are not protected. The fruits are ready to harvest when they have fully changed colour and there is no hint of green left. Pruning Whether grown in the ground or in containers, blueberry shrubs can benefit from an annual prune carried out when they are dormant in winter. New blueberries don’t need much pruning, apart from removing any wayward stems or shortening them to encourage branching. From the third year onwards, annual pruning involves removing any dead, diseased or rubbing branches. As the shrub matures, up to 25% of the oldest and thickest stems can either be pruned back to a strong shoot lower down or removed at the base, to encourage new growth which will fruit the following year. References 1. The Blueberry: An American native. (2021, October 27). Berkeley Horticultural Nursery. Retrieved March 13, 2023, from https://berkeleyhort.com/gardening-suggestions/the-blueberry-an-american-native-2/
Learn more
11 Delicious Blueberry Varieties With Lorraine Summer From Trehane Nursery
IN THIS GUIDE 1) V. corymbosum ‘Duke’ 2) V. corymbosum ‘Spartan’ 3) V. ‘Berkeley’ 4) V. ‘Chandler’ 5) V. corymbosum ‘Patriot’ 6) V. ‘Sunshine Blue’ 7) V. ‘Pink Lemonade’ 8) V. ‘Top Hat’ 9) V. corymbosum ‘Hortblue Petite’ 10) V. ‘Herbert’ 11) V. corymbosum ‘Aurora’ References Blueberries are botanically named Vaccinium corymbosum and are part of the Ericaceae family. Native to North America, blueberry shrubs produce delicious fruits and beautiful autumnal foliage and can grow well here in the UK’s climate.1 “I like ‘Berkeley’ as its berries are very sweet,” shares Lorraine Summer, owner of Trehane Nursery, which specialises in blueberry plants. “‘Chandler’ and ‘Herbert’ also have a very good flavour and are favourites of mine.” What follows are eleven popular types of blueberries which can be grown in the UK, including some very special RHS AGM recipients. “There are Blueberry cultivars more suitable for smaller gardens that grow 0.5m-1m high & wide,” shares Master Horticulturist Colin Skelly. I grow a couple of these in my garden, including V. ‘Sunshine Blue’ and V. ‘Top Hat’, and these produce a large crop on relatively small bushes. “The taste of home grown blueberries picked straight from the bush is a real summer highlight in the garden.” All of the varieties mentioned below must be grown in acidic, loam or sandy soil in full sun or part-shade in a sheltered location. Also, they all bear fruit in the summer and are H6 hardy unless otherwise mentioned, meaning they can be grown in any and all areas of the UK throughout the year. 1) V. corymbosum ‘Duke’ COMMON NAME(S): blueberry ‘Duke’ FOLIAGE: Green, red and yellow FLOWERS: White FLOWERING SEASON(S): Spring / Summer FRUIT: Black and blue TYPICAL SIZE: 1.5-2.5m in height, 1-1.5m spread Perhaps one of the most readily available blueberries, ‘Duke’ is one of the larger cultivars that can grow to an eventual height of up to 2.5m. Producing good size berries with a sweet flavour, it is no wonder it is so commonly grown not only domestically, but commercially as well. Flowering later than others, but often ripening early, it can be an excellent choice for growing in areas where late frosts can present a problem. Rated H6 for hardiness, blueberry ‘Duke’ can tolerate the worst of winters and temperatures as low as -15-20°C. 2) V. corymbosum ‘Spartan’ COMMON NAME(S): blueberry ‘Spartan’ FOLIAGE: Green, red and yellow FLOWERS: White FLOWERING SEASON(S): Summer FRUIT: Black and blue TYPICAL SIZE: 1-1.5m in height, 1-1.5m spread Blueberry ‘Spartan’ is another popular variety which, unlike its name suggests, produces good crops. Slightly smaller than ’Duke’, blueberry ‘Spartan’ will reach 1.5m in height and spread over time with an upright and bushy habit. Fruiting from July, it is a vigorous shrub that produces deep blue-coloured berries with a good flavour. Having received the RHS Award of Garden Merit (AGM), it has proven to perform reliably well. 3) V. ‘Berkeley’ COMMON NAME(S): blueberry ‘Berkeley’ FOLIAGE: Green, red and yellow FLOWERS: White FLOWERING SEASON(S): Spring FRUIT: Blue TYPICAL SIZE: 0.5-1m in height, 0.5-1m spread With its spreading habit and large fruits, blueberry ‘Berkeley’ is a later fruiting shrub which is ready for harvesting in late July. With vigorous growth, it can reach a little over 1m in height and spread over time and, as with all blueberries, requires an ericaceous soil. Blueberry ‘Berkeley’ ripens to lighter blue, yet do not let this put you off as it is often recommended for its sweet and firm berries that are easy to pick. 4) V. ‘Chandler’ COMMON NAME(S): blueberry ‘Chandler’ FOLIAGE: Green, red and yellow FLOWERS: White FLOWERING SEASON(S): Summer FRUIT: Black and blue TYPICAL SIZE: 1-1.5m in height, 1-1.5m spread For the biggest fruits, blueberry ‘Chandler’ is certainly worth considering as it can produce delicious berries up to 2cm. A mid to late-season blueberry, ‘Chandler’ ripens slowly throughout the picking season and has lovely autumnal foliage. With a bushy habit, this blueberry shrub can grow up to 1.5m tall and wide if given the right conditions. 5) V. corymbosum ‘Patriot’ COMMON NAME(S): blueberry ‘Patriot’ FOLIAGE: Green and red FLOWERS: White and cream FLOWERING SEASON(S): Spring / Summer FRUIT: Black and blue TYPICAL SIZE: 1.5-2.5m in height, 1-1.5m spread One of the larger blueberry shrubs, ‘Patriot’ can grow to a final size of 2.5m tall as it matures. Fruiting in July, ‘Patriot’ is an early-season blueberry that produces mid-blue coloured and medium-sweet berries with an excellent flavour. More tolerable of soil conditions than others, it can be a good choice for those growing on less-than-ideal ground conditions. 6) V. ‘Sunshine Blue’ COMMON NAME(S): blueberry ‘Sunshine Blue’ FOLIAGE: Green, red and purple FLOWERS: White and pink FLOWERING SEASON(S): Spring FRUIT: Blue TYPICAL SIZE: 0.5-1m in height, 0.5-1m spread If growing space is limited, then a smaller and more compact blueberry shrub such as ‘Sunshine Blue’ may be more suitable. Blueberry ‘Sunshine Blue’ will have an eventual size of only 1m high and half as wide, making it ideal for growing in smaller spaces or containers. A semi-evergreen blueberry shrub, it displays bright pink flowers before fruiting and its foliage provides lovely autumnal interest as the leaves turn purple-red. 7) V. ‘Pink Lemonade’ COMMON NAME(S): blueberry ‘Pink Lemonade’ FOLIAGE: Green, red and yellow FLOWERS: Pink FLOWERING SEASON(S): Spring FRUIT: Pink TYPICAL SIZE: 1-1.5m in height, 1-1.5m spread For something totally different, this deciduous blueberry shrub produces blueberries, that are not blue as normal, but pink. Blueberry ‘Pink Lemonade’ is a new self-fertile cultivar introduced from North America that produces pink flowers followed by pink blueberries which are firm with a delicious and mild flavour. Growing to a height and spread of 1.5m with a bushy habit, ‘Pink Lemonade’ is a mid- to late-season blueberry with lovely autumnal leaves which turn a deep red before falling for the winter. 8) V. ‘Top Hat’ COMMON NAME(S): blueberry ‘Top Hat’ FOLIAGE: Green and bronze FLOWERS: White FLOWERING SEASON(S): Spring FRUIT: Blue TYPICAL SIZE: 0.5-1m in height, 0.5-1m spread For a dwarf and compact blueberry that is ideal for containers or the patio, blueberry ‘Top Hat’ is perfect as it will only grow to 50cm tall and wide. With white flowers in spring that produce flavoursome sky blue blueberries from July to August, it looks great coming into autumn as its foliage turns red. Preferring full sun, ‘Top Hat’, if grown in a container, will need frequent watering, especially when fruits are forming, as pots tend to dry out more quickly. 9) V. corymbosum ‘Hortblue Petite’ COMMON NAME(S): blueberry ‘Hortblue petite’ FOLIAGE: Green, red and blue FLOWERS: White and pink FLOWERING SEASON(S): Spring FRUIT: Blue TYPICAL SIZE: 0.5-1m in height, 0.5-1m spread Blueberry ‘Hortblue Petite’ is rather special as it is a new cultivar that has been bred to crop twice in a growing season. Fruiting in July and then September, it will produce delicious dark blue berries on a compact shrub that will only grow to an eventual size of 1m high with a 0.75m spread. Like ‘Top Hat’, ‘Hortblue Petite’ is well suited to growing in a container, but can equally be grown in the ground in a sheltered and south-facing position. As with other container-grown blueberries, it will benefit from a monthly liquid ericaceous feed throughout the growing period. 10) V. ‘Herbert’ COMMON NAME(S): blueberry ‘Herbert’ FOLIAGE: Green, red, orange and yellow FLOWERS: White FLOWERING SEASON(S): Spring FRUIT: Blue TYPICAL SIZE: 1.5-2.5m in height, 1.5-2.5m spread Well known for its excellent flavour and large berries, blueberry ‘Herbert’ is a large shrub that will need space. Reaching a size of 2.5m tall over time, it is a vigorous blueberry with an upright habit and produces fruit from late July to August. Being deciduous, its green foliage turns a lovely bright red come autumn before dropping for the winter. With a hardiness rating of H4, it is less hardy than some other blueberry cultivars, so care might be needed if the winter temperatures drop severely. 11) V. corymbosum ‘Aurora’ COMMON NAME(S): blueberry ‘Aurora’ FOLIAGE: Green, red, purple, orange and yellow FLOWERS: White FLOWERING SEASON(S): Spring FRUIT: Blue TYPICAL SIZE: 1.5-2.5m in height, 1.5-2.5m spread For fruits to harvest later in the season, blueberry ‘Aurora’ produces large deep blue berries with a rich flavour from August into September. A large cultivar with an upright habit, ‘Aurora’ can grow to 2.5m in height and spread when mature if given the right conditions and enough space to grow. Providing intense autumnal foliage, blueberry ‘Aurora’ has great ornamental qualities before turning dormant for the colder months. References 1. The history of blueberries: From Native American staple to domesticated superfood. (2019, January 19). University of Illinois. Retrieved March 13, 2023, from https://extension.illinois.edu/blogs/garden-scoop/2019-01-19-history-blueberries-native-american-staple-domesticated-superfood
Learn more
How To Plant And Grow A Fig Tree (And Why They're Not Suited To Every Garden)
IN THIS GUIDE Overview Common Varieties Growing From Seed Planting Ongoing Care Harvesting References Fig Trees are not necessarily suited to every garden and are not the easiest fruit to grow at home, but they can be very rewarding additions in a suitable spot. Growing your own figs at home could be a wonderful new string for your gardening bow. In this guide, we will help you decide whether a fig tree is right for you, and if so, which options you might consider. Overview Botanical Name Ficus carica Common Name(s) Fig Tree Plant Type Fruit Tree Native Area Mediterranean and West Asia Hardiness Rating H4 Foliage Deciduous When To Plant September – November Harvesting Months August – September When To Prune February Figs are the fruits of Ficus carica, a small tree which is native to the Mediterranean region and western Asia, but which is commonly cultivated in warmer temperate regions and other climate zones.1 The edible fig is believed to have been one of the first plants cultivated by human beings – grown even before humans grew agricultural crops like wheat, barley and legumes.2 It is commonly prized for its edible fruit, but is also used as an ornamental garden tree. Common Varieties Some of the most common F. carica varieties include: ‘Brown Turkey’ This is the most popular type for outdoors growing in the UK. ‘Brunswick’ Another popular hardy variety that is suitable for UK cultivation. ‘Chelsea’ ‘Chelsea’ can be found near Chelsea Bridge, fruiting reliably outdoors, with good cold hardiness. ‘Ice Crystal’ This variety does have small sweet fruits, but it is usually grown for its ornamental foliage. ‘Madeleine des Deux Saison’ Suited to hotter gardens in the south, where this variety can fruit in June and September. ‘Violette de Bordeaux’ ‘Violette de Bordeaux’ is a hardy fig from the gardens of Versailles. There is also a dwarf mutation of this type called ‘Little Miss Figgy’ than can be grown in large pots on a patio. Other varieties include: ‘Sultane’ ‘Panachee’ ‘Doree’ ‘Dalmatie’ Growing From Seed Fig trees are usually purchased and planted, but it is also possible to grow a fig tree from seed. Just remember that supermarket figs are likely not to be suitable for UK cultivation, and also that it will take up to 3 years before your fig tree starts to bear fruit. Seeds must be soaked for 24 hours prior to planting. Once the seeds are fully hydrated and have developed a small white root, plant into a suitable free-draining potting mix, around 2cm deep. Water regularly and keep moist and warm, and new growth should emerge within a couple of weeks. Keep the young sapling in a warm and sunny area, fertilising and watering regularly, and plant out into the final growing position once the tree is well established at around 40cm tall. Planting The best time to plant fig trees is in autumn, between September and November, so that the tree can establish roots before cold weather sets in. However, you can also plant in the early spring. Fig trees should be planted either in deep holes in the ground or in containers. Be sure to note the care requirements below when choosing a suitable spot. Some more tender varieties should be grown in an unheated greenhouse or conservatory in the UK, while hardier varieties will cope outside across much of the UK. How To Plant Figs actually do best and bear the most fruit when their roots are restricted. It can be a good idea to create a bund underground when growing figs in the garden to keep the roots from expanding outwards. You can use reclaimed paving slabs or blocks to line the planting hole or use a root control bag. Part filling the planting hole with well-rotted manure or other organic material and rubble can also help with root restriction. Ongoing Care Fig trees are borderline hardy for many UK gardens, so it is important to choose the right place for them and to care for them correctly. Sunlight Fig trees need a warm spot and as much sun as possible to do well here in the UK. A sheltered spot close to a south-facing wall can be ideal. Soil Requirements Figs will grow well in chalk, loam or sandy soil which is moist but well-drained or free draining. They require a fertile environment with plenty of organic matter and will do best in soil with an alkaline or neutral pH. Watering Keep your fig tree well watered, especially when growing in a container. Keep the medium or soil moist yet not waterlogged throughout the summer months. Fertilising Apply an organic mulch upon planting and replenish that mulch annually each spring. This will help conserve soil moisture, suppress weeds, and slowly fertilise the tree. It is also a good idea to feed the tree weekly, especially when growing in a container, once fruits start to appear, with a high-potassium organic liquid plant feed. Container Growing If growing in a container, choose a suitable large and deep pot, and make sure that there is good drainage. Make sure that excess water can drain away from the base. Fill the container with John Innes No. 3 or a homemade equivalent potting mix. Pruning Fig trees should be pruned in winter each year to keep their growth in check, and to remove any dead, damaged or diseased material. This should be done while the tree is dormant, over the winter months. I find that February is usually a good time to prune. Do not prune once the sap has risen, as these will ‘bleed’ when cut at other times. “Figs can be pruned as fans on a south-facing wall to optimise the warmth and light reaching the branches,” Master Horticulturist Colin Skelly says. “These will need to receive summer pruning to restrict their growth. Figs produce an irritant sap from the cut stems. “From bitter experience, make sure you wear protective long sleeves and gloves when pruning.” Simply remove some older, thicker branches down to the base to open up the canopy to let light through to ripen the fruits. Figs can also be fan-trained against a sunny south-facing wall to make the most of your space. Overwintering While figs grown in the UK are somewhat hardier types, they will still often need some protection over the winter months in chillier gardens and more northern areas. This is especially true while the trees are still young. You can protect outdoors trees with fleece or other coverings, back straw around branches, or move container-grown fig trees under cover into a cool shed or greenhouse that remains frost-free. Propagation Fig trees can be propagated by seed, or by means of hardwood cuttings. Harvesting Figs can produce more than one harvest a year in warmer climes, but most of the time, only one of these crops will ripen in the UK – which will be ready to harvest in September or October. Tiny little figs formed in autumn will develop to provide a harvest next year, but those that formed in spring and early summer that have not ripened by October will not do so. These should be removed in late autumn. References 1. Common Fig. (2003, January 1). Science Direct; Elsevier BV. https://doi.org/10.1016/b0-12-227055-x/00463-6 2. Noble Wilford, J. (2006, June 1). Figs Believed to Be First Cultivated Fruit. The New York Times. Retrieved March 15, 2023, from https://www.nytimes.com/2006/06/01/science/01cnd-fig.html
Learn more
Growing Raspberries: Best Planted As Bare-Root Canes Over The Dormant Period
IN THIS GUIDE Overview Common Growing Varieties How To Grow Raspberry Bushes Ongoing Plant Care Pruning Harvesting References Raspberries are one of the most delicious fruits and they can be grown relatively easily in many UK gardens. Learn more about these plants and everything you need to know to grow them successfully where you live in this simple guide. Raspberries are a delicious crop which can provide you with abundant yields while taking up a relatively small amount of space. Most are cane fruits, which are grown vertically, usually on supports, for summer or autumn harvest. Though, interestingly, there are also some related ground-cover raspberries to consider. Planting perennial fruiting plants like raspberries can be a wonderful choice for home growers as they provide an excellent return for the effort you expend, and take a lot less work than an annual food-producing garden. Overview Botanical Name Rubus idaeus Common Name(s) Raspberry Plant Type Perennial Fruit Native Area Europe and North Asia Hardiness Rating H6 Foliage Deciduous Flowers 5-petalled flowers When To Plant October – April Harvesting Months Varies depending on type grown When To Prune August to October or February Raspberries most commonly grown are of the species Rubus idaeus. Rubus idaeus var. idaeus is known as the European red raspberry and these raspberries are the focus of this guide. However, it is worth noting that there are also other species and varieties within the Rubus genus, such as the American red raspberry, R. idaeus var. strigosus, and Asian raspberry types.1 Many modern cultivars are actually hybrids between these two naturally occurring varieties. Of relevance to some UK growers are some ground-cover Rubus species, such as R. tricolor, which can be used as ground cover, even in more shady spots. In this guide, we will focus on the most common domestic cultivars of raspberry. Common Growing Varieties Raspberry cultivars are commonly divided into early-summer fruiting, mid-summer fruiting, late-summer fruiting and autumn-fruiting varieties. For their care requirements, they are grouped more broadly into summer and autumn fruiting cultivars. Common early-summer fruiting cultivars include: ‘Glen Clova’ ‘Glen Moy’ (AGM) ‘Malling Jewel’ (AGM) ‘Willamette’ ‘Malling Jewel’ Common mid-summer fruiting cultivars include: ‘Glen Ample’ (AGM) ‘Newburgh’ ‘Ripley’ ‘Valentina’ ‘Zeva’ Common late-summer fruiting cultivars include: ‘Cascade Delight’ ‘Glen Magna’ (AGM) ‘Malling Admiral’ (AGM) ‘Tulameen’ (AGM) ‘Tulameen’ Common autumn fruiting cultivars include: ‘All Gold’ (AGM, yellow fruits) ‘Autumn Bliss’ ‘Fallgold’ (yellow fruits) ‘Joan J’ (AGM) ‘Polka’ (AGM) For container growing, there are dwarf cultivars in the Lowberry series such as: ‘Baby Dwarf’ ‘Goodasgold’ ‘Little Sweet Sister’ How To Grow Raspberry Bushes Raspberries are best planted as bare-root canes over the dormant period. It is best to choose a mild day, ideally in late autumn or early winter, though you can also plant any time before March. Planting Out Raspberries can be grown in dedicated beds or borders, or integrated into mixed perennial schemes – you might place them on the sunny fringe of a forest garden, for example. Give them room to roam as they can freely sucker. Raspberries are typically grown in the ground, but you might be surprised to learn that you can also grow them in containers in small spaces, and even potentially grow them indoors if you do not have any outside space at all. If growing in containers, choose a container for each plant which is at least 38cm wide. The larger a container you can accommodate, the easier you will find it to maintain. Light & Exposure The ideal spot is one with plenty of sun. Raspberries can tolerate light or dappled shade but will fruit best when grown in full sun. Windy locations can reduce the efficacy of insect pollination, so bear this in mind when planting. Branches can also bend and whip about, and may break in strong gusts or storms. Spacing Raspberry plants should be placed around 45-60cm apart, and if you are planning on creating more than one row, the gap between rows should usually be 1.8m. Depth Plant raspberries to the depth that they were previously planted, going by the soil mark on bare root canes. The top roots should be 5cm below the surface of the soil at a maximum push. If the soil is heavy clay or prone to waterlogging, it is a good idea to plant raspberries on a ridge raised around 7cm above the surrounding ground level. Alternatively, you can also plant into raised beds. Height The height of supports for your raspberries should be determined ahead of time, and supports should be placed before planting. Usually, support structures should be around 1.7-2m tall above the ground, though dwarf cultivars can be grown with shorter supporting structures. Ongoing Plant Care Caring for raspberries involves, first and foremost, choosing the right options and placing these in the right places to provide optimal growing conditions. As long as these conditions are met, you should then find it relatively easy to continue to care for your raspberries over time. Preferred Soil Raspberries will do best in fertile and moisture-retentive yet well-drained soil with plenty of organic matter. The soil should be relatively deep, weed-free, and should not become waterlogged. A slightly acid soil with a pH of between 6.5-6.7 is ideal. If growing in containers, the optimal mix recommended by the RHS is one with 80% peat-free multi-purpose compost, and 20% loam-based potting mix to increase weight for stability.2 However, raspberries should thrive in a homemade mix with sufficient levels of organic matter, which is moist yet free-draining. Staking Or Trellising There are a number of different support options for raspberries. 1-3 plants (in the ground or in a container) can be supported by a single post, stake, bamboo canes or natural branches in a wigwam shape. A single row of summer fruiting raspberries in a small garden can be supported on a single fence, with sturdy posts 3m apart, with galvanised metal wire stretched between these posts 60cm apart. A double fence with additional support can be a good choice for autumn fruiting raspberries. Place posts 3m apart as above in two rows either side of your plants. Place the rows around 60cm apart and attach short horizontal beams to each post. Stretch galvanised wire at 60cm intervals working up the posts to form a rectangular pen. Watering Raspberries (especially those growing in containers) need to be watered well during dry spells, but you do need to be careful not to overwater or create waterlogged conditions. If you live in a hard water zone, try to make sure that you water raspberries with rainwater wherever possible. Ensure that you have a nearby rainwater harvesting system set up. When watering, make sure that you water the soil and not the foliage, flowers or fruits. Wet foliage can increase the risk of fungal diseases taking hold and watering at or below the soil level where the water is actually needed will conserve water too. Installing a drip irrigation or soaker hose system can be ideal. Feeding Raspberries should be mulched well upon planting, with at least a 7-8cm layer of organic material, which should be replenished each spring. This mulch will boost nutrients in the soil, improve soil structure, suppress weeds and help retain moisture. A mulch of good quality homemade compost or well-rotted manure is ideal, and this can be topped with comfrey leaves or the leaves of another potassium-rich dynamic accumulator plant to give a potassium boost. If you are growing in a container, you should also use an organic liquid feed like compost tea or a comfrey liquid feed once a month or so. Pollination Raspberries are insect pollinated, so they will benefit if you create a wildlife-friendly garden filled with bees and other insects. While it is best not to plant beneath raspberries, growing plenty of flowering plants in the vicinity is highly recommended. Tansy, rue, yarrow and alliums are some good companion plants to consider. Container & Indoor Growing As mentioned above, choose dwarf varieties for container growing. Try to choose a container which is as large and deep as possible, as larger containers will require less watering and feeding over time. Growing container raspberries indoors can be challenging, largely because it can be difficult to provide enough light for successful fruiting. But it is possible, as long as you have a light bright window which allows the plants to get at least 6-8 hours of unobstructed sunlight a day. Keep your plant in a cool, bright room, away from heat sources and protected from extreme temperature fluctuations. The other main thing that is different with indoor growing is that without bees and other pollinators around, you will have to pollinate your plants by hand. As soon as the flowers open, use a small paintbrush to transfer pollen in the blooms to the centres of the flowers. Common Pests & Diseases Some common pests of raspberries are: Birds, which eat the berries before you get the chance (netting your canes or growing in a fruit cage can help prevent this). Raspberry beetle, which causes dry patches to develop on stalk ends and little white maggots are found inside the fruit. Attract plenty of predators to your garden, like birds, hedgehogs and ground beetles to keep their numbers down. Some raspberry diseases are: Raspberry cane blight – a serious fungal disease that causes canes to turn brittle and snap off at the base. Make sure plants are well spaced, well watered and mulched well to reduce incidence and remove all infected material promptly to reduce spread. Raspberry spur blight – another fungal disease that will weaken raspberries, though it does not usually kill them. Again, avoid overcrowding and cut out of and dispose of any infected canes. Verticillium wilt – make sure environmental needs are met and plants are as healthy as possible. Avoid growing raspberries near other susceptible crops. If it develops, destroy the raspberries present and replace with a plant that is rarely affected. Pruning “Even with correct pruning, well established patches of raspberries can become dense thickets and you have to be careful they don’t become a victim of their own success,” shares Master Horticulturist Peter Lickorish. “Rooted suckers can be lifted in February by gently forking the ground to loosen it and slicing through any connecting growth underground with a spade or secateurs. “I would suggest lifting any dense clumps of suckers, separating them and transplanting them elsewhere to give their parent plants space for good air-flow. This helps in the fight against fungus. “Raspberry suckers growing outside of their allotted space can be transplanted elsewhere too.” Harvesting Raspberries are ready to harvest once the berries have reached their mature colouration and are plump, glossy and full. Mostly, mature raspberries will be bright red, though some varieties are yellow and there are also black cultivars. When the fruits will be ready to harvest depends on whether you are growing an early-summer, mid-summer, late-summer or autumn fruiting variety. How To Harvest Simply pull the ripe berries off the central white rasps. It is best to do so on a dry and sunny day if possible. Average Yield It is normal to obtain yields of around 9kg from a 3m row. Though some of the best cultivars can deliver a yield almost as high, or even higher, from a single plant. Storing Raspberry Fruits Raspberries are delicious when eaten fresh. They can be stored in your fridge for a few days, or frozen for later use. If storing, wash before eating rather than prior to storing, to reduce the likelihood of fruit becoming mouldy. Of course, you can also preserve them in a range of other ways, such as by making raspberry jam, for example. You should have no difficulty in finding ways to use up all your delicious berries. References 1. Rubus idaeus var. idaeus. (n.d.). North Carolina Extension Gardener Plant Toolbox. Retrieved March 23, 2023, from https://plants.ces.ncsu.edu/plants/rubus-idaeus-var-idaeus/ 2. Raspberries. (n.d.). Royal Horticultural Society. Retrieved March 23, 2023, from https://www.rhs.org.uk/fruit/raspberries/grow-your-own
Learn more
Prune Gooseberry Bushes Like This To Produce A Much Bigger Crop Overall
IN THIS GUIDE Formative Pruning Pruning In Bush Form Pruning In Standard Form Fan-Training Pruning As Cordons Gooseberries are incredibly easy plants to grow and can offer an abundance of fruits which can be used in a wide range of different ways. I find them one of the most valuable and abundant fruit bushes to grow in my forest garden as they fruit well, even in dappled shade. Gooseberries really don’t require a huge amount of work. You don’t necessarily have to spend time on their care and pruning is certainly not essential, but learning how to prune gooseberries properly can be a very good idea. “I find that pruning gooseberries helps to produce a much bigger crop overall, with much bigger berries than leaving bushes unpruned,” says Colin Skelly, a Horticultural Consultant. “It is also much easier to get in amongst the spiny branches to harvest if there is space between them.” Correct pruning is of threefold importance: First, gooseberry bushes can get overgrown in a haphazard and even tangled-up way and, therefore, can look very unkempt. Second, such overgrown and unkempt bushes are much more susceptible to diseases like powdery mildew and pests like aphids. And third, they produce a smaller crop than they would if they were correctly pruned. Read on for more information about pruning gooseberries in their first year, and on an ongoing basis to create different forms. Formative Pruning Gooseberry plants can be purchased while young or propagated from existing plants. They can be grown more naturally in bush form, or trained into a range of space-saving or decorative shapes. Grafted or budded plants can also be purchased which give gooseberries a standard form, with a tree-like main stem below the bushy area. If you purchase a young gooseberry plant that has not been trained already in a specific way, then in the first year after planting you should undertake formative pruning to achieve the desired shape down the line. If you wish to grow gooseberries in a natural bush form, then in the first part of spring the year after you have planted your gooseberry, you should prune to create a well-balanced and open framework of branches. Choose 5 main branches to retain as the main framework and cut all other growth off at the base. Prune the stems you have selected to form the main framework back to around 15-20cm in length. These stems should ideally lean out from one another, leaving an open centre to the plant, which will allow light to penetrate the centre of the plant and also make harvesting a little easier. If you wish to train a gooseberry as a cordon plant or have purchased a young cordon gooseberry plant with one main growing stem and short side shoots, this can be a great space-saving idea. With this type, in the first year you should remove around a quarter or the main stem, cutting it off just above one of the buds. Next, cut off any side shoots that are within 15cm of the surface of the soil on the lowest portion of the stem. Finally, prune all the side shoots to leave just 1-2 buds. Pruning In Bush Form From the plant’s second year onwards, a bush gooseberry should ideally be pruned between Mid-June and July. Look for the current season’s fresh young growth and on all of this except that required to increase the length of the main framework branches, cut back to around 5 leaves. Pruning in this way won’t remove any fruit because fruit forms mainly on older wood rather than the growth of the current season. Then, in winter, carry out maintenance pruning to get rid of any dead, damaged or diseased material and any low-lying stems. It is also a good idea to shorten the tips of the branches by 25%, cutting to a suitable outward-facing bud, and to prune all side shoots to leave 1-3 buds on short spurs. While you can simply leave gooseberries to grow as they will, this will result in a tangled mess and can make harvesting a challenge. Pruning In Standard Form If you purchase a gooseberry that already has been created in a standard form, this will typically have a bare ‘trunk’ at the base and be like a bush on top. These types need to be staked for support. If you choose this type, then pruning the bushy section at the top will be the same as pruning a bush gooseberry. Fan-Training If you wish to fan-train a gooseberry or have purchased a plant in a fan form, pruning and training will go hand in hand. Gooseberries can be fan trained in late winter or early spring before the buds break. This involves placing the young plant against a wall or fence and training the stems by tying them into a support framework of wires against this structure. Select two branches to form the main arms then erect two canes at 45° angles and tie the chosen branches to these canes. Reduce each of these main branches to an upwards-facing bud. As side shoots grow, select which ones you will keep and tie them into support structures. Remove any shoots growing outwards or towards the wall or fence. The following spring, cut back these side shoot branches by 33%, cutting to an upward-facing bud if possible. Prune established fan-trained gooseberries in mid-summer and again in the winter to maintain their form. In summer, cut back new shoots to leave 5-6 leaves. In winter, cut these shoots back again to two buds to form short fruit-bearing spurs. Pruning As Cordons From the second year onwards, plants grown as cordons should also be pruned between June and mid-July and then again in winter during dormancy. During the summer pruning, aim to cut back new side shoots back 5 leaves and as the main stem grows, tie it into its support. Once the leaves have fallen, in the late autumn or winter, prune back each of these side shoots, leaving 1-2 buds on each one. Also, prune the main growing tip by around one-third. As soon as the cordon grows beyond its supports, or to a height that can no longer easily be harvested from, in summer, prune the growing tip to around 5 leaves from the previous year’s growth. Then, cut back once more in the winter months. Remember, you do not necessarily have to follow these pruning instructions, but doing so and undertaking regular pruning on your gooseberry plants can ensure abundance and good health on the plants, make harvesting much easier, and allow you to train or shape your gooseberries as required or desired.
Learn more
How To Get Abundant Yields From Gooseberry Shrubs Grown In Pots (With Little Effort)
IN THIS GUIDE Can You Grow Gooseberries In Containers? Choosing Pots For Gooseberry Plants Choosing A Growing Medium Potting Up Gooseberries Potted Gooseberry Care Gooseberries are wonderful shrubs that are very easy to grow in a garden and can produce abundant yields with very little effort on your part. Gooseberries grow best in full sun or dappled shade, in moist yet free-draining soil. But they are very tolerant plants that can cope with a wide range of different soils and growing conditions. If you would like to grow gooseberries where you live but don’t have much space, or you rent your property, you might wonder whether you can grow gooseberries in containers. Can You Grow Gooseberries In Containers? The good news is that you can indeed grow gooseberries in containers. While this will typically take a little more work than growing them in the ground, they can easily be maintained to grow even in the smallest of spaces. Gooseberries can be kept in a bushy, natural form but they can also be trained and pruned to keep them within different forms. They can be fan-trained, for example, and placed against a wall or fence, or they can be grown as cordons. You can grow gooseberries in a range of shapes and forms in containers, but perhaps training as a cordon is the best option for container growing and small space gardeners. Bushes can be kept small, but typically need to be spaced 1-1.5m apart. Cordons, on the other hand, can be placed just 30-35cm or so apart. This will mean that gooseberries in containers will be able to be placed much closer together to make the most of whatever space is available. Remember, however, that cordon plants will require support, so whether growing in containers or in the ground, you will need a support system in place. Choosing Pots For Gooseberry Plants You can grow gooseberries in a range of different containers. Often, you can get away with planting a gooseberry in a 20L pot, but larger is generally better when it comes to gooseberries. When choosing a container, you should choose one that is as wide as possible. Since gooseberries are fairly shallow-rooted, depth is less important for these plants. A container at least 40-50cm across will be best. The container should have drainage holes at the base, to allow excess water to drain away freely. Gooseberries do like moist conditions but they also prefer the environment to be free-draining and can experience issues in waterlogged conditions. Choosing A Growing Medium When growing gooseberries in containers, you can plant them into any peat-free, soil-based, multi-purpose compost. I find that they do well in containers filled with a homemade mix of 1/3 clay-loam soil from my garden, 1/3 homemade compost and 1/3 leaf mould. “If you don’t have access to homemade ingredients, young plants can be potted into John Innes no. 2 compost and then into John Innes no.3 once established and transferred to a larger pot,” shares Horticulturist Colin Skelly. “This will ensure sufficient nutrients, moisture and drainage. “An annual top-up of compost would be beneficial and plants should periodically be re-potted every 3-5 years depending on the final pot size and pruning form.” You don’t have to worry too much about which growing medium you use, since these are tolerant plants that can grow well in a wide range of growing conditions. As long as the soil does not become waterlogged and is reasonably fertile, the gooseberries should do pretty well. Potting Up Gooseberries Gooseberries can be purchased as bare root plants during the winter months in the dormant period, or they can be purchased as potted plants in active growth. There are many different varieties that you might choose from. Place a little of your growing medium in the base of the container you have chosen, then position the plant in the pot. You can plant the gooseberry in its new container a little deeper than the soil mark on a bare-root plant, or a little deeper than it was in its previous pot. How Many Can You Plant Per Pot? Giving gooseberries space to spread is important, so as well as choosing as wide a container as you can, you should also avoid planting other plants within the same pot. Instead of planting other plants with your gooseberry in a container, mulch around the plant with organic matter upon planting. Afterwards, water your newly potted up gooseberry in well, and it should begin to reward you with abundant harvests over the coming years. Potted Gooseberry Care Sunlight Place containers with gooseberries in a sunny spot, or in dappled shade. Support Make sure you provide support for cordon or shaped forms of gooseberry. Watering & Feeding Remember that plants grown in containers typically require more watering than plants growing in the ground, so water well, especially during dry spells in summer. Aside from a mulch around the top of the container that should be replenished each spring, additional fertiliser will not typically be required. However, if the growth seems poor, you can feed your gooseberry with an organic liquid feed in spring/summer. Pruning Pruning gooseberries properly will typically be essential when growing in pots. How and when precisely you will prune will depend on the form of your plant and there are different pruning guidelines for bush form, fan and cordon plants. Pests & Diseases Remain vigilant for pests and diseases and work to maintain natural biodiversity and balance in your container garden to keep gooseberries healthy and productive. Net or cage fruits to protect from birds and other pests where necessary.
Learn more
Gooseberry Sawflies Can Cause Defoliation And A Lower Yield - Try These Organic Solutions
IN THIS GUIDE What Is Gooseberry Sawfly? Identifying Gooseberry Sawfly How To Deal With Sawflies References Gooseberries are generally relatively easy and low-maintenance plants to grow in your garden, and even a single plant can produce abundant yields of fruit that can be used in a range of different ways. One problem that can arise fairly commonly is gooseberry sawfly. Gooseberry sawflies will rarely kill gooseberry plants, but they can lead to unsightly areas of defoliation and can affect your yield if they are present in larger numbers. Sawfly populations can be relatively easily kept in check with an integrated pest management approach in an organic garden. Read on for a more in-depth discussion of the above. What Is Gooseberry Sawfly? There are three types of sawfly that eat the leaves of gooseberry bushes: The common gooseberry sawfly (Euura ribesii) The pale spotted gooseberry sawfly (Euura leucotrichus) The small gooseberry sawfly (Pristiphora appendiculata) All of these sawflies are members of the Symphyta suborder of the Hymenoptera insect family (to which bees, ants and wasps belong).1 They are three of around 500 sawfly species found in the British Isles.2 Sawflies are named for the egg-laying organ of the females, which looks somewhat like a saw.3 Using this appendage, the sawflies mentioned above will lay their eggs onto gooseberry plants. These eggs then hatch into caterpillar-like larvae. Identifying Gooseberry Sawfly The first thing you notice with the presence of sawfly might be their impact on the gooseberry plant, rather than the insects themselves. If you notice that entire branches of leaves have been stripped from the plant, then these sawfly larvae are likely to be the culprits. However, you may also be able to spot these insects, both in adult form and in their larval stages. The common gooseberry sawfly adults are yellow and black-winged insects. The females are 5-7mm long and are yellow with black heads and black marks on their thoraxes. Males look rather similar but have more black on them. This species has larvae that grow to around 2cm long and they are pale green, with many black spots and black heads. Pale spotted gooseberry sawfly larvae are slightly smaller in size and they also have pale green heads. This species has only one generation per year, and the larvae are present during May and June. The small gooseberry sawfly on the other hand, can have up to four generations from late April onwards. These larvae are pale green. How To Deal With Sawflies The first thing to understand is that the presence of gooseberry sawfly need not be considered a problem at all. Within a balanced garden ecosystem, these insects are an extremely valuable addition and won’t usually kill your plants, and, when their populations are kept in check, will not typically significantly reduce your yield. Even when these larvae eat every single leaf on a gooseberry, the plant can, remarkably, usually recover the following year. Though with such an extreme attack, your yield is almost certain to be significantly reduced. It is important to think of these insects not as pests, but as a welcome visitor in a wildlife-friendly garden – typically doing little more than making plants look a little unsightly after they have feasted on them. Sawflies are a good source of food for many garden birds, and for other predators like ground beetles. So encouraging these species in your garden can help you keep the sawfly numbers down and ensure that, while they are present, they are not present in such high numbers that you lose all the leaves on gooseberry bushes. In my organic forest garden, I do find that the odd branch here and there is defoliated by sawflies on my gooseberry bushes. However, I rarely see much more than the odd branch, since birds and other wildlife in the biodiverse space eat the larvae before their populations get out of control. In fact, defoliated branches tend to be those closest to the ground, hidden in other plants below, where birds cannot easily pick off the larvae before they cause any problems. “The first year I planted gooseberries on my allotment, sawfly decimated the foliage,” shares Master Horticulturist Colin Skelly. “I handpicked off the larvae I could find. The following year and subsequently there was far less damage. “I think this was in large part due to the garden ecosystem taking a while to develop complexity and more balance as the allotment was newly planted at that stage.” On the plants in clear view of birds (and us), I tend not to see significant defoliation. So, to tackle gooseberry sawfly where they are present in large numbers – increasing biodiversity is the most important strategy. Short term, you can also be vigilant and pick off sawflies by hand when you spot them and, if needed, nematode controls are available. However, in an organic garden, you can certainly live and let live to a degree and work with nature in your garden. References 1. Ants, Wasps, Bees and Sawflies: Order Hymenoptera. (n.d.). The Australian Museum. Retrieved March 16, 2023, from https://australian.museum/learn/animals/insects/sawflies-wasps-bees-ants-hymenoptera/ 2. Sawflies. (n.d.). NatureSpot. Retrieved March 16, 2023, from https://www.naturespot.org.uk/gallery/sawflies 3. Sawflies. (n.d.-b). University of Minnesota. Retrieved March 16, 2023, from https://extension.umn.edu/yard-and-garden-insects/sawflies
Learn more
You Can Use Layering Or Hardwood Cuttings To Propagate Gooseberry Bushes
IN THIS GUIDE Gooseberry Propagation Methods 1) Layering 2) Hardwood Cuttings Gooseberries might not be everyone’s favourite fruit, but I love them. I use them unripe in jams and other preserves, and to make a tart lemon juice substitute for a range of recipes. I also enjoy the ripe fruit too in a range of ways in my kitchen. In my forest garden at home, I have several gooseberry bushes, all of which were propagated from one original plant. If you would like to propagate your own gooseberry bushes at home, the good news is that this is a very easy and straightforward gardening job. “As with most fruits, there are many different cultivars of gooseberry,” shares Colin Skelly, a Horticultural Consultant. “You can choose one or more depending on whether you want a cooking or dessert gooseberry, sweet or sour, early, mid or late-season, or a combination. “If you have a friend or neighbour with a favoured cultivar it is easy, as described here, to propagate from.” Gooseberries are an extremely easy plant to propagate and are therefore a great place to start if you are new to the process of propagating your own shrubs in your garden. Difficulty Easy Equipment Required Gloves, knife or secateurs Gooseberry Propagation Methods There are two main ways to make new plants from an existing gooseberry bush: By layering With hardwood cuttings Both of these jobs are undertaken between late September and early November. Let’s take a closer look at each of these simple and straightforward options. 1) Layering “Propagation by layering”, by Gražvydas J, licenced under CC BY 3.0 Layering involves taking a stem from an existing gooseberry bush and bending it down so that a portion of this stem comes into contact with the soil, while the tip grows up and out of the soil. “Propagation by layering”, by Gražvydas J, licenced under CC BY 3.0 By pegging or weighting down this stem, keeping it in contact with the soil, it can be encouraged to root while still attached to the parent plant and, gooseberries will root fairly reliably in this way. “Propagation by layering”, by Gražvydas J, licenced under CC BY 3.0 Make sure a section of the stem is under the soil, gently cover it with a little more soil to hold it down and guide the tip of the stem to grow upwards out of the soil. “Propagation by layering”, by Gražvydas J, licenced under CC BY 3.0 By autumn the following year, this stem that has been layered should have taken root and be well established. “Propagation by layering”, by Gražvydas J, licenced under CC BY 3.0 The connection to the parent plant can be severed and the new gooseberry can be moved to a new location within your garden. “Propagation by layering”, by Gražvydas J, licenced under CC BY 3.0 2) Hardwood Cuttings The other equally easy way to propagate gooseberries is to take hardwood cuttings. As with layering, this is best undertaken sometime between September and early November. To take hardwood cuttings, select a healthy stem with soft growth at the tip and woodier growth at the base. Cut off this stem to obtain a cutting around 20cm in length, using a pair of clean, sharp secateurs. Gooseberry cuttings will root very easily and in my experience, you do not need to use a rooting hormone to get well-rooted healthy new plants. Simply remove the lower leaves from the cuttings, then push the end of the cutting into the soil in a nursery area or any fertile bed or growing area. Make sure that the stem descends at least 5cm or so into the soil. Gently firm down the soil around the cutting to make sure that it is held in place. Afterwards, simply water the cutting well and leave it alone until spring. In spring, you should see new growth as an indication that the cutting has taken and rooted well. If you plan to move your gooseberry to a new location, you can do this the following autumn.
Learn more


