

Growing

Turn Your Comfrey Leaves Into A Fertiliser 'Tea' And Feed Plants Organically
IN THIS GUIDE Why Grow Comfrey? What Makes It A Good Fertiliser? How To Make Comfrey Tea Fertiliser How To Use Comfrey Feed Storage How Long Does Comfrey Tea Last? Alternative Methods References Comfrey is a ubiquitous plant in sustainable gardening, used in a wide range of different ways. One thing it is especially useful for is making a comfrey fertiliser, or liquid feed. Comfrey is an extremely useful plant, both when growing in the garden, and when chopped and used. In this guide we’ll explain exactly how you can maintain fertility in your garden and keep your plants happy by making a comfrey fertiliser or ‘comfrey tea’ to feed your plants in an organic, eco-friendly way. Before we do – it is worth exploring briefly exactly why comfrey is such a useful plant to grow in your garden; the benefits it can bring for you, wildlife with whom you share your garden, your garden soil and your plants. Why Grow Comfrey? There are a huge range of reasons why comfrey is such a useful plant to grow: Comfrey grows quickly, producing an abundance of organic material. That material can be used as a mulch and soil amendment. It can be used in the creation of no-dig garden beds, added to a compost heap, or, of course, used to make a liquid plant feed. Their quick growth and effective ground cover means that they can be good for stopping the ingress of grasses or weeds into areas where you do not want them. Comfrey plants don’t just grow quickly, they also have very deep tap roots which means that they are very effective ‘dynamic accumulators’. In other words, they are good at taking up nutrients from the soil (we’ll explore this more below).1 When the plant materials are gathered and used, or the plants die back naturally in winter, those nutrients return to the soil and can be taken up by other plants. When comfrey is in flower, they are beloved by bees and other insects. Of course, bees and other pollinators are essential visitors for many of the crops and other plants we grow. Other insects attracted to comfrey can also help in keeping pest numbers down – comfrey is a great plant for organic pest control.2 This plant is also a great addition to the diets of backyard chickens and other livestock. What Makes It A Good Fertiliser? Comfrey is, as mentioned above, great at gathering nutrients.3 It draws up nutrients through its deep roots and stores them in a more bioavailable form. It is this characteristic which makes comfrey great for use as a fertiliser. The nutrients can be harnessed by chopping and dropping the material a couple of times over the growing season. These can either be used as mulch or an ingredient in composting systems or raised beds – where the materials will break down pretty quickly. Or they can be used to make a liquid fertiliser to give certain plants a boost. “I’ve always made a lot of comfrey and nettle feeds,” shares Author and Gardener Tamsin Westhorpe. “This is definitely worth doing as long as you can stand the smell of rotting foliage!” Comfrey (all parts of the plant) contain the three key nutrients required for plant growth: nitrogen, phosphorus and potassium (NPK).4 Comfrey is said, in particular, to be a good dynamic accumulator of potassium, though it typically also includes plenty of other micro-nutrients in smaller amounts. The exact NPK profile of comfrey will depend on where it is grown, but a mulch or liquid feed made with this plant will be rich in potassium, which makes it particularly beneficial for flowering and fruiting plants. Potassium is important for plants in maintaining their lifecycles and it is especially important during phases of reproduction.5 How To Make Comfrey Tea Fertiliser The first step in making a comfrey tea fertiliser is, of course, choosing and planting your comfrey. One of the most commonly used types of comfrey in gardens in the UK is called Symphytum x uplandicum (Russian comfrey) ‘Bocking 14’.6 This is a sterile cultivar developed in the 1950s by Lawrence Hills, who founded the Henry Doubleday Research Association.7 We do recommend that you choose a sterile cultivar since comfrey, though useful, can easily spread, and wherever it grows, it can be difficult to eradicate due to its deep roots.8 Comfrey is a hardy plant, which can grow well in many gardens with very different conditions. For best results, it should be grown in a sunny or partially shaded or dappled shade site in deep, rich soil. Comfrey is typically harvested for a liquid feed twice in the growing season – once in June, and again in August. The comfrey can simply be chopped down, or mowed. Remember, however, while harvesting, that it may be beneficial to keep some flowering for the wildlife in your garden. Next you should: Chop the comfrey leaves, stems (and flowers where these have emerged) into smaller pieces, which will break down more quickly. Prepare a large bucket, barrel or other receptacle in which to make your liquid feed. It can be beneficial to choose a container which has a tap near the base, so you can draw off the liquid. It should also have a lid, since the comfrey tea will get very smelly! Fill the container with the chopped up comfrey leaves, packing them down to cram in as many as you can. Cover the comfrey with water, placing something on top to hold down the plant material. Then be sure to put the lid back on the container. Next, simply wait until the plant materials rot down into the water. This should take around 4-6 weeks. How To Use Comfrey Feed Run off the slurry and dilute it with water at a ratio of ten parts water to one part of this mix. This will give you a liquid fertiliser that will not be too strong for your plants. You can use this when watering your plants – I tend to fill a watering can with 1/3 of diluted comfrey tea with 2/3 water and use this on plants which will benefit from the potassium. You can also use the diluted mix as a foliar feed – spraying it onto your plants. Comfrey fertiliser can also be added to a composting system to pump up microbial content and nitrogen and aid in speeding decomposition. “When using for the first time, I’d suggest starting with a very weak mix and then check the plants for any ill effects that may look like burning, as too strong a mix can do more harm than good,” shares Dan Ori, a Master Horticulturist. “If all is well after testing a weak mix, you can creep up to 1/3 comfrey tea to 2/3 water, just keep checking the plants for burning, as it can happen that mixes come out too strong.” Storage I tend to plan to use my first batch of comfrey tea in early summer, on summer crops, and the second batch in late summer or early autumn. Storing any liquid feed for a long time is generally not the best idea as it will lose nutrients over time. “Label containers that comfrey tea is stored in correctly,” Dan recommends. How Long Does Comfrey Tea Last? You can leave any remaining comfrey mix in the container in which it was made until spring, though typically, it is best to use it up in the autumn before starting fresh with a new batch the following year. You can also decant the mix and store it in tightly sealed bottles in a cool, dark place for later use. However, it will have a shelf life and is usually best used within around 4 weeks. Alternative Methods If you are pushed for time, you can also make a quick comfrey tea by steeping the leaves in boiling water for just 24 hours. Just leave the leaves in the water, then strain out the leaves and dilute the mix with the same quantity of water and use this to water your plants. Another alternative method is to pack the foliage into a covered container without water. The leaves should turn into a thick blackish goo which can be collected after a few weeks and diluted 1 part to 15 times as much water for use. References 1. Zarro, G. (2020, July 20). Breaking Ground with Dynamic Accumulators. Cornell Small Farms. Retrieved March 14, 2023, from https://smallfarms.cornell.edu/2020/07/breaking-ground-with-dynamic-accumulators/ 2. Comfrey: Its History, Uses & Benefits. (2022, June 30). Permaculture. Retrieved March 14, 2023, from https://www.permaculture.co.uk/articles/comfrey-its-history-uses-benefits/ 3. Comfrey Fact Sheet. (n.d.). Aeronvale Allotments. Retrieved March 14, 2023, from https://aeronvale-allotments.org.uk/downloads/Comfrey_factsheet-01.pdf 4. Comfrey. (2023, January 10). Garden Organic. Retrieved March 14, 2023, from https://www.gardenorganic.org.uk/expert-advice/garden-management/soil/comfrey 5. Potassium for crop production. (n.d.). University of Minnesota. Retrieved March 14, 2023, from https://extension.umn.edu/phosphorus-and-potassium/potassium-crop-production 6. A survey of comfrey use. (2022, November 15). Garden Organic. Retrieved March 14, 2023, from https://www.gardenorganic.org.uk/what-we-do/citizen-science-and-research/members-experiments/a-survey-of-comfrey-use 7. Comfrey. (n.d.). Google Books. Retrieved March 14, 2023, from https://books.google.co.uk/books/about/Comfrey.html?id=HWTEOQAACAAJ&redir_esc=y 8. Comfrey – A Controversial Herb. (n.d.). Master Gardener. Retrieved March 14, 2023, from https://www.mastergardenersmecklenburg.org/comfrey—a-controversial-herb.html
Learn more
9 Remarkable Comfrey Varieties With Sterile, Variegated And Bushy Options
IN THIS GUIDE 1) Common Comfrey 2) Caucasian Comfrey 3) Dwarf Comfrey 4) Iberian Comfrey 5) Russian Comfrey 6) Comfrey ‘Bocking 14’ 7) Variegated Russian Comfrey 8) Comfrey Goldsmith 9) Comfrey Hidcote Pink References Comfrey, a member of the Borage Family, is made up of 35 different species, all belonging to Symphytum.1 They attain heights of about 50-125cm. The different species’ foliage occurs in somewhat different shades of green, including bright medium green, deep dark green, and glazed greyish-green. However, all share a common distinctive feature in that the foliage – leaves, stalks and petioles – is visibly and palpably hairy. The leaves, deeply etched with veins, are elliptical and 20-25cm in length. Those of Symphytum officinale have a more pronounced elliptical shape than those of other varieties. In May and June, the plants produce 1-2cm pendent flowers shaped like tubular bells. In shades of cream, yellowish, lilac, purple or pink, they are sometimes bicoloured with the upper or basal half being white or off-white and the lower or outward half in some shade of blue, pink, or purple. 1) Common Comfrey BOTANICAL NAME: S. officinale FLOWER COLOUR: BLUE NATIVE AREA: UK; EUROPE This variety has a clumping and spreading habit. Its flowers are either cream or in a colour in the pink through purple spectrum. This same species that produces blue flowers is identified by a specific name: S. officinale blue-flowered or Blue-Flowered Common Comfrey. 2) Caucasian Comfrey BOTANICAL NAME: S. caucasicum FLOWER COLOUR: LILAC-BLUE NATIVE AREA: Iran; Georgia; Eurasia This plant has an erect habit and spreads rapidly. It is native to Iran, Georgia and surrounding regions of Eurasia.2 It attains a height of about 60cm and bears lilac-blue flowers that are frequently pink as buds. 3) Dwarf Comfrey BOTANICAL NAME: S. grandiflorum FLOWER COLOUR: PINK NATIVE AREA: UK; EUROPE A bushy habit and one of the less-invasive species. It is native to the UK and Europe.3 It may reach a height of only about 40cm with a spread of 60cm. Flowers are a rich cream shade but are an equally rich pink as buds. 4) Iberian Comfrey BOTANICAL NAME: S. ibericum FLOWER COLOUR: YELLOWISH-WHITE NATIVE AREA: TURKEY; THE CAUCASUS Another dwarf species but has a spreading, branching habit. It originates from Turkey and the surrounding Caucasus region.4 It too reaches a height of about 40cm with a spread of about 60cm. Its flowers are off-white or yellowish-white while the buds are rose-red. 5) Russian Comfrey BOTANICAL NAME: S. × uplandicum FLOWER COLOUR: MAGENTA NATIVE AREA: EUROPE; ASIA Russian Comfrey is a sterile hybrid and, therefore, cannot self-seed – which greatly reduces the concern one has about comfrey’s invasiveness. However, it exhibits very vigorous growth and, as such, can spread. It can reach a height of nearly 2m and because of the overall size, this hybrid is a top choice for harvesting leaves for composting and other practical purposes. Its flowers are among the most appealing too, being of a pretty purple-to-violet hue. 6) Comfrey ‘Bocking 14’ BOTANICAL NAME: S. × uplandicum ‘Bocking 14’ FLOWER COLOUR: PURPLE NATIVE AREA: CULTIVATED A very popular variety and ‘the smart choice’. The reason is that it carries all the advantages of the plant without any downside. Like the parent hybrid, it is sterile and cannot self-seed but on top of that it is a well-behaved, non-invasive variety that does not spread so much.5 It reaches a height and spread of (only) about 1m and bears the same pretty purple-to-violet flowers as the parent hybrid. 7) Variegated Russian Comfrey BOTANICAL NAME: S. × uplandicum ‘Variegatum’ FLOWER COLOUR: PINK; PURPLE NATIVE AREA: EUROPE; ASIA This variety carries a different set of plusses. It too is sterile and ‘well-behaved’ with a clumping, non-spreading habit. It attains a height and spread of 80-100cm. Like common comfrey, its flowers are in the pink through the purple spectrum. Unlike common comfrey, its leaves are variegated, displaying fairly thick cream-yellow edging. Did we say that comfrey plants are not at all ornamental? Oops! “My top two picks are S. × uplandicum ‘Variegatum’ and S. × uplandicum ‘Bocking 14’,” shares Master Horticulturist Dan Ori. “They stay under control but are still productive enough to produce plenty of leaves for making plant feed (comfrey tea).” 8) Comfrey Goldsmith BOTANICAL NAME: S. grandiflorum ‘Goldsmith’ FLOWER COLOUR: PURPLE NATIVE AREA: THE CAUCASUS This is the grandiflorum species’ contribution to comfrey ornamentation. It has a bushy, clump-forming habit and is one of the dwarf varieties at about 40cm in height with a somewhat smaller spread. The flowers are pastel purple at the basal or upper half and white at the lower or distal half. The variegated leaves are a much brighter shade of green than other comfreys with an equally bright yellow, very broad and irregular, edging. 9) Comfrey Hidcote Pink BOTANICAL NAME: S. ‘Hidcote Pink’ FLOWER COLOUR: CREAM; PINK NATIVE AREA: EUROPE Has a bushy, clump-forming habit and it does not get out of hand as much as a few of the species can. Its height is as tidy as its habit, being only 40-50cm. Its bicoloured flowers are cream at the basal end and a rich bright pink on the outer or distal half. It has an earlier blooming season than other comfreys. S. ‘Hidcote Blue’ is a variant that bears blue-to-purple flowers. References 1. Comfrey (Genus Symphytum). (n.d.). iNaturalist United Kingdom. Retrieved March 14, 2023, from https://uk.inaturalist.org/taxa/55725-Symphytum 2. Comfrey (Caucasian). (n.d.). Wild Flower Finder. Retrieved March 14, 2023, from https://wildflowerfinder.org.uk/Flowers/C/Comfrey(Caucasian)/Comfrey(Caucasian).htm 3. Symphytum grandiflorum. (n.d.). North Carolina Extension Gardener Plant Toolbox. Retrieved March 14, 2023, from https://plants.ces.ncsu.edu/plants/symphytum-grandiflorum/ 4. Symphytum ibiricum. (n.d.). Kew Royal Botanic Gardens. Retrieved March 14, 2023, from https://powo.science.kew.org/taxon/urn:lsid:ipni.org:names:120793-1 5. Symphytum × uplandicum “Bocking 14.” (n.d.). Royal Horticultural Society. Retrieved March 14, 2023, from https://www.rhs.org.uk/plants/108577/symphytum-x-uplandicum-bocking-14/details
Learn more
Growing Vegetables In Winter? Often They Will Need Forward Planning - Start Here
IN THIS GUIDE Winter Growing That Requires Forward Planning Growing Salad Crops & Microgreens Indoors Sowing Early For Next Year’s Vegetable Garden When you think about vegetable gardening, you might think of this as something that you will do in the spring and summer months. But with the right approach, you can sow and grow your own food year-round. There are even vegetables you can sow in winter. “I think in the UK, there’s too much emphasis on growing summer vegetables,” shares Garden Writer Val Bourne. “I think that the most valuable vegetables I grow are the winter veg. This includes brassicas, sprouts, cabbages, parsnips and leeks because they don’t all come at once – you can harvest them throughout the year.” Gardening and growing year-round is possible in the UK, but you do need to have certain things in place. At this time of the year, sowing will not be outdoors, but rather inside your home. However, if you have planned and prepared correctly throughout the earlier seasons, you could have plenty of vegetables growing in your garden – even in the middle of winter. “Planning is key for winter vegetables as sowing will often be in the prior spring or summer for winter harvesting,” says Horticultural Consultant Colin Skelly. “In a greenhouse or polytunnel, some salad production can carry on but for the most part thinking in winter swings to sowing for the next growing season. A gardener’s work is never done!” While there are certain crops that will survive the winter in the UK, often, some form of protection is used. You might use cloches, row covers, cold frames, polytunnels or greenhouses – but whichever form of protection you use, the concept is the same – to stave off the worst of the winter cold and the winter wet. Even if you only have a windowsill to sow on, there are still vegetables you can grow in winter – both for a winter harvest, and to grow on for the months to come. “Vegetable growing is one of the best things people can do, as it’s like having a pantry in your garden that you can just go and visit,” shares Val. Winter Growing That Requires Forward Planning Growing your own can be a year-round pursuit, but gardeners who want to eat from their gardens all year round need to be forward-thinking. Preparation to have vegetables growing in your garden over the winter months can begin as early as the previous spring. Sowing For Winter In Spring & Early Summer To grow vegetables to harvest in winter, you can sow certain crops in spring and early summer, such as: Brussels sprouts Cabbages (winter types) Kale Leeks Parsnips These hardy winter vegetables take quite a long time to grow, but can be valuable vegetables to harvest over the winter months. They can cope outdoors in winter, and even taste better after having been exposed to frost. Sowing For Winter In Late Summer In July, summer crops will be in full swing, but you should also plan ahead for harvests over the autumn and winter months. From around July, you might sow several other crops for an autumn to winter harvest, though these will almost certainly need some form of protection once the first frosts threaten. You might sow, for example: Beetroot Carrots Chicory / Endive / Radicchio Kohlrabi Land cress Perpetual spinach Radishes Turnips You might even plant some second early potatoes in July for a harvest of new potatoes around Christmas, if you have a protected undercover area to place them in when winter arrives. You may also plan to overwinter crops in your winter garden for harvests in the spring. So you might sow: Chard Spring Cabbages Sprouting Broccoli Each of these can provide a harvest during the traditional ‘hungry gap’. Sowing For Winter In Autumn After the end of summer, in early autumn, there is still time to sow some quick crops (with protection) for a winter harvest. For example, you might sow: Corn salad Komatsuna Mibuna Mizuna Mustard Pak choi Pea shoots Radishes Rocket Winter lettuce You might also sow peas, and broad beans for overwintering in September or October. And you might plant some onion sets, or garlic, in autumn for an earlier harvest of these crops next year. Growing Salad Crops & Microgreens Indoors There are also options, however, which allow you to get started right away. Even if you have not planned and prepared, and don’t already have vegetables growing in your garden, you do not necessarily have to wait until spring to sow, grow and even get a small winter harvest. On your windowsill, indoors, you can grow a range of salad crops and micro greens throughout the year. You can even get started in the depths of winter – and you could harvest small leafy greens in as little as a month after sowing – even less for microgreens. All of the leafy crops listed above for sowing outside in autumn (with protection for winter) can also be sown and grown on a windowsill indoors from a winter sowing. Cut and come again crops will allow you to harvest leaves little and often as required. Even if there are other vegetables in your garden, and vegetables in store, it can still be worthwhile growing a few leafy crops on a sunny windowsill for fresh salads even during the coldest part of the year. I have an unheated polytunnel where I grow a range of crops over the winter months, some overwintering for later harvests, some that I can harvest in the depths of winter – but I also like to grow a few salad crops on a windowsill over winter. My favourites are a cut-and-come-again oriental salad mix, and pea shoots, which I can easily just harvest a little from as and when required without even having to step outdoors. I also often grow some micro greens for a quick and very healthy windowsill harvest. I like to grow cress, and brassicas of a range of types. Microgreens are not grown to maturity but are eaten as tiny sprouts – these micro-greens, and sprouted seeds, can help sustain you over the winter months. Sowing Early For Next Year’s Vegetable Garden As well as sowing quick crops for winter harvests, winter is also the time to think about planning ahead for the next gardening year. Preparing Potatoes For Planting One of the first jobs of the new year is chitting seed potatoes. This is the process of leaving the potatoes in a bright, cool spot for green shoots (called chits) to form from the ‘eyes’ or small dimples on their skin. I will often do this towards the end of January where I live. Sowing Tomatoes, Peppers & Other Warm Season Crops In January or February, I also start sowing summer crops, to get a head start and make sure I can obtain a worthwhile harvest by the end of the summer months. It is a good idea to get started early with the growing season so that you have some healthy plants to plant out in a polytunnel or greenhouse, or into the garden by the time that warmer weather does arrive. Tomatoes and peppers are two examples of crops that it can be beneficial to sow early. Technically fruits rather than vegetables, these are of course key crops grown in UK gardens. However, when starting early with these warm-season crops, you should note that a heated propagator and grow lights can be useful to achieve the best results. If you do have a heated propagator, then aubergines, celery and celeriac are other crops which it can be useful to sow early in the year. Sowing Alliums (Onions & Leeks) From Seed Onions and leeks can also be sown from seed early in the year, and this is a good idea as the tiny seedlings need some time to bulk up a little before they are planted out into the garden. Not that you could not only consider sowing annual alliums, but also perennial onion crops at this time of the year. Sowing Peas & Broad Beans Other crops that I like to get started early indoors are peas and broad beans. I start these indoors in winter before moving them into my polytunnel in early spring, because direct sowings can often fall prey to rodents or other pests. You can also continue to sow quick leafy salad crops in successional sowings so that you can enjoy a continual supply. And from the very end of winter, into early spring, you can also sow hardy brassica crops for summer indoors to harden off and plant out soon after spring arrives. If you plan and prepare for year-round growing, you may be surprised by how much food can be available from your efforts over the winter months. You may also be surprised by just how much there is that you can do at this time of the year. The garden may mostly be ‘sleeping’ in the depths of winter – but even when there are sub-zero temperatures outside, and even when there is frost, ice and snow, there are still ways to grow your own and keep yourself busy.
Learn more
These 9 Shrubs Have Red Leaves All Year (And Not Just In Autumn!)
IN THIS GUIDE 1) Hazel ‘Red Majestic’ 2) Japanese Barberry 3) Chinese Witch Hazel ‘Burgundy’ 4) Purple-Leaf Sand Cherry 5) Red Robin 6) Smoke Bush 7) Wine And Roses 8) Ninebark Diabolo 9) Double Play Big Bang Evergreen foliage is a must in any garden. When the evenings cool and the sun slips below the horizon earlier each day, much of the colour and vibrancy of your garden will fade with it. That’s where evenly-distributed evergreens can come into their own. But despite their name, evergreens don’t have to be green in hue. In fact, many people claim that autumn is their favourite season of the year for the fantastic transformation that takes place on trees, shrubs and bushes, when leaves turn crimson, mauve and a deep burgundy. So why not replicate those enchanting shades all year round? “When using red-leaved shrubs, I try to ensure that the effect is not diluted by using too many relative to green foliaged shrubs and trees,” explains Master Horticulturist Colin Skelly. “It is the contrast that provides the attraction of red leaves.” Many of the following shrubs boast red foliage from January through to December, ensuring there will always be some fire and effervescence to your outdoor display. So without further ado, here are our top nine (mostly) evergreen (or ‘ever-red’) shrubs to brighten up your garden: 1) Hazel ‘Red Majestic’ BOTANICAL NAME: Corylus avellana HARDINESS RATING: H6 FOLIAGE: DECIDUOUS RED COLOUR SEASONS: SPRING / SUMMER / AUTUMN With its profoundly reddish-purple foliage, crinkly textures and interweaving branches, majestic is certainly one name for this showstopper of a shrub. The way in which its stems twist in and out of one another will certainly add intrigue to your garden, making for a truly unique plant. The dark tint to its leaves will endure throughout the year, but the arrival of purplish-pink catkins in late winter brings another dimension to its aesthetic appeal. Capable of reaching as much as 4m in height and the same again in spread, it’s one of the larger shrubs on this list. However, it will take well over a decade to scale such lofty heights and its slow-growing nature makes it fairly easy to care for, too. Place it in moist but well-drained soil of almost any composition, and expose it to at least partial (but preferably full) sun and it’ll tend to itself. 2) Japanese Barberry BOTANICAL NAME: Berberis thunbergii HARDINESS RATING: H7 FOLIAGE: DECIDUOUS RED COLOUR SEASONS: SPRING / SUMMER This genus can be either deciduous or evergreen, but if you opt for the Japanese barberry variety, you’ll be blessed with reds, purples and pinks on its leaves throughout the year. Come springtime, you’ll even be treated to a spectacular floral display which adds a buttery yellow to the mix. However, don’t be fooled by its pretty appearance; in spring, the blossoms are accompanied by barbs on its branches, too! Those spiny thorns mean you must take care when handling or pruning it, but the dramatic flair it brings to your garden (accentuated by the scarlet berries in autumn) are well worth the effort. It’s largely unfussy about its location in your garden, as long as it’s planted in well-draining soil and given plenty of hydration in its first year. Once established, it’ll largely fend for itself and can reach a maximum of 1.5m in height, though many never exceed a single metre. 3) Chinese Witch Hazel ‘Burgundy’ BOTANICAL NAME: Loropetalum chinense HARDINESS RATING: H4 FOLIAGE: EVERGREEN RED COLOUR SEASONS: YEAR-ROUND From one part of the Orient to another, this Chinese native puts on a transformative show through its foliage throughout its lifetime. Its leaves begin life with an almost pinkish hue to their rich red, darkening to an olive colour in their advanced years. What’s more, the plant also boasts impressive floral displays of bright pink blossoms in tassel form in late winter and early spring. The pleasing contrast of the flowers and the foliage, alongside the delicate perfume that the blooms give off, make it one attractive addition to any garden. Individual branches on a Chinese witch hazel plant can reach 2m in length, while the overall height and spread of the cultivar can exceed that figure. For best results, plant the specimen in at least partial shade and fertilise it three times a year to allow it to achieve its maximum potential. 4) Purple-Leaf Sand Cherry BOTANICAL NAME: Prunus x cistena HARDINESS RATING: H6 FOLIAGE: DECIDUOUS RED COLOUR SEASONS: SPRING / SUMMER / AUTUMN This delightful specimen is a member of the rose bush family, though that doesn’t mean that its dainty, pinkish-white flowers resemble roses all that closely. Nonetheless, it’s still a stunning specimen which is guaranteed to bring bags of attraction to your ensemble. The leaves of this Prunus are, as the common name suggests, of a spectrum which spans every tone from red to purple, encompassing maroons, burgundies and browns and deepening as the year progresses. When the flowers arrive to offset those tones in springtime, the effect is complete. The purple-leaf sand cherry normally grows to around a metre (or just over) in height and the same again in spread, making it ideal for filling out a border or injecting some life into a neglected corner. It’s fairly hardy and self-sufficient, but needs plenty of sunshine and well-draining soil to truly flourish. 5) Red Robin BOTANICAL NAME: Photinia x fraseri HARDINESS RATING: H5 FOLIAGE: EVERGREEN RED COLOUR SEASONS: SPRING The leaves of this eye-catching photinia start life as a deep red, thus giving the plant its common name. However, they do have a tendency to soften into a lusher green in their maturity, but you can always ensure you have plenty of red in amongst your display by pruning back the stems of those which have made the switch. In addition to the pleasing contrast of green and red that Red Robin boasts, it also features small clusters of white flowers in springtime, completing the Christmassy effect. The fact that it can grow up to 4m in both height and spread means it’s very popular as a hedge, too. All in all, it’s a very low-maintenance plant which won’t demand a lot of you in terms of its upkeep. In the British climate, there shouldn’t be too much need to hydrate it further than natural rainfall, but if you do water it, aim for the soil rather than the foliage. 6) Smoke Bush BOTANICAL NAME: Cotinus coggygria HARDINESS RATING: H5 FOLIAGE: DECIDUOUS RED COLOUR SEASONS: AUTUMN Although it takes its name from the clouds of softly pink flowers that really do resemble smoke in summertime, the real draw of Smoke Bush is the foliage. There are a wide variety of different cultivars which cover the whole spectrum of leaf colours, though all of them are quite spectacular in autumn. For more year-round red appeal, try ‘Grace’, ‘Royal Purple’ or ‘Golden Spirit’. The former two have a purplish hue lightening to red in summer, while the latter is characterised by yellow foliage tinted with hints of red. Whichever one you opt for in the end, you’ll be rewarded with a spectacularly colourful display regardless. Most Smoke Bush varieties grow to 4m in height and 4m in spread, meaning they’re also widely favoured to create bushes, hedges and other natural boundaries to a property. You should mulch once a year and expose to full or partial sunshine, but no pruning is needed to maintain its shape. 7) Wine And Roses BOTANICAL NAME: Weigela florida HARDINESS RATING: H6 FOLIAGE: DECIDUOUS RED COLOUR SEASONS: SPRING / SUMMER / AUTUMN Weigela are hugely popular options for beds and borders, given their expansive size, evergreen nature and easy-going temperament. Wine and Roses is a particularly sought-after option due to the purply-red tint on its foliage, which only becomes more pronounced as the plant matures. The clusters of pink blossoms, which burst forth in tubular form each spring, add an extra sparkle and sheen to the plant. Certain plants will even offer a second blooming season in summer, granting you more bang for your buck when it comes to sprucing up your outdoor display. The plant usually grows just shy of 2m in height and will respond well to aggressive pruning throughout the year, so keep those garden shears sharpened. It’s largely unfussy about the type of soil it inhabits, so long as it’s fairly fertile and well-draining. Full or partial sun exposure is required. 8) Ninebark Diabolo BOTANICAL NAME: Physocarpus opulifolius HARDINESS RATING: H7 FOLIAGE: DECIDUOUS RED COLOUR SEASONS: SPRING / SUMMER / AUTUMN Okay, okay, okay, so strictly speaking, ninebark diabolo won’t produce red foliage year round. As a deciduous plant, its leaves are prone to falling away in the depths of the winter, but will remain attractive for the majority of the calendar. Meanwhile, the deep red bark beneath ensures it’s still visually pleasing even when naked. As for the leaves themselves, they’re attractively three-lobed customers with a deeply reddish-purple hue. The texture of the foliage is another point of interest, while the pompoms of delicate white flowers which shoot forth in spring provide a startling contrast to the reds and purples beneath. It’s slightly faster growing than some of the other options on this list, so it’ll still take the best part of a decade for it to reach its maximum height of 2.5m. Although it will tolerate alkaline soils, it thrives in acidic ground and may struggle if the chalk content of its terrain is too high. 9) Double Play Big Bang BOTANICAL NAME: Spiraea japonica HARDINESS RATING: H6 FOLIAGE: DECIDUOUS RED COLOUR SEASONS: SPRING / AUTUMN Fans of an autumnal palette will be particularly pleased with Double Play Big Bang in their outdoor arrangement. As the mercury in your thermometer rises and falls, so too will the colours of the plant’s foliage oscillate between yellow, orange and red, creating a truly warming tonal effect for your garden. Again, spiraea are another deciduous shrub whose foliage will fade in the winter months, but the spectacular show they put on for the rest of the year more than compensates for that temporary drop-off. Meanwhile, the pink blossoms that surface in summer are yet another string to their bow. They’re on the smaller side of red-leaved shrubs on this list, generally growing to anywhere between 60cm and 90cm. However, it’s largely trouble-free as long as it’s planted in a sun-facing location that’s blessed with good soil. In poorer terrain, it may be susceptible to powdery mildew.
Learn more
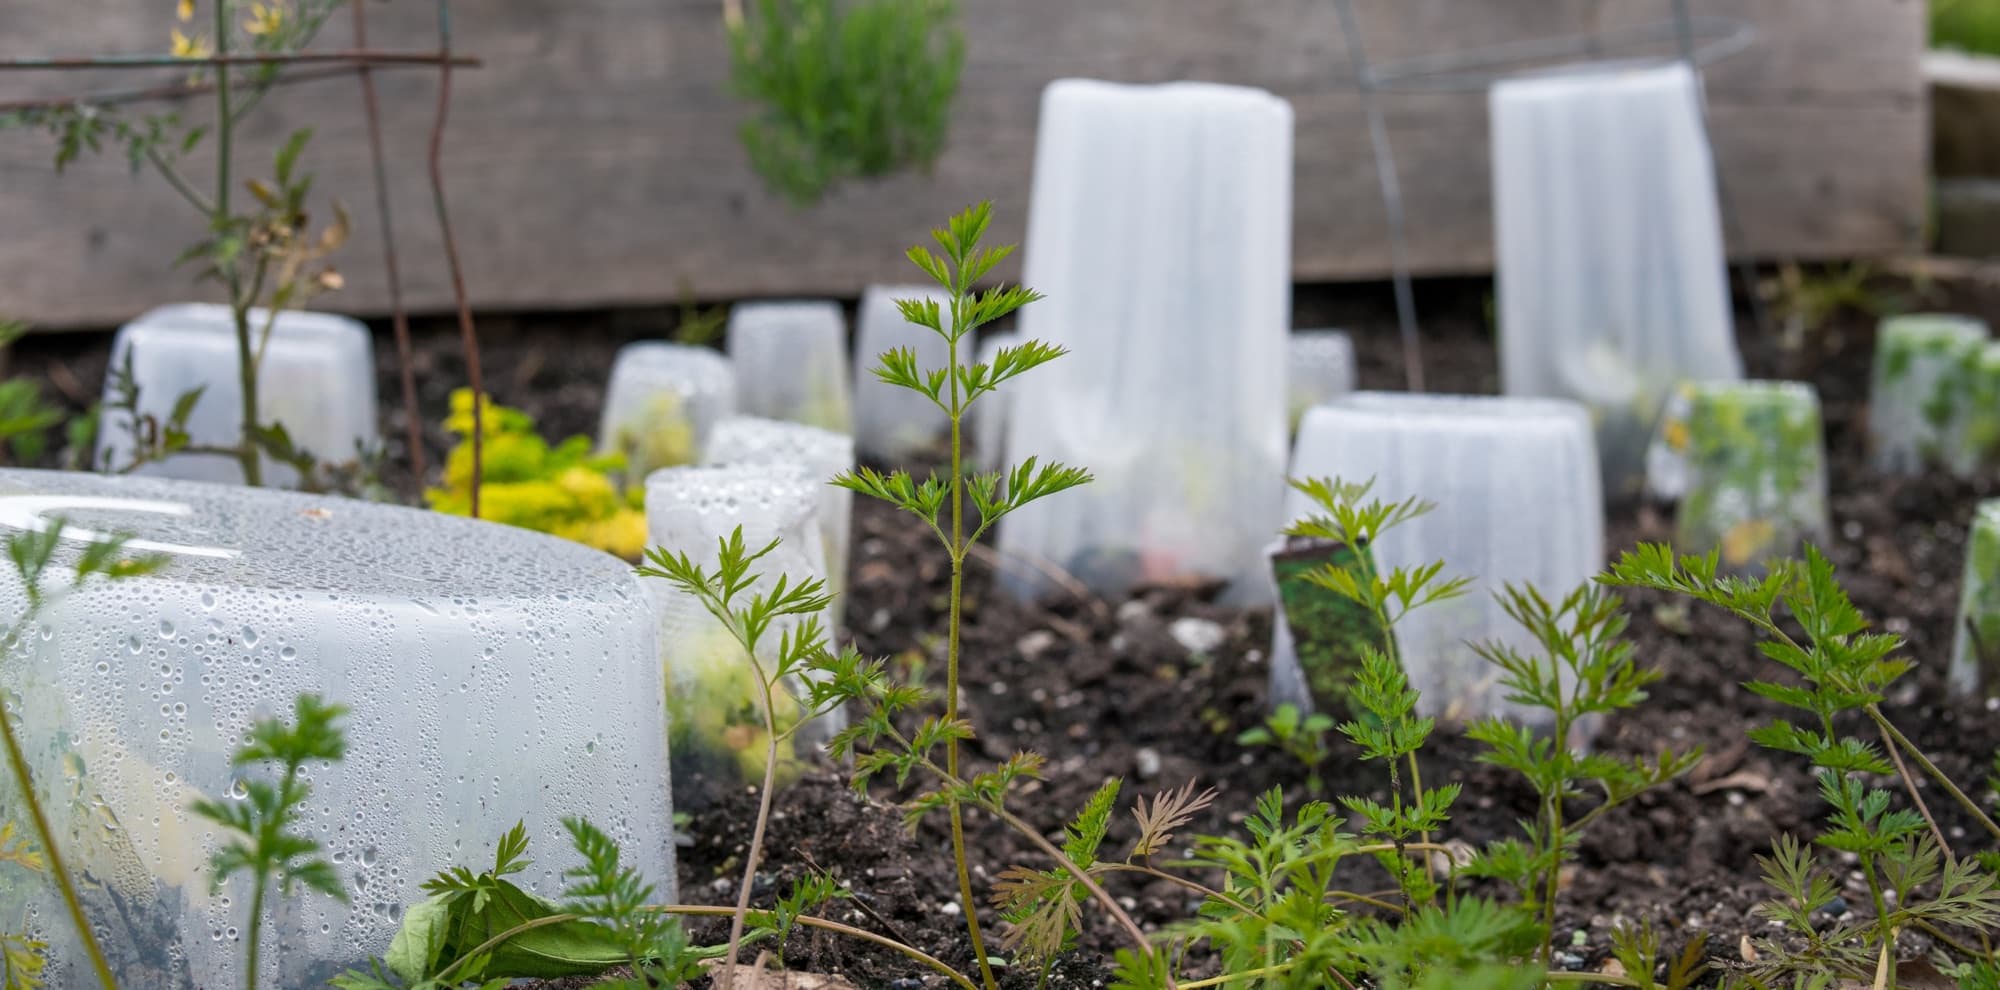
You Can Regrow Greens From Carrot Top Scraps And Potentially Collect The Seeds
IN THIS GUIDE Why Regrow From Carrot Tops For Greens? 1) Selecting Carrots To Regrow 2) Choosing A Method 3) Waiting For Shoots & Hair Roots 4) Planting Sprouted Carrot Tops 5) Saving Carrot Seeds Carrot tap roots won’t regrow once chopped off, but you can regrow carrot greens and potentially collect seeds from the plants to sow next year. Learn how to grow carrots from carrot tops and you can make the most of even the vegetable scraps from your garden. You could, of course, simply decide to place carrot tops in your composting system to recycle their nutrients into the garden system – but before you relegate carrot tops to the compost heap or bin, you might want to consider this fun and useful project. It is important, first of all, to understand that when we talk about growing carrots from carrot tops, we do not mean the colourful tasty tap roots. These, unfortunately, are a ‘one-hit wonder’ and will not regrow from the carrot top no matter how long you wait. However, when you place carrot tops in water or a suitable growing medium or soil, you can grow a supply of fresh carrot greens. And, if you leave the plant to grow on, these biennial plants will flower and set seed, and you could potentially collect the seeds from these plants to sow in your garden to grow new carrots for their roots from scratch next year. Why Regrow From Carrot Tops For Greens? When you think about eating carrots, you are most likely to think about eating the roots. Many people are unaware that you can also eat the green leafy foliage that grows from the top of the taproot. This secondary yield from carrots has a rather strong carrot or parsley-like flavour. The fronds can be added in moderation to mixed salads, or used much as you would use parsley, as a pot herb – it can add flavour to a wide range of recipes. While the plants regrow, they can also make rather attractive houseplants for a sunny windowsill. They have soft feathery fronds, and when grown correctly, can flower with delicate flowers and then set seed. Regrowing carrots is a fun activity to enjoy with kids, or simply to hone your own simple growing skills. And there is a lot of satisfaction to be had in really making the most of a homegrown carrot crop, or of parts of your purchased carrots that might otherwise have been thrown into the composting system. 1) Selecting Carrots To Regrow The first thing to think about is the carrots that you select to regrow. If you grow your own carrots, you should consider saving the tops of the best and healthiest specimens. I’d recommend that you choose organic, heritage options. If you wish to save your own seeds it is important to remember that hybrid varieties will not ‘come true’. In other words, the plants which grow from the seeds may not be the same as the parent plant they came from. “Heritage or heirloom varieties also may not produce ‘true’ seed if there are other varieties nearby with which they have cross-pollinated,” adds Master Horticulturist Peter Lickorish. If you have purchased your carrots, from a supermarket, farmer’s market, farm shop or through a veg box scheme, you might not always know which type of carrot you have. Remember, where possible, purchasing organic produce direct from the producer is the most eco-friendly and sustainable option. While this is more expensive on the whole, learning about regrowing can help you buy less and eat better for less overall. 2) Choosing A Method Once you have your carrots, simply cut off the ends of the roots from which the foliage grows, leaving around 2cm or so of the taproots. Eat the rest of the carrots, or set them aside to eat later – what comes next could not be easier. “If the carrots have foliage, cut this back to a few centimetres, because until new roots form, this growth will only wilt,” shares Peter. You simply need to place the carrots, cut side down, in a position where new shoots will emerge from the top, and small hair-like roots will emerge around the edges of the former tap root. For this, sunlight and water are required. There are a few different methods you could use in terms of where exactly you position your carrot tops. You can: Place the carrots into a shallow tray or saucer of water. Arrange the carrots on top of damp pebbles surrounded by water in a tray or on a plate. Layer damp newspaper or scrap untreated paper/card in a shallow container and place the carrot tops on top of that. Whichever option you choose, you should place your carrots on a sunny windowsill. 3) Waiting For Shoots & Hair Roots Once you have placed your carrot tops in a suitable location, the next job is simply to wait for new shoots to emerge from the top of each one. This should not take very long at all and usually, you should see new growth within around a week or so, perhaps even sooner. As well as seeing fresh green growth at the top of the new plants, you should also see, before too long, small new roots like little hairs coming out around the edges of the former tap root. Once you see some of these new roots, you can think about planting up your new carrot plants into their own pots, within the next couple of weeks, so you can continue to enjoy them as houseplants within your home or plan them out into the soil in your garden if it is between late spring and late summer. 4) Planting Sprouted Carrot Tops Carrots need a moist yet free-draining medium, such as peat-free compost, and the right conditions are easy to achieve when growing them in pots for this secondary yield of leaves, or letting them grow on to produce seeds. Simply place your carrots in small pots filled with a suitable growing medium, so that the top crown of the carrot is just sticking above the surface of the potting mix. Then watch your carrots grow and harvest the foliage as and when required or desired. “If you have got the bug for propagating your own veg plants from their tops, why not try the same thing with pineapples?” asks Peter. “Their tops can be used to grow another fruit, but you’ll need patience as this can take a couple of years.” 5) Saving Carrot Seeds If you leave your carrots to mature, they will grow larger, flower, and form seeds. Carrots are biennial, which means that they go to seed in their second year. When you grow carrots from carrot tops, you are allowing carrots to enter this second phase of their life cycles. Just remember that if you want to save seeds from your carrots, these will not necessarily have the same, tasty tap roots as the original unless you have a heritage or heirloom variety. Carrots grown from tops may not always develop full flowering heads. If you want a more reliable way to save seeds then leave a few carrot plants unharvested to flower the following summer. However, if your carrot regrowth does flower, you can leave the head to fully mature. Wait until the flowering head begins to turn brown and dry out, then carefully cut it off. Place it in a small paper bag where drying can continue, and the tiny seeds will fall from the heads into the bag with a gentle shake. You can now retrieve and store the darkened little seeds in a cool, dry location in an airtight container and sow them the following year, either in containers, or outdoors in your garden. By selecting and saving seeds from heritage carrot varieties, you can selectively breed carrots ideally suited to the conditions where you live and create closed-loop, sustainable growing systems in your garden.
Learn more
You Can Prevent Broccoli Plants From Bolting By Following These 7 Important Rules
IN THIS GUIDE 1) Choose The Right Location 2) Sow & Plant At The Right Time 3) Practice Companion Planting & Crop Rotation 4) Mulch Plants To Keep Soil Cool 5) Water Broccoli Plants Correctly 6) Harvest Promptly 7) Choose Bolt-Resistant Varieties References Broccoli is still edible once it has bolted, but it can be disappointing if it occurs early and you have not obtained a worthwhile yield from your crop. Broccoli plants can be prone to bolting (running prematurely to flower and set seed) when the environmental conditions are not right. Most commonly, broccoli and Calabrese will be most likely to bolt due to stress caused by temperatures (most commonly too high but also potentially too low early in the growing season), water shortage, or a lack of nutrition.1 Sometimes, extreme weather conditions may be to blame for the bolting – and environmental factors may be largely out of your control. However, a lot of the time, the decisions you make and what you do as a gardener can be to blame. Once a plant has bolted, you can slow it down, but unfortunately can’t bring it back. However, taking steps to prevent your crops from bolting in the first place can often help you avoid disappointment – and making changes can help you grow broccoli more successfully in future if this is a problem that you have encountered more than once in your garden. So, to reduce the chances of bolting broccoli plants, here are a few tips: 1) Choose The Right Location Choosing the right spot for growing broccoli can help you avoid many of the common issues – bolting included. Remember that bolting is caused by stress of some kind, which encourages the plants to rush to reproduce. Plants that are placed in a suitable location with good, fertile soil (or growing medium) and optimal conditions in terms of sunlight and temperatures are far less likely to have a problem. Broccoli likes a situation in full sun or very light shade, with a fertile, and moisture retentive yet well-drained soil. In very hot summers – especially in the south – a lightly shaded spot may be preferable, since broccoli forms better heads in cooler summers here in the UK. In a very hot location, when temperatures rise too high, broccoli is far more likely to bolt. 2) Sow & Plant At The Right Time When exactly you sow your broccoli will depend on which type and variety you are growing and where you are growing it. Typically, seeds can be sown between March and June or July. Seeds are sown indoors or under cover in seed trays or pots before the last frost date, and can be direct sown, usually, from some time in April onwards. Sowing earlier can sometimes be a good policy for summer-harvested heading broccoli (Calabrese) since you can harvest before the weather heats up too much. However, sowing too early can sometimes be problematic too, since plants can bolt if they are not potted up or planted out in time and the roots become too confined or starved of nutrients in their containers. If indoors grown plants are placed outside too early, or placed out without hardening off, they may be stressed and may bolt due to a cold snap or too extreme a change in temperatures and conditions. So make sure you are aware of the temperature expectations where you live, and keep an eye on weather forecasts before you decide to plant your broccoli outdoors. 3) Practice Companion Planting & Crop Rotation Generally, the healthier and happier your broccoli plants are, the less likely they are to experience the stress that can lead to bolting. Like us, broccoli plants will be happiest when they have good neighbours. So make sure you think about companion planting, which can improve environmental conditions, reduce pest problems, and help maintain a balanced and fertile growing area. Practising crop rotation with brassicas like broccoli can also help make sure that the soil remains healthy and the plants are less likely to succumb to diseases or be stressed in other ways which cause them to bolt. 4) Mulch Plants To Keep Soil Cool Another important strategy to maintain the fertility of your growing areas and meet broccoli’s higher nitrogen needs is to mulch well around your plants with a nitrogen-rich organic mulch material. A mulch won’t only help maintain fertility and a healthy soil, it will also help reduce competition for the broccoli from weeds that might pop up. Crucially, it can also help keep the soil cool. Broccoli does not typically bolt due to high air temperatures, but rather due to high temperatures of the soil. Keeping the soil cool with an insulating blanket of mulch will help stop roots from overheating during warm summer weather. A good mulch should also help keep conditions moist, and reduce the amount of water that is lost through evaporation from the soil surface around your broccoli plants. This should help reduce issues caused by drought, which can be another common cause of bolting. 5) Water Broccoli Plants Correctly Of course, in addition to taking steps to conserve water in the soil, it is also important to make sure that you water your plants sufficiently, especially during the summer months. Broccoli is quite a thirsty plant. Typically, you will need to water outdoors grown plants every 10-14 days in dry weather – more frequently of course if you are growing broccoli under cover, or in containers. When watering, make sure that you water plants at the base, rather than from above, to use water more efficiently and make sure that it gets where it needs to go – into the soil around plant roots. If you have a larger garden, or struggle to maintain your watering routine, consider adding drip irrigation, and perhaps an automated system, to make things easier. 6) Harvest Promptly While plants will sometimes bolt prematurely, it is also important to remember that broccoli can also begin to flower and go to seed if you simply leave it too long before you harvest your crop. Keep on top of harvesting and harvest promptly to make sure you make the most of your produce and do not miss out. 7) Choose Bolt-Resistant Varieties Finally, if you consistently experience problems with broccoli bolting in spite of your best efforts, you might like to consider trying to grow more bolt-resistant varieties next year. Some broccoli cultivars are less prone to bolting than others. Hybrid F1 seeds often have better resistance to bolting and handle stress better, though you should note that these will not come true from seed like heritage varieties. References 1. Bolting in vegetables. (n.d.). Royal Horticultural Society. Retrieved March 13, 2023, from https://www.rhs.org.uk/vegetables/bolting
Learn more
A Beginner’s Guide To Crop Rotation With Garden Presenter Ade Sellars
IN THIS GUIDE What Is Crop Rotation? Why Practice Crop Rotation? Which Crops Need Rotating? Adding Nitrogen Through Rotation Planning Your Growing 3 Year Crop Rotation Example 4 Year Crop Rotation Example Key Tips For Crop Rotation Combining Crop Rotation & Companion Planting Year-Round Growing Growing Gaps References Understanding crop rotation can go a long way toward helping you manage disease and maintain fertility in an organic garden. In this beginner’s guide to crop rotation you will find out what crop rotation means, why we practice it, and the crops for which it is most important. We’ll give you some tips for crop rotation and some examples which will help you in making planting plans and determining the layout of plants in your garden. What Is Crop Rotation? Crop rotation can be a simple concept, but it is one which can cause some confusion, especially for new gardeners. It simply involves taking steps to make sure that you do not grow the same plant family in the same part of your garden over more than one year. Rather than growing, say, tomatoes or potatoes in the same bed year after year, you will ‘rotate’ them between a number of different raised beds or growing areas over the course of several years. Why Practice Crop Rotation? Before we delve into crop rotation a little deeper, it is important to look into why this can be a beneficial practice when it comes to your annual crops. We practice crop rotation because it can prevent or decrease the likelihood of a range of common issues, and bring a range of benefits. We practice crop rotation to: Make sure different garden areas get the nitrogen (and other nutrients) they need.1 To prevent nutrients from being excessively depleted from the soil.2 In order to reduce disease build-up in the soil of our growing areas.3 To reduce pest problems (especially those pests which spend the winter in the soil in your garden). Keep crops healthier by taking care of the soil.4 Which Crops Need Rotating? Crop rotation is often beneficial for all the reasons mentioned above, but you should note that it is only strictly essential for a number of specific crop families. Some plants can definitely cause or encounter issues when grown in one spot year in year out, while others will be perfectly happy remaining in one growing area as long as their needs are all taken care of. “Some crops, such as Asparagus and Rhubarb, stay in the same ground for a number of years rather than rotating as they are perennial rather than annual crops,” shares Colin Skelly, an RHS Master Horticulturist. “Soil care for perennial crops involves weeding (as the ground will not be turned) and mulching in late winter.” Identifying the families of plants which most benefit from crop rotation, and which can most suffer if grown in the same area year after year is important. Three key plant families to think about are: Solanaceae – potatoes, peppers, tomatoes, aubergines etc. Brassicaceae (Cabbage family) – cabbage, cauliflower, broccoli, kale and so on… Alliums (Onion family) – onions, garlic, leeks etc. Root crops like carrots, parsnips, beetroot etc. can also be more prone to problems if grown in one bed or area year after year – though are not quite as problematic as the three families mentioned above. Members in the tomato/potato family grown in the same location for multiple years are more likely to develop issues with fungal disease – blight for example. Cabbage family plants are hungry plants which will deplete nutrients such as soil nitrogen when grown in one spot.5 When crop rotation is not practised, these crops are also more likely to develop issues like root rot. Onions (as well as some root crops like carrots) are also more likely to succumb to disease if you grow them in the same place year in year out. Adding Nitrogen Through Rotation As well as thinking about the different families mentioned above, when developing a crop rotation scheme it is important also to think about crops which it is beneficial to move between your different growing areas. Legumes (peas and beans) are one of the most important pieces of the puzzle in a successful crop rotation scheme. These plants will not really suffer themselves if grown in one specific location over the years, but the benefits they bring mean that it is a good idea to move them around each year. Peas and beans (and other legumes) are nitrogen fixers.6 This means that they have symbiotic relationships with bacteria on their roots which are able to convert atmospheric nitrogen and make it available in the soil.7 Some of that nitrogen is used by the plants themselves, but some will remain in the soil and can be used by plants which follow them in rotation. Planning Your Growing When planning for crop rotation then, it is important to remember the key plant families, both those which need crop rotation to prevent problems, and the legumes which will benefit other plants more when moved around. Usually, gardeners will aim for either a three-year or four-year crop rotation plan which includes these key plant families. There is certainly some flexibility, and of course you can also grow a range of other plants to include in a crop rotation plan for annual food production, but the core of a plan will often look as follows: 3 Year Crop Rotation Example Year One: BED/AREA 1: POTATOES BED/AREA 2: LEGUMES, ROOTS & ONIONS BED/AREA 3: CABBAGE FAMILY PLANTS Year Two: BED/AREA 1: LEGUMES, ROOTS & ONIONS BED/AREA 2: CABBAGE FAMILY PLANTS BED/AREA 3: POTATOES Year Three: BED/AREA 1: CABBAGE FAMILY PLANTS BED/AREA 2: POTATOES BED/AREA 3: LEGUMES, ROOTS & ONIONS 4 Year Crop Rotation Example Year One: BED/AREA 1: LEGUMES BED/AREA 2: BRASSICAS BED/AREA 3: POTATOES BED/AREA 4: ONIONS / ROOT CROPS Year Two: BED/AREA 1: BRASSICAS BED/AREA 2: POTATOES BED/AREA 3: ONIONS / ROOT CROPS BED/AREA 4: LEGUMES Year Three: BED/AREA 1: POTATOES BED/AREA 2: ONIONS / ROOT CROPS BED/AREA 3: LEGUMES BED/AREA 4: BRASSICAS Year Four: BED/AREA 1: ONIONS / ROOT CROPS BED/AREA 2: LEGUMES BED/AREA 3: BRASSICAS BED/AREA 4: POTATOES Key Tips For Crop Rotation In both of the above schemes, you can see that certain types of crop will always follow others. There are benefits to the order of the crop rotation as well as just rotating the crops. It is often recommended to: Follow legumes with cabbage family crops, which really appreciate nitrogen. Follow potatoes with onions and root crops, since the potatoes help break up the soil creating good conditions for these crops to grow. However, there are few hard and fast rules and you can experiment to see which plant combinations and crop rotation plans work best in your garden. Combining Crop Rotation & Companion Planting One important thing to remember is that your beds should not only contain the main crops outlined in the crop rotation schemes above. Though it can be helpful to pare things back in this way to understand the principles of crop rotation, you should understand that growing companion plants alongside these key crops is another important strategy in keeping plants and soil healthy and improving your yields. Many people get confused about how to combine the idea of crop rotation with the idea of companion planting – but the two ideas can be combined in a range of effective ways. The key is to begin with the main plant families which require crop rotation, then to build up polycultures of diverse plants around those main plant families. For example, alongside potatoes you might grow additional nitrogen fixers, like peas. You might also grow lettuce and radishes in the gaps between potatoes before they need the space. Growing onions and carrots together is already an example of companion planting, and growing them together can help in pest control for both. Legume beds might also contain a number of other plants which benefit from nitrogen fixation. Leafy crops in summer may also benefit from the shade cast by taller peas and beans. Brassicas can appreciate the company of beetroots, and celery, and growing low-growing lettuce and other leafy greens can also help you make the most of your space. Onion family plants may also sometimes be good companions for brassicas, but make sure you think about crop rotation and amend plans accordingly if you wish to grow them together, so you do not have onions grown too frequently in the same areas. Year-Round Growing Another thing that can confuse people when creating crop rotation plans is how to work out plans for year-round growing. Ideally, no beds or growing areas in your garden should be left bare at any time. Even over the winter months, it is best for soil health to keep a living root in the soil and keep it covered. Especially in a polytunnel or other undercover growing area, you will be able to grow your own not just in summer, but all year round. With some careful planning, you can create plans which allow for crop rotation, companion planting and year-round cultivation. For example, overwintering broad beans or peas might be followed by brassicas in early summer. Overwintering brassicas might be followed by French beans, squash and sweetcorn. Alliums and roots grown over winter might be followed by tomatoes and companion plants. These are just a few examples and there are many ways to create successful crop rotation plans, even when you are using the growing areas year-round. Growing Gaps When growing year-round, it is important to think about how you can avoid any gaps in your planting schemes. You should not leave areas of bare soil when other plants are not going to be positioned right away. Where you will not be growing crops immediately, cover crops and green manures can be used in rotation plans. These protect the soil and are often chopped and dropped to maintain fertility in the areas in question. Cover crops and green manures will also allow you to protect all outdoor growing areas over the winter months. However, sometimes, you can strategically use gaps in your planting to your advantage, as Garden Writer Kim Stoddart shares: “Free planting is the method of gardening I have employed for a number of years now in the vegetable garden and it is a slight alternative to crop rotation. “It is also known as polyculture in permaculture circles. The basis is that I allow space between plants of the same family rather than planting in crop rotational blocks. “This makes it much harder for pests to find what they are looking for and for diseases to spread. “You can also grow on a lot of plants for longer than you would otherwise imagine which can help boost resilience massively. “For example, purple-sprouting broccoli and chard can actually grow on for a number of years if you just cut them right back when they start trying to flower.” The ideas behind crop rotation are clear and simple to understand – companion planting and year-round growing can add a little complexity. But with a little work, you should be able to create excellent plans for your garden, to keep it healthy and make the most of your space. References 1. Value of crop rotation in nitrogen management. (n.d.). Iowa State University. Retrieved March 14, 2023, from https://crops.extension.iastate.edu/encyclopedia/value-crop-rotation-nitrogen-management 2. Crop Rotation Monitoring. (2022, August 11). EOS Data Analytics. Retrieved March 14, 2023, from https://eos.com/industries/agriculture/crop-rotation/ 3. Managing Plant Diseases With Crop Rotation. (2022, February 9). SARE. Retrieved March 14, 2023, from https://www.sare.org/publications/crop-rotation-on-organic-farms/physical-and-biological-processes-in-crop-production/managing-plant-diseases-with-crop-rotation/ 4. Crop Rotations. (2020, December 15). Rodale Institute. Retrieved March 14, 2023, from https://rodaleinstitute.org/why-organic/organic-farming-practices/crop-rotations/ 5. Nduwumuremyi, A., & Sylvestre, H. (2020, December 18). Effects of Organic and Mineral Fertilizers on Soil Nutrients and Yield of Headed Cabbages. ResearchGate. Retrieved March 14, 2023, from https://www.researchgate.net/publication/347463824_Effects_of_Organic_and_Mineral_Fertilizers_on_Soil_Nutrients_and_Yield_of_Headed_Cabbages_Brassica_orelacea 6. Nitrogen Fixing Bacteria. (n.d.). Tropical Permaculture. Retrieved March 14, 2023, from https://www.tropicalpermaculture.com/nitrogen-fixing-bacteria.html 7. Genetic and Molecular Mechanisms Underlying Symbiotic Specificity in Legume-Rhizobium Interactions. (n.d.). Frontiers. Retrieved March 14, 2023, from https://www.frontiersin.org/articles/10.3389/fpls.2018.00313/full
Learn more
Deadhead Your Marigolds To Stop Your Plant Focusing On Producing Seed
IN THIS GUIDE Why Deadhead Marigolds? When Not To Deadhead How To Deadhead Marigolds Marigolds will bloom over a long period through summer and into autumn. These Tagetes species, especially French marigolds, are not only popular as ornamental plants but also prized as companion plants in a kitchen garden. Marigolds are very easy to grow and care for and are a great choice no matter your level of gardening experience. However, one job to think about when growing these flowers is deadheading. Deadheading simply means removing the spent blooms once each one has finished flowering. Why Deadhead Marigolds? Deadheading marigolds is not something that is only carried out for aesthetic reasons. The main reason to deadhead marigolds is to ensure that new blooms continue to be produced. If you do not deadhead, then the plants will focus on producing seed and the overall flowering period of the plant will be reduced. Removing the heads before seed formation can spur plants into producing more blooms. Removing the spent flowers will also prevent self-seeding where this is not desired, though this is rare outdoors in the UK. Of course, removing the spent heads can also keep your garden looking good and can improve airflow for the flowers and other plants remaining in a growing area. When Not To Deadhead The only reason not to deadhead marigolds is if you wish to save the seeds from your marigolds or would like to allow marigolds to self-seed for a low-maintenance planting scheme. Where you would like the plants to produce seed, you should leave at least some of the flowering heads to develop. Saving seed from your marigolds is easy, and is a good idea, since of course marigolds are tender annuals and will die when autumn frosts arrive. Saving your own seeds will allow you to use this to propagate new plants at home next spring and mean that you won’t have to buy in new seeds or plants. Collect seeds on a dry day, when the seed head has fully turned a light shade of brown. How To Deadhead Marigolds If you decide to deadhead marigolds, the process itself is very easy. Simply take a sharp pair of scissors or secateurs and cut off the dead flower head at the base of its individual stem. “Sharp tools are a must for deadheading, otherwise blunt tools can crush, rather than cut, growth, which can do more harm than good,” shares Peter Lickorish, a Horticultural Consultant. Remember, you don’t need to worry about getting every single one, and this job is not an absolute must. “For plants which are becoming spindly, you can cut back a little harder by up to half their height to achieve the desired look,” says Peter. “Make sure you do not cut below the lowest few leaves. This will also delay the next blooms a little.” But doing some deadheading, especially earlier in the season, will help to keep these plants in bloom over a longer period – looking good and attracting beneficial wildlife to your garden.
Learn more
8 Lovely Marigold Varieties To Try: 'I Wouldn’t Want My Allotment To Be Without Them'
IN THIS GUIDE Appearance 1) T. erecta ‘Big Top Yellow’ 2) T. erecta ‘Inca I Orange’ 3) T. erecta ‘Kushi Mix’ 4) T. patula 5) T. patula ‘Alumia Vanilla Cream’ 6) T. patula ‘Strawberry Blonde’ 7) T. patula ‘Safari Scarlet’ 8) T. F1 ‘Zenith Mixed’ References Genus Tagetes includes within it about 50 species and several hundred hybrids and cultivars.1 Among the 50 species, the two key ones, from a flora-centric viewpoint, are Tagetes erecta and Tagetes patula. T. erecta is informally called ‘African Marigold’ and T. patula, ‘French Marigold’.2 “I think the humble French Marigold is so underrated and reminds me of my uncle’s organic kitchen garden, so I always grow these and save seeds,” shares Garden Writer Ellen Mary. “I wouldn’t want my allotment to be without them.” This nomenclature may justifiably cause Latin Americans to feel aggrieved because both species originate from Central and South America!3 At least T. lucida is known as ‘Mexican Marigold’ but that’s scant consolation.4 Other species include T. lucida and T. tenuifolia; their flowers are also used, though less frequently so, for ornamental and celebratory purposes. The increasingly popular hybrid T. erecta x T. patula and the F1 Zenith hybrid deserve a mention as these combine the best qualities of either species in particularly robust and trouble-free (relatively) new ‘semi-species’. All of these Tagetes species fall under Family Asteraceae. As such, one must bear in mind that technically Marigold ‘flowers’ are, in fact, composite flowers, flowerheads, or capitula, and the ‘petals’ are actually ray florets. Tagetes leaves come in varying shades of green depending on the variety. What they have in common is that they are heavily lobed or divided, and are pinnate. They occur in an alternate or opposite arrangement. Appearance T. erecta or ‘African Marigold’ varieties vary widely in height, ranging from 30-120cm with a majority hovering around 90cm. Some varieties have an upright habit while others have a bushy one, and their spread ranges from 30-60cm. Flowerheads are up to 12cm across, are mostly double but sometimes single, are quite dense, and resemble a pompom. The colour varies from pale yellow to orange. “The closest colour to white I’ve found in a large flowering marigold is Tagetes erecta ‘Vanilla’,” shares Peter Lickorish, a Master Horticulturist. “I was really stunned when I first saw it because of the sharp contrast between its cream flowers and dark foliage, and I was struck by how unusual it was. “It is far paler than Tagetes patula ‘Alumia Vanilla Cream’, which is unusual in its own right. “‘Vanilla’ opens up so many options for using marigolds with cooler colours in bedding displays, such as the blues, pinks and purples of Petunias and Lobelia, which might clash with traditional golden marigold tones.” 1) T. erecta ‘Big Top Yellow’ T. erecta ‘Big Top Yellow’ rises to about 90cm and has a bushy habit. It produces flowers from early summer into autumn. The densely-packed rounded flowerheads are about 8cm wide and are an intense sunny hue of yellow. 2) T. erecta ‘Inca I Orange’ One of the less common types that is both a dwarf to about only 30cm and with an upright habit. This productive variety bears blooms from summer until late autumn. The pompom-like flowerheads are 8-9cm across and are that classic golden-orange hue that is usually associated with Marigolds. 3) T. erecta ‘Kushi Mix’ Has dimensions plumb in between the above two varieties with a height of 75cm and spread of about 50cm. It is a new variety from India that is considered to be robust and weather-resistant – the flowerhead will tolerate damp and wet. This variety is a mix, and colours include different shades of yellow, gold and orange. 4) T. patula Varieties usually range from 20-30cm with a spread of 15-25cm. They have a bushy habit. Their smaller flowerheads are about 5cm across, and occur in single form as well as double. Their colours range from a deep yellow to red. 5) T. patula ‘Alumia Vanilla Cream’ T. patula ‘Alumia Vanilla Cream’ grows to 30cm with a proportional, bushy habit. Its long flowering season extends from late spring well into autumn. The semi-double flowerheads are quite big for T. patula at 6-7cm. In an amusing coincidence, this French Marigold is in the exact hue of French Vanilla ice cream! 6) T. patula ‘Strawberry Blonde’ Attains a height of only about 25cm and has a bushy habit. It too has a very long flowering season stretching from mid-spring deep into autumn. The flowers are only 5cm across but they make up for it with their colours. Some flowers open in shades of deep pink and rose and mature to yellow; others retain salmon, rose, and russet hues. 7) T. patula ‘Safari Scarlet’ ‘Safari Scarlet’ is another dwarf variety that reaches about 25cm; it has a finely-branched and bushy habit. It produces blooms from mid-spring to late autumn, and they are gorgeous. The double but not dense flowers are a rich mahogany orange to scarlet with golden-yellow edging on each petal. This variety has been awarded the RHS Award of Garden Merit.5 8) T. F1 ‘Zenith Mixed’ Zenith F1 series varieties combine the compact size and bushy habit of Tagetes patula with the larger flowerheads of Tagetes erecta. They have a height and spread of 30-35cm, often with a mounded form. The flowerhead is 7-8cm across as a minimum for most cultivars in the Zenith series. Because these hybrids cannot set seed they continue producing flowers well into autumn. Even by Marigold’s lofty standards this series’ cultivars are floriferous. Marigold ‘Zenith Deep Orange’ features large double flowerheads of a perfect, rich orange. Marigold ‘Zenith Red’ features large, very dense, flowerheads in vermilion to red. References 1. The Editors of Encyclopaedia Britannica. (1998f, July 20). Marigold. Encyclopedia Britannica. Retrieved March 21, 2023, from https://www.britannica.com/plant/marigold 2. Tagetes erecta | African marigold. (n.d.). Royal Horticultural Society. Retrieved March 21, 2023, from https://www.rhs.org.uk/plants/151627/tagetes-erecta/details 3. Marigold History. (2021, May 21). Burpee. Retrieved March 21, 2023, from https://www.burpee.com/blog/marigold-history_article10006.html 4. Tagetes lucida. (n.d.). North Carolina Extension Gardener Plant Toolbox. Retrieved March 21, 2023, from https://plants.ces.ncsu.edu/plants/tagetes-lucida/ 5. Tagetes patula “Safari Scarlet.” (n.d.). Royal Horticultural Society. Retrieved March 21, 2023, from https://www.rhs.org.uk/plants/106265/i-tagetes-patula-i-safari-scarlet-(safari-series)/details
Learn more


