

Growing

Sowing Cabbage: An Easy Process For A Complete Novice Or An Experienced Gardener
IN THIS GUIDE Choosing Cabbage Seeds To Sow When To Sow Cabbage Seeds Sowing Cabbage Seeds Planting Out Young Cabbage Plants Cabbage is one of these crops that just keeps on giving. Choose the right varieties, grow these in the right places and in the right ways and you can potentially be harvesting cabbage literally all year round. Growing cabbage from seed is relatively easy, whether you are a complete novice or a more experienced gardener. Here is the process to follow if you would like to grow cabbage from seed: Choose a cabbage type and specific cultivar to grow. Sow seeds at the right time of year for the specific variety you are growing and when you want to harvest your cabbage crop. Sow seeds indoors for best results, in pots, trays or soil blocks around 2cm deep. Plant out young cabbage plants in the garden after around 5 weeks. Follow the steps below depending on the time of year you are growing. Difficulty Easy Equipment Required Cabbage seeds, pots, growing medium When To Sow February – September When To Plant Out April – October Choosing Cabbage Seeds To Sow There are a huge array of different cabbages that you might choose to grow in your garden, and that is before you even begin to think about other related plants in the cabbage family. Cabbages are traditionally divided into several groups, named for the period when they are harvested. There are summer cabbages, that are harvested over the warmest months, hardy winter cabbages to harvest after the frosts have arrived, and spring cabbages that overwinter and are harvested the following spring. When To Sow Cabbage Seeds Sow summer cabbages from late February/early March indoors or under cover. Sow winter cabbages in April or May. Sow spring cabbages in July or August, or up until September under cover. Sowing Cabbage Seeds When sowing cabbages, you can choose to sow them indoors or under cover, before transplanting them into your garden. You can also sow them into a traditional seed bed, to move later to their final growing positions in your garden, or you can direct sow them where they are to grow. The easiest option, and the one most likely to end well, is sowing indoors. Since cabbage seeds and seedlings can be rather vulnerable when directly sown into the garden. Planting Out Young Cabbage Plants Cabbages will be ready to move to their final growing positions if not direct-sown around 5 weeks after the seeds are sown. “Cabbages require alkaline soil, so a liming material such as ground limestone should be added to slightly acidic or neutral soils at the time of indoor sowing to ensure the soil is ready for planting out,” explains Master Horticulturist Roy Nicol. “Regular applications of wood ash can achieve the same result.” Summer cabbages are typically planted out in May/June, winter cabbages in late June/July, and spring cabbages in September or October. These brassicas are planted so that their lowest leaves are at ground level. You should give them a very good drink, allowing water to fill the planting hole then drain it several times before you fill it in. ‘’Cabbages should be netted with 4-7mm mesh to prevent white butterflies from laying eggs and their caterpillars from severely damaging the crop and to prevent pigeon damage,” Roy adds. “It’s also worth taking steps to prevent slugs and snails from damaging young plants; the use of nematodes is an effective and organic method.” The soil should be firmed well around the plant. “Firming in the soil is important to prevent wind-rock and encourage the plants to form a good heart,” Roy explains. You should also mulch around the plants with an organic mulch of homemade compost or well-rotted manure. Companion planting with legumes, for example, can help make sure these plants get the nitrogen-rich environment they need to thrive.
Learn more
Planting And Growing Onions With Horticulturists: 'You Can Sow Seeds Or Purchase Sets'
IN THIS GUIDE Overview Common Varieties Growing Onions Planting Plant Care Guidelines Common Problems References Onions are an extremely useful addition to your home-grown diet, and can be useful as companion plants for other crops too. Onions are of course highly prized for their flavour. When in growth, their strong pungent aroma is said to deter or confuse a range of pests. Onions are not hugely difficult to grow, especially if you plant sets (young bulbs) rather than growing from seed – but there are some things you need to bear in mind in order to get the best possible yields. In this guide, we’ll tell you more about these plants, and the varieties that you might consider. We’ll cover the basic environmental and care requirements and help you understand how to grow onions from start to finish. Overview Botanical Name Allium cepa Common Name(s) Onions Plant Type Biennial, Vegetable, Bulb Native Area Cultivated Hardiness Rating H2 / H3 Foliage Thin, upright leaves Flowers Globes of white flowers When To Sow February When To Plant March, April / September, October Harvesting Months June, July, August, September People have been cultivating onions for over 5,000 years.1 It is a biennial plant, related to wild species which occur in the wild in Asia, but in gardens and on farms, it is more typically grown as an annual crop. A number of different onions, or plants in the Allium family are commonly grown in gardens. In this article, we are referring specifically to the bulb onion, or common onion: Allium cepa var. cepa. This is related to but has different care requirements from perennial onion types, and other close relatives commonly cultivated in annual gardens including garlic, leeks etc. The shallot is another related plant, which has been classified as the same species (var. aggregatum) since 2010.2 Common Varieties Onion varieties which have been awarded with the RHS Award of Garden Merit (making them particularly suited to growing in the UK) include: ‘Autumn Gold’ ‘Centurion’ ‘Fasto’ ‘Hercules’ ‘Hybound’ ‘Hylander’ ‘Jetset’ ‘Red Baron’ ‘Red Fen’ ‘Redspark’ ‘Rumba’ ‘Setton’ ‘Sturon’ ‘Stuttgarter’ ‘Zebrune’ When choosing onion varieties, it is important to think about whether you would like to grow onions from seed, or purchase sets or young onions to plant (which is the easier option). It is also important to consider how you wish to use the onions (and whether you need them to store well). You also need to think about when you are sowing – some varieties are better for spring planting, and some for overwintering. Growing Onions As mentioned above, you can sow onion seeds, or you can purchase sets and plant these. Deciding which of these options you will take is one of the first things you need to decide when growing onions at home. Sowing Indoors If you decide to opt for the more challenging (but cheaper) option of sowing seeds, the seeds can be sown indoors or outside. When sowing indoors, you will sow the seeds in mid to late winter. Sowing Outdoors You can also direct sow onions where they are to grow from late winter until mid-spring, as soon as the soil is becoming less damp and is starting to warm. “Often, keen gardeners will sow too early in spring and get hit by a cold spell which can make plants bolt,” explains Master Horticulturist Dan Ori. “Bolting is what we call the reaction of the plant when due to a stress factor the plant sends up a flower stalk. “The flowering of an onion affects the quality and storage qualities of the onion bulb, as the plant will put most of its energy into producing seeds rather than developing the bulb. “You can get bolt-resistant varieties like ‘Centurion’ that I would recommend.” See our detailed guide to sowing onions for more information. Planting Onions sown from seed, or onion sets, are planted out in March or April. Certain varieties can also be planted in October or November and overwintered for an earlier crop the following year. Overwintering onions is an option for those who do not have heavy clay soil or a location prone to winter waterlogging. Onion sets can rot when placed in overly wet conditions. However, providing the medium is free draining (or you grow undercover) overwintering onions can be a great idea. Preparing Your Planting Site Onions have fairly limited root systems, which means that it is important to make sure that the area where you are planting them has the nutrients they need, and that the soil is healthy. Using no dig methods to enrich the growing area or create it in the first place, is a great idea. A ‘lasagna garden’ or other no-dig raised bed can be the ideal environment for growing onions, just as it can be great for other crops. Make sure that there is plenty of compost, well-rotted manure or other organic matter in the garden area. Hardening Off Seedlings Harden off indoors seedlings before transplanting into the ground in spring – or potting up into containers if you are continuing with indoors growing. Hardening off seedlings simply means gradually increasing exposure so they are gradually acclimatised to outdoors conditions. How To Plant Onion Sets Planting out onion sets simply involves choosing a suitable site, then placing the sets pointy end upwards in the ground (or the container). Especially when overwintering, but also in spring, it is a good idea to mulch well around the plants. A mulch including potassium-rich leaves of dynamic accumulator plants like comfrey, for example, can help onions grow well. A mulch spread over the surface of the bed or growing area can also lightly cover the sets or young onion plants and stop birds from plucking them from the ground. Spacing If direct sowing, the seeds should be sown around 1cm deep, in rows 20cm apart, thinning to 10cm between plants, or around 9 per square foot. Spacing is approximate and you can alter it, depending on how large you would like the bulbs to become and the varieties you are growing. As a rough rule of thumb, onion sets should usually be placed around 10-15cm apart or, again, around 9 per square foot. Depth When planting onion sets, the pointy tips should just show above the surface of the soil or growing medium. Plant Care Guidelines Onions should ideally be grown in full sun for best results. Watering Water onions every two weeks or so during prolonged dry spells – more frequently if the onions are growing somewhere where they are not getting natural rainfall, or when growing them in containers which will dry out more quickly. Whenever watering, try to water at the soil level, not from overhead, since overhead watering can increase the incidence of fungal infections. Once the onion bulbs have expanded and swelled, by around mid-summer for spring sown crops, stop all watering. If you continue to water past mid-summer, the onions will not store as well. Feeding Nutrition will largely be provided by the soil or growing medium, which should, as mentioned above, be mulched with compost or other organic matter upon planting. Adding a potassium-rich mulch or fertiliser in around June can help encourage healthy bulb formation. Autumn planted onions will also benefit from top dressing with a nitrogen-rich mulch or organic fertiliser like dried poultry manure in late winter. Weeding Onions are one crop that does not cope very well with competition. Unfortunately, since onions don’t give good ground cover or produce much shade, weeds can easily spring up between them. It is important to keep on top of weeds. A mulch will help to keep down the weeds, but you are likely to still have to do some weeding. Since onions have shallow roots, these can easily be damaged by careless hoeing. Weeding by hand, little and often, or careful use of a hoe, can help you keep on top of things. Lift and drop annual weeds on the surface of the soil, or consider collecting more pernicious weeds and using these to make a liquid fertiliser for your garden. Common Problems Onion Fly Onion fly is one of the best-known pests of an onion crop. Unfortunately, the first sign will be drooping yellow foliage (before you would expect to see this as harvest approaches). But by this time, the larvae will already be nibbling away, destroying the bulb. Plant carrots and parsley in rows between onions, or in among them, to reduce the incidence of this problem. These plants can somewhat mask the scent of the onions and so make it less likely that onion flies will find them. Onion Neck Rot Onion neck rot can be a problem during wet summers, especially in locations with heavier and less free-draining soils. You’ll see brown markings and a fluffy grey mould may appear. Avoiding overcrowding and improving drainage may reduce the incidence of this problem, and bulbs should be dried thoroughly so this problem does not occur in storage. References 1. Onion History. (2019, December 1). National Onion Association. Retrieved March 21, 2023, from https://www.onions-usa.org/all-about-onions/history-of-onions/ 2. Allium ascalonicum. (2023). United States Department of Agriculture. Retrieved March 21, 2023, from https://npgsweb.ars-grin.gov/gringlobal/taxon/taxonomydetail?id=2221
Learn more
Growing Onions From Seed? It's Lower Cost, But Will Take Up To 120 Days
IN THIS GUIDE When To Sow Onion Seeds 1) Harvesting Onion Seeds 2) Fill Shallow Trays 3) Thin The Seedlings 4) Plant Out The Young Plants 5) Caring For Onion Crops Onions, or Allium cepa as they are botanically named, are a staple of home–growers and can be grown either from seed or from sets, which are simply small onion bulbs that have already been grown from seed. Growing onions from seed can be very rewarding, but patience is required as the crop will take time to mature and generally only be harvestable after 100–120 days from sowing. Here’s a simple process for growing onions from seed: Harvest seeds from the pods of existing plants, or purchase seeds from your chosen retailer Fill shallow trays with a peat-free growing medium Thin the seedlings Plant out the young onions. Ongoing care for onion crops This process is explained in more depth below: Difficulty Medium Equipment Required Seed or module tray, trowel, fork, rake if sowing outdoors When To Sow January, February, March When To Plant Out March, April, May When To Sow Onion Seeds Onion seeds can be sown indoors in late winter to plant out in spring. The months of January and February are generally considered the best. Onions can also be sown outdoors later in spring, but only once the soil has begun to warm up. 1) Harvesting Onion Seeds To harvest onion seed, allow a stem to develop flowers and subsequently set seed before allowing to dry and collecting using a paper bag. Store the seed in a cool, dry place to sow the following spring. Onion seed is cheaply and readily available and is therefore most often purchased rather than being collected. 2) Fill Shallow Trays If sowing onion seed indoors, fill a seed or module tray with a seed sowing compost mix and sow the seeds individually in cells or in groups of 3–4 at a depth of 1cm and cover over with compost. Water gently on sowing to avoid dispersing the seed and keep at a minimum temperature of 10°C, with the soil moist until germination occurs. If sowing directly outdoors, prepare the soil by raking to a fine tilth and sow the seed thinly in rows 15-20cm apart at a depth of 1cm. Carefully water after sowing and keep the soil moist, but not wet. 3) Thin The Seedlings With indoor sown onions, thin the seedlings to 1–3 per module and when they are 5-7cm tall, prick out into individual pots to grow on under cover. For outdoor sowings, once the seedlings are large enough to handle, they can be thinned to a spacing of 5–7cm, or less for more onions of a smaller size. 4) Plant Out The Young Plants Having been grown on in small pots undercover, the onions can be planted out, but only having been gradually hardened off first. On this occasion, our seedlings were grown undercover in trays in a greenhouse, with water added regularly to the bottom of the tray. Plant out the onions at the same depth they were previously planted and water in. For decent-sized onions it is recommended to plant them 10–15 cm apart. However for smaller onions, to maximise space, this distance can be reduced. With outdoor sown onions, these can now be further thinned to a final spacing as above, depending on the desired size of the harvestable crop. “Thinning out excess plants is important to develop good-sized onion bulbs, but often I will thin out crowded onion plants gradually and harvest the larger than normal thinnings to eat like a spring onion,” shares Master Horticulturist Dan Ori. “This approach can also, in a small way, help control weeds.” 5) Caring For Onion Crops For a healthy crop, keep the onions weed-free and water every 1–2 weeks and especially during hot and dry spells, to encourage the onions to swell. If growing in poor soil, a general-purpose liquid feed can be applied, to help provide the required nutrients for an impressive crop. Once the onions have swelled to the desired size, watering can be reduced to help prevent any fungal diseases and allow the crop to begin to dry out, in preparation for storage. If flowers appear on the onion stems, it is advisable to remove them swiftly as they will prevent the bulbs from growing any larger. However, some blooms can be left on the stems to develop seeds to be collected for future sowings, if desired. If sown earlier in the year, onions will generally be ready to harvest from late summer to early autumn and once the foliage begins to yellow and droop. Onions are best lifted using a fork to avoid any damage to the bulbs and then left to dry undercover for 2–3 weeks. Once the skins are dry, the foliage can be removed and the crop stored in a light and well-ventilated area until needed.
Learn more
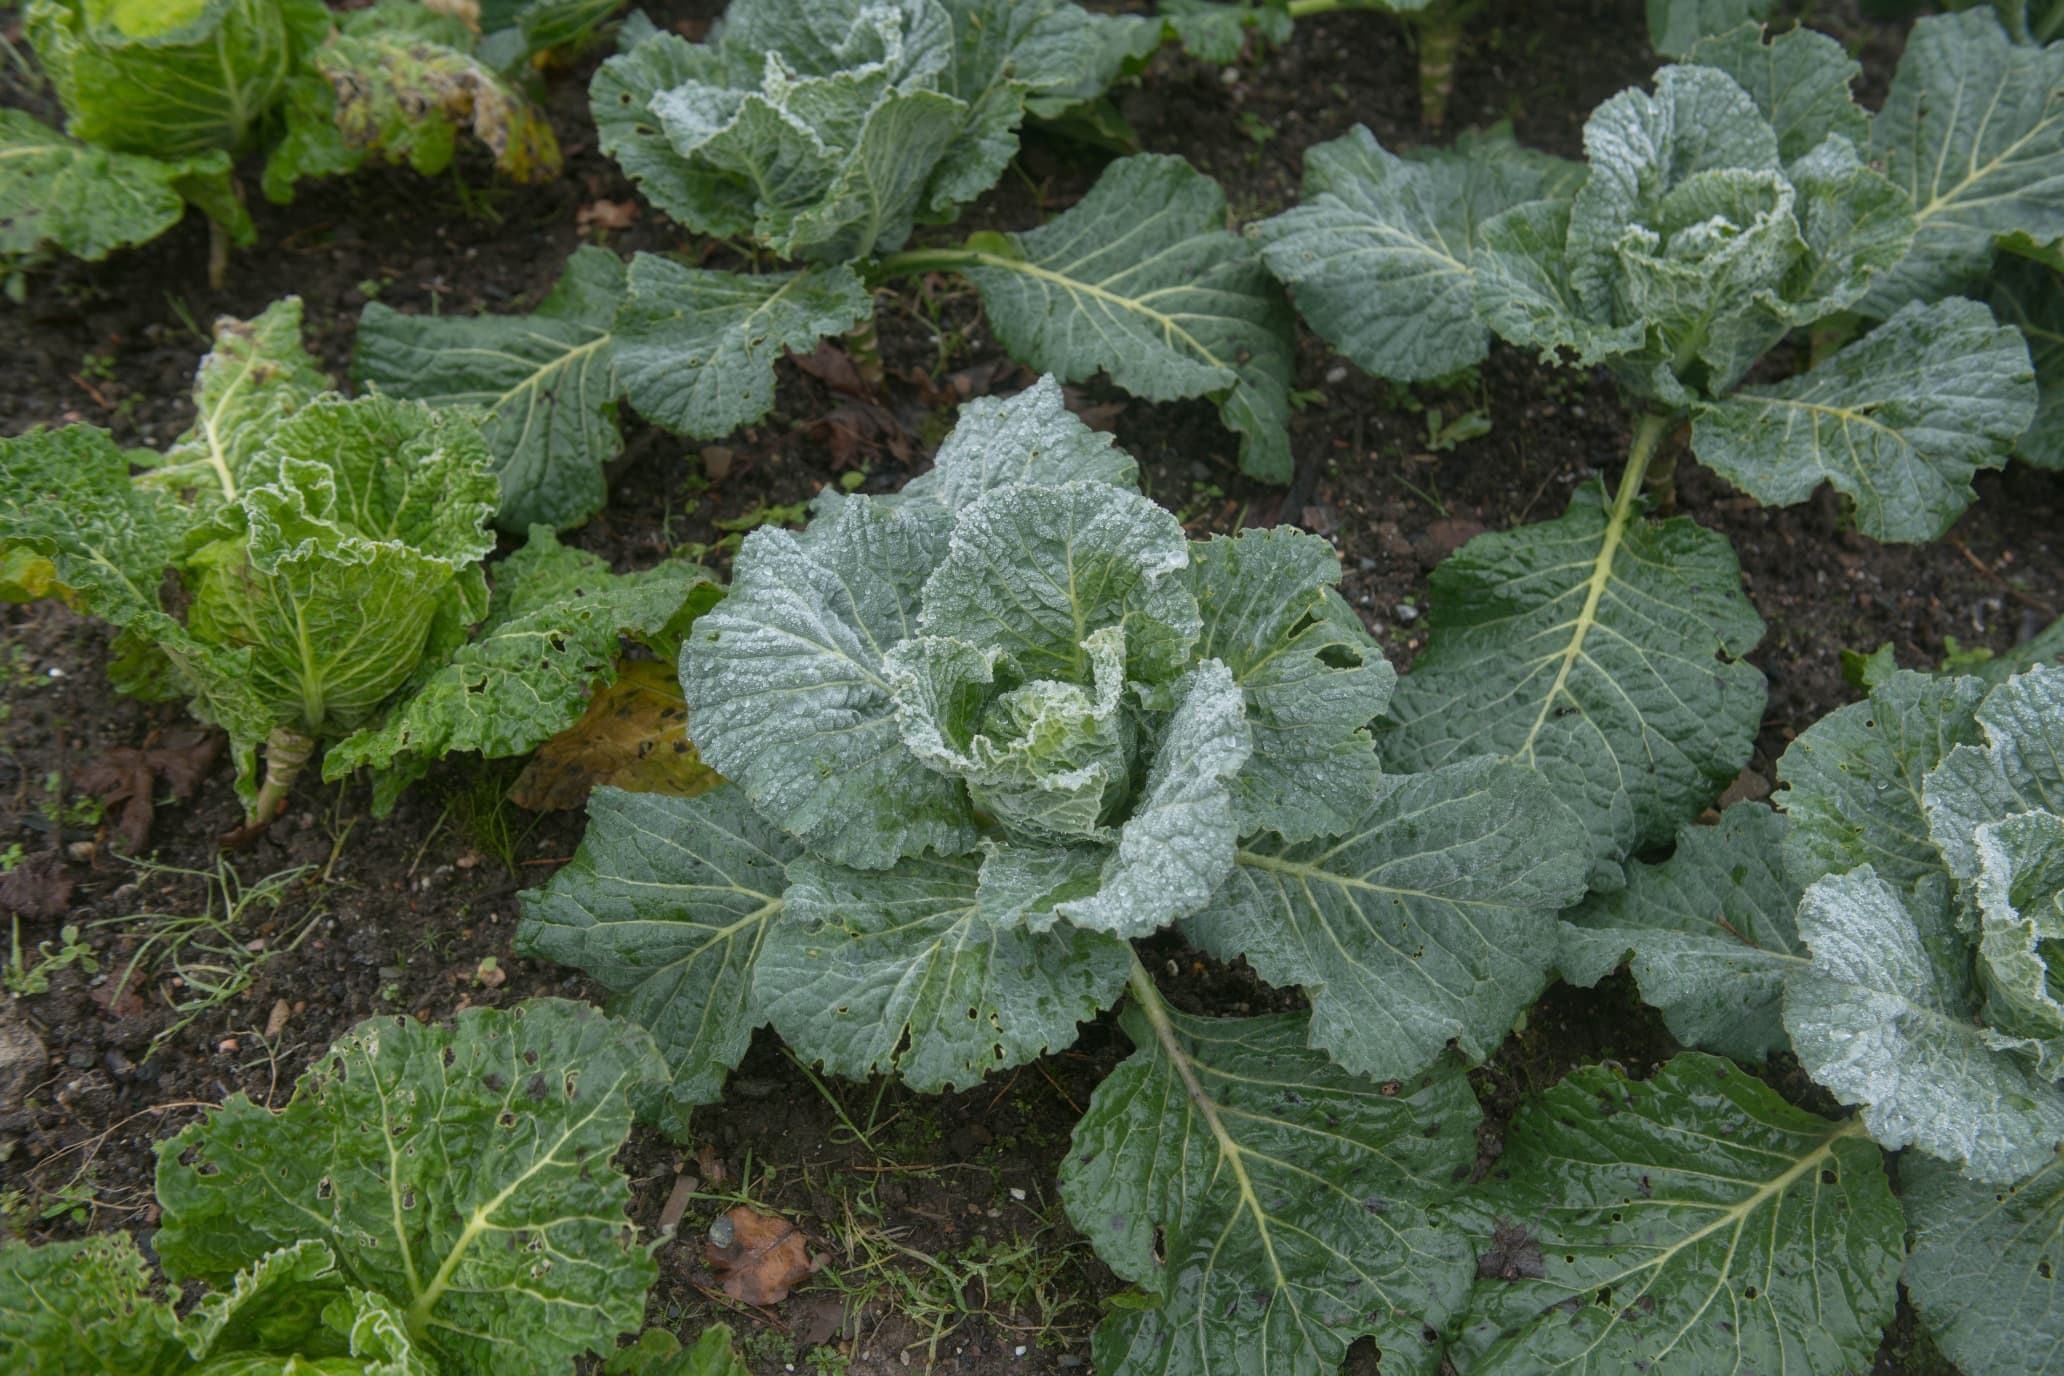
Cabbage Takes Time To Mature, But Experts Advise Harvesting Within 12-20 Weeks
IN THIS GUIDE 1) Pre-Harvest Maintenance 2) Determining Readiness 3) Harvesting 4) Storage Cabbages are divided into spring, summer and winter types; as a consequence, this is one vegetable that you can harvest from your garden all year round in many regions of the UK. Cabbage does take rather a long time to mature – anything from 12-20 weeks, depending on the variety in question. It is also best harvested near its peak of maturity, but in order to reap the best possible crop, some pre-harvesting maintenance is called for. In this guide, we identify the essential pre-harvesting activities and also spell out a three-point method to detect when your cabbage crop is nearing its peak. Difficulty Easy Equipment Required Gardening gloves, secateurs (optional) When To Harvest Depending on the variety, anything from 12 to 20 weeks after planting To learn how to harvest your cabbages, simply follow the process below: 1) Pre-Harvest Maintenance Cabbage takes quite a long time from planting to harvest – for most varieties the time to harvest is anything from 12-20 weeks, with the specific timeframe depending on the particular variety. In order to reap the best possible harvest the closer you get to the anticipated harvest date, the more you need to maintain your cabbage crop. Cabbages are known to be among the heavier feeders among vegetables. Be sure to fertilise regularly with a vegetable or balanced fertiliser. If any head is not maturing well, looks stunted or its leaves are peeling, cut it off; the remaining leaves can still be harvested. If a good, well-maturing head of cabbage has a limp or withering outer leaf or an outer leaf that has come away, carefully cut it off. Use a small sharp knife, mini secateurs, or scissors. Rabbits, squirrels, voles and mice are all serious threats to maturing cabbages so guard against these pests or protect your crop with wire netting. Finally, be aware that cabbage can bolt. If a plant does bolt, you lose that cabbage as it becomes unpleasant to the taste. Even summer cabbage cannot tolerate continuous temperatures much above 30°C. Continuous high temperature will probably cause scorching or wilting, or, just as likely, some cabbages may bolt. Similarly, if any type of cabbage experiences a stretch of very cold weather, if there is a sharpish uptick in temperature some cabbages may bolt. 2) Determining Readiness When the time to harvest for your given variety is approaching, start to check the cabbages for readiness. First, compare the size of the majority of your lettuce heads to the average size for that particular variety. Hold two or three heads firmly and give them a light squeeze. If they do not feel loose or layered and instead feel tight and firmed up, the cabbage crop is ready for harvest. If you spot a head or two with leaves that have peeled away from the base of the cabbage, that may indicate that harvesting time is here. Or, if a cabbage has split, you’ll know for sure that you need to harvest the other cabbages. 3) Harvesting Hold the cabbage head with one hand, gently pull slightly upward and to one side. On the other side with the other hand, cut the stem at the base of the cabbage. This may be done with a sharp knife or a pair of secateurs. The first time you harvest cabbage in this way you may struggle, but once you do it a few times it will become automatic. You can leave the stumps of the stems behind. If you want to try to grow another set of cabbages from those stems, make notches on their upper surface and keep watering. 4) Storage If you would like to store your cabbage, this is a vegetable that keeps quite well in the fridge. First, check all heads for any outer leaves that have peeled away, are wilting, or have brownish edges. Carefully cut off these leaves. Wash the cabbages in cold water, shake them dry, and let them air-dry for 15-20 minutes. Tightly wrap each head individually in cling film and store in the fridge’s crisper. Cabbages stored in this way will keep for at least 2 weeks and some varieties can be stored for even up to 4 weeks.
Learn more
Harvesting Season For Broccoli Can Start From April - 'Better A Week Too Early Than Late'
IN THIS GUIDE When To Harvest 1) The First Harvest 2) The Second Harvest 3) Washing And Storage Broccoli – that food that your parents made you eat and you’ve now grown to like – is a great plant to grow in your garden. However, it’s only if you ‘treat it right’ after harvesting that broccoli will deliver that super tasty knockout punch. We lay out how, underneath. When To Harvest Broccoli varieties mature and are ready for harvest within a fairly narrow timeframe, which is usually from 8-12 weeks. The best sowing and growing season for broccoli means that peak harvesting season is July through to September. However, this harvesting season can run all the way from April through October depending on your region’s climate, the cultivar you are growing, and whether you start the seeds indoors. As your broccoli plants are coming along, you want to reap a bountiful harvest. So be on the watch-out for birds, slugs and snails, any of whom can put paid to your crop. Consider protecting your broccoli patch with bird netting. As the time to maturity approaches for your broccoli variety, keep a careful eye on your plants. It is better to harvest a week too early than a week too late. When the main (upper) heads are firm and well-formed, each one showing those familiar little knobs, it is time to harvest. For most cultivars, the size should be a bit bigger than a cricket ball and the colour should be a rich, deep shade of green. If you wait too long, broccoli can bolt and in warmer regions or during a heat wave the chances of bolting are greater. You can forestall bolting by providing afternoon shade and by not letting the soil dry out. The sign of yellow on a head means that that plant has started to bolt. If a plant bolts, cut off that stalk and harvest the rest of the plants. Difficulty Easy Equipment Required Gardening gloves, secateurs or scissors (optional) When To Harvest 8 to 12 weeks to main harvest depending on variety; peak harvesting July through September; extended harvesting April through October 1) The First Harvest Harvest broccoli in the early morning to mid-morning. Use secateurs or a sharp knife, whichever suits you better. On each plant, cut the upper, main head with its stalk down to about 12cm without disturbing the rest of the plant. Do not cut horizontally; cut at a slant. A slanted surface means water cannot pool on top of the stalk and bring about stem rot. 2) The Second Harvest Continue watering and feeding the plants as you were. Monitor the side stalks now for your second ‘side’ harvest. These side heads will not become as large as the main, upper heads; when they are 50-75% of the size of the main heads that you had harvested, they are good to go. Because the smaller side heads will mature at different rates, this second harvest can be taken progressively, on an as-needed basis. The timeframe is from three to five weeks from the day you took the earlier, main harvest. If in doubt, simply take this side harvest four weeks from the first one. This time around you can cut each head with most of its stalk. As before, be watchful for bolting. 3) Washing And Storage If you plan to store your broccoli for a few days, do not wash it – just put it in a perforated polythene bag, squeeze out all the air from it, and put that in the fridge’s crisper. It should be enjoyed in three days. If you plan to store your broccoli for longer, this is one veggie that is amenable to freezing for up to several months, provided it is prepped correctly. You will first need to clean it, as described below. Then it needs to be cut into small pieces, and blanched and flash-chilled. Yes, that’s a specialised method and it’s easier said than done. As for washing this veggie, small insects and other germs may be hidden between the florets and in the crevices. If you are fully confident that your garden does not harbour such pests, you could wash the veggies for five minutes by putting them in a colander while holding it under running water and swishing the veggies. Otherwise put lukewarm water in a container and add apple cider vinegar or potassium permanganate as appropriate to the amount of water, and mix. Put the broccoli in this solution for 10-15 minutes, and periodically swish it around. After you remove it, wash it under cold running water.
Learn more
Make Sure To Harvest Your Lettuce Before Your Plant Bolts And Turns Bitter And Inedible
IN THIS GUIDE Harvesting Loose-Leaf Lettuce When To Harvest Head Lettuce Harvesting Technique Storage If you harvest lettuce from your own garden to take with you to your kitchen table, it will be packed full of flavour that store-bought lettuce just won’t have. You can enjoy this tasty veggie right from June clear through to November. But when exactly do you harvest lettuce? This depends – of course – on when you sowed the seeds. However, two additional factors come into play. First, the time to maturity of the given variety, and, second, your personal likes and needs. All types of lettuce can be harvested young or when fully mature. Most varieties will be ready for harvest from 8-12 weeks after germination though a few varieties take longer. Difficulty Easy Equipment Required Gardening gloves, sharp knife or secateurs/scissors or mini-secateurs (optional) When To Harvest Head lettuce from 8 to 12 weeks after planting Harvesting Loose-Leaf Lettuce Loose-Leaf lettuce can be harvested on an ongoing basis similar to how you harvest chard. Leaves can be picked from about 6 weeks after sowing or when the outside leaves have grown to about 15cm. The idea is to take what you need from each plant while allowing it to keep growing and producing fresh leaves until the end of autumn. Pick three or four leaves from each lettuce, going only for the outside leaves. Gently pull away a leaf and snip it at the stem a few centimetres off the ground. If you use mini-secateurs or scissors you run less risk of inadvertently slicing through other leaves. Also, instead of bringing the scissors or mini-secateurs into the plant, run them at a tangent to the plant so that you are sure to isolate the leaf you want to cut. You can – of course – harvest the entire Loose-Leaf lettuce in one go. When To Harvest Head Lettuce As stated above, most lettuce varieties will be ready for harvest in from 8 to 12 weeks, though a few varieties take longer. You may harvest lettuce young to suit your needs, but you must harvest it by its ‘Expiry Date’. If you don’t and the plant bolts, the lettuce will become bitter and inedible. “Start harvesting early and often, as if you wait too long your lettuce will start to bolt and you’ll have a lettuce glut on your hands,” shares Horticultural Consultant Colin Skelly. “Little and often is my tactic when it comes to harvesting lettuce.” Fortunately, lettuce throws up a tell-tale signal that you may soon lose it! For all types of head lettuce that have a round shape, if the round head shows the least sign of elongating, that lettuce should immediately be harvested as it will otherwise bolt. You can pre-empt this signal and still harvest lettuce at its peak of maturity. For all hearting lettuce, including romaine or cos, simply peer into the lettuce, parting a few leaves as necessary. If it has formed a heart, it is fully mature and is ready to harvest. Harvesting Technique Lettuce is best harvested in the early morning, especially in summer or hot weather, otherwise you may well be picking limp, tired heads. To harvest, firmly grasp the lettuce head with one hand, gently pull up and over to one side, and on the other side with the other hand, using a pair of secateurs or a sharp knife, cut the stem cleanly close to the soil. You may struggle the first time or two that you harvest lettuce but you’ll soon get the hang of it. If you plan to harvest some of your lettuce crop early, then, instead of harvesting several heads growing adjacent to one another, you could pick every other lettuce (assuming you don’t need to clear a patch of ground for some other crop). Taking alternating heads will allow the plants left behind room to develop even more fully. Storage After bringing in your lettuce, pull out leaves in twos and threes, then put in a shallow bowl and wash in cold running water. The best place to ‘store’ your freshly-harvested lettuce is on the kitchen table! The delicious taste will diminish the longer lettuce is stored. If you must store your harvested lettuce for a longer period of time, wrap it tightly in a polythene bag or cling film that has a few tiny holes, and store in the fridge’s crisper. The longer you keep it in the fridge, the less flavourful and succulent it will get. We suggest you keep it in the fridge for a maximum of four days.
Learn more
Lettuce From Seed: These Annuals Are Very Amenable To Successional Sowing
IN THIS GUIDE 1) Prepare The Soil 2) Sow Seeds 3) Water 4) Thin The Seedlings Lettuce comes in several types – iceberg and romaine, butterhead and loose-leaf. However, they all have a couple of attributes in common: they are everyone’s first ingredient for salads, and they are all grown in a similar way. By mixing up those lettuce types in your garden, you can make your salads more varied! Lettuces are annuals that are grown from seed and they are very amenable to successional sowing, though you have to be on your guard during warm summers to avoid plant bolting. The ideal daytime temperatures for growing lettuce are between 15°C and 21°C, but there is some ‘room for error’. Difficulty Easy Equipment Required Gardening gloves, hoe or other cultivating implement, cane or stick When To Sow April – Early September Aspect Full sun or morning sun; preferably sheltered; some cultivars require a south- or east-facing aspect Growing these leafy greens is a simple four-step process: 1) Prepare The Soil Select a site that gets full sun or at least morning sun. A sheltered spot would be preferable; many lettuce varieties need it, though some don’t. Using a hoe or cultivating implement, till the ground well. You don’t need to go very deep – about 20cm is enough. Mix in ample organic compost or well-rotted manure. Though the soil should not be heavy and should drain very well, it should retain moisture. Amendment with organic compost should do the trick but you can always mix in vermiculite as necessary. Soil pH levels from 6.1 to 7.3 – slightly acidic to neutral – will be perfect. If you live in a warm region of the country and intend to sow in summer, your lettuce plants may not germinate, and if you grow this crop through summer, your lettuce plants may bolt. “If I’m sowing lettuce in the summer, I’ll put some shade netting up around the newly sown trays to avoid lettuce seeds from entering dormancy through conditions being too hot, which happens quite easily in a greenhouse,” shares Colin Skelly, a Master Horticulturist. “This has happened to whole batches of my newly sown seeds before, so I’m quite cautious to make sure they don’t ‘bake’ once sown.” To ensure germination you can sow seeds in trays that are placed in a cool location and to avoid losing your lettuce crop, select a spot that gets afternoon shade and keep the soil consistently moist (and be sure to use cold water). 2) Sow Seeds In most regions of the UK, you can sow lettuce seeds at any time from April through to early September. To do this, make a very shallow drill, about 1cm deep, and sow seeds thinly in it. Cover very lightly with a mixture of organic compost, vermiculite, or both. Do not pack in the medium because these seeds need light to germinate. The spacing between rows depends upon the size of the varieties but you can’t go wrong with a row spacing of 30-40cm. You can sow seeds every two weeks – successional sowing – to reap an ongoing harvest. For the most part, you can sow seeds until about September, but this depends on your region’s first frost date and the time it takes a given type of lettuce to mature. Quite a few lettuce varieties can withstand a light frost or two, but it is wise not to sow seeds if the lettuce will not be ready for harvest by the first expected frost. 3) Water Lettuce needs shallow but regular watering so that the soil can stay consistently moist. In fact, besides overly warm weather, dry soil can cause lettuce to bolt. On the other hand, soil should not stay soggy either. Every few days check the soil with a finger to about 3cm. If it is not moist, water. Be sure to use cold water and to water by mid-morning. You can apply a thin layer of mulch over and around the growing site to conserve moisture. It is a good idea to add vermiculite to mulch when the aim is moisture conservation. 4) Thin The Seedlings Start to thin your lettuce after the seedlings have put out two true leaves. Remove the laggards and seedlings showing uneven growth. Thin again after two to three weeks, and do so again if necessary. The aim is for the growing plants to be spaced 15-25cm apart. As for the thinnings, they should be going to the kitchen as your first lettuce harvest of the season!
Learn more
The Signs To Know When Your Plums Are Ready To Harvest (And How To Protect Them)
IN THIS GUIDE 1) Protect Your Incipient Harvest 2) Thin The Crop 3) Test For Readiness 4) Pick The Fruit Plums may well be the sweetest, juiciest, most luscious of fruits to bite into and delight in. Unfortunately, many people would not agree with that assessment – and the reason is that all they’ve ever eaten are mass-produced store-bought plums that have been transported over long distances! But if you have a plum tree or two in your front yard, you may well agree with our opinion. And you’ll agree with it even more if you harvest your plums correctly and methodically. As a plum grower, you know that colour is one indicator of ripeness and harvest-readiness. And you would also know that plum varieties’ colours vary – red, maroon, burgundy, purple, and even green. However, there are other indicators of harvest-readiness as well as a few do’s and don’ts. Difficulty Medium Equipment Required Gardening gloves, mini-secateurs or scissors; a helper may be useful When To Harvest July – September Underneath we take you through the ins and outs of plum harvesting so that you may reap the most ‘fruitful’ harvest: Protect your incipient harvest from frosts and birds Thin out branches for a healthy crop Test your plums for readiness Pick the fruit when it’s ready This process is explained in more depth below – 1) Protect Your Incipient Harvest Plums are susceptible to two threats: early frosts when the blossoms are on show and birds when the fruits are forming. (These are the two most common and major threats to plums but are far from the only ones.) So you need to take care of your harvest right from spring when it is not even formed. If you anticipate a late spring frost you will need to keep buds and flowers snug with fleece or similar protection lest they get zapped. As for birds, mesh netting is difficult to set up and ugly to look at but it is a very effective method to frustrate birds; other methods are also available. Increase the amount of water during the height of summer when the fruit is developing and maturing. Increasing the amount of water is critical during hot, dry spells. Wear gardening gloves when it’s your turn to thin the fruit after Mother Nature has taken her turn. 2) Thin The Crop Plum trees are very generous – indeed, they’re generous to a fault. They crop so heavily that they cannot possibly bring all the fruit to ripeness, and overburdened branches sometimes even break. This fault is partially compensated for by Mother Nature and should be partially compensated by you. Mother Nature does her part through ‘June Drop’ when some number of immature plums fall off the tree. This fruit fall is normal. Actually, this June Drop is a marvellous signal for you to play your part. Immediately after this automatic thinning is over, you should thin the forming fruit, though how much depends on your cultivar and on how much your tree is overloaded. Branches should not be under obvious strain. Simply snip off a conservative number of fruits; use mini-secateurs or even scissors for this purpose. Choose under-developed, mis-shapen, and damaged fruit for thinning. “When thinning plums, I use the RHS guidance for thinning, which is to leave a plum every 5-8cm or a pair of plums every 15cm,” shares Master Horticulturist Colin Skelly. “This works well for me, leaving a crop of good-sized plums that are plentiful but without overloading the branches.” Though plums can be ripened after picking, they taste best when tree-ripened. Therefore, it is important to pick these fruits at just the right stage. 3) Test For Readiness Depending on your cultivar, plums will be ready to be picked sometime between July and September. All plums on a tree will not ripen at the same time. Your harvesting will consist of several go-throughs, at each of which you would pick some fruit – a little or a lot. But when do you know that the fruit is tree-ripened and should be picked? Here’s a checklist:– No matter what the colour of your cultivar’s plums, except for a few marginal plum types like cherry plums, ready-to-pick ripe plums will have a chalky glaze. While unripe plums will be very firm, ripe plums will have a bit of ‘give’ or some softness if gently squeezed between finger and thumb. Ripe plums exude a mild sweetish scent that unripe plums usually don’t. Ready-to-pick plums will come away fairly easily from the branch; all they need is a gentle pull using only finger strength with a bend or twist, with only a touch of support, if any, to the branch. If the branch moves to more than a very small degree when you pull a plum, the plum is not ripe. Pick a plum that you think is ripe, wash it if necessary, and bite into it. You’ll know for sure if other plums like it are ready or not! 4) Pick The Fruit Support the branch – you may have to hold back on a cluster of plums – with one hand while you pick a plum with the other. However, there is an acquired technique to picking fruit like plums with a single hand (and you’ll be glad if you acquire this technique if you haven’t already done so). Hold up or push back the branch (or cluster) with your thumb while plucking with two fingers pressed against the palm, using a quick bend or twist. No matter how you detach a plum, if one or more other plums in that cluster are well-ripened or have a weak stem then the resultant recoil or jarring may result in such fruits falling to the ground! If the ground is muddy, those fruits will get dirty; if it is hard, they’ll get bruised. To guard against this you may want to hold a basket underneath the plum you are picking; even better if you have a helper to hold the basket. Remember you won’t harvest your entire crop in one go; only those plums that are ready. You’ll need to make a few passes during the harvesting season to collect your full harvest.
Learn more
Growing Plum Trees: How To Plant Out A Bare Root Tree And Care For It Properly
IN THIS GUIDE Overview Common Types Growing From Pits Planting Bare Root Plums Plum Tree Care Guidelines Propagation Common Problems & Diseases Plum trees are an excellent choice for many UK gardens, providing both visual appeal and an abundant yield. ‘Plum’ is the name given to the fruits of a number of different trees in the genus Prunus. European plums (Prunus domestica) are the type most commonly grown for their edible fruits in UK gardens and will be the focus of this guide. Overview Botanical Name Prunus domestica Common Name(s) Plum Tree Plant Type Tree / Fruit Native Area Europe (Cultivated) Hardiness Rating H5 Foliage Deciduous Flowers Blossom followed by fruits When To Sow / Plant November, December, January, February Flowering Months March, April However, P. cerasifera is one type of ‘ornamental plum tree’ grown in UK gardens which will sometimes also bear edible fruit. And there are also other plums, such as Chinese plums, Japanese plums and a wide range of New World plums too. Within even European plums, there is an almost bewildering range of different types of plum to consider. P. domestica is divided into different subspecies. When we talk about plums, we might be talking about: Common plums Damsons and bullaces Egg plums Gages/greengages Mirabelle plums etc. It can be helpful to understand a little more about the different plums you might grow before you narrow down your choices and decide which one may be right for your garden. Common Types As well as honing in on the subspecies types, you will also need to think about the specific cultivar of plum tree that you would like to grow. Some common and well-loved options are: ‘Avalon’ ‘Blue Tit’ ‘Cambridge Gage’ ‘Czar’ ‘Denniston’s Superb’ ‘Farleigh Damson’ ‘Golden Sphere’ ‘Jubilee’ ‘Marjorie’s Seedling’ ‘Opal’ ‘Shropshire’ ‘Victoria’ However, there are many more interesting options to consider, and many things to bear in mind when choosing your plum tree. You will need to consider: Whether you are looking for cooking or dessert plums (and have any flavour preferences). Whether the tree is self-fertile or needs a pollination partner for best results. When the fruit will be ready to harvest (remember that plum trees are often categorised into early, mid-season and late varieties depending on when the fruits will be ready to harvest). Growing From Pits While you can grow a tree from a plum pit, that tree will not necessarily have fruits which taste like the fruit from which the pit came – it may not even fruit at all. What is more, there are no guarantees that the tree which grows from the pit will be suitable for growing in your garden. One important thing to note is that when you purchase a fruit tree for your garden, it will usually have been grafted. Grafted trees are made up of a rootstock (the bottom-most part of the tree with roots), and a scion (top part of the tree) of the fruit varietal you have chosen. The rootstock determines the health, size and vigour of the tree, and the scion is what determines the fruit that you will get. When choosing a plum tree for your garden, therefore, you need to think not only about choosing a named varietal, but also about choosing one on an appropriate rootstock. In the UK, many plums are grafted on to: ‘Saint Julian‘ – A semi-vigorous rootstock which creates bush-trained trees 4.5-5m tall. ‘Torinel’ – also semi-vigorous, good for containers, 2.4-3m tall ‘Pixy‘ – a semi-dwarfing rootstock used for dwarf bushes, cordons and patio trees, with an ultimate height of 3-4m tall. “Even a small garden can accommodate a plum on a Torinel or Pixy rootstock,” shares Colin Skelly, a Master Horticulturist. “These are also suitable for growing in a (large) container if you have the time to keep up with its demands, particularly in summer. “The birds in my garden have proved adept at judging the ripeness of the fruit on my recently planted plum (on Pixy rootstock). Hopefully, when is has grown a bit more, there’ll be enough to share!” Planting Bare Root Plums Plum trees are typically planted out as bare-root trees over the dormant period, some time between November and February. Bare root trees are cheaper, and will usually establish more successfully than pot-grown trees purchased at other times of the year. Choosing A Planting Site Standard or bush-trained plum trees can make excellent stand-alone trees for smaller gardens. Plums can also be trained in a variety of different ways in order to make the most of small spaces. Be sure to choose the right option for the space available, considering its shape (and how you will prune it) as well as its eventual size. Smaller plum trees can also be grown in large containers, though container-grown trees will always require more care. If you have the space, including a plum tree as part of a forest garden design can be a great idea. Forest Gardens & Companion Planting A forest garden is an eco-friendly and low-maintenance type of garden, which maximises yield while mimicking and working with nature and creating a thriving, biodiverse and resilient ecosystem. Forest gardens do not need to be huge – they may only include 2-3 trees. But creating one does mean thinking not only about productive trees, but also about creating synergistic combinations of layered planting beneath them. Every time you think about planting a plum tree (or any other fruit tree) you should also consider the plants that will aid their growth, help with pollination and pest control, and generally improve the health and resilience of the tree and the system as a whole. Planting fruit tree guilds beneath and around a fruit tree is a type of companion planting. Considering the creation of guilds around a plum tree should definitely be considered when making plans about where to plant your new tree. Preferred Climate Plum trees are typically H5 hardy, meaning that they can survive through the winter across most of the UK, even during severe winters. However, they will fruit best when grown in a sheltered and protected site in full sun – and some varieties will do best when given the warmth and protection of a spot against a stone or brick wall. Some are tougher and hardier than others. Soil Conditions In terms of soil, plum trees will thrive in a loamy or sandy soil, with moderate to high fertility, enriched with plenty of organic matter. They do best where the soil is moist but free draining, though can also cope with more free-draining conditions. And they prefer soils (or growing media) with a neutral or slightly acidic pH. How To Plant As when planting any fruit tree, to plant a plum tree you should dig a generous hole, then add compost of well-rotted manure to the base of it. Place the tree in the hole, making sure that the soil is at the same level as previously, and that the graft point is above the ground. Firm the soil back around the roots, making sure that there are no air pockets. Plum Tree Care Guidelines Plum trees placed in a suitable location will require some care until they become established. Be sure to water well during the first growing season when the weather is dry. Once established, plum trees should be fairly low maintenance and easy to care for. Mulching Restricting grass growth around the base of a new fruit tree, and mulching as well as adding a guild of beneficial companion plants is an excellent idea. Organic mulch will add slow release fertility, improve the surrounding soil, reduce moisture loss and aid in weed suppression. Fertilising The best way to make sure that a plum tree has the nutrients it needs over time is through the use of mulches, and companion planting. Dynamic accumulator plants (comfrey etc..) chopped and dropped around the base of the tree should help in keeping your plum tree happy and healthy. Transplanting Seedlings If you have grown a plum tree from a pit, in spite of the above cautionary note, and would like to give it a go, your young seedlings should usually be kept in a tree nursery or protected location in a container for their first year at least. They should then ideally be moved to their final growing position in early spring. Container Growing Small plum trees can certainly be grown in large containers in small spaces, and you should fill your container with a mix of soil and compost or a suitable soil-based potting mix. Note, however, that when growing in a container, you will have to spend more time on their care. They will continue to need regular watering – more than those grown in the ground – and may benefit from a liquid feed if growth is poor. Propagation Effective propagation of plum trees usually involves more complex horticultural methods like chip budding and grafting, so are not usually undertaken by gardening novices. Common Problems & Diseases Plums placed in the right spot, with a guild of beneficial companion plants, will usually experience far fewer problems. So your first defence against any plum tree issues should be careful and holistic garden design. Pests plum trees can suffer from include aphids, scales, moths, caterpillars and birds. Diseases to remain vigilant for include blossom wilt and brown rot, pocket plum, bacterial canker and silver leaf, for example. Leaves Turning Brown If plum tree leaves turn brown, or there is leaf drop, this can be a sign of drought, or improper watering. It can also be due to a fungal disease or other systemic issues which prevent the tree from taking up water effectively through its roots – or which stops water from reaching a branch and its leaves as it should. Remember, however, that plum trees are deciduous and leaf drop is normal and natural if it occurs when it should in the autumn months.
Learn more


