

Growing

Harvesting Peas Correctly Very Much Depends On The Type You Are Growing
IN THIS GUIDE 1) Pea Shoots 2) Mangetout 3) Sugar-Snap Peas 4) Shelling Peas 5) Pulse Peas How To Harvest Peas Peas are one extremely popular crop to grow in your garden, and once you taste them fresh from your vegetable beds, you will understand why so many people choose to grow this vegetable. “I can’t imagine a dish without some of my favourite peas from my garden,” shares The Seed Detective Adam Alexander. Peas are relatively easy to grow and care for. They are a legume that takes atmospheric nitrogen and makes it available in the soil, helping to maintain soil fertility. If you are thinking about growing peas, then you should know that there are a number of different options to choose from and the options you choose will dictate when you will harvest them. When it comes to harvesting peas: Peas grown for pea shoots can be harvested any time, during early stages of growth. Mangetout, or snow pea types are harvested when the pods are still flat, and around 7cm long. Sugar snap peas are typically harvested when the peas within the pods have started to develop. (Again, when the pods are around 7-8cm long). Typical garden peas (shelled from the pods) are harvested when the pods are well filled and the peas within have reached a good size before the peas begin to harden up. Peas can be felt within the pod, and the pod should be fully green. Peas to dry and use as a pulse, and soup peas are left until they mature more fully, and are typically harvested when the pods begin to dry out. It is very important to think about what you would like to grow and which part of the peas you would like to eat when choosing varieties and determining the best time to harvest your crop. We have listed the ways in which you should harvest (and when) different varieties of peas: 1) Pea Shoots The first thing that it is interesting to consider is that peas can also be eaten as pea shoots during their early growth. Some people will grow peas in containers simply to harvest the shoots alone – a good crop for small spaces. You can also harvest the occasional side shoot from a plant that you also wish to harvest pods or peas from later in the season. As long as you take side shoots and leave the main stems to grow, you should be able to get a few pea shoots for salads and also enjoy your main harvest later. 2) Mangetout Aside from pea shoots, the quickest harvest that you can get from peas are mangetout. Mangetout pea varieties, also sometimes known as ‘Snow Peas’, are pea varieties with which you eat the pods and any peas forming inside. With this type, you can harvest as soon as the pods appear. However, to maximise your harvest it is best to hold off harvesting until the pods are around 7cm long or so. Once they reach this size, it is important to keep up with harvesting, since if you pick them promptly, more should be produced. 3) Sugar-Snap Peas Sugar snap peas are also eaten whole, with the pods and the peas inside forming part of the harvest. However, with sugar snaps you will usually see the peas forming within the pods, rather than them remaining flat. Again, you should harvest regularly and promptly, picking the pods when they are around 7-8cm long. 4) Shelling Peas When growing garden peas that are not meant to be eaten in the shell, the size of your harvest will be somewhat smaller. There will also be a little more work involved in the actual harvesting process since you will not just pluck pods from the plants and use them as they are – you will also have to shell the peas from the pods once you have picked them. Wait until the pods are plump and full and you can see the peas inside almost filling the space when you hold the pod up to the light. Make sure to pick the pods before they begin to dry out and while they are still glossy and fresh looking. 5) Pulse Peas While most garden peas are harvested while they are still fresh and bright green, some peas are left to mature further and dry out for use as a pulse, or for making soups later in the year. It is perhaps less common to grow these types but they can be well worth considering if you would like to be able to eat peas from your garden all year-round. With these types for soups or drying, you will typically leave them on the plant to mature to the stage where the pod begins to dry out and turn brownish in colour. They are sometimes known as field peas. The Harvesting Technique As you can see from the above, there is no one clear answer as to the stage at which peas should be harvested, since this depends on the varietal and type of pea you have chosen to grow and the harvest that you wish to obtain from the plant. But harvesting peas is simply a case of nipping off the part you want with a finger and thumb. You can process and store these as you wish or you can use them right away. Fresh peas can always be frozen if you want to store them for later in the year. “You can save the seeds of heirloom varieties of pea and get a plant with similar qualities,” shares Peter Lickorish, a Master Horticulturist. “It is still possible to harvest peas for eating, but remember to stop harvesting around four weeks before the end of the harvest window for the plant, to allow the last pods to produce fully developed seeds. “This would often be in late July. “Once the pod has become brittle and brown, collect the seed on a dry day and ensure it is completely dry before sealing it in a glass jar. “Place them somewhere cool and dark, before sowing next year.” If you sow, grow and care for your peas correctly, you could be eating peas from your garden, in one form or another, all year long.
Learn more
Using Nasturtium As Companion Plants - They Make An Excellent Trap Crop In A Veg Garden
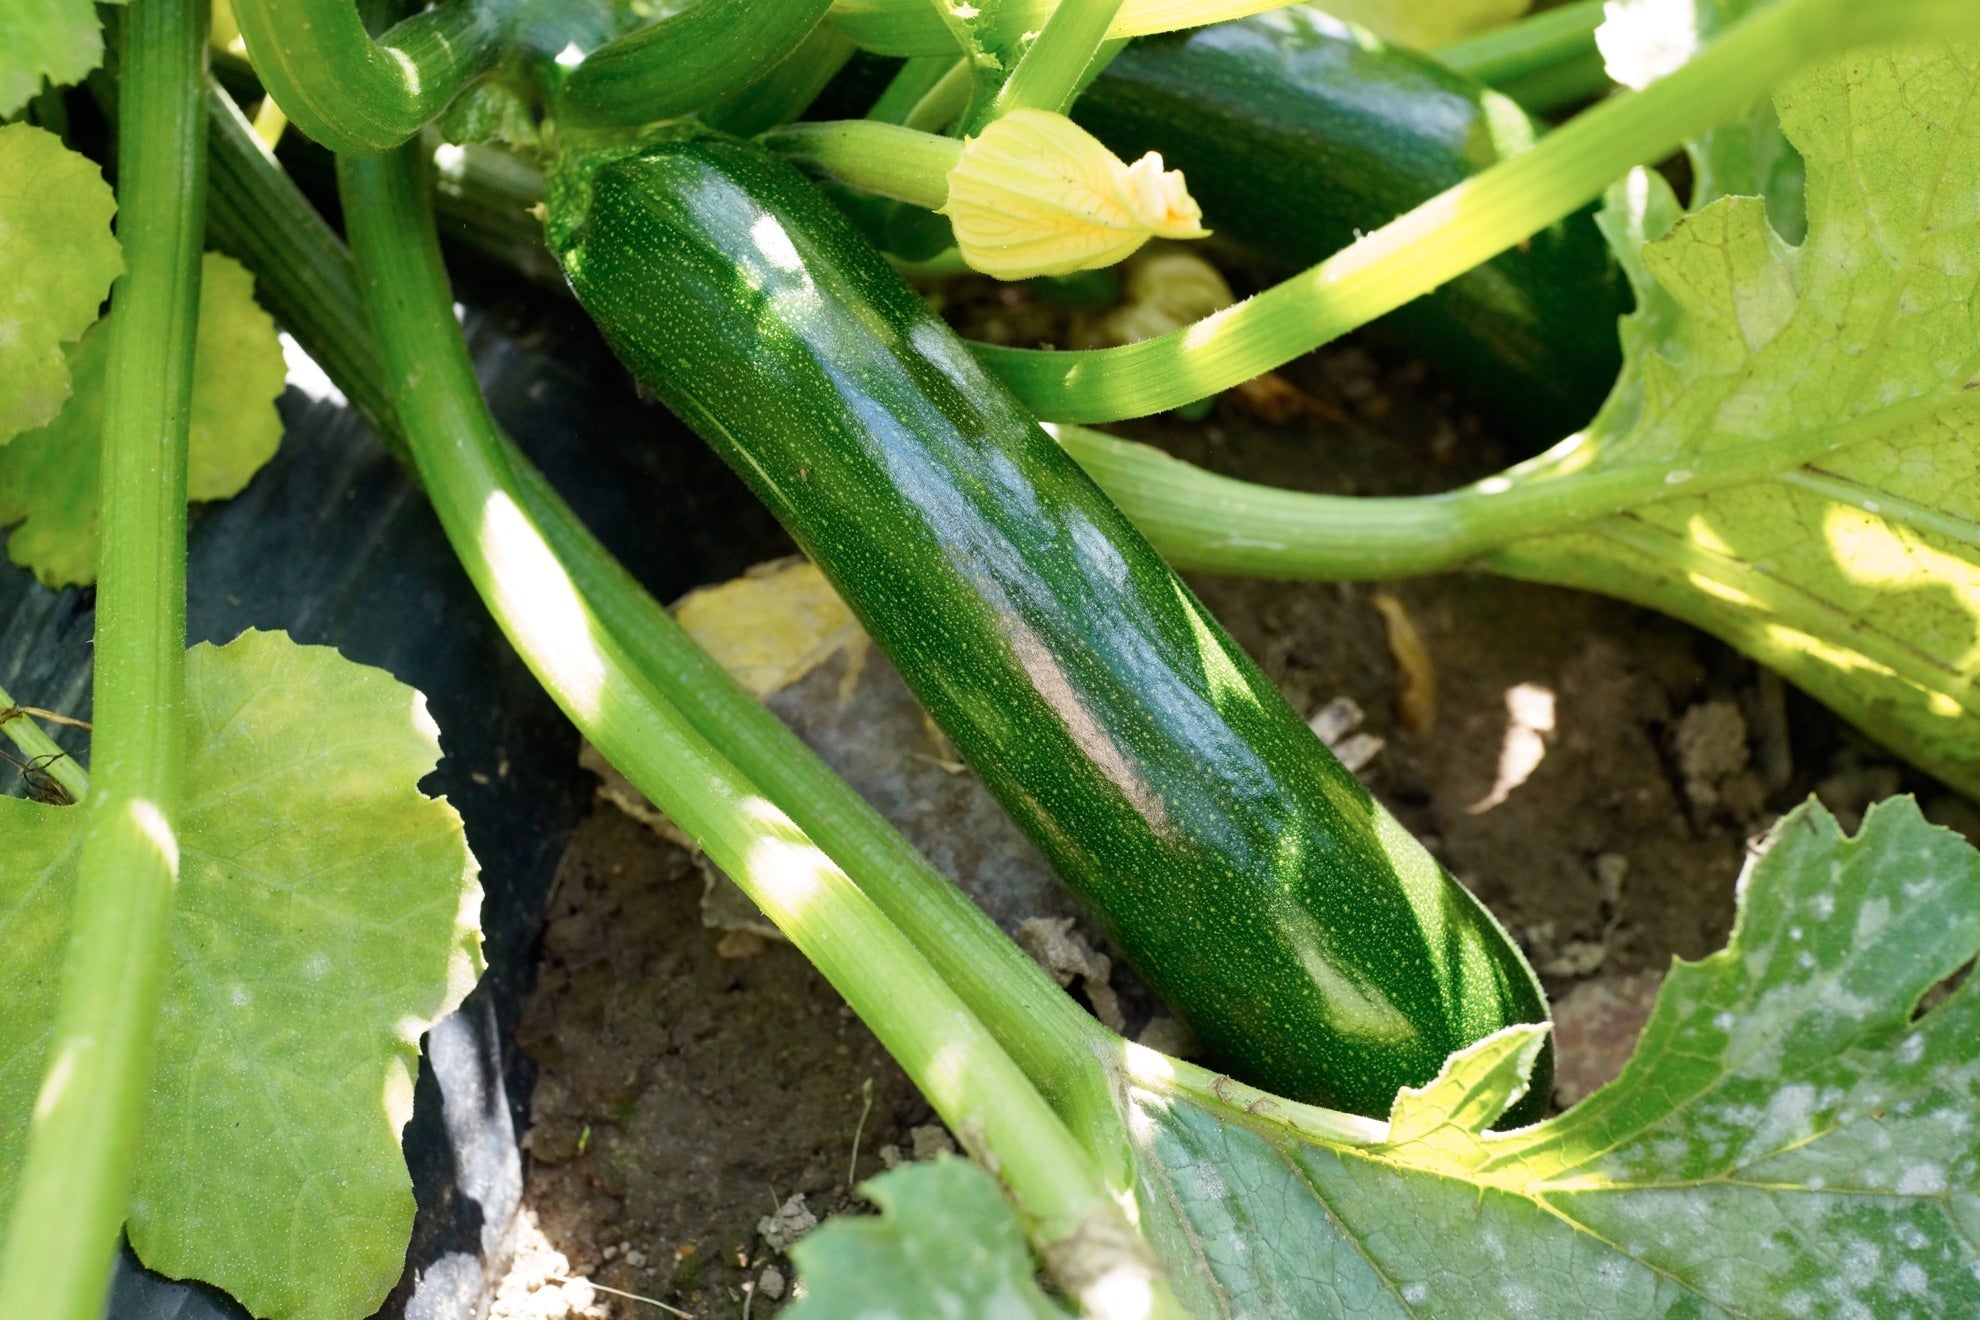
IN THIS GUIDE Plants That Could Benefit Companion Planting With Brassicas Companion Planting With Cucurbits Companion Planting With Legumes Companion Planting With Nightshade Using Nasturtiums Alongside Fruit Trees Nasturtiums are wonderfully easy flowers to grow and are great for new gardeners and for those growing with the youngest members of the family. They can, of course, be wonderful as ornamental plants, but another thing to consider is that they also make great companion plants in a vegetable garden – and provide edible yields in their own right. Nasturtiums make great companion plants because they: Attract bees and other pollinators. Draw in pest species like aphids, weevils and beetles, serving as a trap crop to keep these pests away from your fruit and vegetable crops. Attract predatory insects that like to eat the aphids and other pests mentioned above, to keep their numbers down. Have a scent that is said to confuse or repel certain pests. Create good ground cover, conserve soil moisture and protect the soil. Quickly grow, generating biomass that can be fed back into the system through composting, or chopping and dropping to help improve soil fertility for other plants close by. Plants That Could Benefit Nasturtiums, for the reasons mentioned above, can aim many plants in a vegetable garden to a degree. They are a particularly good companion plant in a vegetable garden for brassicas (e.g. broccoli, brussels sprouts and kale), cucurbits (e.g. courgettes, cucumbers, squash and pumpkins), legumes (e.g. French beans or runner beans) and nightshades (e.g. aubergine, peppers, tomatoes). Elsewhere in the garden, nasturtiums can also work very well as a companion plant on the sunny fringe of a fruit tree guild. Companion Planting With Brassicas When companion planting nasturtiums with brassicas some care is required, since brassicas are hungry plants and will easily be outcompeted by nasturtiums. However, sowing nasturtiums near brassicas once the plants are reasonably well established can be a good idea. The nasturtiums can spread below larger brassica plants, creating good ground cover and keeping the soil moist. They can also help repel or confuse a range of pests such as caterpillars, which can become an issue for these crops. Companion Planting With Cucurbits My favourite place to include nasturtiums in my vegetable garden is close by courgettes, or summer squash, or on a trellis alongside cucumbers or larger squash. Think carefully about spacing, since cucurbits are also hungry plants. Creating the right level of competition is important. Having nasturtiums alongside these plants is hugely beneficial because they draw in pollinators when these crops need them around, draw aphids, flea beetles and other pests to themselves as a trap crop, and therefore attract predatory species which keep pest numbers in check. Companion Planting With Legumes Alongside nasturtiums and squash growing on a trellis, climbing French beans or runner beans can also be a great addition to the polyculture. The legumes are a good addition to a polyculture alongside nasturtiums since they will fix nitrogen from the air and ensure its availability in the soil. While the nasturtiums should help with aphid problems on the beans. Companion Planting With Nightshade Tomatoes, peppers and aubergines can also all benefit from nasturtiums when it comes to pollinator attraction and pest control. Nasturtiums growing as ground cover around the base of tomatoes and other related crops can also be beneficial in terms of retaining soil moisture. While these are the main families of plants to consider growing nasturtiums alongside, they can be happy bedfellows with a range of other crops too – just don’t grow them with plants too easily outcompeted or smothered by this vigorous growing plant! Using Nasturtiums Alongside Fruit Trees Nasturtiums will not be perennial in our UK climate but they might still be included as an annual around the sunny fringes of a perennial guild (and will sometimes self-seed readily, making for an excellent low-maintenance system). A fruit tree guild is a carefully constructed planting scheme, with plants chosen for their ability to aid the tree at the centre of the guild in some way. Forest gardens are layered planting schemes designed to mimic a natural forest ecosystem but include plants that are useful to the system as a whole. On the sunny fringe of a fruit tree guild or forest garden, nasturtiums can look very pretty as ground cover, in addition to providing their services as a companion plant mentioned above. “Growing nasturtium in a fruit tree guild is a great idea,” shares Master Horticulturist Colin Skelly. “It tends to work best where it can do its thing and spread freely, which means it can be difficult to manage in a vegetable garden or more formal space. “The biggest challenge is preventing it from smothering adjacent plants, so plant it alongside robust shrubs and perennials that can cope with the competition.”
Learn more
Feeding Dahlias: Add Organic Matter During Flowering And Use A Potassium-Rich Feed
IN THIS GUIDE 1) Provide Healthy & Fertile Soil 2) Add Organic Matter During Flowering 3) Use A Potassium-Rich Feed Dahlias have fairly high nutrient requirements and, like other flowering plants, require plenty of potassium to bloom well. In order to meet these flowering plants’ nutritional needs, feeding this plant with a potassium-rich feed is beneficial, as David Hall, manager and director of Halls of Heddon, explains: “Dahlias respond well to regular feeding – but don’t overdo it. A high nitrogen feed can be used in the early stages, then a balanced feed is best after a few weeks. “As soon as the buds appear, a tomato feed or a fertiliser high in potash should be used. This will help with stem strength and flower colour.” However, it is also important to consider the environment these plants are growing in. Feeding can be optimised by following these 3 key rules: Mulch well with homemade compost or well-rotted manure upon planting and replenish this mulch every year in spring. Consider mulching additionally in summer with a mulch of leaves from dynamic accumulator plants that contain plenty of potassium. During the flowering period, feed once a fortnight with a potassium-rich organic liquid plant feed. A feed suited to tomatoes such as a comfrey liquid feed will also suit dahlias well. Feed once a week if growing in containers. Here’s more information on the three key steps to take in an organic garden when caring for your dahlias. 1) Provide Healthy & Fertile Soil Providing for any plant’s nutritional needs always comes back to the soil. “I plant Dahlias in compost or soil I have added granular controlled orcontinuous release fertiliser to,” shares Horticultural Consultant Dan Ori. “If you use a 6 month controlled release product like Miracle-Gro all purpose continuous release plant food, that may be all that is required for outdoor planted Dahlias that will be dug up in autumn. “If you use an organic granular controlled release product like Miracle-Gro Performance Organics all-purpose, after 3 months I would apply a top-dressing of granular feed mixed with some fresh compost.” Mulching around your plants and replenishing this mulch each spring helps to preserve a healthy soil biome, with plenty of nutrients and the micro-organisms and other soil life we need within the system. When planting dahlias you should spread a layer of homemade compost, leaf mould, or well-rotted manure around your plants. This material will help to provide the key nutrients of nitrogen, phosphorus and potassium, as well as many other essential plant nutrients, and will release these slowly over time. The mulch will also help conserve soil moisture, and suppress weed growth to a degree, helping dahlias thrive by reducing competition around them. 2) Add Organic Matter During Flowering As dahlias begin to flower, they will have the need for potassium to flower well. One option to consider to make sure that there is sufficient potassium in the soil around your dahlias is to add an additional layer of mulch using leaves from dynamic accumulators of this nutrient. Chenopodium album, Amaranthus, borage and comfrey are some plants that can be effective in gathering potassium. When dropped on the soil around dahlias, the leaves of these plants can return these nutrients to the soil and help to feed your plants. 3) Use A Potassium-Rich Feed To give your dahlias a speedy boost of potassium and other nutrients, you can also – during the flowering period – feed your plants with a potassium-rich organic, liquid plant feed. A feed suited to tomatoes will also suit dahlias well says Elaine Patullo from Dachshund Dahlia Plant Nursery: “A good quality feed is essential. Tomato feed can be used initially, and then liquid seaweed can assist with keeping the plants flowering all season.” A comfrey tea is one good organic option to consider and you can also make liquid plant feeds using other plants mentioned above. Through mulching and liquid feeds, you can make sure that your dahlias continue to flower well and bloom beautifully each year. “If I judge it necessary to further boost flowering, I can add liquid feeds high in potassium like tomato feed,” shares Dan. “My advice would be to pay a few pounds more for a tomato feed with seaweed extract, as this has numerous plant health benefits, including addressing any nutrient deficiencies that may be causing discolouration in leaves.”
Learn more
Showing Emily Cupit's Chilli Harvesting Process From Her Greenhouse In Late Summer
IN THIS GUIDE When To Harvest How To Tell When Chillies Are Ready How To Harvest Storing Chillies Growing your own chilli peppers is a great option for those who like the heat. There are a huge range of different options to choose from, from fairly mild and sweet options to those that offer the ultimate kick, with many different levels of spice in between. In the UK, chillies can be grown in a greenhouse or polytunnel or, after being sown indoors, can be placed out in a warm, sunny and sheltered spot in a garden for the summer months. Here are the basic things you need to know about harvesting chillies: When To Harvest You should aim to harvest your chilli peppers between July and October. The earlier you sow your seeds indoors, the earlier your harvest will begin and the longer you will be able to harvest. If you are growing chillies in a greenhouse or polytunnel, you may be able to begin your harvest in July. Outdoors chilli plants will usually begin to be ready for harvest from August. How To Tell When Chillies Are Ready Deciding when chillies are ready to harvest is not as simple as just looking at the colour, or waiting until the fruits reach a certain size because there is so much variety between different cultivars. Many chillies start off green before maturing to more ‘hot colours’ like yellow, orange or red, but some start off purple before maturing or remain green even as they mature. Telling when chillies might be ready to harvest and deciding when to do so means that you need to be aware of how the fruits of the particular chilli that you have chosen mature, and what they look like as they do. When ready to pick, chillies will have a glossy shine to them. It’s important to remember that as chilli pepper fruits mature, they tend to become hotter and spicier over time. However, by leaving the fruits on the plant to mature further you won’t get new flowers and fruits forming. Deciding when to harvest chillies involves deciding whether it is more important to you to get milder chillies, and more of them over the growing season, or brighter and hotter chillies, but a harvest that might be reduced by around a quarter overall. Many will prefer to make the most of the growing area and increase their overall yield by picking the fruits relatively early (typically while they are still green but are nearing mature size for the cultivar in question). But if you crave the heat and want your chillies to be as fiery and punchy as possible, then you should leave the fruits to mature for as long as possible, waiting for them to change in colour. You might also wish to leave the fruits to mature if you would like to enjoy the ornamental appeal of the brightly coloured fruits – which can be particularly varied and vibrant with some cultivars. “Some chilli cultivars are sold as edimental (ornamental and edible), such as ‘Basket of Fire’ or ‘Spangles’, which have multi-coloured fruit,” shares Master Horticulturist Colin Skelly. How To Harvest While deciding when precisely to harvest chilli peppers might not be all that easy, the actual process of harvesting chillies could not be simpler. When you are ready to harvest chillies, simply use a finger and thumb or a pair of secateurs or gardening scissors to cut through the stem just above the fruit, to release it from the plant. At the end of the growing season, you will remove all of the fruits to use, dry or preserve in other ways, but throughout the summer you can simply take the fruits when you wish to do so individually or in small numbers as they are required. Of course, you can use the chillies you have harvested in a range of recipes right away. Harvested chillies can also be stored whole in the fridge or in an airtight container for a week or so. Thicker-skinned chillies may last longer than thinner-skinned ones – a couple of weeks or even a little longer. Storing Chillies If you want to preserve chillies for later use, there are a range of ways to do so. You can: Freeze chillies (for up to a year in a suitable container). Dry chillies (using your oven, or in a dehydrator – sometimes by air drying, though this is challenging in the humid UK climate). Use chillies in a range of preserves such as chutneys, pickles, etc. and can them using the hot water bath canning process. By growing your own chillies and harvesting them successfully, you could be enjoying their spice in numerous ways throughout the rest of the year.
Learn more
Follow One Of These Chilli Feeding Regimens To Determine How Hot They Will Grow
IN THIS GUIDE Feeding Chillies For A Bumper Crop Feeding Chillies For Maximum Heat Chilli Peppers come in a range of different shapes, sizes and hues, and vary dramatically in their heat levels, from no heat at all, to fierce and fiery options – there’s something for everyone. How hot chillies will be starts, of course, with cultivar selection and also depends on when you choose to harvest. However, you might not realise that how much or how little you feed your chilli plants over the summer months is another factor that will determine how hot your chillies will be. There are two regimens that you might follow, depending on how hot you would like your chillies to be: Feed chillies weekly once flowering begins, with a liquid organic plant feed that is high in potassium, for a bumper crop. If you want the chillies as hot as possible, reduce feeding significantly, or even forgo feeding altogether. Plants will be smaller, but their fruits will be hotter as a result. Feeding Chillies For A Bumper Crop First off, when planting chillies, it is beneficial to ensure slow-release fertility by surrounding your plants with a mulch of homemade compost, or something similar. Don’t use a particularly high-nitrogen mulch though, as this can encourage leafy growth at the expense of flowers and fruit. Mulching also helps to conserve water and reduce weed growth. Once the plant begins to flower, you can improve its performance by giving it a potassium boost. This can be supplied by means of a mulch of comfrey leaves or other potassium-rich materials or through the provision of a compost tea or another organic, potassium-rich liquid plant feed. “I use comfrey from my own garden to make a comfrey mulch which slowly rots down to feed the chillies,” explains Colin Skelly, a Horticultural Consultant with almost 15 years of experience. “I use a cultivar called ‘Bocking 14’, which is high in nutrients but doesn’t take over your garden.” Feeding with a liquid feed weekly through the flowering and fruiting period should lead to a bumper harvest. Though the fruits will not be quite as fiery and hot as they would have been if they were treated less well, you will see great results in your crop yield. Feeding Chillies For Maximum Heat If you like the heat, then the idea is to treat your chillies badly. The spiciness is the plants’ adaptation in a bid to prevent themselves from being eaten by animals. High temperatures are the most important factor if you want your chilli to be as spicy as possible. And of course, the variety you choose is key. You should start growing as early as you can to give the fruits time to mature as much as possible. Restricting water also plays a role. How much you feed your chillies is important, and for blisteringly hot chillies, less is more. Keeping plants a little stressed will make your harvest smaller – but the fruits hotter. Forgoing the liquid feeds so plants take their nutrition only from the soil or growing medium won’t kill them, but it will stunt them a little, therefore increasing capsaicin production (the substance responsible for a chilli’s heat).
Learn more
10 Chilli Types Ordered By Their Spiciness (In Scoville Heat Units)
IN THIS GUIDE Spiciness Scoville Heat Units 1) ‘Anaheim’ 2) ‘Ohnivec’ 3) ‘Hungarian Wax’ 4) ‘Jalapeño’ 5) ‘Serrano’ 6) ‘Peperone Picante Calabrese’ 7) ‘Bolivian Rainbow’ 8) ‘Cayenne’ 9) ‘Bird’s Eye’ 10) ‘Habanero’ References All chillies are species of Genus Capsicum.1 This genus – along with potatoes, tomatoes, and many other plants, some of them quite surprising – is a member of the Family Solanaceae, the Nightshade Family of plants. The capsicum genus has five species: C. annuum, C. chinense, C. frutescens, C. pubescens, and C. baccatum. Each of them contains numerous varieties and a great number of hybrids as well. A sizeable majority of the varieties that are used all over the world belong to C. annuum and C. chinense. The first includes most of the well-known ‘normal-hot’ varieties and the second most of the well-known ‘super-hot’ ones. Spiciness The heat or spiciness of a chilli comes from capsaicinoids which are a class of chemical compounds of which capsaicin is the most common.2 Capsaicinoids are found in all chillies in concentrations from trace or negligible to off-the-scale. On the point of spiciness, the heat or pungency of a particular variety of chilli is a quantifiable value, as many readers may know. Scoville Heat Units In 1912 – over a hundred years ago – Wilbur Scoville, an American pharmacist, devised a not-too-precise but ingenious method to measure the heat or spiciness of chillies.3 Very concisely, he had volunteer tasters try out diluted solutions of various chillies. (The inverse of the) the dilution at which a particular chilli’s heat became undetectable was that chilli’s heat rating. This number came to be called ‘Scoville Heat Unit,’ abbreviated as SHU. Chillis (or peppers) that have no heat and are classified as ‘sweet peppers’ have 0 to 100 SHUs. In the kitchen we use chillies as a spice (and bell peppers as a vegetable) and are free to see and treat them as such; however, all Capsicum species, be they whatever kind of chilli, are fruits from a botanical perspective.4 For the purposes of this article, chillies are not props for showing off in chilli-eating competitions but are a food ingredient. Therefore, we do not discuss the ‘Nuclear’ Chillies – let alone ‘Dragon’s Breath’ or ‘Carolina Reaper’. Nor do we list exotica like black chillies. A very nice assortment of sensible choices selected for usability in the kitchen, enjoyability in dishes, and tingle-tastiness on the palate, is presented underneath. We list these in order of increasing heat and spiciness since that is, after all, the primary attribute of chillies. For informative purposes we mention the SHU value for each variety of chilli we list underneath. 1) ‘Anaheim’ As this variety’s name suggests, it is very popular on America’s West Coast. This dark green-to-red variety is the ‘go-to’ chilli for homemade dishes, being very mild and piquantly flavourful. Perfect for all who clamour for spicy foods! Only 500 to 2,500 SHUs. 2) ‘Ohnivec’ This little-known chilli is a fairly ‘adjustable’ variety; more so than most. Pick it young and yellow and it is totally mild; pick it when it’s deep red, and it has a bit of a kick (but only a bit). At 20-25cm these chillies are BIG. Moreover, these plants bear profuse fruit. It is an easy-to-grow variety, is also easy on the palate, and has a ‘juicy’ taste. 1,000 to 2,500 SHUs but specimens may reach 3,500 SHUs. 3) ‘Hungarian Wax’ This mild variety is very easy to grow indoors. It is not only well suited to the British climate, it is also well suited to the British palate! This popular variety starts off yellowish-green and turns red on the plant. It is one of those whose heat is very strongly dependent on its maturity on the vine, as Horticultural Colin Skelly shares: “I can attest to the suitability of ‘Hungarian Wax’ for the British climate. “This is my go-to cultivar for reliability and variability of heat; low when green and pretty hot when red. “It does make for the odd surprise in heat, which can be exhilarating or excruciating depending on your preference!” 5,000 to 10,000 SHUs but specimens may range from a low of 1,000 to a high of 15,000. This variety has also been given the RHS Award Of Garden Merit. 4) ‘Jalapeño’ Though somehow this name usually conjures up images of intense heat, a Jalapeño is actually one of the milder varieties, ranking exactly nowhere on the H-Bomb scale. This biggish and thickish green chilli is one of those flavourful ones, having – besides a pleasant dose of heat – citrusy-tangy taste. In Texas, a pizza is not considered complete without Jalapeños. 2,500 to 8,000 SHUs. 5) ‘Serrano’ One might call this variety a smaller and hotter version of a Jalapeño. Though this chilli starts off green and progresses to orange or red (or yellow), it is usually picked green. Unlike a Jalapeño, the Serrano is not often used as a topping or diced in foodstuffs but is roasted or used to make salsas and sauces. 10,000 to 22,500 SHUs. 6) ‘Peperone Picante Calabrese’ If a chilli can be called ‘flavourful,’ this one is at least a prime contender. A deep, lovely red in colour and with that classic chilli shape, the Calabrian has a nice level of heat but has a wonderfully complex flavour, being tangy, fruity, and a little smoky. This versatile chilli is as suitable for home-cooked foods as it is for high-end cuisine. 25,000 to 40,000 SHUs. 7) ‘Bolivian Rainbow’ Though far from an ‘essential’ variety, you just have to mention this pretty baby – after all, it’s a two-in-one, being a highly ornamental plant but also a bona fide chilli. At any given time during the fruiting season, this plant bears its small, inverted fruit in yellows, oranges, reds, and purples – this plant is Nature’s Pixie Lights! At the same time they are that ‘just right’ hot and spicy, and are even easy to grow. 20,000 to 40,000 SHUs. 8) ‘Cayenne’ If it’s long, thin, and red, it’s a Cayenne Chilli. Cayenne powder and flakes, so commonly found in Tex-Mex style restaurants, is the dried form of the Cayenne Chilli. Also, many or most Spanish or Mexican-style hot sauces have Cayenne as an ingredient. Tried diced or sliced, you will find an appreciable level of heat. It has a very zesty and pungent, slightly smoky, taste. 30,000 to 50,000 SHUs. 9) ‘Bird’s Eye’ Identified with Thailand to the extent that it is even called ‘Thai Chilli,’ this narrow, pointed chilli packs near-bomb-level heat. Unlike most other chillies, this one is borne upright (pointing upwards). Used in most Far-Eastern cuisines, this is the chilli that gives Thai Cuisine its distinctive hot spiciness, a tingling, citrusy, and very tasty heat. It is too hot to eat comfortably except finely chopped, and is wonderful to make sauces, curries, and pastes with. 50,000 to 100,000 SHUs. 10) ‘Habanero’ This is an extremely hot naturally-occuring chilli and this is where the chilli heat-bombs begin. Not merely super-hot, the Habanero is tasty and citrusy. Unlike our other varieties this one’s a type of Capsicum chinense. Though it did not originate in Mexico, it is now claimed by the Mexicans as their own and is a widely-used spice in Mexican cuisine, sauces, and pastes.5 Habanero Chillies are easy to grow and the plants are productive but the fruit can hardly be chopped up, ground, or blended and added to homemade food given its intense heat! SHU 100,000 to 350,000 SHUs but some cultivars go up to 600,000 SHUs. Habanero has also been awarded the RHS AGM. References 1. Capsicum species. (n.d.). Oxford University Plants. Retrieved March 14, 2023, from https://herbaria.plants.ox.ac.uk/bol/plants400/Profiles/cd/Capsicum 2. The Science of a Chilli. (2019, March 2). The Oxford Scientist. Retrieved March 14, 2023, from https://oxsci.org/the-science-of-a-chilli/ 3. The Scoville Scale. (n.d.). The University of Bristol. Retrieved March 14, 2023, from http://www.chm.bris.ac.uk/motm/chilli/scoville.htm 4. Is a Pepper a Fruit or a Vegetable and Why? (n.d.). Eufic. Retrieved March 14, 2023, from https://www.eufic.org/en/healthy-living/article/is-a-pepper-a-fruit-or-a-vegetable-and-why 5. Habanero. (n.d.). World Crops. Retrieved March 14, 2023, from https://worldcrops.org/crops/habanero
Learn more
Calendula Will Readily Self-Seed, Deadhead Them If You Only Want This Season's Flowers
IN THIS GUIDE Why Deadhead Calendula? How To Deadhead Calendula Calendula is a beautiful annual flower, but it is not just an ornamental. Calendula can also be a very valuable addition for wildlife, and a great companion plant for your vegetable garden – helping to draw in pollinators and predatory insects to keep pests at bay. Calendula can bloom over a relatively long period, through the summer and sometimes into early autumn. When they are happy they often self-seed readily and pop up year after year. One key thing to consider when growing Calendula is deadheading, and whether this is something that you want or need to do. Difficulty Easy Equipment Required Secateurs, gloves (optional) When To Deadhead Through summer; early autumn Why Deadhead Calendula? It is important to note that deadheading Calendula is not strictly essential. You don’t need to undertake this job at all, unless you wish to do so for a specific reason. The main reasons to deadhead Calendula are: To encourage the plants to produce more blooms. To reduce overcrowding and ensure good light and airflow. To keep your garden looking neat and attractive. To prevent the plants from self-seeding. Calendula do tend to flower freely over the summer whether or not you deadhead. But deadheading can encourage the plants to put their energy into forming new flowers, rather than putting it into producing seed. You might not need to deadhead the spent blooms if, instead, you harvest the blooms for their edible petals, use them for other purposes around your home, or use them for cut flower arrangements. If calendula are growing in profusion, sometimes, cutting or nipping off the spent blooms can help to keep the plants healthy and flowering well by reducing congestion and allowing good airflow around the plants. You may also prefer to remove the spent blooms if you like your garden to look immaculate all summer long – for aesthetic reasons. If the calendula are in the right spot, they can self-seed readily, and this can be wonderful for a low-maintenance scheme. But in certain circumstances, when growing them as an annual with annual crops in rotation, for example, you might not always want them to do so. So removing the faded flowers before seeds form can stop the plants from spreading their seeds around the area. “If seed heads are allowed to develop and dry out on the plant, seed can be collected and placed in a paper envelope, kept cool and dry over the winter and sown in the spring for next year’s flower display,” explains Roy Nicol, Professional Gardener and Horticulturist. “Although the resulting flowers may not be the same as the original, I find it’s an easy way to grow new plants for free!” How To Deadhead Calendula The deadheading process could not be simpler. You can simply nip off the flowering heads with a finger and thumb once the bloom is spent. Or, if you are a perfectionist, or the space seems overcrowded, you can take a pair of secateurs or gardening scissors and snip off the flowering stems as low down as possible. How zealous you are about deadheading will depend on how many calendulas you are growing, where, and in what type of scheme. Just remember, while it can be beneficial, deadheading calendulas is not something to worry about if you are short on time.
Learn more
These 9 Calendula Varieties Are Perfect For Bedding Arrangements Or Underplanting
IN THIS GUIDE 1) C. officinalis 2) C. officinalis ’Snow Princess’ 3) C. officinalis Fiesta Gitana Group 4) C. officinalis ‘Apricot Pygmy’ 5) C. officinalis Kinglet Mix 6) C. officinalis ‘Dandy’ 7) C. officinalis ‘Daisy Mixed’ 8) C. officinalis ‘Indian Prince’ 9) C. officinalis ‘Orange King’ Calendula officinalis and its cultivars have lanceolate leaves with the lower, mature leaves tending to spatulate and the upper, younger leaves to oblong. They are of an unusually bright yet rich green shade. The margins are usually entire but may be wavy and the lamina slightly hairy. The single or double flowers are typically 5-8cm across, with sizes varying by variety, as does plant height and spread. A select list of varieties is outlined underneath – after introducing the species, we have ordered the cultivars by the colour tones of the flowers. All varieties, with a hardiness of H5, are hardy almost throughout the United Kingdom – however, they are usually treated as annuals. “Calendula cultivars are typically used in bedding arrangements or at the front of a border to underplant taller plants, producing a blaze of colour all summer long,” shares Master Horticulturist and Professional Gardener Roy Nicol. 1) C. officinalis The mother species and it is, in dead earnest, a treasured plant to many people. It reaches heights of around 50cm with a spread only slightly less than the height. The flowers are single and typically of a flame orange hue and they are 5-6cm wide. The very long flowering season spans all of summer and autumn and sometimes even beyond. 2) C. officinalis ’Snow Princess’ Grows to only about 30cm with about the same spread. The two-toned double flowers display creamy shades on their undersides and a light buttery yellow on the upper surfaces. The flowering season covers summer through mid-autumn. 3) C. officinalis Fiesta Gitana Group Also reaches a height and spread of only about 30cm. The double flowers are about 4cm wide and are of a buttery yellow to sulphur yellow tone, sometimes to light orange. It is an especially floriferous variety that blooms in summer and autumn. This variety has received the RHS Award of Garden Merit. 4) C. officinalis ‘Apricot Pygmy’ Growing to only about 25cm, this variety’s leaves are particularly aromatic. The small flowers are semi-double and are in shades of yellow, from a pale, pastel yellow to light apricot orange. It blooms from summer deep into autumn. 5) C. officinalis Kinglet Mix Reaches heights of 40-50cm. It bears large, crested fully double flowers. This mix of Kinglet varieties throws up floral colours from the palest of yellows through sulphur yellow to flame orange. This early bloomer produces flowers from late spring to early autumn. 6) C. officinalis ‘Dandy’ An especially tall variety reaching heights of 50-60cm. It produces large, fully double flowers of a light but bright and vibrant orange hue with startling green centres. They are among the more ornamental of C. officinalis varieties. Another early bloomer, it produces flowers from late spring to early autumn. 7) C. officinalis ‘Daisy Mixed’ A dwarf that grows to only about 25cm with a similar spread. It is a floriferous variety that bears single flowers that are more daisy-like than most C. officinalis cultivars. They are of a tangerine orange to reddish-orange colour. It has a particularly long flowering season that starts at the beginning of summer and continues past autumn. 8) C. officinalis ‘Indian Prince’ One of the stateliest of all varieties, attaining heights of 65-75cm. It also produces among the deepest- and darkest-hued flowers. Though the flower is usually a rich, dark orange with a dark brown centre, they are sometimes even brownish-orange to russet. It flowers through summer and autumn. 9) C. officinalis ‘Orange King’ Reaches heights of 40-50cm. It produces among the largest flowers that are fully double and which are of a bright orange colour – indeed, in view of their shape, form and colourations, they could be mistaken for Tagetes Marigold blooms. It flowers from late spring to early autumn.
Learn more
Learn To Grow Pot Marigolds As Annuals And Get Charming Golden Flowers Every Year
IN THIS GUIDE Overview Habitat & Growing Conditions Why Grow Pot Marigolds? Where To Grow Calendula Calendula Care Common Problems References In single through double forms and in tones from softest yellow to deepest orange, calendula is genuinely pretty. The Calendula genus is a member of the very large Aster family and it probably shows in the disk-shaped daisy-like flowerheads. Indeed, Calendula arvensis flowers simply look like a yellow daisy! C. arvensis The most well-known Calendula species and the one from which almost all cultivars descend is C. officinalis, popularly known as ‘Pot Marigold.’ All told there are only 15 to 20 species in this small genus.1 Overview Botanical Name Calendula officinalis Common Name(s) Pot Marigold, Common Marigold Plant Type Annual / Biennial Native Area Western & Central Europe, South Asia, Northern Africa Hardiness Rating H5 Foliage Bushy, deciduous, simple alternate leaves When To Sow March, April Plant Out After last frost ‘Pot Marigold’ is not to be confused with what one may call the ‘Marigolds Proper’ which bear fully double semi-dome-shaped golden flowers and which are members of a different genus, Tagetes. Calendula species are herbaceous deciduous plants and a given species may be an annual, biennial or short-lived perennial, depending on the climate it is grown in. C. officinalis and its cultivars are biennials or short-lived perennials but are usually treated as annuals in the UK and other temperate regions. The Calendula flower – like those of other members of the Aster family – is actually an inflorescence or a composite flowerhead made up of innumerable tiny flowers. It has two parts, the capitulum, which is the central disk, comprising numerous disk florets, and the ‘petals’ which are actually individual ray florets. The colours are sunny and golden, verging from a light bright yellow to deep rich orange. Some varieties produce bi-coloured or graduated flowers, and a few varieties produce flowers with pink or reddish edging. A few new varieties produce creamy and pinkish flowers. Habitat & Growing Conditions The Calendula genus is native to Western and Central Europe, South Asia, and Northern Africa.2 The ‘original’ native range of C. officinalis species is restricted only to Spain and the Western Mediterranean region; in stark contrast, the range of countries it has been introduced to spans nearly the whole world including even some sub-tropical and tropical regions.3 It was naturalised in the British Isles no later than the 10th century when it was primarily grown in cottage gardens for use in pot cooking.4 It grows in the wild near inhabited areas in sheltered locations. Why Grow Pot Marigolds? The ‘Pot Marigold’ flower has an aroma rather than a scent or a fragrance per see. The aroma is less like what one expects from a flower and somewhat like the resin or sap that may ooze from tree bark with a note of spice. Conversely, from a visual standpoint the ‘Pot Marigold’ bloom verily epitomises flowers – if a child is asked to draw a flower, they will end up drawing something that closely resembles a Pot Marigold! Having sung the plant’s praises, it would be remiss not to mention a few other qualities. So, to round up, C. officinalis and its cultivars are valued for their long flowering seasons – some varieties bloom all through summer and past autumn. They number among the more pest-resistant and disease-free plants, being affected by no more than a couple of problems. They are hardy to H5, and you can grow them as biennials most anywhere in the United Kingdom. “Typically however they are grown as ‘half-hardy annuals’, started from seed in the early spring and dug up after the first hard frosts,” adds Roy Nicol, a Master Horticulturist. Finally, these plants really do – to use a well-worn gardener’s phrase – thrive on neglect. Where To Grow Calendula C. officinalis and its cultivars are not the most beautiful of ornamentals but they are innocently and charmingly pretty in their own right and are ideally suited to cottage gardens and country gardens. The flowers’ open, sunny presentation make them excellent choices for potted plants situated on the patio or the balcony. Commonly considered a very fine bordering plant, consider that C. officinalis varieties range in heights from 25-50cm and bear single through fully double flowers in pale yellow through vibrant, rich orange. As a result, one or another appropriate variety will be well-nigh perfect as edging, border, or centrepiece! If you can manage the two plants’ somewhat differing water needs, pair them with bluebells to set up marvellous complements in floral forms and colours, while mixing and matching heights. Perhaps above all, C. officinalis is recognised as a first-rate companion plant in the herb and vegetable garden. It draws some pests away from veggies which they’d otherwise destroy and entirely repels other pests including harmful nematodes. Tomatoes, cucumbers, beans and asparagus are among the vegetables that greatly benefit from having Pot Marigolds as companions. Calendula Care There is nearly nothing to cultivating Pot Marigold and other Calendulas. Soil Requirements Calendulas in general can and do grow in poor soil, not that you should plant them in such soil; at the same time, very rich and fertile soil or heavy soil does not suit them either. A light soil composed of sand and loam with 30-40% organic compost mixed in will suit these plants perfectly. The soil must drain very well and should not stay at all waterlogged. They may be planted outdoors or in containers and traditional clay pots though these should have sufficient drainage holes. The best soil pH for C. officinalis varieties is in the Slightly Acidic to Neutral range, that is 6.1 to 7.3, not that it is necessary as this unfussy plant will grow even in Strongly Acidic through Slightly Alkaline soils. Preferred Aspect The ideal conditions are full sun in the morning, moderate temperatures, and filtered or dappled afternoon sun or shade if the summers are very warm. The plants require sun to grow and bloom but the flowers need protection from hot sun to maintain freshness. So much for ideal – this trooper of a plant will grace your garden even if conditions are nowhere close to ideal. Watering Seedlings and growing plants require very regular watering; they should be watered in moderation every other day. Mature plants’ water needs are low to moderate in fair weather. Increase the amount and frequency of watering in hot weather as most varieties tend to wilt in the heat, and keeping the soil moist helps to deter the fungal infection powdery mildew. C. officinalis (and its varieties) happily self-seeds but does not spread too much nor is it considered invasive. Feeding As long as plants are rooted in open soil that has been amended with organic matter, they need no fertilising. Maturing plants growing in poor soil or in containers may be fertilised in early summer with a balanced fertiliser diluted to a strength that is less than recommended bearing in mind that these plants do not respond well to overly rich growing conditions. Winter Care If your plants are outdoors and you wish to treat them as biennials or (short-lived perennials), if you live in a coldish region then before the onset of winter put a layer of mulch of 6-8cm around the roots. If you anticipate a frost, protect the plants with horticultural fleece. It is not difficult to confuse some Pot Marigold varieties with Tagetes Marigolds! Pruning As Pot Marigold and full-size cultivars grow and mature, you may pinch off the growing stem to limit height and trigger bushier growth. Otherwise plants may develop a gangly form and be prone to legginess in warm weather. Common Problems The species and the varieties are fairly pest-resistant and disease-free plants in the main. Indeed, in the vegetable garden they function as ‘decoy plants’ and will end up drawing aphids to themselves. Apart from aphids, they may succumb to powdery mildew, as Roy explains further: “This fungal infection thrives where plants are dry at the roots and was particularly evident on C. officinalis plants during the drought of summer 2022.” References 1. Calendula | Description, Uses, & Facts. (2009, February 5). Encyclopedia Britannica. Retrieved March 13, 2023, from https://www.britannica.com/plant/calendula 2. Fiorentino, M., Gravina, C. F., Piccolella, S., Pecoraro, M., Formato, M., Stinca, A., Pacifico, S., & Esposito, A. (2022). Calendula arvensis: A Systematic Plant Analysis of the Polar Extracts from Its Organs. Foods, 11(3), 247. https://doi.org/10.3390/foods11030247 3. Calendula officinalis. (n.d.). Kew Royal Botanic Gardens. Retrieved March 13, 2023, from https://powo.science.kew.org/taxon/urn:lsid:ipni.org:names:187894-1 4. ASE’s Medieval Garden. (2021, December 16). UCL. Retrieved March 13, 2023, from https://www.ucl.ac.uk/archaeology-south-east/news/2021/dec/ases-medieval-garden-4-flowers
Learn more


