

Growing
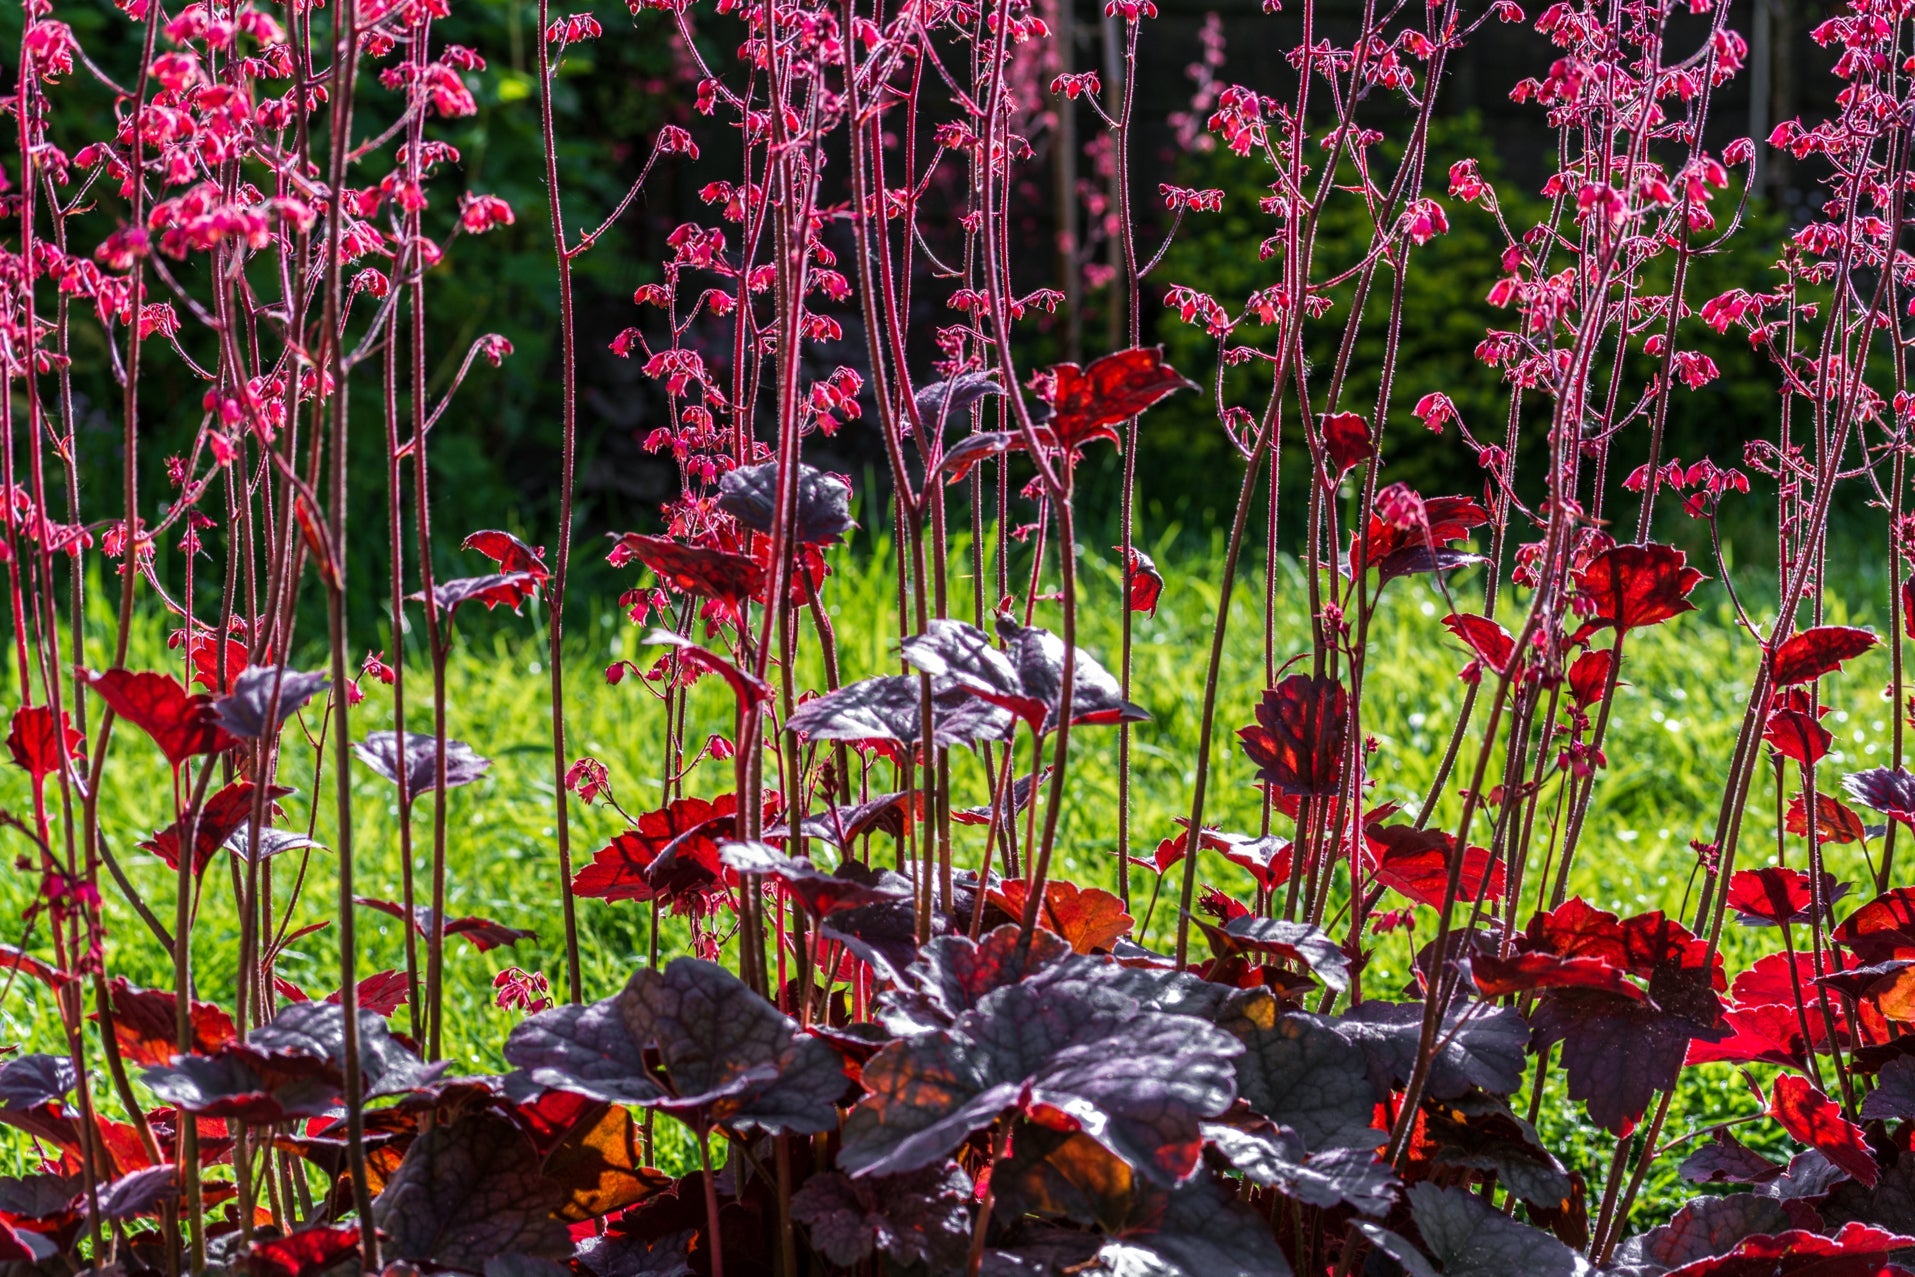

Divide Heuchera To Prevent Overcrowding And Keep Your Borders Looking Their Best
IN THIS GUIDE 1) Lift The Mature Plant 2) Take Divisions 3) Discard The Old Centre 4) Pot Up New Divisions 5) Place In A Suitable Location 6) Plant Out If you already have a heuchera in your garden, you will already know how attractive and versatile they can be in your planting schemes. If you have a mature heuchera, by far the easiest and quickest way to propagate it is by means of division. Division can also help you reduce overcrowding and keep your beds and borders looking good and performing well. Heuchera is best divided in spring. To lift and divide heuchera, there is a very simple process to follow: Lift the mature heuchera plant. Pull off a number of small, vigorous sections from around the edges of the clump. Place the old, woody centre of the plant on the compost heap. Plant each of the new sections into its own pot filled with free-draining potting mix. Place them in a sheltered and shaded spot to root, watering well in hot weather. Plant into their final growing positions in autumn or the following spring. This process is described in a little more detail below. Difficulty Easy Equipment Required Mature heuchera and a garden spade When To Prune Spring 1) Lift The Mature Plant Heucheras do have a tendency to become woody and bedraggled as they age and over time. They will tend to produce fewer leaves and flowers and can develop a bare centre. So, it is best to divide the plants every 3-4 years to keep your garden looking good and to keep them healthy and vigorous. Division also, of course, allows you to take one plant and turn it into a number of new plants (identical to the parent) for your garden. The first step is to identify a plant that needs division, or that you wish to propagate in this way. Once you have chosen a plant for this treatment, the first step is to ease a spade or fork around the edges of the plant and lift it from the soil. Heuchera is fairly shallow-rooted so you should have little difficulty in lifting it from the ground. 2) Take Divisions Once you have lifted the clump, identify and pull off a number of small sections that seem healthy and vigorous from around the outer edges. Pulling these off usually allows for separation at a natural breaking point. You can make any number of divisions, as long as each one has several roots and at least 2-3 healthy shoots. “Have you ever started to divide a plant and instead of ending up with a nice small plant, with roots and shoots, you’ve been left with a root-less piece of stem?” asks Horticultural Consultant Peter Lickorish. “Don’t panic and also don’t discard it! Basal cuttings, short clusters of young leaves attached to a stem, can be taken from heucheras. “Simply dip their tip in rooting powder and place them in compost, in a small pot, to half their depth. “The same can be attempted with any accidentally root-free divisions.” 3) Discard The Old Centre If the centre of a mature plant has become old and woody, and the plant is looking a little worse for wear, you should discard the oldest core section – placing it into your composting system. 4) Pot Up New Divisions Take each of the new sections you have created and place each one into a pot. The pot should be filled with a free-draining potting compost with around 25% added horticultural grit. Bear in mind that heucheras cannot stand waterlogged soil and if you leave them in soggy compost, they are liable to rot. 5) Place In A Suitable Location Choose a shady, sheltered spot to place your pots, and make sure you water well over the summer, especially in hot and dry weather. 6) Plant Out In autumn, or the following spring, you can plant out your divisions. Just remember that most heucheras will prefer a spot with part or dappled shade and well-drained soil. “When it comes to potting young divisions, never choose a pot that is too much bigger than their root system,” says Peter. “You may think you’re being generous, but this often leaves plants sitting in a mass of damp compost and can cause them to rot.”
Learn more
Why Heuchera Is An Excellent Choice For Perennial Container Displays
IN THIS GUIDE Should You Grow Heuchera In Pots? Choosing Pots For Coral Bells Sourcing Compost Potting Up Heuchera Potted Heuchera Care Heucheras are incredibly versatile and hardy perennial plants that can work very well in a wide range of garden settings. They are commonly grown at the front of garden borders, but you might be wondering whether you can also grow heuchera in pots. Should You Grow Heuchera In Pots? The good news is that heuchera can quite easily and effectively be grown in containers. In fact, they can be an excellent choice for perennial container displays. Growing heuchera in containers can be a particularly good idea where garden soils are heavy and prone to waterlogging since these are plants that cannot cope with those conditions. Choosing Pots For Coral Bells When choosing a container for heuchera, you should first think about how long the plants will be in their containers for. Often, you may grow heuchera temporarily in pots, before you place them out into your garden. This can be a good strategy for enabling smaller plants to increase in size, before being planted in the jostling of a mixed border. In this case, you will need only smaller pots, since the plants will be planted out before they get the chance to outgrow them. If you plan on growing heucheras in a container longer term, you must ensure that it is large enough to accommodate the roots with just a little space around the sides. In either case, it is also important to make sure that the container has good drainage holes at the base. Sourcing Compost Fill your chosen container or containers with a suitable compost or growing medium. Any good-quality peat-free potting mix, with some extra grit mixed in to improve drainage, should work well. This can be a mix you purchase or one that you make yourself at home. Potting Up Heuchera When potting up Heuchera, the most important thing to note is that you must plant so that the centre or crown is at, or very slightly above, the surface of the soil. How Many Can You Plant Per Pot? You can place a single plant in a pot, or, in larger containers or planters, you can consider planting heucheras alongside other plants in mixed displays. Heuchera does well with the related plants Heucherella and Tiarella as companions since these plants like the same growing conditions. You could also combine them in larger containers with a range of other plants. Potted Heuchera Care Here are some of the key things to consider when growing your heuchera in a container: Place heuchera in pots in dappled or partial shade unless you have a darker leaved variety and want to bring out more intensity in the leaves, in which case placing them in a sunnier spot can be a good idea. Water regularly and remember that plants in containers will need to be watered more frequently than those in the ground. Water well throughout dry spells in spring and summer. Make sure that excess water can drain away freely and that no waterlogging takes place. In winter, if it is very wet, move containers to a sheltered or undercover spot if they are at risk of becoming too soggy. Add a mulch of homemade compost or other organic matter around the plants in the spring. Provide regular liquid organic plant feeds (such as compost tea) to heuchera growing in containers over the spring and summer months. Trim off spent flowering stems if you wish, and tidy up the plant by trimming off damaged leaves. Lift and divide your heucheras every few years to keep them healthy and vigorous. “I have one command I consider essential if growing heuchera in pots: keep on the look-out for vine weevil,” shares Master Horticulturist Peter Lickorish. “In my experience, their root-eating grubs usually cause significantly more damage in containers. “If you spot any wilting when the compost is moist, this is a sign that the roots have been chewed. “If the pest is spotted, plants can be lifted and vine weevils around the roots disposed of. “Replant in fresh compost and in this way, plants can be saved.”
Learn more
Daylilies Are Suitable For Pot Growing, But They'll Need Extra Care And Protection
IN THIS GUIDE Are Daylilies Suitable For Pot Growing? Choosing Containers For Daylilies Container Compost For Daylilies Potting Up Hemerocallis Potted Daylily Care Daylilies can work well in many gardens, adding a touch of the exotic and vibrant colour over the summer months. If you don’t have a lot of space to play with, you might be wondering whether you can grow daylilies in pots, and, if so, you may be wondering exactly how to do so. You’ll find the answers to your key questions below. Are Daylilies Suitable For Pot Growing? The good news is that daylilies can be a great choice for container cultivation. However, Steve Amy from The American Daylily Society suggests that although it is possible to grow daylilies in containers, this will require extra care. “The problem with growing them in pot is that if the containers hold too much moisture for the plant, they will rot the roots and crown. “The containers also cannot be allowed to freeze solid in winter as the roots will likely be killed. “Tilting them on their sides over winter to avoid water filling the container and freezing the roots can sometimes work.” Though plants in containers will need a little more care and maintenance than those growing in the ground, many types are well suited to the conditions that container gardeners can provide. When growing in pots, it is usually best to choose smaller cultivars, but with a sufficiently large container, all daylilies can potentially be grown in pots or planters, as Paula Dyason from Strictly Daylilies explains: “Containers can be used for all daylilies if they are the appropriate size and have adequate drainage. “Although this is usually more conducive to smaller clumping plants, you can grow any size of daylily if the pot is large enough.” Choosing Containers For Daylilies When choosing a container for daylilies, remember that they require moist yet reasonably free-draining conditions. Make sure that you avoid waterlogged soil as this can become an issue for these plants, so choose a container with good drainage at the base. “They will need to have frequent watering during bloom season, so good drainage in the pot is essential,” Paula says. The size of the container that you choose for your daylily will depend on its stage of growth and the particular cultivar that you have chosen. Select a container large enough to accommodate the root system of the plant, adding around 2cm or so of compost, to give the plant a little room to grow. As a general rule, a full-sized daylily should not be planted into anything smaller than a 5-litre container. “We grow all of our display plants for shows in 15-litre pots and they do great,” shares Paula. Container Compost For Daylilies When you are placing daylilies in pots, it is important to think about whether you are growing them in pots temporarily, before you place them out in the garden (as you might if you have grown them from seed, or purchased bare-root plants) or will grow them in a container longer term. If you are growing daylilies in containers for a shorter period, you should plant them into any good quality peat-free potting mix. If you are keeping them in containers longer term then I’d recommend choosing a soil or loam-based potting compost or a homemade mix of compost and garden soil. “I’ve grown large Hemerocallis palnts in large pots,” shares Colin Skelly, a Master Horticulturist. “These are less prone to freezing solid than small pots. I use John Innes no.3 with some added horticultural grit to provide sharper drainage. “Always ensure your pot has drainage holes!” “The compost needs to be well-draining and supply adequate nutrients,” Paula adds. Potting Up Hemerocallis “Potted daylilies will generally need to be divided and repotted more frequently than those in the ground,” shares Paula. When potting up daylilies, make sure that you plant them to the same depth that they were at in their previous pot, or to the soil mark on bare-root plants. How Many Can You Plant Per Pot? It is important to give each plant room to grow, but you can potentially grow several daylilies in one larger container, or combine daylilies with other plants in a mixed perennial display. Just remember that with container displays, you will need to avoid congestion and divide plants within them every few years. Potted Daylily Care Here are some key things to note about caring for daylilies in containers: Place containers with daylilies in full sun or dappled shade. Water well and consistently throughout the growing season. Remember that containers dry out more quickly, so will need more watering than plants in the ground. Mulch around the tops of pots with organic matter to retain moisture and replenish nutrients. Feed regularly through spring and summer with an organic, potassium-rich liquid plant feed, as Paula shares: “We use a balanced time-released fertiliser in all of our pots and water daily during the growing season.” Remove spent flowering stems at the base when flowers are done. “Another thing to think about is that healthy daylilies will grow and multiply and soon may fill a container with many divisions. This requires the plant to be divided and separated to avoid crowding, which would cause the plant to suffer,” says Steve Amy. It is recommended to pot up as required as daylily clumps grow; divide and pot up divisions when plants become congested, which is usually every 3-5 years. If you wish, you can remove faded foliage in autumn or early spring, but you can also consider leaving this in place for the wildlife in your garden. Some daylilies are evergreen, while most are deciduous, but as hardy perennials, these plants can add interest and appeal to your garden for many years. When cared for and positioned correctly, you should find daylilies relatively easy and straightforward container plants to grow.
Learn more
Cut Back Daylily Growth 'To About 4 Inches' Shares Nursery Grower Paula Dyason
IN THIS GUIDE 1) Remove Spent Flowers 2) Cut Back Faded Foliage Daylilies are dramatic flowering plants that can add an exotic and interesting feel to your garden with little care. However, if you want to keep them in check, you can choose to prune your daylilies. “Hemerocallis don’t have to be ‘pruned’ but I believe the best practice is to cut down all remaining foliage and scapes prior to spring growth to about 4 inches,” shares Paula Dyason, from Strictly Daylilies. “Although this can be done anytime, it is best done from late autumn to late winter so it does not interfere with the blooming season.” There are two key things to think about when it comes to pruning these perennials: Removing spent flower stalks after they have finished flowering. Cutting back old and faded foliage on the plants. These steps are explained in more detail below. Difficulty Easy Equipment Required Secateurs or gardening knife When To Prune After flowering or in autumn or early spring 1) Remove Spent Flowers An individual flower on a daylily will, as the name suggests, bloom for only a single day. However, each plant will produce more flowers in quick succession, so you will be able to enjoy blooms over a period of a number of weeks over the summer months. To keep a daylily plant flowering well, it is a good idea to remove the entirety of a stem down to the ground as soon as it has finished flowering altogether. Unless you wish to collect seed from a plant, removing the finished flowering stems (deadheading) is a good idea. This is because this will encourage the plant to send up new flowering stems, so it should lead to blooms over a longer period. Removing spent stems will also ensure that the plant does not waste its energy on seed production when this is not required or desired. Simply take a clean, sharp pair of secateurs or gardening knife and cut the stems off right at the base. 2) Cut Back Faded Foliage The only other pruning job for daylilies is an optional one. In autumn, at the end of the season or in the early spring, you can cut back old, faded foliage to neaten up your beds or borders. “Poor-looking foliage after all bloom is over can also be trimmed to encourage healthy new growth,” says Paula. However, this is not of any benefit to the plant and is purely for aesthetic reasons. “It’s important to note that Hemerocallis scapes cannot be ‘Chelsea Chopped’ to encourage more or later blooming.” Steve Amy from The American Daylily Society explains why he doesn’t prune back the faded foliage on his daylilies: “I leave the foliage on the plants through the winter months when the plants go dormant. “The foliage acts as a mulch to cover the plant roots over the harsh months. “I then prune the old dead foliage in the spring and the daylily will sprout new foliage on the fans itself afterwards”. So, if you can live with a little untidiness, consider leaving the old leaves in place, especially over winter, as these provide useful shelter for a range of insects and other wildlife. It is a good idea to avoid taking steps which will make your garden less of a haven for the many other creatures who share your space, so with this and other perennials, I recommend that you leave faded foliage in place wherever possible.
Learn more
Divide Hemerocallis In 4 Steps With This Advice From The American Daylily Society
IN THIS GUIDE 1) Lift The Mature Clump 2) Clean Off Soil 3) Divide The Root Mass 4) Replant Divisions Daylilies, also known as Hemerocallis, are attractive perennial flowers for your garden. They are relatively easy to grow and care for and can be propagated fairly easily through division. The divisions of a hybrid plant, unlike the plants grown from seed, will be identical to the parent plant. You can divide an established clump of daylilies every 2-3 years. Not only can you obtain new plants, but it’s also a good idea to divide your daylilies every few years as their clumps can become congested, as Steve Amy from The American Daylily Society explains: “Daylilies can create a large plant when healthy and build many divisions in the clump. “When there are too many divisions (fans) the entire clump can end up vying for the nutrients and water and, if not enough is available, the clump will suffer”. This job should be successful at any time of year, but the best times to divide a daylily is in spring or autumn. To lift and divide daylilies: Ease a spade into the ground and gently remove the plant from the soil. Shake or wash off the soil so you can see the tubers and fibrous roots more clearly. Split the clump into smaller sections. Replant the divisions into suitable locations. Difficulty Easy Equipment Required Mature daylily, spade, garden fork When To Divide Spring or autumn 1) Lift The Mature Clump Place a spade or fork into the soil around the edge of a mature clump and ease it gently up out of the soil. Make sure that you go deep enough to lift the tubers and fibrous roots to keep them as intact as possible. 2) Clean Off Soil It can be helpful to shake or clean off the roots a little so that you can see more clearly what you are doing. 3) Divide The Root Mass Since daylilies are large, fibrous-rooted perennials, the tangled mass of tubers and roots at the base of the plant can be challenging to divide. It can be a good idea to put two garden forks back to back down the centre of the clump, then lever outwards to break the root mass in half. Once you have done this, you should then be able to pull apart the remaining halves to make more divisions as desired. “An established clump of Hemerocallis will produce many potential divisions,” shares Master Horticulturist Colin Skelly. “As well as regeneration of the clump, this can also produce many additional plants that can either be replanted elsewhere or potted on for friends and neighbours.” “It is good to keep the clump to a few fans of perhaps 3-5 in order to have a good display of blooms”, Steve Amy suggests. 4) Replant Divisions Once you have separated your divisions, you should get these back into the ground, or into containers. Daylilies need reasonably free-draining conditions, with some moisture in spring and summer. However, they are adaptable and can cope with a wide range of soils. They can perform well in full sun or in light or dappled shade, but be aware thar deeper shade will lead to poor flowering. Choose a suitable spot and your new plants should reward you with their flowers for many years to come.
Learn more
Collect Daylily Seeds And Sow Them In Mid-Spring - They Should Flower In 2-3 Years
IN THIS GUIDE 1) Collect Seeds 2) Sow The Seeds 3) Harden Off & Plant Out 4) Wait For New Daylilies To Flower A daylily will bloom only for a single day, but the plants will flower abundantly in rapid succession over a number of weeks. These plants are a great choice because they are attractive hardy perennials which can grace UK gardens for many years. If you would like to grow daylilies in your garden, you will usually purchase plants in containers, or bare-root plants. Most of the plants grown in UK gardens are hybrids, and the plants grown from their seeds will not come true, with each growing into a unique new plant which may not resemble its parents. Those who do want to propagate new plants which look and perform the same will typically divide their plants. However, if you are interested in experimenting and creating new hybrid daylilies for your garden, then learning how to grow daylilies from seed could be an intriguing proposition. Difficulty Medium Equipment Required Seeds, seed tray or pots, growing medium, greenhouse or undercover area If you are interested in breeding new daylilies in your garden, here is a very brief overview of the process: Collect the daylily seeds. Sow seeds 1.5-2cm deep into pots or into the ground. If sowing indoors or undercover, harden off and transplant seedlings into the garden in spring. After 2-3 years, your new daylilies should produce flowers and you can see what new hybrids you have created. See more detail on each step below: 1) Collect Seeds If you want to experiment with creating new hybrid daylilies, then the first step is to cross-pollinate two parent plants with desirable characteristics, as Master Horticulturist Peter Lickorish explains: “If you have a plethora of lovely day lily varieties and would like to control which ones you combine, you will need to do the cross-pollination yourself. “You can use a cotton bud or even a pen, rubbed on clothing to generate static, as a way of collecting pollen and transferring it from the anthers of one flower to the stigma of a different plant. “This is a long pin-shaped piece, in the centre of the flower. The flower can then be covered, such as with a sock tied tight with string or a similar method, to prevent further pollination, though remember their flowers are short-lived anyway. “The genes will then mix in different proportions and some seedlings will grow on to be near copies of one parent, others varying mixes of the two.” Once you have done this, you can then wait for the flowers to fade. At this point, there is around a 50% chance that a seed pod will develop. If a seedpod develops and ripens successfully, you can then collect the black seeds and prepare to sow them. “Be aware that some of the bigger flowering Hemerocallis are tetraploids, meaning they have twice the normal number of chromosomes,” Peter adds. “This complexity in breeding means that you may be able to get seed from them, but you may not be able to collect viable seed from their offspring.” 2) Sow The Seeds Daylily seeds may be slow to germinate depending on temperature, but success rates can be good. Often, they will germinate successfully when directly sown into a suitable spot in a garden. However, in the UK, the best chance of success is to store seeds in your fridge for around six weeks and then sow them into pots or seed trays with peat-free potting mix, in a greenhouse or other undercover area in mid-spring. Sow them to a depth of 1.5-2cm and keep the medium moist. They should germinate within a couple of weeks if kept above 16°C. Once the seedlings are large enough to handle, these should be pricked out into individual pots. 3) Harden Off & Plant Out Grow on the daylilies by overwintering them for their first winter in the greenhouse. Then, harden them off and plant them out in spring, after the last frost date in your area. 4) Wait For New Daylilies To Flower While the process itself is fairly easy and simple, patience is required. You will have to wait for 2-3 years for the new plants to flower and reveal their secrets. So, it will be a long time before you learn the results of your hybridisation.
Learn more
8 Ravishing Red Cyclamen Varieties Including Elizabeth Waddington's Favourites
IN THIS GUIDE 1) C. persicum ‘Latinia Scarlet Red’ 2) C. persicum ‘Success Bright Red’ 3) C. persicum ‘Verano Red Improved’ 4) C. persicum ‘Rainier Scarlet’ 5) C. persicum ‘Sterling Scarlet’ 6) C. persicum ‘Laser Synchro Wine’ 7) C. persicum ‘Midori Synchro Scarlet’ 8) C. persicum ‘SeeWhy Scarlet’ Cyclamen varieties belong to two different groups; hardy cyclamen for growing outdoors, and more tender types which are typically grown as houseplants in the UK. When choosing a cyclamen variety to grow, it is important to think about where you would like to grow it and to choose the right option for that location. Of course, other considerations will also come into play, and one of those things is colour. Cyclamen of the hardy types are usually in shades of pink or white, and even those with the ‘rubrum’ suffix are usually a deeper pink rather than a true red. However, when it comes to indoor-grown cyclamen, there are several which do have truly red flowers. Here are some red cyclamens that you could consider growing as houseplants in your home, or as bedding plants towards the end of the season with frost protection. “Red Cyclamen make a festive statement indoors or out,” shares Master Horticulturist Colin Skelly. “I usually use pots of hardy Cyclamen outside of my front door at Christmas time, which provides a warm festive floral welcome alongside seasonal foliage and berries.” Note that all cyclamen in this list should be planted in a sheltered location and will grow to less than 0.5m in height and spread. 1) C. persicum ‘Latinia Scarlet Red’ HARDINESS RATING: H3 FLOWERING SEASON(S): Winter SUNLIGHT: Part Shade SOIL PREFERENCE: Any soil type; any pH The Latinia Series of cyclamen is a highly regarded series of cultivars which come in a range of different hues, including, for those who love true red blooms, the ‘Scarlet Red’ cultivar. There is also attractive variegation on the leaves. This series consists of compact plants with large flowers. Flowering is uniform, abundant, and fairly early. These cyclamens are known for their ease of growth and good performance. 2) C. persicum ‘Success Bright Red’ HARDINESS RATING: H3 FLOWERING SEASON(S): Winter SUNLIGHT: Part Shade SOIL PREFERENCE: Any soil type; any pH Another trademarked cultivar with the ‘Outstanding Cyclamen’ label is ‘Success Bright Red’. This is another true red cyclamen variety which can be an excellent houseplant for your home. It is also a part of the Latinia Series. These plants have marbled, deep green foliage which perfectly complements the stunning red blooms. 3) C. persicum ‘Verano Red Improved’ HARDINESS RATING: H3 FLOWERING SEASON(S): Autumn / Winter SUNLIGHT: Full Sun / Part Shade SOIL PREFERENCE: Any soil type; any pH The Super Verano Series is another popular series of cyclamen available in the UK. ‘Verano Red Improved’ is the option for those who love true red flowers. The flowers on this variety bloom abundantly above the heart-shaped leaves. This series of F1 cyclamen can be grown indoors, or, in the south, may sometimes be grown outdoors. This series was developed to avoid the flowering delay caused in other cultivars by high temperatures. 4) C. persicum ‘Rainier Scarlet’ HARDINESS RATING: H2 FLOWERING SEASON(S): Autumn / Winter SUNLIGHT: Full Sun / Part Shade SOIL PREFERENCE: Loam or sand; acidic / neutral pH This red-flowered cyclamen from the Rainier Series can make an excellent houseplant, bringing a cheery splash of red colour to your home over the festive period and brightening the place up for Christmas. Kept in a cool, bright room they should flower for several weeks and may even be coaxed into flowering in subsequent years if cared for correctly. 5) C. persicum ‘Sterling Scarlet’ HARDINESS RATING: H2 FLOWERING SEASON(S): Autumn / Winter SUNLIGHT: Part Shade / Complete Shade SOIL PREFERENCE: Any soil type; any pH This red cyclamen is in the Sterling Series and is another F1 option with beautiful red blooms. 6) C. persicum ‘Laser Synchro Wine’ HARDINESS RATING: H1C FLOWERING SEASON(S): Autumn / Winter SUNLIGHT: Part Shade SOIL PREFERENCE: Any soil type; any pH Another offering from the Synchro range, this flower is great for uniformity. It has medium-sized flowers, flowering early and slightly more vigorously than some other cultivars. 7) C. persicum ‘Midori Synchro Scarlet’ HARDINESS RATING: H1C FLOWERING SEASON(S): Summer / Autumn / Winter SUNLIGHT: Full Sun / Part Shade SOIL PREFERENCE: Any soil type; any pH This is another early flowering red flowered option from the Synchro range and is a mini cyclamen option with early flowering which is also good for uniformity. This variety is suitable for late summer to early autumn production. 8) C. persicum ‘SeeWhy Scarlet’ HARDINESS RATING: H2 FLOWERING SEASON(S): Summer / Autumn SUNLIGHT: Full Sun / Part Shade SOIL PREFERENCE: Any soil type; any pH This is another red flowering mini cyclamen for flowering in late summer to autumn, with small flowers and leaves and a pleasing round habit. It can work very well for greenhouse cultivation and is the earliest and most uniform in this cyclamen segment.
Learn more
7 Important Tips To Help Grow Tender Cyclamen As Houseplants Indoors
IN THIS GUIDE 1) Choose Your Cyclamen 2) Pot Up Your Plant 3) Place In A Suitable Spot 4) Water Sparingly 5) Feed During Active Growing Season 6) Remove Dead Foliage 7) Move To A Cool Spot Tender cyclamen cannot usually cope with outdoor conditions in the UK, but they can make great houseplants if you care for them correctly. Tender cyclamen are grown as houseplants over the autumn and winter months, then placed outside or in a cool, dry spot until they start to grow once more. To grow and care for cyclamen indoors, there are a number of simple steps that you must follow: Choose a suitable cyclamen to grow as a houseplant. Pot up your cyclamen in an appropriate container. Place your cyclamen in a suitable spot. Water your cyclamen correctly, following a strict routine. Feed sparingly with a suitable organic feed. Gently tug away dead flowers or leaves. Move the plant to a cool spot over summer to get it to re-flower. Read on for a more detailed explanation of each of these steps: 1) Choose Your Cyclamen The most important thing to remember if you wish to grow cyclamen as a houseplant indoors is that only certain species will be suitable for this type of treatment. Most commonly, when growing cyclamen indoors, you will be growing a cultivar of C. persicum. “Cyclamen persicum originates from rocky slopes in North Africa and the Eastern Mediterranean,” says Colin Skelly, a Horticulturist with 15 years of experience in the industry. “These are the conditions that you are trying to replicate – free draining and warm but not hot. In spring and summer, they enter dormancy due to the hot-dry conditions they evolved to deal with before reemerging and flowering into winter as cooler conditions return.” There is a range of options with different bloom colours to choose from. 2) Pot Up Your Plant Most commonly, cyclamens will be purchased as potted plants, though these plants can also be planted as tubers, or grown from seed. When the plant arrives or has grown large enough to handle, pot it up into an individual container, filled with loam or soil-based multi-purpose compost mixed with grit and leaf mould for best results. These plants like fertile and free-draining growing mediums. Make sure that the pot has adequate drainage and that the top of the tuber sits just above the surface of the growing medium. Be gentle when potting up to disturb the roots as little as possible. 3) Place In A Suitable Spot You need to place indoor cyclamen in a cool, bright spot out of direct sunlight. Ideally, a cool room with temperatures of between 10-15°C should be chosen. Make sure that you do not place your cyclamen where it will be too warm or it may stop flowering and enter dormancy too early. 4) Water Sparingly When watering cyclamen grown as a houseplant, it is important to make sure that you do not over-water, and that excess water is able to drain away freely. It can be beneficial to water from below so that you do not wet the leaves. Stand the cyclamen in a shallow container of water for an hour or so, then when the medium is moist but not saturated, let excess water drain away. Water during the active growth and flowering period whenever the medium begins to feel dry, but in the dormant period, stop watering when the leaves turn yellow in spring. 5) Feed During Active Growing Season Cyclamen do not need much feeding, as excess feeding can cause problems with foliage growth at the expense of flowers. However, to keep cyclamen going as a houseplant over multiple years, feed every couple of months over the active growing and flowering period with an organic feed suited to use with houseplants. 6) Remove Dead Foliage To keep your houseplant looking good, remove dead flowers or leaves with a gentle tugging motion. Just remember to leave the flowers to mature and produce seeds if you wish to try propagating your plant. However, this is a somewhat challenging job which can require patience, so is perhaps not the best job for beginners. 7) Move To A Cool Spot In spring, the leaves of cyclamen are meant to turn yellow. This is the beginning of the dormancy phase which is a part of the plant’s life cycle. Once this occurs, place the cyclamen somewhere cool and dry – a sheltered and shaded spot outdoors is ideal. The compost should be kept moist, so if you live in a wet area, consider laying the pot on its side to prevent waterlogging due to excess rainfall. In September, your cyclamen should begin to grow again, and you can bring it back indoors, resuming watering as soon as you see new growth.
Learn more
Sow Cyclamen In June And July - 'By Autumn You Need Them To Be Robust Plantlets'
IN THIS GUIDE When To Sow Cyclamen 1) Collect Cyclamen Seeds 2) Soak Seeds Overnight 3) Sow Seeds In Containers 4) Cover Seedlings 5) Plant Outside Cyclamen can make great plants for your garden or for inside your home. The key lies in finding the right variety for your desires. Hardy cyclamen are grown outdoors, while more tender varieties can be grown as houseplants. Growing cyclamen from seed is not the easiest way to obtain either of these types of plants for your garden or home. However, with some know-how and a lot of patience, both hardy and tender Cyclamen can be propagated from seed. To grow cyclamen from seed: Collect ripe seed from an existing cyclamen or purchase seeds of the right type. Soak the seeds overnight. Sow seeds immediately after soaking in a tray or pots full of seed compost. Place a protective cover over your seeds and wait for germination. Pot on or plant out once seedlings are large enough to handle. Difficulty Hard Equipment Required Seeds, pots or seed trays, potting medium When To Sow June-July When To Plant Out Autumn-Spring When To Sow Cyclamen “Sow seed in June and July so that, by autumn, they are robust plantlets that can then keep growing through the winter”, Trevor Wiltshire from The Cyclamen Society explains. “Late sowings are possible, but this requires more skill and the correct aftercare. “If sowing later in the year, provide them with some shade in summer and water carefully”. 1) Collect Cyclamen Seeds If you are growing cyclamen already in your garden, you can consider collecting the seeds from an existing plant to obtain new plants. “If Cyclamen are setting seed, then you should start to see some self-seeded plants spring up,” shares Master Horticulturist Colin Skelly. “Collecting the seed and sowing in ideal conditions will help to accelerate this process. “You can also start to spread the Cyclamen to more distant parts of the garden, assisting its dispersal.” The seeds of most species of cyclamen can be collected when the flower stalk coils down and the maturing seed capsule draws closer to the soil. It is important to make sure that you collect the seeds from the capsules only once they are fully ripe. Immature seeds will not germinate correctly. Determining the right time to collect seeds can be challenging, which is why this is a more challenging proposition and not necessarily something for beginners to try. When cyclamen of tender types is grown indoors, deadheading will often preclude the formation of seeds, but seeds of large-flowered, tender cyclamen can sometimes be purchased and sown at home. 2) Soak Seeds Overnight Germination rates will be best with both hardy and tender types if you soak the seeds in warm water for at least 12 hours prior to sowing. 3) Sow Seeds In Containers Once you have soaked your seeds, place these into trays or small pots filled with a suitable seed starting medium. A specialist seed compost or a homemade mix with leaf mould incorporated into it can be ideal. Try to space the seeds as evenly as possible and cover them with around 1cm of compost or horticultural grit. Make sure that you cover the seeds over properly since light can inhibit germination. 4) Cover Seedlings It can be beneficial to cover your pots or trays with glass or plastic trays to retain moisture and provide the right conditions for the seeds to germinate. Make sure that the seeds remain at a minimum of 16°C and no more than 21°C. Note that germination times can vary significantly. Germination will often take place after 30-60 days, but with some varieties, it can take up to a year or even longer for your seedlings to emerge, so be sure not to give up on them too soon. 5) Plant Outside Leaves will emerge from small tubers and as soon as this happens and the seedlings are large enough to handle, you can move them to their new growing positions. Hardy types can be potted up and placed outside, or given a suitable spot in your garden, with the small tubers 2-5cm deep. They prefer a spot in partial shade with fertile, humus-rich, well-drained soil. Tender types should be potted up into their own individual pots, filled with John Innes No 2 with added grit and leaf mould, or another similar medium. The tuber should be planted level with the top of the compost.
Learn more


