

Growing
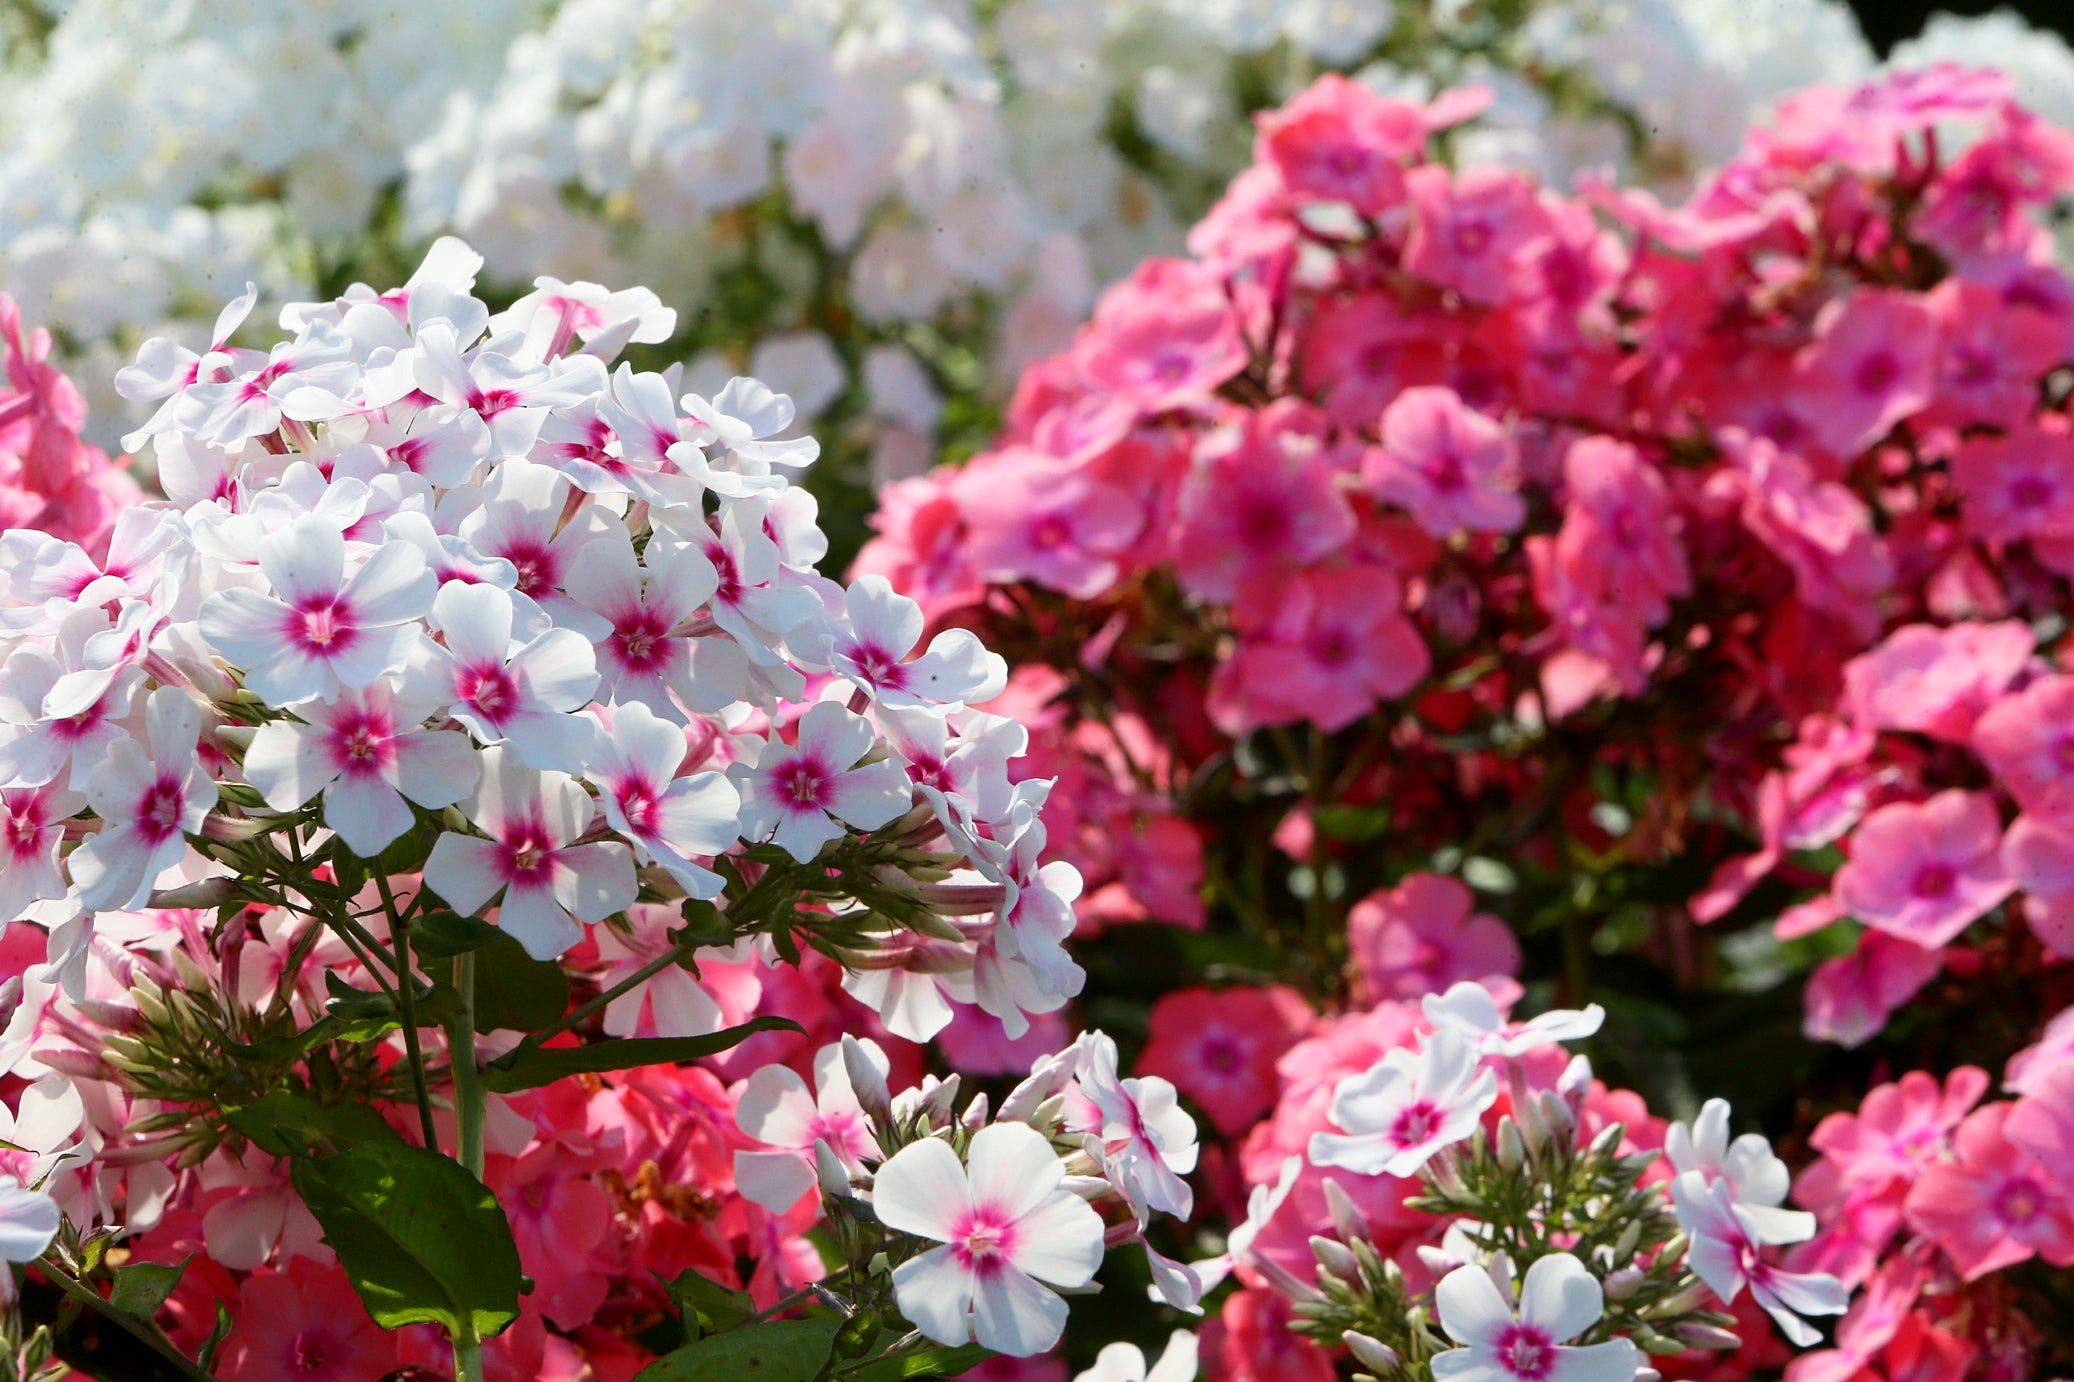

Pinch Off Spent Phlox Flowers To Make It Even More Floriferous Say Horticulturists
IN THIS GUIDE 1) Pinch off Spent Flowers 2) Cut Fading Flower Stems 3) Cut Back In Autumn As floriferous and long-blooming as phlox is, you can make it even more floriferous and long-blooming by deadheading your phlox plants. Phlox varieties number in the many hundreds and occur in an amazing array of heights and habits. All of them except the creeping, mat-forming types should be deadheaded. The first phase of deadheading will begin early on in the flowering season, whereas the second will start about three weeks into the flowering season. Both are done on an ongoing basis. The third ‘phase’ is to be done in autumn after the flowering season is over. The process is explained in more detail below. Difficulty Easy Equipment Required Secateurs, Gardening Shears When To Deadhead June-August, then October-November 1) Pinch off Spent Flowers On any given terminal cluster of flowers, a few flowers will wilt early even as some buds are yet to open. To maintain a neat and fresh look about your plant, when you see spent blooms, remove them. Pinch the stalk of the spent flower between your thumb and forefinger and pluck it off where it attaches to the stem. When doing so, you may need to steady the stem with the other hand. 2) Cut Fading Flower Stems As the flowering season progresses, many flowers on a terminal cluster will be fading and withering, over and above the individual ones you had pinched off earlier. I find it’s good practice during the flowering season to do a quick weekly run-through of your plants to spot fading, withering clusters. Deadhead such a fading floral cluster by cutting off its stem right from the base with secateurs. Deadheading will not only spruce up your plant but will also trigger fresh blooms. 3) Cut Back In Autumn By September, perhaps even October at the latest, the blooming season will draw to a close. Shortly thereafter, you should cut back your phlox plants so that they can bloom beautifully again the following year. In the October-November timeframe, cut back the plant to the ground using gardening shears. “I find that Phlox paniculata cultivars are some of the tougher perennial stems,” shares Colin Skelly, a Horticultural Consultant. “I leave it until it really starts to degrade in January or February, as I like to leave dead plant material in the garden as a wildlife resource as long as possible. “By the time I’m making my last cutback, new growth is emerging.” This super-hardy plant will ‘come again’ in the spring.
Learn more
Transplant Perennial Phlox In Spring (After The Last Frost) Advise Horticulturists
IN THIS GUIDE 1) Choose A Suitable Location 2) Make The Soil Mix 3) Dig A Planting Hole 4) Prepare The Plant 5) Move To New Location Phlox are among British gardeners’ favourite garden standards and there are as many reasons for this as there are varieties of the plant. No matter what the reasons and the variety, phlox produces oodles of little flowers in terminal clusters for three months or more. The salver-shaped five-petalled flowers radiate a simple, uncomplicated charm and the plant itself is uncomplicated, requiring little care. Phlox plants are most commonly bought in bare-root form or as potted plants from both brick-and-mortar garden centres and online nurseries, which means that after you get your little companions you’ll need to set them up in your garden. It’s not difficult at all but I’d advise that you transplant phlox in spring after the last frost. “Typically, you’ll find perennial Phlox for sale in the spring rather than autumn as it enters dormancy,” says Horticultural Consultant Colin Skelly. “You can plant any divisions from existing Phlox clumps in autumn or you can pot them on and follow the instructions given in this article in spring.” You can transplant phlox by following the steps outlined below: Difficulty Medium Equipment Required Gardening gloves, shovel or spade, flat plastering trowel Preferred Aspect Full sun, sheltered or exposed 1) Choose A Suitable Location Regardless of the variety, it is best to site phlox in full sun. Though partial shade will do as well for some varieties, several hours of sunlight are required for these plants to produce a profusion of blooms and also for them to stay healthy. Though phlox is fully hardy, avoid northern exposure if you can help it. 2) Make The Soil Mix Unfussy Phlox will do well in any type of moderately-fertile loam mix that drains well. Different forms and habits of the plant have their own particular preferences but a loam composed of roughly equal parts sand, chalk, and clay amended with some organic compost will work very well. Phlox’s flexibility extends to soil pH. Though slightly acidic to neutral soil is preferred, most phlox will make do in any soil pH except extreme acid or alkaline. 3) Dig A Planting Hole Eyeball the bare-root plant or the size of the pot of the potted plant, as the case may be. Dig a hole that is about as deep as the plant’s root system, and about one-and-a-half times as wide. Use the soil mix partially to fill in the hole. Pre-water this planting area. 4) Prepare The Plant Remove the potted plant, soil and all, by trying to loosen the soil and inserting a flat trowel around the inner edge of the pot and pushing from the drainage hole. Removal of the whole soil ball sometimes becomes easier if you thoroughly pre-soak it, otherwise, you can simply break the pot. Remove the covering or wrapping from the bare-root plant and soak the roots in water for 5 minutes. If the plant has been in a pot too small for longer than it should have been, it will have become root-bound or the roots will be constricted. If this is the case, shake out the soil and spread out the roots. For a bare-root plant, gently shake out the roots to loosen them. 5) Move To New Location Grasping the plant from the base of the main stem, place it in the hole such that the top of the root system is at the same plane as the ground. Try to spread out the roots. Backfill the hole with the prepared soil. Make sure that the soil level is the same as it was for the potted plant (or a touch lower). Firm up but do not pack in the soil, and give the plant a good watering. Treat your new phlox to a helping of balanced granular fertiliser, but be careful to avoid the central roots of the plant.
Learn more
Multiply Your Phlox Plants By Dividing Them Every 4 Years - Horticulturists Show How
IN THIS GUIDE When To Divide Phlox 1) Prepare Pots Or Re-Planting Holes 2) Water And Loosen The Ground 3) Dig Up The Plant 4) Vertically Divide The Plant 5) Re-Plant The Divided Sections Fragrant phlox are wonderfully versatile flowering plants that you can use for patio pots, rear borders, mass plantings, and much more, depending on the particular variety and its height and habit. In view of phlox’s many merits, you will surely want another plant. Fortunately, there’s an easy and surefire way to multiply your phloxes: plant division. Difficulty Medium Equipment Required Gardening gloves, garden mattock or hand-pick, shovel or spade, sharp knife, watering can When To Divide Spring or Autumn In fact, as these plants grow and mature, they form congested clumps so dividing them around every four years will also help spread their blooms out across your garden. When To Divide Phlox Phlox should be divided in spring or autumn, with the middle of these seasons being best. As a general rule, in spring re-plant divided sections in open ground, and in autumn, in pots. “Phlox will spread out as a circle, eventually leaving a bare hole in the middle,” says Master Horticulturist Colin Skelly. “To keep Phlox vigorous and prevent it from becoming too big or spreading where you don’t want it, dig up the entire clump and replant the wanted section in the desired position. “I replant in the ground in autumn or spring, as autumns are now mild enough to allow root growth before the worst winter weather. Any additional plants that you want to keep can be planted into pots.” You can divide phlox plants by following the steps below: 1) Prepare Pots Or Re-Planting Holes Prepare pots or holes for re-planting divided plants and till the soil if planting in open ground. A well-balanced loam with a slightly acidic to neutral pH is ideal. Pots should have drainage holes and soil should drain very well. Pre-water the planting area or pots. 2) Water And Loosen The Ground You may want to wear gardening gloves at this point. To be able to lift the plant with minimal stress to it, soak the soil around it and work it loose. Do so by jabbing the ground with a garden mattock or hand-pick, or even a gardening fork. Be sure to stay away from the roots. Depending on the size of the particular plant of this very diverse genus, you should start anything from 10-30cm away from the main stem. Pull away the soil as it is loosened so as to expose the roots. 3) Dig Up The Plant Depending on the size of the plant and its root system, go around the plant with a shovel or a spade, pushing downward and prising up the plant from below the roots. Gently grasp the plant around its centre, gently jiggle it to work it loose, and with an assist from the shovel or spade, lift it up, roots, soil and all. 4) Vertically Divide The Plant Divide the plant vertically into two to four equal sections. The number of sections you make depends on the size of the plant and its root system. Separate the stems, first pull apart the upper roots near the crown as well as you can. After you’ve done this, cleanly cut downwards through the remaining roots with the knife. 5) Re-Plant The Divided Sections The new clumps should be re-planted promptly. Re-plant in the holes or pots you have readied, being sure to keep the soil line of the new sections the same as it was in the parent plant. To stay on the safe side, keep the soil level barely to the top of the main root. Backfill and firm up the soil, and give the newly-planted sections a good watering.
Learn more
African Daisies Showing Signs Of Debilitation? This Is Probably The Cause
IN THIS GUIDE 1) Aphid Infestation 2) Downy Mildew 3) Root Rot 4) Wilting And Dieback The majority of osteospermum varieties are tender perennial evergreens and are usually grown as annuals in most regions of the UK. These small plants’ simple, merry flowers, wide-open and disk-shaped, almost startle the observer with their refreshing innocence, especially the ones in white and pale tones which are exactly what very many varieties produce. African Daisies in the main are pest-resistant and disease-free plants. Only a handful of problems and issues affect them in most British climates and even these can be precluded under optimal growing conditions. The four main issues that gardeners in the UK need to be aware of are outlined underneath. Aphid infestation Downy mildew Root rot Wilting and dieback See guidelines for dealing with each of these common problems below. 1) Aphid Infestation Aphids are tiny sap-sucking pests of which there are many sub-species but all of them have two attributes in common: they breed very rapidly and they can be destructive. As terrifying as they may sound, aphids are not very difficult to control, especially if the infestation is detected early or before these pests have colonised your plants. The first course of action is to tolerate aphids and allow the wildlife in your garden to control aphids, which are predated by ladybirds and blue tits among others. After all, they may not cause significant damage to affected plants. The next best approach is to wipe aphids colonies off plants by hand. If all else fails, organic pesticides containing natural pyrethrum or plant oils such as Rapeseed Oil can be used which are less likely to affect larger insects such as ladybirds. For detailed information please see our gardening guide on aphids. 2) Downy Mildew Downy Mildew is not exactly uncommon in rainy England. This is because this air-bourne fungal disease that infects foliage thrives in wet weather and is promoted by damp foliage. Downy Mildew, manifesting as unsightly discolourations and blotches on the upper leaf surface and obvious grey mould on the lower leaf surface, cannot be treated with consumer-class fungicides. However, it seldom proves fatal and can be avoided with a bit of effort. Head off downy mildew by watering at soil level or watering before 10am – preferably both! Absolutely do not get the foliage wet in the evenings. If an Osteospermum does get this disease, cut off and destroy the affected parts, keep the foliage dry at all times, and ensure that the plant has good air circulation and gets ample sunlight. 3) Root Rot African daisies originated in the veldt of South Africa and they flourish in the light, sandy, and friable soils of their native habitat. Also, the soil they grow in must drain very well and not be waterlogged. Clayey soils, compacted soil, too much organic material, and damp ground, conversely, are not well tolerated by this plant. Such conditions may well bring about root rot, which is very difficult to spot, or even cause other, follow-on fungal diseases. If your osteospermum shows signs of debilitation (stunted plants with low vigour and which wilt easily) and your soil is of the type described above, your plant may well have root rot. “Affected plants can be identified by digging them up and washing the roots,” shares Master Horticulturist Roy Nicol. “If they are dark coloured and soft, these parts can often be cut away and if sufficient white healthy roots remain the plant can be replanted in its favoured soil conditions described above.” 4) Wilting And Dieback The wrong type of soil, overwatering, or consistently damp soil may cause, not only root rot, but, a serious disease which will manifest in African daisies as wilting and even dieback. This disease is Verticillium wilt. Though uncommon, it can and does affect African daisies. Unfortunately, there is no consumer-class treatment for this soil-borne fungal disease that attacks the roots and then clogs up the plant arteries. If Osteospermum plants have Verticillium wilt, they must, sadly, be uprooted and destroyed. “Care should be taken not to spread infected soil around the area or on tools,” adds Roy. “Plants affected by this fungus can be identified by cutting a section of a woody stem and checking if a circle or part-circle of brown marks are visible, this is the die-back of the water-carrying vessels (xylem) in the plant.” Plants susceptible to this disease should not be grown in soil known to be infected with the Verticillium fungus.
Learn more
Sow African Daisies In Mid-April To Give Them Plenty Of Time To Germinate
IN THIS GUIDE When To Sow African Daisies 1) Prepare The Seeds & Soil 2) Plant In Pots Indoors 3) Prepare For Transplantation 4) Transplant Outdoors 5) Osteospermum Aftercare Also known as the African daisy, Osteospermums are an ideal choice for brightening up borders with their long-lasting blooms right through summer and into autumn. Available in a wide variety of colours, sizes and petal shapes, they’re also adept at bringing bees and butterflies to your garden. Plus, they’re minimal fuss to coax into life from seed, providing you follow these simple steps: Prepare the seeds and compost for sowing. Plant in pots or a sowing tray indoors – usually around 6 weeks before the last frost in your area. Cultivate your seedlings. Transplant them outdoors after the last frost has passed. Follow ongoing care guidelines, like keeping them well watered during periods of drought. If you require a little more in-depth information on each of those steps, we’ve laid them out in greater detail for your convenience below. Difficulty Easy Equipment Required Individual pots or seed trays, seed compost, trowel When To Sow April When To Plant Out June When To Sow African Daisies Although it’s theoretically possible to plant osteospermum seeds directly into your garden, their African origins and the Great British climate means it’s not recommended. For best results, allow them to establish themselves in a greenhouse or inside your home before transplanting outdoors. Seeds sown into indoor containers can be done in mid-April, which will give them plenty of time to germinate and grow. They can then be transplanted outdoors from late May to early June. 1) Prepare The Seeds & Soil To ensure the seeds are fully hydrated, place them on a wet paper towel or cloth for several hours prior to planting. You can also submerge them in a glass of water if you prefer as the seeds are not too small, but be careful not to leave them too long or they may drown. Meanwhile, fill your containers with seed compost, making sure the mixture is not too densely packed. 2) Plant In Pots Indoors Place the seeds onto the surface of the seed compost and cover very lightly with vermiculite or sieved seed compost. You can sow more than one seed in a pot, but picking them apart at a later date may damage the roots and as such, individual potting is preferable. You can see in the image below that I used a propagation tray, with room for 8 separate plug plants to grow: Cover the pots or trays with the clear plastic cover that may have come with the pot or tray or use perforated clingfilm to retain warmth and moisture, but allow ventilation. Place in a warm location, ideally 15°C, out of direct sunlight. Water as required, ensuring that the seedlings become neither parched nor waterlogged. 3) Prepare For Transplantation Once the seeds have sprouted and are beginning to establish themselves, the clingfilm or plastic cover should be removed and you can gradually introduce them to lower temperatures to allow them to acclimatise accordingly. Depending on the location in which they are positioned, this could take the form of opening a window or moving them into a colder room (or even outdoors) for an hour at a time. Take care to ensure they are not overwhelmed by the change in the thermometer. 4) Transplant Outdoors After at least three leaves of foliage have emerged on your osteospermum, the plant is ready to move completely outdoors. If more than one specimen has been planted in a single pot, exercise extreme caution when untangling their roots and separating the plants. Choose a sunny spot with free-draining, fertile soil and at least some shelter from the elements. “To avoid issues such as root rot, it’s beneficial to improve the soil structure by mulching around the plant as over time, earthworms and other soil life will incorporate this into the soil and create a well-structured free-draining soil,” shares Horticultural Consultant Roy Nicol. Plant them at intervals or 20-25cm to allow their roots to spread out and water abundantly at first. 5) Osteospermum Aftercare Several days after transplanting outdoors, you can pinch the stems to stimulate growth laterally rather than vertically. You can also administer a layer of mulch to improve the soil and prevent weeds from growing in the vicinity of the plant. Check out some of the beautiful flowers I was able to grow from seed in my outdoor beds: Once established, osteospermums are fairly hardy plants (although generally won’t surviving hard frosts) and shouldn’t require too much maintenance if you’re happy for them to die back at the end of Autumn. Water them only in prolonged periods of dry weather and deadhead to prolong blooms for as long as possible.
Learn more
Try Cutting Back Your Osteospermum In Late Spring Or Autumn For More Flowers
IN THIS GUIDE When To Prune 1) Prepare Your Tools 2) Cut Back In Late Spring Or Autumn 3) Watch Out For Fading Blooms 4) Deadhead Regularly Osteospermum boasts beautiful daisy-like flowers in a variety of different colours, earning it the nickname African daisy. Its long-lasting blooms and relative hardiness make it an ideal choice of perennial plant for British beds and borders. Though the plant will flower reliably even in poorer quality soil and when left to its own devices, you can extend its blooming season and ensure it retains an aesthetically pleasing shape by pruning it regularly. The process is a straightforward one and simply consists of the following steps: Prepare your tools (pruning shears or secateurs are most important). Cut back your Osteospermum in early spring or early autumn. Keep an eye out for spent or fading blooms in summer. Deadhead any spent blooms regularly. For more information on each of those stages, check out our detailed explanations below. Difficulty Easy Equipment Required Gardening gloves, pruning shears or secateurs, cloth, isopropyl alcohol When To Prune Cut back in early spring or early autumn, deadhead throughout summer When To Prune It’s advisable to cut back your osteospermum plant in early spring or autumn, or even at both times if you wish to encourage fuller growth. However, doing so on at least one occasion is imperative in preventing your plant from becoming overly tall and leggy. It’s also a good idea to deadhead your African daisy throughout the blooming season since this will divert its energies away from seed production towards blossoming. 1) Prepare Your Tools It’s vital that you ensure the tools you use are free from blight or disease. As such, you must clean them thoroughly before and after use each time. To do so, soak a cloth in isopropyl alcohol and rub the blades of your pruning shears to remove any impurities. “It’s important to keep secateurs and shears clean by removing resin on a regular basis using a proprietary resin remover or cleaning eraser, and to keep them sharp using sharpening tools designed for this task,” says Master Horticulturist Roy Nicol. “This will ensure clean cuts which will heal more readily – much better for the health of the plant.” 2) Cut Back In Late Spring Or Autumn In order to maintain an aesthetically pleasing structure for your osteospermum’s growth, you should cut it back in late spring. Use the shears to cut back the plant to at least half its original height, taking care to leave several leaf clusters on each stem. Remove all cut foliage and dispose of it away from the plant to prevent the spread of disease. You may repeat the process in autumn if you wish to instigate fuller growth. 3) Watch Out For Fading Blooms It’s important to ensure that your plant devotes its energies to the areas which need them most. This means discouraging seed production when we’d like the plant to be generating more flowers. Identify flower heads that are beginning to turn brown in the centre or suffer from drooping petals, since these are the ones which must be removed in order to maintain a healthy plant and prolong the blooming season. 4) Deadhead Regularly Having identified the blooms in need of attention, you should use the shears to cut back the offending party to where it joins the stem. If all blooms on a stem are on their way out, you can cut back the entire stem to where it joins the main plant, leaving a small rosette of leaves to ensure further growth. Remember to remove all discarded foliage and dispose of it far from the plant. Deadheading should be undertaken as often as possible, but at least once a week during summertime.
Learn more
Winter Approaching? Give Osteospermum The Best Chance At Survivial
IN THIS GUIDE 1) Take Summer Cuttings 2) Move Potted Plants Indoors 3) Prune Back Prior To Winter 4) Fertilise & Mulch Osteospermums are vibrant and vivacious plants which will bring some much-needed colour to your beds and borders throughout summer and into autumn. Of course, they’re not known as the African daisy for no reason, so many varieties will struggle to withstand the extremes of the British winter. However, that doesn’t mean that all is lost. From taking cuttings and replanting them the following year to giving your existing specimens the best possible chance of making it through the colder season, there are several things you can do to provide winter care for osteospermum. We’ve outlined the main ones below: Take summer cuttings. Move potted plants indoors. Prune back prior to winter. Fertilise and mulch. For those who’d appreciate some further guidance on overwintering their osteospermum plants, we’ll take a closer look at each of those instructions in more detail. Difficulty Easy Equipment Required Gardening gloves, pruning shears, cloth, isopropyl alcohol, organic mulch 1) Take Summer Cuttings The most surefire way to guarantee you can enjoy osteospermum blooms throughout the next year is to equip yourself with a store of reserve plants. You can do this by taking softwood cuttings during summer when the plant is in full growth. Look for healthy offshoots to snip off, then plant them in potting soil. Osteospermum roots quite easily and grows extremely fast, so you should be able to see mature growth within a matter of months. “Keep these young plants under cover, before planting later in the following spring,” says Peter Lickorish, a Horticultural Consultant. 2) Move Potted Plants Indoors The next best thing you can do to protect your osteospermum plants after planning for life without them is to move potted varieties indoors. For best results, relocate your container osteospermum into a greenhouse, conservatory or other indoor setting and treat them as you would other house plants. However, you have to be mindful that doing so may encourage the spread of disease, so stay on top of damaged or diseased foliage and remove any fallen leaves and flowers immediately. 3) Prune Back Prior To Winter If your African daisies are planted outdoors, they may have to take their chances in the British winter. You can give them the best shot of survival by pruning them back to remove congestion and improve ventilation among the leaves, as well as conserve their energies for the struggle ahead. “Pruning before winter is risky and should be done carefully to avoid having the opposite effect,” says Peter. “The aim should be to remove tall stems which may make the plant prone to damage and wind-rock and any weak growth which may rot. “This is done whilst leaving enough foliage to act as a blanket. Some of this foliage will be sacrificed to the frost and may soon blacken or die, but it could still protect lower shoots from frost or snow damage. “You will therefore need to prune again in late spring, to remove any damaged growth.” Always be sure to clean your pruning tools thoroughly before and after use, by scrubbing them with a cloth soaked in isopropyl alcohol. This will eliminate the chance of cross-contamination or disease infection. 4) Fertilise & Mulch Other steps you can take to bolster their chances of coming back next spring include administering a slow-release fertiliser to the soil surrounding the plant in autumn. This will give the fertiliser plenty of time to break down and allow the roots to absorb it gradually, fortifying the plant for winter. Placing a layer of organic mulch over the surface of the topsoil is also a good idea. A thin layer of bark will help insulate the plant’s roots and prevent the growth of weeds for the duration of the colder months. “Feeding ahead of winter is a delicate art,” Peter adds. “You don’t want the plant to grow too fast towards the end of the season or soft new growth will fall at the first frost. That rules out having too much nitrogen in the feed and using large quantities of any fertiliser. “Potassium has been shown to improve cold-hardiness in some plants, acting a little like anti-freeze. “For application, wait until the flowering has finished otherwise you could encourage a mass of flowering up until winter, which would exhaust the plant’s precious energy reserve.” Of course, it should be remembered that even following all of these steps cannot guarantee that your plant will survive a harsh British winter. Osteospermums do not like temperatures below -5°C, so the most reliable and recommended way to bring them back the next year is to treat them like annuals and take cuttings for replanting.
Learn more
Some Gardeners Choose To Propagate Osteospermum Cuttings Instead Of Overwintering
IN THIS GUIDE 1) Take Your Cuttings 2) Prepare Your Module Tray 3) Plant The Cuttings 4) Cultivate Growth 5) Prepare For Transplantation 6) Transplant Outdoors 7) Plant Aftercare Osteospermums are sometimes known as African daisies – and it’s not difficult to see why. Their disc-like blossoms are reminiscent of daisies in shape and structure, while the spectrum of colours they are available in is more in keeping with the flamboyance and vibrancy of the African continent. One other characteristic influenced by their native land is the semi-hardiness of osteospermum. Although more resilient than some other specimens, they will often die if the mercury drops below -5°C. In the UK, that’s a fairly regular occurrence, meaning it may make more sense to take cuttings and replant them the following year, rather than trying to overwinter your specimens. The good news is that propagating osteospermum from cuttings is a straightforward process that shouldn’t present too many difficulties. Simply follow these instructions and you won’t go far wrong: Take your cuttings using secateurs or a sharp implement. Prepare your module tray. Plant the cuttings in compost. Cultivate growth (wait!). Prepare for transplantation. Transplant outdoors. Ongoing plant care. If you’re still feeling unsure about how to approach the propagation of osteospermum from cuttings, don’t worry. We’ll cover each step in more detail below. Difficulty Easy Equipment Required Spade or fork, knife, cuttings compost mix, hormone rooting powder, module tray, pot When To Take Cuttings Summer 1) Take Your Cuttings Although it’s possible to take your cuttings at other times of the year, doing so in summer will ensure that the plant is in its best possible state of health. It will also give you plenty of time to root the cuttings and prepare them for transplantation outside the following year. “Harvesting cuttings first thing in the morning is a good idea, as plants usually have their moisture levels topped up overnight,” says Master Horticulturist Peter Lickorish. Choose non-flowering shoots and slice off a 5cm length of the stem from the tip downwards. Repeat as many times as desired. “Place harvested cuttings in a moistened plastic bag to keep them humid until you’re ready to prepare them, but don’t delay too long,” Peter adds. “They will still lose precious moisture every moment between being taken away from their parent plant and being placed in damp compost.” 2) Prepare Your Module Tray Whether using segmented trays or planting the cuttings directly into a shared pot, you should plan to give one enough space (at least 2-3cm2 and preferably more) for it to develop. You should experience decent results with any cuttings compost mix, but you can enhance the chances of your cuttings taking root by grit, perlite or sand (for drainage) into the mix. 3) Plant The Cuttings When it comes time to plant the cuttings, prepare each one by stripping off its lower leaves, keeping at least two, and making a small incision in the stem with a sharp knife just below a leaf node. This forms the base of the cutting. Then, dip this base of the cutting in hormone rooting powder and position it in the module tray. Firm the soil around its base down gently and water thoroughly, labelling each specimen as you go. 4) Cultivate Growth Care for your cuttings by keeping them moist, warm and well-ventilated. You can do this by placing perforated clingfilm over the top of the soil, though this step is not strictly necessary. You should, however, guarantee that the ambient temperature of the room or greenhouse in which the cutting is located does not drop below 15°C. Water your cuttings regularly but sparingly, keeping them moist but not waterlogged. 5) Prepare For Transplantation Around 2-3 weeks before you plan to move your specimens outdoors, you should prepare them for the drop in temperature by hardening the cuttings. You can do this by opening a window nearby or moving them outdoors for an hour at a time. “This is also a good time to move the cuttings into bigger or individual containers if you have not already done so,” shares Peter. Meanwhile, you should also prepare the outdoor terrain in which you will plant them. Work it over thoroughly using a trowel, being careful to choose a spot which enjoys plentiful sunshine, good drainage and at least some shelter from the elements. 6) Transplant Outdoors By now, your osteospermum cuttings should have established themselves well and shown decent foliage growth. This means that they are ready to be moved outdoors – though you shouldn’t do so before the last frost of winter has passed. Plant your cuttings at 20-25cm intervals so as to allow plenty of room for their roots to grow. Pinch off the top of the stem within 2-3 days of transplantation to encourage lateral growth and achieve a bushy plant. 7) Plant Aftercare In normal conditions, your osteospermum plants shouldn’t require too much watering after they have taken root in the outdoor soil. You don’t want them to become waterlogged or the roots will die, but neither do you want them to become parched – so keep an eye on rainfall and water in times of drought. You can fertilise the plant every 3 weeks or so with a mineral-based mixture, as well as mulching around the base to prevent weeds from inhibiting their growth. Prune the plant as necessary to achieve the desired shape and prolong blooming.
Learn more
Try One Of These Osteospermum Varieties For Pastel Coloured Daisy Flowers
IN THIS GUIDE 1) O. ecklonis 2) O. ‘Sunny Mary’ (Sunny Series) 3) O. ‘White Pim’ 4) O. ‘Weetwood’ 5) O. ‘Stardust’ 6) O. ‘Erato Purple’ (Erato Series) 7) O. ‘Sunny Gaia’ 8) O. ‘Buttermilk’ 9) O. ‘Serenity Sunshine Beauty’ 10) O. ‘Purple Sun’ 11) O. ‘Akila White Purple Eye’ (Akila Series) 12) O. ‘Snow Pixie’ 13) O. ‘Cannington Roy’ 14) O. ‘Lady Leitrim’ 15) O. ‘Tresco Purple’ 16) O. ‘Blue Eyed Beauty’ Dizzying Diversity References Everyone loves daisies and that’s just what Osteospermum is – a bushy little plant with those wide-open disk-shaped daisies. These lovely little wildflowers originate from the warm savannah and grassland of South Africa. Not surprisingly, therefore, these are frost-tender plants with the vast majority having a hardiness rating of H3 and a few others even less than that. Until very recently African daisies were not all that diverse in floral colour: barring a few varieties in bright or saturated tones, most of them came in soothing, low-key shades of pinks, purples, and white, plus a few yellows. Of late, cultivars boasting vibrant tones and bicoloured or gradated flowers have entered the market. African Daisies will make for a merry front border and are also excellent choices as little companions to fill gaps between statelier specimen plants. All of my favourite picks in this article are H3 hardy, will grow in chalk, loam or sand, and will do well in any soil pH. Without further ado, here are sixteen stunning osteospermum varieties: 1) O. ecklonis COMMON NAME(S): African Daisy FOLIAGE: Evergreen FLOWERS: white FLOWERING SEASON(S): Summer EXPOSURE: Sheltered SIZE: 0.5-1m in height, 0.5-1m spread Why not begin with this species plant, that is almost twice as tall as the others on this list, growing up to 1m. Even its variably-shaped leaves are 8-10cm long making African daisies a giant among its species. The 5-8cm flowers are white, though they do have a darker shade of blue-purple if you care to look underneath. 2) O. ‘Sunny Mary’ (Sunny Series) COMMON NAME(S): African Daisy ‘Sunny Mary’ FOLIAGE: Evergreen FLOWERS: Pink and purple FLOWERING SEASON(S): Summer / Autumn EXPOSURE: Sheltered SIZE: 0.1-0.5m in height, 0.1-0.5m spread Continuing with those rule-proving exceptions, this one’s a cultivar that falls squarely in the middle of the height range at about 30cm. However, ‘Sunny Mary’ breaks the mould in floral shade: the classic daisy flowers occur in bright, even vivid tones, from pink through magenta to purple. It is also notable for flowering all summer long. 3) O. ‘White Pim’ COMMON NAME(S): African Daisy ‘White Pim’ FOLIAGE: Evergreen FLOWERS: White FLOWERING SEASON(S): Spring / Summer / Autumn EXPOSURE: Exposed / Sheltered SIZE: 0.1-0.2m in height, 0.1-0.5m spread At the opposite end of the scale to both of the above selections, this variety is ultra short in height and produces white flowers. O. ‘White Pim’ has a mat-forming habit and attains a height of only 10-20cm. The pure white flowers, with a purplish flush on the undersides, are not exactly big at 6cm, but they begin blooming from late spring and continue into autumn. This variety has been awarded the RHS Award of Garden Merit. 4) O. ‘Weetwood’ COMMON NAME(S): African Daisy ‘Weetwood’ FOLIAGE: Evergreen FLOWERS: White FLOWERING SEASON(S): Spring / Summer / Autumn EXPOSURE: Exposed / Sheltered SIZE: 0.1-0.5m in height, 0.1-0.5m spread ‘Weetwood’ is an African daisy of bushy habit, rising to about 35cm, and bearing hard white flowers about 6cm wide and with a golden-yellow disk. It has some foliage interest by virtue of its distinctly greyish-green leaves and also has a long flowering season starting in late spring and finishing up in autumn. This variety has also received the RHS Award of Garden Merit. 5) O. ‘Stardust’ COMMON NAME(S): African Daisy ‘Stardust’ FOLIAGE: Evergreen FLOWERS: Pink FLOWERING SEASON(S): Summer / Autumn EXPOSURE: Sheltered SIZE: 0.1-0.5m in height, 0.1-0.5m spread ‘Stardust’ is about 40cm tall and produces full-looking flowers that are quite striking in chalky but bright tones of mauve through purple, centred with a contrasting yellow disk. They start appearing in early summer and wind up in early autumn. 6) O. ‘Erato Purple’ (Erato Series) COMMON NAME(S): African Daisy ‘Erato Purple’ FOLIAGE: Evergreen FLOWERS: Purple and orange FLOWERING SEASON(S): Summer / Autumn EXPOSURE: Exposed / Sheltered SIZE: 0.1-0.5m in height, 0.1-0.5m spread Breaking the mould, this proprietary cultivar has a hard-to-categorise habit – technically bushy, ‘Erato Purple’ is of a billowing form that makes this daisy a top choice for a hanging basket. The foliage is in a rich, intense hue of dark green but it is outdone by the unusual, spectacular flowers which are of a deep, intense hue of magenta-purple with an orange centre. 7) O. ‘Sunny Gaia’ COMMON NAME(S): African Daisy ‘Sunny Gaia’ FOLIAGE: Evergreen FLOWERS: BURGUNDY FLOWERING SEASON(S): Summer / Autumn EXPOSURE: Sheltered SIZE: 0.1-0.5m in height, 0.1-0.5m spread Back to ‘orthodox’ heights and habits but staying with vibrancy, this newer cultivar has bright green foliage in a perfect clump-forming habit, and reaches up to 30cm tall. The flowers of ‘Sunny Gaia’ have a satiny sheen that enhances their rich, saturated purple-burgundy tone. They bloom from early summer clear into mid-autumn. 8) O. ‘Buttermilk’ COMMON NAME(S): African Daisy ‘Buttermilk’ FOLIAGE: Evergreen FLOWERS: Yellow FLOWERING SEASON(S): Spring / Summer / Autumn EXPOSURE: Exposed / Sheltered SIZE: 0.1-0.5m in height, 0.1-0.5m spread Dialling back on the intensity, ‘Buttermilk’ is a well-heeled cultivar that will make a brilliant contrast with the one above, for its 7cm flowers are a pale, buttery yellow, with its petals emerging virtually white. These flowers are centred by a brownish-purple disk. The long flowering season gets underway before summer begins and finishes after it ends. It has been awarded the RHS Award of Garden Merit. 9) O. ‘Serenity Sunshine Beauty’ COMMON NAME(S): African Daisy ‘Serenity Sunshine Beauty’ FOLIAGE: Evergreen FLOWERS: Orange and yellow FLOWERING SEASON(S): Summer / Autumn EXPOSURE: Exposed / Sheltered SIZE: 0.1-0.5m in height, 0.1-0.5m spread Doubling up on the colour yellow, this cultivar is of much more recent vintage and its brand of yellow is a spanking bright hue. In fact, ‘Serenity Sunshine Beauty’ displays gradated petals that start bright yellow at the base and finish a rich orange at the tips, living up to its name. This bushy variety reaches up to 25cm high and blooms through summer into early autumn. 10) O. ‘Purple Sun’ COMMON NAME(S): African Daisy ‘Purple Sun’ FOLIAGE: Semi-Evergreen FLOWERS: Orange and purple FLOWERING SEASON(S): Summer / Autumn EXPOSURE: Exposed / Sheltered SIZE: 0.1-0.5m in height, 0.1-0.5m spread This relatively new proprietary cultivar is another one that features gradated flowers, with the difference in that they are verily tri-coloured. Petals start purple near the centre and transition to pink with the outer half a soft, glowing apricot-orange. ‘Purple Sun’s lovely blooms are produced from early summer to early autumn. It rises to about 30cm. 11) O. ‘Akila White Purple Eye’ (Akila Series) COMMON NAME(S): African Daisy ‘Akila White Purple Eye’ FOLIAGE: Semi-Evergreen FLOWERS: Blue, purple and white FLOWERING SEASON(S): Summer / Autumn EXPOSURE: Exposed / Sheltered SIZE: 0.1-0.5m in height, 0.1-0.5m spread Another late cultivar, this biennial’s stunning flower has a purple-blue disk surrounded by a magenta shadow which transitions into pure white petals. ‘Akila White Purple Eye’ is a floriferous variety and produces very full flowers all through summer. It grows to about 45cm in height and has a similar spread. 12) O. ‘Snow Pixie’ COMMON NAME(S): African Daisy ‘Snow Pixie’ FOLIAGE: Semi-Evergreen FLOWERS: Yellow and white FLOWERING SEASON(S): Spring / Summer / Autumn EXPOSURE: Sheltered SIZE: 0.1-0.5m in height, 0.5-1m spread Another cultivar that produces a stunning flower that is well and properly pure white centred with a pale, bright yellow disk, making for a classic daisy. ‘Snow Pixie’ is a very popular vintage model that rises to about 40cm. It produces its elegant, simple flowers through summer into early autumn and is the most versatile and multi-purpose variety. 13) O. ‘Cannington Roy’ COMMON NAME(S): African Daisy ‘Cannington Roy’ FOLIAGE: Evergreen FLOWERS: Purple and white FLOWERING SEASON(S): Spring / Summer / Autumn EXPOSURE: Exposed / Sheltered SIZE: 0.1-0.5m in height, 0.5-1m spread Growing to only about 20cm tall, this diminutive variety has nearly twice the spread of its height. ‘Cannington Roy’ flowers are of uniquely warm-cool tones that span light pink, mauve, and purple, changing in shade as they age. Though they are just 5cm wide, they start coming before summer begins and continue well after it finishes. 14) O. ‘Lady Leitrim’ COMMON NAME(S): African Daisy ‘Lady Leitrim’ FOLIAGE: Semi-Evergreen FLOWERS: Pink and white FLOWERING SEASON(S): Spring / Summer / Autumn EXPOSURE: Sheltered SIZE: 0.5-1m in height, 0.5-1m spread This time-honoured cultivar still enjoys tremendous popularity, for good reason: its 6-7cm flowers open white and gradually develop a pink-purple flush, especially at both ends of the petals, making for a particularly stylish daisy. Adding to the merits of ‘Lady Leitrim’, it begins blooming in late spring and ends sometime in autumn. It has received the RHS Award of Garden Merit. 15) O. ‘Tresco Purple’ COMMON NAME(S): African Daisy ‘Nairobi Purple’ FOLIAGE: Evergreen FLOWERS: Purple FLOWERING SEASON(S): Summer / Autumn EXPOSURE: Sheltered SIZE: 0.1-0.5m in height, 0.1-0.5m spread A well-known cultivar whose many synonyms reflect its widespread popularity, it grows to about 30cm and has a similar spread. ‘Tresco Purple’ boasts intensely-coloured flowers that are of a vibrant magenta-purple hue and are centred with a violet disk. They are produced from the beginning of summer to the beginning of autumn. 16) O. ‘Blue Eyed Beauty’ COMMON NAME(S): African Daisy ‘Blue Eyed Beauty’ FOLIAGE: Semi-Evergreen FLOWERS: Blue, yellow and purple FLOWERING SEASON(S): Spring / Summer EXPOSURE: Exposed / Sheltered SIZE: 0.1-0.5m in height, 0.1-0.5m spread Boasting virtually a tri-coloured flower, ‘Blue Eyed Beauty’ even manages to combine complementary colours. The plant has a height and spread of about 40cm and blooms through the summer. The gorgeous flowers feature a chocolate disk with petals that are bright yellow for the most part but are wine-purple near the centre. This cultivar holds Plant Breeder’s Rights (PBR) meaning it cannot be propagated without the owner’s permission. Dizzying Diversity Some shrub species such as O. ecklonis reach a height of 1m but in contrast, the subshrub O. ‘Cannington Roy’, like O. ‘Snow Pixie’, grows to only 15cm – merely 5cm more than the length of O. ecklonis’s leaves! Talking of leaves, the diversity within Osteospermum extends even to that part of the plant. The leaves are lanceolate or ovate, with toothed or entire margins, depending on the species or cultivar. Furthermore, one and the same species, for example, O. ecklonis, can put out leaves of different morphologies! O. barberiae As a general rule, toothed leaves indicate a hardy variety – such varieties, rather than growing upright, usually spread along the ground forming clumps. The African Daisy has about 70 species and an increasing number of cultivars; indeed, the Royal Horticultural Society lists over 900 varieties.1 Many of these varieties are notable not only for the ray florets but even for the central disks which sometimes provide a fine contrast to the rays setting them off or sometimes are of deep or metallic colours that are attractive in their own right. Some varieties have bicoloured disks; others have rays in gradated shades. This humble daisy spoils both gardeners and florists for choice as it can light up a flower bed just as well as a floral arrangement. References 1. A. (2017, April 26). Production Guidelines for Four Crops—Osteospermum, Angelonia, Calibrachoa & Ornamental Sweet Potato (Ipomoea batatas). Center for Agriculture, Food, and the Environment. Retrieved March 22, 2023, from https://ag.umass.edu/greenhouse-floriculture/fact-sheets/production-guidelines-for-four-crops-osteospermum-angelonia
Learn more


