

Growing

Plant These Vegetables In August Says Kitchen Gardener Stephanie Hafferty
IN THIS GUIDE 1) Chicory 2) Radish 3) Lettuce 4) Cabbage 5) Turnips 6) Overwintering Onions 7) Green Manures 8) Bonus Crop: Strawberries Go Forth & Garden References August may not seem like a month to plant crops. At the heat of summer, it’s the time you’d expect to be out in the fields – or, more likely, the garden – harvesting the fruits (and vegetables) of your spring labours. In fact, in native cultures of the Canary Islands, August is called Beñesmer – a word that signified the annual harvest festival and held tremendous importance in their annual calendar.1 If you’ve found this article, though, you’re probably aware that you can actually plant things out this late in the year. A selection of quick maturing veggies, for example, along with rooted strawberry runners and various green manures. In this article we’ll dig a little deeper into each (if you’ll pardon the pun), telling you what you need to know about planting out crops in August. “At this time of year, I am sowing plants for cropping during autumn and over winter, including cabbages, kales, chard, spinach, radishes, salads, mustards and overwintered onions,” shares Organic, No-Dig Gardener Stephanie Hafferty. For the enthusiastic gardener trying to shoehorn a few more plants into their annual growing schedule, vegetables are a more rewarding August avenue than fruits. You’ll see the best results if you live in the south of England or in a region elsewhere with an equivalent climate. Folks in the northern reaches of Scotland, for example, may not see as much growth (or any at all), so keep this in mind before you build your hopes too high. 1) Chicory This member of the dandelion family isn’t a frequent fixture in our kitchens, but it is a surprisingly versatile ingredient. Chopped and raw it makes a fine (if bitter) addition to salads. Grilled or poached it provides an interesting starter or accompaniment. And you can even use the dried and grounded plant as a coffee alternative! Sowing season for this intriguing plant ranges from April to August, depending on the variety, so double-check you pick up the right seeds for the job. Then find an open site with full sun or mixed shade, with well-draining soil. 2) Radish These bright red mustard relatives bring a distinct and delicious crunch to any dish that includes them – most usually salads. If you enjoy a slightly peppery flavour without threatening the integrity of your taste buds, then a home-grown bushel of radishes is just the ticket. August is the tail-end of the long radish sowing season, which begins in February. Both summer and winter cultivars can be sown in August, as it’s the end and beginning of their seasons, respectively. Find a spot with well-draining soil and watch your radishes shoot out of the ground. You’ll be surprised at how quickly they mature! “Radishes are a great fast crop, perfect for an August sowing,” shares Master Horticulturist Colin Skelly. “Winter radishes will stand longer as the weather gets colder, so a sowing of both now will keep you in radishes well into autumn.” 3) Lettuce There are myriad different types of lettuce, each with its own distinctive appearance and quality of crunch. Many varieties lend themselves well to planting in August (or even September!) although there are a few things to keep in mind. Firstly, check that the variety you’ve got is suited to sowing this late in the year. If it is, plant out seeds in a spot that gets full sunlight, and where the soil can retain moisture. Then, from September onwards, cover your seedlings with a closed cloche to prevent chilly weather or persistent pests from wreaking havoc on your baby lettuce plant. 4) Cabbage One of our unsung kitchen heroes, the humble cabbage has been pushed out of the limelight by other, trendier vegetables. Things like butternut squash, sweet potato, asparagus, and even kale now feature more prominently in recipes than this mainstay of British gardening. But if, like us, you know just how delicious and versatile cabbages are, then you need to know that you can plant them in August, giving yourself another opportunity to harvest a crop before the year ends. You can either take the traditional approach of sowing cabbages in a seedbed then transplanting to your veg bed when they’re ready, or plant them straight into the veggie bed. If the former, your cabbages should be transplanted to their final spot in September or October. 5) Turnips August marks the end of the growing season for the humble turnip, another vegetable whose prominence has waned in recent years. There’s a reason turnips were a staple in British cuisine, though. These sweet and earthy veggies are tasty and versatile in equal measure, working just as well in rustic recipes as fine dining ones. Maincrop turnips can be sown until the middle of August, and turnip tops can be planted out in August or September. Simply pop the seeds a centimetre or so into the soil, and wait. 6) Overwintering Onions You’ll be hard-pressed to find a cuisine that doesn’t have onion in a fairly central role. This vegetable is the head honcho of a family of plants that includes garlic, chives, shallots, leeks, and a bunch of other ingredients that impart flavour and interest into literally thousands of recipes. Growing your own onions is a way to ensure a regular supply, and a depth of flavour that simply blows away anything you’ll find at the supermarket. You’ll be amazed at how piquant and flavourful a freshly-chopped onion from your garden can be. It may very well change the way you cook. Over the years many onion cultivars have popped up, many of which are well-suited to growth in August, and even later in the year. 7) Green Manures Mustard is a popular green manure “What’s green manure?” you may be asking. These handy plants are favoured by gardeners as a way to cover bare soil whilst it’s not being used for growing. They grow quickly, prevent as many weeds from being able to grow, and help to avoid soil erosion. Then, when you’re ready, you can dig them into the ground where they’ll break down and replenish the soil nutrients. In short, they’re something of a miracle cure for tired and bare sections of your garden. Italian Ryegrass This hardy winter annual has plenty of benefits for your garden. It’s easy to grow, firstly. It’s less bulky than some other green manures, while being just as effective at drowning out weeds. The long and sturdy roots are good at pulling nutrients from deep in the soil, meaning that when you work it back into the soil later on, the nutrients are more readily available to the short routes of fledgling plants. This green manure is noted for its ability to pull nitrates from soil, meaning you can incorporate it into a crop rotation by planting something that’s hungry for nitrates into the treated soil. Crimson Clover This green manure pairs especially well with Italian ryegrass, with a 75:25 ratio considered to be most effective at creating a balanced soil. Spreading crimson clover seeds over bare soil in August and leaving them to grow until November or December, before working them back through the soil, will improve conditions and strengthen the plants you grow next season. 8) Bonus Crop: Strawberries Not a plant that has ever been considered a vegetable. But done properly, planting out your rooted strawberry runners should pave the way for a bountiful harvest of many fruits later down the line. If you’re not familiar with rooted strawberry runners, let us fill you in. This is a way to propagate a strawberry plant which involves isolating a runner – the tendrils that emerge from the main plant – and encouraging it to put forth its own root system. It’s possible to tame these tangled tendrils The runners are the red stems in the picture above, sprouting forth from the mature plant. When the runner finds a suitable spot in the soil it puts forth its own roots, spreading the plant and extending its capacity to fruit. If you capture one of these tendrils and use an upside-down U-shaped piece of wire to hold it in place over a pot of soil, the leaves at the end of it will eventually send out roots. Once the root system is strong enough to support the fledgling plant, you can cut the cord linking it to its mother. Then the young strawberry plant is ready to be planted out, soon to be its very own bush! Go Forth & Garden There you have it: eight plants suited for planting out in August, a month that many people would write off as harvest season. After reading this guide, though, you can now count yourself among the hallowed few who know that August is still a time for sowing, further increasing the size of your total annual harvest. It’s our hope that you now feel inspired and able to get some last-minute growing into your gardening calendar. Enjoy, and good luck! References 1. The history of the Canary Islands natives. (2020, September 17). Hola Islas Canarias. Retrieved March 27, 2023, from https://www.hellocanaryislands.com/experiences/the-history-of-the-canary-islands-natives/
Learn more
8 Wholesome Vegetables To Plant In September According To Horticulturists
IN THIS GUIDE Improving Soil Fertility 1) Broad Beans 2) Garlic 3) Kale 4) Onion 5) Radish 6) Spinach 7) Turnip 8) Winter Lettuce References Planting a selection of overwintering vegetables in September will reward you with a bountiful harvest come springtime. As soon as the cold snap sets in from November onwards, you can kiss goodbye to any growth in your vegetable patch. That doesn’t mean you should shut up shop after summer, however; taking the time to seed overwintering vegetables in September will give them a good window to establish themselves before winter begins, meaning they’re well-placed to flourish when the temperature starts to rise once more. Ironically, many vegetables that are considered “winter” varieties – like brussels sprouts, leeks and parsnips – require planting earlier in the calendar, which catches out a clutch of novice gardeners every year.1 If that sounds familiar, don’t worry – there are still plenty more overwintering options to choose from that will reward your autumn diligence with a delicious bounty come the following spring. Indeed, September is not too late to reap the benefits of a late harvest in the same year if you opt for faster-growing varieties among your selection. Improving Soil Fertility As well as salvaging the last growth of the current year and getting a jump on the coming one, planting winter vegetables is also a great way to provide protection and nutritional benefits to the soil in December, January and February.2 Even if you don’t end up opting for vegetables, it’s an idea to cover bare areas with green manures like crimson clover or Italian ryegrass, which will improve the soil’s texture and enrich its nitrogen content. However, the same job can be done by vegetables while simultaneously providing a supply of food for your household, so we’d personally favour going the latter route every time. Here’s a handful of suggestions to get your autumn planting odyssey underway, along with a few pointers on how to handle them in order to produce the best results possible. 1) Broad Beans BOTANICAL NAME: Vicia faba RECOMMENDED VARIETIES: ‘Aquadulce Claudia’ HARDINESS RATING: H5 WHEN TO PLANT: SEPTEMBER – NOVEMBER Depending upon the variety of bean you go for, you can either plant Broad Beans in the autumn or the following spring. However, we prefer opting for an overwintering strain such as Aquadulce Claudia and getting your hands dirty in September (or even as late as November). This will help to provide coverage and protection to a soil that would otherwise be at the mercy of the elements through the most extreme parts of the year. Broad bean seeds should be sown at a depth of around 5cm, with spacing of approximately 15cm between plants and 45cm between rows. You should also provide support for your beans in the shape of stakes and twine, since the buffeting blasts of wintry winds can overwhelm them. 2) Garlic BOTANICAL NAME: Allium sativum RECOMMENDED VARIETIES: ‘Cristo’, ‘Germidour’ HARDINESS RATING: H4 WHEN TO PLANT: LATE SEPTEMBER – NOVEMBER Since garlic cloves require around six weeks of cold (below 10°C) temperatures to multiply into a bulb, they’re the perfect vegetable to plant in autumn. In fact, it’s possible to plant them at any point between September and spring, though you’re likely to receive a better yield if you get them in the ground sooner rather than later. Resilient and resourceful, garlic is among the easiest overwintering vegetables you’ll come across. Simply stick a clove in the soil and a bulb will take its place with minimal input from your side. Child’s play! The biggest potential obstacle to a hearty harvest come springtime is waterlogged soil, so if your home is in a particularly wet part of the UK, it might be an idea to plant the garlic in raised beds so as to allow plenty of opportunity for the moisture to run off. 3) Kale BOTANICAL NAME: Brassica oleracea var. sabellica RECOMMENDED VARIETIES: ‘Black Magic’, ‘Starbor’ HARDINESS RATING: H7 WHEN TO PLANT: AUGUST – SEPTEMBER Kale is one of the more under-appreciated members of the vegetable kingdom. Its extreme hardiness makes it incredibly simple to grow, requiring next to no maintenance and brushing off the inclemency of the British winter with ease. Larger varieties of kale will even produce edible yields all the way through the calendar year, with a single plant providing enough weekly sustenance for one person. However, it’s when springtime rolls around that this leafy green vegetable really comes into its own, with leaves the size of sheaves and vibrant foliage that’s really quite aesthetically pleasing. 4) Onion BOTANICAL NAME: Allium cepa RECOMMENDED VARIETIES: ‘Radar’, ‘Electric’ HARDINESS RATING: H4 WHEN TO PLANT: SEPTEMBER – MARCH Onions are such versatile ever-presents in the kitchen that esteemed Chilean poet Pablo Neruda famously penned a poem about them.3 While most onion sets are normally planted in springtime, there are many varieties (like Radar or Senshyu Yellow) which lend themselves well to seeding later in the year. For best results, plant them in modules with up to 10 seeds per module, spacing them at a distance of 25cm between each other and 30cm between rows. When it comes to harvesting in May, simply rip the whole lot up by their foliage and trim their ends to roughly the same length. Hey presto! Homegrown onions made easy. 5) Radish BOTANICAL NAME: Raphanus sativus RECOMMENDED VARIETIES: ‘Daikon’ HARDINESS RATING: H3 WHEN TO PLANT: JUNE – SEPTEMBER For those gardeners who want to squeeze one last harvest from the year before winter begins in earnest, a September seeding will see you feasting on radishes before October is over. Most varieties of this rapid-growing little specimen will go from seedling to sprouting to finished article in under a month, meaning it’s a great option if you prioritise a quick turnaround time on your produce. Radishes are also very versatile and can be incorporated into salads, roasts or even solo as a standalone snack. Their peppery punch and crispy crunch make them a favourite among culinary enthusiasts, while their laid-back, low-maintenance growing demands ensure they’re equally popular among the horticultural community. Plant them at 2.5cm intervals and with 1cm depth of soil and you’ll be snacking on these tasty autumn vegetables in next to no time. 6) Spinach BOTANICAL NAME: Spinacia oleracea RECOMMENDED VARIETIES: ‘Giant Winter’ HARDINESS RATING: H4 WHEN TO PLANT: MARCH – SEPTEMBER Spinach is a slightly more delicate plant than its cousin kale. That’s because the plant is susceptible to germination issues whichever season its planted in, but opting for an autumn seeding could enhance your chances. When planting in September, you should expect one mini-harvest at the end of October or beginning of November, before the plant goes into virtual hibernation for the colder months. When the temperatures do plummet, spinach will also require a little more in the way of protection than some other options on this list. Ensure it’s not ravaged by the worst of the frost by using fleecing from October onwards or, better yet, use a polytunnel to protect it from the elements. But with a little bit of TLC and some good-quality soil, your spinach plant will produce impressive yields when spring rolls around once more. 7) Turnip BOTANICAL NAME: Brassica rapa subsp. rapa RECOMMENDED VARIETIES: ‘Oasis’, ‘Atlantic’, ‘Tokyo Cross’ HARDINESS RATING: H6 WHEN TO PLANT: JULY – SEPTEMBER First thing’s first: it’s important to clarify that when we talk about planting turnips in September, we’re referring to the white variety (as opposed to swedes). Pick a fast-growing Japanese strain like ‘Tokyo Cross’ and get it in the ground early enough in the month and you’ll be able to take advantage of a final bumper yield before the nights draw in and the temperatures drop too low. As a quick and easy crop to cultivate, turnips are the ideal option to replace a spring or summer plant that has recently been harvested. Create 2cm-deep well and drop a single seed in each, leaving a 10cm interval between them. Alternatively, you can sow them in seed trays and transplant them into the Earth once they’ve begun to take root – but just ensure you leave more space for them to develop if taking this route. 8) Winter Lettuce BOTANICAL NAME: Lactuca sativa RECOMMENDED VARIETIES: ‘Winter Density’ HARDINESS RATING: H2 WHEN TO PLANT: AUGUST – NOVEMBER Lettuce has always been a favourite in British gardening circles, but what newbies might not realise is that this leafy salad crop can be cultivated right through the winter, as well. In fact, growing certain strains of lettuce is even easier later in the year, since the worst of the summer heat and drought will have passed. To take advantage, plant winter varieties of lettuce all the way up until October, then reap the rewards even in the depths of winter. “Winter lettuces will stand longer than summer lettuces, which tend to bolt if left too long unharvested,” says Master Horticulturist Colin Skelly. “‘Winter Density’ is a great choice and I use mini cloches in the coldest months to keep them harvestable.” Seeds should be dropped into drills with a depth of just 1cm, while spacing should be between 15cm and 30cm depending upon the particular strain you settle upon. The job will become even easier if you use a polytunnel or something similar to provide some insulation through the colder months, but it’s not necessary if you don’t have one to hand. Cloches and fleeces will do the same job just as well. References 1. Vegetables: growing for winter. (n.d.). Royal Horticultural Society. Retrieved March 27, 2023, from https://www.rhs.org.uk/vegetables/growing-for-winter 2. 5 Ways To Protect Soil this winter. (n.d.). Soil Association. Retrieved March 27, 2023, from https://www.soilassociation.org/causes-campaigns/save-our-soil/5-ways-to-protect-soil-in-the-winter/ 3. Giardino, A. (2018, October 9). Ode to an Onion: Pablo Neruda and His Muse. GoodReads. Retrieved March 27, 2023, from https://www.goodreads.com/en/book/show/38748272-ode-to-an-onion
Learn more
Woody Or Leggy Heather? Expert Nursery Growers Share 5 Rejuvenation Tips
IN THIS GUIDE Common Problems Advice To Help Revive Your Plants 1) Pre-Emptive Pruning 2) Check It’s Alive 3) Compost Accordingly 4) Hydrate To Regenerate 5) Relocate When Required References Heather that has become woody or leggy can be an eyesore in your garden – but all hope is not lost. With its evergreen foliage, brightly coloured blooms and year-round hardiness, heather is a popular choice for gardeners across the UK. In this guide, we’ve collaborated with heather experts, David Edge and Irene Lang. “In my early teens, I worked with heathers at a local nursery and appreciated the wide range of varieties,” shares David. “In the 1970’s they first gained publicity and recognition for their qualities and this stimulated my interest in collecting and growing them for myself. “The qualities that I appreciated then remain the same, especially with the plant’s concern for bees and butterflies, and for providing an environment and shelter for other wildlife.” The fact that it’s a native of this country makes it an ideal option in all weathers, while the little maintenance required means that novice horticulturalists generally find it easy to work with.1 Common Problems Having said that, heather is not impervious to pests, blights and diseases, nor is it infallible and invulnerable. Indeed, it’s likely that over the course of its lifetime, heather may give you cause for concern when parts of the plant turn brown or grey and it lacks the vim and vitality of its youth. In such cases, it can be difficult to know how to coax your heather plant back from the brink and rejuvenate it once more. While not all heather specimens will be able to be saved, there are certain tips and tricks that you can try to breathe fresh life into its roots and stems. Here are a handful of hints on how you can revitalise a heather plant that looks like it has seen better days. Advice To Help Revive Your Plants 1) Pre-Emptive Pruning You know what they say about prevention – it’s invariably better than the cure. “Trimming annually is a must to remove the old flowers and will keep the plant bushy with a tidy habit,” explains David. The fact that you’re reading this article means it may be too late to pre-emptively prune your heather plant before it develops any issues, but it’s a lesson worth bearing in mind for next time in any case. All heaths and heathers don’t require much in the way of dedicated care – but they will appreciate regular pruning. That’s because trimming the plants will help them to stay dense and compact, allowing them to divert nutrients to the parts which need them the most and promote multiple blossoms. It will also prevent the development of a woody interior, which is often the beginning of the end for heathers. Wait until the flowering period has ended, then prune them back by removing the stems of all old flowerheads and shearing off some of the foliage – but don’t trim them back so far as to reach the bare wood. 2) Check It’s Alive Once you do begin to experience a fatigued or fading plant, your first course of action should be to establish whether the whole plant is dead or dying. Lacklustre growth at the forefront of the plant can hide healthy stems underneath, while a heather that still appears healthy could already be in the first stages of decay. There are three main ways to check if a heather plant is alive or not. The first involves your sense of touch: handle the heather’s foliage and flowers to see if they’re dry and brittle, since this could be a tell-tale sign that it’s on its way out. Next, break off a single stem of the plant. If it’s pliable and green or white inside, it’s still alive; if it snaps in half easily, it could be dead. Finally, dig a small hole nearby the base of the plant to look at its roots. White roots indicate it’s healthy, while brown, red or black ones will tell you that it’s dying or dead. 3) Compost Accordingly One of the likeliest causes of a failing heather plant is improper soil. Heathers love acidic soil types with good drainage, so you can encourage a flagging specimen to flourish once more by ensuring it has the nutrients it needs. Place ericaceous compost at its base to promote new growth, or else mulch with pine needs and other organic matter to enhance the acidity of the soil. Remember, some heather plants are more reliant on acidity than others, so check the label on your particular specimen or else look up the genus online to see if it requires special treatment. In the right soil, heathers are hardy enough to thrive and survive for many years at a time, even when left to their own devices. 4) Hydrate To Regenerate Another chief cause of a dying heather plant is improper irrigation. If a specimen’s roots and foliage are allowed to dry out completely, it’ll die out within a matter of days and won’t return the following year. That’s why it’s important to ensure that the soil surrounding the plant is always kept moist (but not waterlogged) in order to maintain adequate hydration. “In hot and dry conditions, newly planted heathers will require watering to maintain moisture,” explains David. “Heathers are not seen to wilt and show little sign of drought conditions until too late.” For a plant that’s desperately in need of a drink to the point of expiration, it can be beneficial to dig it up entirely (roots and all) and soak it in a bucket of water for a couple of hours to slake its thirst. “Soaking in a bucket is an emergency plant first aid and it will work for other plants as well as heathers if you find a casualty in the garden,” shares Master Horticulturist Colin Skelly.. “Unfortunately, it will either work (and the recovery can be dramatically quick) or it won’t.” Then, it’s simply a case of replanting in the location of your choice. It should also be noted that some heather varieties are susceptible to hard water, which can come out of the taps of many households in Britain. For best results, collect rainwater and use that to irrigate your plants instead of using tap water. You can also feed your heathers to help them recover, David suggests: “Give your heathers a light granular broadcast feed of a general fertiliser to help it maintain good, healthy growth.” 5) Relocate When Required The final factor which could be contributing to poor performance from your heather is its location. For starters, heather plants are hardy beasts that love the great outdoors, so if you have yours cooped up indoors, it might not enjoy the conditions. They can also be grown in pots and containers without too much of a problem, but if you have acidic soil in your garden, it’s always a preferable option. “Ensure that the soil type is correct for the type of heather you are planting,” says David. “Winter and spring flowering heathers are tolerant of heavier alkaline soils, whereas most of the summer flowering heathers require an acidic and light soil type. “Planting and other care information can be found online as well as on individual plant labels.” While heathers are resilient under most conditions, they don’t do well in the extremes of hot or cold, so if you’re lucky enough to live in a particularly sunny part of the country, it may be an idea to plant it in a spot that enjoys at least partial shade. Plant the heathers with enough distance between them to allow their roots to explore at will and feed and water them regularly at the outset to ensure they take to their new environment and you may just be able to bring them back from the precipice. References 1. New Forest National Park Authority. (2019, September 25). Heather. Retrieved March 16, 2023, from https://www.newforestnpa.gov.uk/discover/plants-fungi/heathland-plants/heather/
Learn more
15 Plants To Grow An Alpine Rock Garden With Inspiration From RHS Harlow Carr
IN THIS GUIDE Expert Chosen Varieties 1) Aubretia 2) Campanula 3) Dianthus 4) Gentiana verna 5) Geraniums (Alpine Varieties) 6) Lithodora 7) Penstemon 8) Pulsatilla vulgaris 9) Phlox 10) Primula 11) Saxifraga 12) Sedums 13) Sempervivums 14) Thyme 15) Veronica Final Considerations References There are plenty of great plants to consider for an alpine rock garden. But when you are getting started with growing alpines, it can be great to have a list of some of the favourites that you can use as a starting point for making your selections. A rock garden is a great feature for a garden – typically in a sunny and open spot. Creating this type of habitat will allow you to grow a range of relatively low-maintenance plants which come from rocky and mountainous regions, and make the most of areas that may have nutrient-poor and/or shallow soils. Expert Chosen Varieties We consulted with a specialist grower to find out their favourite alpines that could be suitable for growth in a rock garden. “Alpines incorporate so many different varieties,” says Hayley Willerton, Owner of The Alpine and Grass Nursery. “Ventilation is also essential and as all the alpines we grow are hardy, they do not need covering up in winter.” Some of Hayley’s favourite varieties include: Erodium x kolbianum ‘Natasha’ “This is a very pretty alpine with fern-like, silver-green leaves bearing darkly veined pink flowers with two maroon eyes,” shares Hayley. “These alpines love basking in full sun.” Armeria maritima ‘Dusseldorf Pride’ “‘Dusseldorf Pride’ bears many clusters of deep pink flowers from spring through to autumn. “It is loved by pollinators and thrives in either full sun or partial shade.” Silene acaulis “This is a compact, slow-growing alpine, studded with tiny pink flowers and is a true delight,” says Hayley. “This alpine always makes me smile.” So – if you have made an alpine rock garden, or are thinking about making one, here are fifteen further plants to consider: 1) Aubretia SUNLIGHT: FULL SUN SOIL: WELL-DRAINED; ALKALINE OR NEUTRAL HARDINESS RATING: H6 Aubretia, also known as purple rock cress or purple chickweed, is a hardy (H6) mat-forming perennial. It is evergreen and has copious, lovely little pink or purplish flowers in the spring. It will thrive in full sun and well-drained soil that is alkaline or neutral in pH, but can also tolerate a little partial shade. 2) Campanula SUNLIGHT: FULL SUN OR PARTIAL SHADE SOIL: MOIST BUT WELL DRAINED; ANY PH HARDINESS RATING: H5 There is a wide range of diminutive bellflowers, Campanula, which are perfect for rock gardens. There are literally hundreds of varied options within this genus. One type of bellflower which I would recommend for a rock garden is Campanula portenschlagiana – wall bellflower. This low growing perennial is a great alpine plant, which is evergreen, forming dense mats of small rounded leaves. They have pretty violet-blue flowers in the summer. H5 hardy, these are ideal for rock gardens or sunny borders where conditions don’t get too wet in winter. 3) Dianthus SUNLIGHT: FULL SUN SOIL: WELL DRAINED; ALKALINE OR NEUTRAL HARDINESS RATING: H6 Alpine varieties of Dianthus, also known as ‘Pinks’ are also ideal for many alpine rock gardens. D. alpinus is another mat-forming perennial which bears pretty pink or cerise flowers in the summer months. It is H6 hardy, and will thrive in a well-drained position in full sun, with alkaline or neutral pH. Their flowers are vibrant additions to an alpine rockery. 4) Gentiana verna SUNLIGHT: FULL SUN SOIL: MOIST BUT WELL DRAINED; ALKALINE OR NEUTRAL HARDINESS RATING: H5 Spring gentian is another lovely alpine for a rockery, which is another small evergreen mat-forming perennial. But in spite of its small size, it can really make a big impact with its stunning sky-blue flowers with white centres, which bloom in late spring and early summer. It is H5 hardy, and prefers moist but well-drained soil that is alkaline or neutral, in full sun. 5) Geraniums (Alpine Varieties) SUNLIGHT: FULL SUN OR PARTIAL SHADE SOIL: MOIST BUT WELL DRAINED; ANY PH HARDINESS RATING: H5 Alpine geraniums are another notable group of plants to consider for an alpine rock garden. One great example is G. ‘Ballerina‘ (Cinereum Group), a great ground cover plant and great for wildlife.1 It is an H5 hardy herbaceous perennial which forms small clumps of foliage and flowers with pinkish purple-hued blooms in late spring and summer. The evergreen perennial G. dalmaticum is another great option to consider for your rock garden. 6) Lithodora SUNLIGHT: FULL SUN SOIL: WELL DRAINED; ACIDIC OR NEUTRAL HARDINESS RATING: H5 Lithodora diffusa is a great training plant for the rock garden. H5 hardy, it has deep green foliage that spreads well, and deep gentian blue flowers which bloom over a long period from May through the summer months. It will do best in full sun; in acidic or neutral soil. 7) Penstemon SUNLIGHT: FULL SUN SOIL: WELL DRAINED; ANY PH HARDINESS RATING: H4 Pine-leaved Penstemon, P. pinifolius, is another interesting plant to consider. This bushy dwarf shrub is evergreen, with short, needle leaves – and it bears bright scarlet tubular flowers in the summer months. It will thrive in very well-drained, sheltered, spots in full sun. Another Penstemon to consider is P. laetus subsp. roezlii, a perennial which bears purple flowers from late spring to mid-summer. 8) Pulsatilla vulgaris SUNLIGHT: FULL SUN SOIL: VERY WELL DRAINED; ANY PH HARDINESS RATING: H5 Also known as pasqueflower or meadow anemone, this clump-forming perennial wows with its large nodding purple flowers, followed by silky fruiting heads. It is H5 hardy and will thrive in any very well-drained soil in full sun. Though it can be hard to establish, once it beds in it is wonderful for an impressive alpine rock garden. 9) Phlox SUNLIGHT: FULL SUN OR PARTIAL SHADE SOIL: MOIST BUT WELL DRAINED; ANY PH HARDINESS RATING: H6 Phlox is a genus which offers a number of different mat-forming evergreen perennials that work very well in sunny, well-drained rock gardens. They have small pinkish flowers which emerge from late spring. Phlox douglasii and P. subulata are both great examples, which are H6 hardy and fairly resilient in the right conditions. 10) Primula SUNLIGHT: FULL SUN OR PARTIAL SHADE SOIL: WELL DRAINED; ALKALINE OR NEUTRAL HARDINESS RATING: H5 For a moist but well-drained rock garden in full sun, ideally in loam, Primula auricula is another reliable choice. This evergreen perennial has lovely bright flowers which emerge in the spring. H5 hardy, these are relatively well known and popular primulas for a rock garden. Note: these are not the same as true show auriculas. Primula marginata, P. allionii and their many hybrids are also excellent options for an alpine rock garden. 11) Saxifraga SUNLIGHT: FULL SUN OR PARTIAL SHADE SOIL: WELL DRAINED; ALKALINE OR NEUTRAL HARDINESS RATING: H5 Saxifraga are yet more mat-forming perennials which are great for adding lush greenery to alpine spaces. There are a number of examples with flowers of various different hues. S. ‘Silver Cushion’ and S. paniculata ‘Lavagreana’, ‘Rosea’ and ‘Venetia’ are all top options to consider. If you are new to alpine rock gardening then this genus should be one of the go-to choices. 12) Sedums SUNLIGHT: FULL SUN SOIL: WELL DRAINED; ALKALINE OR NEUTRAL HARDINESS RATING: H5 Like saxifrages, Sedums are also an obvious go-to choice, whether you are a complete novice or a far more experienced gardener of alpine plants. Many stonecrops, with their pretty little star-shaped flowers, are ideal for nestling among rocks in a rockery, or even planting into the top of a stone wall. S. cauticola, for example, is one such Sedum to consider. 13) Sempervivums SUNLIGHT: FULL SUN SOIL: WELL DRAINED; ANY PH HARDINESS RATING: H7 For free-draining, sunny sites, succulents like Sempervivum are often a great choice. Houseleeks, as they are sometimes called, are very easy to please alpine succulents. There is a reason why they are so well known and widely recognised – with attractive and intricate rosettes, they can grace your garden for many years as long as they don’t have ‘wet feet’ and are protected from excessive rain in winter. 14) Thyme SUNLIGHT: FULL SUN SOIL: WELL DRAINED; ALKALINE OR NEUTRAL HARDINESS RATING: H5 Thyme is a plant that you might be more likely to consider placing in a herb garden rather than in an alpine rock garden, but Thymus vulgaris will be right at home in this location. Well known as a culinary herb, thyme can also be a great decorative plant – producing little purple flowers in addition to aromatic leaves. A creeping thyme variety will be ideal for spreading through your rock garden. 15) Veronica SUNLIGHT: FULL SUN SOIL: WELL DRAINED; ANY PH HARDINESS RATING: H5 Veronica prostrata, or rock speedwell, is my final pick – another of my favourites for an alpine rock garden. This mat-forming semi-evergreen perennial thrives in well-drained locations in full sun. It is H5 hardy and has really pretty blue flowers that bloom during the summer months. This is another relatively easy and low-maintenance plant. Final Considerations A rock garden can represent a big investment in rock, and in time and energy – even where the rocks are already available on site. So it is important to make sure that you make the right plant choices for your particular rock garden. Remember that “rock gardens should have a growing media that is relatively low in nutrients and organic matter and high in gravels, grits and sands to reflect the habitats that alpines come from,” according to Master Horticulturist Colin Skelly. “Choosing the right plants means that they should thrive in the conditions that you have created for them, a ‘home from home’. “However, plants that like fertile conditions will suffer, whilst drought-tolerant non-alpines might take over your rockery. “A little homework on planting goes a long way to successful planting!” References 1. Geranium (Cinereum Group). (n.d.). Royal Horticultural Society. Retrieved March 9, 2023, from https://www.rhs.org.uk/plants/194563/geranium-(cinereum-group)-ballerina/details
Learn more
How To Create An Alpine Garden In 8 Steps With Jenny Shukman (Picts Hill Alpines)
IN THIS GUIDE What Is An Alpine Garden? How To Make An Alpine Garden What Alpine Plants Might You Use? References Head up into the mountains and you’ll see a completely different palette of plants and flowers to those you see at lower altitudes. An alpine garden is a special type of garden designed to replicate these mountainous growing conditions as closely as possible, giving this captivating set of plants an opportunity to thrive in your very own backyard. In this guide, we’ve collaborated with Jenny Shukman, Co-owner of Picts Hill Alpines. What Is An Alpine Garden? To expand on the brief introduction above, an alpine garden is one specifically designed to simulate the conditions and replicate the flora that grows naturally at high altitudes. A whole new palette of colours and shapes This is achieved through several means, one example of which is switching out regular garden soil for sandier, well-drained soils, along with gravel and rocks to align more closely with the stark and barren mountaintop conditions. With these changes, it becomes possible to grow a set of plants that might not otherwise thrive at lower altitudes, and to bring their aesthetic from the far reaches of a mountain range to the comfort of your back garden. The first alpine garden is attributed to Anton Joseph Kerner, a renowned Austrian botanist.1 The concept has since spread far and wide, garnering enthusiasm from gardeners around the world. Lots of alpine gardens feature succulents like sedum So popular are alpine gardens, in fact, that the Alpine Garden Society (AGS) was formed in 1929 to support any gardener looking to learn more about this type of gardening.2 How To Make An Alpine Garden Hopefully by now you’re inspired to begin turning your backyard (or at least a section of it!) into an alpine garden. Here’s how to do it: 1) Decide where your alpine garden will go So far we’ve alluded to alpine gardens as fairly big undertakings, prone to make use of a large portion of your outdoor space. This doesn’t have to be the case, however. Alpine gardens can range in size from a full backyard, right down to a trough or even a flower pot. “You can create an alpine garden in many different ways and it doesn’t need to be on a large scale,” Jenny shares. “All sorts of containers can be used and raised beds work as well. Choose rocks to suit the size of your container.” 2) Make sure the spot simulates the desired conditions Whichever size alpine garden you go for, keep in mind that you’re aiming to recreate mountain conditions as closely as possible. This means lots of exposure, no shelter from the wind, and less moisture than you’d usually find in your garden. “Crevice gardens are an effective way of displaying alpines, where the rocks are placed vertically and close together to provide narrow planting pockets,” Jenny recommends. “It is also important to display them where you can appreciate them and where you can look after them easily. “Raised beds work well for this, or simply a few clay pots on a patio table. “As well as being able to enjoy them better, you will be able to quickly spot any problems.” Crevice garden Unless you’re working with a particularly large garden, it’s not unusual at this stage to struggle to find the right spot. Most of us will have gardens without a spot that’s shade-free all day. If this is the case, look for the spot that gets the most sunlight compared to everywhere else. Avoid a spot near buildings, trees, and other tall plants. Ideally it will be as open as possible from all sides, letting the air circulate undisturbed. 3) Try to position your alpine garden against a natural background When you’re up a mountain, it’s unlikely that the splendorous plants and their bright flowers will be set against a brick wall, a wooden fence, or some similar man-made backdrop. Whilst we appreciate that space may be a limiting factor here, we do advise trying to find as natural a background as possible. Something that gives you and your guests an opportunity to suspend disbelief, and imagine themselves atop a mountain peak somewhere in Europe, rather than being sat in a British back garden. “Trying to create a naturalistic backdrop was the reason that Victorian estates sometimes spent vast amounts of money in converting quarries, importing stone or even creating artificial stone to build immersive alpine experiences,” explains Master Horticulturist Colin Skelly. “Rest assured, more modest efforts also make the required impact.” 4) Remove the weeds This is good advice for any area of your garden, really, but it’s especially important for an alpine garden. For two reasons: Weeds will break the illusion by mixing two distinct aesthetics. Alpine plants are susceptible to being damaged by weeds. For best results, take special care to remove all weeds from your alpine garden spot before planting anything, then remain extra vigilant and quickly remove any industrious weeds that break cover. 5) Ensure good drainage This is of paramount importance. Alpine plants require far less moisture to thrive, and will suffer if left standing in moist soil for too long. “Most alpines don’t mind the cold, but damp weather can cause problems,” says Jenny. “Make sure they are in well-drained soil or compost and provide good airflow. “Don’t overcrowd the plants and provide a good layer of horticultural grit or stone chippings to cover the soil or compost. “Quickly and carefully remove any foliage that shows any sign of succumbing to the damp.” Choose sandy soil or gravel to allow water to drain away quickly and easily from your alpine garden. Lewisia cotyledon ‘Elise Mixed’ “Use free draining soil or compost mixed with horticultural grit, and add a layer of grit or stone chippings on top,” Jenny explains. With Jenny’s advice in mind, if you’re working with a spot that currently has regular soil, we recommend working grit or sand (or both!) into it to bring it in line with what these plants need. “Top up the mulch of horticultural grit or stone chippings when needed,” Jenny adds. “This will prevent the alpines from sitting in wet soil and prevent them from rotting.” 6) Add rocks If you’re working with a space big enough to allow it, incorporating large rocks is a fantastic way to cultivate the alpine garden aesthetic. You can buy stones from garden centres and outdoor shops, or go straight to the source and approach stone merchants directly. Limestone is often found in natural mountainous conditions, and makes a popular addition to home alpine gardens. Try not to get too hung up on the exact size and shape of the stones you buy, instead accepting that a rugged and unplanned selection will probably end up looking better than rocks fastidiously chosen to match each other. “Try not to let any weeds get established as they will be difficult to remove if their roots grow under the rocks,” Jenny explains. “Pull them out carefully by hand when they are still seedlings.” 7) Plant your garden Once everything is ready, it’s time to start planting out your alpines. “Select plants with a theme,” says Jenny. “For example, you could opt for a range of sempervivums to provide all year interest and other alpines with similar properties to provide seasonal colour.” You have a lot of other options here, so let’s take a look at a few: Buy mature alpine plants from a garden centre. This is a great way to get your garden looking alive from the outset, which is motivating and encouraging. Choose a few plants you like, double-check that their needs align with your conditions, then take them home and plant them out. Grow alpine plants from seed. Each plant has different requirements so we won’t go into all of them here, but it’s possible to grow a range of alpines from seed. Participate in the AGS seed exchange.3 Each year the Alpine Garden Society run a seed exchange where alpine gardeners – from amateurs through to seasoned vets – can find unusual seeds they may struggle to find elsewhere. Whichever combination of options you choose, planting things out into your alpine garden is probably the most exciting step. This is when your plans and potentially hard labour morph into a tangible medley of beautiful plants. 8) Other tips We highly recommend checking out the AGS website, along with other resources designed to help budding alpine gardeners find their feet.4 Like many niche types of gardening, alpine gardeners are a vibrant and enthusiastic community ready and willing to help newbies get acquainted with the technique. There are plenty of books about alpine gardens, too: Great if you’d like to delve a little deeper into the area, and to bolster your understanding even more before setting out on your very own project. What Alpine Plants Might You Use? As well as sedum, pictured above, there are plenty of exciting and attractive plants that feature frequently in alpine gardens. Here we’ll showcase a few to give you a feel for what you could be working with. Rock Cress / Arabis alpina This flowering Brassicaceae boasts delicate white flowers, above a tuft of rugged leaves. Hailing from only a few places on the Isle of Skye, it’s a tricky plant to find in the wild. This goes some way to explaining its appeal to alpine gardeners, who can, with care, bring something quite rare to their garden. Pasque Flower / Pulsatilla vulgaria Bright and beautiful blooms With bright purple petals surrounding a sumptuous yellow centre, the pasque flower brings a bold splash of colour to any alpine garden. The plant is related to the buttercup family, and is found naturally in various parts of Europe. Yellow Helmet Flower / Scutellaria orientalis Comfortable growing in the harsh alpine tundra, the yellow helmet flower features small tubular flowers (no points for guessing which colour they are), alongside deep green, ridged leaves. Seeing this plant, it’s obvious immediately that it cut its teeth somewhere harsh and unforgiving. Alpine Geraniums / Geranium macrorrhizum This Geranium is suitable for growth in UK gardens – one of the few plants you’ll find regularly in alpine gardens to do so.5 Its bouquet of gentle purple flowers, above bright green leaves which share their distinctive shape, is eye-catching and attractive. Candytuft / Iberis sempervirens Bunches of white petals dancing aloft from the ground, the candytuft lives up to its light and airy name. Ranging all over Europe, parts of Africa, the Middle East, and Asia, this plant hails from far and wide. Its attractive bloom makes it a popular and viable addition to any alpine garden. See this guide for more alpine plant inspiration. And this guide if you’re looking to grow your alpines in a trough. References 1. Kerner von Marilaun, Anton Joseph. (n.d.). JSTOR. Retrieved March 9, 2023, from https://plants.jstor.org/stable/10.5555/al.ap.person.bm000152118 2. Alpine Garden Society Homepage. (2023, March 16). Alpine Garden Society. Retrieved March 20, 2023, from https://www.alpinegardensociety.net/ 3. Seed Exchange. (2022, October 3). Alpine Garden Society. Retrieved March 20, 2023, from https://www.alpinegardensociety.net/seed-exchange/ 4. Beginner’s corner. (2023, January 4). Alpine Garden Society. Retrieved March 20, 2023, from https://www.alpinegardensociety.net/beginners-corner/ 5. Alpine or Rock Geraniums. (2020, July 24). The Hardy Geranium Nursery. Retrieved June 27, 2023, from https://hardygeraniumnursery.co.uk/2020/07/24/alpine-or-rock-geraniums/
Learn more
12 Short And Low Growing Grasses Chosen By Horticulturists To Match Any Garden Scheme
IN THIS GUIDE 1) Acorus gramineus ‘Ogon’ 2) Elymus magellanicus 3) Festuca glauca 4) Hakonechloa macra 5) Imperata cylindrica 6) Koeleria glauca 7) Luzula sylvatica 8) Milium effusum 9) Melica uniflora 10) Pennisetum villosum 11) Sesleria caerulea 12) Nassella tenuissima Ornamental grasses can add movement, variation and year-round colour to your borders, raised beds and garden planting schemes. While most of us might associate the term ‘grasses’ with the slender elegances of rushes and reeds, these versatile and diverse plants come in all shapes and sizes. “I think the one group of plants that is essential to my work are ornamental grasses,” shares Designer Wes Shaw. “They are such versatile plants that can be used anywhere. They look great all year, are easy to grow, drought tolerant and have fantastic form and texture. “I love naturalistic planting and they combine so well with other perennials to produce beautiful displays that will also benefit wildlife and diversity.” In fact, the grass genus is one of the biggest in the entire plant kingdom, with strains and species having adapted to every conceivable climate and soil type on the planet. What that means is that in addition to the long, waving stems of taller grasses, there are also a number of small, short and low-growing varieties which are perfect for more economical spaces. “Ornamental grasses are my favourite, purely because of the fact that they add movement to a garden, lots of interest throughout the year if you select the right ones and are great for wildlife,” shares TV Presenter Mark Lane. “They look lovely when they’re frosted in the autumn and winter and are a brilliant plant for putting into a border to divide up colours and blur plants together.” They also work well in stitching the aesthetic of your garden together, providing a subtler background link between more showy blooms. The fact that there are many evergreen varieties available – alongside the multi-toned colours that many varieties offer – makes them an ideal method of brightening up your display throughout the colder months. “Ornamental grasses are successful in our natural world that they obviously work well in our gardens,” says Neil Lucas, an expert on ornamental grasses. “You need to make sure that you’re growing the right plants in the right soil. “When using grasses, the important factors are shade and drainage, and if you can get those factors right, grasses split quite easily into those categories so you can learn where to put them.” Aside from the practical considerations of which grasses will flourish in the conditions available to you, the other major factor in your decision-making process should be a cosmetic one. In this respect, it pays to be bold in your choice of ornamental grasses, opting for colours that will change and transform as the calendar year progresses. This means they can not only complement the existing décor in your display, but provide a focal point all of their own, as well. “In almost all of our schemes, we include grasses,” says Garden Designer Gavin McWilliam. “They catch the light and look great. They also act as a great filter between the different planting groups and are relatively low-maintenance.” For any green-fingered enthusiast for whom space is at a premium, or who simply wishes to use smaller varieties of grass to create a more compact and grounded effect, here is a suggested list of low-growing ornamental grasses that won’t exceed one metre in height – 1) Acorus gramineus ‘Ogon’ COMMON NAME: SWEET FLAG HARDINESS RATING: H6 TYPICAL HEIGHT: 0.3M Acorus gramineus ‘Ogon’ – otherwise known as Sweet Flag – is a semi-evergreen grass which provides vibrant colour for much of the year. Its distinctive sword-shaped leaves are a delicious yellow in colour, complemented by the lush green of the variegated stripes which line them. The plant will remain an attractive component of your display until late autumn when the foliage begins to fade, at which point it should be pruned back to encourage further growth the following year. Unlike many other grasses, A. gramineus actually prefers wetter soil types with poor drainage, so it makes for an excellent addition to the periphery of a pond, fountain or other water feature. Alternatively, you can leverage the vibrancy of its foliage to brighten up shady areas of the garden which don’t receive much in the way of sunlight. 2) Elymus magellanicus COMMON NAME: Magellan Rye Grass HARDINESS RATING: H6 TYPICAL HEIGHT: 0.6M With its metallic blue leaves that carry an almost silver hue, Elymus magellicanus is perhaps the bluest of all bluegrasses. It’s a native of South America, with the plant found in plentiful supply in the colder climes of southern Chile and Argentina. For that reason, it holds up well against the vagaries of the Great British climate, though it won’t prosper in the extremes of a summer heatwave or a winter frost. Instead, E. magellanicus prefers a milder year-round temperature. In the right conditions, it can provide evergreen colour, though gardeners may notice that it exhibits signs of fading and fatigue in winter. If that happens, it should be cut back severely in spring, after which it will rebound slowly but reliably, requiring very little in the way of maintenance. It shouldn’t require dividing for several years, but spring is the best time to do so when the opportunity does arise. 3) Festuca glauca COMMON NAME: Blue Fescue ‘Blaufuchs’ HARDINESS RATING: H5 TYPICAL HEIGHT: 0.35M Sometimes called ‘Blaufuchs’ or Blue Fox, Festuca glauca is another compact grass defined by the steely blue of its leaves. Unlike Elymus magellanicus, however, F. glauca is a deciduous plant which dies away during the colder months. Its foliage is also narrower and more needle-like than the sword-shaped fronds of its South American counterpart, while the green buds of flowers which appear in summer are similarly slender and unglamorous in their nature. The striking colour of its leaves makes it an ideal addition to a rock garden, where the metallic hues will complement the greys and whites of pebbles and stones beneath. Growing to just 35cm in height, it’s easily manageable and will thrive in most soil types with little in the way of support. 4) Hakonechloa macra COMMON NAME: Japanese Forest Grass HARDINESS RATING: H7 TYPICAL HEIGHT: 0.5M Hailing from the rocky cliffs of the Japanese island of Honshu, this attractively shaped perennial grass is great for bringing a touch of the Orient into your garden. Its long, curving green leaves spring from a tufted mound and shoot upwards, before draping over themselves in an eye-catching manner. Meanwhile, the red and brown hues that the foliage takes on in autumn and winter make it a crowd-pleaser right through the calendar. The cascading nature of the plant’s growth makes it ideal as an edging element to a pathway, an understated backdrop to taller and showier shrubs or flowers or as a standalone focal point in a minimalist gravel forecourt. It’s fully hardy and slow growing, meaning it doesn’t require much in the way of garden care, though it will appreciate being pruned in winter and mulched in sprung to encourage an encore of growth in the following year. 5) Imperata cylindrica COMMON NAME: Red Baron HARDINESS RATING: H4 TYPICAL HEIGHT: 0.5M Characterised by the brilliance of its scarlet spikes, Imperata cylindrica – or Red Baron, to give it one of its common names – is perhaps one of the more eye-catching inclusions on this list. The redness of the foliage fades into a mellow green at its roots and the entire leaf turns slightly translucent as it matures. This interesting visual effect makes it perfect for livening up borders and pairing with similarly ostentatious grasses and shrubs. It’s a hardy little critter which will handle most soil types with ease, but for the most vivid colours which really pop, it’s advisable to grow I. cylindrica in moist soil with a high humus count in full view of the sun’s rays. It also works equally well in a pot or container and when set alongside three or four other plants of the same genus, it will produce a particularly impressive aesthetic. 6) Koeleria glauca COMMON NAME: Blue Hair Grass HARDINESS RATING: H5 TYPICAL HEIGHT: 0.5M The blue-green tufted hummocks of Koeleria glauca (common name: Blue hair grass) are most popular in rock gardens and gravel forecourts. The foliage is at its most stunning earlier in the year, while the blooming of silver-green flowers come summertime adds another layer of intrigue. As the shadows begin to lengthen and autumn sets in, the leaves and flowers both fade to a rustic straw-yellow. Hardy, low-maintenance and unassuming, K. glauca is a fantastic choice for those looking for a more reserved accompaniment to brighter flowering plants. Indeed, perhaps the only drawback of this resilient and versatile species is that it generally doesn’t last as long as some others on this list, so may require replacement within a couple of years. 7) Luzula sylvatica COMMON NAME: Great Woodrush HARDINESS RATING: H7 TYPICAL HEIGHT: 0.8M This evergreen perennial is often planted en masse, forming a handsomely hummocked carpet for your garden floor. Although Luzula sylvatica does bear small clusters of brown flowers in late spring and early summer, the floral blooms are not considered its finest attribute. “Like many plants sold as grasses, Luzula is not technically a grass but a perennial in the Rush family,” explains Horticultural Consultant Colin Skelly. “From the ornamental rather than botanical standpoint, the effect is the same, and Luzula is a fantastic plant for damp shade where it will cover the ground and look fantastic and associate well with other damp and shade-loving perennials.” Instead, it’s the glossy greenery of its foliage, which spills out of loose clumps in an overflowing effect, which steal the show. Native to both Europe and southwest Asia, this hardy little plant knows a thing or two about colder temperatures. It doesn’t enjoy the full heat of the sun if the soil beneath it is allowed to dry out, but will otherwise cope with pretty much anything the elements can throw at it. For best results, plant it in grouped clumps and divide to propagate further come springtime. 8) Milium effusum COMMON NAME: Bowles’ Golden Grass HARDINESS RATING: H7 TYPICAL HEIGHT: 0.5M With sprouting foliage that appears bright yellow in spring before turning a rich green later in the year, Milium effusum is a favourite among gardeners searching for a bright grass to add some energy to a dark or jaded part of their display. It’s semi-evergreen in nature, meaning the foliage is prone to losing some or all of its lustre in the colder months, but it invariably grows back again the following year. The delicate yellow flowerheads of summertime only add to its appeal. It’ll work best in soil with good drainage, while it doesn’t overly enjoy too much UV radiation, so keep it in a shady spot to coax the best performance out of it. Dead foliage and flowerheads can be pruned in spring and they can be propagated by division at that time of the year, too. Other than that, M. effusum will thrive when left to its own devices. 9) Melica uniflora COMMON NAME: Wood Melick HARDINESS RATING: H7 TYPICAL HEIGHT: 0.5M As the Latin name of this elegant grass suggests, Melica uniflora flowers bloom singly come summertime. Their spiky panicles are apt to sway pleasingly in a gentle breeze, while the dense, pointed foliage beneath provide depth and colour to their backdrop. For that reason, they’re a popular choice for blending the edges of a garden with the surrounding environment, blurring the lines between nature and nurture. As a native of Europe, northern Africa and southwestern Asia, Melica uniflora is a highly adaptable grass which will fare well in almost all conditions, from the high altitude of the Alps to the low plains of the prairie. As such, it should perform well wherever you place it in your garden and will grow in slowly spreading clumps that are easy to manage should they become too big for their horticultural boots. 10) Pennisetum villosum COMMON NAME: Feathertop HARDINESS RATING: H3 TYPICAL HEIGHT: 0.5M Pennisetum villosum – or feathertop – is one of the most desirable ornamental grasses going, especially in sensory gardens where touch is just as important as aesthetics. That’s due to the bobbing masses of rabbit tail-like blooms, which spring up each summer and sit proudly atop the fine-leaved foliage like clouds. As well as being incredibly easy on the eye, they’re also the kind of grass that begs to be touched. As natives of tropical regions of Africa, P. villosum is unlikely to survive the harsher extremes of a British winter. There’s no need to worry, however, since they are experts at self-seeding and will, in all likelihood, come back the following year even stronger with little in the way of help from your end. 11) Sesleria caerulea COMMON NAME: Blue Moor Grass HARDINESS RATING: H7 TYPICAL HEIGHT: 0.5M Although not the first grass on this list to carry a bluish tinge to its green, Sesleria caerulea is perhaps unique in its combination of those two colours. That’s because the topside of its leaves features a dull blue that’s almost grey in hue, while the underside is painted in a rich dark green. Together, those shades make for quite the head-turning specimen, while the purple flowers which proliferate during summer are just the icing on the cake. Ideal for use as ground cover, Sesleria caerulea prefers well-draining soil that receives full or partial sun. It’ll reach a maximum of 50cm in height, meaning it can work well at the front of a border with taller plants behind, while the only maintenance it will require is a quick raking in spring to separate the dead leaves from the live ones. 12) Nassella tenuissima COMMON NAME: Mexican Feather Grass HARDINESS RATING: H4 TYPICAL HEIGHT: 0.6M Nassella tenuissima goes by many names: Mexican Feather Grass, Pony’s Tail or Angel Hair to name but a few. One look at the soft feathery flowerheads which proliferate in summer will reassure you that each of them is an apt moniker for this attractive deciduous, clump-forming grass. It’s particularly effective when placed alongside other grasses or as part of a herbaceous border, adding understated charm to its surroundings. The long, slender stems of N. tenuissima grow to a maximum of 60cm in length, while the plant will perform most impressively in full view of the sun and in sandy soil that enjoys good drainage. Its flowerheads make for attractive cut-and-dried floral displays, but alternatively, the seeds within them can provide a solid source of sustenance for finches and other birds in autumn and winter.
Learn more
10 Perfect Ornamental Grasses For Containers With Tips From RHS Gold-Medalist Neil Lucas
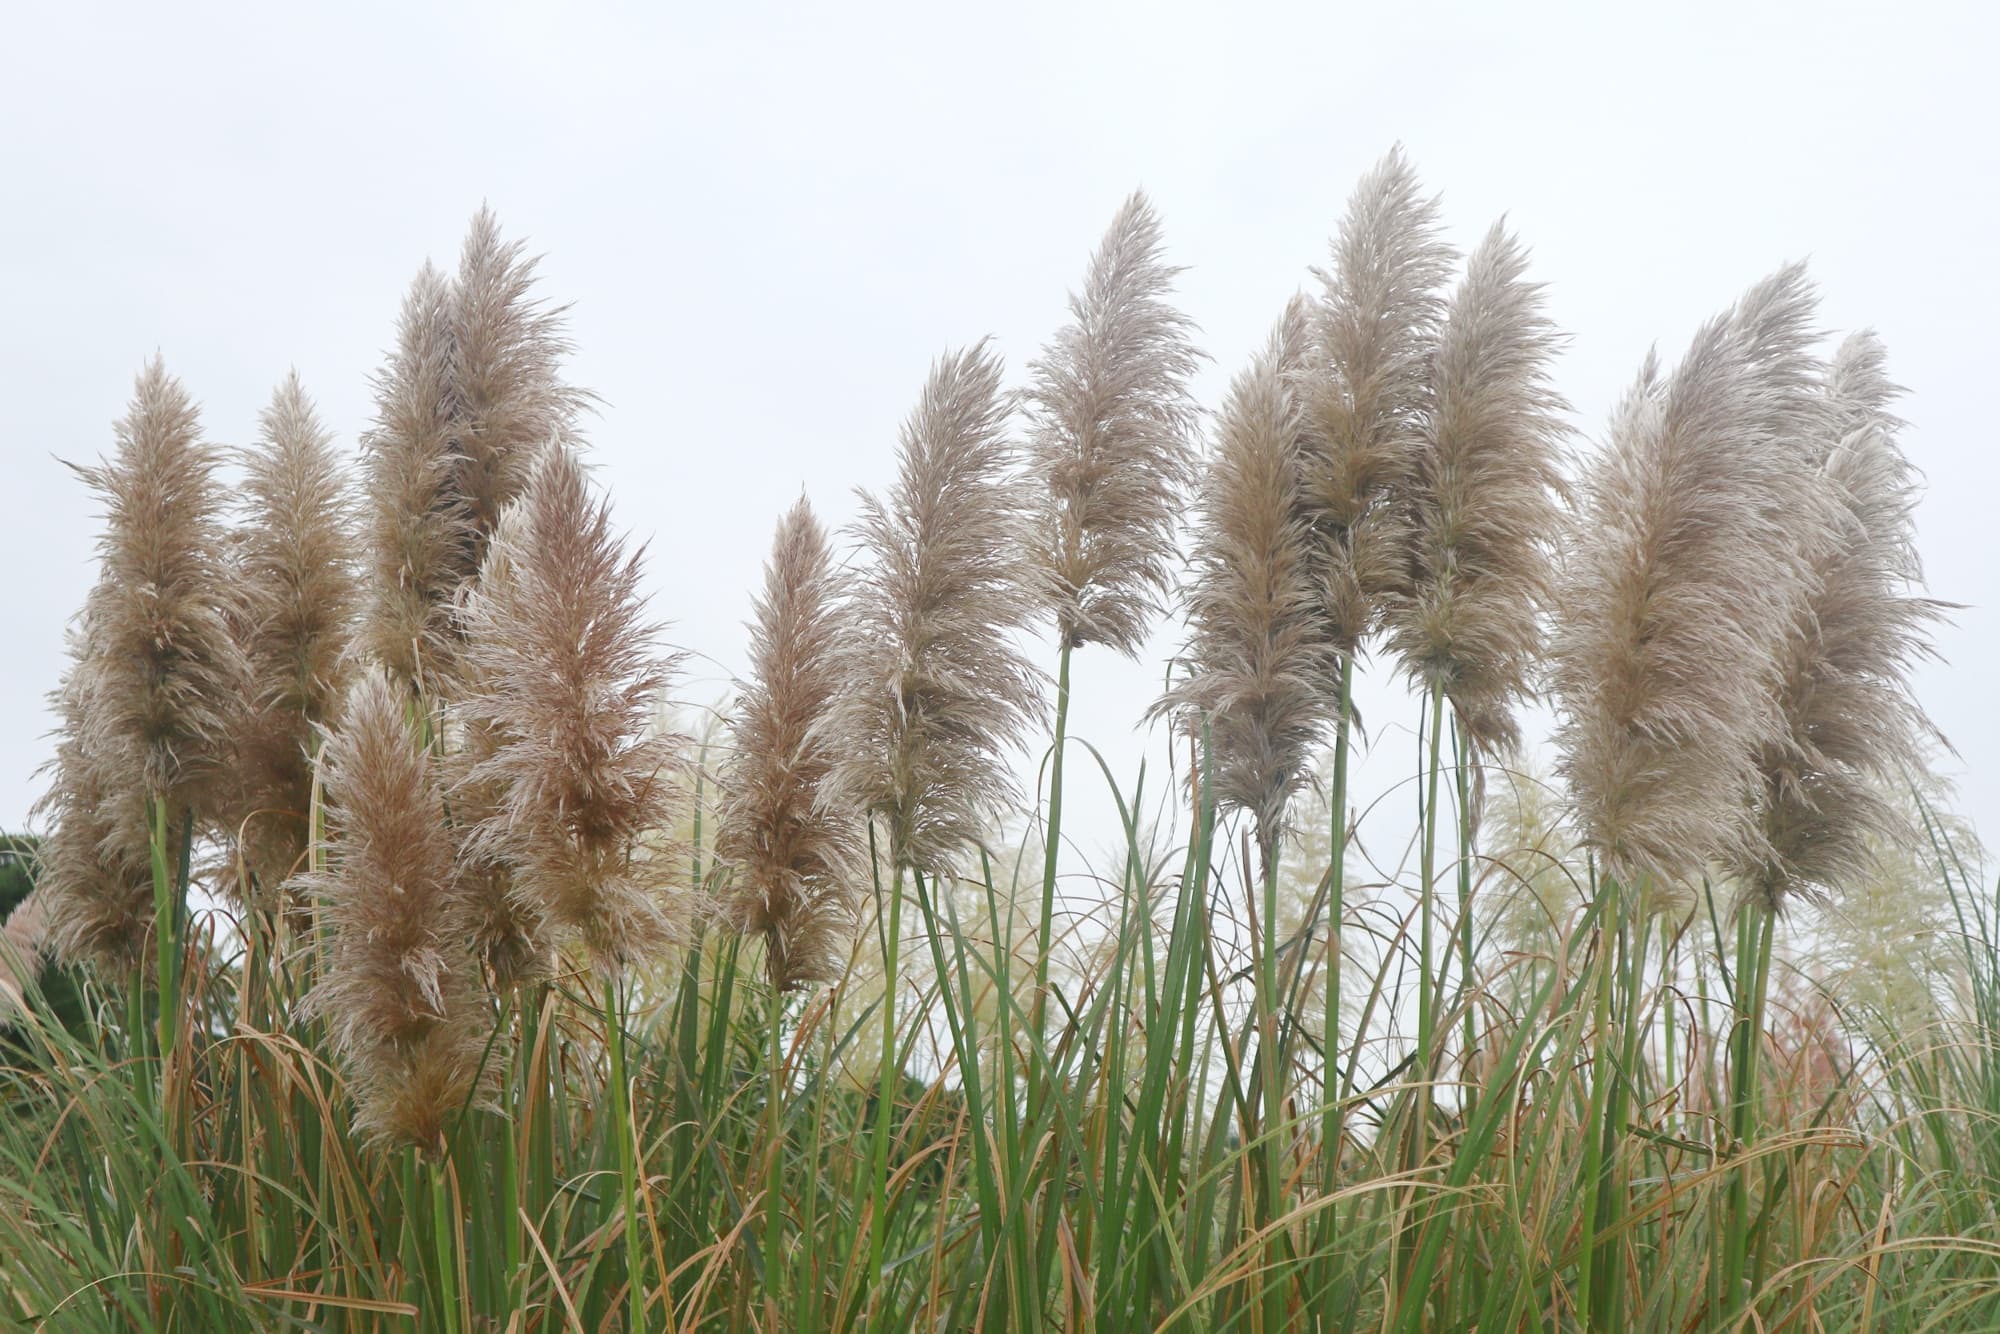
IN THIS GUIDE 1) Anemanthele lessoniana 2) Carex 3) Cortaderia selloana ‘Pumila’ 4) Festuca glauca 5) Hakonechloa macra ‘Aureola’ 6) Miscanthus sinensis ‘Morning Light’ 7) Pennisetum setaceum 8) Stipa gigantea ‘Pixie’ 9) Stipa ichu 10) Stipa tenuissima Notes When Growing Ornamental Grasses In Containers Many ornamental grasses that can be grown in garden beds can also work well in containers. Ornamental grasses can work very well as container plants – adding drama, height and/or visual interest to a container garden on a patio, balcony, or in another outside space. “A lot of ornamental grasses do well because they have a fibrous root system that is easy to please,” shares Ornamental Grass Expert Neil Lucas. “The bigger the container, the better the grass will perform.” As long as you care for them correctly – watering, fertilising, cutting back and repotting as required – you should find that it is relatively easy to enjoy these grasses without having to grow them in the ground. “I love grasses, because they give 10 months of interest throughout the year and when you cut them down you can have bulbs coming up through them,” shares Garden Designer Amanda Patton. “They bring such a lot of movement and light into the garden, so always sneak a few into gardens.” Here are the best 10 for including in gardens: 1) Anemanthele lessoniana COMMON NAME(S): Pheasant’s Grass, Pheasant’s Tail, New Zealand Wind Grass PLANT TYPE: CLUMP-FORMING; SEMI-EVERGREEN HARDINESS RATING: H4 TYPICAL HEIGHT: 0.6 – 0.9M Hailing from New Zealand, this grass is known as pheasant’s grass – a name which reflects its drooping foliage. It naturally grows in windy environments, and does not enjoy having wet feet. So growing it in a container can be a great idea, especially if the soil is not very free-draining where you live. It grows quickly, to 60-90cm in height, and lives for 3-5 years. It has foliage that is green when it emerges, but which turns yellow-tan, orange and reddish, becoming more intense during the winter months. Sprays of airy flower heads emerge in late summer – tease out dead foliage from the clump in the container each spring. 2) Carex COMMON NAME(S): Sedges PLANT TYPE: EVERGREEN PERENNIAL HARDINESS RATING: TYPICALLY H5 TYPICAL HEIGHT: 0.5 – 1M Though Carex are technically sedges rather than grasses, there are a great many that work extremely well instead of or alongside ornamental grasses in containers. “The fact they are sedges gives them fairly broad leaves in a variety of exciting and sometimes variegated tones,” says Master Horticulturist Peter Lickorish. Some examples of Carex that work very well in containers include: C. buchananii C. comans C. elata C. flagellifera C. morrowii C. oshimensis C. testacea “Smaller grasses like Carex can be mixed with perennials or bedding plants to create short-term displays, with plants potted on or planted out once they outgrow their pot,” adds Peter. 3) Cortaderia selloana ‘Pumila’ COMMON NAME(S): Pampas Grass PLANT TYPE: EVERGREEN PERENNIAL HARDINESS RATING: H6 TYPICAL HEIGHT: 0.5 – 1.2M Pampas grasses are often too large to consider growing in containers. But you can consider some options within this genus when you have a container garden and are looking for something to add drama. Cortaderia selloana ‘Pumila’ has foliage that reaches just 50cm or so in height, and sends up plumes on stems around 1.2m high in late summer. This works for larger containers and is more manageable than most C. selloana, which reach up to 2.5-3m in height. 4) Festuca glauca COMMON NAME(S): Blue Fescue PLANT TYPE: EVERGREEN HARDINESS RATING: H5 TYPICAL HEIGHT: 0.3M If you are looking for smaller grasses for containers, then Festuca glauca (blue fescue) offers a number of excellent options. Try: ‘Blaufuchs’ ‘Casblue’ ‘Elijah Blue’ ‘Golden Toupee’ All of the above can work very well in containers. 5) Hakonechloa macra ‘Aureola’ COMMON NAME(S): Hakone Grass PLANT TYPE: CLUMP-FORMING; DECIDUOUS HARDINESS RATING: H7 TYPICAL HEIGHT: 0.3M Hakonechloa is a perennial deciduous grass that can work just as well in containers as it can in garden beds or borders. “The Hakonechloa is my number one choice for container growing and you can use either the green or variegated forms,” says Neil. “They are really easy to please, slow-growing (so they are happy in pots) and they look stunning in containers in the summer months.” There are a range of different cultivars to choose from. ‘Aureola’ is just one that is a great pick for container gardens, and containers can be placed in shade as well as in sunnier spots. These grasses will live for 10 years or more, and since they are relatively slow-growing, will need repotting only every couple of years or so. “I love the combination of the zestful hues of Hakone grasses with dark or slate-coloured containers,” says Peter. 6) Miscanthus sinensis ‘Morning Light’ COMMON NAME(S): Eulalia PLANT TYPE: DECIDUOUS PERENNIAL HARDINESS RATING: H6 TYPICAL HEIGHT: 1 – 1.5M Miscanthus are common ornamental grasses in the UK. More compact varieties often work very well in containers, as well as in borders. ‘Morning Light’ is one cultivar that can grow well in a container, as long as it is medium-large in size. In pots, it will grow to around 1.2m in height, creating a strong and dramatic statement for your outside space. M. sinensis ‘Kleine Fontane’ is one somewhat smaller Miscanthus, compared to others in the genus, to consider. 7) Pennisetum setaceum COMMON NAME(S): Fountain Grass PLANT TYPE: CLUMP-FORMING; DECIDUOUS HARDINESS RATING: H3 TYPICAL HEIGHT: 1 – 1.5M Many Pennisetum also work very well when grown in containers. Fountain grasses make a great architectural and visual statement. Their fountain-like arching habit means that they are natural for container growing. There are also many other interesting Pennisetum to consider, with a variety of textures, and hues. Try ‘Fireworks’ for example, with its brilliant red colours. P. thunbergii ‘Red Buttons’ and P. villosum are two other types of grass in this genus to consider growing in containers. 8) Stipa gigantea ‘Pixie’ COMMON NAME(S): Golden Oats ‘Pixie’ PLANT TYPE: TUFTED EVERGREEN HARDINESS RATING: H4 TYPICAL HEIGHT: 1 – 1.2M Stipa is another genus that offers a range of interesting options for ornamental grasses which can be grown in containers. Stipa gigantea is one species within this genus which offers a range of dramatic architectural grasses for container gardens, as well as for other parts of a garden. Golden oats ‘Pixie’ is one option to consider. It forms dense mounds of foliage, and open-branched panicles of oat-like flowers during the summer, to a height of around 1m. 9) Stipa ichu COMMON NAME(S): Peruvian Feather Grass PLANT TYPE: DECIDUOUS PERENNIAL HARDINESS RATING: H4 TYPICAL HEIGHT: 0.9 – 1M Stipa is such a useful genus of grasses that these last two options on our top ten container grasses list are also Stipa. S. ichu, also known as Jarava ichu or Peruvian feather grass, is another of our top picks. The feathery plumes with silvery-white flowers grow to around 90cm in height during the summer months and look beautiful spilling out of a container. 10) Stipa tenuissima COMMON NAME(S): Mexican Feather Grass PLANT TYPE: DECIDUOUS; MOSTLY PERENNIAL HARDINESS RATING: H4 TYPICAL HEIGHT: 0.5 – 0.6M S. tenuissima, Mexican feather grass, is another beautiful Stipa grass that also works very well in containers. Forming tufts of up to around 60cm in height, this is another very manageable choice in a container garden. The graceful shape of the plant and the texture it creates also means that it is known as ‘ponytails’. “It is also sold under the name Nassella tenuissima too – a recent reclassification,” adds Peter. Notes When Growing Ornamental Grasses In Containers When growing ornamental grasses in containers, it is important to understand whether the grasses you are growing are perennials, and whether they die back in winter or will remain standing throughout the winter months. You need to know for each particular species and cultivar what care is required, and when you should cut back and when you should leave the grass in place. You will of course also need to know how long your grass can remain in its container for – and how, as well as how often – it will need to be repotted over time.
Learn more
Growing 'Gardeners Delight' With Dan Ori (One Of The Sweetest Tomato Varieties)
IN THIS GUIDE Overview How To Grow ‘Gardener’s Delight’ Ongoing Care Harvesting References This tomato is often described as one of the sweetest and tastiest tomato varieties around. Lycopersicon esculentum ‘Gardener’s Delight’ is a popular heritage variety and (at least historically) one of the most highly regarded types of tomato. This makes it a popular choice, and has long been a popular choice, for many UK gardeners. “‘Gardener’s Delight’ is a great variety for growing outside in the UK, even up North!” shares Hannah Reid, a Gardener and Content Creator. ‘Gardeners Delight’ was first introduced to British gardeners by breeders and seed producers Benary.1 They sold it to a number of seed suppliers in Britain over thirty-five years ago. After its introduction it quickly gained favour and was adopted as a favourite by many horticultural experts and home growers. Overview Botanical Name Lycopersicon esculentum ‘Gardener’s Delight’ Plant Type Fruit Native Area N/A (Cultivated) Hardiness Rating H1C Foliage Cordon type tomato Flowers Yellow When To Sow Indoors January, February, March, April When To Plant Out May, June Fruiting Months June, July, August, September, October ‘Gardener’s Delight’ is an open-pollinated variety, not an F1 hybrid, so should come true from seed. As a heritage variety, saving your own seeds should yield plants that are the same as the parent, evolving just slightly. Saving your own tomato seeds is basically evolution at work – over time, you can create tomato strains better suited to growing in your specific garden. The small cherry tomatoes of this variety are produced on trusses and reach around 2cm across; they have a sweet and pleasant flavour. It is the flavour of these tomatoes that is the main reason for their success and popularity with home growers. While, in recent years, there has been some discussion over whether this old favourite is still as good, reliable and well-flavoured as it once was, it is still a favourite for many and is certainly one of the most popular varieties for UK gardeners to grow in their greenhouses or polytunnels, or outdoors. How To Grow ‘Gardener’s Delight’ Like other tomatoes, ‘Gardener’s Delight’ is usually sown indoors or under cover between late January and April. Sowing earlier, in late January or February, can be a good choice, as it can mean that you will be able to harvest more ripe tomatoes before the end of our relatively short growing season. Growing From Seed Early sowings can sometimes get leggy due to the low light levels – LED grow lights can help avoid any such issues. I grew mine in a heated propagator with LED grow lights and the temperature set to 21°C. Sowing is very straight forward: Sow the seeds into seed trays, wood flats or other containers. They should germinate within a week or two. Then prick out and pot up into their own pots, or other containers, once they have developed their first true leaves and are large enough to handle. With my heated propagator (and clearly some very good quality seeds) I had no issue with getting these to germinate. Be sure to pot up your tomatoes as required as they grow – and when you do, bury them a little deeper in the growing medium each time. This will help ensure that your plants develop good, strong root systems. Planting Out ‘Gardener’s Delight’, like other tomatoes, is planted out from May and into June when all risk of frost has passed. If you are planting in a greenhouse or polytunnel, then you can plant out a little earlier than you would if you are growing your plants outdoors. Indoor-grown plants, it is important to remember, should always be hardened off before you plant them out into their final growing positions. This basically means exposing them gradually – and for increasingly lengthy periods – to outdoors conditions. Remember, tomato plants like plenty of sun, and plenty of warmth – the more the better. If not growing under cover make sure you are growing them in a sunny and sheltered location. Providing Support ‘Gardener’s Delight’ is an indeterminate tomato, best grown as a cordon variety. “A cordon is a single stem trained up a cane or string, whilst an indeterminate means it will just keep heading up or wherever you manipulate it,” shares Master Horticulturist Dan Ori. “It is common practice to pinch or cut the top of an indeterminate tomato when it gets the height you want. “Side shoots are not the ones you would identify as going sideways! To identify these work your way down the stem and you will find thick branches, often at a right angle to the stem, which are not side shoots. “Instead look where the branch meets the stem and in a crevis between them (what I call the upside-down armpit), you may see a leaf shoot coming out of the armpit – this is a side shoot. “In cordon-trained tomatoes, the main reasons we remove side shoots are so energy goes into flower and fruit development and removing them also helps increase airflow, increases light to ripen fruit, and makes it easier to harvest your tomatoes. “Bush tomatoes are not normally pruned of their side shoots as it is particularly fiddly to do so.” Though they can also be left to bush out, you will get larger, better fruit more quickly if you cordon them. It is best to get your cordon system ready and in place before you plant out your tomato plants. You should also make sure that you have soil that is fertile and rich in organic matter. When planting your tomato plants, it is a good idea to spread a good quality organic mulch around your plants. A good quality compost or well-rotted manure, for example. Ongoing Care Watering Water well and consistently, and remember to direct water to where it is needed – at the roots – and not from above. Wet foliage can increase the likelihood of disease. Ideally, water early in the day so that there is no risk of the plants being wet at night. Feeding Provide plenty of fertility. Use a good organic liquid feed as soon as the flowers form, and every couple of weeks throughout the summer. A tomato feed should be high in potassium, without too much nitrogen. Ventilation Make sure (if growing under cover) that the space remains open and pollinators can get inside. Ensure adequate ventilation and make sure your plants are not overcrowded. Companion Planting Choose appropriate companion plants to help tomatoes – basil, oregano, marigolds, borage, and alliums (e.g. garlic, spring onions) can all be great options for a polyculture guild, for example. Make sure you have a good crop rotation plan in place and don’t grow ‘Gardener’s Delight’ in the same place year after year. Remain vigilant for pests, and diseases – especially tomato blight – and remove diseased material as quickly as possible. Harvesting ‘Gardener’s Delight’ cherry tomato plants tend to fruit between July and October. They will obviously be further ahead and earlier to fruit if you start your tomato plants indoors. Growing these undercover in a greenhouse or polytunnel means that you will get a somewhat earlier harvest, and may be able to continue to harvest for a little longer at the end of the year. References 1. Solanum lycopersicum L. Gardener’s Delight. (n.d.). Benary. Retrieved March 27, 2023, from https://www.benary.com/products/solanum-lycopersicum-l-benarys-gartenfreude/benarys-gartenfreude-p9971
Learn more
20 Robust Patio Fruit Trees And Plants Recommended By Garden Designers
IN THIS GUIDE 1) Apple 2) Pear 3) Plum 4) Cherry 5) Quince 6) Mulberry 7) Apricots 8) Peaches 9) Figs 10) Citrus Trees 11) Raspberries 12) Grapes 13) Kiwi Fruit 14) Gooseberries 15) Blackcurrants 16) Redcurrants 17) Blueberries 18) Cranberries 19) Honeyberries 20) Strawberries Bare-Root Vs Pot Grown Choosing Patio Fruit Trees Patio fruit trees, fruiting canes, fruiting vines and fruit bushes can provide abundant yields for a small space gardener. If you want to grow at least some of your own food this year, dwarf fruit trees or other fruiting plants that can be grown in containers on a patio are a great place to start. Growing these perennial options often involves a lot less work than tending an annual vegetable garden – and once the trees are established, you should get a reliable yield not just for one season but over a number of years. “Every garden patio needs a tree and you can grow it in a pot if you need to because it gives you the possibility of moving things around.,” shares Flo Headlam, Garden Designer and Presenter. “If it is a fruit tree, you’ll get blossom in the spring, fruit that follows, and autumn colour. “Alternatively, a seasonal deciduous tree keeps you in touch with the seasons which is great.” Many fruit trees are easy and relatively trouble-free to grow in the UK. And when they are grown on dwarfing rootstocks, they can take up a lot less space than you might imagine. When you plan and make the right choices, you can grow an abundant fruit-producing garden in a surprisingly small amount of space. “I’ve got lots of soft fruit trees and plants growing in my garden,” shares Designer Ann-Marie Powell. “Even though my children hate gardening, they like eating straight from the fruit trees!” Below, you will find a list of fruit trees that can potentially make great patio fruit trees in the UK. But remember, the type of fruit is just one of the things to think about. You also need to think about the variety, and the rootstock on which it is grown, in order to make the right decision for you. 1) Apple BOTANICAL NAME: Malus domestica HARDINESS RATING: H6 PREFERRED POSITION: FULL SUN OVERWINTER INDOORS: NO Apples are definitely one of the most popular choices for temperate climate gardens. They need fertile soil or growing media which is neither prone to waterlogging nor particularly free draining. Dessert apples need full sun, ideally, while cooking/cider or crab apples can cope with less sun and can often cope well in a more shaded spot. Apple trees (depending on variety) fruit within a few years, provided they don’t encounter any growing issues. When growing apples as patio fruit trees, often, extreme dwarfing rootstocks are used. One example in the UK is called M27, while dwarfing rootstocks called M9 and M26 are also commonly utilised – so these are the ones to look out for. “My recommendation for a robust rewarding small patio tree would be an M26 Cox orange pippin self-fertile apple,” shares Dan Ori. “It should survive if you forget to water it for one week, it can deal with the cold, it doesn’t need pollinators and the fruit tastes good.” 2) Pear BOTANICAL NAME: Pyrus communis HARDINESS RATING: H6 PREFERRED POSITION: FULL SUN OVERWINTER INDOORS: NO Pear trees can be great trees to plant in many regions of the UK. Pear trees will do well in sheltered and sunny spots that are not prone to frost and do well as individual specimen trees or as part of a larger garden system. Depending on the variety, the tree you plant as a sapling in the dormant season will fruit within a few years and can continue to fruit reliably, in the right conditions, for many years. One interesting thing to note about patio pear trees is that they often come on rootstocks that are not even from a pear. They are frequently grafted onto quince rootstocks (such as Quince C) to keep them small. Sometimes an additional third section of a pear variety that works well with the rootstock from the quince is spliced in. Quince C is also used for a number of other fruit trees to be grown in containers. 3) Plum BOTANICAL NAME: Prunus domestica HARDINESS RATING: H5 PREFERRED POSITION: FULL SUN; SHELTERED SPOT OVERWINTER INDOORS: NO Plum trees are also an excellent and popular choice for UK gardens. They will tend to fruit prolifically in fertile and moist yet free-draining growing conditions. Some varieties can be grown in containers, while others will grow much larger. You must check whether the plum you buy is self-fertile as sometimes you will need more than one plum tree to get fruits. Related damsons and gages are also worth considering. You should note that there are no extreme dwarfing rootstocks for plum as there are for apples. But semi-dwarfing rootstocks (‘Plumina’, ‘Pixy’ and ‘VVA-1’ for example) are available. These help to limit the size of the trees where this is required and their growth will be further restricted when they are grown in containers. 4) Cherry BOTANICAL NAME: Prunus avium HARDINESS RATING: H6 PREFERRED POSITION: FULL SUN OVERWINTER INDOORS: NO With beautiful blossoms and lovely fruits, cherry trees are also popular and good choices for UK gardeners. There are two main types – sweet cherries and sour cherries. Sweet cherries sometimes require a companion for fertilisation, while sour cherries are typically self-fertile. Sweet cherries require a sunny spot, while sour cherries are more tolerant of shade. Cherry trees can be kept smaller through the use of the ‘Gisela 5’ rootstock. And again, their growth can be restricted by growing them in containers, and through careful summer pruning. 5) Quince BOTANICAL NAME: Cydonia oblonga HARDINESS RATING: H5 PREFERRED POSITION: FULL SUN; SHELTERED SPOT OVERWINTER INDOORS: NO Quinces are a more unusual option to consider. They have a high level of pectin which makes them ideal for making a range of jams and jellies and other preserves. Quince can be grown in many UK gardens, even in northern areas when placed in a sheltered and sunny position – against a south-facing wall for example. As mentioned above, you can get dwarfing rootstock for quince, which is used not only on these trees but on pears and other patio fruit trees too. 6) Mulberry BOTANICAL NAME: Morus nigra HARDINESS RATING: H6 PREFERRED POSITION: FULL SUN; SHELTERED SPOT OVERWINTER INDOORS: NO Mulberries are already small trees, and you can restrict their growth further by growing them in containers. Growing these fruits can be a great option because the fruits are difficult to source in stores, and also because mulberry leaves are also an additional edible yield. 7) Apricots BOTANICAL NAME: Prunus armeniaca HARDINESS RATING: H4 PREFERRED POSITION: FULL SUN; SHELTERED SPOT OVERWINTER INDOORS: NO (MAY NEED FROST PROTECTION) Apricots thrive in moist and fertile soil, though it must be well-drained and ideally slightly alkaline. They will not tend to thrive in colder regions or in locations where the soil is shallow or lacking in nutrients. In the right conditions, however, they can be grown in the ground or in containers, which, as with peaches, can allow them to be grown where the season in shorter and temperatures lower. Hand pollination may be necessary for successful fruit formation. Wavit, a plum rootstock, is sometimes also used for apricots. 8) Peaches BOTANICAL NAME: Prunus persica HARDINESS RATING: H4 PREFERRED POSITION: FULL SUN; SHELTERED SPOT OVERWINTER INDOORS: NO (MAY NEED FROST PROTECTION) Peach trees will need protection from frost in cooler climes but will do well in a sunny, sheltered spot and can be grown in containers which would allow them to be brought inside in the winter. Make sure containers are of sufficient size – at least 45cm across, and you must choose a dwarfing variety. In more southerly, sunny and sheltered gardens, peaches can thrive when trained against a wall. Hand pollination may be necessary for fruit to form. Peach patio fruit trees are also sometimes also grown on ‘Wavit’ rootstock. 9) Figs BOTANICAL NAME: Ficus carica HARDINESS RATING: H4 PREFERRED POSITION: FULL SUN; SHELTERED SPOT OVERWINTER INDOORS: NO (MAY NEED FROST PROTECTION) Fig trees also need warmth and plenty of sunlight. In more northerly and chillier climes, certain hardy fig varieties can be grown outdoors in a suitable spot. In some colder areas, even less hardy figs can be grown in containers, as long as they are brought inside or given protection in the winter months. Figs will actually fruit better if grown in containers, since this will help to restrict foliage and root growth and encourage the trees to focus on fruit production. 10) Citrus Trees BOTANICAL NAME: Various HARDINESS RATING: Various PREFERRED POSITION: FULL SUN; SHELTERED SPOT OVERWINTER INDOORS: YES Citrus fruit is mostly grown in warmer climes. However, fruits like oranges, limes and lemons can be grown in containers in the UK as long as they are brought into a heated greenhouse or indoors over the winter months. No matter what type of citrus tree you would like to grow, it is possible to find examples of almost all varieties suitable for container growing. In addition to considering the trees mentioned above, there are other fruiting perennial shrubs and canes to consider growing on your patio. These might not be technically classified as ‘trees’, but can be grown just as effectively. These include: 11) Raspberries BOTANICAL NAME: Rubus idaeus HARDINESS RATING: H6 PREFERRED POSITION: FULL SUN; SHELTERED SPOT OVERWINTER INDOORS: NO The best way to grow raspberries and other cane fruits in containers is to choose (or make) a container of at least 75-litre capacity. Then create a wigwam with 3-5 supports and plant one bare root plant per support in winter. Be sure to tie in the canes as they grow, and prune over time to maintain fertility. 12) Grapes BOTANICAL NAME: Vitis vinifera HARDINESS RATING: H5 PREFERRED POSITION: FULL SUN; SHELTERED SPOT OVERWINTER INDOORS: NO Choose a container of at least 60-litre capacity and you should also be able to successfully grow a grape wine in a small garden or on a patio. Just remember that the vine will need support and something to climb as it grows – so place the container against a trellis or fence. 13) Kiwi Fruit BOTANICAL NAME: Actinidia deliciosa HARDINESS RATING: H4 PREFERRED POSITION: FULL SUN; SHELTERED SPOT OVERWINTER INDOORS: NO (MAY NEED FROST PROTECTION) Kiwi fruits need a sheltered sunny position, ideally against a south- or west-facing wall or fence. They can be grown in containers of at least 60-litre capacity. Note that you will need a male and a female unless you choose a self-fertile variety. 14) Gooseberries BOTANICAL NAME: Ribes uva-crispa HARDINESS RATING: H6 PREFERRED POSITION: FULL SUN OR PART SHADE OVERWINTER INDOORS: NO Gooseberries are an excellent choice for growing in pots, and will do well even on a more shaded patio, as these are one of the more shade-tolerant fruits. Unlike many other fruiting plants, they will usually fruit well even without full sun. 15) Blackcurrants BOTANICAL NAME: Ribes nigrum HARDINESS RATING: H6 PREFERRED POSITION: FULL SUN OR PART SHADE OVERWINTER INDOORS: NO Blackcurrants are also a little more tolerant of light shade than other fruits, and can also do very well in containers. Choose a container at least 45-50cm in diameter and repot in late winter every 2-3 years. 16) Redcurrants BOTANICAL NAME: Ribes rubrum HARDINESS RATING: H6 PREFERRED POSITION: FULL SUN OR PART SHADE OVERWINTER INDOORS: NO A similar container can also be used to grow redcurrants. These too will tolerate some shade, but will fruit better, with sweeter currants, if planted in the sun. 17) Blueberries BOTANICAL NAME: Vaccinium corymbosum HARDINESS RATING: H6 PREFERRED POSITION: FULL SUN OR PART SHADE OVERWINTER INDOORS: NO Blueberries are another great choice for pots. Since blueberries need acidic conditions, growing in containers is the best way to grow them if you do not have acidic soil where you live. Remember to use ericaceous compost to fill your containers. 18) Cranberries BOTANICAL NAME: Vaccinium subgen. oxycoccus HARDINESS RATING: H6 PREFERRED POSITION: FULL SUN OR PART SHADE OVERWINTER INDOORS: NO Grow cranberries in pots that are at least 35cm in diameter. Though since they have shallow roots, that extend typically no more than 15cm into the growing medium, depth is not as important. Remember, however, that these are bog plants, so the growing medium must be kept moist. A self-watering container could therefore work well. 19) Honeyberries BOTANICAL NAME: Lonicera caerulea HARDINESS RATING: H7 PREFERRED POSITION: FULL SUN OR PART SHADE OVERWINTER INDOORS: NO Honeyberries are another more unusual fruit to grow on your patio. This is an edible member of the honeysuckle family and taste like a mix between a blueberry, a grape and a plum. Simply plant up in a container 4cm in diameter wider than the pot it came in, then pot up as required. 20) Strawberries BOTANICAL NAME: Fragaria HARDINESS RATING: H6 PREFERRED POSITION: FULL SUN; SHELTERED SPOT OVERWINTER INDOORS: NO Of course, last but not least, you could go for this tried and trusted favourite. Strawberries are, of course, another fruit that is very easy to grow on your patio in pots or other containers. These are not the only choices, of course, but they should give you a place to start when trying to choose the right, fruitful options for you, your family, and where you live. Bare-Root Vs Pot Grown Fruit trees are typically bought as either bare-root or pot-grown examples. As you can no doubt guess from the name, pot grown examples come in containers. Bare-root trees are, as the name suggests, delivered out of pots, with their roots bare. Patio fruit trees (along with many fruit trees commonly purchased for gardens) are usually grafted trees. This means that they are ‘Frankenstein’ trees, made up of a rootstock (the base section with root system) and a scion (the top section). The rootstock typically determines the size, vigour, disease resistance and hardiness of the tree, while the scion determines the abundance, characteristics and taste of the fruit. Understanding this can help you to make the best choices when it comes to choosing patio fruit trees for you. Rootstocks are typically categorised in reference to the size of tree they make. You can find: Standard (full size) Semi-dwarfing (somewhat smaller, often ideal for mid-sized gardens) Dwarfing (suitable for step-overs and trees grown in pots, for example). Of course, it is the last of these three, the dwarfing rootstocks that are usually used on trees marketed and sold as ‘patio trees’. When choosing a fruit tree, try not to just go for the varieties that are commercially grown in your area. Consider also the wider range of interesting heritage varieties that will do well where you live. Heritage varieties can taste a lot better than ordinary store-bought fruits. They may just have not been suitable for large-scale commercial use due to their being bruised easy, or not storing well, for example. It is very important that we retain as much diversity as possible in our food, and keeping heritage fruit tree varieties alive is one great way to play your part in your garden. “I am keen on planting fruit trees because we need to plant more of them, they give us fruit and they are great for pollinators,” shares Sara Venn, the Founder of Edible Bristol. “There’s really nothing to be scared of, but lots of people are afraid of planting trees, especially in pots.” Choosing Patio Fruit Trees Before you decide which patio fruit trees and other fruiting plants to buy, there are a number of things to consider. You need to consider: The climate in your area and general weather conditions. Whether your patio area is sunny or rather shaded throughout each day and throughout the year. How much rain it receives, and how windy or sheltered the location is. (The micro-climate in your particular garden.) How much care and attention you are willing/able to give your new trees/ plants. Which fruits you and your family actually enjoy eating. Whether the fruit trees you are considering need a pollination partner. (Some trees can self-pollinate while others will need to be purchased along with another tree in order to produce fruit.) The eventual size of the patio fruit tree or other fruiting plant you are growing. It is also worth thinking about whether or not growing in containers is the right thing for your space. In certain cases, in-ground growing may be a better option – in some small gardens, fruit trees can be grown in the ground and trained against a wall or fence to make the most of the space, for example. Step-over apple trees, pleached trees and other small fruiting plants can also be squeezed in as bed or path edging, as a type of fencing, or between other elements in your garden – this could be another way to make the most of your space. Remember, trees and other plants grown in containers will typically need more watering than those grown in the ground. The most common reason why these trees are lost is due to issues in this regard. Fertility is also something that will have to be more closely monitored when plants are being grown in pots or containers. So if you are looking for a low-maintenance scheme, then container growing may not always be the best option for you.
Learn more


