

Growing
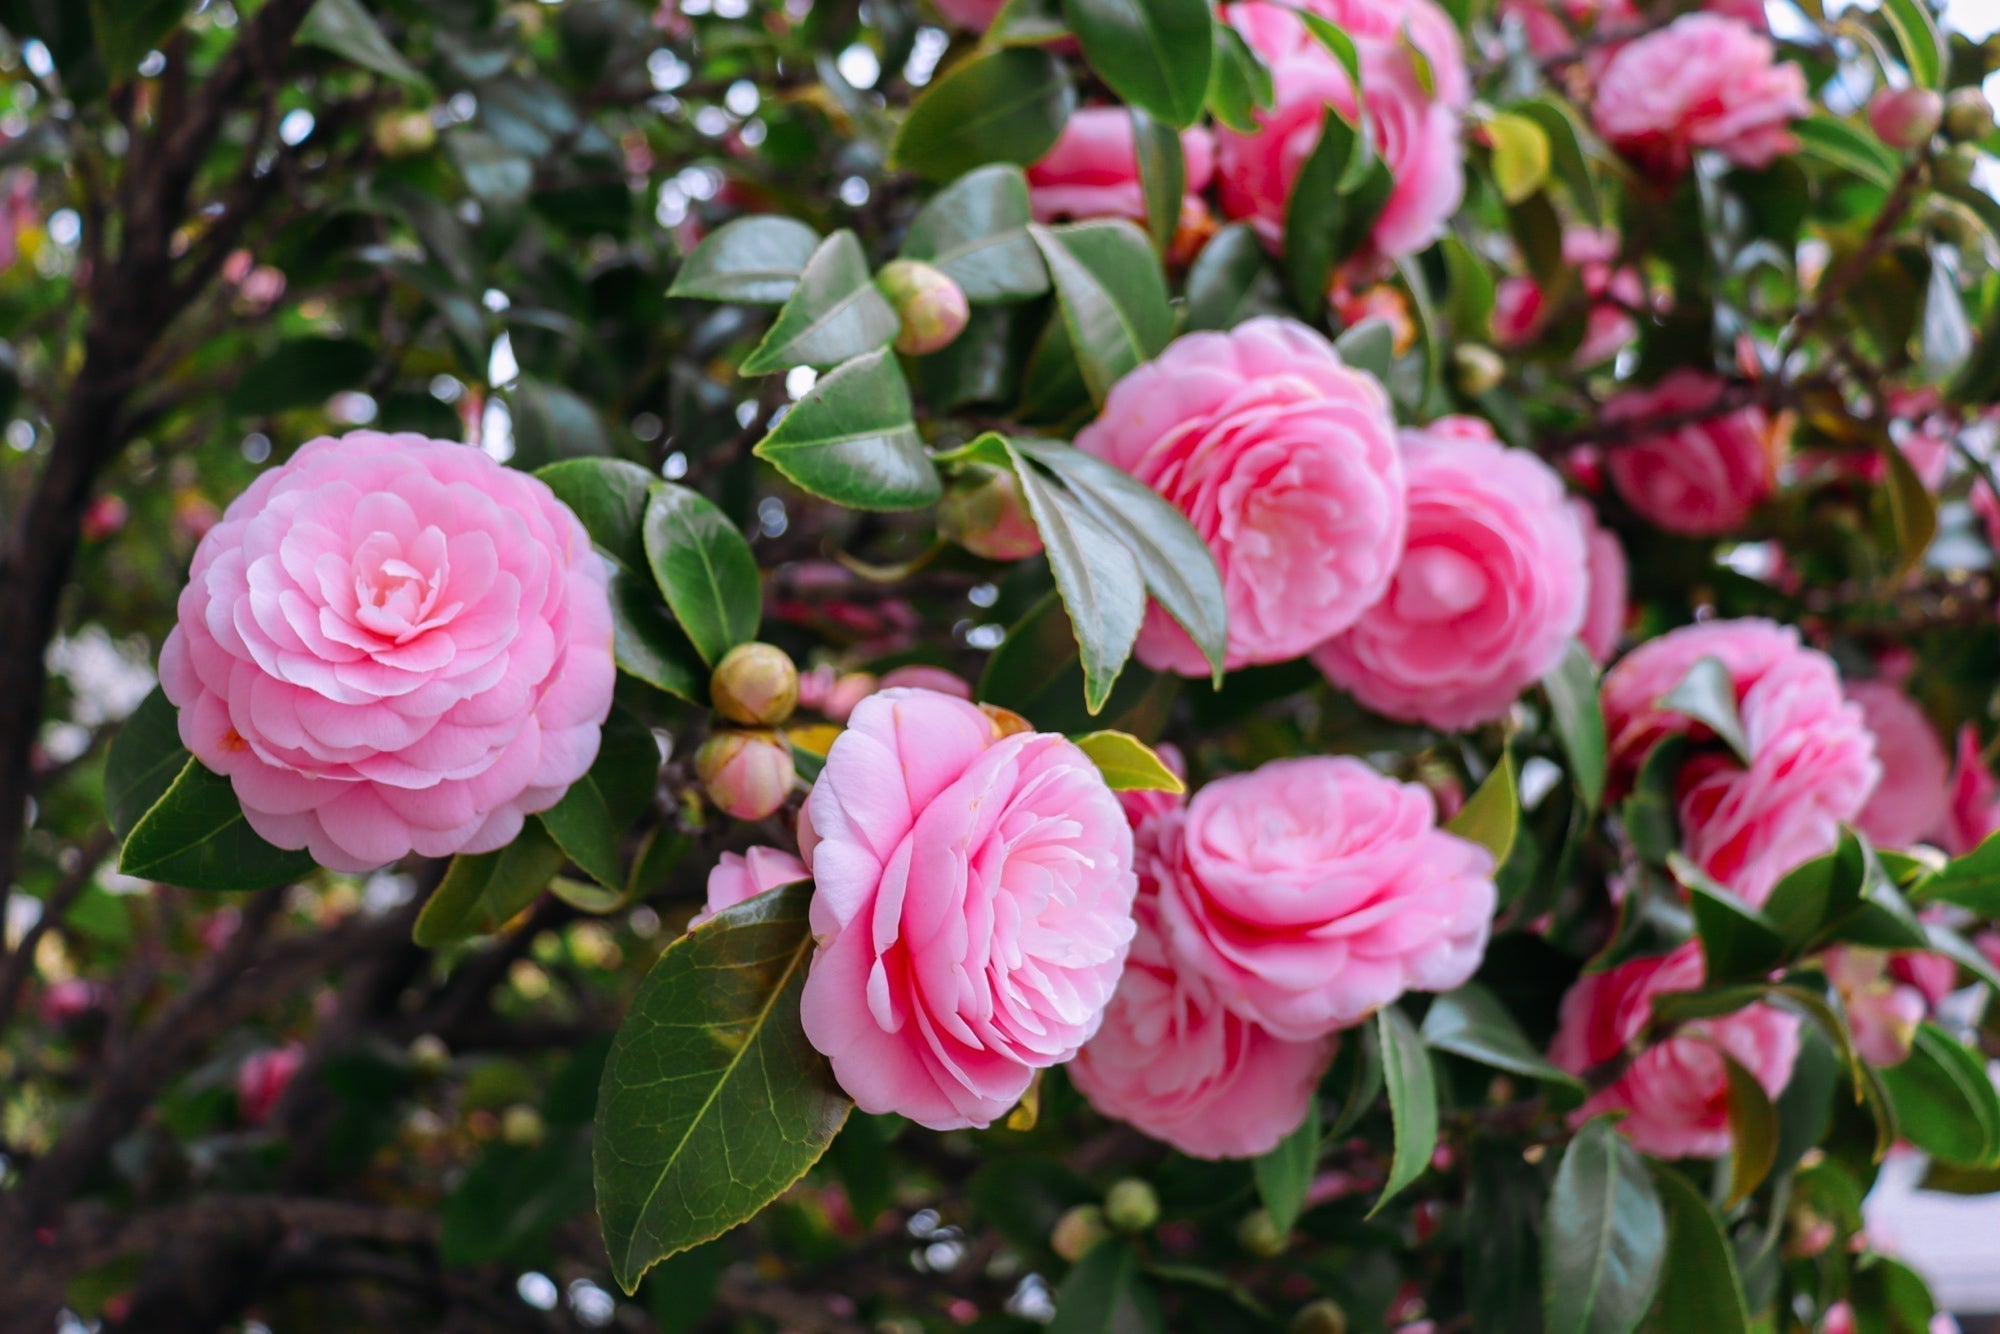

Master Horticulturist Shares 5 Reasons Your Camellia Leaves Have Brown Spots
IN THIS GUIDE 1) Frost Damage 2) Sun Scorch 3) Overwatering 4) Root Rot 5) Leaf Blight Camellia can often be easy plants to grow, but, as always, there are a number of things that can go wrong. Brown spots on camellia leaves can be an early indication of one or a number of problems. These brown patches on your camellia might often be caused by: Frost damage, especially on tender varieties susceptible to cold temperatures. Sun scorch, which is a problem more likely to affect plants in the fierce summer sun. Overwatering or waterlogged soil, where roots are sat for long periods in a damp growing medium. Root rot, which is the next step for plants left too long in waterlogged soil. Camellia Leaf Blight – a fungal issue that is more likely in prolonged wet periods. Read on for a more detailed breakdown of each of these issues – 1) Frost Damage Brown spots on the leaves of a camellia plant can often be caused by frost damage. In winter, when the temperatures are low, cold winds can cause water to evaporate from leaves more quickly than it can be replenished from the roots. This can cause the leaf tips and upper leaves on your plant to turn brown in places. Remember, some camellias are hardier than others, so when choosing and positioning a camellia, it is always important to look at whether the particular type and cultivar you are considering can cope with the winter conditions where you live. Fortunately, frost damage will usually be a temporary problem. You can simply remove the affected foliage and the plant will usually recover just fine in spring, putting out new growth. 2) Sun Scorch Leaves can also turn brown in places during the summer when the weather is particularly hot and the sun is fierce. Remember, most camellias are best grown in partial or dappled shade, where they are protected from solar rays. Sun scorch can usually be avoided by carefully positioning a camellia so that it is protected from the sun in summer. Again, as above, a problem with brown spots or leaves caused by seasonal variation is not life-threatening. Simply remove the affected foliage and the plant should have no problem recovering. 3) Overwatering Brown patches on leaves that seem damp and watery are often a sign that the camellia has been overwatered or that excess water could not drain away. If you think that you have overwatered your camellia, reduce watering right away and water only when the top few centimetres of the soil or growing medium is dry. Take steps to improve drainage and hopefully it won’t be too late to allow the plant to recover. 4) Root Rot If there has been prolonged waterlogging, this can, unfortunately, lead to root rot and a fungal infection could take hold. When root rot occurs, the roots will not be able to do their job of transmitting water and nutrients to the foliage, so leaves may begin to turn brown. 5) Leaf Blight Another fungal issue that can sometimes occur in camellias and cause brown spots on the leaves is leaf blight. This problem can often take hold after prolonged wet periods and, if left unchecked, brown leaves can progress to full branch dieback. “Camellia leaf blight is far more likely to affect newly propagated and young plants,” explains Colin Skelly, a Master Horticulturist. “Mature camellias tend to be very robust, healthy plants with leaf browning due to hot or wet conditions.” If you suspect a fungal infection like this, remove affected foliage as soon as possible to prevent its spread. Remember to practice good garden hygiene to avoid spreading the fungal infection to other parts of the same plant or other plants in your garden.
Learn more
Bud Drop? Lorraine Summers Shares 3 Reasons Your Camellia Buds Are Not Flowering
IN THIS GUIDE 1) Water Shortage 2) Excessive Or Late Feeding 3) Low Winter Temperatures Camellia blooms come in a range of different hues and the beautiful flowers of these evergreen shrubs are one of the main reasons to grow them. Therefore it can be very disappointing if, before buds open, they turn brown or drop off. “I often get asked why camellias are failing to flower,” says Lorraine Summers, Owner of specialist Camellia growers Trehane Nursery. “Most times, this is down to the plants not having enough water during the summer months, which is when camellias are making their flower buds. “It can also be because the plant has not received enough light to set the buds.” With that in mind, Camellia buds turning brown or dropping off before they open is usually caused by: An inadequate supply of water during late summer of the previous year. Excessive or late feeding of camellia shrubs. Low winter temperatures causing damage to more tender varieties. A lack of exposure to light, which helps set the buds. We discuss each of these issues with more background information below. 1) Water Shortage Camellia buds start to form during late summer. Sometimes adverse environmental conditions during this earlier period of bud formation, or during the early spring, can cause them to abort and drop off prematurely. Dry soil is most commonly to blame, so it is important to make sure that you water well if the weather is dry, as Master Horticulturist Colin Skelly shares: “In the UK, low winter temperatures would historically have presented the greatest risk of bud drop, but summer drought has taken over in much of the country as a more likely occurrence. “I try to ensure that irrigation is available if needed for existing plants and that new plants are located where the soil does not routinely dry out in summer.” Remember, you will usually need to water your camellia more if you are growing it in a container compared with when you are growing these shrubs in the ground. 2) Excessive Or Late Feeding Another problem that can cause buds on camellias to turn brown or drop off is excessive or late feeding. Do not feed any camellias, even those growing in pots, after the end of July. Also, remember that camellias growing in a reasonably fertile soil should not need additional feeding at all – and should instead be provided with just an organic mulch around the plant each spring. 3) Low Winter Temperatures Not all camellias are hardy enough to withstand winter temperatures and conditions in the UK. So, when growing camellias, it is important to know how hardy the variety you are growing is – and to make sure that it is placed in an appropriate position. A plant affected by frost might have bud drop that looks something like this: Some types can suffer leaf damage due to frosts or drying winds in the winter months, and the buds can also turn brown and drop off with more sensitive cultivars during excessive cold. If you are growing a somewhat less hardy cultivar, move it to a sheltered position or protect it with horticultural fleece to ensure it makes it through the winter with the buds intact. A number of environmental issues can cause buds to fail to form altogether or cause them to turn brown and fall off, but the above are the most common causes and each is a fairly easy problem to avoid. Position your camellia correctly in the first place, and provide it with the right care, and you should find that it blooms reliably year after year.
Learn more
12 Black And Purple Hellebores You Could Combine With Snowdrops
IN THIS GUIDE 1) H. atrorubens subsp. croaticus 2) H. × hybridus ‘Double Black’ 3) H. orientalis ‘Hello Ruby’ 4) H. x hybridus Ashwood Garden Hybrids 5) H. × hybridus ‘Black Swan’ 6) H. × hybridus ‘Double Ellen Purple’ 7) H. × hybridus ‘Harvington Double Dark Purple’ 8) H. orientalis hort. ‘Shades of Night’ 9) H. × hybridus ‘Harvington Smokey Blues’ 10) H. × hybridus Party Dress Group 11) H. × hybridus ‘Smokey Blue’ 12) H. purpurascens Purple and black hellebore varieties can add a lot of interest and appeal in a partly shaded spot. The rich, deep and dramatic purple tones possible with this plant mean that they are great to include in a purple-themed garden. “Black and purple hellebore flowers have a jewel-like quality that invites you in to look more closely,” says Colin Skelly, an RHS Master Horticulturist. “Combined with other early spring bulbs such as Snowdrops, they can be a real highlight of winter gardens. “If you have more than one species or cultivar, they will often hybridise to create new variations.” From rich plums to vibrant grape hues, to purples so deep they are almost black, here are some purple hellebore species and cultivars to consider. 1) H. atrorubens subsp. croaticus COMMON NAME(S): croatian hellebore HARDINESS RATING: H6 FOLIAGE: deciduous FLOWERING SEASON(S): spring SUNLIGHT: full sun / part shade Starting with a flower which could perhaps be described as being at the more subtle end of the purple colour spectrum, the Croatian hellebore is a clump-forming deciduous perennial which grows to around 40cm tall. It has rounded leaves divided into leaflets that often have a purple tinge. The nodding flowers are 2-3cm wide, with deep purple to pinky-purple colouration on the outside of the petals and greenish hues on the inside. This variety is H6 hardy. 2) H. × hybridus ‘Double Black’ COMMON NAME(S): hellebore hybrid ‘double black’ HARDINESS RATING: H7 FOLIAGE: evergreen / semi-evergreen FLOWERING SEASON(S): winter / spring SUNLIGHT: part shade Now we zoom to the other end of the spectrum. This option has some of the darkest hellebore blooms you will find – so deep a purple that it almost edges into black. The petals’ deep colour contrast appealingly with its greenish-white stamens. These plants are around 40cm tall. 3) H. orientalis ‘Hello Ruby’ COMMON NAME(S): hellebore ‘hello ruby’ HARDINESS RATING: H7 FOLIAGE: deciduous FLOWERING SEASON(S): winter SUNLIGHT: part shade A plummy reddish-purple in hue, these are also stunning flowers to consider. They grow to around 35cm in height and are hardy perennials which can thrive in dappled shade. 4) H. x hybridus Ashwood Garden Hybrids COMMON NAME(S): hellebore Ashwood Garden hybrids HARDINESS RATING: H7 FOLIAGE: semi-evergreen FLOWERING SEASON(S): winter / spring SUNLIGHT: full sun / part shade These hybrid hellebores offer some of the best purple-hued options. They are seed-raised evergreen herbaceous perennials which grow up to 30cm tall and come in a huge range of single and double, plain and patterned forms, and in a huge range of hues. Some of the purple flowering ones include: Single Dusky Grape Double Dusky Grape Double Reverse Picotee Purple Single plum shades Though there are also other options which may include some purple or edge into this colour zone. This group of garden hybrids is very much worth exploring not only if you are looking for purple varieties of hellebore, but also if you are interested in other notable colours and shades. 5) H. × hybridus ‘Black Swan’ COMMON NAME(S): hellebore hybrid ‘black swan’ HARDINESS RATING: H7 FOLIAGE: semi-evergreen FLOWERING SEASON(S): winter / spring SUNLIGHT: full sun / part shade This clump-forming perennial grows around 60cm tall, with dark green, deeply lobed leaves, which usually remain throughout the winter, and stunning deep, rich purple flowers which are outward facing. These flowers have white stamens, and are borne on strong, upright stems. This plant is H7 hardy. 6) H. × hybridus ‘Double Ellen Purple’ COMMON NAME(S): hellebore hybrid ‘double ellen purple’ HARDINESS RATING: H7 FOLIAGE: semi-evergreen FLOWERING SEASON(S): winter / spring SUNLIGHT: part shade This option has double, deep purple flowers that are lightly speckled and have yellow centres, which grow to around 35cm high. They have dark green leaves, are perfect for partial shade and are H7 hardy. 7) H. × hybridus ‘Harvington Double Dark Purple’ COMMON NAME(S): hellebore hybrid ‘harvington double dark purple’ HARDINESS RATING: H7 FOLIAGE: evergreen FLOWERING SEASON(S): winter / spring SUNLIGHT: full sun / part shade The stunning nodding or outward-facing dark purple flowers on this option bloom from late winter to the middle of spring, to a height of around 60cm above dark green leaves. Good for planting in full sun or dappled shade. This is another H7 hardy variety. 8) H. orientalis hort. ‘Shades of Night’ COMMON NAME(S): hellebore ‘Shades of the Night’ HARDINESS RATING: H7 FOLIAGE: evergreen FLOWERING SEASON(S): winter / spring SUNLIGHT: full sun / part shade Another option from Harvington is the stunning ‘Shades of the Night’. This plant grows to around 45cm tall and produces large, single blooms in a deep purple to black colour. Also fine in sun or partial shade, this plant is H7 hardy. 9) H. × hybridus ‘Harvington Smokey Blues’ COMMON NAME(S): hellebore hybrid Harvington Smokey Blues’ HARDINESS RATING: H4 FOLIAGE: evergreen FLOWERING SEASON(S): winter / spring SUNLIGHT: full sun / part shade This variety’s purple-black flowers have a dark bluish sheen and creamy yellow centres. They are particularly effective amid snowdrops or amongst other white flowering hellebores. 10) H. × hybridus Party Dress Group COMMON NAME(S): hellebore Party Dress Group HARDINESS RATING: H7 FOLIAGE: evergreen FLOWERING SEASON(S): winter / spring SUNLIGHT: full sun / part shade If you are looking for somewhat paler shades of purple, then the Party Dress Group of hellebore will provide you with some options. These neat and slow-growing plants come in a range of hues. They are hybrids derived from H. torquatus and well-coloured forms of H. x hybridus. 11) H. × hybridus ‘Smokey Blue’ COMMON NAME(S): hellebore ‘smokey blue’ HARDINESS RATING: H7 FOLIAGE: semi-evergreen FLOWERING SEASON(S): winter / spring SUNLIGHT: full sun / part shade This is a clump-forming semi-evergreen perennial, which grows to around 45cm high. It has deep green leaves and bears beautiful dark greyish-purple blooms from late winter to spring. 12) H. purpurascens COMMON NAME(S): purple-flowered Christmas rose HARDINESS RATING: H6 FOLIAGE: deciduous FLOWERING SEASON(S): winter / spring SUNLIGHT: full sun / part shade Another option is the purple-flowered Christmas rose. This is a deciduous, clump-forming perennial which grows to around 25-30cm high. It has rich purple or pinkish-purple flowers which start opening in December and continue to flower through to March.
Learn more
These 12 White Hellebores Are 'A Real Spring Treat' And Well Worth Growing
IN THIS GUIDE 1) H. × nigercors ‘Snow Love’ 2) H. × ericsmithii ‘Winter Moonbeam’ 3) H. × hybridus ‘Double Ellen White’ 4) H. × hybridus ‘Harvington Double White’ 5) H. × hybridus ‘Pebworth White’ 6) H. × hybridus ‘Pretty Ellen White’ 7) H. niger 8) H. niger ‘Potter’s Wheel’ 9) H. niger ‘Wintergold’ 10) H. × sahinii ‘Winterbells’ 11) H. thibetanus 12) H. ‘Verboom Beauty’ Helleborus are very easy plants to grow and are suited to many UK gardens. They are often best suited to partial shade, though many types also do well in full sun, as long as they have moist but well-drained, alkaline to neutral soil. They are great for wildlife-friendly gardens, providing a nectar source for pollinators and other insects when there are few other sources around at that time of year. “White hellebores are a real spring treat, their flowers have a delicacy and poise that makes them a stand-out garden plant for humans,” says Colin Skelly, a Master Horticulturist. “When planting for non-humans, I often see bumblebees taking advantage of this early flower.” This list of white cultivars should be a great place to start if you are wanting to add a hellebore to your garden display. 1) H. × nigercors ‘Snow Love’ COMMON NAME(S): hellebore ‘snow love’ HARDINESS RATING: H5 FOLIAGE: evergreen SUNLIGHT: full sun / part shade This clump-forming perennial plant grows around 45cm high. It has dark green, serrated leaves and stems which stand out against the foliage, bearing creamy white flowers which become lightly flushed with green as they mature. The flowers bloom between the middle of winter and early spring and are perfect for moist but well-drained soil in full sun or partial shade. This variety is H5 hardy. 2) H. × ericsmithii ‘Winter Moonbeam’ COMMON NAME(S): hellebore ‘winter moonbeam’ HARDINESS RATING: H5 FOLIAGE: evergreen SUNLIGHT: full sun / part shade This option also forms mounds, but these are to around 35cm. It has attractive silvery-grey, vein-like markings on the leaves and bears white, single, outward-facing flowers on a short stem. The flowers turn pinkish and then reddish as they fade. ‘Winter Moonbeam’ is H5 hardy. 3) H. × hybridus ‘Double Ellen White’ COMMON NAME(S): hellebore ‘double Ellen White’ HARDINESS RATING: H7 FOLIAGE: evergreen / semi-evergreen SUNLIGHT: full sun / part shade The white flowers on this semi-evergreen, clump-forming perennial are large, double blooms with ruffled edges. They bloom through the winter and into spring. It is H7 hardy. 4) H. × hybridus ‘Harvington Double White’ COMMON NAME(S): hellebore ‘harvington double white’ HARDINESS RATING: H7 FOLIAGE: evergreen / semi-evergreen SUNLIGHT: full sun / part shade Another semi-evergreen Hellebore, this variety thrives in partial shade, where its pendent or outward-facing, double, saucer-shaped flowers stand out pleasingly above the dark green leaves. A bushy type, it grows up to around 60cm high. This plant is H4 hardy. 5) H. × hybridus ‘Pebworth White’ COMMON NAME(S): hellebore ‘pebworth white’ HARDINESS RATING: H7 FOLIAGE: semi-evergreen SUNLIGHT: full sun / part shade The blooms on this cultivar are white with green or pale pink flushing, lightly marked with a little red towards the centre. It grows to around 50cm in height and is H7 hardy. 6) H. × hybridus ‘Pretty Ellen White’ COMMON NAME(S): hellebore ‘pretty Ellen White’ HARDINESS RATING: H7 FOLIAGE: semi-evergreen SUNLIGHT: full sun / part shade This Hellebore is semi-evergreen and grows to around 35cm tall. It has divided, dark green leaves and its white flowers also often have faint green or pink blushing and light spotting towards the centre. They are borne in late winter and spring and are H7 hardy. 7) H. niger COMMON NAME(S): christmas rose HARDINESS RATING: H7 FOLIAGE: semi-evergreen SUNLIGHT: part shade Also known as the Christmas rose, this is a semi-evergreen perennial which grows to around 30cm tall. Each plant bears 1-3 pure white or pink-tinged blooms up to 8cm in width. This plant is H7 hardy. 8) H. niger ‘Potter’s Wheel’ COMMON NAME(S): christmas rose ‘potter’s wheel’ HARDINESS RATING: H7 FOLIAGE: semi-evergreen SUNLIGHT: part shade While you may simply purchase and grow the species type, there are also several named cultivars of Christmas rose to choose from. This is one of the best-known, with flowers that can be 10-13cm across, overlapping pure white petals that are marked green towards the centre and golden-yellow stamens. Like the species, this named cultivar is H7 hardy. 9) H. niger ‘Wintergold’ COMMON NAME(S): christmas rose ‘wintergold’ HARDINESS RATING: H7 FOLIAGE: evergreen SUNLIGHT: part shade Another named cultivar of the Christmas rose is ‘Wintergold’. This plant grows 30-35cm high and its white flowers are around 8cm across, pure white, with bright yellow stamens. 10) H. × sahinii ‘Winterbells’ COMMON NAME(S): hellebore ‘winterbells’ HARDINESS RATING: H4 FOLIAGE: evergreen SUNLIGHT: full sun / part shade This is an interspecies hybrid of H. niger and H. foetidus. Its flowers are not pure white, but rather white overlayered with soft pink and greenish hues, which look lovely against the silvery-green foliage. It can cope with partial or even full shade on suitable soils. 11) H. thibetanus COMMON NAME(S): tibetan hellebore HARDINESS RATING: H5 FOLIAGE: deciduous SUNLIGHT: part shade An interesting option, the Tibetan hellebore is a deciduous perennial growing to around 45cm tall. Its leaves have saw-like edging and the flowers are bell-shaped, arriving in clusters of 2-8. They are around 5-6cm across and bloom in early spring. The flowers, which have a papery texture, start out pure white but fade through pale pink to green, sometimes with dark veining. 12) H. ‘Verboom Beauty’ COMMON NAME(S): hellebore ‘verboom beauty’ HARDINESS RATING: H6 FOLIAGE: semi-evergreen SUNLIGHT: full sun / part shade This hellebore is semi-evergreen. It flowers early and abundantly on compact plants and bears beautiful pure white flowers in late winter and spring. It is H6 hardy. Hellebores can often be an excellent way to bring interest to a shady spot and are a boon for the bees. These white flowering options are just some of the many plants within this genus to consider growing in your garden.
Learn more
Propagating Hellebores Is Not The Easiest Garden Job - Try These Two Proven Methods
IN THIS GUIDE 1) Propagating By Division 2) Propagating From Seed Hellebores are delightful perennials which brighten the garden with their blooms when few other flowers are out in winter and early spring. Propagating Hellebores is not always the easiest garden job. These plants do not usually offer the option to propagate from cuttings, but can often either be propagated by division or by growing from seed. The best option will depend on which type of hellebore you are growing. We explain your two choices in more detail below. Difficulty Medium Equipment Required Spade or fork, knife, seeds, compost, pot or seed tray When To Propagate Summer (by seed) or Autumn or Spring (by division) 1) Propagating By Division Before you divide hellebore, note that this method of propagation is not suited to all varieties and, although this is the easiest way to get new plants from those you already have in your garden, hellebores are notoriously fussy and do not like to be moved or disturbed. If you have a suitable hellebore variety which is large and healthy, careful division is best carried out in early autumn. However, you can also consider undertaking this job in the spring, immediately after the flowering period. To divide a hellebore, dig carefully around the plant and, keeping the roots as intact and undisturbed as possible, lift it from the soil or growing medium. Slice through the centre of the clump with a sharp spade or gardening knife to divide it into 2 or more sections. Replant each of the divisions as soon as possible in a spot suited to their growing needs. Make sure that you place them so that the base of the growing shoots are approximately 2.5cm below the surface of the soil or growing medium. It is very important to make sure that your new plants are watered well during the first growing season and are not allowed to dry out. Note that you will have to be patient, as it can take a couple of years for transplanted divisions to flower well. 2) Propagating From Seed Hellebores like H. argutifolius, H. foetida, H. lividus and H. sternii are among those which do not respond well to division. Therefore, these and some other hellebores are best propagated from seed. Often, the best way to obtain new hellebores is simply to allow them to self-seed where they are growing in your garden. However, you can also collect the seeds in their ripe pots and sow these directly in the garden where they are to grow in mid to late summer. If seeds are stored rather than direct sown, it can be challenging to get these to germinate successfully, but it is possible. However, the seeds will require a period of warmth followed by a cold spell in order to germinate. You should also note that this also requires a lot of patience because germination can often take up to a year and can still be sporadic or patchy. After you have sown the stored seeds in pots or seed trays filled with a seed-starting peat-free compost, these should be kept at temperatures between 15-18°C for 6 weeks. They should then be exposed to winter cold, or kept at 5°C for another 6 weeks. When growing from seed, remember that the plants you grow will vary from the parent plant. Luckily, it can be interesting to experiment to see which variations occur and to create your own interesting new hellebores. “When hellebores are growing happily, they will produce seedlings that you can either allow to grow to maturity if you are happy with where they are, pot-on or transplant to a different spot,” shares Horticultural Consultant Colin Skelly. “If you have several species or cultivars in your garden they will tend to hybridise. “If you want to obtain a copy of the parent then you’ll need to divide, but the seedlings will produce variations on the parent species or cultivars.”
Learn more
Hellebores Grown From Seed Can Be Very Rewarding - Simply Follow These 5 Steps
IN THIS GUIDE When To Sow Hellebore 1) Harvest Or Purchase Seeds 2) Fill Pots With Compost 3) Sow Seeds 4) Prick Out Seedlings 5) Grow On Hellebores, also widely known as the ‘Christmas Rose’ because of when they flower, are a group of hardy perennial plants that can flower from winter until spring. Growing hellebores from seed can prove lengthy and tricky, as they can be difficult to germinate and take a few years until they flower. However, if successful growing hellebores from seed can be very rewarding. Some hellebores self-seed freely and the seedlings can be left to grow where they are or potted up. However, they may well not come true and end up looking different from the parent plants. To grow hellebores from seed: Harvest seed pods or source them from your local garden centre. Fill shallow pots with a seed-sowing compost mix. Sow seeds, firming them gently into the compost. Prick out seedlings to ensure they aren’t competing for resources. Grow on undercover, providing shaded conditions out of direct sunlight. This process is explained in detailed steps underneath. Difficulty Medium Equipment Required Gloves, pots or seed tray, seed sowing compost, horticultural grit or perlite When To Sow May-July When To Plant Out Autumn to Spring When To Sow Hellebore Hellebore seeds are usually best sown straight away on receiving or harvesting them and before the seeds dry out, which can lead to their dormancy. 1) Harvest Or Purchase Seeds Hellebore seeds are rarely found available in a garden centre, but can be purchased from an online supplier or harvested from a plant that has recently bloomed. Hellebore seeds can be collected from a plant once the flowers have faded and the seed pods have turned brown and are beginning to split, usually around the month of May. Remove the spent flower heads or seed pods from the plant and separate the small glossy black seeds which can be kept in a paper envelope until sowing. 2) Fill Pots With Compost Fill a small pot, or seed or module tray with a seed sowing compost mix and tamp down to provide a smooth surface to scatter the seeds over. 3) Sow Seeds Sow the hellebore seeds thinly on top of the compost and firm the seeds gently down ensuring good soil contact. Cover the seeds with a thin layer of perlite or horticultural grit and water gently from above being careful not to disperse the seed. Label clearly and place the pot or tray outdoors in a sheltered spot out of direct sunlight and water when required to keep moist. 4) Prick Out Seedlings Hellebore seeds can take a long time to germinate and require some time exposed to cold temperatures before doing so. Once the seeds have germinated, typically when the temperatures drop around November to December, place them in an unheated greenhouse or cold frame to grow on. “Essentially, this replicates the conditions in which they have evolved, as germinating before or during summer would result in high rates of loss due to drought,” explains Master Horticulturist Colin Skelly. “As temperatures drop into autumn and wetter weather resumes, the seeds are primed to emerge.” Once the seedlings are large enough to handle and display a pair of fully opened leaves, they are really for pricking out. Carefully prick out the seedlings, handling the leaves only, and pot on individually into small pots filled with a peat-free multi-purpose compost with some horticultural grit added. 5) Grow On Grow the seedlings on in an unheated greenhouse or cold frame and out of direct sunlight, keeping the soil moist at all times. Pot on the young hellebores a size up when they outgrow their pots and continue to grow the plants on until they are large enough to be planted out into a border or a final container or pot.
Learn more
Pruning Hellebore In 3 Steps - 'In Late Winter, I Remove All Of Last Year’s Foliage'
IN THIS GUIDE When To Prune Hellebore 1) Remove The Foliage 2) Deadhead Spent Flowers 3) Dispose Of Old Foliage Hellebores are a group of flowering perennial plants that can bloom from winter through to spring. There are several benefits to cutting back hellebores, including maintaining optimal plant health and removing the foliage so that their jewel-like flowers can be seen and enjoyed. Cutting back hellebores is a fairly simple process as described below: Remove any browning, diseased or damaged foliage. Deadhead the flowers back to the base of the stem. Get rid of old foliage to prevent the spread of any pests or problems. This process is explained in more depth underneath. Difficulty Easy Equipment Required Secateurs, gardening gloves When To Prune October to February When To Prune Hellebore Hellebores should be cut back either in the autumn or in mid-winter, depending on the variety. The easy-to-care-for and widely-grown Helleborus x hybridus, with its nodding flowers that tend to bloom in February and March, requires cutting back in late winter before the new growth appears. Other hellebore varieties require some pruning in late autumn and after flowering in spring. 1) Remove The Foliage The foliage of Helleborus x hybridus is semi-evergreen and can begin to look tired and tatty towards the end of the year. It is these old and often browning leaves that can be removed by cutting to the base of the stem with a clean and sharp pair of secateurs. “In late winter, I remove all of last year’s foliage on my H. x hybridus,” shares Colin Skelly, a Horticultural Consultant. “At the same time, I mulch around them with compost. “This creates the perfect backdrop for the emerging flowers to stand out as they emerge as well as improving the soil.” Other hellebore varieties require any diseased or damaged foliage to be cut away earlier in the autumn. Hellebores can be prone to a fungal disease called leaf spot, characterised by dark spots and blotches on both the foliage and the flowers. Cutting back and removing any infected or old foliage can help prevent and control leaf spot disease. 2) Deadhead Spent Flowers Helleborus x hybridus have a tendency to self-seed and can even take over an area. This can be minimised by either deadheading the spent flowers back to the flowering stems’ base with secateurs before the seed pods are formed or by removing the seedlings once germinated. Other hellebore varieties, such as Helleborus foetidus or the Stinking Hellebore as it is suitably named, which flower in spring can also self-seed freely. These produce thicker and taller flower stems which can either be cut back right after flowering to discourage their reproduction or left to develop pods and self-seed, before cutting back to their base. 3) Dispose Of Old Foliage Along with the fungal leaf spot disease, hellebores can also succumb to a viral disease known as Hellebore black death. Aptly named due to the black linear markings on the foliage that appear, the only control is to remove and destroy the plant when the disease is identified. As a result, and to avoid contamination, it is recommended not to add any hellebore material to home composting systems, but for it to be destroyed instead.
Learn more
Do You Even Need To Prune Escallonia? Only If It's Become Congested - Here's Why
IN THIS GUIDE Do You Need To Prune Escallonia? When To Prune Escallonia Pruning Hedged Escallonia Renovation Pruning Shrub Aftercare Escallonias are attractive evergreen shrubs that come in a range of sizes and colours. These plants are generally quite hardy and require a moderate to low amount of care. Pruning shrubs can sometimes be rather confusing for new gardeners, but the good news is that with escallonias, things are very simple. There is no need to prune most escallonias on a regular basis each year. The only exception to this is where you are growing it as part of the hedge or your shrub has become congested, as we explore below. Difficulty Easy Equipment Required Secateurs or gardening knife When To Prune Spring or autumn Do You Need To Prune Escallonia? As mentioned above, you really don’t need to prune escallonia shrubs at all if you are growing them in a bed or border in your garden. The shrubs generally tend to have a pleasing natural form and do not really benefit from regular maintenance pruning. Some gardeners give the plant a light prune in late winter or early spring, but this can actually reduce flowering if you are too vigorous. With this in mind, I would suggest that if you do wish to prune, it is best to restrict yourself to very light reshaping by focusing on the removal of any dead or damaged material. When To Prune Escallonia If you are growing escallonia as a hedge and want abundant flowers, prune annually just after flowering in September or October. If you want a more formal and neat hedge, you can also shear over the hedge a couple of other times through the year. However, keep in mind that if you do this you will have fewer flowers in the blooming season. A mature shrub that has become overgrown and congested can be renovation pruned. This involves taking out one in three of the oldest branches either close to the ground or where they join another main stem in mid-spring. Pruning Hedged Escallonia If you are growing escallonia as a hedgerow, a little more shaping will naturally be required to keep your hedging looking good. There are different schools of thought about when and how much to trim escallonia hedges. However, if you are interested in and like your hedge to flower well, then the best time to prune these hedging shrubs is immediately after they have finished flowering for the year in autumn. Alternatively, if you like a neater hedge and are not too bothered about abundant flowers, you can also trim the escallonia hedge a couple of times throughout the growing season. “Escallonia hedges have a tendency to grow incrementally year by year if pruned annually,” says Colin Skelly, a Horticultural Consultant. “To keep them within bounds, I find it necessary to cut them back 2 or 3 times a year. Ideally, cut back some older branches every year to rejuvenate growth and avoid bare patches or die back.” When pruning the hedge, think about making it a trapezoidal shape so that sunlight can reach the base of the hedge and ensure that it remains healthy. Thin out the odd old branch in congested sections if necessary. Renovation Pruning If you have a mature escallonia shrub that is overgrown and congested with old wood, you can give it a new lease of life through gradual renovation pruning. The idea is to remove up to one-third of the oldest branches each year over a number of years. This type of more extreme pruning is best carried out in mid-spring. This more extreme pruning will create plenty of new growth, so after doing this job, you might also want to consider taking cuttings in mid-late spring to propagate your shrub. Shrub Aftercare Whether pruning a hedge or a mature congested shrub, aftercare is crucial for the best results. Make sure that after pruning you spread a good quality organic mulch around the root area of your shrubs. This mulch, which should be around 5cm deep, provides fertility, reduces moisture loss from the soil and helps to suppress weeds. A good quality homemade compost would be ideal.
Learn more
Sowing Cockscomb: This Plant Lives Out Its Entire Lifecycle Within A Year
IN THIS GUIDE When To Sow Celosia 1) Sow Cockscomb Seeds 2) Provide The Right Care 3) Transplant Seedlings 4) Harden Off 5) Plant Outdoors Celosia, or ‘Cockscomb’, is a bold and vibrant plant used to bring a splash of colour to gardens. This plant isn’t challenging to grow from seed and doing so is actually a reliable way to liven up your garden. As an annual plant, this is a process that will need to be done each year – as the plant lives out its entire lifecycle (germination to setting seed) within a one-year timeframe. Here’s a brief overview of the process: Sow your seeds indoors, preferably in seed-starting compost. Keep your seedlings at a consistent temperature and moisture level to encourage growth. Thin out your seedlings when they’re established to prevent them from competing for nutrients. Harden them off to get them ready for their journey outdoors. Plant out into your garden and wait for them to bloom. Let’s take a look in a little more depth. Difficulty Easy Equipment Required Seeds, compost, seed tray When To Sow February to April When To Plant Out Late May to June When To Sow Celosia In the UK you’ll need to sow your celosia seeds indoors for them to grow to a sufficient size within the year. February through to April is probably the best time to do this. 1) Sow Cockscomb Seeds The first step is to plant your seeds in compost. Lay out a layer of compost to fill the depth of a seed tray, then press the seeds lightly onto the surface and just cover with either compost or vermiculite. For best results choose a seed-starting compost, as this has the right balance of nutrients to facilitate healthy growth. “As Celosia seeds can be susceptible to fungal infections, it’s important to ensure equipment including the seed tray is clean before starting and the seedlings are not over-watered and allowed to dry out between waterings,” says Roy Nicol, Master Horticulturist. 2) Provide The Right Care Seeds need conditions to be just right in order to grow big and strong, which is one of the main reasons for planting them indoors. It’s much easier to control temperature and moisture levels inside. For best results, keep the temperature between 15-20°C as consistently as possible. A heated propagator can help to achieve desired results. Use a spray bottle to spritz the top layer of soil every other day, as this will keep the moisture levels in the right range. 3) Transplant Seedlings When your seedlings are starting to become established you’ll want to thin them out a little to give them space to grow. Keeping them bunched up will hinder their ability to thrive and will reduce the final size of your Celosia, as well as create ideal conditions for ‘damping off’. Prepare another seed tray by putting out a layer of compost, then gently move the seedlings out of the first tray. Leave a gap of 5cm between each seedling in this new one so they have space to grow. 4) Harden Off Hardening off ensures that your seedlings are ready for the harsher conditions in the outdoors of the UK. Skip this step at your peril, as a seedling that hasn’t been hardened off is more likely to die when you plant it out. Be aware that hardening off can take a couple of weeks, so make sure to incorporate this step into your daily schedule. I’d recommend making a note of it somewhere, either in your garden planning book or a calendar. Leave the tray of seedlings outside for a couple of hours during the day, in a sheltered and shady spot. Bring them indoors again that night. Repeat this for a few days, extending the time spent outdoors for an hour or so each day. 5) Plant Outdoors When your seedlings are fully established and hardened off, it’s time to plant them out. Late May or preferably June (well after the last frost) is the best time of year for this. Plant out into beds or containers of well-watered, well-drained compost. Leave a gap of at least 20cm between each young plant to ensure the adult plant has plenty of space to grow big and strong. Keep your seedlings well-watered as they grow. Celosia will be in bloom from June through October, giving you a medley of colour to enjoy in the summer months.
Learn more


