

Growing
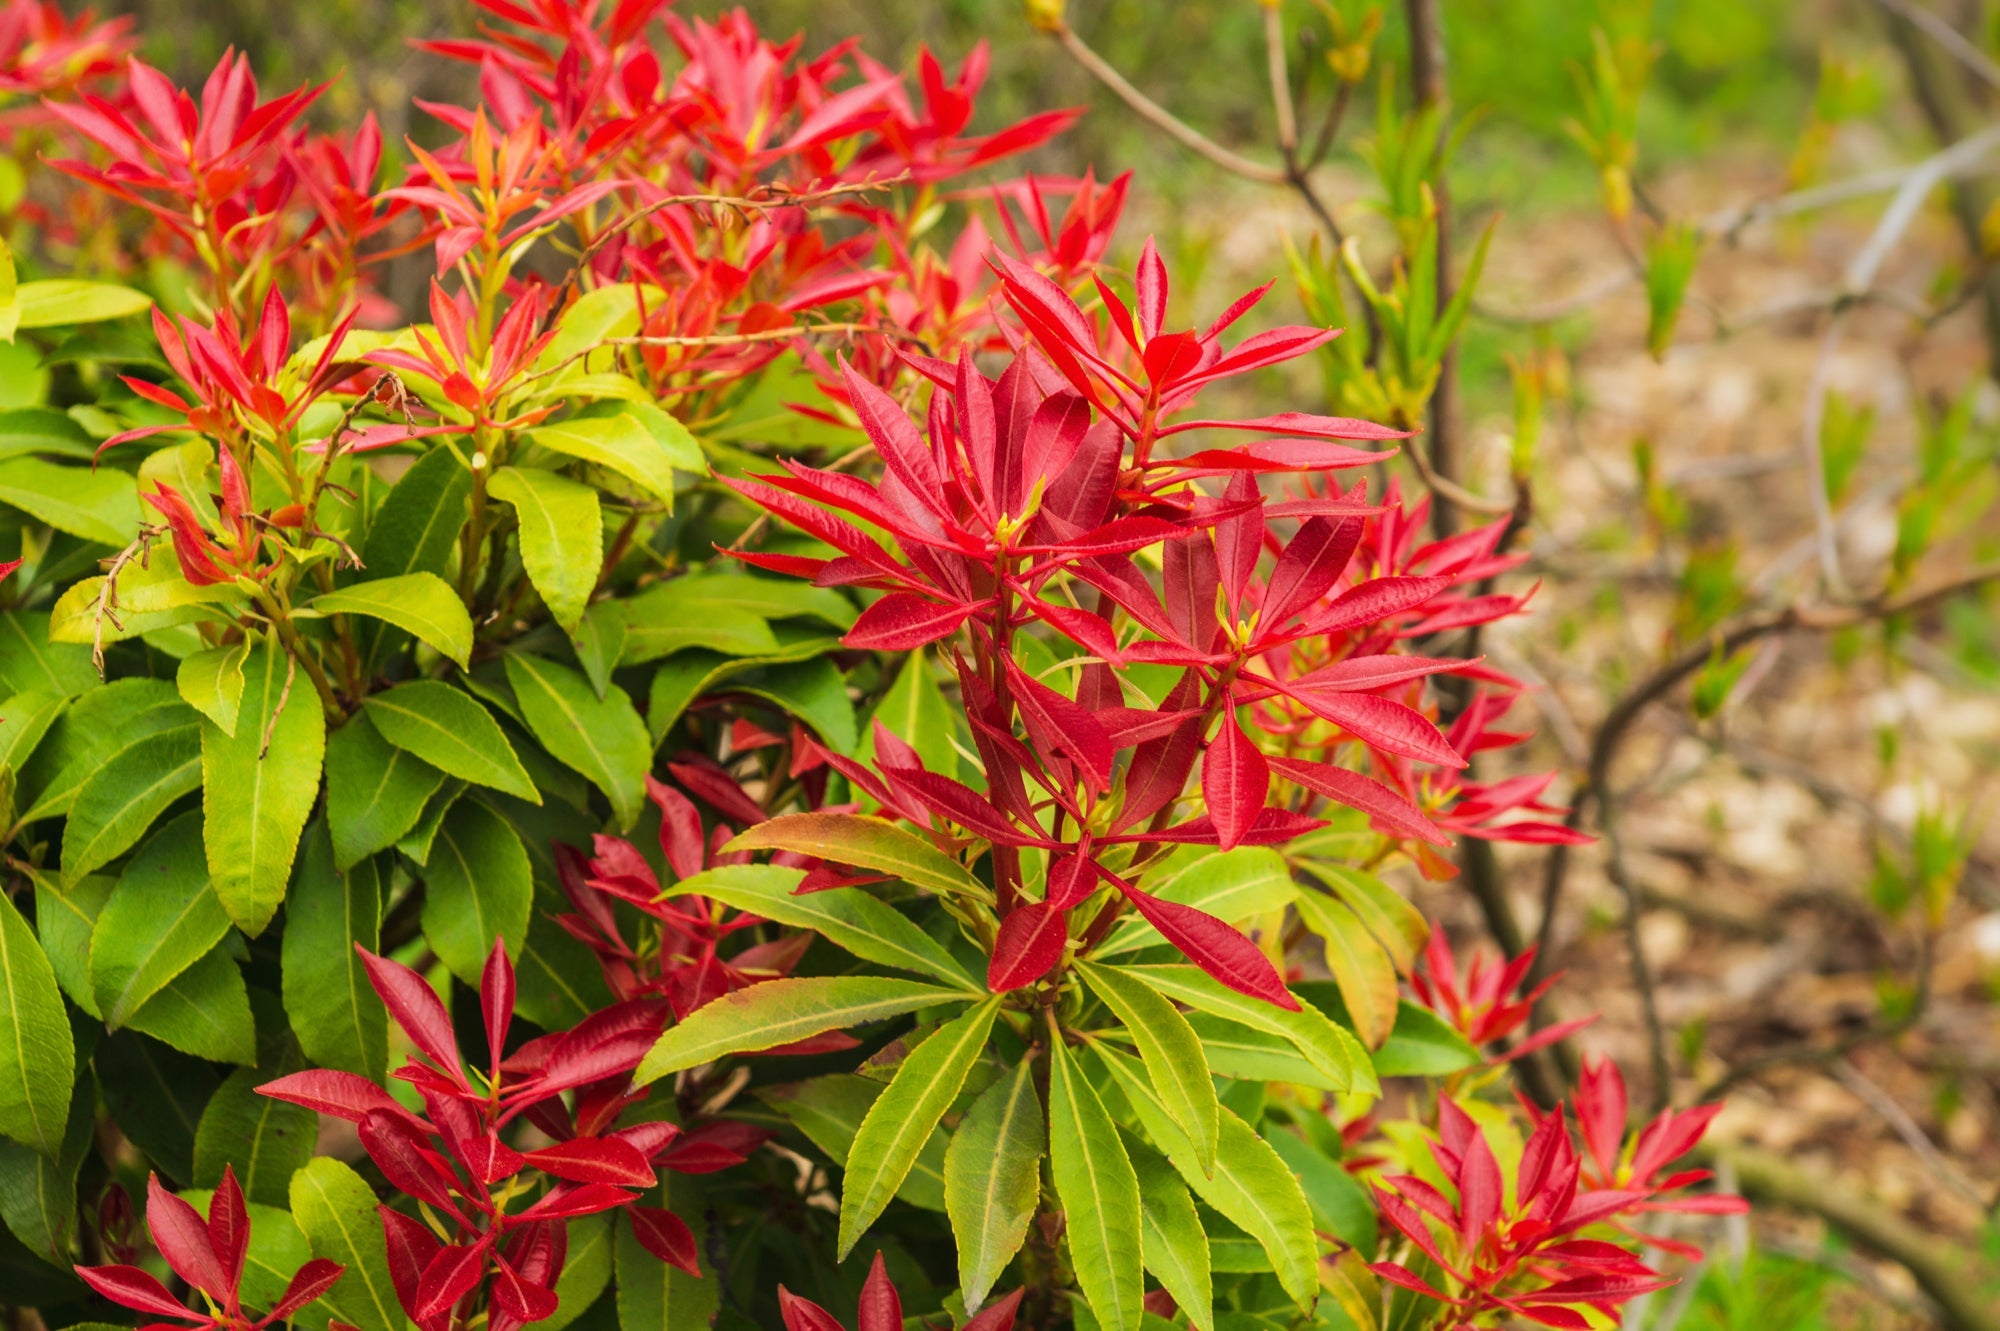

These Are The Common Causes Of Issues With Pieris According To Colin Skelly
IN THIS GUIDE 1) Yellow Leaves 2) Brown Spots 3) Poor Growth Pieris are generally fairly easy and low-maintenance shrubs to grow, as long as they are provided with the right environmental conditions. “Most problems with Pieris health that I have seen are due to them being planted in either insufficiently acidic soil or a lack of drainage (or both),” shares Colin Skelly, a Master Horticulturist. “If your soil is not naturally acidic, trying to amend it is a never-ending battle with the underlying conditions. It is better to grow Pieris in a container using ericaceous compost.” However, there are some signs to look out for that indicate that there is some kind of problem, such as: Yellow or pale leaves. Brown spots on leaves. Poor growth or a general lack of flowering. Below, we will take a look at some of the most common causes for these symptoms and help you work out what problem or issue you might be dealing with when growing Pieris. 1) Yellow Leaves Yellow or pale leaves on pieris plants can be caused by a number of different problems. Yellow leaves are sometimes caused by too much direct sun. When plants are not in dappled or partial shade, leaves can turn yellow in the bright sunlight and should be moved to a more shaded spot. Yellow leaves can also develop due to problems with the soil or growing conditions. The soil may not be sufficiently acidic, which may be causing poor nutrient uptake that results in the yellowing of the leaves. Root issues may also mean that plants are not getting the nutrients they need. Pale and bleached-looking leaves can also be caused by lace bugs, which are present in southern parts of England but can be found elsewhere. Pieris lace bugs, also known as andromeda lacebugs, can be seen on the underside of leaves that look pale and mottled on top. They are sap-sucking insects which can cause leaf drop if the infestation is heavy enough. The bug is notable for its distinctive lace pattern Tolerate populations in small numbers and encourage natural predators like birds, ladybirds and ground beetles in your garden to keep the number of these and other sap-sucking insects down. A Pieris will be able to tolerate a small infestation, but you should prune heavily infested ones. A selection of organic and synthetic pesticides can be used to remove infestations, but be careful not to apply them while your plant is flowering. Such chemicals will cause harm to any pollinating insects that visit your garden, so use them sparingly and always outside of flowering seasons. 2) Brown Spots Brown spots are commonly a sign of a fungal issue on a Pieris shrub. Fungal leaf spot and other fungal issues are most likely to arise where there is overcrowding, poor airflow and where humid or waterlogged conditions prevail. Brown leaves may also be a sign that the plant has not received enough water, which is more common when growing Pieris in pots. Remove affected material as soon as possible to prevent fungal issues from spreading. 3) Poor Growth If your Pieris grows poorly or does not flower, this is often a sign that it is not happy in its current location. This might be due to the soil not being acidic enough, a problem with water availability or because a container plant has outgrown its pot. Address any potential problems with environmental conditions and care, and you should be able to avoid many of the most common issues and keep your pieris happy and healthy for a number of years to come.
Learn more
Grow Heather In Pots - It Allows You To Better Control The Acidity And Moisture Levels
IN THIS GUIDE Is Heather Suited To Pots? Choosing Containers For Heather Compost For Heather Potting Up Heathers Potted Heather Care Ubiquitous in the Scottish Highlands, heather is a hardy, drought-tolerant plant that is native to northern Europe but has since been introduced to many other parts of the globe. Because of its durable nature, heather can be easily grown and maintained in pots, containers or the ground. Indeed, the simplicity of its cultivation makes it an ideal plant for novice gardeners. As long as you get the pH balance of your soil right, keep it well hydrated and protect it from the worst ravages of winter, your heather plant will do just fine. Is Heather Suited To Pots? It might be a more common sight on the glens and bens of Scotland, but heather can be quite easily grown in containers. In fact, doing so can be advantageous, since it allows you to better control the acidity and moisture levels in the soil, as well as move the plant around your garden (or even indoors) at will. “Please do not think that heathers and heaths are for heather beds only,” says Irene Lang from Perthshire Heathers. “Heathers in containers look lovely and I especially like growing the winter/spring flowering varieties in large containers for a burst of spring colour.” Choosing Containers For Heather Generally speaking, heather isn’t a plant that dominates its surroundings, only ever reaching a maximum of 30cm in height, but frequently less than half that. Its roots are similarly shallow, so they don’t need exceptionally deep or large pots. Having said that, I find heather is often at its most attractive when positioned alongside other blossoming plants from the same Ericaceae family, such as rhododendrons and azaleas. As such, you may want to choose a container big enough to fit all of the plants you intend to place within it. In any case, you should ensure that the pot has adequate drainage holes in the bottom, since heather can’t stand waterlogged soil. Also, if replanting, make sure the pot is one size larger than the one in which it was previously housed to allow it the space to develop healthily. Compost For Heather Heather is a little fussy about the type of compost in which it is grown, but the good news is that planting it in a pot gives you far greater control over this aspect. “Soil type is very important and although the Erica x darleyensis and Erica carnea varieties will tolerate most soils, E. calluna varieties require an acidic soil,” warns Irene. “Check the pH level first and add ericaceous compost when planting where necessary.” Ideally, you’ll pot it in ericaceous soil that retains moisture well but still has good drainage, with a pH level anywhere between 4.5 and 5.5. Indeed, this predilection for acidity is the most demanding aspect of heather’s requirements, so you’ll want to make sure the levels do not drop over time and certainly do not add any lime to the soil. Any product marketed for growing ericaceous plants should do the trick. On the other hand, if you’d like to create your own potting mixture, you can do so by combining 50% compost, 20% perlite, 10% leaves (or some other mulch), 10% sand and 10% garden soil. This will create the perfect pH, moisture retention and drainage qualities to serve your heather well. Potting Up Heathers Before you do anything, it’s a good idea to select the location in which you’ll position your potted heather plants. This is especially true if you plan to use heavy concrete or terracotta pots filled with many different plants and a shedload of soil. With that in mind, choose a location that enjoys plenty of sunshine but has decent protection from the wind. Heather will perform best when it’s exposed to at least eight hours of sunlight per day, and though it can survive in windy locations, it will appreciate some shelter. Fill your container with your potting mixture to around two-thirds of the height of the pot. Place the heather in it, positioning larger specimens towards the rear of the container and smaller ones at the front. Make sure the roots are splayed and have room to manoeuvre, then add pine bark to maintain appropriate acidity levels and discourage weeds. Fill with more potting mixture and tamp down gently. Give the plant a good soaking to make sure it has enough to drink at first, allowing excess water to drain from the bottom of the pot. While your plant is still establishing itself, you can expect to water it 1-2 times per week, making sure the soil is never allowed to fully dry out. Preferably, you’ll use collected rainwater to keep the acidity of the soil high. How Many Heathers Should You Plant Per Pot? The answer to this question will depend entirely on the size of the heather specimens you have, the dimensions of your container and whether or not you wish to include other plants and flowers in the pot. Generally speaking, they have compact root systems and will play well alongside others. Potted Heather Care In terms of irrigation, you’ll find that you should be watering heather less the more it becomes established. Having said that, it’s important not to allow the soil to dry out completely. “To get the best results, it is important when planting to keep the plants moist until they are established,” says Irene. “Be vigilant with watering as they will not tolerate drought until very well established.” “However, you should ensure the soil is free-draining and it’s best not to plant in heavier or clay soils unless you are able to add some materials to lighten the condition.” Always water the roots directly, avoiding the leaves, since this can encourage the development of fungal infections. “It can be quite tricky to balance the water requirements of heather in pots or containers,” explains Master Horticulturist Colin Skelly. “They like free-draining soil but dislike getting very dry, which is quite a difficult combination in a potted plant. “I once lost several mature plants due to drying out in this way, despite watering every day. “If you can, drip irrigation in the very warmest weather would help to ensure that there is always available moisture but not too much.” Heather doesn’t necessarily require fertilisation, though you can feed it if its appearance is lacklustre and seems as though it may have used up much of the nutrients in its container. Choose a heather-specific fertiliser and apply it just once per growing season, as any more will be detrimental to its health in the long run. Heather will benefit from a good trim in early spring, stripping away any leggy or drooping parts of the plant. Not only will this give it a more sightly shape, but will also encourage fuller growth and more vigorous blooms when it comes to the flowering season in summer. Heather does like sunshine but if it has to endure the full strength of midday heat in particularly warm locations, it can suffer root rot. “I find they do best in open sunny sights, but partial shade will be tolerated,” explains Irene. You should also be vigilant against pests such as spider mites and scale insects. If you spot the signs, treat the plant immediately with an appropriate systemic insecticide. As for overwintering, heathers are generally quite resistant to frost. Having said that, they may succumb to the harshest temperatures in the UK. If in doubt, move potted specimens indoors if you can. If not, you can insulate them as much as possible by mulching the base with straw and covering the entire container (including the base) with polystyrene foam or another suitable insulating material.
Learn more
Coral, Peach And Apricot Flowers - Here Are 35 Ornate Orange Perennials To Grow This Year
IN THIS GUIDE 1) Blackberry Lily 2) Blanket Flower 3) Orange Ball Tree 4) Butterfly Weed 5) California Poppy 6) Canna Lily 7) Chrysanthemum 8) Shrubby Cinquefoil 9) Dahlia 10) Daylily 11) Gerbera Daisy 12) Avens 13) Giant Montbretia 14) Globe Flower 15) Golden Pea 16) Hawkweed 17) Helenium 18) Himalayan Spurge 19) Georgian Fleabane 20) Iris 21) Lantana 22) Ligularia 23) Monkey Flower 24) Orange Coneflower 25) Chinese Trumpet Vine 26) Peony 27) Persian Buttercup 28) Peruvian Lily 29) Rainbow Bitter Root 30) Rock Rose 31) Red-Hot Poker 32) Tulip 33) Wallflower 34) Welsh Poppy 35) Bird Of Paradise References Orange is a great choice for those who want to add some flair and flavour to their garden and perennials excel at creating a long-term outdoor display. Encompassing a range of colours from coral to peach to apricot, these orange-flowering plants will be just as enticing to winged pollinators as they are to green-fingered people. 1) Blackberry Lily BOTANICAL NAME: Iris domestica HARDINESS RATING: H7 FLOWERING SEASON(S): summer SUNLIGHT: full sun / partial shade EXPOSURE: sheltered SOIL PREFERENCE: clay or loam; any pH SIZE: 0.5-1m in height, 0.1-0.5m spread The name here is somewhat misleading, since there are no black tones nor berries in sight, and the plant is not even a true lily! Instead, it belongs to the iris family – but don’t hold that against it. The delicate orange blossoms, speckled with delightful red spots, can last for several months and brighten up any space. 2) Blanket Flower BOTANICAL NAME: Gaillardia pulchella HARDINESS RATING: H4 FLOWERING SEASON(S): summer / autumn SUNLIGHT: full sun EXPOSURE: exposed / sheltered SOIL PREFERENCE: chalk, loam, sand; any pH SIZE: 0.1-0.5m in height, 0.1-0.5m spread From its bulbous dark-red stigma, the blanket flower gradually softens into orange and yellow at its tips. This makes for a supremely warm and autumnal sight for sore eyes that is every bit as enticing to butterflies as it is to humans. It’s hardy enough and overwinters well, so should thrive in most parts of the UK. 3) Orange Ball Tree BOTANICAL NAME: Buddleja globosa HARDINESS RATING: H5 FLOWERING SEASON(S): summer SUNLIGHT: full sun / partial shade EXPOSURE: sheltered SOIL PREFERENCE: all soil types; any pH SIZE: 4-8m in height, 4-8m spread This semi-evergreen shrub can reach a whopping 5m in height, so bear that in mind when selecting and planting it. The dark green leaves resemble snake tongues, while the globose rosettes of the orange flower heads are around 2cm in diameter and appear without fail in the early summer months. 4) Butterfly Weed BOTANICAL NAME: Asclepias tuberosa HARDINESS RATING: H4 FLOWERING SEASON(S): summer / autumn SUNLIGHT: full sun EXPOSURE: sheltered SOIL PREFERENCE: clay, loam, sand; acidic or alkaline pH SIZE: 0.5-1m in height, 0.1-0.5m spread A magnet for butterflies and honeybees, this attractive plant is considered an invasive weed and will spread rapidly if left unattended. Having said that, it’s not the worst problem in the world, since the dainty clusters of orange blossoms bobbing atop the vibrancy of its green foliage is a beautiful sight in its own right. 5) California Poppy BOTANICAL NAME: Eschscholzia californica HARDINESS RATING: H3 FLOWERING SEASON(S): summer SUNLIGHT: full sun EXPOSURE: exposed / shelteredf SOIL PREFERENCE: loam or sand; any pH SIZE: 0.1-0.5m in height, 0.1-0.5m spread The cupped blossoms of the California poppy seem to spring up overnight, carpeting the surrounding area in a wave of orange vitality. Although they grow very fast, their beauty is ephemeral; you’ll struggle to even put picked flowers in a vase before their blooms wilt away. “As mentioned, California poppies are not perennial in the UK and, although you can buy seeds, you are more likely to have them self-seed from neighbouring gardens,” shares Master Horticulturist Dan Ori. “Once established, they may or may not be a nice surprise as they pop up unexpectedly around your garden.” They will need to be grown as annuals in colder areas of the UK. 6) Canna Lily BOTANICAL NAME: Canna × generalis HARDINESS RATING: H2 FLOWERING SEASON(S): summer / autumn SUNLIGHT: full sun EXPOSURE: sheltered SOIL PREFERENCE: all soil types; any pH SIZE: 0.5-1m in height, 0.1-0.5m spread Offering an excellent burst of colour and very little in the way of upkeep, canna lilies are far hardier than their extravagant aesthetics might suggest. Both flowers and foliage will last for many months throughout the year and can be overwintered indoors to act as perennials, but if planted outdoors, they’ll typically grow as annuals. “Canna lilies are not perennial in the UK, but they do make a good houseplant if the room is not too dry, so I recommend trying to overwinter them,” says Dan. “It is common for cannas to be overwatered indoors during the winter, often because they are in pot covers that allow them to sit in water. “When growing indoors, other than not overwatering, my top advice would be to bring them indoors during early autumn and keep them out of cold drafts.” 7) Chrysanthemum BOTANICAL NAME: Chrysanthemum ‘Sicardo Orange’ HARDINESS RATING: H3 FLOWERING SEASON(S): autumn SUNLIGHT: full sun EXPOSURE: sheltered SOIL PREFERENCE: loam; neutral pH SIZE: 0.1-0.5m in height, 0.1-0.5m spread Chrysanthemums are often associated with the colour red but are actually available in a variety of hues, including a brilliant orange that is guaranteed to add punch and pizzazz to any arrangement. They can reach up to 90cm in height and will do best if treated to frequent watering due to their shallow rooting habits. 8) Shrubby Cinquefoil BOTANICAL NAME: Potentilla fruticosa ‘Hopleys Orange’ HARDINESS RATING: H7 FLOWERING SEASON(S): summer / autumn SUNLIGHT: full sun / partial shade EXPOSURE: exposed / sheltered SOIL PREFERENCE: chalk, loam, sand; any pH SIZE: 0.5-1m in height, 0.5-1m spread This gorgeous perennial bush is populated with an abundance of button-shaped blooms which last throughout the summer months. It’s a fast grower and can exceed 2m in height and spread if left to its own devices, while it’s also resistant to most types of pests and predators. 9) Dahlia BOTANICAL NAME: Dahlia ‘Orange Nugget’ HARDINESS RATING: H3 FLOWERING SEASON(S): summer / autumn SUNLIGHT: full sun EXPOSURE: sheltered SOIL PREFERENCE: clay, loam, sand; any pH SIZE: 0.5-1m in height, 0.5-1m spread Reminiscent of the chrysanthemum, the dahlia boasts a fuller, more-rounded architecture to its rosette and dainty points at the tips of its petals. Of course, dahlias are available in a range of colours, but orange varieties can really spice up their surroundings. 10) Daylily BOTANICAL NAME: Hemerocallis fulva HARDINESS RATING: H7 FLOWERING SEASON(S): summer SUNLIGHT: full sun / partial shade EXPOSURE: exposed / sheltered SOIL PREFERENCE: all soil types; any pH SIZE: 0.5-1m in height, 0.5-1m spread Another plant whose beauty is short and sweet, the day-long duration of the blooms gives ‘the daylily’ its name. Not to worry, however, since a single plant can produce hundreds upon hundreds of flowers across the season. Once established, they require very little in the way of upkeep indeed. “Daylily varieties are my go-to plants when I need an orange perennial,” explains Dan. “Their ability to harmonise in a border with so many other plants while still being showy is what makes them special to me.” 11) Gerbera Daisy BOTANICAL NAME: Gerbera ‘Sweet Sunset’ HARDINESS RATING: H3 FLOWERING SEASON(S): spring / summer / autumn SUNLIGHT: full sun EXPOSURE: sheltered SOIL PREFERENCE: chalk, loam, sand; any pH SIZE: 0.1-0.5m in height, 0.1-0.5m spread Native to South Africa, Gerbera daisies prefer full sun and warmer temperatures, though hybrid varieties have been developed which can withstand colder climes. Their beautiful wheel-like flower heads should be pinched off as soon as they begin to wilt in order to prompt fresh growth and prolong the blooming season. 12) Avens BOTANICAL NAME: Geum ‘Totally Tangerine’ HARDINESS RATING: H7 FLOWERING SEASON(S): spring / summer / autumn SUNLIGHT: full sun EXPOSURE: exposed / sheltered SOIL PREFERENCE: all soil types; any pH SIZE: 0.5-1m in height, 0.1-0.5m spread A member of the rose family, geums are low-maintenance plants which often flower from spring all the way into autumn. Available with red, orange and yellow flowers, their growing habits (up to 50cm) makes them an ideal choice for the centre of a mixed border. 13) Giant Montbretia BOTANICAL NAME: Crocosmia masoniorum HARDINESS RATING: H4 FLOWERING SEASON(S): summer SUNLIGHT: partial shade EXPOSURE: sheltered SOIL PREFERENCE: all soil types; any pH SIZE: 1-1.5m in height, 0.1-0.5m spread As the name suggests, these attractive plants can exceed 1m in height and as such, are better suited to the rear of your display. Their clusters of orangey-red flowers appear in late summer from July to August, but their swordlike foliage should provide attraction year-round. This plant can be invasive if left unattended. 14) Globe Flower BOTANICAL NAME: Trollius × cultorum ‘Orange Princess’ HARDINESS RATING: H7 FLOWERING SEASON(S): summer SUNLIGHT: full sun / partial shade EXPOSURE: exposed / sheltered SOIL PREFERENCE: clay or loam; any pH SIZE: 0.5-1m in height, 0.1-0.5m spread Extremely versatile, globe flowers love moisture and therefore do best when situated next to a pond, stream or bog garden. Having said that, their buttercup-like blossoms will liven up any bed or border with minimum fuss, as long as you remember to keep them well hydrated. 15) Golden Pea BOTANICAL NAME: Lathyrus aureus HARDINESS RATING: H6 FLOWERING SEASON(S): spring / summer SUNLIGHT: full sun / partial shade EXPOSURE: exposed / sheltered SOIL PREFERENCE: clay, loam, sand; any pH SIZE: 0.5-1m in height, 0.1-0.5m spread Golden Peas belong to the Lathyrus family, some of which are cultivated for food production. However, home growers should simply marvel at the profusion of golden-orange flower heads which appear in early summer on each of its upright stems. 16) Hawkweed BOTANICAL NAME: Hieracium aurantiacum HARDINESS RATING: H5 FLOWERING SEASON(S): summer SUNLIGHT: full sun / partial shade EXPOSURE: exposed / sheltered SOIL PREFERENCE: chalk, loam, sand; any pH SIZE: 0.1-0.5m in height, 0.5-1m spread Hawkweed is notable for the architectural intrigue and bright orange colour of its blossoms, which appear between June and August each year. As the ‘weed’ part of its name suggests, it’s invasive and will spread out of control once established, so bear that in mind when choosing a location to plant it. 17) Helenium BOTANICAL NAME: Helenium ‘Sahin’s Early Flowerer’ HARDINESS RATING: H7 FLOWERING SEASON(S): summer / autumn SUNLIGHT: full sun EXPOSURE: exposed / sheltered SOIL PREFERENCE: all soil types; any pH SIZE: 0.5-1m in height, 0.1-0.5m spread Characterised by bulbous stamens and thin, daisy-like petals, heleniums grow to a reasonable height and are often favoured for providing background colour. 18) Himalayan Spurge BOTANICAL NAME: Euphorbia griffithii HARDINESS RATING: H7 FLOWERING SEASON(S): summer SUNLIGHT: partial shade EXPOSURE: exposed / sheltered SOIL PREFERENCE: clay or loam; any pH SIZE: 0.5-1m in height, 0.5-1m spread Native to Bhutan, Tibet and regions of southern China, the Himalayan spurge has dark red stems supporting bright green leaves and red or orange blossoms in the early summertime.1 It’s fast-spreading and can sometimes be invasive. 19) Georgian Fleabane BOTANICAL NAME: Inula orientalis HARDINESS RATING: H6 FLOWERING SEASON(S): summer SUNLIGHT: full sun / partial shade EXPOSURE: sheltered / exposed SOIL PREFERENCE: all soil types; any pH SIZE: 0.1-0.5m in height, 0.1-0.5m spread With large disc-like blossoms reminiscent of an oversized common daisy, Inula orientalis hails from Asia and is fully hardy for cultivation in the UK. It’s a versatile little plant which will do well in almost all conditions, except waterlogged terrain with no sun exposure – but that’s the same for most perennials! 20) Iris BOTANICAL NAME: Iris ‘Orange Harvest’ HARDINESS RATING: H7 FLOWERING SEASON(S): spring / summer / autumn SUNLIGHT: full sun EXPOSURE: exposed / sheltered SOIL PREFERENCE: loam or sand; acidic to neutral pH SIZE: 0.5-1m in height, 0.1-0.5m spread With their 80cm stature and paper-like flowers, irises are fragile but fascinating additions to your garden. They’re generally quite low-maintenance creatures but don’t do well when starved of water, so take care to make sure their soil doesn’t dry out completely. Their flowers appear between May and July. 21) Lantana BOTANICAL NAME: Lantana camara HARDINESS RATING: H1C FLOWERING SEASON(S): spring / summer / autumn SUNLIGHT: full sun EXPOSURE: sheltered SOIL PREFERENCE: all soil types; any pH SIZE: 1-1.5m in height, 1-1.5m spread These vining plants look every bit as attractive when climbing up a trellis, tree branch or exterior wall as they do when trailing from a hanging basket. They come in a variety of different colours, from blue to white to orange, and will thrive if treated to well-draining soil and plenty of irrigation. They will need overwintering indoors to survive as perennials in the UK. “You may find Lantana hard to overwinter, which is why I regard it as an annual and sow new plants each year,” Dan says. 22) Ligularia BOTANICAL NAME: Ligularia dentata HARDINESS RATING: H6 FLOWERING SEASON(S): summer / autumn SUNLIGHT: full sun / partial shade EXPOSURE: sheltered SOIL PREFERENCE: all soil types; any pH SIZE: 1-1.5m in height, 0.5-1m spread Almost as popular for their lush, lance-like foliage as they are for their yellow and orange blossoms, ligularias are often known as leopard plants for the combination of colours on their flower heads. Their Latin name comes from the word for tongue and derives from the shape of the petals emanating from the central disc.2 23) Monkey Flower BOTANICAL NAME: Mimulus aurantiacus HARDINESS RATING: H2 FLOWERING SEASON(S): summer / autumn SUNLIGHT: full sun / partial shade EXPOSURE: exposed / sheltered SOIL PREFERENCE: all soil types; any pH SIZE: 0.5-1m in height, 0.5-1m spread Monkey flowers gained their common name due to the assertion that the petals on some varieties look like the face of our simian friends, but you might have to use your imagination a little bit to see the resemblance! Nonetheless, their fused petals and bright colours are supremely attractive, meaning they’ve spread far beyond their native Americas. Unfortunately they will not survive the winter period outdoors in the United Kingdom. “Mimulus aurantiacus is one to grow under winter-heated glass, so it is best not to regard it as an outdoor plant, although for some it is worth the work of moving large containers to have it outside in the summer,” says Dan. 24) Orange Coneflower BOTANICAL NAME: Echinacea ‘orange passion’ HARDINESS RATING: H5 FLOWERING SEASON(S): summer / autumn SUNLIGHT: full sun EXPOSURE: exposed / sheltered SOIL PREFERENCE: chalk, loam, sand; any pH SIZE: 0.5-1m in height, 0.1-0.5m spread Orange coneflowers are among the most popular orange perennials in the UK and elsewhere. The yellowy-orange petals are arranged in a pleasing star-like formation around a dark central stamen, while the hairy texture is unique and soft to the touch. 25) Chinese Trumpet Vine BOTANICAL NAME: Campsis grandiflora HARDINESS RATING: H4 FLOWERING SEASON(S): summer / autumn SUNLIGHT: full sun EXPOSURE: sheltered SOIL PREFERENCE: all soil types; any pH SIZE: 8-12m in height, 2.5-4m spread Originally hailing from the tropical climates of Paraguay and Brazil, the orange trumpet might be difficult to establish in the UK.3 If you succeed, however, you’ll be treated to fantastic evergreen vines populated by orange tubular blossoms in the wintertime, adding some much-needed life to your garden in the colder months. 26) Peony BOTANICAL NAME: Paeonia ‘Coral Charm’ HARDINESS RATING: H6 FLOWERING SEASON(S): spring / summer SUNLIGHT: full sun / partial shade EXPOSURE: sheltered SOIL PREFERENCE: clay, loam, sand; any pH SIZE: 0.5-1m in height, 0.5-1m spread Another staple of the Great British gardening scene, peonies come in all types of shapes, colours and sizes. The orange-coloured specimen above is a personal favourite of mine and can change its tones as it matures, so keep an eye out for a mesmerising metamorphosis throughout its blooming season. 27) Persian Buttercup BOTANICAL NAME: Ranunculus asiaticus HARDINESS RATING: H4 FLOWERING SEASON(S): spring / summer SUNLIGHT: full sun EXPOSURE: sheltered SOIL PREFERENCE: loam or sand; any pH SIZE: 0.1-0.5m in height, 0.1-0.5m spread The flower heads of this beautiful perennial look like the paper-mâché creations that we used to knock together at school, though nature is a far better craftsman than I or my classmates ever were. Its preference for cooler climes makes it ideal for UK cultivation, as in hotter regions, the petals will simply wither and die. “Choose your varieties with care, as only a few Ranunculus are perennial in the UK,” warns Dan. 28) Peruvian Lily BOTANICAL NAME: Alstroemeria ‘Orange Glory’ HARDINESS RATING: H4 FLOWERING SEASON(S): summer / autumn SUNLIGHT: full sun / partial shade EXPOSURE: sheltered SOIL PREFERENCE: all soil types; any pH SIZE: 0.5-1m in height, 0.5-1m spread This bushy perennial can achieve almost 1m in height with a similar spread, so remember to give it plenty of elbow room when planting. Once flowering begins, you’ll be delighted with the range of lily-like flower heads which appear all over its body, the dark flecks offsetting the brilliance of its orange petals. 29) Rainbow Bitter Root BOTANICAL NAME: Lewisia cotyledon ‘rainbow’ HARDINESS RATING: H4 FLOWERING SEASON(S): spring / summer SUNLIGHT: partial shade EXPOSURE: exposed / sheltered SOIL PREFERENCE: loam or sand; acidic to neutral SIZE: 0.1-0.5m in height, 0.1-0.5m spread This herbaceous evergreen perennial is often mistaken for a succulent, due to the waxiness of its leaves and its tolerance for drought. Despite the interesting foliage, it’s the star-shaped flowers which are the real attraction for the eye-catching array of pinks, reds, oranges and yellows which adorn them. 30) Rock Rose BOTANICAL NAME: Helianthemum ‘Coppernob’ HARDINESS RATING: H4 FLOWERING SEASON(S): spring / summer SUNLIGHT: full sun EXPOSURE: exposed / sheltered SOIL PREFERENCE: all soil types; alkaline to neutral pH SIZE: 0.1-0.5m in height, 0.1-0.5m spread The deep orange of the tissue-paper petals on a rock rose plant looks particularly stunning set against the lush greenery of its foliage. It’s an excellent choice for beginners, given that it will survive in almost all conditions, including with very little water, but it does best in full sunlight. 31) Red-Hot Poker BOTANICAL NAME: Kniphofia uvaria HARDINESS RATING: H5 FLOWERING SEASON(S): summer / autumn SUNLIGHT: full sun EXPOSURE: exposed / sheltered SOIL PREFERENCE: loam or sand; any pH SIZE: 0.5-1m in height, 1-1.5m spread There are few perennials more impressive than the torch lily, which gains its name from the changing colours of the flowers on the conical stem, which graduates from yellow nearer the base through apricot and coral up to a soft red at its apex. As such, it really does resemble a flaming torch. 32) Tulip BOTANICAL NAME: Tulipa ‘Orange Angélique’ HARDINESS RATING: H6 FLOWERING SEASON(S): spring SUNLIGHT: full sun EXPOSURE: sheltered SOIL PREFERENCE: all soil types; any pH SIZE: 0.1-0.5m in height, 0.1-0.5m spread Tulips come in a wide variety of hues, but there are plenty of oranges cultivars to choose from. ‘William of Orange’, ‘Orange Queen’ and ‘Orange Angelique’ (pictured above) are just some of the options on offer. Whichever you choose, their mid-range height and soft coral tones make them ideal for the middle of a border. 33) Wallflower BOTANICAL NAME: Erysimum cheiri HARDINESS RATING: H5 FLOWERING SEASON(S): spring SUNLIGHT: full sun EXPOSURE: exposed / sheltered SOIL PREFERENCE: chalk, loam, sand; alkaline to neutral pH SIZE: 0.1-0.5m in height, 0.1-0.5m spread Native to southern Europe, the wallflower gains its name from the fact that it’s so adept at dealing with dry soil that it can even sprout from between the silty cracks in brickwork. Far from being bashful like their human namesakes, however, wallflowers are extremely hardy, yet still very pretty to look at. Their four-petalled flower heads come in blues, purples, reds, yellows and, of course, oranges. 34) Welsh Poppy BOTANICAL NAME: Papaver cambricum HARDINESS RATING: H6 FLOWERING SEASON(S): spring / summer / autumn SUNLIGHT: partial shade EXPOSURE: sheltered SOIL PREFERENCE: clay, loam, sand; acidic to neutral pH SIZE: 0.1-0.5m in height, 0.1-0.5m spread This softly orange poppy is a counterpart to the Californian variety mentioned above, though it differs in its preference for dark and damp locales. It’s often found in forested areas in the wild and under the shade of walls in captivity, but wherever it’s located, it will invariably attract pollinators by the bucketload. 35) Bird Of Paradise BOTANICAL NAME: Strelitzia reginae HARDINESS RATING: H1B FLOWERING SEASON(S): winter / spring SUNLIGHT: full sun / partial shade EXPOSURE: sheltered SOIL PREFERENCE: chalk, loam, sand; any pH SIZE: 1-1.5m in height, 0.5-1m spread Is it a bird? Is it a plane? Nope, just a dramatically attractive plant. Capable of growing to almost 2m in height, bird of paradise plants will need plenty of their own space and even more sunlight, though they must be grown exclusively indoors here in the UK. References 1. Euphorbia wallichii – Wallich Spurge. (n.d.). Flowers of India. Retrieved March 21, 2023, from https://www.flowersofindia.net/catalog/slides/Wallich%20Spurge.html 2. A Grammatical Dictionary of Botanical Latin. (n.d.). Missouri Botanical Garden. Retrieved March 21, 2023, from https://www.mobot.org/mobot/latindict/keyDetail.aspx?keyWord=lingua 3. Campsis radicans. (n.d.-b). Missouri Botanical Gardens. Retrieved March 21, 2023, from https://www.missouribotanicalgarden.org/PlantFinder/PlantFinderDetails.aspx?kempercode=b840
Learn more
Don't Deadhead Scabiosa If You Plan To Collect The Seeds Or Allow Self-Seeding
IN THIS GUIDE Should You Deadhead Scabiosa? Collecting Pincushion Seeds How To Deadhead Scabiosa Scabiosa is a genus which includes a number of flowering plant species perfect for attracting bees and butterflies to your garden. There are annual, biennial and perennial types, all of which are wonderful choices for a wildlife-friendly garden. These plants can work well in a range of different settings, whether that’s in more artfully arranged beds or borders, or in wilder and more natural schemes. One decision that you will have to make if you plan on growing some kind of scabiosa in your garden is whether or not you will deadhead your plants. Should You Deadhead Scabiosa? Whether or not you choose to deadhead Scabiosa flowers will depend on whether or not you plan to collect the seeds or allow self-seeding. It may also depend on practicalities and on which variety or varieties you are growing, and where. Scabiosa varieties are often chosen for a low-maintenance wildlife-friendly garden scheme. In such gardens, deadheading may not be high on the priority list. You may prefer to simply leave your pincushion flowers to bloom and set seed naturally within a low-maintenance garden area or wildflower meadow. Working in harmony with nature in this way by letting nature take the reins is a good choice for those with less time on their hands. Scabious can also be grown in beds or borders in, for example, a cottage garden style scheme, where aesthetics and order are likely to be a little more important. If you are growing scabiosa in such a setting, then deadheading can give you beautiful blooms for longer and keep your garden looking good. “If a large flowered Scabiosa was next to a path or in a pot, I would deadhead it,” shares Master Horticulturist Colin Skelly. “This would enhance its appearance whilst I would also not want the plant to self-seed in this context. “On the other hand, if grown in a naturalistic or meadow context, the seed heads and self-sowing would be central to the aesthetic and function of the plants.” Collecting Pincushion Seeds If you do wish to collect the seeds or want to allow for the possibility of self-seeding, then do not deadhead too zealously, as if you remove all the spent flowers, the plants will not have the opportunity to go to seed. However, if you do not desire seeds, deadheading scabiosa can be a good idea. Removing the flowers once they have faded will focus the plants’ energy on further bloom production and extend the flowering period. How To Deadhead Scabiosa If you do decide to deadhead some scabiosa in a bed or border to prolong the blooming period and prevent the plants from going to seed, then this is a very simple process. All you need to do is take a clean, sharp pair of secateurs and snip off the flowering stems once the flowers have finished. The stems can then be cut down in autumn or left in situ for wildlife until spring. Deadheading really is not essential for these plants, so whether or not you choose to do so is entirely up to you.
Learn more
Sowing Scabiosa Seeds: 'Keep The Bed Weed Free To Prevent Them Being Swamped'
IN THIS GUIDE When To Sow Scabiosa 1) Sow Scabious Seeds 2) Keep Under Cover Through Winter 3) Pot On In Individual Pots 4) Plant Out In Spring Scabiosa, also known as the ‘Pincushion Flower’, can be perennial, biennial or annual. Whichever type you decide to grow, these are a great choice for attracting wildlife to your garden. They can be great additions to beds or borders, or as part of wildflower meadows. Fortunately, these useful plants are relatively easy to grow from seed. Annual types can even be sown directly outdoors with little care required. “Sowing annuals outside is easier if you are growing them in a weed-free seed bed, such as in a cut flower garden,” shares Colin Skelly, a Master Horticulturist. “If they are being sown in a border, the challenge is to mark clearly where you have sown them and to keep the bed weed free to prevent them being swamped by weeds.” To grow scabious from seed: Sow seeds indoors or under cover in autumn. Keep the seedlings under cover throughout winter. Pot on scabiosa seedlings once they are large enough to handle. Plant out where they are to grow in spring or directly sow annual types into the ground. Difficulty Easy Equipment Required Seeds, seed tray, growing medium When To Sow Spring or autumn When To Sow Scabiosa If you already grow scabious in your garden then you may well be able to collect the seeds from your existing plants, as these are usually abundantly produced with annual types. Just note that hybrids will not come true from seed. Most types of scabious seeds should be sown in Autumn for best results, preferably in September or October. However, annual types can also, if you wish, be directly sown in spring where they are to grow. Spring sowing might be your strategy if you are growing scabiosa as part of a wildflower mix. However, for more reliable germination, sowing scabiosa in autumn usually yields better results, especially with those types which may be a little more challenging to grow successfully from seed. 1) Sow Scabious Seeds Sow Scabiosa seeds indoors or undercover in seed trays filled with moist yet free-draining peat-free seed compost. Cover them over lightly with a thin layer of growing medium. 2) Keep Under Cover Through Winter Keep these in a reasonably cool undercover location until they germinate, and keep them under cover through the winter months. Try to place the seedlings in a light, bright spot so that they don’t become leggy. 3) Pot On In Individual Pots Once the scabiosa seedlings are large enough to handle, prick them out of the seed tray and place each one into its own individual pot. Be sure to handle the young seedlings gently and hold them by a leaf rather than by the stem to prevent damage. Make sure that their medium remains moist, but do not overwater. 4) Plant Out In Spring You can then plant out your young scabious where they are to grow in March or April. Most prefer full sun but can tolerate light shade, whilst the soil should be moist yet free-draining. If the scabiosa you have chosen is an annual one, it will bloom the same year before dying, though may self-seed in some settings. If it is a biennial, it will bloom and then die in its second year. Perennial types will, of course, live on and bloom over a number of years.
Learn more
These 5 Pests & Diseases Can Be A Real Pain For Broccoli Growers - Here's What To Do
IN THIS GUIDE 1) Birds 2) Caterpillars 3) Cabbage Root Fly 4) Club Root 5) Mildew & Mould References Broccoli is a relatively easy crop to grow in your garden and you should find it relatively straightforward to care for if you place it in the right location. However, as with most crops, broccoli can experience problems with a range of pests and diseases. Some of the most common pests and diseases encountered when growing broccoli include: Birds Cabbage white caterpillars Cabbage root fly Club Root Mildews and moulds While there are also other problems that might arise, these are the most common broccoli issues for UK gardeners. 1) Birds Birds are, of course, wonderful in a garden, bringing a range of benefits to the local ecosystem. Unfortunately for gardeners, they can also sometimes become a pest problem too. Broccoli is one plant (along with other brassicas) that birds like pigeons often love to eat. If you do not take steps to cover your plants, they can easily damage your crops and can even entirely consume all of the plants you are lovingly trying to grow. If birds damage and eat brassicas in your area, it is best to cover your crop as soon as they are planted out, placing cloches, row covers or netting over beds where they are grown to keep them safe. Bird scaring strategies can sometimes work briefly, but won’t typically work for long as I find that birds tend to get used to them, so physical barriers are usually the best option. “For my brassicas, I use a fine mesh fabric over a frame with the bottom of the fabric weighted down to create a sealed-off enclosure,” shares Master Horticulturist Dan Ori. “I find good weed management before sowing and the willingness to live with a few weeds coupled with drip hose watering means that I don’t need to unseal my brassica enclosure very often, which reduces the opportunities for pests to get in.” 2) Caterpillars Caterpillars, particularly those of the cabbage white butterfly, are another common problem for Calabrese and other brassicas.1 Physical barriers are also the best way to prevent cabbage white butterflies and moths from laying their eggs on your broccoli plants. Cabbage white caterpillars and other caterpillars are another major broccoli pest and you can lose the entirety of your crop to a serious infestation. Cabbage white destruction In the case of a minor infestation, you may be able to pick off caterpillars by hand, but fine netting is the best option when it becomes a more serious problem. Placing decoy butterflies (made from white plastic, for example) is said by some to help – and companion planting can also aid in keeping down pest species to a degree. But a physical barrier is really the only sure-fire way to keep your brassicas safe. 3) Cabbage Root Fly Fine insect netting or some other physical barrier protection will also protect your broccoli from another major pest of this crop – the cabbage root fly. The flies lay their eggs in the soil below the plants and these turn into white larvae which eat the roots and can kill your plants. Covering the area, especially in the early spring, can help reduce the chances of this problem taking hold. 4) Club Root Broccoli can also be prone to fungal infection and one of the main fungal infections encountered when growing this crop is club root. Club root is a fungal infection caused by Plasmodiophora brassicae.2 It causes swollen and distorted roots on broccoli and a range of other related plants between midsummer and late autumn. This can lead to stunted growth, wilting foliage in hot weather, and purplish discolouration of the leaves. Growth and yield are typically affected, and plants with a severe case of this issue can die. I would argue that prevention is always better than cure when it comes to club root. Make sure broccoli plants come from a club-root-free source – and don’t grow brassicas in any soil where this has previously been a problem. Club root can be more common where soil is too acidic, so liming can help to reduce the chances of this problem in acidic soils. Unfortunately, this is a problem that can remain in the soil for up to 20 years. 5) Mildew & Mould Club root is not the only fungal problem that you might encounter when growing broccoli. Mildew and mould present on the leaves can also become an issue. Mildew and moulds are more likely to take hold when the environmental conditions are less than ideal, so make sure that you grow brassicas like broccoli in suitable soil and a suitable spot and care for them correctly. If such a problem arises, take steps to remove affected leaves or plant portions as soon as possible to prevent their spread. Remember, these are just some of the problems for which you should prepare when growing broccoli. Simple steps such as positioning plants correctly, good hygiene, physical barriers and crop rotation can help keep any problems from spreading out of control. References 1. Broccoli | Diseases and Pests. (n.d.). Plant Village. Retrieved March 13, 2023, from https://plantvillage.psu.edu/topics/broccoli/infos 2. McGrann, G. (2016). Plasmodiophora brassicae (club root). CABI Compendium, CABI Compendium. https://doi.org/10.1079/cabicompendium.41865
Learn more
Water And Feed Your Broccoli Plants Like This For The Best Possible Yield
IN THIS GUIDE When & How to Water Broccoli Feeding Broccoli In An Organic Garden Broccoli is a relatively easy crop to grow at home, but it is important to think about the conditions and care this plant requires in order to obtain the best possible yield. Broccoli is a relatively hungry and thirsty plant, so watering and feeding are two key things to think about when it comes to their care. Here are some key things to think about when watering and fertilising your broccoli plants: Water broccoli growing in the ground every 10-14 days or so in dry weather. Water broccoli plants growing in containers more frequently, making sure the growing medium does not dry out entirely. Try to water soil, not leaves, directing water to where it is needed. Reduce water requirements and add fertility with an organic mulch. When it comes to fertility, consider the plants’ nitrogen needs and how you can meet them in an organic garden. Read on to discover more detail on the above… When & How to Water Broccoli Broccoli does require a moist but relatively free-draining soil or growing medium. When growing in the ground, you will typically have to water broccoli deeply and well every 10-14 days in dry weather, which could be much sooner depending on your soil and local climate. However, when growing in containers or undercover, you will have to water more frequently and take steps to make sure that the soil or growing medium does not dry out. Remember, water requirements depend on a range of environmental factors, including sunlight levels and temperatures. So, how much water broccoli requires will vary depending on the location, the season and precisely where it is growing. Try to water as early in the day as possible and try to water the soil and avoid splashing it onto the leaves and other parts of the plants. Keep water directed towards the roots where it is required. Feeding Broccoli In An Organic Garden Broccoli will do best in a fertile soil, rich in organic matter. A good idea to take a no-dig approach to boost your yields of this brassica plant and reduce the incidence of any problems. Mulch should be spread around, but not touching the stems of the plants, upon planting. An organic matter rich in nitrogen will be ideal for these leafy vegetables. Companion planting with nitrogen-fixing legumes, or by placing brassicas in the ground vacated by peas or beans in crop rotation, can help meet the nitrogen needs of these plants. Where growth seems poor or when growing in containers, you can also give your broccoli a boost by feeding with an organic liquid plant feed, such as a tea made with grass clippings or compost. If you keep the basics of watering and feeding in mind, you should not find it too much of a challenge to grow this popular crop.
Learn more
Sowing Broccoli: Follow These Important Steps If You're Growing From Seed
IN THIS GUIDE When To Sow Broccoli Seeds 1) Choose Your Variety 2) Sow Seeds Indoors 3) Sow Seeds Outdoors Broccoli is a great vegetable to grow in your garden, whether you are an experienced gardener or a complete beginner. To grow broccoli from seed: Decide which type of broccoli you would like to grow. Sow seeds between March and July. Sow indoors in early spring or sow directly into the ground after the last frosts. Keep reading to understand each of these steps. Difficulty Easy Equipment Required Seeds, seed tray, growing medium When To Sow March-July When To Sow Broccoli Seeds Sow broccoli seeds between March and July, thinking about not only the conditions where you live but also about when you want to harvest your crop. 1) Choose Your Variety There are two main types of broccoli that you should consider growing in your garden. The first is calabrese broccoli, the type of broccoli that many are most familiar with if you’re used to buying this veggie from the shops. This is the type that forms larger heads that look like little trees. This variety is typically sown earlier in the spring and then harvested in the summer in the UK. The second type is sprouting broccoli. Sprouting broccoli is hardy and is often planted a little later, during the winter, in order to provide a yield in the spring the following year. It has smaller florets, which can be either green or purple, and it can be useful for providing a yield during the time of year when less fresh food is typically available. If you choose the right varieties and sow these at the right times, broccoli is a crop that you can be harvesting throughout much of the year. As well as harvesting the heads in summer and into autumn and florets from sprouting broccoli through late winter and early-mid spring, you might also sow broccoli seeds to eat as sprouted seeds or micro-greens throughout the winter months. 2) Sow Seeds Indoors Before the last frosts in your area, broccoli seeds can be sown indoors. You can sow your seeds into seed trays, modules, small pots, or soil blocks. These should be filled with a suitable seed-starting compost, which can be either one that you have purchased or one you have made. After germination has taken place (typically within a week or so), thin out or prick out the seedlings, leaving one per pot. A weekly feed with a general-purpose organic liquid plant feed such as a compost tea will help give the plants a good start. Once the seedlings are around 10-15cm tall with good root formation, they can be planted out in your garden or transplanted into larger pots for container cultivation. If you do decide to direct sow, it is typical to leave around 45cm between rows, or to grow one Calabrese in each square foot of space in a square foot gardening bed. Sow three seeds at each station, around 2cm deep, then thin to leave one healthy plant at each. Plants should typically be at least 30cm apart. Closer spacing will typically result in a smaller yield. 3) Sow Seeds Outdoors After the last frost date in your area, seeds can also be directly sown into the location where they are to grow. Just remember that pests like birds, slugs and snails can be a problem and can quickly devour young brassica seedlings, which is why I’d usually recommend sowing indoors first. Sow 3 seeds 30cm apart and when the seedlings emerge, thin these out to leave one healthy seedling every 30cm.
Learn more
Cordyline Can Be Injured By Frost, Damp Or Wet: Revive Yours With These Tips
IN THIS GUIDE Immediate Action For Reviving Outdoor Varieties Follow-Up Care For Outdoor Varieties Reviving Indoor Varieties Fixing Underwatering Fixing Overwatering Repotting Damaged Houseplants Cordylines, in their native sub-tropical to temperate habitats, are long-lived trees. However, in the UK, they can be damaged by draughts, dampness and winter cold or wet, regardless of whether they are grown inside or outside. Underneath we explain how you can revive a fully-fledged outdoor cordyline or a small potted plant that you are at risk of losing. Immediate Action For Reviving Outdoor Varieties Outdoor cordyline trees in the UK are more often injured by frost, damp and wet in the winter than by other problems. The first sign is dead and dying foliage. While this can sometimes be down to other causes, if the upper part of the main stem or trunk is not hard and stiff but feels unpleasantly soft, it is usually because the cold or wet has caused the plant to rot. The first step is to remove the dead or dying foliage by either pulling or cutting it off. You will also need to shepherd the injured tree through the cold season by protecting the crown as well as the roots from winter wet. You can do so by tying together any remaining leaves and covering the crown and main stem with a waterproof horticultural fleece or plastic sheeting. Do so only during cold and wet periods and not when the days are dry and sunny. Also, protect the roots by putting down a layer of organic mulch around 10cm thick, leaving 2-3 centimetres around the main stem. During periods of inclement weather, lay plastic sheeting around the main stem. Follow-Up Care For Outdoor Varieties The next step is a cutback or severe prune when spring arrives. Feel your way down the trunk or main stem to the point at which it is not soft but feels healthy, firm and hard. At least several centimetres below this point cut off the trunk or main stem. “Make your cut using a sharp pair of loppers or a pruning saw, at a slight angle, to let water drain,” adds Peter Lickorish, a Master Horticulturist. After angling and smoothing out the trunk or main stem, give the plant a fair amount of water, especially if the soil is dry. Water regularly so that the soil becomes moist all through but does not get soaked and allow it to dry out between watering. During this recovery period, I would recommend that you water the plant with filtered water that is at room temperature so you don’t cause any further damage. Feed the tree a very moderate helping of organic fertiliser every 3 weeks, making sure to stay away from the roots when working the granules into the soil with a hand fork. “In time, bare stems should soon produce horn-like re-growths, which develop into leaves,” adds Peter. Reviving Indoor Varieties If your potted Cordyline fruticosa variety is ailing, its foliage will provide a very good clue if either underwatering or overwatering is to blame. If the leaves have brown tips and edges, the cause is likely underwatering. If the leaves through most of their surfaces are turning a sickly shade of yellow or another pale colour, the cause is likely overwatering. Now that you have these clues, you should be able to determine the cause for sure. Had you jetted off for a holiday and forgotten to make watering arrangements for your little cordyline, or are you a first-time cordyline owner who has been watering your plant very religiously? No matter the cause of your plant’s health woes, the container should be kept in a suitable spot, be it outdoors during the summer or indoors all year round. Fixing Underwatering If the cause of a plant’s health struggles is underwatering, the solution is always easier and the recovery is almost always surer than if the cause is overwatering. First, give the plant a good watering, but be sure the soil drains very well and the pot has drainage holes. To improve the chances of recovery, water with bottled or filtered water at room temperature. Afterwards, do not water daily but water it regularly and moderately so that the soil is made damp all through but is not soaked. Allow the soil to dry out between waterings. Fixing Overwatering If you have determined that the cause of your troubles is overwatering, you may have a trickier task on your hands. If you conclude that the overwatering has been extensive then you will need to repot your cordyline into a fresh, drier medium. However, if you have caught the problem in good time, the solution is simply to stop watering and allow the soil to dry out. I find that tilling, raking and turning over wet, compacted soil with a gardening fork or a hand rake is immensely helpful in aerating, loosening and drying out damp or wet soil. Try to do so as deeply as possible without touching the roots. When you recommence watering after the soil has totally dried out, use bottled water at room temperature. You will notice that the leaves gradually regain their natural hues and become healthy and turgid. If they begin to appear limp once again or develop brown tips or edges, you are ready to resume normal watering. Repotting Damaged Houseplants If the plant is badly affected by overwatering, you will need to prepare a new container with moderately fertile loam-based soil that is free-draining in which to repot the plant. Not only will the injured plant benefit from soil that is suitable and fresh, but you will also get a chance to inspect the roots. If all the roots are white or light-coloured and not limp or squishy, your plant is all set for repotting. However, if any of the roots are brown and have a limp or squishy feel about them, root rot has set in and you’ll need to find out how much of the root system is damaged. Very gently remove the soil from the root ball so as to inspect the root system. It is best to do so using your fingers. If considerably over half of the root system has rotted, the chances of recovery are slim, but otherwise, your plant should still be able to recover. If your decision is to try to save the plant, use sterilised mini secateurs to cut away those parts of the roots that have rotted. Once the job is complete, repot the plant and follow the watering guidelines above to revive it.
Learn more


