

Growing

There Aren't A Huge Number Of Choisya Varieties, But These 9 Are Reliable Options
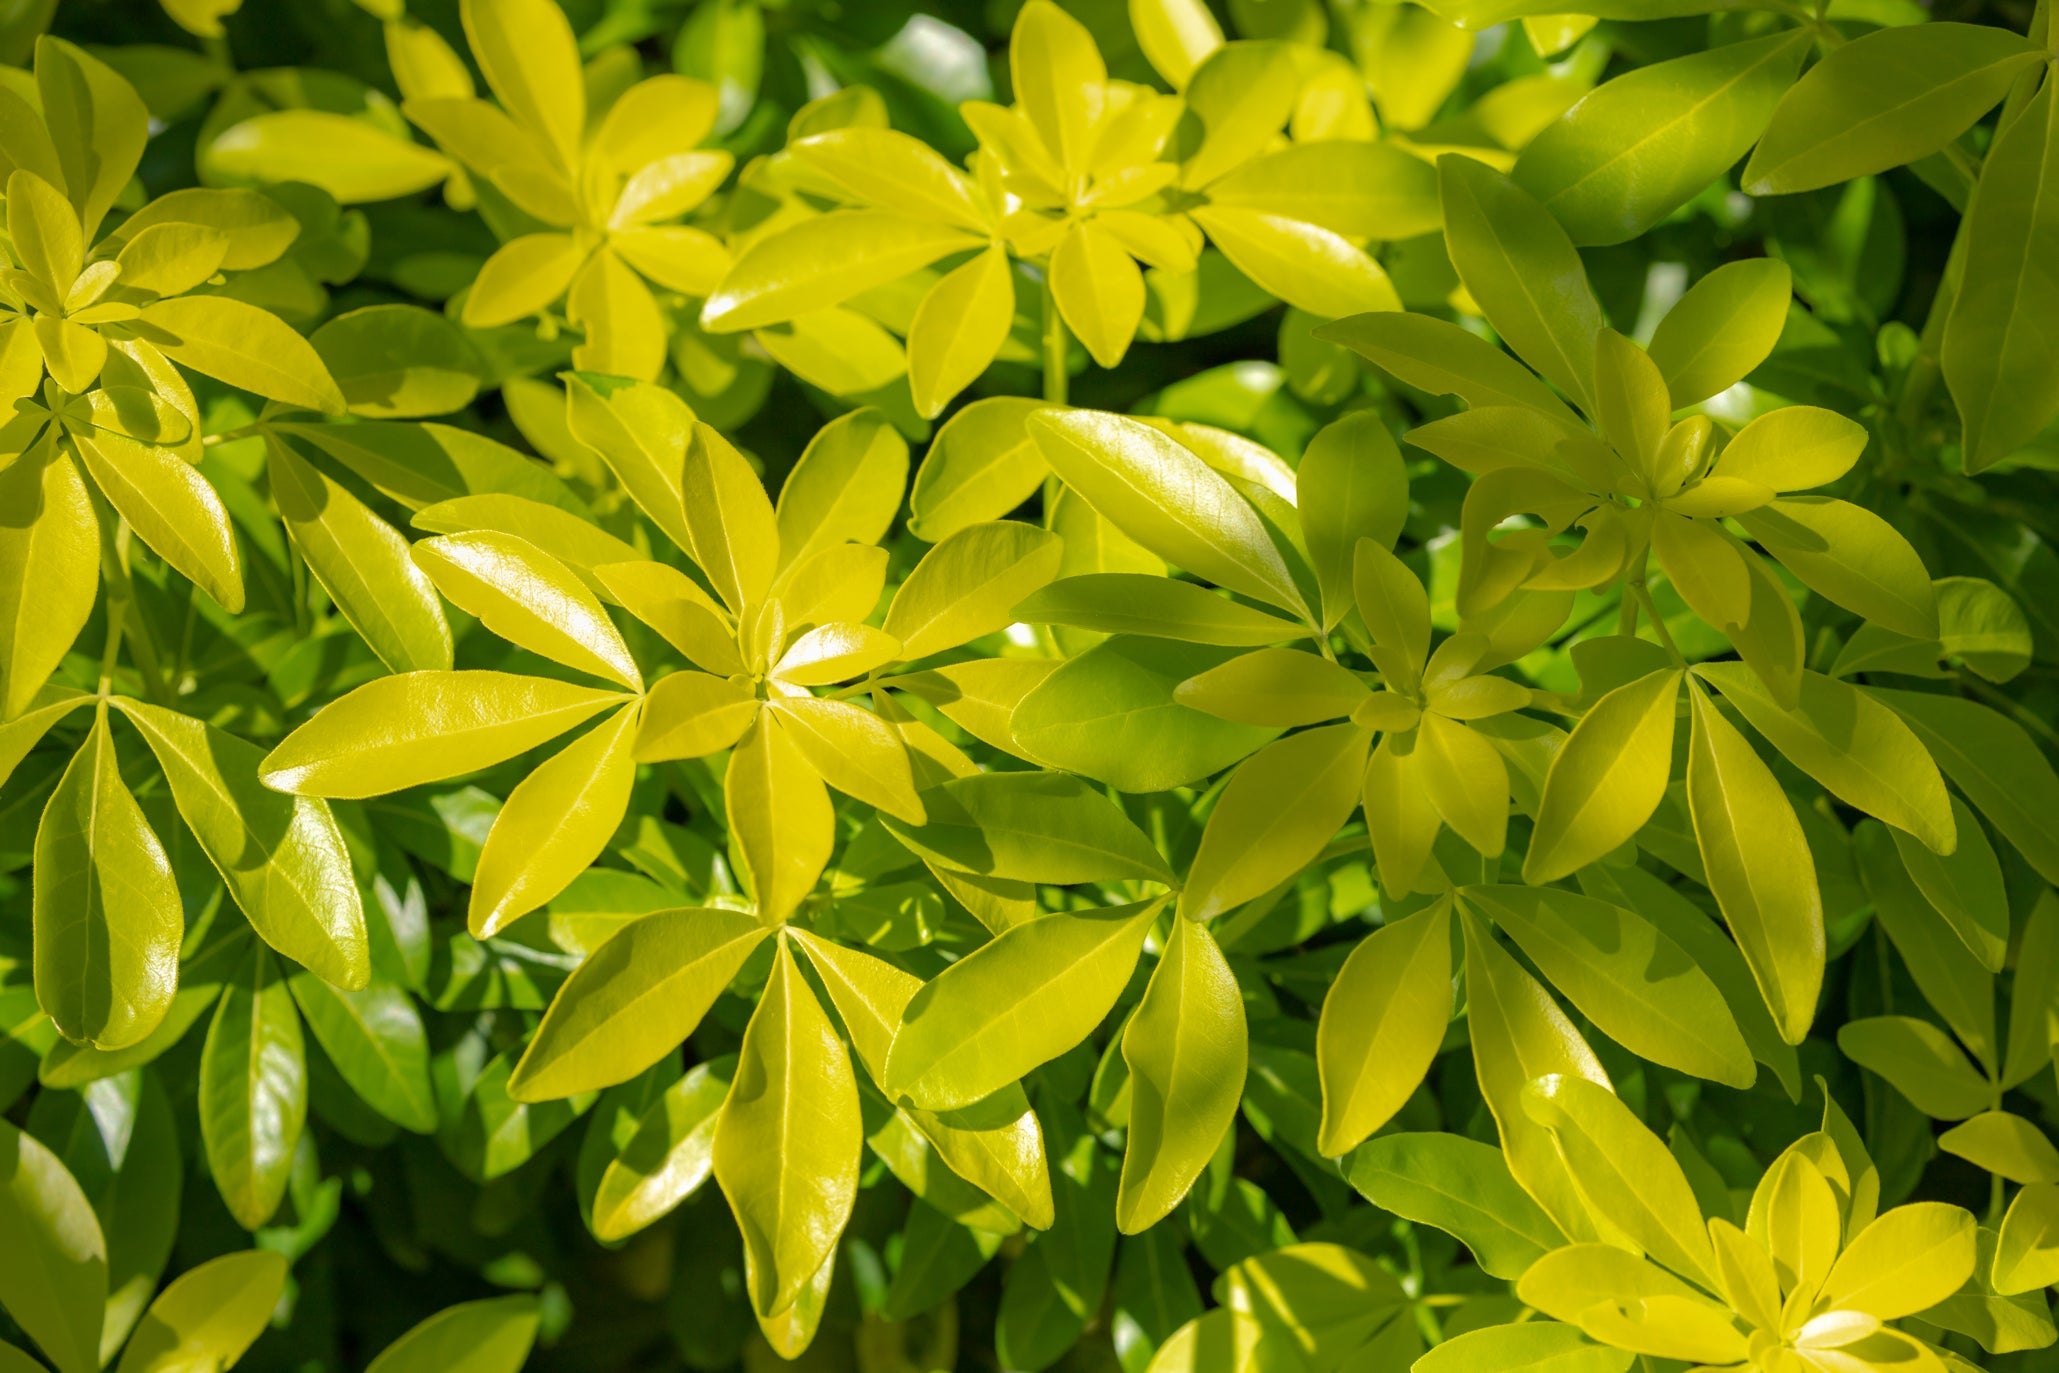
IN THIS GUIDE 1) C. ternata 2) C. ternata ‘Sundance’ 3) C. × dewitteana ‘Aztec Pearl’ 4) C. × dewitteana ‘White Dazzler’ 5) C. × dewitteana ‘Apple Blossom’ 6) C. × dewitteana ‘Aztec Gold’ 7) C. × dewitteana ‘Goldfingers’ 8) C. × dewitteana ‘Snow Flurries’ 9) C. ‘Royal Lace’ Choisya are popular evergreen shrubs grown in many UK gardens. If you are looking for a choisya to grow in your garden, then size is likely to be one of the main deciding factors. Some choisyas will grow much larger than others, and smaller cultivars are best for small gardens or for container cultivation. You might also wish to look for an option which reliably blooms in autumn, as well as in the spring, and might also think about the colour of the foliage, the growth habit of the particular cultivar, and some other details and characteristics. There are not a huge number of different choisyas readily available to UK gardens. Here are some of the choisya varieties you are most likely to find. Please note that all of the choisyas in this list with grow in any soil type and pH, need full sun and have to be positioned in a sheltered location in order to thrive. 1) C. ternata COMMON NAME(S): Mexican Orange Blossom HARDINESS RATING: H4 FOLIAGE: Green FLOWERS: White FLOWERING SEASON(S): Spring / Autumn / Winter SIZE: 1-2.5m in height, 1.5-2.5m spread SHOP CHOISYA TERNATA FROM £16.95 This is the plant that many will think of when thinking about Mexican orange blossom, having also been awarded the RHS AGM Award of Garden Merit. It is a medium-sized evergreen shrub that can grow to around 1.5-2.5m in height, with an ultimate spread of 1.5-2.5m. The shrub has dark and glossy green leaves which are divided into three wide leaflets. These will usually bloom in spring, then again in autumn, and the flowers can also appear in the winter. 2) C. ternata ‘Sundance’ COMMON NAME(S): Mexican Orange HARDINESS RATING: H4 FOLIAGE: Yellow FLOWERS: White FLOWERING SEASON(S): Spring / Autumn SIZE: 1.5-2.5m in height, 1.5-2.5m spread SHOP CHOISYA 'SUNDANCE' FROM £16.95 ‘Sundance’, also known as ‘Lich’ is a cultivar of the above which grows to the same size. But rather than having dark green leaves, it has bright yellow to vivid lime green leaves instead, which are brighter yellow when grown in full sun. Again, clusters of small, fragrant flowers with a white hue are borne in spring, and typically also again in the autumn. Choisya can be a great choice for a warm and sheltered spot, in full sun or sometimes in partial shade. These shrubs have great drought tolerance, so can be great for a low-water-use garden. But note that, in colder and more northern regions of the UK, some winter protection is likely to be required and these shrubs typically need well-drained soil or growing medium. So, consider your own garden and its conditions before you decide to grow choisyas where you live. 3) C. × dewitteana ‘Aztec Pearl’ COMMON NAME(S): Mexican Orange ‘Aztec Pearl’ HARDINESS RATING: H4 FOLIAGE: Green FLOWERS: Pink and white FLOWERING SEASON(S): Spring / Autumn SIZE: 1.5-2.5m in height, 1.5-2.5m spread SHOP AZTEC PEARL FROM £18.95 This option is a somewhat larger choisya, growing around 1.5-2.5m in height, with a spread of around the same. As with the above, the leaves are made up of 3-5 thin leaflets. The flowers, tinged pink in bud, open to a pure white. These flowers are around 3cm in width, fragrant and bloom in late spring and autumn. This variety has received the RHS AGM Award of Garden Merit. 4) C. × dewitteana ‘White Dazzler’ COMMON NAME(S): Mexican Orange HARDINESS RATING: H4 FOLIAGE: Green FLOWERS: White FLOWERING SEASON(S): Spring / Autumn SIZE: 0.5-1m in height, 0.5-1m spread SHOP CHOISYA 'WHITE DAZZLER' FROM £13.95 Among the smallest choisya cultivars on offer, this one grows into neat and compact mounds of thin leaflet foliage under 1m in height and width. This is another exceptionally free-flowering option, with white flowers that appear in clusters in spring, and often return for a second blooming period in the late summer and early autumn. Recipient of RHS AGM. 5) C. × dewitteana ‘Apple Blossom’ COMMON NAME(S): Mexican Orange HARDINESS RATING: H4 FOLIAGE: Green FLOWERS: Pink and white FLOWERING SEASON(S): Spring / Autumn SIZE: 1-1.2m in height, 0.5-1.2m spread “Choisya x dewitteana cultivars are hybrids between C. ternata and C. dumosa var. arizonica,” shares Horticultural Consultant Colin Skelly. “The latter species is smaller than C. ternata and has finer foliage, producing more compact options for gardeners.” This compact and upright evergreen shrub can grow to around 1.2m tall, with a spread of around the same figure. The green foliage is dissected into several slender leaflets. As the name suggests, the flowers somewhat resemble those of an apple tree, opening from pink buds to reveal white blooms. These will typically bloom in mid to late spring and again in early autumn. 6) C. × dewitteana ‘Aztec Gold’ COMMON NAME(S): Mexican Orange ‘Aztec Gold’ HARDINESS RATING: H4 FOLIAGE: Green and yellow FLOWERS: Pink and white FLOWERING SEASON(S): Spring / Summer / Autumn SIZE: 1-1.5m in height, 1-1.5m spread Growing around 1-1.5m tall and wide, this option has leaves made up of slender leaflets which open yellow and mature to green. The flowers are fragrant and white and, similar to the above, you can expect blooms in late spring and again from late summer to autumn. H4 hardy. 7) C. × dewitteana ‘Goldfingers’ COMMON NAME(S): Mexican Orange HARDINESS RATING: H4 FOLIAGE: Yellow FLOWERS: White FLOWERING SEASON(S): Spring / Summer SIZE: 1-1.5m in height, 1-1.5m spread This Choisya grows around 1-1.5m in height and spread. It has narrowly elliptic leaves which can be a vivid yellow hue in the sun, though will be greener when shaded – so for full effect, is best grown in full sun. The fragrant white flowers bloom in the late spring and into the early summer. 8) C. × dewitteana ‘Snow Flurries’ COMMON NAME(S): Mexican Orange ‘Lisflurry’ HARDINESS RATING: H4 FOLIAGE: Green FLOWERS: White FLOWERING SEASON(S): Spring / Summer SIZE: 1-1.5m in height, 1-1.5m spread A compact evergreen shrub, this choisya forms a neat mound of around 1.5m in height. The leaves are aromatic, and slender, with a deep green hue. This option is particularly free-flowering and the white flowers appear from pink buds to fill your garden with fragrance in spring and early summer. 9) C. ‘Royal Lace’ COMMON NAME(S): Mexican Orange HARDINESS RATING: H3 FOLIAGE: Gold and green FLOWERS: White FLOWERING SEASON(S): Spring FRUIT SEASON(S): Autumn SIZE: 0.5-1m in height, 0.5-1m spread This hybrid cultivar has a dense, neat and compact growing habit, with golden to lime green evergreen foliage with a lacy appearance. It grows only around 75cm tall, so resembles ‘Aztec Gold’, but is actually better for containers or tiny gardens. Mounds of white flowers bloom on the plant in profusion in the spring, It’s best grown in full sun and is H3 hardy.
Learn more
These Are The Soil Composition, Drainage & pH Levels To Aim For With Choisya Plants
IN THIS GUIDE Soil Composition, Fertility & pH Levels Aspect Drainage References With their attractive evergreen foliage and fragrant white blossoms, choisyas are a popular choice in gardens up and down the UK. Their ease of cultivation and versatility among other specimens only enhances their appeal. Originally hailing from Mexico, choisya plants have adapted extremely well to the British climate and will thrive well in most parts of the country.1 Having said that, they will perform best when their soil preferences are met and they are grown in the optimum conditions. With that in mind, here’s a quick rundown of the factors you should bear in mind when planting choisyas either in the ground or in a container. Soil Composition, Fertility & pH Levels Choisyas are largely unfussy creatures and will generally make the most of whatever soil you give them, regardless of whether it’s predominantly composed of clay, loam, sand or chalk. However, fertile soil is always preferable. It’s a similar story when it comes to the pH levels of the soil, as they will cope well in acid, neutral or alkaline soils. Having said that, choisyas don’t like any terrain which is either excessively acidic or alkaline, so temperance is the name of the game here. Perhaps more important than the quality of the soil itself is the conditions which affect it. Therefore, you may find that the following factors have more of a bearing on your Choisya’s performance than the soil composition. Aspect Generally speaking, choisyas need their fair share of sun to thrive. That’s especially true in colder parts of the country, so selecting a location with full sun (or only partial shade, at a push) is recommended. They’ll also benefit from protection from the wind and elements, so being positioned by a wall or fence is ideal. Most choisya species are hardy down to around -10°C, but will struggle with the frost in the soil thereafter. Therefore, those living in chilly regions of the UK might want to consider planting their specimen in a container to allow for ease of movement to an indoor location during winter. If planting in a pot, a general rule is that the larger the receptacle, the happier both you and your choisya will be. This is because it will not only have the space it needs for its roots to develop, but it will require watering less frequently. Drainage As with many plants, drainage is the all-important factor for choisyas, since the plant simply cannot stand getting its feet too wet, as Horticulturist Colin Skelly explains: “The soil type will make a difference to moisture holding around the roots of plants. “The main culprit for plants that like free-draining conditions is clay, with heavy clay holding onto moisture like a sponge. “In these conditions, you will need to find the highest part of the garden or amend the soil structure with de-compaction and compost to allow moisture to flow more freely around the plant’s roots.” In waterlogged soil, it will falter and fade, eventually dying due to the excess water. As a result, it’s imperative that you choose a well-draining location for your choisyas in your garden. If your soil is not naturally amenable to good drainage, you may wish to give it a helping hand by raking it over and using an aerator if you have one (a hand trowel or rake will suffice if you don’t). You can also artificially enhance drainage by adding compost or raising the planting area above the surrounding terrain via the use of a mound or berm to allow water to flow downwards more efficiently. References 1. Choisya ternata. (n.d.-b). North Carolina Extension Gardener Plant Toolbox. Retrieved March 14, 2023, from https://plants.ces.ncsu.edu/plants/choisya-ternata/
Learn more
Root Rot Or Pests? Try These Effective Hebe Treatments For Any Growing Problems
IN THIS GUIDE 1) Root Rot 2) Under Watering 3) Leaf Spot Disease 4) Downy Mildew 5) Too Much Sunlight 6) Pests References Prized for its colourful flowers and foliage, hebe is a resilient plant which adapts well to most climates and terrains and doesn’t demand too much in the way of upkeep. However, like pretty much all plants, it’s not completely impervious to growing pains. Some of the most common complications encountered by gardeners when growing hebe in their garden include: Root rot Underwatering Leaf spot disease Downy mildew Too much sunlight Pests To identify which of the above issues is afflicting your plant and, most importantly, to learn how to address it appropriately, read on for more detailed advice below. 1) Root Rot Root rot afflicts plants in soil with poor nutrients, bad drainage or excessively cold temperatures. If the ground becomes waterlogged, the roots can drown, or else fungi can develop which causes them to rot. A hebe plant suffering from root rot will be immediately apparent because all parts of the plant, including its stems and leaves, will turn brown and growth will decelerate almost entirely. Digging up the plant will reveal that the roots themselves are completely rotted, turning black and limp in the process. Unfortunately, root rot is pretty much a death sentence for your hebe specimens. The only thing to do is dig up and dispose of the affected plants, then improve the soil quality by adding nutrients and enhancing drainage. After that, it’s simply a case of planting a new hebe in the rejuvenated terrain. 2) Under Watering While root rot can occur because of an excess of water, a shortage of water can have similarly disastrous results. Under-watered plants will see their root balls dry out completely, meaning they are not able to extract the nutrients they need from the soil. The symptoms of this are most noticeable in the plant’s leaves, which will begin to become brown and discoloured. If this occurs with your hebe, check the soil around its base by gently inserting your fingers into it. It should be damp but not saturated or bone-dry. If the latter occurs, simply water the plant abundantly and apply a layer of organic mulch to retain the moisture within the soil. If it doesn’t show signs of improvement within a couple of days, it could be that the root ball is repelling the water; remedy this by adding a teaspoon of liquid soap to 10L of water and irrigating the plant over an extended period. 3) Leaf Spot Disease Officially known as Septoria, this disease is caused by a fungus growing on the plant and manifests itself in the shape of brown spots on its leaves.1 The signs are generally visible from October to February but can appear earlier in the year on occasion. Try to avoid watering from above to reduce moisture on the leaves, optimise air circulation and remove affected leaves. 4) Downy Mildew If you notice irregular brown patches on the top of your hebe’s leaves and a downy grey fungal growth on their underside, it could well be suffering from downy mildew. Hebes can be prone to downy mildew and blackspot, more so if container grown – they seem to be happy when in the ground” says Charlie Bewley from Hic Bibi Hebe Nursery. “If this occurs remove any dead leaves from around the plant don’t put the dead leaves in compost. “There are effective treatments and more biological treatments are becoming available. check the label.” This malady is caused by the growth of the fungus Peronospora grisea, which thrives in damp, cold conditions with poor circulation of air.2 If left unattended, the fungus and the mildew it causes can eventually kill your plant completely. 5) Too Much Sunlight From too little sunlight to too much sunlight, hebe plants can also suffer if they receive too much of a good thing. Overexposure to UV will become obvious if the foliage is brown, scorched, or crunchy to the touch. “I have lost a few Hebes in pots from too much exposure to strong sunlight,” shares Master Horticulturist Colin Skelly. “Think carefully when planting or placing a pot to ensure that shade is available during the middle of the day.” It’s even more easily identifiable if those symptoms only appear on one side of the plant. This concern most commonly occurs during the summer months and can be prevented by protecting your plant from the brightest of the sun’s rays. Move potted specimens indoors during peak hours (11am and 3pm) or erect a shade cloth for those growing in the ground outside. 6) Pests Hebe plants are not just pleasing to humans; they’re also an appetising prospect to all sorts of bugs and beasties, including caterpillars, vine weevils and leafcutter bees. You can identify which insect is attacking your plant by the signs they leave behind. For example, caterpillars will deposit tiny excreta on the lower leaves of the plant. Vine weevils take small, notched chunks out of the foliage, while leafcutter bees will remove much larger and rounder holes from them. Caterpillars are best dealt with by removing them manually, while vine weevils can be treated using diatomaceous earth or sticky traps. As for leafcutter bees, they provide important pollination service for the rest of your garden and the wider environment, so I find it’s best to just let them have a slice of leaf every now and again! References 1. Lee, J., Orosa, B., Millyard, L., Edwards, M., Kanyuka, K., Gatehouse, A., Rudd, J., Hammond-Kosack, K., Pain, N., & Sadanandom, A. (2015, March 24). Septoria leaf blotch disease in wheat. New Phytologist Foundation. Retrieved March 16, 2023, from https://www.newphytologist.org/news/view/81 2. Peronospora grisea. (n.d.). Peronospora Grisea (Hebe Downy Mildew). Retrieved March 16, 2023, from https://www.bioimages.org.uk/html/Peronospora_grisea.htm
Learn more
Delphiniums Are Best Supported To Prevent Damage - Consider These 3 Options
IN THIS GUIDE When To Provide Support Support Options To Consider 1) Single Canes Or Stakes 2) Cage / Ring Supports 3) Grid Supports Whether you are growing perennial delphiniums, or annual delphiniums (Larkspur), you will find that they are wonderful additions to many gardens. However, both of these types of delphiniums do require some care, and one thing that you need to think about is support. Delphiniums are tall plants – though some are taller than others. The particular cultivar that you have chosen will determine exactly how fragile and likely to topple it might be. Where exactly you have placed your plant will also determine whether it needs staking, or another form of support. In some cases, surrounding plants or man-made features in a garden may already protect your plants to a degree, and, especially with shorter delphiniums, additional support may not always be required. However, most delphiniums are best supported, since even in a sheltered spot their hollow stems and height make them vulnerable to damage. The last thing you want is for a sudden summer storm or windy weather to knock over these majestic plants and disappoint you after all your work to grow and tend to them. When To Provide Support Delphinium supports should be added in the spring before the plants tower to their summer heights. Take care when inserting supports not to damage the plants themselves or their root systems. If planting out delphiniums, you may wish to consider placing supports before planting, to avoid any potential damage or disruption. Support Options To Consider When supporting delphiniums, it is important to remember that these are plants which like to sway a little in a gentle breeze. Tying too tightly to too rigid a support can do more harm than good. In a particularly sheltered spot, where delphiniums are at the back of a border with other plants in front, you may be able to get away without supporting them. However, to avoid risk to your plants, here are some support options to consider. 1) Single Canes Or Stakes The simplest and most straightforward way to support a few delphiniums is to use single bamboo canes, or natural branch stakes pushed into the soil nearby. The plants can be tied in using natural twine to these supports as they grow. Just be sure to use a stake which is tall enough for the cultivar you are growing, and if growing in containers, make sure that the pot is heavy and sturdy enough not to fall over when the support is added. 2) Cage / Ring Supports Another option is to create or buy a cage or ring-type support, which provides some support by encircling the stem up to 1m or so in height. Owner of delphinium nursery Home Farm Plants, Graham Austin, shares his specialist advice on staking delphiniums: “It is important to stake them. I’d recommend using 3 canes around each plant, tying around the canes to form a cage as they grow”. There are plenty of reclaimed materials that you might use to create a cage or ring support – from strong fencing wire to a simple design with three canes and some natural twine. Such supports can be hidden by other plants and can be designed so as to be relatively unobtrusive. 3) Grid Supports If you are growing a larger number of delphiniums, you might also consider placing a series of stakes or canes with a lattice of twine between them. “In informal planting schemes, I like to use long thick forking branches pushed deep into the soil, as this gives a softer rustic feel to a border,” shares Dan Ori, a Horticultural Consultant. Again, at 1m or so in height, this can provide support for a number of taller plants while remaining relatively unobtrusive in the overall look of the garden.
Learn more
Planting Bulbs In The Garden: The Ultimate Guide With Jonathan Hart
IN THIS GUIDE Types Of Bulbs When To Plant Bulbs How To Plant Bulbs Lasagne Planting What If You’ve Missed The Right Time For Planting? FAQs Bulbs of many types can be useful and beautiful additions to a garden. In this guide, we’ll explore some different options, and help you understand when and how to plant them. We worked with the team at BULBi, Jonathan Hart from Harts Nursery and RHS Master of Horticulture Roy Nicol to curate some useful tips and tricks in this guide. “Flower bulbs are a gardener’s best friend. They are easy to plant, low maintenance, and provide year-round interest in the garden. “Whether you are a seasoned gardener or just starting out, flower bulbs are an excellent choice for adding colour, texture, and beauty to your outdoor space.” For those beginner gardeners: ‘Bulbs’ is a term used in gardening to refer to bulbous plants – herbaceous perennials grown for ornamental or edible purposes which have underground (or near-ground) storage organs, used to store water and plant nutrients during dormancy. “What makes us so passionate about growing bulbs is seeing how something so beautiful can come from them,” Jonathan says. “The promise and suspense of planting a bulb is something that always excites us.” There are so many types of bulbs, tubers, corms and rhizomes so there is always something to suit everyone’s taste. “It’s always amazing to see the first sign of spring bulbs coming through to let us know good things are coming.” Types Of Bulbs While we refer to these plants as ‘bulbs’ colloquially, botanists will distinguish between true bulbs, rhizomes, tubers, corms and tuberous roots. In horticulture, it is beneficial to categorise bulbs into: Spring-flowering ornamental bulbs. Hardy summer-flowering ornamental bulbs. Edible bulbs treated as annuals in a vegetable garden. Perennial edible bulbs. Tender summer-flowering ornamental bulbs. Autumn flowering bulbs. When To Plant Bulbs “We always say that spring-flowering bulbs (such as daffodils, tulips, hyacinths, crocuses, etc.) should be planted in autumn,” says the team at BULBi. “However, the soil should be well-cooled, as the bulbs need a cold period under the soil – so planting before September is definitely not the perfect time. “Of course, this also depends on the climate where you live, but ideally you should plant the bulbs in autumn, and October or November is early enough. “The flower bulbs can even still go into the ground in December – but then it shouldn’t be freezing.” Hardy flowering ornamental bulbs that bloom in the summer (like ornamental alliums, crocosmia and lilies) can also be planted in autumn. “Although Crocosmia and lilies are really summer bloomers and we always recommend planting them in spring.” says BULBi. Autumn is also the best time to plant perennial alliums like elephant garlic. Tulips, which flower a little later in spring should be planted later in autumn, in November. Tender summer-flowering bulbs like gladioli are best planted from March to April. Autumn-flowering bulbs, like nerines, for instance, should be planted before the end of the summer. How To Plant Bulbs Bulbs should be planted out as soon after they are acquired as possible. Your first decision will be where you will place your bulbs, which varieties will be appropriate for your desires or requirements, and the location. “The versatility of flower bulbs is one of their biggest selling points,” shares the team at BULBi. “They can be grown in a variety of conditions, from full sun to deep shade, making them a great option for any type of garden. “With a little effort and planning, you can have a garden filled with beautiful flowers from early spring through late summer.” You might place bulbs: In borders or beds. In fruit tree guilds or other polycultures. In containers. In lawns and long grass. “Always make sure you check that you are planting your bulbs in the correct position,” says Jonathan Hart. How deep bulbs should be planted depends on which specific bulb you have chosen to grow. However, as a general rule of thumb, it can be helpful to work from the guideline that bulbs should be placed at a depth of around 3 times their height. “If it’s your first time planting bulbs go for something that needs little care like tulips, alliums or narcissi,” Jonathan suggests. “Also, don’t be afraid to try something that looks exotic. “Lilies, for example, are some of the hardiest bulbs you can plant and can actually withstand temperatures of -20°C, so our UK climate is fine for them.” In Borders & Flowerbeds If planting bulbs in borders or beds (in soil that has been prepared for the bulbs you want to grow) you should consider the tips outlined below. Make holes deep and wide enough to accommodate each bulb. For a bulb that is 3cm high, dig a hole around 9cm deep and sit the bulb at the base of it. As a general rule of thumb, bulbs should be spaced around twice their own width apart from one another, so, for example, bulbs that are 5cm wide should be placed roughly 10cm apart. For pleasing displays of ornamental bulbs in beds and borders, aim to plant in groups of 5-10 – larger drifts of bulbs can look better, so often, you’ll need 50 bulbs, or even more, to make an impact. Usually, bulbs will have a pointier end from which the shoot will grow, and this should be placed facing upwards, as the experts at BULBi explain: “You can hardly go wrong with planting bulbs. Did you know that flower bulbs grow towards the light? We always plant them with the tip upwards and the flat side down because that’s where the roots grow in the earth. “However, even if the flower bulb is crooked, that’s no problem. The flower will just grow out of the earth.” Bulbs can be fairly closely placed along the borders of a fruit tree guild or another planting scheme to reduce grass/weed ingress into the growing area. Alliums (both edible and ornamental) can be useful additions for a range of reasons in an organic garden and can often help in organic pest control. Bulbs planted on a sloping area can be beneficial in stopping runoff and nutrient losses. Once bulbs have been planted into the soil of the growing area, soil should be gently firmed back over the site. Avoid stepping on the soil since this can damage the bulbs, as well as causing compaction. When planting in autumn, or when the soil is sufficiently moist, watering-in may not be required. However, for spring and summer plantings, when the soil may be dry, water straight after planting. Add an organic mulch to maintain fertility, protect the soil, reduce weeds and conserve soil moisture. A mulch of autumn leaves or similar can also help keep overwintering onions or garlic and other bulbs safe over the winter months. In Containers Many ornamental and edible bulbs work very well in containers. The containers should allow for good drainage while retaining sufficient moisture for the bulbs in question. The growing medium used should be chosen for the specific bulbs you wish to grow. The mix should be different depending on whether the bulbs will remain in the container only for a single season, or will be in the container longer term. “As not all bulbs like the same aspect or if you have a heavy clay garden, we would suggest planting your bulbs in nice pots or containers,” says Jonathan. Bulbs in containers can typically be placed with one bulb width between them. After planting up containers, it can, again, be beneficial to place an organic mulch on top – sometimes, you might also consider a decorative gravel mulch or similar. When planting in autumn, a mesh cover might be used over the top to prevent squirrels from unearthing your bulbs and undoing your good work. Bulbs in containers will usually have to be watered more frequently than those in the ground. Water after planting, then regularly while the bulbs are in active growth, then taper down watering during dormancy but make sure pots do not dry out altogether. For best results, feed bulbs in a container every week or so with a high-potassium organic liquid plant feed. This should be done from the time when the first shoots emerge to when the foliage begins to die down as the plants move towards dormancy. In Lawns & Long Grass Many bulbs can also look beautiful and perform well when naturalised in lawns or taller grass. To naturalise bulbs in grass you should throw bulbs from waist height and let them naturally fall where they may. Then, plant them exactly where they fall for a naturalistic look. Planting holes can be dug with a trowel, but using a bulb planter will make things quicker and easier when planting through the turf. Place the bulbs and crumble some soil from the plug you have taken out around the bulb to backfill. Then replace the plug of turf on top, trying to keep it at the same level as the surrounding area. Lasagne Planting When planting bulbs, it is important to think not only about one variety in isolation. Often, the most impressive results can be achieved by planting multiple types of bulbs. A type of layered planting called ‘lasagna planting’ is a strategy used to plant more than one bulb type in a particular growing area and thereby extend the flowering period. What If You’ve Missed The Right Time For Planting? Bulbs are not like seeds and cannot last out of the ground or a suitable growing medium for long. While many seeds will still be viable if you wait a year, storing them in a suitable environment before planting the following year, bulbs usually lose viability more quickly. If you forget to plant bulbs in autumn, or couldn’t plant as planned, don’t try to wait until spring or autumn the following year. Bulbs are likely to rot, turn soft, or deteriorate further. Some store longer than others, and how long bulbs will still be in good condition will also very much depend on where they were kept, but generally, it is best to go for it as soon as possible – even if you missed the optimal planting time. Get your bulbs into the ground or into containers as soon as you possibly can – after checking them over and discarding any that are soft or rotten. Late is better than never. Planting bulbs late will usually mean that they will not perform as well during their first year, but if they are a type which returns year after year, they should gradually get better over time. FAQs Should You Soak Bulbs Before Planting? While soaking bulbs before planting is not necessary, it can bring benefits for certain bulbs. Soaking bulbs, corms or tubers in tepid water for a while before planting will hydrate them, making sure they have the water they need to develop. This can lead to quicker growth and potentially earlier flowering for a certain few bulbs. “Flower bulbs (such as tulips, daffodils, hyacinths, muscari, crocus and all other spring-flowering bulbs), do not need to be placed in water,” argues the team at BULBi. “In fact, that is bad for the flower bulb, the bulb will rot. “Even if you water these flower bulbs (which is not really necessary because they get enough water in autumn and they have enough nutrition), it is very important that the water can drain away properly – so that no excess water can remain. “A pot should therefore always have a hole in the bottom. “Anemone tubers and ranunculus corms can be put in water for a while before planting.” How Many Bulbs Can You Plant Together? How many bulbs you can plant together very much depends on: Where you live and the specifics of the place where you are planting. The type(s) of bulbs you are growing. The space you have available. Other plants growing in the area. Do Bulbs Come Back Every Year? BULBi shares how only the naturalising varieties of bulbs return the following season. “These include daffodils, crocuses, galanthus, muscari and hyacinths. “In general, tulips are also annual bloomers. Tulip bulbs usually flower for one year once they are planted in the garden. “In their first year, they produce beautiful flowers; in their second year, you will only see a few green leaves; and in their third year, you will probably see nothing at all. “In the flower bulb fields, tulip bulbs are also harvested after one flowering period. As soon as the tulips bloom, they are cut off, which we call deadheading. “The nutrition then all goes to the bulb. When the remaining leaves have turned yellow, the bulbs are lifted. “After lifting, the bulbs are cleaned and stored dry. After which they are returned to the ground in autumn. However, there are tulip varieties that you can leave in the ground, and which will return the following year. We call these perennial tulips.”
Learn more
Regular Rejuvenation Pruning Helps Prevent Lilac Becoming Unsightly And Unwieldy
IN THIS GUIDE When To Prune Lilac 1) Prepare Your Tools 2) Deadhead Throughout The Blooming Season 3) Prune After Flowering 4) Tip-Off Longer Stems 5) Thin Out 6) Strip Away Suckers What To Do With Overgrown Lilacs With their lusty blooms and intense flora fragrance, lilacs are a popular shrub or small tree throughout the UK. As deciduous perennials, Syringas are hardy creatures which will lose their leaves each autumn but come back with renewed vigour the following spring. Having said that, it’s important to prune your lilac bush or tree regularly to avoid it becoming unruly and unkempt. “Regular rejuvenation pruning will keep a lilac in more vigorous plant size with larger flowers at a lower height, where they can be better experienced and enjoyed free of any pests,” says David Gressley, from the International Lilac Society. Left to its own devices, a lilac tree can exceed 8-9m in height, while its splayed branches and sparse blossoms make it unsightly and unwieldy. Fortunately, you can avoid this outcome by keeping on top of its pruning. While this might be a time-consuming process when you get down to it, you only have to undertake it once a year. Follow the steps outlined in the guide below and you can’t go wrong. Difficulty Easy Equipment Required Gardening gloves, pruning shears, pruning saw, cloth, isopropyl alcohol, fertiliser When To Prune April-June (after flowering) When To Prune Lilac Pruning your Syringa bush or tree at the right time is all-important to its continued growth and development, especially in the immediate future. That’s because the following year’s buds begin development almost straight after the last ones have died. As a result, leaving pruning too late in the year could jeopardise the blossoms of the following spring. For that reason, it’s advisable to tackle the job as soon as the flowers have begun to fade on your bush. This will give the new buds plenty of time to mature, keeping the plant healthy over winter and ensuring a stronger yield of blooms next year. With that in mind, pruning can take place anywhere from April to June, depending on the climate where you live and the way in which your particular lilac species reacts to it. July is generally too late to undertake maintenance without incurring adverse effects on the following year’s blooms, while autumn pruning is out of the question altogether. 1) Prepare Your Tools I can’t stress enough how important it is to keep your tools in top condition. Blunt shears can result in unclean cuts that foster bacteria and encourage disease, while those which haven’t been properly cleaned can spread both of the aforementioned blights throughout your garden. “Keeping secateurs and loppers sharp is a must as using blunt tools can cause more harm than good,” says Colin Skelly, a Master Horticulturist. “I clean my pruning tools after every use, cleaning away any sap and dirt and using a sharpening stone to ensure that when next used they are sharp. “Every month or so I’ll use a diamond file to rework the edge after a few uses.” Therefore, you should keep your pruning shears as sharp as you can – don’t be afraid to replace them altogether if they’re beyond saving. You should also use a clean cloth soaked in isopropyl alcohol to thoroughly clean the blades before and after use, drying them after the act. Gardening gloves are a must for this part of the process, too. 2) Deadhead Throughout The Blooming Season Lilacs make a lovely cut bouquet for indoor arrangement, but many people feel they are cutting down the plant in its prime by deadheading in this manner. Actually, nothing could be further from the truth; by deadheading blooms that are at or just beyond their peak, you’re actually helping your Syringa. That’s because it allows the plant to devote all of its energies to new growth, rather than sustaining flowers that are already on the way out. Make the cut at the base of the flowerhead and repeat as often as desired or as possible. 3) Prune After Flowering Once the flowering season has run its course, you shouldn’t waste any time in tackling your pruning tasks. To do so, cut back the stem to the first set of leaves beneath the flowerhead. Make the cut using sharpened, clean pruning shears while wearing gardening gloves. Pruning to this point is a good strategy because it will guarantee that you do not accidentally remove next year’s buds, but still enhance flowering as much as possible come the following spring. Pruning each year in this manner will also prevent the plant from becoming unruly. 4) Tip-Off Longer Stems As well as pruning back flower heads, you should also keep an eye out for longer stems which may not carry any blossoms, but are stretching out beyond the main body of the plant. These will also require your attention so as to keep the shrub’s aesthetic shape intact. Again, you’ll want to pare the stem all the way to where the nearest side shoots are emerging. If it doesn’t yet have any side shoots, look for buds or nodes that are likely to develop into shoots in the future and make the incision just above these. 5) Thin Out Next, you’ll want to thin out the plant to ensure it enjoys a good circulation of air amongst its branches and foliage. This helps to prevent the development of things like mould and fungus, which are detrimental to the growth of your lilac bush or tree. When thinning out your plant, always target the dead, dying or discoloured stems and branches first. This will stop these liabilities from sapping the lilac of its energy. You can also chop back stems that are more than 5cm in diameter, which will keep the plant from becoming too tall. A pruning saw may be necessary for extra thick and tough stems. 6) Strip Away Suckers Suckers are baby trunks which sprout from or near the base of the plant and provide competition for nutrients and energy for the main trunk. As such, they should be removed for both aesthetic and practical reasons, especially if your lilac specimen is grafted. I find the best results can be achieved by gently removing the suckers from the soil with your (gloved) hands since this can pull up the roots entirely. Then you can plant the sucker in a pot of its own and enjoy a new lilac plant altogether. What To Do With Overgrown Lilacs If you’ve not had time to properly address the upkeep of your lilac bush or tree in recent years – or you’ve inherited an overgrown one from someone else – you might find that the plant is in need of a more intensive pruning job. This type of work is best undertaken late in winter, once the final frost has passed. That’s because extremely cold temperatures can damage the wounds created when pruning the tree. However, by this point, the plant has not yet started to flower and is still dormant. Begin by targeting the diseased or dying branches first, then move on to the oldest parts of the bush or tree. Try to keep a mixture of old and new growth so as to allow the lilac to continue thriving and never remove more than a third of its foliage in a year. For trees that have become too tall to be manageable, you can cut back their height to bring them under control. Again, don’t chop back more than a third; you can always repeat the process in future years if need be. Be mindful that this type of aggressive pruning can endanger the next spring’s blossoms, but it will be worth it in the long run. Once the aggressive pruning job is complete, give the plant the best chance of rejuvenation by applying fertiliser liberally to its base. This restores the appropriate balance in pH levels to the soil and grants the plant access to the nutrients it needs to recover.
Learn more
Hibiscus Plant Care Findings From Our Interview With The International Hibiscus Society
IN THIS GUIDE Overview Recommended Varieties Growing Hibiscus Planting Ongoing Hibiscus Care Common Problems Propagation References Hibiscus is a large genus of flowering plants: there are hardy hibiscus types that can thrive outside in many UK gardens, and tropical types can be grown as houseplants indoors. In this article, we will focus on two of the most common Hibiscus in cultivation – the hardy Hibiscus syriacus, also known as Rose of Sharon, Rose Mallow or Tree Hollyhock, and the popular houseplant Hibiscus rosa-sinensis. We interviewed Darren Eminian to help produce this guide – Darren is the President of the Southern California Hibiscus Society and the International Hibiscus Society. “My passion for hibiscus comes from the incredible and second-to-none combination of multiple colours on large blooms that few, if any, other species of plants can produce” says Darren. Explore his tips for making the most of your plants in the guide below. Overview Botanical Name Hibiscus Common Name(s) Rose of Sharon, Rose Mallow, Tree Hollyhock Plant Type Shrub / Tree Native Area Temperate subtropical and tropical regions Hardiness Rating Varies Foliage Deciduous Flowers Trumpet-shaped with numerous hues When To Plant April-May (for hardy varieties grown outdoors) When To Prune June There are several hundred different species of hibiscus, which are included within this diverse genus of flowering plants in the Malvaceae, or mallow, plant family.1 Hibiscus can be found around the globe, in temperate, subtropical and tropical climes.2 The genus includes trees, shrubs and herbaceous plants – both perennial and annual. Of all the plants within this genus, two are most widely cultivated as ornamental plants: H. syriacus (grown outdoors in the UK) and H. rosa-sinensis, which is grown as a houseplant in temperate areas. The former is by far the easier option. When planted in an appropriate spot and cared for correctly, H. syriacus can flower extremely well from late summer into early autumn. H. rosa-sinensis, also known as tropical hibiscus, is usually grown indoors, though it may succeed in a warm greenhouse as long as this remains frost-free over the coldest months. They can be rather difficult to grow successfully and are not necessarily to be recommended for novice houseplant gardeners, but when successfully grown, can bloom beautifully from May right through to October. Recommended Varieties Some varieties of H. syriacus to grow in the UK include: ‘Ardens’ ‘Chiffon’ Series ‘Duc de Braband’ ‘Marina’ ‘Monstrosus’ ‘Oiseau Bleu’ ‘Red Heart’ ‘Sugar Tip’ ‘Totus Albus’ ‘Woodbridge’ Some H. rosa-sinensis cultivars include: ‘Columbine’ ‘Holly’s Pride’ ‘Karmen Keene’ ‘Me Oh My Oh’ ‘Peaches & Cream’ ‘Pink Frost’ ‘Sprinkle Rain’ ‘Tarantella’ ‘Velvetine’ ‘White Swan’ “With H. rosa-sinensis, I prefer to grow most varieties from the ‘Hidden Valley’ hybrid collection, because they are the only hybridizers dedicated to creating new hybrids that have strong and vigorous bushes with large blooms that bloom often,” Darren explains. Growing Hibiscus Your first decision, of course, will be whether you wish to grow hibiscus in your garden or indoors. In order to make this decision, you will have to determine whether you can create the right conditions for either hardy or tropical hibiscus where you live. The plant care requirements outlined below will help you understand what is possible and the conditions each of these two common hibiscus types require. Planting “Every growing location has it’s own unique parameters so it takes time to see what tweaks need to be made,” says Darren. “The base need for hibiscus is a soil mix that is light and full of air all the time even when wet. Hibiscus will struggle to survive in clayey soils in the long term.” Dig a hole large enough to accommodate your new plant in a suitable location and place the new shrub in the hole you have excavated, or place your hibiscus in a container filled with a suitable growing medium. Mulch with an organic matter around your new plant to retain moisture over the summer months and to provide slow-release fertility. When To Plant When growing hardy hibiscus outdoors, you will usually purchase and plant your new shrub in late spring. Tropical hibiscus can be purchased and potted up at any time, though again, repotting in spring is generally best. Where To Plant H. syriacus should be placed in a sunny spot which is as warm and sheltered as possible. This plant will be easier to grow in the south, or in very sheltered city gardens where your plants are less likely to be impacted by frosts. You can also plant in a container so you can bring your plant undercover in the coldest part of the year. In a suitable spot, sheltered from cold winds, this plant should make it through the UK winter unscathed, though some protection may be necessary for more northern areas. H. rosa-sinensis is grown indoors, in a location with bright but not direct sunlight. Growing these plants in a frost-free conservatory or a bright bathroom can be ideal. Container Growing Both types of hibiscus under discussion in this article work well in containers. Choose a container which can drain relatively freely, and fill with a medium which meets the soil requirements and other environmental needs discussed below. Ongoing Hibiscus Care H. syriacus placed in a suitable location should usually be a relatively easy and trouble-free plant, which should require little care and attention, especially once well-established. H. rosa-sinensis can be more challenging to grow, but following the care guide below should help you to grow this plant as a houseplant in your home. Darren argues: “The Golden Rule of growing hibiscus is ‘What you see today was caused by events 2-3 weeks ago’. “So you have to keep track of inputs like weather, temperature, water or rain, what you fed them and so on…so you can get to the cause of a problem. “Being very patient and a keen observer is key so you can track inputs and start to figure out what works and what doesn’t. “Understand that you might lose quite a few plants as you come down the learning curve which can take 2-3 years minimum.” Soil Requirements H. syriacus requires a moist yet free-draining soil or growing medium which is ideally neutral or slightly alkaline. If growing in a container, a loam-based, peat-free compost is ideal. H. rosa-sinensis also requires a moist yet free-draining medium, and it is essential to choose containers which allow water to drain away relatively freely for both types. Watering H. syriacus should be watered regularly during dry spells during the growing season when rainfall is in short supply. However, these plants are relatively tolerant of dry conditions once established. The “number one problem is too much water or not enough air in the soil” according to Darren. “Hibiscus roots are tender and vulnerable to root rot.” As such they do not do well with sprinklered water: “they do better with a drip system and if you can install a fertiliser injector that is a great way to get them to thrive.” Remember that plants grown in containers will usually need to be watered more frequently. Water indoor-grown H. rosa-sinensis regularly from spring through to autumn, but always let the top few centimetres of the potting mix dry out before watering once more. Remember to cut down on watering during the dormant period, watering only when the top few centimetres of the growing medium are dry. Temperature & Humidity H. syriacus can cope with the UK winter but will need a warm and sheltered spot to flower well, which is why they are easier to grow in the south. A spot in a sunny courtyard garden or against a south-facing wall might be ideal to maintain the summer and early autumn temperatures required for a good flowering display. H. rosa-sinensis cannot cope with temperatures below 7-10°C. They must be kept in a location where it does not drop below these minimum temperatures. Tropical hibiscus also requires high humidity. They can drop their buds if the humidity drops too low so it is important to mist regularly or to move to a bathroom or another more humid location. Feeding “For feeding, hibiscus needs lots of potassium, which is key for root development and health,” Darren shares. “As their roots are tender, this goes a long way in helping them become established and strong. They don’t need much in the way of nitrogen, phosphorus, or other common plant nutrients.” With this in mind, H. syriacus should be fed with a high-potassium organic liquid feed each year in the spring. It can also be beneficial to add a thick organic mulch around the plants in autumn, for slow-release fertility as well as for a range of other reasons. Indoor-grown hibiscus should be fed once every couple of weeks from spring to the beginning of autumn with a high-potassium organic liquid plant feed. Overwintering As Darren explains, “H. rosa-sinensis is a tropical plant, so it isn’t genetically bred for seasons and cold weather events.” This does not, however, mean that you can’t or shouldn’t grow your hibiscus outside here in the UK. A hard frost in autumn may well cause your H. syriacus to die back, but this is not something to worry about. This is a deciduous plant and the plant should regrow from the base the following spring. You might think that your plant is not regrowing, but you should note that the plants develop slowly in spring and new growth can be slow to appear. Wait until June before you worry about the lack of new growth. “Established woody H. syriacus plants are normally fully hardy in most parts of the UK and resume growth in mid to late spring,” shares Master Horticulturist Roy Nicol. In colder and more northern areas, it is best to add a thick mulch of carbon-rich organic matter around the base of the plants in autumn to make sure that they overwinter successfully. In particularly cold areas, you might wish to take container-grown plants into a greenhouse or conservatory – though this is not usually required. Make sure that you have cut back on watering H. rosa-sinensis indoors during the winter months during its period of dormancy. Pruning & Training After around three years, once a H. syriacus is established, or after it reaches a height of around 1.5m, it is a good idea to start pruning the plant annually to keep it in shape. While not always strictly necessary, pruning can help prevent the outer branches from falling outwards with the weight of their leaves. H. rosa-sinensis should be pruned each year in early spring. Prune back long shoots to 5-7cm from their base, shorten the previous year’s growth to create a main framework of branches, and remove thin or straggly non-flowering stems. “As both types of Hibiscus flower on the new growth produced in the current year, timing is important to ensure good flowering, so pruning should be carried out just before growth starts in early spring,” advises Roy. “Delayed and reduced flowering will be produced if pruned later than this.” Common Problems “As you problem-solve issues with your hibiscus it might take most of one growing season to see if what action you took worked or not” says Darren. “So the learning curve for becoming an effective hibiscus grower can take 2-3 years minimum as you figure out the correct inputs needed and actions to take when problems arise.” Issues with H. rosa-sinensis are usually environmental, but look out for spider mites, which can become a problem – especially where humidity is too low.3 Root Rot Many times when Hibiscus are struggling with root rot their leaves will become pale and veiny – which to many gardeners is an indication that the plant is lacking nutrients like iron, magnesium or nitrogen. “So they water in supplements which is the exact opposite of what the roots need which is more air in the soil. “The additional water can prove to be fatal. “Instead back off on watering for a couple weeks and check the soil with a water meter to see how wet it is deep down where the roots are” says Darren. “Changing the soil mix many times is the difference maker but what you use depends on the climate and resources available to you so it differs with each region.” Pests Pests are another big challenge in the more tropical, humid areas of the world, but not particularly in UK growing conditions. Sometimes even with ideal climate conditions, pests can prove to be a never-ending problem greatly reducing the performance of a hibiscus. Darren says: “unfortunately we have tested many of the organic remedies and have found very little success with them, so proper and careful treatment with specific insecticides/miticides is key”. Of course we would always argue that this should be a last resort where organic solutions are not fruitful. Propagation H. syriacus can be propagated by means of seed, softwood cuttings or layering. Taking softwood cuttings in spring is usually the easiest option. While it can be somewhat more challenging to root them successfully, H. rosa-sinensis can also be propagated most easily by means of softwood cuttings. However, this is very hard with many hybrid cultivars and may not be very easy for most home growers. If you have any specific questions, Darren recommends that you reach out to hibiscus specialists, like those in the International Hibiscus Society, for relevant tips and tricks. References 1. The Editors of Encyclopaedia Britannica. (1998d, July 20). Hibiscus | Description, Species, & Uses. Encyclopedia Britannica. Retrieved March 17, 2023, from https://www.britannica.com/plant/hibiscus 2. Hibiscus History. (n.d.). Hidden Valley Hibiscus. Retrieved March 17, 2023, from https://www.hiddenvalleyhibiscus.com/history/earlyhistory.htm 3. Hibiscus. (n.d.). University of Florida, Institute of Food and Agricultural Sciences. Retrieved March 17, 2023, from https://gardeningsolutions.ifas.ufl.edu/plants/ornamentals/hibiscus.html
Learn more
Expert Growers Share The Secrets To Raised Bed Planting: Build These Types Today
IN THIS GUIDE What Is A Raised Garden Bed? Types Of Beds Benefits Of Raised Beds Crops To Grow How To Build A Raised Bed Commonly-Used Materials Filling The Bed Specialist Ornamental Beds Long used on allotments for growing vegetables, raised beds have enjoyed a steady uptick in popularity, and for good reason. They offer a controlled, self-contained growing environment and allow easier gardening with less strain. They are also fairly easy to build as a DIY project. Also, if a raised bed is made with the right materials it will last for well over a decade. What Is A Raised Garden Bed? A raised garden bed is a rectangular bed that is elevated to a fair degree from the ground and is enclosed on all four sides with short walls. Typically these rise to upper-shin height. Types Of Beds Garden beds are usually one of four types: In-Ground Or Soil-Level Beds Mounded Beds Raised Beds Container Beds A mounded bed is one in which soil is formed and shaped into an oblong mound. As the mounded soil has no supports the soil gradually slides down to ground level. Such a bed sometimes does not survive a heavy downpour. A container bed is one which is not only enclosed on all four sides but also has a base or a floor. “Container-raised beds are difficult to grow in now the climate is so erratic because we are getting very dry springs and summers,” explains Val Bourne, an expert Gardener. “Raised beds really do dry out, but they are also wet in the winter with nowhere for the water to go because they have wooden sides. “I much prefer to use small in-ground beds with planks in between that you can walk on now, which I’m finding is an improvement. I’ve turned my existing container beds into flower beds.” Benefits Of Raised Beds “We broke our allotment plot down into bite-sized chunks and made lots of raised beds, using reclaimed tiles, fence panels and wooden pallets, and created pathways in between each bed,” shares Garden Blogger Joe Harrison. “By doing this we were able to manage the site a lot easier and the paths meant that we weren’t walking on the soil and compacting or damaging it. “Raised beds are a great way to utilise space and work well for those who have very poor growing conditions, as you can fill the beds with nutrient-rich compost and provide the perfect growing environment for almost any fruit or vegetable.” Raised beds offer other various benefits, which include: A self-contained gardening environment. Controlled soil or even a specific soil mix as distinct from that which is on the ground. Ability to bypass ground soil that may be poor or contaminated. Drainage is automatically enhanced. Plants are relatively closer to eye level, resulting in better observation and easy access. No chance of accidentally stepping onto the bed. No bending down or squatting means less strain and an easier gardening setup. Easier to work on after a rainy spell than a ground-level bed. Earlier start to the season because raised beds’ soil warms up quicker and earlier than ground soil. Crops To Grow “You can grow almost anything in raised beds, (depending on their size) including soft fruit bushes, vegetables, perennial & annual flowers, shrubs and alpines,” shares Gardener Hannah Reid. “I grow a range of plants in my raised beds – some of my beds even have fruit trees planted in. “I enjoy companion planting in my raised beds too, such as growing squash with dill and nasturtiums and marigold with beans.” First, any and all types of herbaceous and most shrubby plants can be grown in a raised bed. These include evergreens, ornamentals, vegetables, edible herbs, and smaller fruiting plants such as strawberries and blackberries, as Joe explains: “There really are no limits to what can be grown in a raised bed. We have grown every vegetable thinkable in ours with no issues whatsoever. “The only consideration you perhaps need is the amount of space your mature plants need. This will avoid overcrowding and will ensure a more successful yield when it’s time to harvest your produce.” Raised beds are particularly helpful when your garden has packed or heavy soil and the plants you wish to grow require very good drainage. I personally believe that the best crops to grow in raised beds are almost all kinds of vegetables and herbs excluding those that grow on tallish climbing vines. To grow root vegetables in a raised bed it should have a depth of at least 60cm. I suggest that you try growing leafy greens, carrots, turnips, leeks, beetroot, courgettes, chillies, and tomatoes in your raised bed. How To Build A Raised Bed “Raised beds don’t have to be expensive – using reclaimed materials as we did works perfectly,” shares Joe. If you intend to build more than one raised bed, first survey the available ground and measure the surface area. Visualise the raised beds that you would like to make, then sketch out a plan for your raised bed. It’s important to consider the length and width, the spacing between them (if you’re making multiple beds), and the height. Finally, using a stick, etch out the boundaries of the raised beds on the ground, or mark them out with twine. First, clear the area of the planned raised bed, making sure to remove any weeds or stones, etc. Then level and firm up the ground. You may even remove some of the ground soil and fill it with your preferred soil – though this is an optional step. Smooth down and make level the ground specifically along the borders where the walls’ timbers will be laid. To build a raised bed from timbers you will need four regulation 3x3inch posts of the appropriate height, an even number of appropriately-sized timbers for the long sides, and the same number of appropriately-sized timbers for the ends. The number of timbers you need on each side and each end depends on how high you will make your raised bed and on the width of the timbers. If the length of the raised bed will be 12m or more, you will need battens of the appropriate size or 2-4 additional posts. This is because such a long raised bed will need one or more battens or posts along its length for additional support. “I would advise you to think about the sizing of your raised beds,” says Garden Blogger Emma Bailey. “You should be able to reach the middle of the bed from the side so that you can easily harvest and weed them without stepping onto the soil. Also, be warned that wooden sides will attract slugs and snails! They love to sit along the side of my wooden sides, especially when it’s been raining. “I”’ve started leaving out a couple of planks of wood along the pathways to attract them. Then I can remove them easily before they have a chance to move into one of my raised beds. Keep your enemies close!” The timbers should have holes drilled in at the ends for screws and the posts should have pilot holes. The holes in the timbers and pilot holes in the posts should be drilled according to measurements and must line up. Draw a line around each post so as to mark the depth that it will be sunk into the ground, which should be 20cm as a minimum. Drive in each post at a corner of what is to be the raised bed, and shore it up. First, put one of the shorter timbers at one end. If the walls will be made of more than one timber, as is most likely, start from the bottom. Screw it in fully on the outside of the post, then do the same for the other end. After fastening one timber on each end, screw in one timber on each side, doing the lowest one first. Then, if the walls are to be made of more than one timber, go back to the ends and work your way up. “I love growing in raised beds and set them all up in the same way as I’d set up a growing space directly into the ground,” shares Allotmenteer Shannon Keary. “I lay good thick cardboard down, ensuring no staples or sellotape are on them, then half fill the raised bed with a composted wood chip which is plentiful on our allotments and top it off with compost. “This helps with moisture retention, to suppress the weeds and to let nature do its thing. Each year I top if off with an inch or so of fresh, homemade compost so it’s really low maintenance.” Width Though the maximum length of a raised bed depends on the surface area at your disposal and good design practice, the width is a function of something highly individual and variable: your reach. I feel that the width of a raised bed should be tailored for the person or persons who will grow plants in it. This ‘tailoring’ is quite easy to do. Assuming that you can stand on either side of the raised bed, you need to be able to reach to about the middle of the bed. You may need to reach to the middle to harvest veggies or prop up a plant that has flopped over, and you would certainly like to garden comfortably and confidently. Though you will be leaning forward, most people garden with their arms downwards and not fully outstretched. As such, the width of the raised bed should not be twice the length of your arm. I’d suggest that a width that is 170-180% of the length of your arm will be ideal. If you inherit a raised bed or make one out of prefabricated materials and cannot reach to the middle of your raised bed from the sides, that is not a major problem. You can instead grow vegetables in rows, leaving the middle of the bed as a walkway if you need it. “The old-school approach, particularly to vegetable gardening, has this obsession with spacing and how far apart plants should be from each other,” shares Kate Cotterill, Garden Designer. “Personally, I ignore this. In my raised beds, I interplant, so I’ve got something growing vertically, something horizontally. “I pretty much ignore all the rules about spacing because as long as you’ve got good compost, then actually there’s enough nutrition for all of the plants.” Depth The depth of your raised bed is basically a function of three variables: If you are placing a raised bed on ground that is cemented over. How much and how well you are able to bend, stoop, and crouch. What exactly you intend to grow in the raised bed. Building a raised bed on ground that has been cemented over will pose a special type of challenge because of drainage. “In this case, you could fill the base with stones or rubble, as long as there is not much mortar on it, and drill some drainage holes in the sides at the base,” says Peter. The poorer or more unworkable the soil, the less well you can bend, stoop, and crouch, or the deeper-rooting plants you plan to grow, the deeper your raised bed must be. If you plan on growing bulb plants, strawberries, tomatoes and such, a depth of only 30cm is quite enough. On the other hand, if you intend to grow large root vegetables or deep-rooting plants, a depth of at least 60cm is called for. As a general rule, a depth of 45cm is a good plan. This depth is sufficient for most ornamentals and also many vegetables. “I’ve known large raised beds lose more than 20cm of their depth in a single season as the soil’s structure and air pockets gradually collapse,” shares Peter. “Mixing mineral material, such as soil or loam, with organic material, perhaps garden compost, helps to overcome this, as will consolidating the soil for every few centimetres added. “Don’t squash all the air out of it, but rake level and firmly tamp down with the back of a rake across the surface. “Doing this several times during the filling process, and again at the end, works well.” Commonly-Used Materials “Setting up raised beds can sometimes be expensive, depending on how you decide to go about it,” says Hannah. “Sourcing wood and materials to make the beds and then compost to fill them can be costly. The most commonly-used materials are timbers, often pressure-treated timbers. Pressure-treated wood lasts much longer than untreated wood, especially when it is used to build a raised bed as the wood is in constant contact with water and damp soil. “Old decking boards etc are a good option, however, it is important to bear in mind the longevity of the wood and how long they’re likely to last. “A great tip is to use wood at the bottom of the beds, this will take up space in the beds meaning less compost is needed, but also the wood will decompose over time.” Cedar, redwood, oak, and pine are very commonly used types of wood. Other materials include concrete, stone, bricks, paving slabs, railway sleepers, and sheet metal. Pre-fabricated or readymade raised beds are also available. These are usually made of timbers, metal, fabric, or synthetic material like High-Density Polyethylene (HDPE). However, they do need to be assembled. If you plan on building a raised bed with wood, we suggest that you shop for MCQ-treated timbers. Raised beds made from concrete or stone will last the longest with good-quality pressure-treated wood and HDPE coming right behind. Filling The Bed How you fill the raised bed depends on how deep it is and what you want to grow in it. If the bed is shallow, say only 30cm, then you will fill it with the appropriate soil mix. If the bed is very deep, say 90cm, then you have the liberty to put in a layer of up to 30cm of whatever earth is native to your garden provided that it is not so heavy that it will prevent drainage. Even if the bed is not quite so deep but is 60cm or more, you can still put in a shallower layer of your garden earth. You do not need to try to improve drainage in a raised bed on top of soil, but adding a lower layer of gravel in a deep bed can be a good idea. Indeed, the deeper the raised bed, the more quickly it will dry out, especially in hot weather, so I would recommend introducing vermiculite in the upper layer or topsoil, as Janice Shipp, a Garden Writer, explains: “Growing in raised beds is a bit different from growing in the ground. I find raised beds dry out much faster so, in summer, you need to water them more often. “My allotment is on clay, so a raised bed can be an advantage in the early part of the year if it’s been a wet winter and I want to get planting, but I’ve only got a couple on my allotment as I like to keep the layout flexible and you can’t easily change things if you put in a lot of raised beds.” The soil you fill your raised bed with is really dependent on the plants you intend to grow in it. We suggest you consult our plant-specific growing and care guides for precise guidance on this point. In general, though, a balanced loam comprising sand, chalk, and some clay, amended with 20-30% organic compost and organic manure with a soil pH anywhere in the slightly acidic-neutral range will do very well. You may lay a 4-6cm layer of mulch after your plants start growing. It will protect plants from the cold in the wintertime as well as slow the surface soil from heating up and drying out in hot weather. “I top my raised beds twice a year and sometimes after I’ve harvested a big crop,” says Emma. “Leaf mould, manure, compost and even chopped-up old crops work great at replenishing the soil and mean that new crops benefit from new nutrients.” Specialist Ornamental Beds You do not need special raised beds for growing ornamentals. It is just a question of the depth of the raised bed and the type of soil it should have. A raised bed for growing ornamentals should optimally have a depth of about 45cm. The kind of soil and soil pH that it should have depends on the particular ornamentals you intend to grow in the raised bed.
Learn more
Horticulturists Recommend 12 Gooseberry Varieties With Culinary And Dessert Options
IN THIS GUIDE 1) Pax 2) ‘Captivator’ 3) ‘Whinhams Industry’ 4) ‘Hinnonmaki Red’ 5) ‘Black Velvet’ 6) ‘Hinnonmaki Yellow’ Other Varieties 7) ‘Rokula’ 8) ‘Xenia’ 9) ‘Invicta’ 10) ‘Greenfinch’ 11) ‘Leveller’ 12) ‘Martlet’ Underneath we present six essential gooseberry varieties and a further six supplemental ones. All descend from Ribes uva-crispa, either solely or jointly. While the colours of these varieties’ fruits are usually classified as yellow, green, and red – with a further classification of white for competition purposes – their hues are manifold and very varied, ranging from a very pale tone of the particular colour to a fully-saturated or very dark tone. A properly pruned Gooseberry bush of most of these cultivars will attain a height that is a shade under 1.5m. “Foremost in most gardeners’ minds when selecting a gooseberry is whether they want fruit which can be picked and eaten straight away – a dessert variety – or a sharper culinary variety, requiring cooking,” says Horticulture Technician Peter Lickorish. “Next to consider is the shape of the plant – whilst vigorous varieties lend themselves to a bush or goblet shape, some of the narrower, slower growing cultivars can be used for cordon growing, including ‘Hinnonmaki Red.’ “This means training a plant to have a single main stem, with fruit clusters borne on short side-stems. “They can be vertical, or oblique – trained at a 45-degree angle, which can slow leaf growth and enhance fruiting, compared to vertical cordons. “This can add an interesting design element to a productive garden. “Moderate size plants, such as ‘Captivator’, can even be fan-trained against a wall, so they take the shape of a Japanese fan, with branches radiating at different angles along supporting canes or wires. “Finally, fruit size, and fruiting time – with some variation between early and late cultivars – and levels of disease tolerance are important considerations.” Here are twelve options to consider: 1) Pax ‘Pax’ is perhaps the ideal cultivar for the gardener who is new to gooseberries and has space for only one bush. The mature bush is virtually thorn-free and has a lot of that ‘hybrid vigour.’ It is more disease-resistant than most varieties. It bears a good yield of wine-red fruit in the June-July timeframe. The fruit is very much an all-rounder – it is sweet without being over-sweet, and is great for eating straight off the bush and is equally good for making pies, desserts, and preserves. 2) ‘Captivator’ ‘Captivating’ for more than one reason. Casual gardeners will love these bushes for being nearly thorn-free come time to pick the fruit, and also for their high mildew-resistance. The fruit is a rosy pink to rose red and is quite large, though this is an average-yielding variety. Eaten ripe and raw, it is deliciously tart-sweet; slightly under-ripe it is excellent for preserves, pickles, and such. 3) ‘Whinhams Industry’ The British heirloom variety dating back to the Victorian Era. Not as disease-resistant as newer varieties, it is very unfussy about soil but can be fussy about climate. Now and again this moody (and very thorny) bush may fail to give a half-decent crop. But when it gets the right climate conditions, mixing moist soil with sun, it will reward you with not only a massive harvest in June-July, but with the most luscious of fruit. 4) ‘Hinnonmaki Red’ Also know as: ‘Hinnonmaki Röd’; ‘Hinnonmaeki Red’ It may be on the verge of becoming the most popular garden-grown Gooseberry bush. This Finnish cultivar has much to recommend it. It is a vigorous grower, has excellent disease resistance, crops reliably, and also gives a well-above-average yield in July. The perfectly red berries have an incredible ‘just right’ sweet flavour, thus competing with other types of berries that are preferred for their sweetness. This is the Gooseberry for modern tastes. “Its suitability to a cordon shape makes it a good fit for a tight space,” says Peter Lickorish. 5) ‘Black Velvet’ An American import that is just catching on in the UK so if you want to get something a little different, this hybrid is the Gooseberry bush for you. And it is a little different. First, for a Gooseberry bush it is comparatively shade loving. Next, its fruit is a tad smaller than what we’re typically accustomed to in the UK but it makes up for it by producing thumping good crops. “If you would like larger fruits, try thinning the clusters by around a third,” encourages Peter. Finally, the ruby-red to blackish-red fruit is as sweet as sweet can be! It is not thorn-free but it has less troublesome thorns than most. 6) ‘Hinnonmaki Yellow’ One of the most unfussy, reliable and trouble-free varieties; it does well even in heavyish soils. Though the odd bush may succumb to disease, it is one of the most mildew-resistant cultivars. It has a bushy but loose, saggy habit and may well need a trellis or support canes. But be careful when you fix it up because this one is a little thorny. It bears huge crops in July of greenish-yellow berries that are most unusual as they have a delightful aromatic sweetness that is redolent of apricot. Other Varieties 7) ‘Rokula’ One of the newer cultivars that is an up-and-comer. It is well-reputed for its high resistance to mildew. It reliably produces a heavy crop that is among the earliest in the season. Berries are already formed in May and are good to pop into the mouth come June. The colour of Ruby Port, this variety’s berries are excellent to eat out of hand but they are, in fact, a top choice for many culinary purposes – preserves and pies as well as salsas and pickles 8) ‘Xenia’ A Swiss cultivar that is gradually catching on in the United Kingdom. It may be billed as being nearly free of thorns but it’s not! However, it has other virtues. It produces a good crop quite early, by June. The berry is very smooth and also quite big. Varying in colour from glazed red to rich red, it is quite sweet but not overly so. It is one of those all-rounders that is excellent for eating raw out of hand, and equally good for using in culinary preparations. Finally, if your plot has heavy, clayey soil, you can still grow Gooseberries, courtesy of this cultivar. 9) ‘Invicta’ Invicta has some serious thorns and only moderate resistance to mildew and leaf spot. That out of the way, this cultivar is among the most impressive ones in growth and consistently produces the heaviest, hugest crops – far more than other varieties. The berry’s colour is a translucent, limpid green but it is classified as a white for competition purposes. Strongly flavoured, it is a top choice for all culinary purposes, from jams and jellies to sauces for savouries to accompaniment with pork and such. 10) ‘Greenfinch’ Has a bushy but self-contained habit that makes for a neat and tidy bush. Though not one of the more popular varieties, it is ideally suited to British conditions and exhibits some tolerance for a range of soil and climatic conditions. It produces average yields of average-sized fruit that is light green. However, this variety’s claim to fame is that the tart, tangy berry is one of the best choices with which to prepare delicious sauces and salsas, to serve with cold cuts, and even with savoury foods like duck. “It is regarded as a culinary, not a dessert variety – so not suitable for picking and eating straight from the bush,” adds Peter. 11) ‘Leveller’ One of the UK’s most popular cultivars for more reasons than one. It needs rich, fertile soil and the right climatic conditions, and when it gets those it bears good crops of relatively huge berries that are yellow when ripening and a light, shiny green when ripe. This is one of those varieties that you pick under-ripe for pies and preserves, and even for pickling, and pick ripe to eat out of hand, exulting in the fruit’s rich sweetness. This is not the most disease-resistant of cultivars; however, it is the one that produces most of the winners of largest-gooseberry contests! 12) ‘Martlet’ One of the newer varieties that has yet to become a favourite, but it well might. To begin with, it is not only marketed as mildew-resistant, it really is. Next, the bush itself is vigorous and adaptable. It yields huge crops of fruit that can be picked throughout June. As for the berry, it is of a rich red hue, is quite large, and has that just-right sweetness that makes it a classic dessert berry – ideal for eating raw, serving in fruit salads, or making desserts with.
Learn more


