

Growing

Growing Fruit Trees In Smaller Spaces? Use A Cordon System To Increase Your Yield
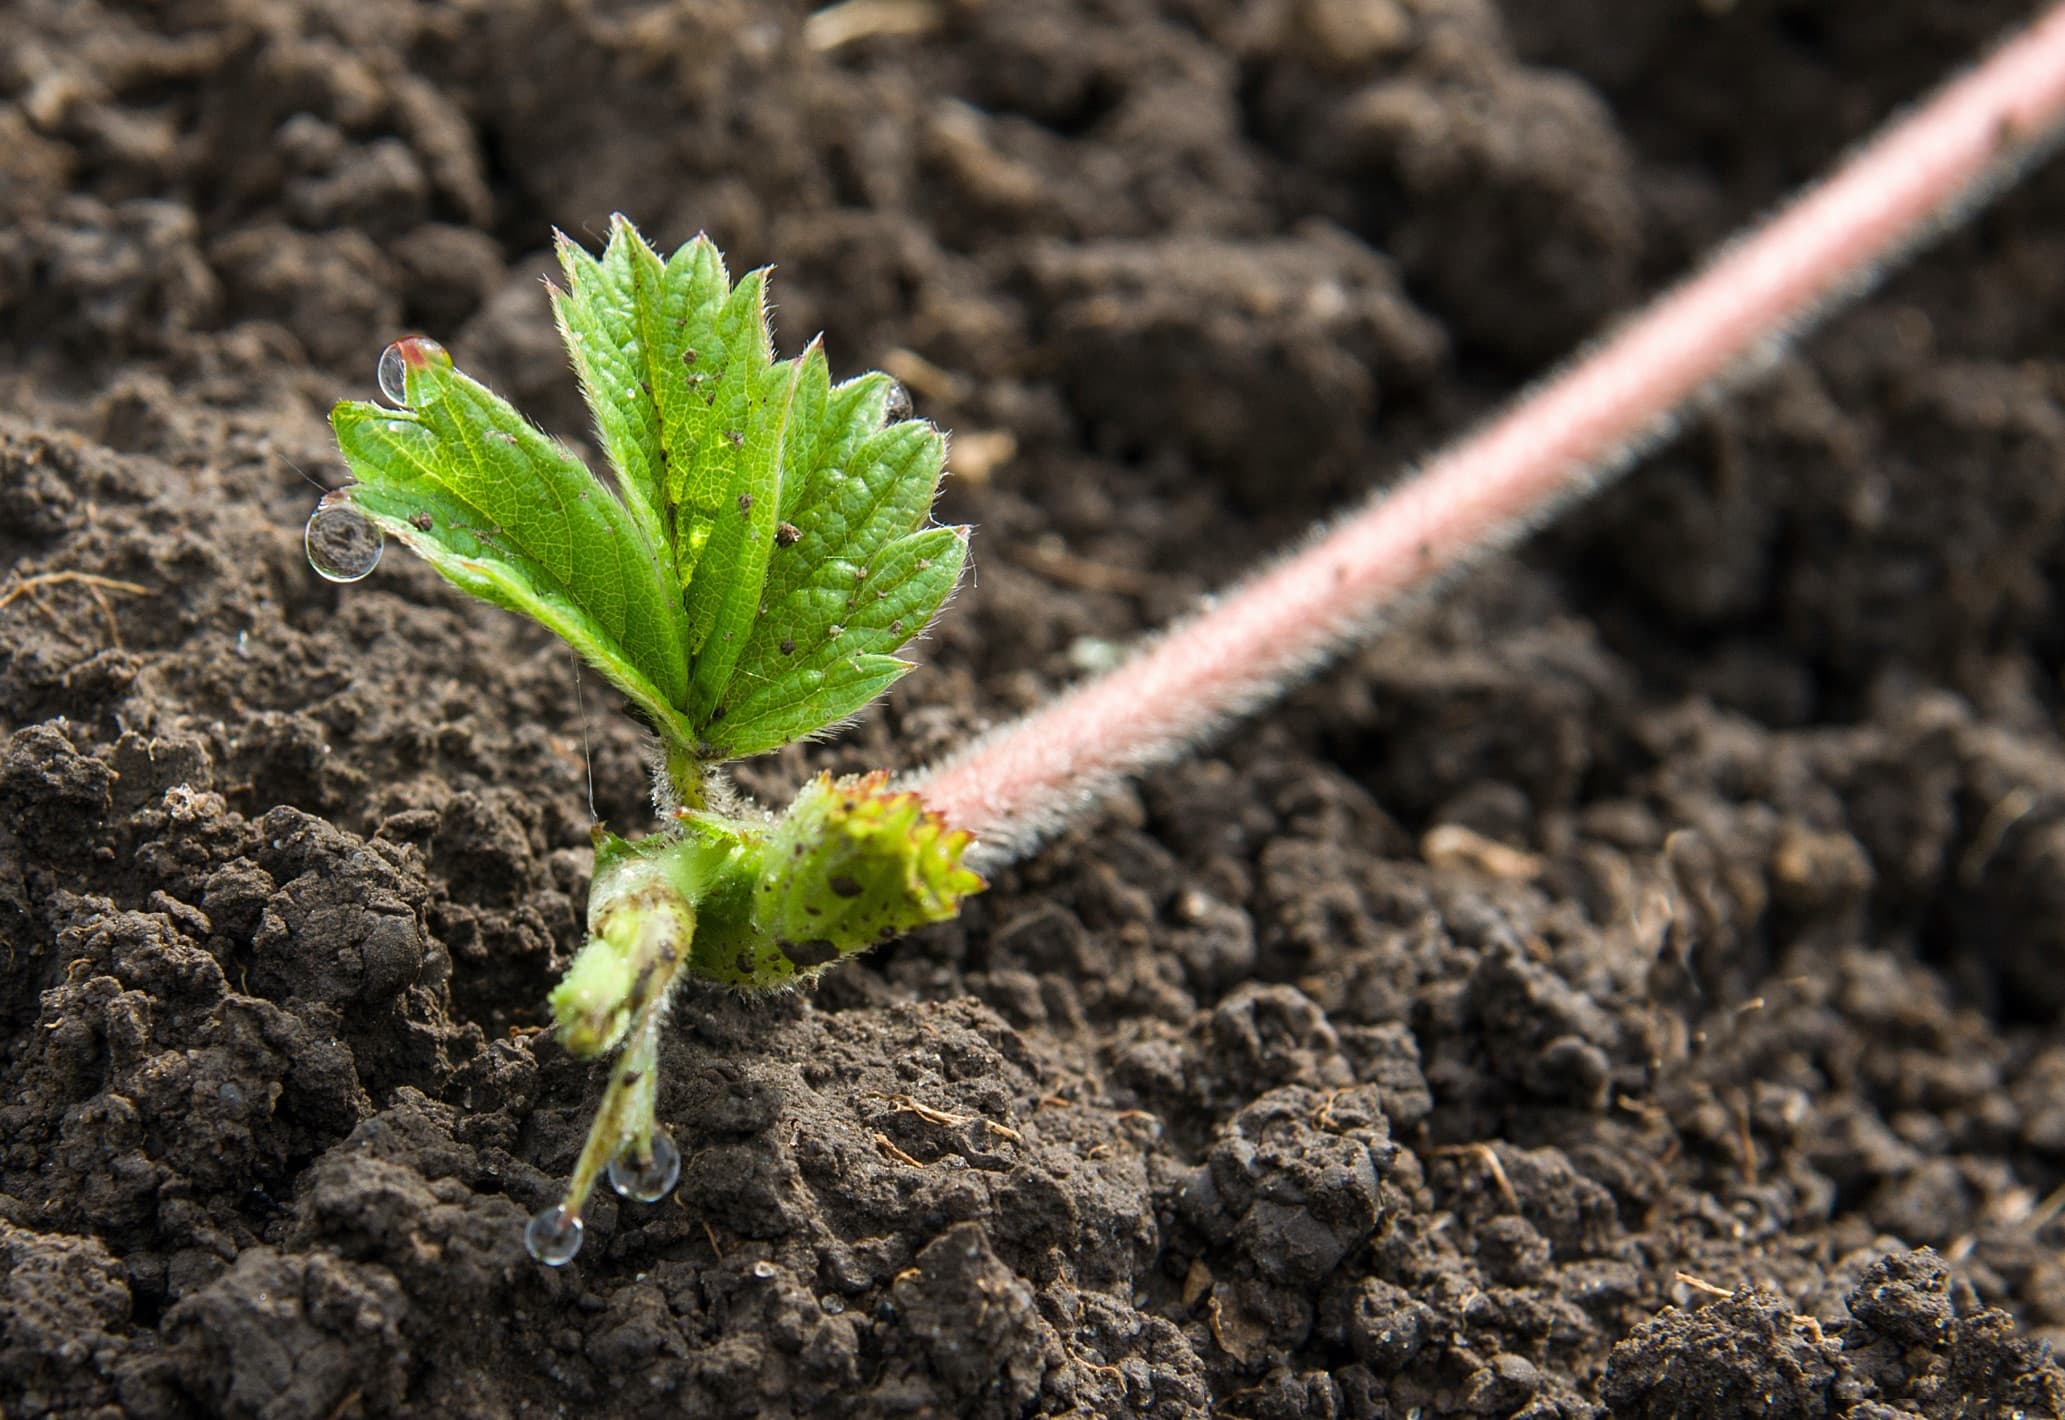
IN THIS GUIDE What Are Cordon Fruit Trees? Why Columnar Fruit Trees In Your Garden? Which Are The Best Fruit Trees To Cordon? Where To Grow Cordon Fruit Trees Support For Columnar Trees Planting Cordon Fruit Trees Fruit Tree Care & Pruning References Fruit trees can be excellent additions to any garden, and when you cordon fruit trees they can be grown in even the smallest of spaces. If you want to grow fruit trees in smaller spaces, a cordon system can be a good idea. “If you have a smaller garden or just want to grow many types and cultivars of fruit, cordons are a great way to optimise the number of different fruits in your garden,” shares Master Horticulturist Colin Skelly. “They are also a relatively low-labour option, only requiring pruning and mulching once a year.” When fruit trees are grown and trained in this specific way, you can grow far more fruit in a far smaller area – so this can be a great way to make the most of your space. Read on to find out more about cordon fruit trees: Learn why they can be a great idea in a small garden. Discover which fruit trees are best for treating in this way and where to position your trees. Get tips for providing them with support and how to plant and care for them in your garden. What Are Cordon Fruit Trees? Cordon grown apple trees Cordon fruit trees are trees which are grown to form narrow, columnar forms. They are kept compact, with once central trunk and short, fruit-producing spurs. They are not allowed to bush out into full standard or bush-shaped trees – nor are they allowed to branch out sideways significantly, as in fan-shaped or espaliered forms. Cordon fruit trees are usually grown on intermediate (moderately vigorous) root stocks. Because they do not have major side branches, cordon trees will not crop as heavily as standard trees or fruit trees with other forms. However, when you choose the right varieties and care for them correctly, trees pruned in this way can still provide a yield of up to around 10kg of fruit per tree. Why Columnar Fruit Trees In Your Garden? While cordon fruit trees are usually relatively small, when treated correctly they can produce a high yield. Since a number can be grown in close proximity to one another, you can increase the overall yield of fruit from your garden. Cordon fruit trees can be an excellent choice if you want to make your garden as productive as possible. You can grow several trees pruned in this way in the space that would ordinarily only be able to accommodate one fruit tree – and therefore get a lot more from the available area. Since cordon fruit trees have a relatively flat profile, they can be grown up against a wall or fence – making use of marginal spaces. They can also be used to provide some privacy or screening without casting excessive amounts of shade across the space. Which Are The Best Fruit Trees To Cordon? Apples Cordoned apple trees in an orchard In the UK, the best fruit trees for cordon fruit trees are apples. Apples are often one of the easiest fruit trees to grow here, no matter what form they take. They tend to like the growing conditions UK gardeners can provide, and will grow well in many gardens across the British Isles. Apples also respond well to different pruning regimes and it is usually fairly easy to find apple trees in cordon or columnar form. Pears Pears are another top pick for cordon fruit trees. Pears too can grow well in many UK gardens, and these trees can also respond well to cordoning or columnar pruning. They too can fruit well on the short fruiting spurs created with this shaping regime. While apples and pears are the best choices, you can also consider other trees too. Plum & Cherry Plums and cherry trees can also make good cordon fruit trees, as long as you select suitable cultivars for this type of pruning. Be sure to choose spur-fruiting cultivars. Choosing Fruit Trees It is far easier for most gardeners to purchase cordon fruit trees which have already been trained and pruned into columnar form. These are now fairly readily available from garden centres and plant nurseries. Remember, however, when choosing your trees, that you must choose cultivars that are suited to the growing conditions in your particular area. Remember to think about all the different factors in the environment which influence plant growth: sunlight, wind, water and soil type, pH and conditions. Where To Grow Cordon Fruit Trees Cordon fruit trees can be placed against an existing structure, such as a wall, fence or trellis, or they can be placed in another spot in your garden, with a new support structure. They can be useful when used to create partitions between different ‘rooms’ in a garden. Cordon fruit trees can be grown in the ground, but there are also fruit trees suitable for growing in containers, or large pots. For best results, they should typically be grown with support, and not as free-standing specimens. Location When choosing where to place cordon fruit trees, it is important to consider the types and varieties of fruit trees that you have chosen. Think about the needs of the plants, and whether the location you are considering will provide them with what they need. Sunlight is one important consideration – think about the orientation of the wall or fence you wish to place your cordon fruit trees against, for example, if you are placing the trees against an existing structure. Does it face south, east, west or north? How much sunlight does it receive? There are fruit trees suitable for structures of any orientation. But you need to choose the right varieties – especially when it comes to choosing cordon fruit trees for a north-facing or more shaded place. Support For Columnar Trees One important thing to note, whether you are training your trees against an existing structure, or making a new support structure, is that it must be strong enough to withstand gales, and support the weight of your trees in windy conditions. It should be sturdy and durable enough to meet the purpose. On an existing wall or fence, you will need to make sure that the structure is in good repair before you begin. And you will need to add support wires which are firmly anchored in place. Remember, fruit trees will be there for the long term – usually the next 30-40 years.1 So make sure your fencing wire and fixings are good quality, durable, and up to the task. Planting Cordon Fruit Trees Before planting your cordon fruit trees, make sure that you have prepared the area. If you are growing in the ground, make sure that you have amended the soil with plenty of organic matter, and provided fertile and weed-free soil. Below we have used some basic illustrations to map out the step-by-step process for planting your trees: 1) Preparing Your Structure If you choose to use one, prepare your support structure and place your well-secured training wires horizontally across this structure. 2) Space Out Your Trees Take long branches or sturdy bamboo canes (2.4m long is ideal) and tie these to the wires, at an angle of 45 degrees to the ground. This marks the angle and spacing of the trees, and is the support to which the main trunk of your cordon fruit tree will be tied. While not essential, it is a good idea to place trees on a 45-degree angle, because this will give you a longer trunk while keeping all the fruits at a comfortable picking height. The canes should be spaced around 60-80cm apart. This gives the spacing for your cordon trees. 3) Dig Planting Holes Next, dig your planting holes at the foot of each cane to accommodate your new fruit trees. Consider adding mycorrhizae to the planting hole to aid establishment.2 4) Plant Your Trees Place your cordon fruit trees in each hole, so they follow the same 45-degree angle as the canes. Tie the main trunks to the canes, and fill back in the soil firmly around each tree. 5) Mulch & Water Water well, and keep watering during establishment and during any dry periods. Mulch well with organic matter around the base of your trees. 6) Introduce Companion Plants Add fruit tree guilds of beneficial companion plants for best results. According to St Ives Community Orchard, some of the best companion plants for fruit trees include Nasturtium, Basil, Yarrow, Comfrey and Chamomile.3 Fruit Tree Care & Pruning Fruit tree care is largely the same no matter what form your fruit trees take. Columnar apple tree The only way that cordon trees differ is in their pruning requirements. In summer (usually August), cut back the leading stem to the height you want to maintain your cordon at. Prune back all straight new shoots to 3-4 leaves above the basal cluster of leaves (the group of leaves at the base of a stem). Prune back all spur growth to one leaf beyond the basal cluster. This means the tree will focus not on foliage growth but on flowering and fruiting in the spring. Though they need more careful pruning than other fruit tree forms, cordon fruit trees can still be a relatively low maintenance choice – especially if you keep them healthy by companion planting beneficial guilds which help keep them free from pests and disease in an organic garden. References 1. How long do fruit trees live? (n.d.). Dave Wilson Nursery. Retrieved March 17, 2023, from https://www.davewilson.com/home-garden/faq/question/how-long-do-fruit-trees-live/ 2. Role of mycorrhizae on mineral nutrition of fruit trees. (n.d.). ISHS. Retrieved March 17, 2023, from https://www.actahort.org/books/1217/1217_34.htm 3. Langley, E. (2020, April 20). Companion / Guild planting. St Ives Community Orchard. Retrieved March 17, 2023, from https://www.stivesorchard.co.uk/companion-planting-around-fruit-trees/
Learn more
Harvest, Store & Process Your Apples By Starting With 'A Gentle Lift And Twist'
IN THIS GUIDE Harvesting Apples Apple Varieties How To Pick Your Fruit Storing and Processing 1) Storing Fresh Apples 2) Dehydrating Apples 3) Freezing Apples 4) Canning Apples 5) Apple Juice, Cider or Cider Vinegar 6) Cooking Apples Right Away References An apple tree can be a wonderful addition to almost any garden but to make the most of your fruit, you need to know how to harvest, store and process the apples you grow. Of course, it is likely that you will eat many dessert apples right away, and use up plenty of cooking apples in a range of recipes. But even with a single apple tree, you may have more apples than you can handle right away. So what should you do? “Enjoy your tree! Harvest your fruits, eat them fresh, bake them into cakes or jams, or make cider,” says Julie Bellemann, from Sheffield Fruit Trees. “Share the glut with your neighbours but leave some for the wildlife too.” Here is our brief guide to help you understand how best to harvest, store and process the apples that you grow in your garden: Harvesting Apples Most apples in the UK are ready to harvest sometime between late July/August and November. When exactly you will harvest your apples will depend on the variety or varieties that you grow – the timing of the apple harvest can also vary quite significantly depending on the weather conditions in a given year.1 Apple Varieties They might be dessert apples – sweeter cultivars often eaten fresh and raw. They might be cooking apples, whose name is self-explanatory, or they might be older heritage varieties which are best used as cider apples.2 Whichever type or types of apple you grow in your garden, the harvest is likely, especially once trees are mature, to be the biggest and most time-consuming job of the year. Tools like extendable fruit pickers can make this job a lot easier if you have several large, mature trees. How To Pick Your Fruit Apples are ready for harvest when they easily come away from the tree with a gentle lift and twist, as Julie explains: “You can check if your fruits are ready to be harvested by giving it a gentle pull on the stem. “It should come free fairly easily.” If the stalks do not detach easily, it is likely that you should leave your apples a little longer. “If you have a large tree, I’d recommend investing in a fruit picker or making one yourself to reach those fruits that are simply too high up,” Julie shares. “Big, established trees also won’t mind being climbed in, just make sure you’re doing it safely.” If the stalks do not detach easily, it is likely that you should leave your apples a little longer. However, it is also worth noting that windfall apples, which are under-ripe and fall from the tree early, can still be used. They can be used to make jellies or jams, or to make a natural fruit pectin to set other fruit jams earlier in the year, for example. At the main harvest, remove each apple carefully from the tree (since some varieties bruise easily, and bruised fruits will not store well). Check over the apples you harvest, putting aside any with damage or blemishes to use right away and discarding any with pests or other problems. Make sure you are ready to store or process the apples – deciding how you will do so ahead of time will mean that there should be little wastage and you will be able to make the most of all of the fruit that you grow. Storing and Processing Certain apples can be stored in a cool pantry or root cellar for a few months. However, not all apples will store well, and some will not last very long at all. How long you can store apples in a pantry or root cellar or similar space will depend very much on the variety or varieties of apple which you are growing. “Some varieties of fruit are best eaten fresh off the tree, whilst others can or even need to be stored for a couple of months to let the flavours develop,” says Julie. “Check with your nursery or go online to see how your varieties should be handled. “Don’t be scared to experiment, as you might prefer a freshly picked tart apple to a stored sweeter one, and there’s nothing wrong with that!” Typically, apples which are harvested later, in the autumn, will store better than those which are harvested earlier in the year. 1) Storing Fresh Apples If you have apples that are reasonably good for storage, you can keep them good for longer by laying them in single layers, in crates or on trays, with space between them. “Apples are best stored in the dark, dry and cold, preferably spread out rather than on top of each other,” says Julie. Each one can also be wrapped in paper, straw, or other breathable material. You should regularly check over the apples as, as the old adage states, one bad apple can spoil the whole bunch.3 Remove any which are showing signs of decay as quickly as possible. 2) Dehydrating Apples Another way to preserve your apple harvest is by dehydrating apple slices and storing these dried apple slices in airtight jars. Apples can be dehydrated in an oven, or in an electric or solar dehydrator. Apples will not usually air dry successfully in a humid climate like ours in the UK. You can also partially dehydrate cooked, pulped apples in a thin layer to make fruit leather – which is like the fruit roll-ups that you can buy in the shops. 3) Freezing Apples Cooking apples can also be frozen, either raw or cooked, if you do not have the time to process and use them right away. This can be a good solution if you have freezer space available. Slice and core the apples, and you can freeze them on a tray separately before placing them into airtight freezer containers. Freezing apples means you will be able to use your homegrown apples in a range of recipes all year long. 4) Canning Apples You can also can apples to preserve them. If you choose to can them, it is important to use canning jars and to process them according to a canning process from a reliable source. It’s possible to can apple slices or apple chunks in sugar syrup in a water bath canner. You can also can apples as apple sauce, or in a range of other preserved recipes, such as apple butter, apple jams, chutneys etc.4 Canned applesauce Though in the UK it is common to do open kettle canning (filling jars and then not processing further), it is far safer to process apples or apple recipes that have been placed into jars in a water bath canner.5 5) Apple Juice, Cider or Cider Vinegar If you have suitable apple varieties, you can also consider storing apples as pasteurised apple juice, or making an alcoholic apple cider, or apple cider vinegar. To make apple juice, you may wish to invest in a juicer, or, (and this is a very good idea if you have more than one apple tree) an apple press. A hand-turned press is a great idea if you are going to be harvesting more than a few apples. “Pressing apples is always popular with children as well as adults,” shares Colin Skelly, an expert in all things horticulture. “The juice is so good that there is rarely any left to store from my small garden, but I do slice some and freeze them to enjoy in the depths of winter.” You might also wish to invest in a fruit crusher to make the job quicker and easier. We find both of these things invaluable to process the fruits from our 6 apple trees. Apple juice will store for a while in your fridge, but if you want to store it for longer, again, it is best to use canning jars. Put it through 10 minutes processing in a water bath canner and keep it in sealed jars and it should keep for a year or so in a relatively cool place.6 If you plan on making cider, or apple cider vinegar, be sure to follow a reliable recipe to achieve the best results. You should also note that you can make scrap cider vinegar using cores or other parts which you have discarded as you processed apples in other ways.7 Of course, these are just some of the many ways that you can process your apple harvest – the methods which will allow you to make use of them over the longest period of time. It is also worthwhile considering the many recipes that allow you to use up your apples right away. 6) Cooking Apples Right Away Cooking apples and versatile types can be used in a wide range of cooked recipes – not just the traditional pies, crumbles and other desserts, but also in breads and other baked goods, and savoury recipes like soups and stews too. Being able to seek out and enjoy new apple recipes is just one of the benefits of growing these delicious fruits in your garden. References 1. Carrington, D. (2018, August 18). Ideal weather brings bumper English apple harvest. The Guardian. Retrieved March 9, 2023, from https://www.theguardian.com/environment/2014/oct/14/ideal-weather-brings-bumper-uk-apple-harvest 2. Blue Barrel Cider Project. (n.d.). Summerwood Community Garden. Retrieved March 9, 2023, from https://www.farmgarden.org.uk/system/files/summerwood_guide_to_starting_out_in_cider-making.pdf 3. Can one rotten apple really spoil the whole barrel? (n.d.). Office for Science and Society. Retrieved March 9, 2023, from https://www.mcgill.ca/oss/article/nutrition-you-asked/can-one-rotten-apple-really-spoil-whole-barrel 4. Making Jams and Jellies. (n.d.). National Center for Home Food Preservation. Retrieved March 9, 2023, from https://nchfp.uga.edu/how/can_07/apple_preserves.html 5. Ames, M. (2020, August 24). Rules for Safe Water Bath Canning. Countryside. Retrieved March 9, 2023, from https://www.iamcountryside.com/canning-kitchen/rules-for-safe-water-bath-canning/ 6. Adamant, A. (2023, February 3). Apple Jam. Practical Self Reliance. Retrieved March 9, 2023, from https://practicalselfreliance.com/apple-jam/ 7. Apple Scraps Vinegar Recipe. (n.d.). Abel & Cole. Retrieved March 9, 2023, from https://www.abelandcole.co.uk/recipes/apple-scraps-vinegar
Learn more
Are Your Tomato Flowers Not Setting Fruit? It's Likely One Of These Common Causes
IN THIS GUIDE Blossom Drop Temperature Nutrient Imbalance Pests Poor Pollination Manual Pollination Nutrient Imbalance There are a number of reasons why tomatoes may not set fruit successfully. In this article, we will discuss some of the most common reasons, so you can troubleshoot the problem and may be able to avoid encountering this issue in future. The top reasons your tomato flowers are not setting fruit fall into two categories. The first category is environmental factors out of your control. These might include the weather conditions – extreme temperature changes. The second is due to environmental factors which are in your control (a mistake you may have made as a gardener). Fortunately, the second category is more common in UK gardens, so there is likely to be something you can do to avoid this problem again next year. Read on to identify the most likely reason in your garden: Blossom Drop Primary Indicator: Flowers Drop Off Before Pollination Can Occur Yellow flowers of tomato plant One reason that your tomato flowers are not setting fruit can be that they drop off before they are pollinated. This is a sign of plant stress, and it can have a number of causes. The most common are: Temperature fluctuations (especially sudden cold snaps with chilly nights). A lack of water. A nutrient imbalance. Insect damage. One common cause is that the nighttime temperatures fell too low during the time when the tomato plant was flowering. Temperature Tomato plants need temperatures of around 10-23°C at night in order to retain their flowers. If nighttime temperatures have dropped too low, this may have led the flowers to drop off before pollination could occur. A sudden cold snap might be to blame, and the weather and your climate is, of course, a factor that is outwith your control. However, you could look out for cold snaps in future and take steps to protect plants when a cold night is forecast. You could also plant out your tomatoes a little later to be on the safe side, or consider growing tomatoes undercover in a greenhouse or polytunnel. If sudden temperature changes are not to blame, the flowers may have dropped off before pollination could occur because you did not provide your plants with enough water. Nutrient Imbalance They may also have dropped off because there was a nutrient imbalance. Remember, all plants need nitrogen, phosphorus and potassium, as well as a range of micro-nutrients. Too little nitrogen, or too little potassium, can both cause flowers to drop off. Too much nitrogen can also be a problem: if you add too much nitrogen, especially in the form of synthetic fertilisers, the plant may focus on foliage growth at the expense of flowers and fruits. Pests Rarely, insects may have damaged the flowers and caused them to fall before pollination could take place. So keep your eyes peeled and be on the lookout for pests in your garden. Poor Pollination Primary Indicator: Flowers Never Setting Fruit Bumblebee pollination Another reason that flowers can drop off rather than setting fruit is that pollination did not take place, or there was poor pollination. Tomatoes are typically wind-pollinated and are also sometimes pollinated by bees and other insects. Ensuring good fruit set involves making sure that there is good airflow and ventilation around the plants – especially those which are grown undercover. Fruit set should be better if you always make sure that there are plenty of insect pollinators around. Manual Pollination If you are growing tomatoes undercover, then where poor pollination is a consistent problem, you can consider giving nature a helping hand by pollinating your tomato plants by hand. You can vibrate open flowers from behind with a device like an electric toothbrush, and gently blow to release and disperse the pollen, or you can use a cotton bud to transfer collected pollen to the end of the flower stigma. Easier techniques to improve results also include simply improving the airflow/ventilation where tomatoes are being grown. And ensuring that there are plenty of pollinators around through companion planting and generally making sure you have an insect-friendly garden. Nutrient Imbalance Primary Indicator: Poor Fruit Set Blossom end rot If some flowers form fruits successfully, but fruit set is poor, then this, once again, may be a problem with nutrient imbalance. If you see only a few small and tasteless tomatoes forming on your tomato plants, this could be due to a lack of fertility. There may also, again, be excessive nitrogen in the soil, or you may have fed plants with too nitrogen-rich a feed. If there are some fruits forming, but fruit set is poor, and fruits do not develop properly (or drop off) this could also be a problem with a lack of potassium. Be sure to feed tomatoes with a potash rich feed (such as comfrey tea, for example) as the flowers and fruits begin to form. Blossom end rot (brown patches on the base of fruits) could also denote a lack of calcium, or indicate that pH is low and the plant cannot absorb sufficient calcium from the soil. “More often, the cause of blossom end rot is inconsistent watering, as dry or waterlogged soil will inhibit the plant’s uptake of nutrients,” shares Horticultural Consultant Dan Ori. “Regular, appropriate watering and feeding during flower and fruit formation will normally be all that’s needed to prevent blossom end rot if you are planting in fresh compost each year.”
Learn more
Sungold Tomatoes Were First Introduced In The 1990's - They Have Their Pros And Cons
IN THIS GUIDE Overview ‘Sungold’ Variety Pros ‘Sungold’ Variety Cons How To Grow ‘Sungold’ ‘Sungold’ Plant Care Harvesting Sungold Tomatoes References Sungold Tomatoes are an extremely popular tomato variety to grow in UK gardens. Sungold tomatoes are a type of orange cherry tomato – an F1 hybrid variety which is by far the most popular variety of its type to grow in UK gardens. This variety was developed by a Japanese breeder – Tokita Seed Company.1 It was introduced to gardeners in the UK in the early 1990s and has become a very popular tomato to grow. Overview Botanical Name Solanum lycopersicum ‘Sungold‘ Common Name(s) Sungold Tomato Plant Type Fruit Native Area Cultivated Hardiness Rating H1C Foliage Vines with green serrated leaves Flowers Yellow flowers which bear fruit When To Sow January, February, March, April Plant Out May, June Flowering Months June, July, August, September, October Harvesting Months August, September, October When To Prune July, August, September The parent plants for this hybrid are a proprietary and closely guarded secret – but there is some speculation that one of the parents of ‘Sungold’ is the famous Brandywine heirloom tomato variety, which is considered to be one of the best beefsteak tomatoes to grow. ‘Sungold’ Variety Pros Without a doubt, the main reason that so many people choose to grow this tomato variety in their gardens is its taste. It is a particularly sweet tomato, prized for its delicious flavour: It has a particularly high Brix (sweetness) rating of 9.3 and is considered to be one of the sweetest of all tomatoes.2 It is great for salads, and even for eating on its own, straight from the garden as a sweet treat. Kids tend to love them, even when other tomatoes are not for them. This variety has received a Royal Horticultural Society Award of Garden Merit.3 It is pretty reliable and regularly produces good yields of roughly 20-25 fruits per truss and 100-120 tomatoes per plant. They can be grown outdoors, or in a greenhouse or polytunnel and these plants can be attractive as well as productive. Their bright golden, orange-yellow fruits can also look great in your garden. ‘Sungold’ Variety Cons One of the main downsides to this tomato variety is that it is an F1 hybrid – this means that it will not come true to type from seed: If you want to save your own seeds from your tomato plants to sow next year, then you will have to choose an heirloom or heritage variety. There are a number of other yellow-fruited heritage cherry tomato varieties to choose from – ‘Galina’, ‘Gold Nugget’ and ‘Golden Sunruse’ are a few alternatives to consider. One other thing to note is that the skins on the fruits of this tomato are thin, and can split easily, though this is not usually an issue as you will likely want to eat your tomatoes right away, as soon as they are ripe. Like other tomato varieties, ‘Sungold’ can be susceptible to certain pests and diseases. If grown as a bush-type tomato, the foliage on this variety can become very crowded and this means that fungal infections may be more likely. ‘Sungold’ is best grown as a cordon, which does mean that you will have to spend some time thinking about support. How To Grow ‘Sungold’ Since ‘Sungold’ is such a popular option, you should have no difficulty in sourcing your tomato seeds or plants. These are common at garden centres and easy to find online. Just make sure that you buy your seeds or plants from a reputable and certified source, so you get what you expect, and do not import problem pests or diseases into your garden. Where To Grow As mentioned above, Sungold tomatoes can be grown in a greenhouse or polytunnel, or outdoors. Like other tomatoes, they need moist yet free-draining, fertile soil, and as much sun and warmth as possible. Since this is a cordon variety of cherry tomato, one important consideration when choosing a location to grow these tomatoes is how you will provide the necessary support. Cordon tomatoes must usually be trained up wires, strings or canes, with a single leader, rather than being allowed to bush out – side shoots will be removed. One interesting thing to consider is that these can also be grown in containers, and even grown in hanging containers upside down. Growing From Seed Sungold tomatoes are best sown indoors, before the last frost date in your area. I started mine last year at the end of February, then potted up and hardened off before planting out into the garden once the weather had warmed, sometime in mid-May where I live. “The most common risk to tomatoes grown outside is late blight which infects plants by wind-borne fungal spores later in the growing season and can quickly kill plants and ruin the crop,” shares Roy Nicol, a Horticultural Consultant. “However, by starting them early in this way, it can often be avoided, especially when supported by good hygiene and rotation practices.” My harvest was exceptional (as you can see in some of my images below) so I would absolutely stick to a similar timeline again in future – though it is sensible to base your decisions on the weather patterns at the time. Planting Out When planting out, you should bury the plants in the soil a little deeper than the level that they were at in their previous pot, burying more of the stem. This encourages new roots to form on the stem that is now below the ground and leads to a healthier, bigger and stronger root system, and better yields. Before planting, make sure that you have your cordon supports in place. “I find by far the easiest method of supporting cordon tomatoes is using strong twine (5mm) tied around the base of the young plant at one end and to the top of the greenhouse or trellis if grown outside,” adds Roy. “As the plant grows and the side shoots are pinched out, the main stem is simply twisted around the twine. This supports stems bearing long trusses of fruit very well.” If you try to place these after planting, you risk damaging the young plants or their root systems. ‘Sungold’ Plant Care Make sure that you keep Sungold tomatoes well-watered throughout the growing season. Try also to ensure that you always water the soil at the base of the plant, where the water is needed – not the foliage. Damp foliage can increase the risk of fungal infections taking hold, and may cause sunscald or other damage to your plants. Fertilisation is crucial for best results, and you should always choose organic options. Mulch well around your Sungold tomato plants with organic mulch (comfrey leaves work well). Also feed with a potassium-rich liquid feed every couple of weeks once the flowers and then fruits begin to form. Again, comfrey is a good option – I find that fertilising tomatoes with a comfrey tea works well. For highest yields, it is also a good idea to think about companion planting – basil is one plant that is always an excellent companion plant for tomatoes. A range of other aromatic herbs can also be hugely beneficial – flowers like marigolds, borage etc. can be excellent for drawing in pollinators to your vegetable garden and aiding in pest control. Basil and Sungold companion planting If you are growing under cover then you should try to make sure that there is always access for pollinators during the crucial period. If there is a lack of pollinators, you may wish to take matters into your own hands to ensure good pollination. Harvesting Sungold Tomatoes If you have successfully reared and cordoned your Sungold tomato plants then you should be able to expect to harvest your first tomatoes around the beginning of August; then over the next couple of months. Unfortunately, ‘Sungold’ are not one of the tomato varieties which will ripen up well indoors when picked before maturity – so make sure you let them ripen fully on the vine. If you grow them well and in the right location, Sungold tomatoes should be a treat for you and your family. While as a cordon type, they might not always be the easiest type of tomato to grow, they can certainly deliver good yields of delicious fruits when handled correctly. References 1. Sungold, F1 Hybrid. (2023, August 17). Worldtomatosociety. Retrieved October 2, 2023, from https://worldtomatosociety.com/tomatoes/sungold-f1-hybrid/#:~:text=%27SunGold%20F1%20Hybrid%27%20was%20developed,and%20liked%20%27Brandywine%27%20tomato 2. RHS top 10 cherry tomatoes with AGM status for your garden. (n.d.). Royal Horticultural Society. Retrieved March 27, 2023, from https://www.rhs.org.uk/plants/articles/graham-rice/edibles/10-cherry-tomatoes 3. Tomatoes: RHS Award of Garden Merit. (2011). Royal Horticultural Society. Retrieved March 27, 2023, from https://www.rhs.org.uk/plants/pdfs/agm-lists/agmtomatoes.pdf
Learn more
Damsons Are Often Overlooked - Why You Should Grow This Fruit Tree In Your Garden
IN THIS GUIDE Overview How To Grow Damsons Damson Tree Care Harvesting Common Problems References Damsons are the purple gems of top fruit, not dissimilar to plums, but with smaller and more oval-shaped fruits. The damson trees upon which the fruit is grown produce a wonderful blossom in the spring, with the fruits being ready to harvest late summer to early autumn. Damson trees take a long time to mature and produce a harvest, but when they do it is so worth it. Overview Botanical Name Prunus insititia Common Name(s) Damson Plant Type Fruit Tree Native Area Origins Unknown Hardiness Rating H5/H6 Foliage Deciduous Flowers White spring blossoms When To Plant January, February, March, November, December Flowering Months April Harvesting Months August, September, October When To Prune June, July Damsons, or Prunus insititia, are small, purple-coloured stony fruits grown here in the United Kingdom for their culinary uses and spring blossom. They are often, rather sadly overlooked by the common plum and are grown on small trees and crop only once a year in late summer to early autumn. Commonly grown varieties include Farleigh Damson AGM, Shropshire Damson and ‘Merryweather’ (pictured above). How To Grow Damsons Damsons are produced on trees and ready to harvest from August to October in the UK. They will come true from a saved stone, but you could be waiting many years for the tree to mature and bear fruit. Most damsons are self-fertile and do not require another nearby. Damson trees are readily available from online fruit tree suppliers and most often purchased as a bare root tree, grafted onto a specific rootstock to control its growth. Bare root simply means that it comes with no soil around its roots and is thus easier and cheaper to transport. Potted trees can be available but at an added cost. The fruit tree planting season here in the UK is between November and March, when the trees are dormant. Where To Grow Damson trees are most commonly planted directly in the ground. However, they can be available grown on a dwarf ‘pixie’ rootstock that can be grown successfully in a large pot or container. Tree shapes can include, standard, half-standard and dwarf – some specialist fruit growers even offer damsons as columns, step overs or even fan trained ready to be grown against a wall. The rootstock they are grown on decides their mature height and spread so it is wise to check this before purchasing, as there is nothing more frustrating than the fruit being out of reach. Damson trees are happiest in full sun and a relatively sheltered position; south or west-facing is ideal. Planting Planting a bare root tree is no more difficult than planting a root-balled tree. Ideally, a bare root tree should be planted swiftly on arrival to avoid it drying out. However, this may not be possible due to the ground being frozen or covered in snow; if this is the case store the tree with the polythene around its roots in a cool place like a garage or shed. The main thing is not to let the root system dry out and so avoid putting it anywhere near a heat source. To plant: Dig a hole at least as deep as the roots and up to twice as wide. If the soil is hard break up the base and sides of the hole with a garden fork. Drive in the tree stake close to where the main stem will be. Add some fertiliser and lower the tree into the hole, gently spread out the roots and make sure that it is planted at the same depth as it was previously. Backfill around the roots so the soil is level with the surrounding soil, gently press the soil down to eliminate any air gaps around the roots. Water well and top up the soil if it subsides. If planting against a wall, it is good to be aware that the adjacent area is often very dry, so it is recommended to plant the tree approximately 30-40cm away from the wall. Damson Tree Care Watering Newly planted trees need watering for the first 2 years, especially during the spring and summer. Water to the base of the tree, slowly so it can be absorbed. Unless you are in an urban area place a tree guard around the stem to protect the tree from rabbits and deer as they love to eat the bark. Tie in the tree to the stake with a suitable rubber tree tie to help protect it and keep it vertical in strong winds. The stake and tie can be removed once established, usually after 2 years. Pruning Damsons are classed in RHS pruning group 1 and require annual pruning in the spring or early summer.1 It is important not to prune a damson during the winter as this can make them susceptible to silver leaf disease. Pruning methods usually depend on their form and habit. Harvesting Damson blossom signals that spring has arrived – their blossom is a wonderful sight with single, small white flowers. Damsons are reliable croppers producing a bountiful harvest for years to come, unless a late frost damages the blossom. If using the fruits for cooking or making jam it is best to wait until the fruits are soft to the touch and a deep purple, usually from August onwards. If you plan to make gin with them, then the fruits can be picked slightly earlier when slightly firm. Common Problems Aphids The two most common types of aphids that are attracted to damson trees are leaf-curing and mealy plum aphids. The leaf-curling aphid affects the foliage during spring leading to leaf distortion and the mealy plum aphid which although does not distort the foliage, leaves a sticky honey dew allowing sooty mould to grow. Check the trees regularly from spring onwards as once any leaves have been distorted by the leaf-curling aphid there is little that can be done. Non-pesticidal control can include encouraging predators such as ladybirds, hoverflies and parasitoid wasps, as well as squishing by hand. Pesticidal controls can include using a plant oil wash in winter, fatty acid and oil sprays and insecticides if infestations are severe. Brown Scale Brown scale are insects that are found on the woody parts of damson trees. Small infestations can be tolerated with minimal consequences, but if large infestations occur, they can lead to decreased vigour and growth. Controls for brown scale are the same as for aphids as above. Plum Moth The plum moth can affect damson trees and can lead to caterpillars eating the damson fruit. The caterpillars are pale pink in colour and are small, only 1cm long. Usually only the first fruits are affected and ideally should be tolerated as only a small proportion of the crop are afflicted. Non-pesticidal approaches could include encouraging natural predators. Pheromone traps that entice the males can be hung in the tree in May, these do not control the numbers but can give a good indication if further action is needed.2 Organic insecticides with natural pyrethrin as the main ingredient can give effective, but short-lived control. For more persistent infections an insecticide such as deltamethrin or cypermethrin may be applied. It is important to note that trees should not be sprayed whilst in flower to avoid any danger to pollinators. “One good organic control for many damson pests and diseases is to collect affected fruits and leaves as soon as you notice them,” adds Dan Ori, a Master Horticulturist. “If you don’t want to have a fire to burn these leaves, I suggest adding them to your household waste or taking them to your local council waste recycling centre and disposing of them in the green waste. “It is important not to try and compost it at home as you will be unlikely to build up the temperatures to kill the pests and diseases that council composting will.” References 1. Shrubs and trees: light pruning. (n.d.). Royal Horticultural Society. Retrieved March 14, 2023, from https://www.rhs.org.uk/plants/types/trees/trees-shrubs-light-pruning 2. Pheromone trapping. (2022, February 14). Forest Research. Retrieved March 14, 2023, from https://www.forestresearch.gov.uk/tools-and-resources/fthr/pest-and-disease-resources/oak-processionary-moth-thaumetopoea-processionea/opm-manual-9-pheromone-trapping/
Learn more
How To Create An Espalier Fruit Tree Screen, With Advice From A Forest Gardener
IN THIS GUIDE What Is An Espalier Fruit Tree Screen? Positioning A Fruit Tree Screen Choosing Your Fruit Trees Preparing & Planting Espalier Fruit Trees 1) Choose A Structure 2) Install Your Framework 3) Prepare A Planting Bed 4) Plant Your Fruit Tree(s) 5) Tie Side Branches Pruning Espaliered Fruit Trees References An espalier fruit tree screen can be a great way to grow fruit in your small-space garden. It can also help you improve privacy, create a windbreak, or screen an ugly wall or fence or an unsightly view. Espalier trees may take a little more maintenance than standard trees, but will take up less space, and often cast less shade, than fruit trees in other forms. Their simple, flat form can also make it easier for you to harvest the fruit from your trees. Read on to discover all about these screens and how to make one yourself. What Is An Espalier Fruit Tree Screen? The term ‘espalier’ is a French word, which means ‘something shoulder support’.1Definition of espalier. (n.d.). In www.dictionary.com. Retrieved March 17, 2023, from https://www.dictionary.com/browse/espalier Originally, the word was used to refer to the framework against which trees or plants were trained, but it has now come to refer to both the structure and the plants themselves. Any fruit tree that is trained to grow flat against a wall, fence or other support structure can be referred to as an espalier fruit tree. A pleached fruit tree is a related concept – this is also all about growing fruit trees on a flat plane. But with pleached trees, the horizontal branches start higher up the trunk – forming a kind of raised screen that can work very well to improve privacy when positioned in front of a lower wall or fence. Horizontal branches eventually grow together to create a single form, which can be great as a summer privacy screen. Positioning A Fruit Tree Screen An espalier fruit tree, or multiple trees, can be placed up against a wall or fence. The orientation of the wall or fence is important because it will determine which fruit trees can successfully be grown. South or west-facing structures are sunnier and will allow a wider range of fruit trees to be grown in this way – but there are also fruit trees that are suitable for growing against shadier east-facing or even north-facing walls. Another interesting thing to consider is that espalier fruit trees don’t just have to be restricted to the outer edges of your garden. By erecting a trellis as support, or a series of sturdy posts to hold the supporting wires, you can potentially create an espalier fruit tree screen to separate one part of your garden from another – to hide recycling bins, or provide privacy for a patio or seating area, for example, or to create a series of garden rooms. You might think that placing an espaliered fruit tree screen across your garden would make it feel smaller. But sometimes, partitioning your garden can have the opposite effect and actually make it feel bigger when placed in the right position. Just be sure to think about the shade that it will cast, and make sure it will not have a detrimental effect on other plants you are growing or wish to grow. Choosing Your Fruit Trees Most fruit trees commonly grown in the UK can be espaliered to grow flat against a wall, trellis or fence. However, if you are trying to create an espalier fruit tree screen, it is important to choose the right fruit tree or trees for the location. Trees that will do best on a sunny, south-facing wall include: Apricots Nectarines Peaches On any south, west or east-facing wall, you will usually be able to grow: Most Apples Damsons Most Pears Most Plums Sweet cherries And on a shadier, north-facing structure you can grow: Cooking apples or crab apples (‘James Grieve’ is one dessert and cooking apple that can cope very well with shade) Sour cherries (‘Morello’, ‘Nabella’) Some plums (‘Czar’, etc.) A few cooking pears (‘Catillac’, etc.) Typically, to create an integrated screen of trees, the trees you choose should be positioned around 3m apart. Preparing & Planting Espalier Fruit Trees There are two options if you would like to create an espalier fruit tree screen. The first option is to purchase maiden whips and train these yourself into a flat form. By far the easier option, however – and the most common – is to purchase young trees which have already been trained into this form. Ready trained trees already have branches which have been trained horizontally on their side of the main trunk. You can buy these as bare-root specimens over the winter months, or buy pot-grown fruit trees from garden centres throughout the year. Usually, pre-trained espalier fruit trees have two layers of horizontal branches, and will quickly grow to create three or four. To prepare your espalier fruit tree screen: 1) Choose A Structure Choose your existing wall or fence, or erect a new trellis support. 2) Install Your Framework Install a framework of around 4 horizontal wires, which match the distance between the horizontal branches on the tree you have chosen. Secure these horizontal wires firmly to the structure, using eye bolts or similar. 3) Prepare A Planting Bed Prepare a bed (or place large containers) at the base of the structure, a little out from the base to avoid any rain shadow. Dig holes for your fruit trees, around 15cm out from the structure (if growing in the ground). Or place your containers in the same position. 4) Plant Your Fruit Tree(s) Plant your fruit trees, making sure that they sit at the same level in the soil or growing medium as that at which they were originally planted. Water well, and firm the soil or growing medium well around the trees. Mulch well with compost/well-rotted manure or another organic material. 5) Tie Side Branches Use twine to tie side branches at several places onto the horizontal wires you have placed. If possible use natural twine rather than plastic for environmental reasons – hemp/flax twine is one good option to consider for an eco-friendly garden. “There are now many natural twines to choose from and there are thicker twines now available that are perfect for tying in larger branches,” adds Master Horticulturist Colin Skelly. “These will last 2-3 years and can be checked during pruning to see if they need replacing. “Alternatively, leather strips also make a long-lasting alternative.” Pruning Espaliered Fruit Trees The main job when creating and maintaining an espalier fruit tree screen is pruning. After planting your espalier fruit tree, leave the main stem to grow through its first spring/summer. The following winter, prune the central shoot down to the next support wire. Leave three healthy buds to form your central leader, and two side branches, which can then be tied into this next support wire. Repeat this process the following year, so branches can be tied into the upper support wire. Between July and September, maintenance pruning involves pruning the shoots growing from horizontal branches. Leave just 3-4 leaves on each. Shoots growing from the main stem should also be shortened to around 3 leaves. Over time, continue to tie down new growth at the end of horizontal branches to the wires on your support, to stop them from growing vertically. Continue to prune, water and provide nutrients for your espalier fruit trees over time and you should be able to keep them in check, healthy and productive. They should provide a screen while the leaves are on the trees, and an attractive – though bare – architectural form in winter. And they should provide plenty of fruit for you and your family, even in the smallest of spaces. If you want to make the most of all the space that is available to you, then choosing trained trees can certainly be an interesting option to consider for your garden. And remember, the trees won’t just provide an edible yield – they can also deliver a range of other benefits and can improve the amenity in your garden.
Learn more
From Air Drying To Dehydrating: 3 Options To Dry And Preserve Chillies At Home
IN THIS GUIDE Harvesting & Storage How To Dry Chillies: Three Methods Air Drying Oven Drying Electric Dehydrating Uses For Dried Chillies Spice Spice, Baby Growing chillies is a popular pastime, and for good reason. These plants are easy to get hold of, don’t require any specialist care to grow big and strong and, most importantly, they provide an ongoing supply of pepper fruits to use in your cooking. If you’ve decided to try your hand at growing chillies after finding your garden or kitchen lacking spice, you may be wondering how best to dry them – in this article we’ll give you a few answers to that question. The tips in this article are good for all kinds of chilli, so whether you’re growing a regular old chilli plant from your local supermarket or a special-bought Carolina Reaper plant, you’re in good hands. Harvesting & Storage First up let’s sing the praises of the humble chilli. Growing chillies at home is an easy way to ensure you always have something spicy to hand. While the plants don’t put out fruit year-round, there are many ways to preserve them to keep them usable until you need them. Drying is one option, as we’ll see shortly. You can also freeze chillies either to defrost before you need them, or to plonk straight into a pot of chilli while it cooks, shares Master Horticulturist Colin Skelly: “Preserving is essential in the UK to keep some of your harvests available during the winter months. “I’m a great fan of freezing soft fruit but now I’ll try freezing my chillies, whilst making sure to label well when putting them into the freezer! “There’s also pickling, which is ideal for the strong flavour of chillies.” Note that if you go for the defrosting option they’ll go a little soggy, but they’re still good to eat. How To Dry Chillies: Three Methods Drying chillies retains their spice and flavour while extending their life, and is a great way to keep your supply fresh and usable. There are three main ways to dry them, which we’ll go through in detail in the following section. They are – Air dry your chillies Dry your chillies in an oven Using a dehydrator to dry your chillies Let’s take a look at each one. Air Drying This is a popular method in Italy, quite a bit warmer than the UK..! To effectively air dry chillies you need to find a sweet spot in temperature: too hot and they’ll get crispy, too cool and they’ll go mouldy rather than drying. Received wisdom is that this temperature is around 25°C, and the observant amongst you will notice that this is potentially prohibitive to us UK gardeners! Don’t write this method off just yet, though. If you have a polytunnel or greenhouse, the temperature inside will be a few degrees higher than outdoors: enough to make air-drying viable for a little more of the year. To air-dry your chillies simply place them on a rack somewhere warm enough and leave them out until they’re dry. Some people recommend avoiding full sun, but this seems to be more preference than compulsory. You can also string thread through the tops of your chilli peppers then hang them in bunches, like in the photo above. Or, finally, you can uproot your entire chilli plant and hang it upside down from the roots! Obviously this hinders its ability to grow again next year. When air drying chillies make sure to turn them occasionally to ensure all angles get their share of sunlight. Oven Drying Drying your chillies in the oven is quicker than air drying, but it requires more energy input. If you’re keen to keep your gardening activities as environmentally sound as possible, bear this in mind. To dry in the oven simply pop your chillies on a tray, making sure they’re not too cramped, and leave in an oven heated to between 100-125°C. They’ll take at least 6 hours to dry, maybe longer. Check them by hand occasionally: if they’re crunchy and they begin to crumble under pressure, they’re ready to go. Take them out, leave to cool, then put the dried chillies in a container for use later on. We’ve heard stories of the kitchen air getting quite spicy when cooking and drying chillies, so be prepared for this outcome. You don’t want to accidentally mustard gas your housemates or guests! Electric Dehydrating Dehydrators are appliances designed to remove moisture from whatever you put inside them. If you’re looking for a sure-fire way to dry your chillies, this is it. Using a dehydrator is easy: you just slice your chillies into chunks small enough to fit inside, put them in, turn it on, and wait until they’re dry. The end result here is the same as the other methods, and unless you already own a dehydrator it’s probably not the most cost-effective option. If you’re planning to grow and dry chillies and other veggies fairly often, though, a dehydrator can make quite a good investment. Uses For Dried Chillies So you’ve got a container full of dried chillies… What now? The most common option is probably to just drop a dried chilli or two to a pot of whatever you’re cooking, whether it’s chilli, pasta sauce, stew, or anything else. This is a great way to impart the spice and flavour to your recipe, while still having the option to remove the chilli once the desired level is hit. You can also grind up dried chillies, whether in a pestle and mortar, with a hand blender, or even in a Nutribullet or similar. The resulting powder will capture the essences of the chillies’ flavour and spice, giving you a spicy and flavourful ingredient to use in all manner of cooking. Sprinkle a pinch onto some cheese on toast to give it a little kick, for example. Or work a couple of teaspoons through a ragu to make it particularly frisky. Or if you don’t want the end result to be quite as fine as a powder, stop grinding a little sooner and you’ll have chilli flakes. These are just as versatile: great on pizza, great in marinades, and much much more. Spice Spice, Baby Growing chillies is one of our top gardening recommendations. The plants are attractive whether bearing fruit or not, and make a good conversation piece. Your friends will be interested to know which varieties you’re growing, how hot they are, and so on. You can even dare people to eat them if you want to liven up your dinner parties. Then, once the chillies have borne fruit, you can deploy their spice and flavour in myriad dishes, whether fresh or dried. And if you go for the latter option, there are plenty of ways to get your chillies dried without them going mouldy. We hope this guide has been useful, and that your chilli-flavoured cooking exploits bring you only joy.
Learn more
Growing Tomatillos: The 'Husk Tomato' With Tangy Fruits And Sprawling Foliage
IN THIS GUIDE Overview Why Grow Tomatillo? How To Grow Tomatillo Tomatillo Plant Care Harvesting Tomatillo References If you are looking for something different to grow in your garden, tomatillo could be something to consider. Fans of Mexican cuisine may already be familiar with these fruits, which are used in a range of recipes, but particularly for salsa verde. The tomatillo is a great plant to grow along with tomatoes at home if you want to make your own salsas and sauces. Overview Botanical Name Physalis ixocarpa Common Name(s) Tomatillo Plant Type Fruit Native Area Mexico & Central America Foliage Deciduous Flowers Small flowers followed by lantern-shaped fruits in papery husks When To Sow March, April, May Harvesting Months August, September The Tomatillo, Physalis ixocarpa, is a relative of the tomato, pepper and aubergine (Solanaceae), and is more closely related to the Cape Gooseberry, Physalis peruviana. It is sometimes also known as the husk tomato or Mexican green tomato. Tomatillos come from Mexico and Central America and have been an important food crop in that region for thousands of years.1 Now, they are cultivated and eaten all around the world – and they can grow well in UK gardens. They are sprawling plants which will grow up to around 1-1.2m in height, with a bushy, floppy form. Small, insect-pollinated flowers form, and tomatillo fruits emerge, surrounded by a papery husk. You will need to grow two plants for proper pollination. The fruits are usually green (though some purple varieties are also available) – they will usually grow no larger than around golf-ball size. Why Grow Tomatillo? The primary reason to grow tomatillo is for their edible fruits, and the opportunity to enjoy them in salsas and a range of other recipes. Harvested while green, the fruits have a tangy taste, which has been described as a combination of tomatoes and limes. “Once you’ve grown them, you’ll keep growing them,” says Colin Skelly, a Horticultural Consultant. “I love the fruits in a summer salad, as they provide a tangy burst of flavour. They are also great for a small vegetable garden due to the large number of fruits they produce in a small amount of space.” Some find them bitter when raw, though the flavour is said by most to be more appealing when the fruits are cooked. Another thing to note is that, while few would consider them a replacement for tomatoes, they can help in gardens where tomato pests and diseases are a problem. They could be at least a partial substitute for tomatoes that don’t make it through, since they are far more resilient crops and are resistant to a range of tomato problems. Tomatillos produce abundantly – two plants are usually considered to provide more than enough tomatillos for a typical family. How To Grow Tomatillo Tomatillo can be grown in a greenhouse or polytunnel, or outside across much of the UK. A study by the University of Warmia found that growing under cover does positively impact (though sometimes only slightly) the size of the harvest and/or rate of maturity.2 In colder regions, it’s likely always going to be easier to grow them undercover. Tomatillos do best in full sun, in a warm, sheltered location. They prefer a moist yet free-draining, fertile soil, and are relatively drought tolerant once established. If you are growing undercover, it is very important to make sure that there is access for the insects required for pollination. Unlike other crops like tomatoes and squash, I have found the tomatillo does not seem to respond well to manual pollination, so you need to make sure there are plenty of insects around in order to achieve a good fruit set. Sowing Tomatillo Seeds Tomatillo seeds should be sown in March or April, ideally in an unheated greenhouse or polytunnel, since nighttime temperature fluctuations are said to aid in successful germination. Germination will generally take place within a couple of weeks or so. As soon as the seeds have germinated and seedlings are large enough to handle, they should be placed into individual pots. After this, they can be placed out into their final growing positions in the garden, or potted on into larger containers for container growing – be sure to wait until all risk of frost has definitely passed in your area. Note: while tomatillos will fruit in containers, they will do better and produce much more abundantly when grown in the ground. It is crucial to make sure you get the timings right when planting out tomatillos. These are warm-season crops, and cannot tolerate even a light frost for a single night. If in doubt, err on the side of caution and plant out a little later. Tomatillo Plant Care Tomatillos require much the same care as tomato plants. Staking Like most tomatoes, tomatillos will do best when provided with some support. Tying them into a trellis, cage, or stake system can help make sure their fragile stems are not damaged by wind, and that fruits do not cause the plants to flop over, leaving fruits dangling onto the ground. It is a good idea to get support structures in place before you plant out your tomatillos, so you do not accidentally damage roots when putting support structures in place. Note however that you should not tie in tomatillos to supports right away. A natural stage of the growth of these plants involves the central stem flopping over to meet the soil. Once this happens, lateral roots are sent out, and heavy fruit-producing shoots form. It is these fruit-producing stems which can benefit from some support once fruits begin to form. Planting Out When planting out your tomatillos, do as you would with tomatoes and bury them a little deeper in the soil than they were in their previous containers. The stems that are buried below the soil should develop new roots, leading to a healthier and larger root system. This, in turn, leads to healthier and somewhat larger and more productive plants. Watering Water consistently, making sure that you deliver the water to where it is needed, at the base of the plant – do not water from above if possible. Keep soil moist but avoid overwatering, and do not let water sit around the plant roots. Mulching Mulch around the base of the plants with an organic mulch, for slow-release fertility, to suppress weeds, and to conserve moisture in the soil or growing medium. Like tomatoes, tomatillo may benefit from a mulch of comfrey leaves, for example. Feeding Feed tomatillos as you would feed tomatoes and other members of this plant family, with a potash-rich organic feed while the plants are flowering and fruiting. Comfrey tea is one organic liquid plant feed to consider making for this purpose. Tomatillos are not as heavy feeders as tomatoes, but will still grow best when provided with fertile conditions and will appreciate some feed during the summer. Plants grown in containers will typically require a feed more often than plants grown in the soil. Common Problems Unlike tomatoes, tomatillos will not benefit from pinching out the growing tip. Leave them to grow and sprawl naturally (with some support) for best results. As mentioned above, tomatillos are largely untroubled by pests and disease, so other than their basic care, they should be very easy and not at all time-consuming to grow. Harvesting Tomatillo Tomatillos are typically ready to harvest in autumn, which could be anything from 65-100+ days after seedlings were transplanted. Harvest when the fruit has mostly filled the papery husk. It is best, in order to protect the fruits, to keep them within their husks – however, some people prefer to wait until the husks just start to split open before harvesting. Make sure that you harvest all ripe fruits, since those that fall to the ground may well emerge as new seedlings next year. In optimal conditions, self-seeding can be prolific. As soon as the plants begin to die, remove any remaining fruits and place them on a sunny windowsill where they will continue to ripen a little more. Alternatively, you can uproot the whole plant and hang it upside down in a cool location (such as a garage or shed) for the remaining fruits to ripen. The fruits can be used in the kitchen right away, but will also store for several months inside their husks, to be used later. Fruits with split husks can be stored at room temperature for a week or so, or in the fridge for up to around three weeks. Husk-free fruits can also be frozen for later use, or canned/bottled as part of canned salsa recipes. References 1. Tomatillo. (n.d.). Retrieved March 22, 2023, from https://civi.wiscweb.wisc.edu/wp-content/uploads/sites/822/2019/07/tomatillo.pdf 2. Majkowska-Gadomska, J., Mikulewicz, E., & Francke, A. (2021). Effects of Plant Covers and Mulching on the Biometric Parameters, Yield and Nutritional Value of Tomatillos (Physalis ixocarpa Brot. Ex Hornem.). Agronomy, 11(9), 1742. https://doi.org/10.3390/agronomy11091742
Learn more
The Kiwi Plant: How To Grow Young Vines As A Source Of Delicious Garden Fruit
IN THIS GUIDE Overview Growing Considerations Habitat & Growing Conditions How To Grow Kiwis Harvesting Kiwis Common Problems Common Varieties References Matching the rise in popularity of the Kiwi fruit over the past few decades is the recent ascendancy of Kiwi as a garden plant. These come in a surprising array of fruiting vines which can be grown from coast to coast in the UK. Admittedly, maintaining Kiwi vines requires time and skill but think of the reward: a bounty of garden-grown luscious Kiwis. Kiwis are often thought of as a fruit native to New Zealand; an exotic fruit with not very many types. These are both misconceptions. The types of Kiwis that we commonly buy at the store are native to China and were introduced to New Zealand as late as 1904.1 It is not exotic as so many hybrids and cultivars exist that they can be grown in hardiness zones from H3 through to H7. The fuzzy-skinned green Kiwi that we know and love so well is Actinidia deliciosa. It originates in the southeastern coastal regions of China.2 Overview Botanical Name Actinidia Common Name(s) Kiwi Plant Type Fruit / Climber Native Area China Hardiness Rating H3-H7 Foliage Deciduous Flowers Creamy white flowers When To Sow March, April, May Flowering Months June Harvesting Months August, September When To Prune January, February, July The Actinidia genus contains about 60 species, plus many hybrids and cultivars of the prime fruiting species.3 Comprising of shrubs and vines, all of them bear fruit from the size of a large grape to the relatively large fuzzy Kiwi. A Kiwi Plantation in New Zealand’s Bay of Plenty The vines that bear the smaller fruit are hardy – some are very hardy – and these are native to north-eastern Russia. Growing Considerations The ‘Fuzzy Kiwi’ fruit that most of us are familiar with is that of the ‘tender Kiwi,’ usually Actinidia deliciosa, sometimes Actinidia chinensis. Kiwi vines are traditionally dioecious – they bear either male or female flowers.4 Only the female vines bear fruit whereas male vines are necessary for pollination. The vast majority of commercial-named cultivars are either male or female though a few occur in both male and female forms, though during the past couple of decades, some reliable monoecious self-fertile cultivars have been developed. Flowers are white or creamy with the male ones having very prominent yellow anthers. They are more or less bowl-shaped with a full look about them. All kiwi flowers are pleasantly fragrant with the sweetness and intensity of the fragrance varying by variety. Habitat & Growing Conditions The various species of Actinidia are native to a swath of land from India and the Himalayas arcing south-east to steamy Borneo and north-east to cold Manchuria and frigid Khabarovsk. As one might expect, these different species’ respective hardinesses span many zones. The genus includes frost-tender species that are good for RHS H3 areas (USDA Zone 8) through ‘super-hardy’ vines that are hardy right down to RHS H7 (USDA Zone 3). The species of paramount interest to us, A. deliciosa, grows wild in the south-eastern coast of China’s Zhejiang province in scrubland with soil of varying quality and where these plants are frequently exposed to stiff northeasterly winds. A. deliciosa (common kiwifruit) is hardy throughout most of the UK (RHS Zone H4). How To Grow Kiwis A few of the more popular cultivars like ‘Hayward’ and ‘Jenny’ can be found as potted plants at some of the bigger nurseries and garden centres. A more extensive selection of cultivars is available at a limited number of fruit tree specialists. These merchants are easily found online and they are your best bet for obtaining a quality vine. Young vines are supplied as potted plants and in bare root form. In addition, you can ‘get’ Kiwi vines yourself by propagating them from softwood cuttings – mid-spring is the ideal time to do so. Be aware: our plant care guidelines pertain to tender Kiwi vine varieties which are derived from A. deliciosa. You can grow these outdoors in most regions of the United Kingdom but if you live in the Scottish Highlands or a particularly cold region of northern England, you will have less trouble with a hardy Kiwi cultivar, unless you grow tender Kiwi vines in a greenhouse (though if you use traditional dioecious vines, fertilising the flowers will be a problematic chore). Soil Requirements In growing Kiwis, soil pH is not of much importance while other soil-related factors are of great importance. That said, the optimal soil pH is moderately acidic to slightly acidic; between pH 5.6 and 6.5. The soil should be laid deep and drain very well. It should be a sand-based, light, friable loam which should include chalk and may also be amended with compost but should have minimal or no clay. As any waterlogging is very detrimental to these vines, to ensure good drainage the ground may be worked into mounds or ridges into which Kiwi vines can be planted. Feeding You may work in just a little bonemeal, fishmeal, or both into the soil itself; do not ‘fertilise’ the roots with it. It will act as a slow-release fertiliser high in Phosphorous and Potassium. Exposure The site should be where the plants are sheltered but enjoy full sun. Ideally the vine should be positioned against a wall that shelters it from the north-east and leaves it with a south-westerly exposure. Spring frosts slow both flowering and fruiting. The vine can tolerate a frost of up to about -7°C; anything colder and it will likely suffer adverse effects. Vines are best planted out in early spring, two to four weeks after the last frost. Pollination If you intend to grow your Kiwis the traditional way with dioecious vines, go with one male vine and four or five female ones. These should be sited close to one another: ‘Atlas’ and ‘Hayward’ are the cultivars of choice. If you want to use a monoecious vine, which is a godsend if you have limited space or must grow your vine in a greenhouse where pollination will be next to impossible, ‘Jenny’ is a top choice for the UK; ‘Solissimo’ is an excellent alternative. Depending on the varieties and other variables, it takes two to five years, typically three, for vines to produce fruit. Watering Water regularly so that the soil is kept moist – it should not stay wet. Vines have increased water requirements soon after transplanting, when they are young, and when they are setting fruit. In wet parts of the country, established Kiwi vines may well get enough water from the rain. Support Female vines have to be grown and trained on trellises (though one ought to do so for male vines too). A Kiwi vine’s horizontal fruiting arms supported by a framework A-frame pergolas are even better as the vine is trained and opened on it in such a way that yields are boosted and harvesting is easier. Pruning For good yields the female vines – besides being adequately pollinated – need to be trained and correctly pruned. “My experience of kiwis (the vigorous cultivar ‘Jenny’) is that if they aren’t pruned annually, they will make a bid to take over your garden,” warns Horticulturist Colin Skelly. “When trained, they are an ornamental feature in their own right as well as a source of delicious fruit.” All said, it is a technical gardening endeavour that requires time and commitment. Train and prune each vine initially so that there is a single leader and about four arms or canes. (These will be refreshed about every three years.) When the leader gets to the top of the frame, pinch it to halt further growth. You should then have three or four strong lateral arms initially – these will become the first fruiting arms. Train these arms at an angle on the trellis and prune any new shoots. The aim is to have a single leader, and to maintain fruiting arms that are spaced from 50-70cm apart on the vine. The arms that are one or two years old bear the most fruit; arms bear less fruit as they age. In summers, deadhead spent flowers and thin them if the bloom is excessive. Train new shoots on the trellis to grow above and away from foliage so that they get the right start. In winters, prune the fruiting arms judiciously – prune arms that are three or more years old (provided you have a sufficient number of young fruiting arms). Maintain the correct spacing between these fruiting arms, and prune excess new shoots. Strive to keep a good balance of new shoots and one- and two-year arms. At this time, train the arms to grow above and away from the foliage. Overwintering Water the vine only now and then in winter. In winter keep an eye on the weather forecast. If a prolonged freeze or repeated frosts are expected, protect the main vine and leader right from the soil line with horticultural fleece. Feeding Every alternate year, you may mix in a touch of bonemeal, fishmeal, or both into the soil away from the roots each spring and then fertilise with nitrogen, or annually apply a little 10-10-10 slow-release fertiliser. Avoid using ‘regular’ fertiliser on Kiwi vines. Harvesting Kiwis As the flowers form into fruit – fruit set – and thereafter until the fruits are harvested, increased watering is beneficial. At this time the vine may be watered every other day. If you see an abundant setting of fruit or even abundant flowering (on the female vines, not the male vine), some thinning may be a good idea to ensure that the fruits you harvest are of the highest quality. Such thinning is dictated to a great extent by the cultivar; for example, ‘Hayward’ will benefit from it but ‘Issai’ will usually not need it. Where Kiwi in the UK is concerned, the best plan is to leave the fruit on the vine to mature (unless slugs or birds force your hand) through the autumn, aiming to pick it as late as possible. When the first ‘real’ frost is forecast, collect all the fruit. Kiwis will keep indefinitely in the fridge. If you have to ripen them, place them in a sunny spot in the kitchen or tightly wrap them in two or three layers of newspaper or cotton cloth. I would personally argue that Actinidia deliciosa – ‘Fuzzy Kiwi’ – eaten peeled and raw, is most enjoyable when the fruit (when pressed from around the peduncle attachment) does not feel at all soft, feels firm-to-hard, with about the firmness (or hardness) of a softwood branch. The flesh of such a fruit that feels raw to hand pressure will not only be just-ripe but will have a very appealing consistency that is not overly-soft or mushy but will have a bit of ‘bite’, and will be bursting with flavour – sweet, tart, and tangy all at once. Common Problems Kiwi plants are remarkably free of pests and diseases in the United Kingdom. If your garden or ground has any history of honey fungus, then you should avoid growing Kiwi as it is very susceptible to this dreadful plant disease. Other than that, the only real threat, such as it is, is from slugs. Even this will be precluded if your vine is on a sun-soaked wall or a type of trellis which cannot be navigated by these nuisance pests. Common Varieties Believe it or not, there are dozens of Kiwi varieties. In this section we present some of the most popular: A. deliciosa ‘Hayward’ A female vine that may just as well be called ‘Old Reliable’. The Kiwis that most of us have eaten and enjoyed are from this tried-and-trusted cultivar. It is by far the most abundant Kiwi cultivar in New Zealand and Italy’s plantations and is the only one used by California producers. It is not particularly high-yielding but the fruit is of top quality. The hen’s egg-sized fruit has green flesh that is sweet, tart, and tangy. You will need multiple ‘Hayward’ vines with one male vine to reap a good harvest of fruit. A. deliciosa ‘Bruno’ Has quite a misleading name, for this is a female vine. The fruit is of a dark brown colour and its ‘fuzz’ is a little bristlier than the fruits of ‘Hayward’. Compared to other female vines it is late to flower and, therefore, to fruit. While the fruit is of excellent quality this vine is also valued for being especially prolific. A. deliciosa ‘Jenny’ Renowned as a very robust climber that has particularly pretty foliage and even stems. This frost-tender vine produces fruits about the size of small eggs in mid-autumn. It is especially easy to grow as a compact, self-fertile cultivar that has proven itself. For a self-fertile vine it is comparatively high-yielding. Also, the fruit is of excellent quality as the flesh has a wonderful consistency and is on the sweet side. A. deliciosa ‘Atlas’ Considered to be the male cultivar of choice. It is a vigorous climber and produces blossoms through the summer. These creamy flowers display prominent golden-yellow stamens whose strong, sweet scent attracts bees and butterflies in droves. It pollinates all female A. deliciosa varieties. A. arguta ‘Issai’ For those UK residents who want to grow Kiwis but whose location makes growing traditional Fuzzy Kiwis a fraught undertaking. On the other hand, even if you live in Cornwall you may want to grow ‘Issai’ simply because you prefer the smaller, sweeter, non-fuzzy fruit of Hardy Kiwis. Be that as it may, this cultivar is so super-hardy that it can be grown in Norway. It is a very high-yielding vine, producing nearly a thousand fruits per season. On top of that, this is a self-fertile variety. References 1. Chinese gooseberry becomes kiwifruit. (1959, June 15). New Zealand History Online. Retrieved March 20, 2023, from https://nzhistory.govt.nz/the-chinese-gooseberry-becomes-the-kiwifruit 2. Actinidia chinensis var. deliciosa. (n.d.). Kew Royal Botanic Gardens. Retrieved March 20, 2023, from https://powo.science.kew.org/taxon/urn:lsid:ipni.org:names:60458895-2 3. Mahr, S. (n.d.-d). Kiwi fruit. Wisconsin Horticulture. Retrieved March 20, 2023, from https://hort.extension.wisc.edu/articles/kiwifruit-actinidia-spp/ 4. Gao, G., Slaughter, R., & Sherman, B. (2020, May 28). Kiwifruit and Hardy Kiwi (Kiwiberries). Ohioline. Retrieved March 20, 2023, from https://ohioline.osu.edu/factsheet/hyg-1426
Learn more


