

Growing
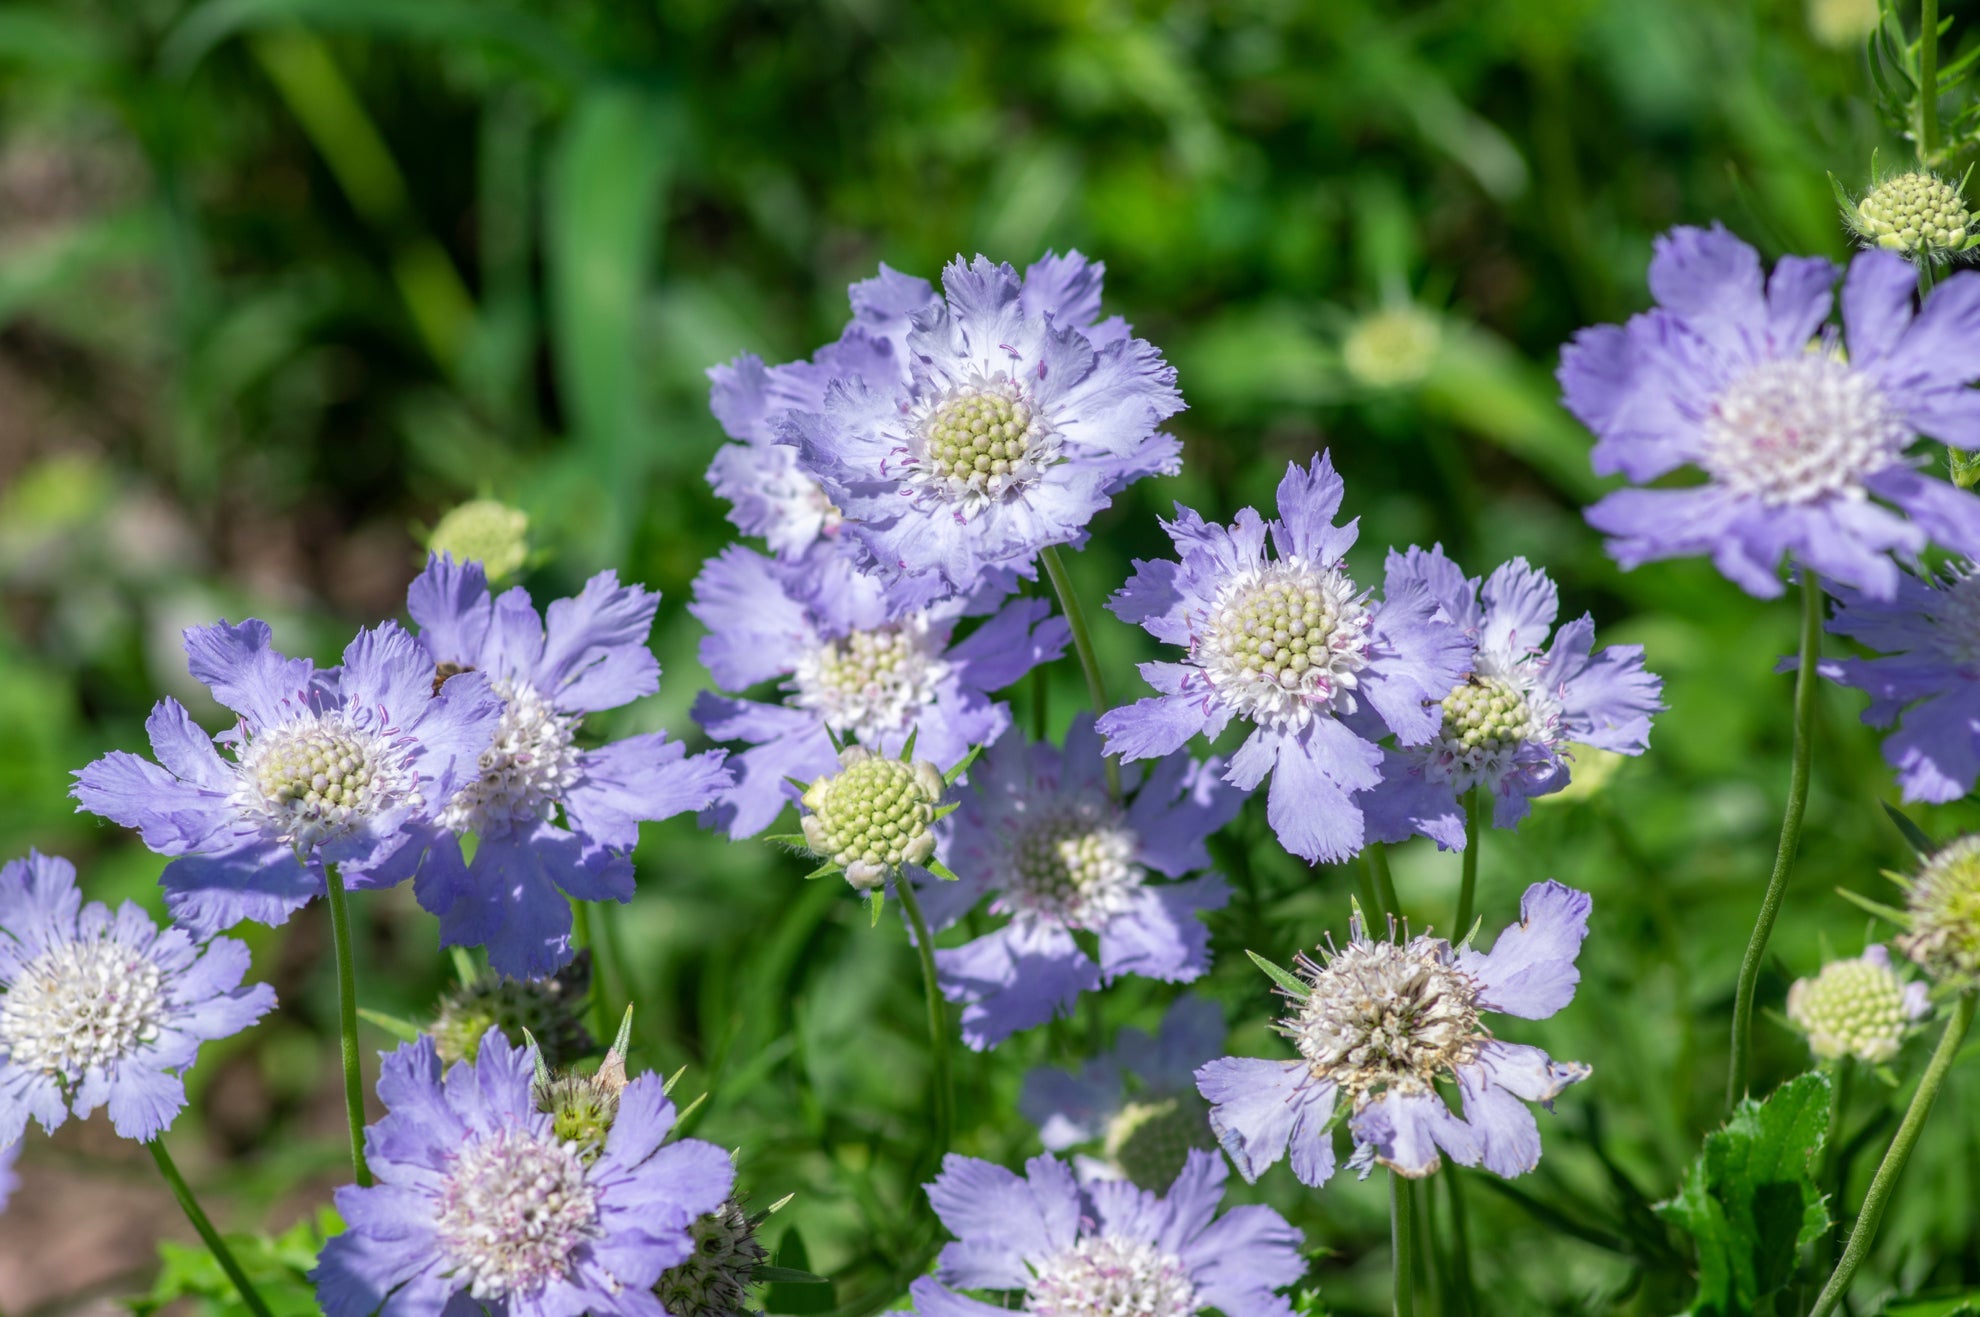

Growing Purple Perennials With These 38 Plants From Master Horticulturist Dan Ori
IN THIS GUIDE 1) Viola odorata 2) Viola cornuta 3) Lavandula angustifolia 4) Aquilegia vulgaris 5) Aquilegia ‘Purple Emperor’ 6) Verbena bonariensis 7) Streptocarpus 8) Perovskia atriplicifolia 9) Salvia verticillata 10) Salvia nemorosa 11) Leucophyllum frutescens 12) Phlox paniculata 13) Phlox subulata ‘Purple Beauty’ 14) Vinca major 15) Vinca minor 16) Crocus sativus 17) Crocus vernus 18) Calluna vulgaris 19) Erica cinerea 20) Geranium × magnificum 21) Geranium himalayense 22) Agastache foeniculum 23) Pericallis × hybrida 24) Lupinus albifrons 25) Lupinus ‘Purple Emperor’ 26) Iris germanica 27) Iris sibirica 28) Iris ‘Purple Magic’ 29) Buddleja davidii 30) Clerodendrum myricoides ‘Ugandense’ 31) Clematis viticella 32) Dianthus caryophyllus 33) Rhododendron ponticum 34) Rhododendron kaempferi 35) Oxalis triangularis 36) Trifolium pratense 37) Trifolium rubens 38) Hydrangea macrophylla References If you’re looking for a perennial that produces stunning purple flowers that will return every year, then this is the list for you. Here are thirty-eight of my favourite purple-flowering perennials that all have fantastic flowers of striking hues, ranging from pale lilac through rich purple to blackish violet. 1) Viola odorata COMMON NAME(S): sweet violet HARDINESS RATING: H6 FOLIAGE: evergreen FLOWERING SEASON(S): winter / spring SUNLIGHT: full sun / part shade I’ve begun this list with a classic purple flower that is even named after a shade of purple – the violet. Incorrectly thought of solely as annuals, sweet violet is a hardy perennial that is one of two perennial varieties in the plant’s species. Of course, there are innumerable cultivars in all shades of purple, but they are not reliable perennials. Sweet Violet flowers often show ‘rabbit ears’. “Viola odorata can be invasive or at best difficult to restrict as it spreads in a rhizomatous way (a mat of rhizome roots),” shares Master Horticulturist Dan Ori. “For this reason, it may not be suitable for some borders.” 2) Viola cornuta COMMON NAME(S): horned pansy HARDINESS RATING: H5 FOLIAGE: evergreen FLOWERING SEASON(S): spring / summer SUNLIGHT: full sun / part shade Much like sweet violet, Pyrenean violets are low-growing mat-forming evergreens with brilliant green foliage. They are only 2-3cm wide but are produced in profusion all through spring. Violets are found in various shades of purple, from mauve through bright purple to deep violet. 3) Lavandula angustifolia COMMON NAME(S): English lavender HARDINESS RATING: H5 FOLIAGE: evergreen FLOWERING SEASON(S): summer SUNLIGHT: full sun Next up is the quintessential English purple flower, the English lavender. This evergreen shrub of a bushy habit appears as a clump of upright plants when in flower, courtesy of those erect floral spikes that grow from 0.2-1m depending on the cultivar. Each spike holds numerous tiny flowers of a royal purple hue which are renowned for their fragrance. English Lavenders flower during summer. 4) Aquilegia vulgaris COMMON NAME(S): common columbine HARDINESS RATING: H7 FOLIAGE: deciduous FLOWERING SEASON(S): spring / summer SUNLIGHT: full sun / part shade With nearly 100 purple or purplish varieties to choose from, aquilegias are one of the list leaders of the purple perennials club. Popularly known as columbines, these are herbaceous deciduous perennials. For the most part, the flowers are delightfully charming, their intricate complexity only adding to their charms. This common columbine variety is fully hardy and flowers throughout spring and well into the depths of the summer months. 5) Aquilegia ‘Purple Emperor’ COMMON NAME(S): columbine ‘purple emperor’ HARDINESS RATING: H5 FOLIAGE: deciduous FLOWERING SEASON(S): spring / summer SUNLIGHT: full sun / part shade Another columbine, ‘Purple Emperor’ has inner petals of a lighter shade framed by outer sepals in a darker one. Columbines are among the few perennials that include flowers in deep, intense tones of violet, including an absolutely riveting black violet. This variety pictured above has darker flowers than that of the common columbine listed above. 6) Verbena bonariensis COMMON NAME(S): purple top / Argentinian vervain HARDINESS RATING: H4 FOLIAGE: deciduous FLOWERING SEASON(S): summer SUNLIGHT: full sun By the standards of Botanical classification, quite a variety of perennials, both deciduous and semi-evergreen, fall under the umbrella of Verbena. Though the little flowers vary in size, verbenas are all borne in big, handsome clusters and are displayed over a very long blooming season that often begins before summer and lasts until autumn. As for the tone of purple, with Verbena you get to choose your shade from pale lavender right through to deep purple. Argentinian vervain is of a pinky-purple shade and can reach up to 2.5m in height and spread. “This is a beautiful plant that is great for pollinators, but be warned, as it can spread through your garden quickly,” says Dan. “You and your neighbours may find yourselves constantly weeding Verbena bonariensis out of the random places it pops up.” 7) Streptocarpus COMMON NAME(S): cape primrose HARDINESS RATING: H1C FOLIAGE: evergreen FLOWERING SEASON(S): spring / summer / autumn SUNLIGHT: part shade If you like to mix and match your colours, cape primrose might just be the purple plant for you, as many of its varieties come in bi-coloured shades. With a hardiness rating of H1C, these plants are best grown indoors as houseplants here in the UK. Despite this, the vast majority of Streptocarpus varieties are a mere 10-50cm high and wide and produce an abundance of ravishing flowers. 8) Perovskia atriplicifolia COMMON NAME(S): Russian sage HARDINESS RATING: H5 FOLIAGE: deciduous FLOWERING SEASON(S): summer / autumn SUNLIGHT: full sun A dizzying array of over 100 salvia cultivars come in purple hues, so it’s no surprise that Russian sage is the first of 3 of my favourites on this list. This deciduous sage is one of the taller varieties and has two-toned purple flowers that make this perennial a particular favourite of mine. 9) Salvia verticillata COMMON NAME(S): whorled clary HARDINESS RATING: H5 FOLIAGE: deciduous FLOWERING SEASON(S): summer SUNLIGHT: full sun Of an upright habit, Salvia verticillata ranges from 0.5-1m in height with a narrow spread. They bear small purple flowers ranging up and down spikes or in racemes, with this variety producing frillier flowers than others in its family. 10) Salvia nemorosa COMMON NAME(S): woodland sage HARDINESS RATING: H6 FOLIAGE: evergreen FLOWERING SEASON(S): winter / spring SUNLIGHT: full sun / part shade The last salvia on this list, woodland sage bears flowers that are fragrant and pull in squadrons of bees and butterflies. Planted in drifts or beds, this plant makes a stunning sight in winter and spring, which is unusual for sage plants, which normally flower throughout the summer months. 11) Leucophyllum frutescens COMMON NAME(S): purple sage / Texas ranger / silverleaf HARDINESS RATING: H2 FOLIAGE: evergreen FLOWERING SEASON(S): spring / summer SUNLIGHT: full sun This evergreen easily grows to 1.5m in height with a similar spread, yet it is content in a large container. Its small leaves are a dull silvery greyish-green and it produces plump blooms in regular flushes, sometimes with the rains and sometimes at its own sweet will. The flowers are somewhat funnel-shaped in a vibrant shade of purple with a paler, stripy, speckled throat. When in flower, Silverleaf is a favourite of the honeybees. “Unfortunately, you are unlikely to find this plant available for sale in the UK as it requires a dry climate,” Dan shares. 12) Phlox paniculata COMMON NAME(S): perennial phlox HARDINESS RATING: H7 FOLIAGE: deciduous FLOWERING SEASON(S): summer / autumn SUNLIGHT: full sun / part shade Phlox is the answer for those who like bright purple hues. These deciduous perennials are found in quite a span of heights up to 1.5m, though even the taller ones have a narrow spread as these plants are mostly of upright habit. The perennial phlox produce lovely leaves that are oblong or lanceolate and of a soft, bright green hue. 13) Phlox subulata ‘Purple Beauty’ COMMON NAME(S): moss phlox ‘purple beauty’ HARDINESS RATING: H6 FOLIAGE: evergreen FLOWERING SEASON(S): spring / summer SUNLIGHT: full sun / part shade Although most cultivars are bright magenta-purple, the pale lilac blooms from this moss phlox variety are truly charming. The flowers are wide-open and disk-shaped, with overlapping petals and are borne in clusters for most of the summer, which is also when their fragrance wafts through the air and draws in honeybees. 14) Vinca major COMMON NAME(S): greater periwinkle HARDINESS RATING: H6 FOLIAGE: evergreen FLOWERING SEASON(S): spring / summer / autumn SUNLIGHT: full shade / full sun / part shade Whether the Vinca species are major or minor, one thing is constant – the colour purple. V. major is a slightly bigger plant at 40-50cm and bears somewhat bigger flowers at 5cm wide. These five-petalled, wide-open, simple little flowers are charming in their own right. This plant is considered invasive in many areas so be prepared to curtail its growth if you do plan on growing it at home.1 15) Vinca minor COMMON NAME(S): lesser periwinkle HARDINESS RATING: H6 FOLIAGE: evergreen FLOWERING SEASON(S): spring / summer SUNLIGHT: full shade / full sun / part shade Vinca minor plants grow to between 10-30cm tall but can spread up to 3 times as wide. What adds to their innocent charm is that they start blooming in spring and obligingly continue until the end of summer. Most cultivars’ blooms are in soothing shades of purple and violet. These easy-to-care-for evergreens are not specimen plants but are ideal for edging, bedding and cottage gardens. 16) Crocus sativus COMMON NAME(S): saffron crocus HARDINESS RATING: H6 FOLIAGE: deciduous FLOWERING SEASON(S): autumn SUNLIGHT: full sun Amongst all the spring flowering bulbs, the crocus is probably the one most would associate with the colour purple. Even the white variety ‘Picturatus’ displays veins that, though finely etched, are in rich purple. However, did you know that some crocuses can also flower in autumn? C. sativus is one of these bulbs, and its pale purple flowers can add a touch of colour to the browning foliage as the months turn colder. 17) Crocus vernus COMMON NAME(S): spring crocus HARDINESS RATING: H6 FOLIAGE: deciduous FLOWERING SEASON(S): spring / summer SUNLIGHT: full sun The more popular spring-flowering crocuses have several cultivars that are bi-coloured or striped with purple, as well as the standard deep purple flowers. This colour is wonderfully complemented by the bright yellow centres. The goblet-shaped and stiffly upright and can bloom from early spring right through until the start of summer. 18) Calluna vulgaris COMMON NAME(S): heather HARDINESS RATING: H7 FOLIAGE: evergreen FLOWERING SEASON(S): summer / autumn SUNLIGHT: full sun Calluna and Erica varieties of heather have such different blooming seasons that if you combine the varieties correctly, you can enjoy their purple flowers all throughout the year. Calluna vulgaris produces lovely flowers throughout summer and autumn that adorn the upright stems they grow along, so much so that they render the foliage, which is attractive in its own right, pretty much invisible. 19) Erica cinerea COMMON NAME(S): bell heather HARDINESS RATING: H7 FOLIAGE: evergreen FLOWERING SEASON(S): summer / autumn SUNLIGHT: full sun Although this might not be the obvious choice, bell heather can be a great option if you are looking for a purple perennial that is perhaps a little different. These evergreens cover a range of heights from a mere 10cm to over 1m, though the vast majority of this variety will sit comfortably at 30-50cm tall. 20) Geranium × magnificum COMMON NAME(S): purple cranesbill HARDINESS RATING: H7 FOLIAGE: deciduous FLOWERING SEASON(S): summer SUNLIGHT: full sun / part shade Geraniums are great for cottage gardens and are beloved by pollinators here in the UK. Their five-petalled flowers are saucer-shaped and many are decorated with dark eyes, veined petals or both. Hues range from pastel lilacs and lavenders to solid, rich violets. 21) Geranium himalayense COMMON NAME(S): Himalayan cranesbill HARDINESS RATING: H7 FOLIAGE: deciduous FLOWERING SEASON(S): summer / autumn SUNLIGHT: full sun / part shade Geraniums are prized for their incredibly long blooming seasons, producing a profusion of blooms from late spring through to mid-autumn. Although the Himalayan cranesbill might not bloom for so long, it will still brighten up your borders for a good few months and is an incredibly easy geranium variety to grow and care for. 22) Agastache foeniculum COMMON NAME(S): anise hyssop HARDINESS RATING: H3 FOLIAGE: deciduous FLOWERING SEASON(S): summer / autumn SUNLIGHT: full sun Hyssops are deciduous herbaceous perennials and most varieties are of upright, clump-forming habit, but some are bushy. The vast majority of varieties are 0.5-1m in height. Many varieties’ foliage, of a soothing, light, sea-green shade, exudes a bracing anise scent. This particular cultivar displays small tubular flowers densely packed on spikes that are in a stunning lilac hue. 23) Pericallis × hybrida COMMON NAME(S): cineraria HARDINESS RATING: H3 FOLIAGE: deciduous FLOWERING SEASON(S): summer SUNLIGHT: full shade / part shade Pericallis × hybridas are treated as annuals in open ground but can also be grown as perennial houseplants. Even though these plants are not hardy enough to be considered outdoor perennials, they are included on this list for their compelling bright, neon-purple blooms. Cineraria varieties bear wide-open flowers that resemble daisies. Most varieties are clump-forming evergreens, clocking in at under 50cm, and they display their electric blooms for most of the summer. 24) Lupinus albifrons COMMON NAME(S): silver lupine HARDINESS RATING: H7 FOLIAGE: evergreen FLOWERING SEASON(S): spring / summer SUNLIGHT: full sun Lupins are predominantly herbaceous deciduous perennials and their flowers boast colours that include numerous shades of purple that are often bicoloured. Its leaves are palmate with radiating leaflets, and the amusing charm of this star-like foliage is doubled when these plants are grown in pots, as they often are. From the midst of those leafy stars rise spikes holding aloft brilliantly coloured spires, densely packed with small flowers for the better part of summer. 25) Lupinus ‘Purple Emperor’ COMMON NAME(S): lupin ‘purple emperor’ HARDINESS RATING: H5 FOLIAGE: deciduous FLOWERING SEASON(S): summer SUNLIGHT: full sun / part shade This lupin variety has bicoloured flowers that are two variations of purple, adding even more purple into your beds with just a single plant! This variety will look great in a cottage garden or in your perennial beds and borders when grown alongside other colourful plants. 26) Iris germanica COMMON NAME(S): bearded iris HARDINESS RATING: H6 FOLIAGE: evergreen FLOWERING SEASON(S): spring SUNLIGHT: full sun Irises are super-hardy bulbous or rhizomatous perennials that come in a wide range of heights, have attractive lily-like foliage and, of course, produce bilaterally symmetric flowers that have contrasting beards (if you opt for the bearded variety!). This lovely hardy flower works well in most gardens and will provide your spring beds with an abundance of colourful blooms. 27) Iris sibirica COMMON NAME(S): Siberian iris HARDINESS RATING: H7 FOLIAGE: deciduous FLOWERING SEASON(S): summer SUNLIGHT: full sun / part shade The Siberian iris is another wonderful choice for most gardens in the UK and is actually less fussy than its bearded counterpart. This deciduous perennial can be grown in all soil types and will also work quite well as ground cover or as a shelter for any wildlife, thanks to the plethora of grassy leaves it produces. 28) Iris ‘Purple Magic’ COMMON NAME(S): iris ‘purple magic’ HARDINESS RATING: H6 FOLIAGE: semi-evergreen FLOWERING SEASON(S): spring / summer / autumn SUNLIGHT: full sun Most Irises are deciduous perennials while some are evergreens, but this specific cultivar is semi-evergreen. ‘Purple magic’ is the last iris on this list, as it is well worth a mention, producing flowers that last from spring right through to autumn! If you plant this perennial in a spot in full sun, you are bound to reap the brilliant purple rewards that this plant can provide! 29) Buddleja davidii COMMON NAME(S): butterfly bush HARDINESS RATING: H6 FOLIAGE: deciduous FLOWERING SEASON(S): summer / autumn SUNLIGHT: full sun / part shade Named after their ability to draw in butterflies and other pollinators in abundance, the butterfly bush is an attractive perennial that can grow up to a towering 4m in height with a spread twice as wide! They have attractive arcing, swaying, foliage branches that bear a profusion of tiny flowers in various shades of purple. The prime flowering season is early summer to mid-autumn. 30) Clerodendrum myricoides ‘Ugandense’ COMMON NAME(S): butterfly bush ‘Ugandense’ HARDINESS RATING: H1B FOLIAGE: evergreen FLOWERING SEASON(S): summer / autumn SUNLIGHT: full sun / part shade This evergreen can be difficult to grow in the UK due to its large size and frost-tender hardiness rating. Too tender to grow outside year-round, but potentially too large to be a houseplant, this stunning purple-flowering perennial is definitely a risk – but I would say it’s worth it! The very special charm of Clerodendrum myricoides ‘Ugandense’ is that its flowers are shaped like butterflies! 31) Clematis viticella COMMON NAME(S): Italian leather flowers / Italian clematis HARDINESS RATING: H5 FOLIAGE: deciduous FLOWERING SEASON(S): summer / autumn SUNLIGHT: full sun / part shade Although many clematis plants are climbers, there are some perennials that bear purple flowers, including the Italian clematis. This purple variety is of a rich purple and can grow up to 4m in height with only a 1.5m spread. Grow this plant against a wall or trellis to get the best results for your garden displays. 32) Dianthus caryophyllus COMMON NAME(S): border carnation HARDINESS RATING: H4 FOLIAGE: evergreen FLOWERING SEASON(S): summer SUNLIGHT: full sun You wouldn’t think of dianthus, usually associated with white, pinks and reds, as perennials that bear purple flowers, but many varieties do, and they are special and spectacular. Most of these are herbaceous evergreen perennials that grow between 20-90cm in height. The flowers are spectacular as they burst open with pinky-purple colour that is often different shades around the edges. 33) Rhododendron ponticum COMMON NAME(S): pontica rhododendron HARDINESS RATING: H6 FOLIAGE: evergreen FLOWERING SEASON(S): spring SUNLIGHT: full shade / part shade / full sun Although not all that common, there are some stunning purple R. ponticum varieties lend themselves to garden cultivation here in the UK. This larger rhododendron variety grows up to 4m in height and spread and can be a great choice for a hedge or for the back of a garden border. Their purple star-shaped blooms are bound to signal the start of spring when they emerge as soon as the weather starts to warm up again after winter. 34) Rhododendron kaempferi COMMON NAME(S): Kaempferi azalea / torch azalea HARDINESS RATING: H7 FOLIAGE: evergreen FLOWERING SEASON(S): spring SUNLIGHT: full sun / part shade Torch azalea is a touch smaller than the previous rhododendron, but it can still reach an impressive 2.5m in height. The shades of purple that this azalea comes in are typically pinkish-purple to magenta-purple. 35) Oxalis triangularis COMMON NAME(S): purpleleaf false shamrock HARDINESS RATING: H3 FOLIAGE: deciduous FLOWERING SEASON(S): summer SUNLIGHT: part shade With purple foliage instead of purple flowers, the purple shamrock is a deciduous perennial of clump-forming habit. This plant produces tiny funnel-shaped flowers, which are usually pale pink. However, it is the lobed clover-like leaves that are purple and provide stunning visual interest. 36) Trifolium pratense COMMON NAME(S): red clover HARDINESS RATING: H7 FOLIAGE: deciduous FLOWERING SEASON(S): spring / summer SUNLIGHT: full sun The first of two clovers on this list, red clovers produce flowers in the spring and summer that are somewhat spherical or ovoid. These stunning purple blooms dance on tall stems up to 50cm in height with double the spread and will make a great addition to perennial borders or a cottage garden display. 37) Trifolium rubens COMMON NAME(S): ruddy clover HARDINESS RATING: H7 FOLIAGE: semi-evergreen FLOWERING SEASON(S): spring / summer SUNLIGHT: full sun Ruddy Clovers are usually semi-evergreens with clump-forming or bushy habits. They produce dense cylindrical clusters of tiny pinky-purple flowers on green stems that grow up to 1m in height, taller than those of the red clover. 38) Hydrangea macrophylla COMMON NAME(S): hortensia HARDINESS RATING: H5 FOLIAGE: deciduous FLOWERING SEASON(S): summer SUNLIGHT: full sun / part shade Hydrangea macrophylla, renowned for its ability to change colours, gives you the liberty to take any pink or blue variety and purple-shift it by changing your soil pH! However, you can also purchase many purple varieties that will save you the trouble of altering your growing medium too much. “When buying a Hydrangea macrophylla, you should be aware that regardless of the flower colour you buy, it will shift over time to match the soil conditions you have unless you alter the soil pH with amendments,” explains Dan. “Alkaline soils (pH 6.5-7.5) produce pink flowers, acid soils (pH 4.5 – 5.5) will produce blue flowers, and neutral to acidic soils (pH 5.5 – 6.5) are best for maintaining purple flower colour.” This flower’s floral forms include fluffy-looking, rounded mop heads and flattish lace caps that are produced during summer into autumn. References 1. Invasive to Avoid: Big Periwinkle. (n.d.). Wildlife. Retrieved March 23, 2023, from https://wildlife.ca.gov/Conservation/Plants/Dont-Plant-Me/Big-Periwinkle
Learn more
While Rainwater Should Be Enough For Rhubarb, It Is A Medium-Heavy Feeder
IN THIS GUIDE Watering Feeding Rhubarb is a delightful vegetable that can bring colour to your garden beds as well as a delicious harvest. If you’re wondering how to get the best out of your rhubarb plants, you might be wondering if you can feed them to help improve growth and yields. In this article, I share my top tips for fertilising and watering rhubarb growing in your garden. Watering Rhubarb requires free-draining soil but also soil that is continuously moist. You will have an easier time of irrigating this plant if you get your soil right. One thing you could do is to plant rhubarb in ridges or mounds to protect the crown from getting soggy. Water young plants regularly with 2-3cm of water per week. Established plants do not require as much water and in many regions of the UK, rainwater will be all the water they need. During dry spells and in hot weather, you will need to water rhubarb regardless of rain. As a general guideline, if the soil surface is dried out, you should provide more water. You do not need to water the dormant crowns in winter but be sure that they do not stay dry for a prolonged period. Feeding First, mulching rhubarb plants will lock in moisture and suppress weeds. In late March to early April, apply a 5cm layer of mulch but be sure to leave an open ring around the crown. Rhubarb is a medium-heavy feeder but do not fertilise this plant in its first year. For the second year onwards we suggest that you avoid chemical fertilisers and opt for organic ones to minimise risk to the crown as it is nearly at the soil surface. Apply fertiliser once in late March to early April. Sprinkle 2-3 pinches of granular fertiliser around the plant and lightly work it into the soil or use an organic liquid plant feed around the base. “Mulching can be the easiest way to feed your rhubarb,” says Master Horticulturist Dan Ori. “In autumn, I cut back all the growth to the base and apply a good layer of rich organic material like well-rotted garden compost. “Care should be taken when mulching not to cover the crown, as this can encourage rot.”
Learn more
6 Vibrant Pink Salvias Chosen By Award-Wining Garden Designers
IN THIS GUIDE 1) S. ‘Wendy’s Wish’ 2) S. ‘Mulberry Jam’ 3) S. nemorosa ‘Sensation Rose’ 4) S. ‘Kisses and Wishes’ 5) S. greggii ‘Icing Sugar’ 6) S. greggii ‘Strawberries and Cream’ Salvia is a showy plant that produces spikes of gorgeous flowers that are tubular in shape, and their square stems and velvety leaves make them instantly recognisable. “Salvias are one of my favourite late summer flowering perennials,” says Colin Skelly, a Master Horticulturist. “They can often flower well into early autumn and decline gracefully as mellow autumn foliage starts to appear and fall. A great resource for late pollinators and great to look at for us too!” If you’re interested in growing this flower in your garden, then you’ve got a wide variety of colours to choose from, with pink being among the most popular. “I love salvias because they are so easy to grow,” shares Garden Designer Isabelle Palmer. “They came up at the beginning of spring and are still there in my borders now. There are so many different types too and they are a real study and beautiful plant to grow.” In this article, we will take a look at some of our favourite pink salvia varieties to help you add a touch of romance to your garden. “I’m also absolutely mad for salvias and I have been collecting these plants for a while,” shares Designer Lachlan Rae. “There’s one that I’ve got at the moment which I love called Salvia involucrata ‘Boutin’ which is a hybrid and is absolutely fantastic.” All of these varieties flower in summer and autumn and should be growing in chalk, loam or sand-based soil. 1) S. ‘Wendy’s Wish’ COMMON NAME(S): sage ‘Wendy’s wish’ HARDINESS RATING: H3 SUNLIGHT: full sun EXPOSURE: sheltered SIZE: 0.5-1m in height, 0.5-1m spread This herbaceous perennial produces deep pink flowers from midsummer to autumn. This variety of salvia has red stems, fragrant olive-coloured leaves and grows to around 1m in height. ‘Wendy’s Wish’ will do its best in full sun or dappled shade in a sheltered spot that has humus-rich, well-drained soil. In springtime, I’d recommend adding a 5-10cm layer of mulch around the base of the plant to help it thrive. This species of salvia doesn’t require any pruning but you can remove fading flower stems to encourage prolonged blooms. 2) S. ‘Mulberry Jam’ COMMON NAME(S): sage ‘mulberry jam’ HARDINESS RATING: H3 SUNLIGHT: full sun EXPOSURE: sheltered SIZE: 1-1.5m in height, 0.5-1m spread This bushy and compact variety of salvia grows to around 1.2m in height and sports pink blooms from summer to autumn. The leaves are small and scented and their green hue really makes the flowers pop. ‘Mulberry Jam’ is tolerant of drought but will grow best in full sun with moist, well-drained and moderately fertile soil. You will want to overwinter these plants, ideally in a greenhouse, away from the grips of frost. 3) S. nemorosa ‘Sensation Rose’ COMMON NAME(S): Balkan clary ‘sensation rose’ HARDINESS RATING: H7 SUNLIGHT: full sun EXPOSURE: exposed / sheltered SIZE: 0.5-1m in height, 0.5-1m spread This pretty, pink salvia is a bushy, upright perennial with greyish-green leaves and tightly packed spikes of hooded, pale-pink blooms. This variety grows up to 1m tall and takes around 2-5 years to reach full height. While the ‘Sensation Rose’ can tolerate partial shade, you will see the best results by planting it in full sun and in moist, light, humus-rich and well-drained soil. 4) S. ‘Kisses and Wishes’ COMMON NAME(S): sage ‘kisses and wishes’ HARDINESS RATING: H3 SUNLIGHT: full sun EXPOSURE: sheltered SIZE: 0.5-1m in height, 0.1-0.5m spread This adorably named species of salvia is an upright, woody perennial that will usually grow to around 75cm in height. It sports delicate, tubular, pale-pink flowers with dark pink streaks that bloom from early summer to late autumn. To get the most out of your ‘Kisses and Wishes’ salvia, you will want to plant them in a warm, sheltered spot, with lots of sun and moist, well-drained, humus-rich soil. As autumn draws to a close, you can either leave this plant where it is and treat it as an annual or overwinter it in a greenhouse. 5) S. greggii ‘Icing Sugar’ COMMON NAME(S): autumn sage ‘icing sugar’ HARDINESS RATING: H4 SUNLIGHT: full sun EXPOSURE: sheltered SIZE: 0.5-1m in height, 0.5-1m spread This bushy variety of salvia grows to around 65-70cm in height and produces terminal racemes of bi-coloured bright pink and purple blooms which blossom from summer to autumn. ‘Icing Sugar’ requires light, fertile soil that is well-drained in a sheltered spot. It will overwinter if provided with full sun and soil that drains well. Rosemary beetles, leafhoppers and slugs and snails are quite partial to the new, young growth of this plant, so keep a watchful eye on it and use organic solutions if necessary. 6) S. greggii ‘Strawberries and Cream’ COMMON NAME(S): autumn sage ‘strawberries and cream’ HARDINESS RATING: H4 SUNLIGHT: full sun EXPOSURE: sheltered SIZE: 0.5-1m in height, 0.5-1m spread This delicious-looking salvia is a shrub variety and grows to around 60-75cm in height. It has pleasantly scented, ovate green leaves and little 1.5cm wide flowers which bloom in pale pink, dark pink and cream from summer to autumn. Not only does ‘Strawberry and Cream’ salvia sound delicious, but they are actually used in culinary pursuits as a herb. This species of salvia needs plenty of shelter from cold, drying winds and prefers full sun. Plant it in light, well-drained soil. These are just some of our favourite pink salvia plants to inspire you – in such a varied genus there are many more available!
Learn more
Start Dividing Your Salvias In Early Spring For More Plants, Experts Advise
IN THIS GUIDE 1) Prepare Pots / Planting Holes 2) Prepare The Plant 3) Lift The Plant 4) Divide At The Roots 5) Re-Plant The Divisions Salvias come in many shapes, sizes and habits and no matter which kind you have, you will surely want to propagate these plants for their ornamental value in the garden. Luckily, many salvia plants have clump-forming habits and will basically self-propagate; all you need to do is to divide the plant at the appropriate time. You can divide salvia by following these steps: Prepare pots or re-planting holes for your new Salvia divisions. Prepare to pull up the existing plant by loosening the soil. Lift the plant from the ground with a shovel or spade. Divide the plant at the roots by separating it into clumps. Re-plant the new divisions into prepared pots or holes. “I remove many of my salvias every year after I’ve rooted cuttings for the following year,” says Master Horticulturist Colin Skelly. “If I want extra insurance for my cuttings, I divide clumping salvias and plant into pots. “I do this in autumn and put the potted divisions into a cold greenhouse. They seem to put on root growth at that point and emerge strongly in spring.” In the April-May timeframe when you see fresh green growth emerging, take the following steps. Difficulty Medium Equipment Required Gardening gloves, knife, shovel, gardening fork When To Divide April-May 1) Prepare Pots / Planting Holes First, prepare the new re-planting holes or containers. For each plant that you intend to divide, estimate how many divisions you will obtain and then add one to that number to know how many pots or holes to prepare. Examining the plant and its size will give you a fairly good idea as to the number of clumps or divisions. Salvias are happy in moderately fertile or even somewhat poor soil, so a mixed loam compost will do, but it must drain very well. Feel free to amend the soil with organic compost. Dig the appropriate number of holes, estimating their depths in view of the apparent size of the clumps, or prepare the appropriate number of pots. Pots should have drainage holes. 2) Prepare The Plant Whether the plant is in a container or in open ground, water it first, and thoroughly soak the soil if the plant is in open ground. If the plant is in a pot, run a flattish small hand-shovel at the edge of the soil all round the pot while you push from the drainage hole so as to extract it from the container with the soil ball. If doing so proves difficult, do not stress the plant. Instead, simply break the container by gently cracking it with a heavyish stone. If the plant is in open ground, loosen the soil around it by jabbing into it with a hand-pick or garden mattock. Start at a distance that is the spread of the plant plus about 10%. As you loosen the soil, draw it away to keep exposing the roots. Once you see the roots, using a spade or a hand-shovel dig downward, keeping a little distance from the roots to avoid needlessly severing them. Dig down to a sufficient depth so that the outer roots are fully exposed. 3) Lift The Plant Depending on the size of the plant, use a shovel or a spade to cut into the soil all around the plant, angling inwards. Make sure not to cut into the roots and keep away from the centre of the crown. Prise up the ground with the shovel or spade and at the same time grasp the plant from the bases of the stem, and slowly pull it up as you gently jiggle it but do not force it – it should come up without undue pulling. You may have to soak the soil again and dig deeper around the plant. 4) Divide At The Roots Divide the plant into clumps, as will be evident to the eye at this stage. As you take this step, try to ensure that each clump gets its own part of the root system. Gently pull apart the clumps holding them around the stem’s base and the crown, separating the root system with your fingers as much as you can. Next, cut through the remaining roots, making clean vertical cuts with the knife which should be sharp. Alternatively, drive two gardening forks back-to-back into the remaining roots and squeeze the handles inwards so that the tines pull the roots apart. 5) Re-Plant The Divisions The divisions should be re-planted without an unnecessary lapse of time. If the soil attached to the roots is like caked mud, you may as well wash out the roots. Do so by dipping the root system into a tub of clean cold water, gently swishing them about, and washing the roots by hand. Re-plant the new clumps into the prepared containers or holes. Try to spread apart the roots to some extent as you backfill the hole. Ensure that the soil level is at the same level as it was originally, or even a touch lower. Water the new plant well as you firm up the soil around it.
Learn more
“Don’t Crowd Common Sages" - Expert Salvia Growers Share Common Growing Problems
IN THIS GUIDE 1) Poor Flowering 2) Short Flowering Period 3) Root Rot 4) Winter Damage Salvias are usually relatively easy plants to grow, are mainly untroubled by pests and diseases on the whole – and any problems you encounter are most likely to be related to environmental conditions, improper positioning or care. Salvias typically need a spot in full sun with free-draining soil, but specific care will often depend on whether you are growing an annual, perennial or shrubby variety. “Salvias are very forgiving and easy to grow plants and, as long as you follow the correct care advice, there should be very few problems,” says Vicki Weston, from Weston’s Salvias. However, some of the common problems you might encounter include: Poor flowering. A short flowering period over the summer. Root rot or other fungal issues. Frost or winter damage to tender cultivars. Below we explain these problems in more detail and outline how you can solve them to keep your salvia plants happy and healthy. 1) Poor Flowering Poor flowering can be caused by a number of issues, but the most common cause is that it has been placed in the wrong spot and is not getting enough sun. Moving your salvia to a sunnier and more suitable spot should solve this issue. “Make sure you know the growth type of your salvia and when it flowers,” says Lyndi Garnett, coordinator of the Victorian Salvia Study Group. “Large and tall salvias flower in autumn and winter, so don’t cut down in winter.” 2) Short Flowering Period You may have heard that salvias have a long blooming period over the summer. However, if you fail to deadhead the flowers when they have faded by around mid-summer, then the plants will go to seed rather than continue to produce blooms. Deadheading is a good idea with most salvias to prolong the flowering period for as long as possible… 3) Root Rot Another common issue with sage is wilting leaves, yellowing and stunted growth caused by overly wet or waterlogged conditions. One of the most important things when growing salvia is to ensure free-draining conditions. Take care not to overwater and make sure excess water can drain away freely, whether you are growing your salvia in containers or in the ground. “If you have moist soil, consider growing a species that has a preference for moister soil, such as Salvia uliginosa,” says Master Horticulturist Colin Skelly. “Mulching is still a good idea in winter and leaving foliage intact but its natural proclivities increase the odds in your favour.” Waterlogging or excessive watering can cause damage to the salvia roots and can cause root rot, allowing fungal issues to take hold. “Don’t crowd common sage varieties,” says Lyndi. “They need sun and air, and they can remain for some years – they’re not just an annual.” If a salvia plant seems to be suffering, improving drainage may allow it to recover. 4) Winter Damage Keeping salvia, especially more tender types, safe through the winter months is often the biggest challenge when growing these plants. Frost can cause damage to tender types which are not offered some protection from the winter cold. Some plants that have been hit by winter cold can grow new growth in spring. However, if there are no signs of regrowth by June, then the plant has likely died. Many salvias will struggle more with winter wet and may die if kept in waterlogged conditions, so make sure that plants have some protection from winter deluges. To overwinter tender types successfully, those in milder areas may mulch around the plants with a 10cm layer of well-rotted manure or other organic material. In harsher areas, it is best to lift these tender types and place them in pots under cover or indoors over winter. If growing salvias with borderline hardiness, don’t cut them back in the autumn. “Careful when pruning your salvias,” says Lyndi. “Don’t prune all stems down and leave one with green growth so the plant doesn’t go into shock.” It is best to wait until late spring because this offers some protection to the roots in cold weather conditions and is also great for providing some shelter for wildlife. See more detailed advice in our guide to overwintering salvias.
Learn more
Unless You Want The Seeds, Make Sure To Deadhead Your Salvias Warns Vicki Weston
IN THIS GUIDE 1) Prepare Your Tools 2) Wait For Blooms To Fade 3) Deadhead Spent Flowering Stems 4) Feed In Mid-Summer Salvias can be a wonderful choice for a UK garden. These wildlife-friendly plants can, when cared for correctly, bloom for a long period over the summer months and sometimes even beyond. Deadheading is one of the jobs to undertake if you are growing these plants in your garden. “You should tip prune your salvias regularly to keep them bushy,” says Lyndi Garnett, one of the founding members of The Victorian Salvia Study Group. As Lyndi says, deadheading is important for salvias because it will encourage the plants to put their energy into producing new flowers and blooming over a longer period, rather than going to seed. Of course, if you want to collect seeds from your salvias then you should not deadhead too zealously – and should allow them to enter their seed-producing phase. However, if you would rather enjoy their flowers over a longer period, then keep reading. 1) Prepare Your Tools Whenever you are deadheading or pruning, it is very important to make sure that your tools are sharp and clean. Blunt tools can cause damage to plants and, if you do not practice good hygiene in the garden, they can inadvertently spread disease. Make sure you have some sharp, clean secateurs ready for this job. 2) Wait For Blooms To Fade Salvias tend to start to bloom in May or June and can bloom right through the summer if you deadhead them. If you don’t, then the flowers will bloom only until around midsummer before they go to seed, although you can deadhead at different times of the year too: “Generally, salvias can be deadheaded at any time of the year, but they must be pruned at least once, ideally twice a year,” says Lyndi. In the middle of summer, you should check over your salvias and look for any flowering stalks that are turning brown. The brown colouration will begin at the base of the flowering area and work its way upwards. Once around 70-80% of the blooms on a flowering spike have faded and turned brown, it is time to consider deadheading by removing that particular flowering stem. 3) Deadhead Spent Flowering Stems Cut off any spent flowering stems where the stem meets the highest set of leaves on the plant. Cut through the stem at this point with your clean and sharp secateurs. New flowering stems should usually grow off the sides of the existing stems. You may wish to repeat this process over the summer to ensure as long a blooming period as possible. “Don’t cut them back in autumn!” warns Vicki Weston, owner of Weston’s Salvias. “Although the plants will look a bit bare in the deepest parts of winter, wait until you can see green shoots at the very base of the plant, then you can tidy back and deadhead to a neat shape. “You’ll have to be patient with some but they will all shoot.” 4) Feed In Mid-Summer “Remember to feed and mulch your plants after any kind of pruning,” says Lyndi. Feed your salvia with an organic, potassium-rich liquid plant feed in the middle of the summer, especially when growing in containers. This will help increase the chance of further blooms and keep your plants as healthy as possible.
Learn more
Salvia Propagation: 'Taking Semi-Hardwood Cuttings Is A Great Way To Ensure Continuity'
IN THIS GUIDE 1) Semi-Hardwood Cuttings 2) Softwood Cuttings Salvia plants are herbaceous annuals or perennials with many species and innumerable cultivars. They boast both ornamental and culinary value, so you will surely want to make use of these wonderful plants. “Many Salvia species are borderline hardy in the UK, so planting out in May and then taking semi-hardwood cuttings in summer is a great way to ensure continuity,” shares Master Horticulturist Colin Skelly. “Once the cuttings have taken, I am happy to remove and compost the previous year’s plants once they have died back from frost damage. “With hardier Salvia, I will often use the same tactics every 2-3 years to keep them vigorous and compact.” Luckily, they are fairly easy to propagate. In this post we focus on propagation via cuttings, of which there are two methods: Propagating via semi-hardwood cuttings in summer. Propagating via softwood cuttings in late spring. These methods are explained in more depth below. Difficulty Easy Equipment Required Secateurs, gardening gloves, perforated polythene bag When To Propagate May or July-August 1) Semi-Hardwood Cuttings In late July or early August, prepare a small clay pot with a mix of approximately half perlite or grit (or both), and half cuttings compost and water it well. Inspect your Salvia plant and choose a stem near the bottom that is from the current year’s growth but which has no buds, then: Cut off this stem then trim it down so that it is 10-12cm long when measured from its tip. Make the cut just below a leaf. Carefully twist and pluck off the lower leaves, leaving behind the top 4 leaves. Though salvia cuttings will almost always root without any special treatment, you can dip the base of the cutting in rooting hormone powder. Make a hole using a dibbler or pencil in the soil and insert the cutting from a quarter to a third of its length in the soil. Gently firm up the soil around the cutting and give it a good watering. To lock in humidity, cover the cutting with the polythene bag which should be large enough not to touch the cutting. You can insert 3 canes into the soil at the edge of the pot to support the polythene bag. Put the pot indoors or outdoors in such a place where it gets ample indirect sunlight but no direct sun. If you have a heated propagator, keep the cutting in it and turn on bottom-heating, as this will significantly increase the odds of the cutting taking root. Water the cutting daily so as to dampen the soil all through. Remove the plastic bag every other day for 20 minutes or so. Keep an eye on the cutting and if it starts to bend, support it with a stiff twig or pencil. In my experience the cutting will take 2-4 weeks to root. After the cutting develops roots and shows fresh green growth, I would recommend you allow it to grow in the same pot but remove the plastic bag, gradually reduce the frequency of watering, and slowly increase exposure to direct sunlight. After a few weeks pot on the cutting to a bigger pot. You may transplant it to a spot in your garden if that variety is sufficiently hardy for your region, otherwise pot it on so that it can be overwintered indoors. 2) Softwood Cuttings Anytime during May, prepare a small clay pot with a mix of approximately half perlite or grit (or both), and half organic compost. Water this soil so that it is damp through, then: On the donor plant, choose a young green stem or shoot; this may be anywhere on the plant. It should be at least 10cm long and have fresh, young leaves but no buds. Using your secateurs, cut off an 8-10cm length of this stem, cutting it just below a node. To prep and plant the cutting, follow the same directions as outlined from step 3 in method 1 (Semi-Hardwood Cuttings). After setting up the cutting in the pot, you will need to keep it cosy because of the temperatures during May in most regions of the UK. As such, if you have a heated propagator, then it would be best to place the pot in it. If not, cover the pot with a polythene bag and place the pot indoors in a warmish place where it can get ample indirect sunlight but not direct sun. Keep watering the cutting and be patient. If the existing leaves have not shrivelled and fallen off and if the stem has not browned and withered, it means good things are happening underground!
Learn more
Remember Large Leaf Salvias Are Typically Frost Tender - Overwintering Is Important
IN THIS GUIDE 1) Bring Potted Plants Indoors 2) Protect From Wind & Rain 3) Lay Mulch 4) Use A Horticultural Fleece How do you care for salvia plants in winter? Well, salvia species and their derivative cultivars range all the way from super-hardy varieties rated to H7 all the way down to H2 varieties that may not survive temperatures even close to 0°C. “The only thing that lets the salvias down is that they are not reliably hardy across most of the UK,” shares Lachlan Rae, a Garden Designer. “Still, I wouldn’t be without them. I think they are fantastic and there are so many brilliant late-flowering varieties.” So the question for UK gardeners really is, should you care for your Salvia plant in winter? If your variety has a hardiness rating of H5 or above, you and your salvia plant are all set for winter, then you’ll need to do nothing except protect the plant from northern exposure. But if your salvia variety is rated H4 or lower, you will need to take progressively more winter care of the plant the less hardy it is, and even more so if you live in the country’s colder regions. “Remember, all large leaf Salvias are frost tender,” warns salvia expert Lyndi Garnett, Coordinator of the Victorian Salvia Study Group. “In cold areas, keep these varieties in a glasshouse away from cold and frost.” Depending on your needs, you can protect your salvia plants during winter by taking these measures: Bring container-grown salvias indoors. Protect outdoor varieties from the wind and rain. Retain the plant’s foliage through winter and lay some mulch. Use a horticultural fleece if required. My four key measures are explained in more depth below. 1) Bring Potted Plants Indoors Before the anticipated first frost of the season, bring your potted salvia indoors or, better yet, put it in a greenhouse if you have one. The indoor temperature should remain above the minimum necessary for the variety in question, so before you put a plant in a cold shed, check on its hardiness rating to see if it will survive the anticipated temperature lows in the shed. The vast majority of salvia varieties should receive several hours of direct sunlight per day, so site the container accordingly. “As well as protecting Salvias over the winter, I take cuttings semi-hardwood cuttings in late summer to ensure that I have backups should the winter weather do its worst,” shares Horticultural Consultant Colin Skelly. “You can also divide clumping Salvias to keep under cover to ensure some small pots of ‘insurance’ plants.” 2) Protect From Wind & Rain Evergreen salvias that are in the open ground and which are hardy enough to survive the winter should be protected from north winds, so screen them appropriately. They should not stay in the cold, wet ground for a prolonged period or even for a few days in winter. Therefore, if you have a thunderstorm, sleet, or snow, be sure to check on the ground. If the soil is waterlogged, you will need to drain away the wet if you want to save your plant. It would be wise pre-emptively to cover the ground with a sheet of plastic or tarp if you anticipate wet weather in the winter. 3) Lay Mulch Deciduous salvias that are in open ground and which are hardy enough to survive the winter should be allowed to retain their withered foliage as, to some extent, this will shield the plant from frost and cold. Foliage can be pruned after the last frost of spring. Before the first frost of autumn or winter, apply a 6-8cm layer of mulch made of pine needles and bark, or organic compost. Mulch will protect the plant from frost and wetness. 4) Use A Horticultural Fleece Before you anticipate severe cold weather, protect open-ground salvias with a horticultural fleece. The horticultural fleece should cover the main stem and the crown rather than the entire plant. If you cover much of the foliage (as in the image shown above) remember to remove the fleece for several hours during the height of the day and then replace it in the late afternoon.
Learn more
Astrantia Specialist Shares How To Lift And Divide Clumps To Keep Your Plant Healthy
IN THIS GUIDE 1) Water Well Before Lifting 2) Lift The Plant 3) Shake Off Excess Soil 4) Divide Into Sections 5) Replant The Divisions Astrantia is a charming perennial which looks great in many different garden schemes. It complements a wide range of companions and is tolerant of a wide range of conditions, though it will absolutely thrive in moist and fertile soil in dappled shade. Once you have Astrantia in your garden, you will no doubt find it an easy and straightforward plant to grow and one that requires little care and attention. One job that is important is keeping an eye on mature plants, and, usually after 3-4 years or so, taking steps to ensure their ongoing health and vitality by lifting and dividing your plant. “Astrantias are clump-forming, so if the clump gets too large, you will have to dig it up and split it,” says Caroline Samuel, from Letham Plants. Dividing Astrantia will keep it healthy by helping to make sure it does not outgrow its present location. “Not all astrantias set viable seed and varieties such as ‘Roma’ are sterile, so the seed will never germinate,” Caroline adds. “Sterile varieties need to be divided to obtain more plants.” The process involved in lifting and dividing your Astrantia is simple: If it has not rained recently, water the existing plant before lifting. Insert a spade or fork beneath the root system and gently lift the plant from the soil. Shake off excess soil from the Astrantia roots. Divide the Astrantia into several sections by cutting down with a spade through the roots. Replant each of the divisions. Difficulty Easy Equipment Required Spade or garden fork When To Divide Spring 1) Water Well Before Lifting Making sure that the Astrantia has received sufficient water before lifting will help to free the roots from the soil and will also reduce the stress associated with the process. If it has not rained recently, you should water well a day or so before undertaking the division. 2) Lift The Plant Next, ease a spade or fork in under the existing plant, taking care not to damage the existing root system. Gently lift the plant up and out of the soil. 3) Shake Off Excess Soil Shake the plant gently and remove any large clumps of soil so that you can see the roots clearly. Check the roots to make sure that there are not any signs of damage or disease. 4) Divide Into Sections Once you are satisfied that there are not any issues with the roots, simply pull the plant apart into sections. Each section should have a healthy portion of roots and crown growth. Usually, Astrantia is fairly easy to pull apart into divisions by hand. Not Astrantia roots – but hopefully this helps to illustrate the process However, where thicker roots are tangled or difficult to divide, you can slice down through the root system with a sharp spade. You can create a few new plants to replant in your garden or a number of smaller divisions which can be potted up and grown on before you plant them out in their final locations. 5) Replant The Divisions Whether you have larger divisions to plant out in the garden or are planting smaller divisions into pots to grow on, it is important to get the plant sections back into the soil or a suitable growing medium as soon as possible. The quicker and more streamlined the process, there’s less chance of the plants experiencing transplantation shock. “The fibrous roots of Astrantia dry out quickly in the open air and I’ve found this impedes the divisions from growing away quickly,” shares Roy Nicol, who has received the Master of Horticulture status from the Royal Horticultural Society. “If plants cannot be replanted immediately, they can be put in a tub of water for an hour or two. “This will ensure the roots are hydrated and will help the new plants to grow on.” As long as you take care to choose the right location to grow your divisions, these new plants should establish themselves relatively quickly. Just make sure that you keep them well watered, especially during drier periods over their first growing season. Following these simple steps is an easy and straightforward way to obtain new Astrantia plants for your garden or perhaps to even give away to family or friends. As mentioned above, the process of division will also help keep mature Astrantia plants in your garden healthy and happy by preventing problems, such as powdery mildew that is associated with overcrowding, in your beds or borders.
Learn more


