

Growing
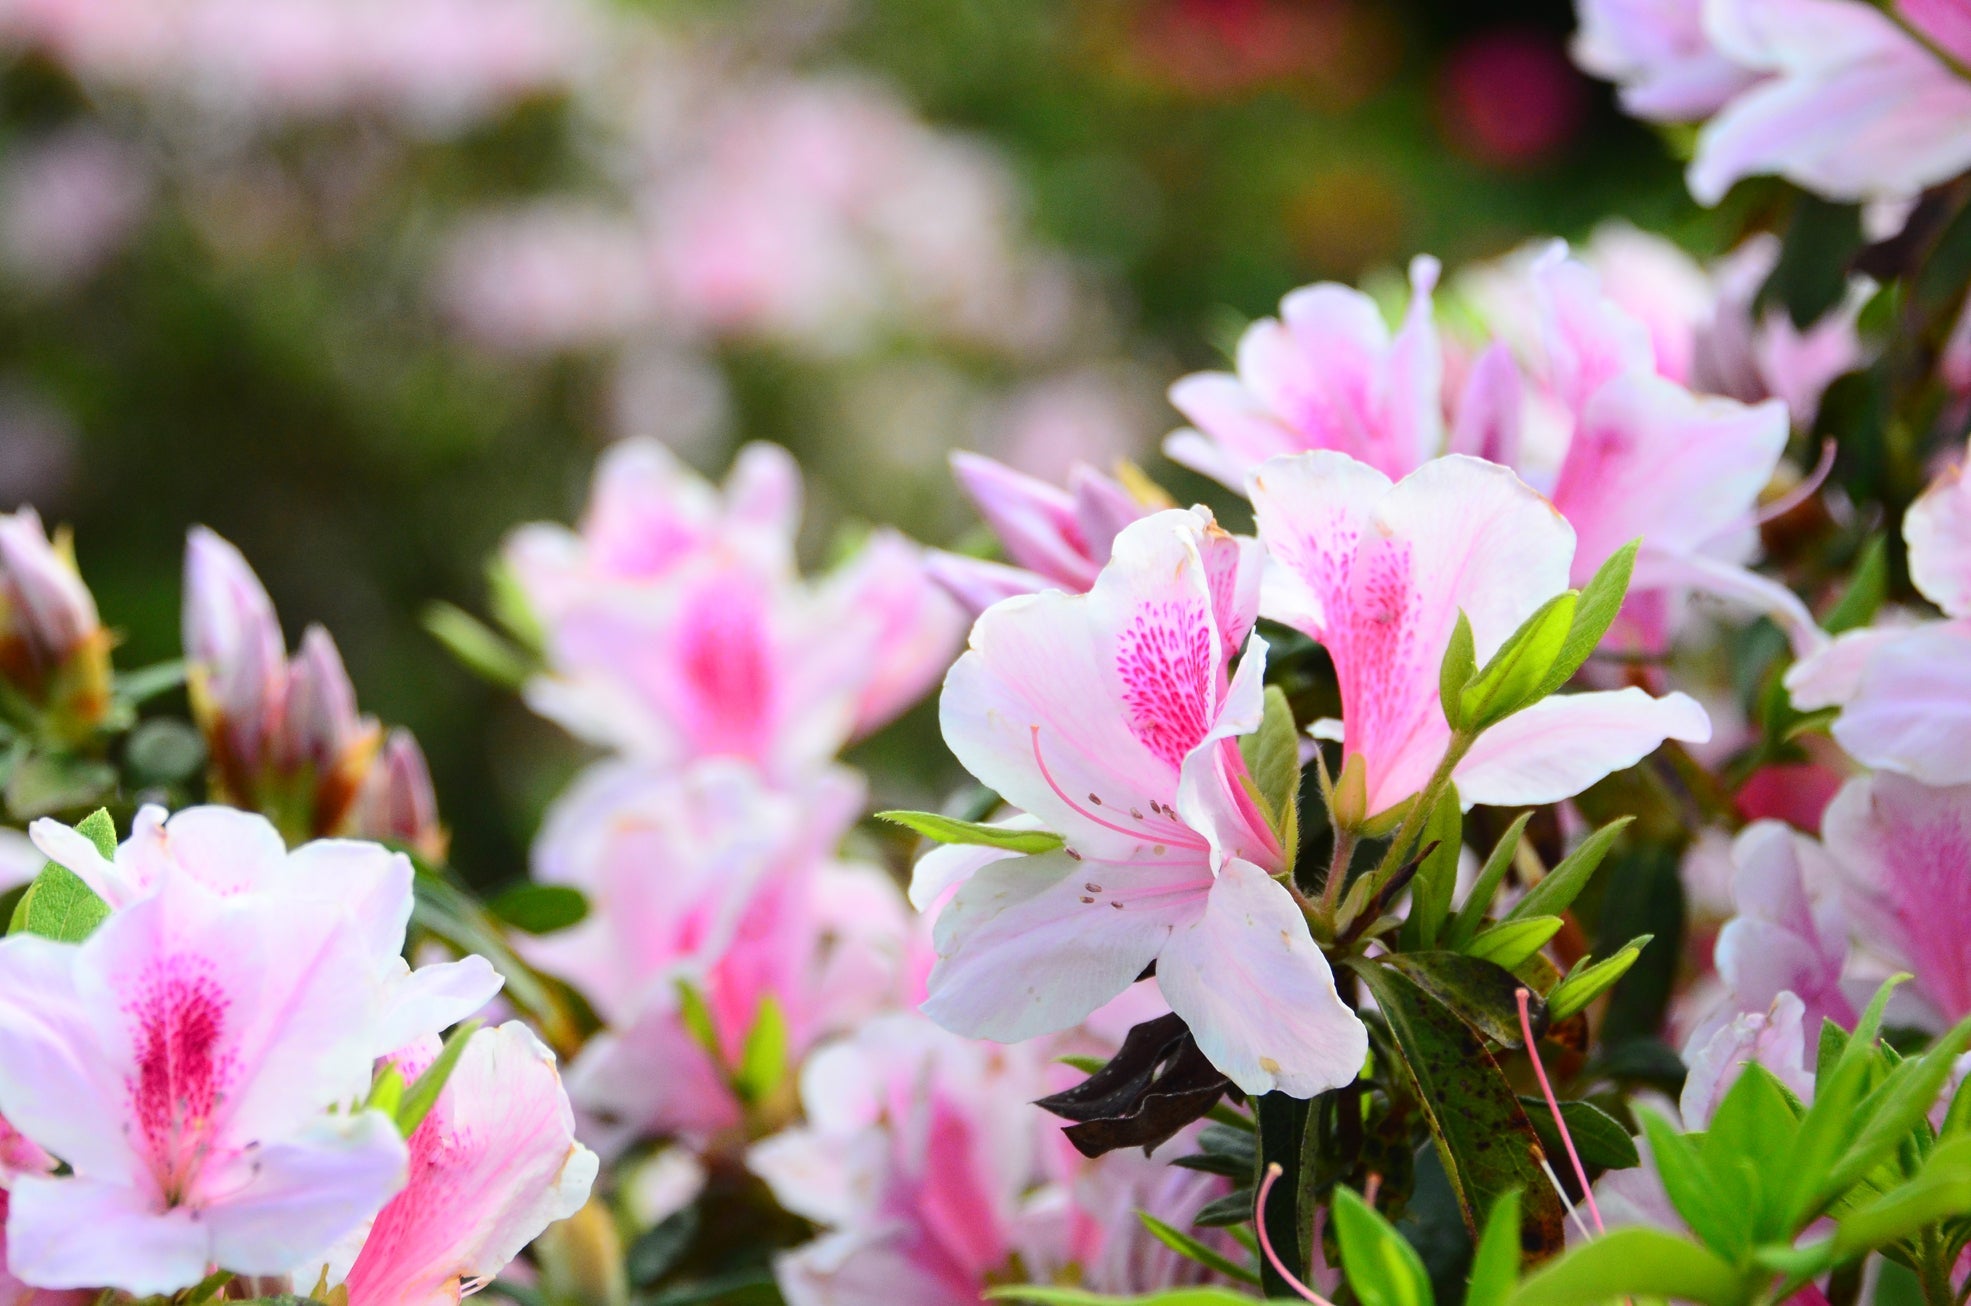

Are Your Azaleas Getting Enough Water? Brown Leaves And Their Causes
IN THIS GUIDE What Causes Brown Leaves? 1) A Lack of Water 2) Cold Winds 3) Waterlogged Soil 4) Fungal Diseases & Pests Azaleas can be relatively easy shrubs to grow, as long as they are grown in the right location. It is important to remember that some Azaleas can be grown outdoors in the UK year-round, while others are tender and can only be grown indoors or under cover during the coldest months. However, though Azaleas can be easy to grow, there are certain problems that can arise. One of the main issues that you might notice is brown leaves. What Causes Brown Leaves? Brown leaves on Azaleas can be caused by a number of different things. Typically, however, brown leaves at a time of year when you would not usually expect to see them is a sign that those leaves are not getting enough water. Azalea leaves can turn brown when: You have not watered indoors grown Azaleas enough, or your outdoor Azaleas have experienced a period of drought. Drying, cold winds have meant that water has been lost faster than it could be replenished. There is not sufficient drainage and the soil or growing medium in a container has become waterlogged. A fungal infection or pest has damaged the roots so water can’t get to the leaves. Each of these reasons is discussed in more detail below: 1) A Lack of Water If the upper leaves on an azalea are crisp and brown around the edges, the first thing to check is whether this is due to a straightforward lack of water. Azaleas need a moist yet free-draining soil or growing medium. You might simply not have watered enough, especially if growing in pots, as potted plants will typically require more watering than those growing in the ground. Mulch around plants to retain moisture in the soil or growing medium, especially when the weather is dry. 2) Cold Winds Sometimes, the leaves may lose water more quickly than they can be replenished, even if there is no shortage of water in the soil or growing medium. The most common cause of this is cold, drying winds, which can be a problem for these plants during the winter months. Fortunately, plant stress in winter that occurs for this reason, or due to cold temperatures will usually recover once the conditions improve. However, make sure that you understand how hardy the azalea is that you are trying to grow. As mentioned above, some are much more tender than others and not all can cope with winter outdoors in the UK. 3) Waterlogged Soil Ironically, water not getting to the leaves of an azalea can also be a sign that you have watered too much, or that there is too much water in the soil or growing medium. “If you’re not sure of the cause of the leaf browning, get on your hands and knees and have a good look at the soil conditions,” Master Horticulturist Colin Skelly recommends. “Use a trowel to excavate the surrounding soil, being careful not to disturb the roots. “It will be obvious if the soil is dry and that is the problem. If not, then the soil may be holding too much water. “This may not be obvious if there has been recent rainfall and the soil is moist. Dig a small hole and pour in some water. If the water does not drain freely then waterlogging is likely the problem.” Waterlogging in the soil can lead to root damage, which can also cause root rot. 4) Fungal Diseases & Pests Water-logged soil and other environmental issues can also increase the likelihood of a fungal infection taking hold. Fungal diseases and pest issues can also lead to damage to either roots or leaves which can cause azalea leaves to turn brown. It’s generally advised to cut back any diseased plant material to help curtail its spread. There are a variety of solutions available for pests such as aphids that can help restore your plant to its former glory.
Learn more
Transplanting Azalea: Here's How To Choose A Good Location To Lift And Re-Plant
IN THIS GUIDE When To Transplant 1) Choose Where To Grow 2) Lift Your Azalea 3) Replant In The New Location Azalea can be very useful shrubs for many gardens, with beautiful foliage and stunning blooms in a wide range of hues – but when one of these shrubs is located in the wrong place, a range of issues can crop up. Fortunately, if you wish to move an Azalea, either for practical reasons or because it is not ideally situated and is failing to thrive, it is fairly easy to do so successfully. “When a plant is not thriving, I always err on the side of moving it rather than trying to coax it into growing more happily in its current position,” Colin Skelly, Master Horticulturist, explains. “When a plant gets what it needs, it can respond very quickly to its new, more favourable position.” To transplant Azaleas, you simply need to: Prepare a new growing location. Gently lift the plant from its existing position. Replant the Azalea in its new location, ensuring it is at the same depth in the soil as it was in its previous spot. Difficulty Easy Equipment Required Spade, new container and growing medium. Preferred Aspect Full sun or partial shade, sheltered. When To Transplant Though in theory, you can move an existing Azalea at any time, it is best to do so either in the spring or in the autumn, when the weather is neither too hot nor too dry. Moving at these times can help to reduce transplantation shock and increase the chances of an Azalea settling in successfully in its new location. 1) Choose Where To Grow Choosing the perfect spot to move an Azalea to will also increase the chances of transplantation success. Azaleas need a spot either in full sun or in partial shade. For many Azaleas, a location in light, dappled shade can be ideal. It is best to choose a spot where your Azalea will be somewhat sheltered and protected from cold, drying winds. Perhaps the most important thing, however, when choosing the ideal spot for an Azalea is to think about the soil. Azaleas need a moist yet free draining medium that is relatively fertile and most will require acidic soil pH. 2) Lift Your Azalea Once you have decided where you will move your Azalea to and have prepared the growing area to which you will transplant it, it is time to lift the existing plant. Simply use a spade to gently lift the plant from the soil, taking care not to damage the root system, and keeping the rootball as intact as possible. 3) Replant In The New Location Then simply move the plant to its new location and replace it in the soil as quickly as you can to prevent it from drying out, and to minimise the shock to the shrub. Dig the planting hole, large enough to accommodate the existing root system. Gently lower the plant into the hole, then firm back the soil gently around the roots. Water in well, then, to increase the chances of the plant establishing, mulch around the plant with lots of organic matter.
Learn more
Re-Pot Azaleas Every Few Years To Maintain Healthy Conditions And Prevent Congestion
IN THIS GUIDE When To Repot Azaleas Choosing A New Pot Filling With A Compost Medium How To Re-Pot Azaleas of a range of different types and varieties are perfect for container cultivation. Tender Azaleas are grown in pots as houseplants year-round, while many hardier types that are relatively compact and small can be great choices for an outdoor container garden. Learning how and when to repot Azaleas is important if you plan to grow them in pots. Fortunately, this is generally a very simple and straightforward process, as explained below. Difficulty Easy Equipment Required Pot, growing medium, gloves, trowel When To Repot Azaleas I’d typically recommend repotting Azaleas with a new growing medium every couple of years. This is a good way of maintaining healthy growing conditions, with adequately acidic soil and sufficient fertility. However, specifically how often you need to repot will depend on the stage of growth of Azaleas and on the particular type of cultivar you have chosen to grow. Azaleas should not become too constrained, so make sure that the roots do not grow congested, or appear out of the holes at the base of the pot. If an Azalea becomes pot-bound, its health and growth can suffer. Choosing A New Pot Azaleas should typically be potted up in a container that is just slightly larger than their previous pot. The container should not be too large because when there is too much space around the roots it can lead to water-logging, and Azaleas need reasonably free-draining conditions. Remember that the pot or container that you choose should have drainage holes at the base which will allow excess water to drain away freely. Filling With A Compost Medium Azaleas usually need an acidic potting medium with a pH of between 5 and 6. A peat-free ericaceous compost is the right type to choose to provide the growing conditions that Azaleas need. You can purchase your potting mix, or make your own at home. How To Re-Pot To re-pot an Azalea: Prepare a new pot or container and ready the growing medium. Gently ease the plant from its current pot. Place a little growing medium in the base of the new container and place the plant gently into the new pot. Add your potting mix around the edges of the root ball, firming it gently in place. Water the plant in and consider adding a layer of mulch on the surface of the container to aid in moisture retention. Place your pot in a suitable location, taking into account the growing conditions required by the particular Azalea you are trying to grow. “Even if a plant likes a full sun position, I like top put newly potted or re-potted plants into a sheltered, part-shade position for a week or two before moving to their permanent position,” says Colin Skelly, a Master Horticulturist with 5 years of experience working at The Eden Project. “This enables the plants to recover from root disturbance and reduces the stress that might occur from heat or wind stress before the roots have begun to grow into the new compost.”
Learn more
Should You Deadhead Azaleas? It's Not Strictly Necessary, But Some Do For Cosmetic Reasons
IN THIS GUIDE Do You Need To Deadhead Azaleas? How To Deadhead Azaleas are attractive shrubs that can make a good addition to many gardens so long as acidic soil and other appropriate environmental conditions can be provided. They can be a relatively low-maintenance choice when growing in the ground and won’t necessarily take up a lot of your time. However, there are certain jobs that you should undertake throughout the year to keep Azaleas thriving and looking their best. While it is not strictly essential, deadheading Azaleas is one job that you might like to consider. Difficulty Easy Equipment Required Secateurs When To Deadhead After flowering (depending on variety) Do You Need To Deadhead Azaleas? Whether you are growing evergreen or deciduous Azaleas you should note that deadheading won’t really prolong the blooming period, nor will it really have much impact on the number of blooms you get the next year. Deadheading can lead to new growth of additional flowering shoots, but won’t usually make that much of a difference. Deadheading can also prevent the build-up of dead flower material within a shrub and reduce the likelihood of a fungal infection taking hold. However most of the time, this is not an issue for Azalea either. So, deadheading is not usually something that will have a big impact on the health or performance of your shrubs. Instead, it is just something I personally do for cosmetic reasons because I don’t like the look of the brown spent blooms. If you are growing larger types, deadheading can take some time, which, if you don’t have much time on your hands, I think could be better spent elsewhere in your garden. How To Deadhead If you do decide to deadhead Azaleas to keep them looking good, simply use a pair of secateurs to snip each brown, faded flower head from the plant. At the same time, you might also undertake minimal pruning, to get rid of any straggling branches or any that are out of place. “In anything other than a small garden, deadheading is likely to be very time-consuming,” explains Colin Skelly, a Horticultural Consultant. “However, one advantage is that when deadheading you also tend to pay attention to the plant up close and may spot things related to the overall health that you wouldn’t at first glance.” It’s important to remember that taking a minimal approach and keeping things more natural won’t do any harm and could mean that you have time for more important jobs, or simply to spend time enjoying your garden. If you plant around Azaleas with other blooms that bloom after the Azalea display has finished, you can keep your garden beds looking good without taking on all this additional and largely unnecessary work.
Learn more
9 Varieties From The Diverse Callistemon Genus You Should Consider Growing
IN THIS GUIDE 1) C. citrinus ‘Splendens’ 2) C. citrinus ‘Mauve Mist’ 3) C. citrinus ‘Perth Pink’ 4) C. citrinus ‘White Anzac’ 5) C. viminalis ‘Little John’ 6) C. viminalis 7) C. viridiflorus ‘Violaceus’ 8) C. pallidus 9) C. salignus For a shrub that originated in Australia, quite a number of varieties can be found in the United Kingdom. “Callistemon are half-hardy with a H3 on the RHS hardiness scale,” shares Colin Skelly, a Horticulturist with almost 15 years of experience. “This makes them perfect for coastal gardens with milder winters but vulnerable to the lowest winter temperatures across much of the UK. “They can be planted in conservatories, glasshouses or pots to move back inside in the winter.” Here is a selection of my favourite Bottlebrush varieties, which also shows off the diversity in the Callistemon genus: 1) C. citrinus ‘Splendens’ ‘Splendens’ is the most popular and well-established variety. It has a loose habit in nature and grows to a small tree of 3-6m with a spread of about 3m. It is so popular because it is both very floriferous and has a very long flowering season, covering spring and summer. Its brushes are bright red, varying from scarlet to crimson. 2) C. citrinus ‘Mauve Mist’ This variety is considered more of a spreading, bushy shrub as its spread may well be greater than its height of typically 3m. It flowers for two or three months in the summer and is valued for the special hue of its 10cm brushes, which are a pinkish or light mauve hue. 3) C. citrinus ‘Perth Pink’ ‘Perth Pink’ is a small shrub growing only to a height and spread of 1.5-2m. An attractive feature is that young leaves are pink-red. This variety blooms unpredictably and variably – you may get vivid rose-pink brushes in spring, summer, or autumn. 4) C. citrinus ‘White Anzac’ ‘White Anzac’ is possibly the most unusual cultivar because its brushes are pure white. It may be a large shrub or a small tree with a maximum height and spread of about 3m. The foliage is a bright green with a silvery sheen and this variety flowers from late spring to early summer. 5) C. viminalis ‘Little John’ This variety is rather unlike its big and brawny namesake, who was Robin Hood’s staunch companion, for it is a dwarf that reaches heights of only 40-70cm. It is a shrub of a naturally rounded form that flowers during summer, producing brushes of an intense blood red to crimson hue. 6) C. viminalis Also known as ‘Weeping Bottlebrush’, this variety is a large shrub, spreading and bushy, or a small tree from 6-8m depending on how you wish to prune and develop it. It has light, silvery green leaves only 3-5cm long. Its special feature is that branches and flowers are pendent and droopy and it also produces long brushes that are a scarlet red colour. 7) C. viridiflorus ‘Violaceus’ This is a medium-sized shrub of about 1.5m with a similar spread that has arching branches and a compact habit. It has greyish-green leaves of only about 3cm and dense brushes of up to 8cm in length, which have an unusual and delightful lilac to mauve hue. 8) C. pallidus ‘Lemon Bottlebrush’, as it is commonly known, is known for its citrusy scent and its brushes that vary from cream to a lemon-yellow shade. This variety is a medium-sized shrub of 2-4m in height and a spread to match. Its leaves are greyish-green and not as narrow as most other varieties. 9) C. salignus Callistemon salignus has an additional colour interest as its leaves emerge red and stay red for quite a long time, eventually turning a deep shade of green. Depending on how you develop it, it is a large shrub or medium tree ranging in size from 5-12m. It bears a profusion of brushes from late spring to the middle of summer that are of light but bright yellow hue.
Learn more
Growing Callistemon: The Frost-Tender Ornamental Trees From Australia
IN THIS GUIDE Overview How To Plant Where To Plant Plant Care Pruning References Some Callistemon or ‘Bottlebrush’ varieties have certain charming qualities, such as a citrusy scent, reddish leaves, and pulling in hummingbirds, but they all have that one special feature: flowers. Usually bright red, bottlebrushes seem to have been created straight from Mother Nature’s factory. Callistemons are large shrubs or small trees that can be grown outdoors in the UK’s milder regions. Overview Botanical Name Callistemon Common Name(s) Bottlebrush Plant Type Shrub Native Area Australia Hardiness Rating H2/H3 Foliage Evergreen Flowers Flowering bottlebrush spikes that are usually red, but can come in a range of colours When To Plant May and June When To Prune April and May (or after flowering) You may remember how amused you felt when you first saw red bottlebrushes sticking out of a little tree, and if you haven’t seen such a sight yet, well, prepare to be amused at this fascinating member of the Plant Kingdom. ‘Bottlebrush’ is a small ornamental tree, technically a shrub, whose species fall under Genus Callistemon or Genus Melaleuca. Both Genus belong to the Myrtle Family (Myrtaceae) which includes myrtle, eucalyptus, and clove trees, among others.1 These plants, as charming as they are amusing, are native to Australia and one or two nearby Melanesian islands.2 So how can we grow Callistemon in the UK? As it happens, most Callistemon species inhabit Australia’s Eastern belt which is known for its temperate to sub-tropical climate.3 Unfortunately, species as well as cultivars are frost-tender and cannot tolerate hard frosts below -5°C. Though all bottlebrush species are classified as shrubs, some have the form of shrubby plants while others develop into small trees with proper trunks. An example of the former is Callistemon viridiflorus or Melaleuca virens while an example of the latter is C. viminalis or M. viminalis. Both forms are highly ornamental. Though 2-6m are common heights for these shrubs and trees, they can be as small as 60cm and as tall as 10m. How To Plant Callistemon can be grown from seed, propagated from semi-hardwood cuttings, or bought as potted plants. Plants grown from seeds may or may not turn out to be of the particular species you think you have sown as bottlebrushes hybridise very freely. The tiny seeds should be sown in mid to late spring. They may be started in dampened potting soil and should be scattered on top of it and not sown at all deeply. The container should be placed in full daylight, be it indoors, and kept in a warm place. Seeds should be watered every two days and the soil should be kept consistently moist. They will germinate in 2-3 weeks. Callistemon varieties are also available as young plants in containers and are popular with home gardeners in this form. If the variety allows, you may be able to keep the shrub or tree in a container, should you wish to do so. What you will need to do is prune it so that it will not exceed the height and spread allowable for the container. Where To Plant Callistemon varieties are frost-tender with hardiness ratings of H2 or H3 (up to -5°C). They can be grown outdoors in only the mildest regions of the United Kingdom. If you live in a region that is H4 or colder, you will need to grow bottlebrush trees in a greenhouse. You can still grow bottlebrush shrubs in a planter so that it can be brought indoors for the winter, assuming you have enough space in a room for a large shrub. Callistemon is not the type of plant that can be grown for ornamental purposes in the northern parts or colder regions of the UK and we recommend against the casual gardener trying to do so as it may not end well. Of course, it is another matter if you are an experienced gardener who has a heated greenhouse. Plant Care Sunlight In simplified terms, bottlebrush is a creature of sun; in the United Kingdom it should be sited in full sun. It should preferably be in a south-facing location while north-facing locations must be avoided. It must also be in a sheltered location as it needs protection from cold winds and stiff breezes. Soil Requirements The best soil for bottlebrushes is a light, friable, moderately-fertile sandy loam with minimal clay content, amended with some compost or peat down to about 30cm. It should drain very well, so you may want to make a raised bed, lay a layer of gravel or incorporate some perlite in the soil. This ericaceous plant needs an acidic soil pH but can tolerate neutral soils. Watering Though bottlebrushes can cope with dry soil they are not drought tolerant. They should be watered regularly so that the soil stays moist. Feeding Mature Bottlebrush shrubs and trees may be fertilised annual in early-mid spring. A balanced fertiliser meant for flowering trees and bushes can be used but the overall size of these plants varies very widely by species and as a result of pruning, so make sure to use the right amount of fertiliser. If you have observed excessive foliar growth and comparatively fewer flowers the previous year, then instead of balanced fertiliser use a 0-10-20 or similar fertiliser. Winter Care If your shrub or tree is outdoors, then you must evaluate whether or not it is sure to survive winter by checking its hardiness rating. Common Problems Though outdoors bottlebrushes are relatively pest-resistant and disease-free, in a greenhouse they may succumb to the usual pests including mealybugs, scale insects, and glasshouse red spider mites. Transplanting To transplant, dig a hole that is as deep as the plant’s root system and twice as wide. The soil should be of the kind described above; pre-dampen the soil. After removing the plant from the pot ensure that it is not root-bound, and if it is, try to spread out the roots. Place it in the hole and backfill it such that the soil line is exactly as it was in the container. Though the soil level may come a little lower on the stem, it should not be any higher. Pack in the soil well and give the plant a good watering. Pruning A good time to prune Callistemon is immediately after the flowering season is over. “The subsequent new growth will then form the flowering shoots for the following year,” shares Master Horticulturist Roy Nicol. How you prune your plant will depend on whether you want to grow it as a shrub or a tree. To Grow As A Shrub To prune a young plant to grow as a shrub, allow it to put out shoots and branches initially. Pinch off any strong stem that shows signs of becoming a leader. Cut back all the stems by one-third. This will encourage fresh growth and a bushier form. Keep an eye out for strong stems that threaten to run away and for straggly growth. This type of strict pruning regimen will result in a well-balanced multi-stemmed bush. To Grow As A Tree To prune a young plant to grow as a tree, choose a strong leader and prune shoots and branches that are competing with it. Also, prune shoots that emerge close to the base of the incipient trunk. Initially allow 2-4 new branches to develop that are well spaced, are on different sides of the tree, and are at an acceptable upward angle. Prune once a season to maintain an attractive balance and spacing between the branches and a well-shaped, even crown. Other than that, during the flowering season deadhead regularly for appearance and also flower production. References 1. Bottlebrush. (n.d.). Standford: Robert Seigel. Retrieved March 13, 2023, from https://web.stanford.edu/~siegelr/flora/bottlebrush.html 2. Bottlebrush – Callistemon –. (n.d.). Australian National Herbarium. Retrieved March 13, 2023, from https://www.anbg.gov.au/callistemon/ 3. Australia’s climate – drivers, variability and extremes |. (n.d.). CoastAdapt. Retrieved March 13, 2023, from https://coastadapt.com.au/australias-climate-drivers-variability-and-extremes
Learn more
Hebes Are Usually Short Lived - Prepare A Propagation Schedule For Replacement Shrubs
IN THIS GUIDE When To Propagate Hebe 1) Take The Cuttings 2) Plant Them Up 3) Grow The Cuttings On Hebes are a group of evergreen shrubs that are sun-loving and originate from the Southern hemisphere. With white, pink or purple flowers that open mainly in summer, some even have ornamental foliage as well. Hebes are always a popular shrub but sadly are usually short-lived. “Hebes rarely exceed more than ten years, so make sure that you have a plan to evolve your planting or a propagation schedule to ensure that you have replacement shrubs that are sufficiently large to replant when the time comes,” suggests Horticulturist Colin Skelly. However, hebes can easily be propagated by taking cuttings from healthy specimens in late summer to produce identical new plants, either to replace old stock or to give away. You can propagate hebe shrubs from semi-ripe or softwood cuttings by following these steps: Take some cuttings from the shrub. Plant up the cuttings. Grow the cuttings on, into garden-ready plants. This process is explained in more depth below. Difficulty Medium Equipment Required Secateurs, plastic bag, pot, cuttings compost mix When To Take Cuttings July, August, September When To Propagate Hebe It is best to take hebe cuttings from healthy and vigorous plants in late summer. Here in the United Kingdom, the ideal time to take hebe cuttings is from July until September. If the soil is dry, it is recommended to water the plant thoroughly the day before taking cuttings to hydrate it fully, which will give the cuttings the best chance of taking. 1) Take The Cuttings Hebe cuttings are best taken early in the morning, before the midday sun has a chance to dry the shrub’s foliage out. To select the best cutting material, choose a healthy and strong parent plant that is free from any disease or pests and is not too leggy. Using a clean and sharp pair of secateurs, remove some (ideally non-flowering) shoots of new growth approximately 10-15cm in length and immediately place them in a plastic bag to reduce the chance of them drying out. 2) Plant Them Up Once ready to pot up the freshly removed shoots, make a small cut at the base of each cutting, just below a node of leaf and remove the growing tip and all but the highest 3-4 leaves. Fill a pot with a free-draining compost mix or blend of peat-free multi-purpose compost with added grit – and insert the cuttings around the edge of the pot so their leaves are just above the soil. Water the cuttings and place the pot in an unheated greenhouse or cold frame, in indirect light and cover with a clear plastic bag. Keep the soil moist, but not wet and periodically remove the covering bag to lower the moisture levels. Check the cutting’s progress regularly and if any cuttings appear to die or rot, remove them swiftly. 3) Grow The Cuttings On Once the cuttings have taken and developed new roots, which may take a few weeks, they are ready to be potted on individually. Carefully separate the cuttings and their roots and pot on separately into 9cm pots using peat-free multi-purpose compost. Plant the cuttings at the same depth they were previously planted at and grow them undercover over the winter months. The soil mustn’t be allowed to dry out, but it is important to avoid overwatering as this can lead to the roots rotting. Once the over-wintered hebes have outgrown their pots, they can be potted on into larger pots or planted out later in the year once large enough, but only once all risk of frost has passed and when they have been gradually hardened off first. The young hebes are best planted out in full sun and in well-drained soil and may even flower later in the year.
Learn more
Optimise The Lifespan Of Your Hebe With Regular Trimming: 4 Steps To Follow
IN THIS GUIDE When To Prune Hebe 1) Deadhead Spent Flowers 2) Prune In Late Summer 3) Prune In Spring 4) Hard Prune Worn Hebe Shrubs Hebes are evergreen shrubs commonly grown for their visual appeal, with stunning purple, pink or white flowers that bloom from spring until autumn. There are several benefits to pruning hebes, including keeping the shrubs to an attractive shape, removing any spent and untidy flowers and preventing them from becoming leggy. “Hebes are generally quite tidy shrubs that require little maintenance,” explains Horticultural Consultant Colin Skelly. “However, I like to put in a few pruning sessions during the year to keep them looking tight in growth. I have found that this also optimises life span.” Pruning hebes is fairly simple if you follow a simple process for trimming the plant: Deadhead any spent flowers once faded. Prune hebe shrubs lightly in late summer, to help keep their shape and remove any dead or damaged wood. Prune again in the spring back to healthy, new growth. Hard prune hebe shrubs that look worn and leggy to attempt rejuvenation. This process is explained in more depth below. Difficulty Easy Equipment Required Gloves, secateurs, shears When To Prune August, September, October, March, April When To Prune Hebe Hebe shrubs generally flower in summer, although some varieties can bloom earlier in spring. Here in the UK, hebes are best pruned in late summer once the flowers fade and if necessary, again in spring after a cold winter. Charlie Bewley from Hic Bibi Hebe Nursery in Chorley, recommends pruning back after flowering, making sure not to leave it too late in the season, as this can cause stress to your hebe shrubs. 1) Deadhead Spent Flowers If the weather is mild, hebes can bloom for a long season and from as early as April onwards. Once faded, the flowers may begin to look untidy and can be deadheaded with a pair of secateurs, which will encourage further blooms and extend the flowering period. 2) Prune In Late Summer Hebe shrubs are relatively slow growing and generally require little pruning, apart from keeping them to shape and removing any dead or damaged wood. Hebe shrubs are best pruned in late summer once the flowering period comes to an end and when the shrubs can be cut back to shape using a clean and sharp pair of shears or secateurs. “Prune regularly and often, rather than all at once, as this can cause stress,” advises Charlie. As Charlie states, Hebe shrubs do not respond well to being hard pruned and do not tend to regrow if cut back into old wood, so a light prune is all that is required. At the end of summer up to a maximum of one-third of the foliage can be pruned back to a bud or leaf, in order to keep the hebe to a compact and pleasing shape. 3) Prune In Spring Hebes are hardy shrubs and are rated H4 for hardiness, and will usually tolerate winter temperatures as low as -5°C to -10°C. However, hebes can struggle in extended low temperatures and during a generally cold and wet winter, especially if the soil becomes saturated, leading to some dieback of branches. In spring, as the temperatures rise, it is advisable to check hebes for any dead or broken branches and stems and to remove them back to a healthy-looking bud. Hebe shrubs prefer moist, but well-drained soil and if grown on compacted or heavy soil that can become waterlogged it is advisable to incorporate some organic matter into the soil to improve the drainage. 4) Hard Prune Worn Hebe Shrubs Over time, hebes can become leggy, misshaped and look as though they have passed their best. Although general advice is not to hard prune hebes, if you are going to replace it anyway it can be worth trying to see if it regrows. The best time to rejuvenate a hebe is in March, just before new buds begin to form. To hard prune, the stems can be cut back to a node about 30cm above the soil using a sharp and clean pair of secateurs. However, due to the high chance of the shrub not re-growing, it is advisable to take some cuttings in the previous summer to replace it with. For a less drastic and gentler approach, one-third of the stems can be cut back hard each year, leaving the rest of the plant to carry on. “To prevent stress, cut back half of the shrub in the spring or summer,” recommends Charlie. “Wait for it to regrow slightly and then do the other half.”
Learn more
Container Growing Hebe Can Be Delightful - But Good Drainage Is Paramount
IN THIS GUIDE Can You Grow Hebe In Pots? Choosing Hebe Containers Sourcing Compost Potting Up Hebes Ongoing Potted Hebe Care References Hebes are a genus of evergreen shrubs that flower during the warmer months. Hebes originate from New Zealand and other parts of the southern hemisphere and are well suited to container growing in the UK climate.1 Generally grown for their white, pink or purple blooms, some varieties have attractive foliage and being evergreen, can provide some ornamental winter interest and structure to the garden. Can You Grow Hebe In Pots? Hebe specialist Charlie Bewley from Hic Bibi Wholesale Nurseries says that as long as hebes are grown in free-draining soil in a sheltered position with lots of sun, they can be grown in pots. Hebes are available in a wide array of sizes, from small dwarf shrubs that are ideal for growing in a container or pot to larger varieties, that are more suitable for the back of a bed or a border. “Smaller leaf varieties tend to be hardier,” Charlie explains. Choosing Hebe Containers When choosing a container to grow hebes in, it is paramount that large drainage holes are present as they prefer moist, but well-drained soil and struggle if grown in wet or waterlogged soil. When it comes to the size of the container, I would advise you to choose a pot that is a minimum 30cm diameter to make sure that it will be large enough to accommodate the plant’s mature size and root system accordingly. Containers are now made from many different materials and will not have much of a bearing on a hebes growth. However, it can be advisable to choose a material that would not be damaged by being left out over the winter. Sourcing Compost Hebes require a free draining soil to avoid their roots becoming too wet, especially during the colder months. When choosing soil for planting out hebes in containers, you should use either a peat-free multi-purpose compost or a loam-based mix with plenty of horticultural grit added to improve the drainage. Potting Up Hebes When potting up a hebe, a thin layer of gravel can be added to the bottom of the container to help with drainage, before half filling with your chosen compost or soil. Once the container is half filled with compost, place the plant at the same depth it was previously planted at and backfill with soil, gently firming in as you go. Water well on planting to help the soil settle and to eliminate any air gaps around the roots. Pots and containers can be placed upon feet, which will raise your shrub above the ground and allow any excess water to drain away freely. How Many Can You Plant Per Pot? Hebes tend to be grown individually in pots, as not only can they grow quite large, but for aesthetic reasons as well. However, some of the smallest dwarf varieties can be planted together, but only in a large container or long trough where they will have enough room to grow and not crowd each other out. Ongoing Potted Hebe Care Watering Correct watering of Hebes is a key part of their care, especially as they are getting established and prefer to be grown in a moist soil. They will struggle if overwatered or allowed to dry out completely. When it comes to watering hebes in containers during the growing season, I would recommend you wait until the top 3-5cm of soil has dried out before watering again. “It is essential that Hebes have a large enough pot to allow the compost to retain moisture during the height of summer,” says Colin Skelly, a Horticultural Consultant. “During hot spells, check the soil moisture daily. A drip irrigation system, ideally with a moisture sensor, makes an efficient option and a great benefit if you plan to be away.” Be aware that any pot-grown hebes will require more frequent watering compared to those grown directly in the ground. In winter, hebes do not require as much moisture, as wet and cold soil can lead to their roots rotting. As the temperatures drop, watering can be reduced and containers moved to the shelter of a wall or undercover to ride out the worst of the cold and wet weather. Fertilising Hebes are not overly hungry shrubs and grow best in a soil with poor to medium fertility. However, when grown in pots or containers, hebes can benefit from being given a balanced fertiliser in spring to replace any spent nutrients lost during the previous year. Charlie recommends fertilising pot-grown hebes with seaweed feed, as this can help keep fungal infections at bay. Pruning To promote a long flowering season, hebes should be regularly deadheaded as the flowers fade, which should encourage new blooms to form, depending on the variety. When it comes to pruning potted Hebes, they are relatively low maintenance and only require a light trim at the end of summer the flowering period comes to an end and again in spring to remove any dead or damaged wood after a harsh winter. Repotting Even though Hebes are not the longest-lived shrubs, they can last for several years and at times will need repotting and their soil refreshed. In general, Hebes need repotting every couple of years or if they have outgrown their current pot, whichever comes sooner. Overwintering During the growing season, most Hebe shrubs prefer to be situated in full sun to partial shade and out of any drying winds. A south- or west-facing sheltered spot is ideal. However, some Hebes are hardier than others and it is advisable to check the shrub’s hardiness rating, which will determine whether the plant requires some extra care over the coldest months. It is also good to note that any hebes grown in containers will be more exposed to the elements as they are less well insulated. A key benefit of growing hebes in containers is that come winter they can easily be moved or given a little more protection, as Charlie explains: “If there is a cold snap in winter, move your hebes into a greenhouse or cover with a horticultural fleece.” Alternatively, as the temperatures fall or if frost is forecast, containers can be either placed in a cold frame or moved under the lee of a wall or porch to protect them from the worst. References 1. Hebe and Related Genera. (n.d.). NZETC. Retrieved March 16, 2023, from https://nzetc.victoria.ac.nz/tm/scholarly/tei-DawFore-t1-body-d9-d4-d4.html
Learn more


