

Growing

Pruning Ceanothus: 'Only Cut Back Into The Green Section Of Stems' Says Horticulturist
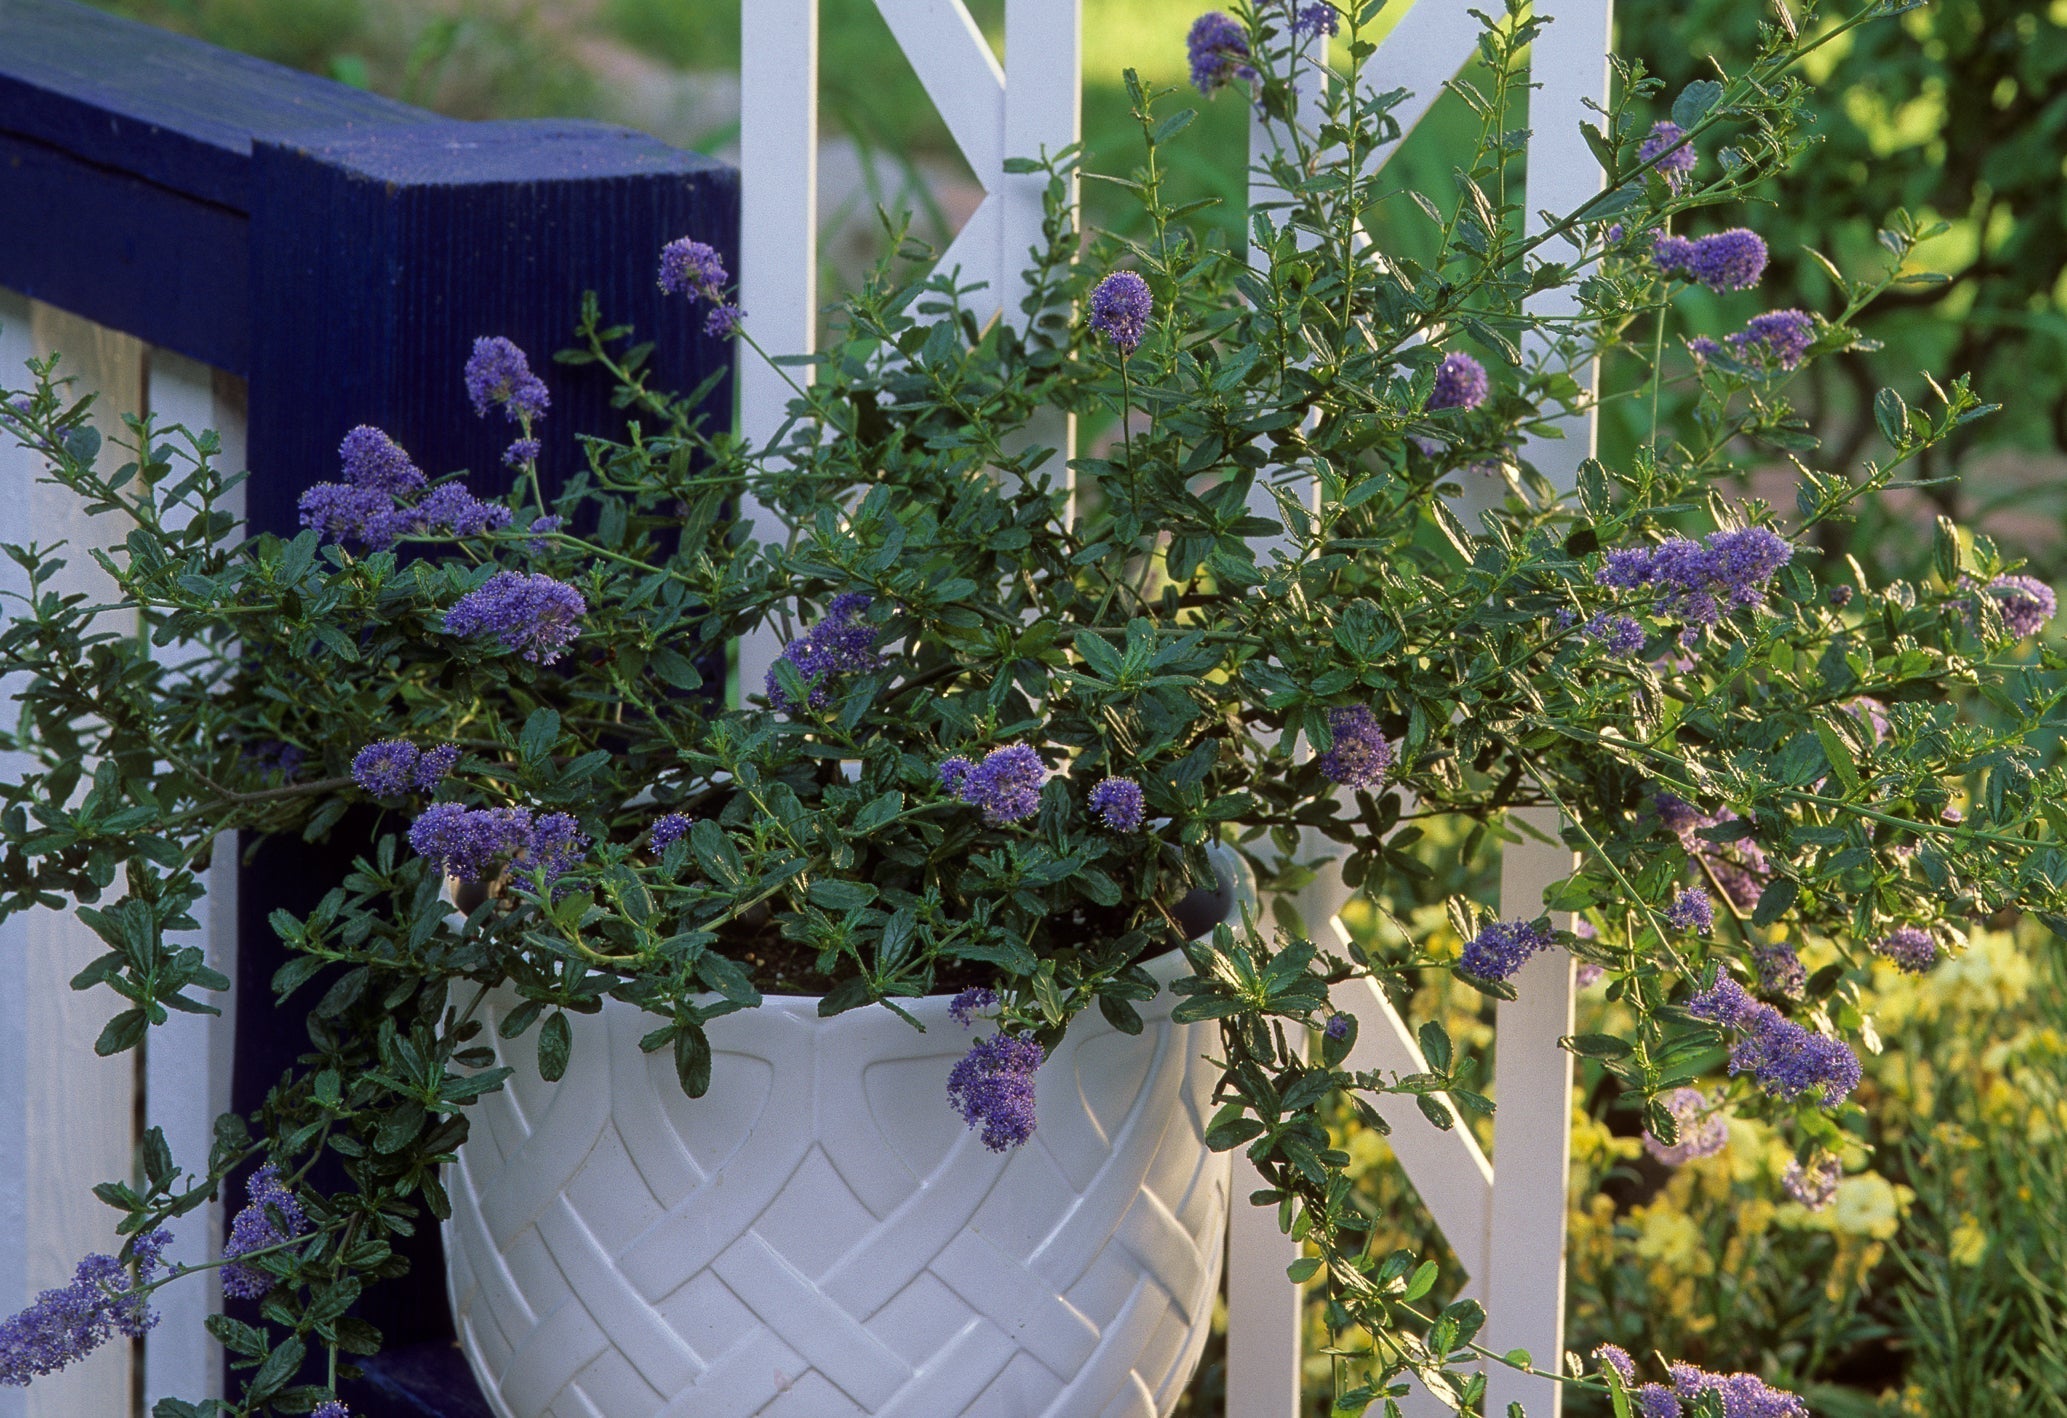
IN THIS GUIDE Pruning Evergreen Types Pruning Deciduous Types Renovating Mature Shrubs Pruning Wall-Trained Types Ceanothus are flowering shrubs that can look great and also fix nitrogen, making them beneficial in many gardens. Although they are not native to the UK, they are commonly grown here and can thrive in the conditions that many of our gardens will readily provide. These shrubs are relatively easy to care for when placed in the right position, but pruning is something you should definitely think about when growing a ceanothus. “Ceanothus can become large if not pruned, so pruning long thin stems back by up to half their length, after flowering time, can help keep the plants more compact,” says Horticulturist Peter Lickorish. “Pruning into woody growth, however, is not always a good idea for evergreen Ceanothus, which may struggle to grow back.” You should always at least remove spent blooms or deadhead new growth to keep a healthy appearance. Personally I find that my tree grows so vigorously that I’m forced to prune it at least once a year (sometimes even to prevent it from growing into my neighbour’s guttering!). Difficulty Medium Equipment Required Secateurs or gardening shears When To Prune Varies by type The process for pruning ceanothus depends on whether you are dealing with an evergreen or deciduous shrub and the flowering seasons: Pruning Evergreen Types Spring Flowering Varieties These evergreens don’t necessarily need regular maintenance pruning. However, they are typically lightly pruned immediately after flowering, when flowering stems can be cut back by up to around one-third of their length. “It’s best to only cut back into the green section of stems as the older woody brown stems may not regrow after pruning and could leave the shrub looking bare or worse, they could initiate die-back and lead to larger sections of the shrub having to be removed,” shares Professional Gardener Roy Nicol. When growing these plants in a more confined space or as informal hedging, you can also cut back again later in summer if required to maintain their shape and compact form. Autumn Flowering Varieties Evergreen ceanothus plants which bloom later in the year bear their flowers on the growth of the current season and sometimes also have a flush of spring flowers on shoots that grew the previous season. With these shrubs, it is best to prune them in spring. You should aim to reduce the previous season’s growth by around a third when tidying up is required. Pruning Deciduous Types Deciduous ceanothus shrubs bloom in late summer and autumn and their pruning is a little more complex than that of evergreen types. They do tend to need more regular attention when it comes to this gardening job in order to ensure that they continue to flower well. These shrubs bear flowers on new growth, so it is best to prune them in early to mid-spring in order to encourage the formation of strong, fresh shoots each year. When you first plant a ceanothus of this type, the pruning strategy will be somewhat different from that used for pruning established, mature plants. To develop a good framework of branches: Shorten all the stems by two-thirds in the first year. In the second year, prune the previous year’s growth by around 2/3 and shorten any side shoots to 10-25cm from the main stems. Once the plant is well established in its third year after planting, reduce the length of the main flowering stems by around 50%. Cut back the weaker side shoots fairly hard, leaving a couple of buds from the main stems. You can also consider cutting out congested and unproductive old wood from the centre of the shrub to keep it performing and flowering well. Renovating Mature Shrubs Evergreen ceanothus does not tend to respond well to hard pruning when renovating an older shrub. So, if a plant has become woody and overgrown, it is usually best to replace it rather than attempt to prune it to give it a new lease of life. Deciduous ceanothus shrubs, on the other hand, are generally easier to renovate. These shrubs can tolerate hard pruning and can even recover from being pruned down to the ground in many cases, though the response will be slow. Hard pruning of deciduous ceanothus is usually carried out in late February or March. After cutting back the plant as much as is required, promote strong regrowth by spreading an organic mulch around the base of the plant. Pruning Wall-Trained Types Ceanothus of some types can be trained to cover a wall or fence. Pruning strategies specific to ceanothus used in this way will help to make sure that a well-balanced framework of branches is developed to create the desired effect without the plant outgrowing its location. The pruning times and techniques for wall-trained ceanothus still depend on which type you are dealing with, so you will need to take into account the notes on pruning evergreen and deciduous types given above. However, you will also need to consider specific techniques for training as a wall shrub. You will need to think about supports, ties, placement and about pruning to create a basic framework of branches, whilst also removing any weak, spindly growth. Then, once a wall-trained ceanothus is established, you should shorten side shoots to within 2-4 buds of the main framework of branches – and remove any shoots that are weak, straggly or growing towards the wall or fence. Pruning ceanothus is not complex once you have determined which type you have, but it is important to think about this gardening job to keep your ceanothus, of whatever type, looking its best. “I have found the key to maintaining evergreen Ceanothus is to lightly prune each year after flowering as described above,” shares Roy. “If these shrubs are allowed to become large and leggy, it’s already too late to reduce them as that would require pruning into the older wood which will not regrow. “This is a job to put in the gardening diary!”
Learn more
Pyracanthas Can Be Pruned Relatively Hard To Restore A Neat Framework Of Branches
IN THIS GUIDE Do You Need To Prune Pyracantha? Pruning Free-Standing Shrubs Pruning Hedged Pyracantha Pruning Wall Or Fence Trained Shrubs Can You Prune Pyracantha In Winter? Pyracantha, also known as Firethorn, is an attractive shrub prized for its flowers and the red, orange or yellow berries that follow in autumn and winter. Pyracantha is a good low-maintenance plant that generally requires little care. However, it can be pruned in specific ways; as a free-standing shrub, an evergreen hedge, or to stand against a wall or fence. When thinking about whether, when and how to prune these shrubs can be an important part of their care. According to Horticulture Technician Peter Lickorish: “Its fast-growing nature means that misshapen pyracanthas can be pruned relatively hard to restore a neat framework of branches. “This is best done during active growth, such as April-August, but make sure to check there are no nesting birds inside first, and be prepared to miss one year’s flowering and fruiting.” Do You Need To Prune Pyracantha? This is an easy-going shrub that can, if left undisturbed, grow rather large in the right setting. We have a huge, unusually thornless pyracantha growing in a corner of our property close to (but not trained on) an east-facing stone wall, with an open southern aspect, which is at least 4-5m in height – more like a tree than a shrub. It was here when we moved in and other than the odd prune here and there (and harvesting branches for decoration at Christmas) I do not prune it regularly or pay it much attention at all. It still flowers and produces orange-red berries abundantly. Where it is located, it looks beautiful and does not impinge on other plants. We value it not only aesthetically but for the wildlife it attracts. Birds nest in its branches and in a nesting box we have placed there, and jackdaws and pigeons spend a lot of time on the rooftops nearby. Of course, many pyracanthas will need to be kept somewhat more in check and many are more compact in form and structure. “Theoretically, a hard prune in winter could kill a Pyracantha,” shares Master Horticulturist Peter. “Unlike deciduous plants, evergreens do not expect to lose many leaves over winter, so do not store nutrients and sugars in the same way. Winter pruning requires the plant to draw on these limited reserves.” Whether you need to prune much at all, and how much you need to prune, will depend on the variety you choose and where you choose to grow it. If pruning prior to flowering, be aware that pyracantha flowers mostly on year-old shoots, meaning you should try not to trim away all the previous year’s growth. However, if you need to drastically prune back an out-of-control pyracantha, you should do so – the flowers and berries can be relied upon to return the following year. Similarly, if any of the plant’s shoots have been damaged by fireblight or blackened by pyracantha scab, you should prune away the affected areas. Pruning Free-Standing Shrubs If you are growing your pyracantha as a stand-alone, free-standing shrub, then all you need to do is carry out some very basic maintenance pruning. In the middle of spring, look over the shrub carefully and simply remove any dead, damaged or diseased material. Always wear thick gloves when pruning, to protect your hands from the plant’s large, sharp thorns, and be careful not to disturb any nesting birds. At the same time, you can also remove any branches that are growing in an unwanted direction or which look unsightly because they are distorting the desired shape of the shrub. If the pyracantha is too large and overgrown for its location, you can consider renovation pruning and can expect reliable regrowth if you cut back pretty hard. Pruning Hedged Pyracantha One reason that you might need to undertake more pruning than usual is that you wish to grow pyracantha as a hedge. Pyracanthas can make great hedges, and their prickles can be useful in keeping animals in, or people out. When pyracantha is pruned as a hedge, a neater and more orderly appearance may be desired. To shape pyracantha as a hedge, it is usually pruned 2-3 times between spring and the end of the summer. Most people will prefer, for visual and wildlife appeal, to keep as many berries as possible, but you will almost certainly lose some berries as you seek to keep the pyracantha constrained into a neater hedge form. Pruning Wall Or Fence Trained Shrubs Another time when more specialised pruning is required is when you are growing pyracantha against a wall or fence. A number of pyracantha varieties lend themselves well to being formally trained as espaliers against a wall or sturdy fence, with horizontal branches trained along wires installed into the supporting structure. These pyracanthas, trained to grow against a wall, are pruned each year after they flower. Waiting until after flowering will help to limit the loss of wood on which berries will be produced. After they flower, you should shorten side shoots to within 2-4 buds of the permanent framework of branches and remove any shoots growing inwards towards the wall or fence or outwards away from it. Be careful not to prune out developing berries or spent flowers at this point. Then, in late summer, shorten all side shoots that emerge from the main framework, taking them back to almost the point where the clusters of berries are produced – this is usually 2-3 leaves away from the base of a side shoot. This will expose this year’s berries and encourage flowering and fruiting for the following year. Remember, your choices about where and how to grow certain plants in your garden, as well as the specific varieties that you choose, will have a big impact on how much ongoing work you are going to have to do. If you want a low-maintenance garden where less pruning is involved, growing smaller pyracanthas as free-standing shrubs will make your life easier. However, if you want to consider other forms and specific growing positions, a little pruning is not necessarily too complex and might be worth your trouble. Can You Prune Pyracantha In Winter? The ideal time to prune your plant is in spring, after flowering, as you will be able to clearly see which shoots to leave, and which are old growth that is no longer flowering and berrying. However, you can also prune in winter – just be aware that the plant flowers on year-old shoots, and if you remove all the previous year’s growth, your plant may not bloom very well that spring. “A winter prune will restrict the plant’s growth, while spring or summer pruning is more about maintaining manageable growth,” concludes Peter.
Learn more
Propagating Pyracantha: 'You'll Find The Semi-Ripe Cuttings Have A Higher Success Rate'
IN THIS GUIDE 1) Take Healthy Cuttings 2) Prepare Your Pyracantha Cuttings 3) Use Rooting Hormone (Optional) 4) Place Cuttings In Pots 5) Plant Out In Autumn Or Spring Pyracantha can be a beautiful ornamental addition to your garden and also be a boon to the wildlife that shares your space, with its beautiful blooms and berries that serve as food sources as well as a feast for the eyes. If you already have a pyracantha in your garden, you might be able to propagate new plants from your garden from cuttings. Pyracantha is relatively easy to propagate, both from semi-ripe, and hardwood cuttings. Using cuttings for propagation ensures that you will get plants that look like the parent, since though you can grow pyracantha from seed, these will not come true. In other words, they will not turn into plants that look like the plant the seed came from. To grow pyracantha from cuttings: Take semi-ripe cuttings in late-summer or early-autumn. Remove any leaves from the lower portion of the cutting to help the plant focus its energy on establishing roots. Dip cuttings into rooting hormone to improve the chances of them rooting successfully (optional). Place cuttings into pots with a suitable growing medium to develop roots. Plant out cuttings in autumn or early spring for the best chance of successful establishment. Read on for a little more information on this process. 1) Take Healthy Cuttings First of all, identify a mature and healthy pyracantha from which you would like to take cuttings. Cuttings can be taken from pyracanthas any time from around midsummer until late autumn. “Greenwood cuttings can be taken at the same time as semi-ripe cuttings (midsummer to early autumn), but you should find the semi-ripe cuttings have a higher success rate,” says Master Horticulturist Dan Ori. “Hardwood cuttings can be taken from late autumn to midwinter, but midwinter cuttings may get scab that disrupts rooting.” The shoots that you want to cut are those that are fresh, current-year growth, green at the tip and just beginning to go woody and harden towards the base. Aim to cut off the tops of the shoots selected, to a length of around 15-20cm. Make your cut just below a node point where a leaf joins the stem. 2) Prepare Your Pyracantha Cuttings Next, take your cuttings and remove the bottom leaves to leave the lower portion of the stem bare. Aim to leave only 4-5 leaves. 3) Use Rooting Hormone (Optional) Though Pyracantha can take fairly successfully from cuttings without this step, to improve the chances of success you can dip the bottom end of your cuttings into a hormone rooting powder to promote successful rooting. 4) Place Cuttings In Pots Aim to place your cuttings into a growing medium as soon as possible. It is best to place a few cuttings around the edges of a large pot or container and to fill the pots with a moist yet free-draining cuttings compost mix. Water the cuttings well but make sure excess water can drain away freely. Place your cuttings in a greenhouse or in a warm and bright position, with relatively high humidity but somewhere out of direct sunlight. Typically, roots will develop within 8-10 weeks. In spring, you might plant out your cuttings, but generally, these will be potted on to grow and mature until the following autumn. 5) Plant Out In Autumn Or Spring Pyracantha cuttings will typically have developed and matured to the stage where they are ready to plant out around a year or so after they were taken or a little longer. Though unfussy about sunlight and soil, pyracantha will do best when planted out in a moderately fertile location. It can cope with a lot, but waterlogged areas will certainly be less than ideal and the plant won’t have as many berries in deeper shade. You can grow pyracantha as a free-standing shrub, in a hedgerow, or trained against a wall or fence. Pyracantha is one of a number of shrubs that are relatively easy to propagate from cuttings. So, if you see one that you like, why not give this relatively easy method a go?
Learn more
Watch Out For Overly Zealous Pruning Of Potentilla Shrubs Argues Elizabeth Waddington
IN THIS GUIDE Do You Need To Prune Potentilla? When To Prune Potentilla Maintenance Pruning Rejuvenation Pruning Cutting Back In Summer Cutting Back In Spring References Potentillas can be either shrubs or herbaceous perennial plants and there are numerous species and named cultivars that are popular in UK gardens. Potentillas grown in gardens are typically categorised into shrubby and perennial types. Characteristics and care requirements differ depending on which of these two groups we are referring to. Shrubby potentillas are pretty shrubs that can be useful at the front of a bed or border, as a ground cover or to form low hedges in a garden for a summer display, whereas perennial potentillas make attractive cottage garden plants. Pruning requirements are minimal for both of these types of potentilla, so read on to see how you can prune your shrubby or perennial varieties. Do You Need To Prune Potentilla? Shrubby potentillas naturally have a loose, natural form that does not respond well to overly zealous pruning. Often, pruning requirements will be minimal and less is definitely more when it comes to pruning these shrubs. Pruning is typically carried out sparingly for the health of the plant and also to keep things looking neat. A little pruning can be an aesthetic decision. When To Prune Potentilla General maintenance pruning and any neatening, as well as more drastic rejuvenation pruning if desired, is best carried out in the early spring, before the flower buds form. Pruning later is possible, but it will reduce flowering in the current and subsequent years. Maintenance Pruning With an annual pruning regime for shrubby potentilla, the key goals are to remove any dead, damaged or diseased material down to within 15cm of the ground, or to a healthy framework. You can also give the plant a gentle trim all over for neatness. It is important not to prune too hard, as these shrubs have a natural loose and open form that does not lend itself to particularly formal pruning. Rejuvenation Pruning However, if a mature shrub has become leggy, overgrown and unsightly, or if flowering has diminished, harder rejuvenation pruning is possible. “On sandy, infertile soils Potentilla shrubs tend to grow in quite tight, mounded shapes,” says Horticultural Consultant Colin Skelly. “In more fertile, moisture-retaining soils, they can become far more floppy and lax. This is when you might need to be harder with your annual pruning and carry out occasional renovation.” If you wish, you can remove up to one-third of the older stems down to within 15cm of the ground in one year (though flowering will likely be reduced). Over the next couple of years, you can continue this process until all the older portions of the plant have been replaced with new growth. Just make sure that you do not remove more than a third of the plant in one year. Cutting Back In Summer Perennial potentillas can sometimes have a tendency to flop as they grow. One option that some horticulturalists will take is cutting back in late May or early June. Known as the Chelsea chop (because it is carried out around the time of the Chelsea flower show), this can create sturdier plants that won’t be as likely to flop and can delay flowering.1 However, in most gardens, this is far from essential, but you may decide to cut back some or all of your perennial potentilla depending on your own preferences and goals. Cutting Back In Spring Perennial potentillas will naturally die back at the end of autumn before new growth emerges in the spring. Traditionally, some gardeners would cut back perennials like these in the autumn once they die back to keep the garden looking neat. However, tolerating a little wildness over the winter months and leaving dead material in place in a perennial bed can bring benefits for overwintering insects and other wildlife. So, rather than cutting back these and other perennials once the growth dies, it is far better to leave any dead material standing over winter before cutting this back in early spring, just before new growth begins to emerge. References 1. Fowler, A. (2014, May 17). Alys Fowler: the Chelsea chop. The Guardian. Retrieved March 23, 2023, from https://www.theguardian.com/lifeandstyle/2014/may/17/alys-fowler-chelsea-chop
Learn more
Elizabeth Waddington's 15 Award-Winning Pieris Types With Star Quality
IN THIS GUIDE 1) P. japonica ‘Blush’ 2) P. japonica ‘Bonfire’ 3) P. japonica ‘Carnaval’ 4) P. japonica ‘Cavatine’ 5) P. japonica ‘Debutante’ 6) P. japonica ‘Firecrest’ 7) P. japonica ‘Flaming Silver’ 8) P. ‘Forest Flame’ 9) P. japonica ‘Mountain Fire’ 10) P. japonica ‘Pink Delight’ 11) P. japonica ‘Prelude’ 12) P. japonica ‘Purity’ 13) P. japonica ‘Sarabande’ 14) P. japonica ‘Valley Valentine’ 15) P. formosa var. forrestii ‘Wakehurst’ A go-to shrub for those with acidic soil, Pieris are interesting evergreen shrubs that can deliver year-round interest in a garden. Often prized for their colourful foliage and also for their pretty springtime flowers, these shrubs come in a range of sizes. If you have a suitable spot in your garden with moist but free-draining soil and acidic conditions, then you have a wide range of Pieris to consider. Where there are no suitable soils or where space is limited, smaller Pieris can also be grown in pots. Below, we’ve listed a number of highly regarded Pieris cultivars of different colours and sizes that you might like to consider growing where you live, so read on to get some suggestions to help you begin to narrow down your options. All of the varieties below have received an Award of Garden Merit from the RHS. 1) P. japonica ‘Blush’ HARDINESS RATING: H5 FLOWERS: white and pink FLOWERING SEASON(S): spring FOLIAGE: green SIZE: 2.5-4m in height, 2.5-4m spread This medium-sized Pieris grows around 1.5-2.5m in height and spread. It is evergreen with glossy oval leaves, and white to pale-pink flowers tipped with deeper pink with red sepals. The flowers emerge from deep pink buds in the late winter and spring. 2) P. japonica ‘Bonfire’ HARDINESS RATING: H5 FLOWERS: white and pink FLOWERING SEASON(S): winter / spring FOLIAGE: green and red SIZE: 0.5-1m in height, 0.5-1m spread A small Pieris that is perfect for small gardens or containers, this option grows around 0.5-1m in height and width. It has small leaves which are brick red when young and mature to dark green. “Pieris ‘Bonfire’ is a fantastic choice for a container, which is ideal if your garden soil does not support acid-loving plants,” says Colin Skelly, a Horticultural Consultant. “This cultivar has early flowers for late winter interest but its real star quality is its foliage, as its name suggests.” Dark pink flower buds form in winter and open to produce sprays of small, white to pale-pink flowers in spring. 3) P. japonica ‘Carnaval’ HARDINESS RATING: H5 FLOWERS: cream and pink FLOWERING SEASON(S): winter / spring FOLIAGE: green, white, pink and red SIZE: 1-1.5m in height, 0.5-1m spread Growing to around 1.5m tall with a spread of just 1m, this upright shrub has small leaves that are bright vivid red in the spring with pinkish edges. These mature to a deep, dark green with creamy fringes. The buds are also a creamy colour, providing winter interest. These open to offer sprays of small white flowers in spring. 4) P. japonica ‘Cavatine’ HARDINESS RATING: H5 FLOWERS: white FLOWERING SEASON(S): spring / summer FOLIAGE: green SIZE: 0.1-0.5m in height, 0.5-1m spread Another smaller Pieris that could work well for containers or the front of a border with suitably acidic soil, this option grows to less than 50cm in height, with a spread of 50cm-1m. It has dark, delicate foliage and bears small white flowers in drooping panicles from late spring through to the early summer. 5) P. japonica ‘Debutante’ HARDINESS RATING: H5 FLOWERS: white FLOWERING SEASON(S): spring FOLIAGE: green SIZE: 0.5-1m in height, 0.5-1m spread ‘Debutante’ is another compact Pieris, with a height and spread of less than 1m even when fully grown. This attractive dwarf shrub has little dark green leaves and bears creamy-white flowers in upright panicles in the spring. 6) P. japonica ‘Firecrest’ HARDINESS RATING: H5 FLOWERS: cream FLOWERING SEASON(S): winter / spring FOLIAGE: green and red SIZE: 1.5-2.5m in height, 1.5-2.5m spread A somewhat larger Pieris that will typically grow to between 1.5-2.5m in height and spread, this option has a bushy form. The leaves are bright red when young, and mature to a deep, dark green. The flowers produced in late winter and spring are creamy-white in hue, hanging in large, branched sprays which make an impressive impact. 7) P. japonica ‘Flaming Silver’ HARDINESS RATING: H5 FLOWERS: white FLOWERING SEASON(S): spring FOLIAGE: green, white and red SIZE: 1-1.5m in height, 0.5-1m spread This shrub typically grows taller than it does wide, reaching around 1-1.5m in height, and growing to around 1m or so wide. The foliage is bright red, maturing to green, and each leaf has a bold margin of silvery white. In spring, the shrub also produces branched clusters of pretty, creamy-white bell-shaped flowers. 8) P. ‘Forest Flame’ HARDINESS RATING: H5 FLOWERS: cream FLOWERING SEASON(S): spring FOLIAGE: cream, pink, green and red SIZE: 2.5-4m in height, 1.5-2.5m spread A larger, impressive and dramatic Pieris, this option can grow 2.5-4m tall and 1.5-2.5m wide. The foliage starts out bright red when young, fading to pink and cream, before finally turning green once mature. In spring, the plant also produces large branched groups of creamy bell-shaped flowers. 9) P. japonica ‘Mountain Fire’ HARDINESS RATING: H5 FLOWERS: white FLOWERING SEASON(S): spring FOLIAGE: green and red SIZE: 2.5-4m in height, 2.5-4m spread Another large Pieris, growing 2.5-4m in height and spread, this evergreen has leaves that start out red, turn a coppery hue, and finally turn a deep green. The flowers, which appear in the middle of spring, are borne in branched panicles and are of a creamy-white hue. 10) P. japonica ‘Pink Delight’ HARDINESS RATING: H5 FLOWERS: white and pink FLOWERING SEASON(S): spring FOLIAGE: bronze and green SIZE: 2.5-4m in height, 2.5-4m spread Growing around 1-1.5m tall and wide, this Pieris has foliage that is bronze when young, soon maturing to a deep, dark green. The flowers, which emerge in spring, are pink, fading to white, and are borne in long, drooping panicles. 11) P. japonica ‘Prelude’ HARDINESS RATING: H5 FLOWERS: white FLOWERING SEASON(S): spring FOLIAGE: pink and green SIZE: 0.5-1m in height, 0.5-1m spread Another more compact Pieris for small gardens or containers, this option has foliage that is pink when young, which matures to a deep green. In late spring, erect panicles of little creamy-white flowers emerge. 12) P. japonica ‘Purity’ HARDINESS RATING: H5 FLOWERS: white FLOWERING SEASON(S): spring FOLIAGE: green SIZE: 1-1.5m in height, 1-1.5m spread This is another relatively small Pieris that can work well in containers as well as in the ground in suitably acidic soil. It grows around 1-1.5m in height and spread. The foliage starts out light green, fading to dark green in summer, and the flowers are quite large, pure white and borne freely on young plants in erect panicles. 13) P. japonica ‘Sarabande’ HARDINESS RATING: H5 FLOWERS: white FLOWERING SEASON(S): spring FOLIAGE: green and bronze SIZE: 1.5-2.5m in height, 1.5-2.5m spread Growing around 1.5 to 2.5m tall and wide, this Pieris has small leaves that are tinged bronze when young and mature to a lush, dark green. The white, urn-shaped flowers are borne in panicles in the late spring. 14) P. japonica ‘Valley Valentine’ HARDINESS RATING: H5 FLOWERS: red FLOWERING SEASON(S): spring FOLIAGE: green SIZE: 1.5-2.5m in height, 1.5-2.5m spread This Pieris also grows to around 1.5-2.5m in height and spread. It has glossy, dark green foliage and offers truly stunning and unique deep pinkish-red flowers which bloom in large, trailing panicles in spring. 15) P. formosa var. forrestii ‘Wakehurst’ HARDINESS RATING: H5 FLOWERS: cream FLOWERING SEASON(S): spring FOLIAGE: red, cream and green SIZE: 2.5-4m in height, 1.5-2.5m spread A large and impressive Pieris that can grow up to 4m in height and spread to 1.5-2.5m, this option has leaves which emerge bright red in spring, turning creamy in colour and then finally turning a deep green. In spring, the creamy-white, urn-shaped flowers are also impressive and are borne in large hanging sprays. Of course, these are by no means the only Pieris that you might grow, but the highly regarded options listed above could be a good place to begin if you are looking to choose one for your garden.
Learn more
Choosing Pieris For Containers: Important Considerations To Keep Your Plants Healthy
IN THIS GUIDE Can Pieris Be Grown In Pots? Common Potted Varieties Choosing Containers For Pieris Choosing Suitable Compost Potting Up Pieris Ongoing Potted Pieris Care Pieris are attractive plants that provide interest over different seasons with their foliage and flowers. They are evergreen and compact in form, making them well-suited to a range of locations. As members of the Ericaceae plant family, pieris prefer acidic conditions and can be a good choice if you have acidic soil where you live. If you do not, you might wonder whether you can grow pieris in pots. Can Pieris Be Grown In Pots? The good news is that many pieris cultivars are ideally suited to growing in containers when these containers are filled with a suitable growing medium and provided with the correct care. Common Potted Varieties Some small to medium-sized pieris that could be good options for container growing include: P. japonica ‘Cavatine’ P. japonica ‘Debutante’ P. japonica ‘Flaming Silver’ P. japonica ‘Pink Delight’ P. japonica ‘Prelude’ Keep in mind that there are plenty of other cultivars that can also potentially work well in pots. Choosing Containers For Pieris Pieris plants are shrubs, even if they are compact, so you will need to choose a reasonably large container. One compact pieris growing on its own can grow in a pot around 40cm across, but if you are creating a mixed display, you might wish to use a larger container. It is important to choose a sturdy pot that can support the pieris and, if you are choosing a taller cultivar, your container should be heavy enough not to topple over. Another very important consideration when choosing a container for pieris is that it should have good drainage at the base. These shrubs typically cannot cope with waterlogged soil and need moist but well-drained conditions. Choosing Suitable Compost One of the most important things when growing pieris in containers is the medium you choose. Remember that these are acid-loving plants and an ericaceous compost is required. For drainage, it can be a good idea to add 20% grit by volume to your ericaceous compost mix, especially in areas with higher rainfall and damper conditions. “For a shrub like Pieris, John Innes ericaceous compost is ideal, as it is formulated for container growing,” shares Master Horticulturist Colin Skelly. “It will have a blend with sand for drainage, but additional grit or fine bark will help to open up the compost and aid drainage further. “As time goes on, an ericaceous liquid feed will be needed as this is formulated especially for lime-hating plants to access.” Potting Up Pieris Once you have purchased or sourced your pieris, prepare your new container with a little compost mix at the base. Place the plant into the container, making sure that it is at the same depth that it was in its previous pot, then fill in more of the ericaceous soil around the sides of the roots, firming gently to avoid air pockets. Water in well, making sure excess water drains away freely, then mulch around the plant. If you are creating a mixed display, you might wish to add other ericaceous plants that like similar conditions, such as heathers. Ongoing Potted Pieris Care Place your pieris in a container in full sun or partial shade. Water consistently through dry spells in summer, making sure that your shrub does not entirely dry out. Check to ensure adequate drainage, especially throughout the colder and wetter months. In cold areas, protect new growth against frosts in spring with a horticultural fleece or another form of protection. Each spring, replenish the mulch around the top of the container and feed your plant with an organic, ericaceous feed to promote healthy growth and flowering.
Learn more
These Are The Common Causes Of Issues With Pieris According To Colin Skelly
IN THIS GUIDE 1) Yellow Leaves 2) Brown Spots 3) Poor Growth Pieris are generally fairly easy and low-maintenance shrubs to grow, as long as they are provided with the right environmental conditions. “Most problems with Pieris health that I have seen are due to them being planted in either insufficiently acidic soil or a lack of drainage (or both),” shares Colin Skelly, a Master Horticulturist. “If your soil is not naturally acidic, trying to amend it is a never-ending battle with the underlying conditions. It is better to grow Pieris in a container using ericaceous compost.” However, there are some signs to look out for that indicate that there is some kind of problem, such as: Yellow or pale leaves. Brown spots on leaves. Poor growth or a general lack of flowering. Below, we will take a look at some of the most common causes for these symptoms and help you work out what problem or issue you might be dealing with when growing Pieris. 1) Yellow Leaves Yellow or pale leaves on pieris plants can be caused by a number of different problems. Yellow leaves are sometimes caused by too much direct sun. When plants are not in dappled or partial shade, leaves can turn yellow in the bright sunlight and should be moved to a more shaded spot. Yellow leaves can also develop due to problems with the soil or growing conditions. The soil may not be sufficiently acidic, which may be causing poor nutrient uptake that results in the yellowing of the leaves. Root issues may also mean that plants are not getting the nutrients they need. Pale and bleached-looking leaves can also be caused by lace bugs, which are present in southern parts of England but can be found elsewhere. Pieris lace bugs, also known as andromeda lacebugs, can be seen on the underside of leaves that look pale and mottled on top. They are sap-sucking insects which can cause leaf drop if the infestation is heavy enough. The bug is notable for its distinctive lace pattern Tolerate populations in small numbers and encourage natural predators like birds, ladybirds and ground beetles in your garden to keep the number of these and other sap-sucking insects down. A Pieris will be able to tolerate a small infestation, but you should prune heavily infested ones. A selection of organic and synthetic pesticides can be used to remove infestations, but be careful not to apply them while your plant is flowering. Such chemicals will cause harm to any pollinating insects that visit your garden, so use them sparingly and always outside of flowering seasons. 2) Brown Spots Brown spots are commonly a sign of a fungal issue on a Pieris shrub. Fungal leaf spot and other fungal issues are most likely to arise where there is overcrowding, poor airflow and where humid or waterlogged conditions prevail. Brown leaves may also be a sign that the plant has not received enough water, which is more common when growing Pieris in pots. Remove affected material as soon as possible to prevent fungal issues from spreading. 3) Poor Growth If your Pieris grows poorly or does not flower, this is often a sign that it is not happy in its current location. This might be due to the soil not being acidic enough, a problem with water availability or because a container plant has outgrown its pot. Address any potential problems with environmental conditions and care, and you should be able to avoid many of the most common issues and keep your pieris happy and healthy for a number of years to come.
Learn more
Cordyline Can Be Injured By Frost, Damp Or Wet: Revive Yours With These Tips
IN THIS GUIDE Immediate Action For Reviving Outdoor Varieties Follow-Up Care For Outdoor Varieties Reviving Indoor Varieties Fixing Underwatering Fixing Overwatering Repotting Damaged Houseplants Cordylines, in their native sub-tropical to temperate habitats, are long-lived trees. However, in the UK, they can be damaged by draughts, dampness and winter cold or wet, regardless of whether they are grown inside or outside. Underneath we explain how you can revive a fully-fledged outdoor cordyline or a small potted plant that you are at risk of losing. Immediate Action For Reviving Outdoor Varieties Outdoor cordyline trees in the UK are more often injured by frost, damp and wet in the winter than by other problems. The first sign is dead and dying foliage. While this can sometimes be down to other causes, if the upper part of the main stem or trunk is not hard and stiff but feels unpleasantly soft, it is usually because the cold or wet has caused the plant to rot. The first step is to remove the dead or dying foliage by either pulling or cutting it off. You will also need to shepherd the injured tree through the cold season by protecting the crown as well as the roots from winter wet. You can do so by tying together any remaining leaves and covering the crown and main stem with a waterproof horticultural fleece or plastic sheeting. Do so only during cold and wet periods and not when the days are dry and sunny. Also, protect the roots by putting down a layer of organic mulch around 10cm thick, leaving 2-3 centimetres around the main stem. During periods of inclement weather, lay plastic sheeting around the main stem. Follow-Up Care For Outdoor Varieties The next step is a cutback or severe prune when spring arrives. Feel your way down the trunk or main stem to the point at which it is not soft but feels healthy, firm and hard. At least several centimetres below this point cut off the trunk or main stem. “Make your cut using a sharp pair of loppers or a pruning saw, at a slight angle, to let water drain,” adds Peter Lickorish, a Master Horticulturist. After angling and smoothing out the trunk or main stem, give the plant a fair amount of water, especially if the soil is dry. Water regularly so that the soil becomes moist all through but does not get soaked and allow it to dry out between watering. During this recovery period, I would recommend that you water the plant with filtered water that is at room temperature so you don’t cause any further damage. Feed the tree a very moderate helping of organic fertiliser every 3 weeks, making sure to stay away from the roots when working the granules into the soil with a hand fork. “In time, bare stems should soon produce horn-like re-growths, which develop into leaves,” adds Peter. Reviving Indoor Varieties If your potted Cordyline fruticosa variety is ailing, its foliage will provide a very good clue if either underwatering or overwatering is to blame. If the leaves have brown tips and edges, the cause is likely underwatering. If the leaves through most of their surfaces are turning a sickly shade of yellow or another pale colour, the cause is likely overwatering. Now that you have these clues, you should be able to determine the cause for sure. Had you jetted off for a holiday and forgotten to make watering arrangements for your little cordyline, or are you a first-time cordyline owner who has been watering your plant very religiously? No matter the cause of your plant’s health woes, the container should be kept in a suitable spot, be it outdoors during the summer or indoors all year round. Fixing Underwatering If the cause of a plant’s health struggles is underwatering, the solution is always easier and the recovery is almost always surer than if the cause is overwatering. First, give the plant a good watering, but be sure the soil drains very well and the pot has drainage holes. To improve the chances of recovery, water with bottled or filtered water at room temperature. Afterwards, do not water daily but water it regularly and moderately so that the soil is made damp all through but is not soaked. Allow the soil to dry out between waterings. Fixing Overwatering If you have determined that the cause of your troubles is overwatering, you may have a trickier task on your hands. If you conclude that the overwatering has been extensive then you will need to repot your cordyline into a fresh, drier medium. However, if you have caught the problem in good time, the solution is simply to stop watering and allow the soil to dry out. I find that tilling, raking and turning over wet, compacted soil with a gardening fork or a hand rake is immensely helpful in aerating, loosening and drying out damp or wet soil. Try to do so as deeply as possible without touching the roots. When you recommence watering after the soil has totally dried out, use bottled water at room temperature. You will notice that the leaves gradually regain their natural hues and become healthy and turgid. If they begin to appear limp once again or develop brown tips or edges, you are ready to resume normal watering. Repotting Damaged Houseplants If the plant is badly affected by overwatering, you will need to prepare a new container with moderately fertile loam-based soil that is free-draining in which to repot the plant. Not only will the injured plant benefit from soil that is suitable and fresh, but you will also get a chance to inspect the roots. If all the roots are white or light-coloured and not limp or squishy, your plant is all set for repotting. However, if any of the roots are brown and have a limp or squishy feel about them, root rot has set in and you’ll need to find out how much of the root system is damaged. Very gently remove the soil from the root ball so as to inspect the root system. It is best to do so using your fingers. If considerably over half of the root system has rotted, the chances of recovery are slim, but otherwise, your plant should still be able to recover. If your decision is to try to save the plant, use sterilised mini secateurs to cut away those parts of the roots that have rotted. Once the job is complete, repot the plant and follow the watering guidelines above to revive it.
Learn more
Helping Cordyline Survive Winter: 'Cold And Wet Weather, Combined, Is Lethal'
IN THIS GUIDE 1) Bring Tender Varieties Indoors 2) Find A Suitable Spot 3) Transplant Outdoor-Grown Types 4) Provide Care For Outdoor Varieties What Not To Do If you’re in the UK and you have a cordyline, the winter care you give your plant depends on the hardiness of the variety, the region you live in and the plant’s age. Even the hardiest of cordylines, most of which are small trees, are only hardy to H3, which means they should not be subject to extended temperatures of more than a few degrees (Celsius) below freezing. Depending on your region in the UK, the larger, semi-hardy cordylines may be grown in open ground. This is possible if the temperature dips just a little below 0°C now and then in your region. However, for smaller, more tender varieties, it won’t be possible to keep these alive over winter here in the UK, so these will need to be grown in containers and moved indoors during the colder months of the year. No matter which type of cordyline you have and whether it is a container plant or growing in open ground, you can take various measures to care for it during winter: Bring tender potted cordylines indoors. Place these indoor varieties in a suitable spot. Make sure your outdoor-grown cordyline is in a good location. Provide additional care for your outdoor specimen. These measures are explained in more depth below. Difficulty Easy to Medium Equipment Required Gardening gloves When To Overwinter Autumn-spring (between the first and last frosts) 1) Bring Tender Varieties Indoors Tender potted cordylines, with a hardiness number below H3, may be kept outdoors in summer when the weather is warmer. However, before the first frost, they should be brought indoors. Indeed, this step should be taken if you anticipate even a few days of sustained temperatures below 10°C. 2) Find A Suitable Spot Even though you may bring your cordylines indoors for the winter, these somewhat fussy plants should not be placed in an unsuitable spot. They will do best in a spot with normal room temperature and will be perfectly content if the spot is a little cosy, but undue temperature fluctuations should be avoided. Furthermore, these plants should not be placed near a vent, be it an air-conditioning vent or a heating one, or where they may suffer chilly drafts. 3) Transplant Outdoor-Grown Types Provided you live in a relatively temperate region of the country, a semi-hardy cordyline may be transplanted in open ground. For the plant to survive winter after winter in the UK, you need to get a few variables right in the first place. First, the variety should have a hardiness rating of H3 or better. Transplant only after the plant is 3 or more years old in mid to late spring. Finally, the plant should be sited in a sheltered spot which drains well. It should enjoy full sun but can cope with some partial shade if the aspect is not north-facing. 4) Provide Care For Outdoor Varieties Before the first frost and the advent of winter rains, place a 10cm layer of mulch around the plant, leaving a few centimetres around the main stem. A leaf, straw, hay, or wood chip mulch is a good option. Cordylines must be protected from the soggy ground especially in winter, as these conditions can prove fatal. If heavy or prolonged showers are anticipated, lay a sheet of plastic or tarp around the base of the plant, angled slightly with bricks or rocks underneath, so that rainwater runs off and away from the plant. These plants need to be well protected from frost, snow, freezing rain and icy blasts. When this type of weather is likely, wrap the main stem from the ground and also as much of the lower foliage as you can cover. Horticultural fleece is best, but burlap, sacking or an old blanket will do. Do not leave these wrappings on any longer than necessary and certainly not for days at a stretch, as the plant will not be able to breathe and may start to rot. As soon as you see a mild sunny day, remove the wrappings. Wrap the plant again in the evening and, if the following day is another pleasant one, remove the wrappings again. “Any leaves outside the wrappings will need to be knocked to dislodge any snow that accumulates on them,” says Horticultural Lecturer Peter Lickorish. What Not To Do Do not fertilise these plants at all from mid-autumn to early spring or prune them in any way during autumn and winter. Whether your cabbage palms are indoor plants or open-ground ones, water them only now and then during winter to hydrate them. Simply ensure that the soil and the roots do not dry out completely or stay dry continuously. “Cold and wet weather, combined, is lethal,” says Peter. “If planting Cordylines outdoors, make sure they are planted no deeper than their original pot level and thoroughly fork the soil first, to ensure good drainage. “Consider having a camber in borders, so that soil slopes gently to the edge, such as where it meets a lawn. “This ensures that rain does not puddle in the border. “The more brightly coloured the leaves, generally the more protection it will need. “If foliage should go brown, leave this in place until well into spring, to protect and insulate the lower parts of the plant.”
Learn more


