

Growing

Watering Your Aloe Plant? Don't Make This All Too Common Mistake
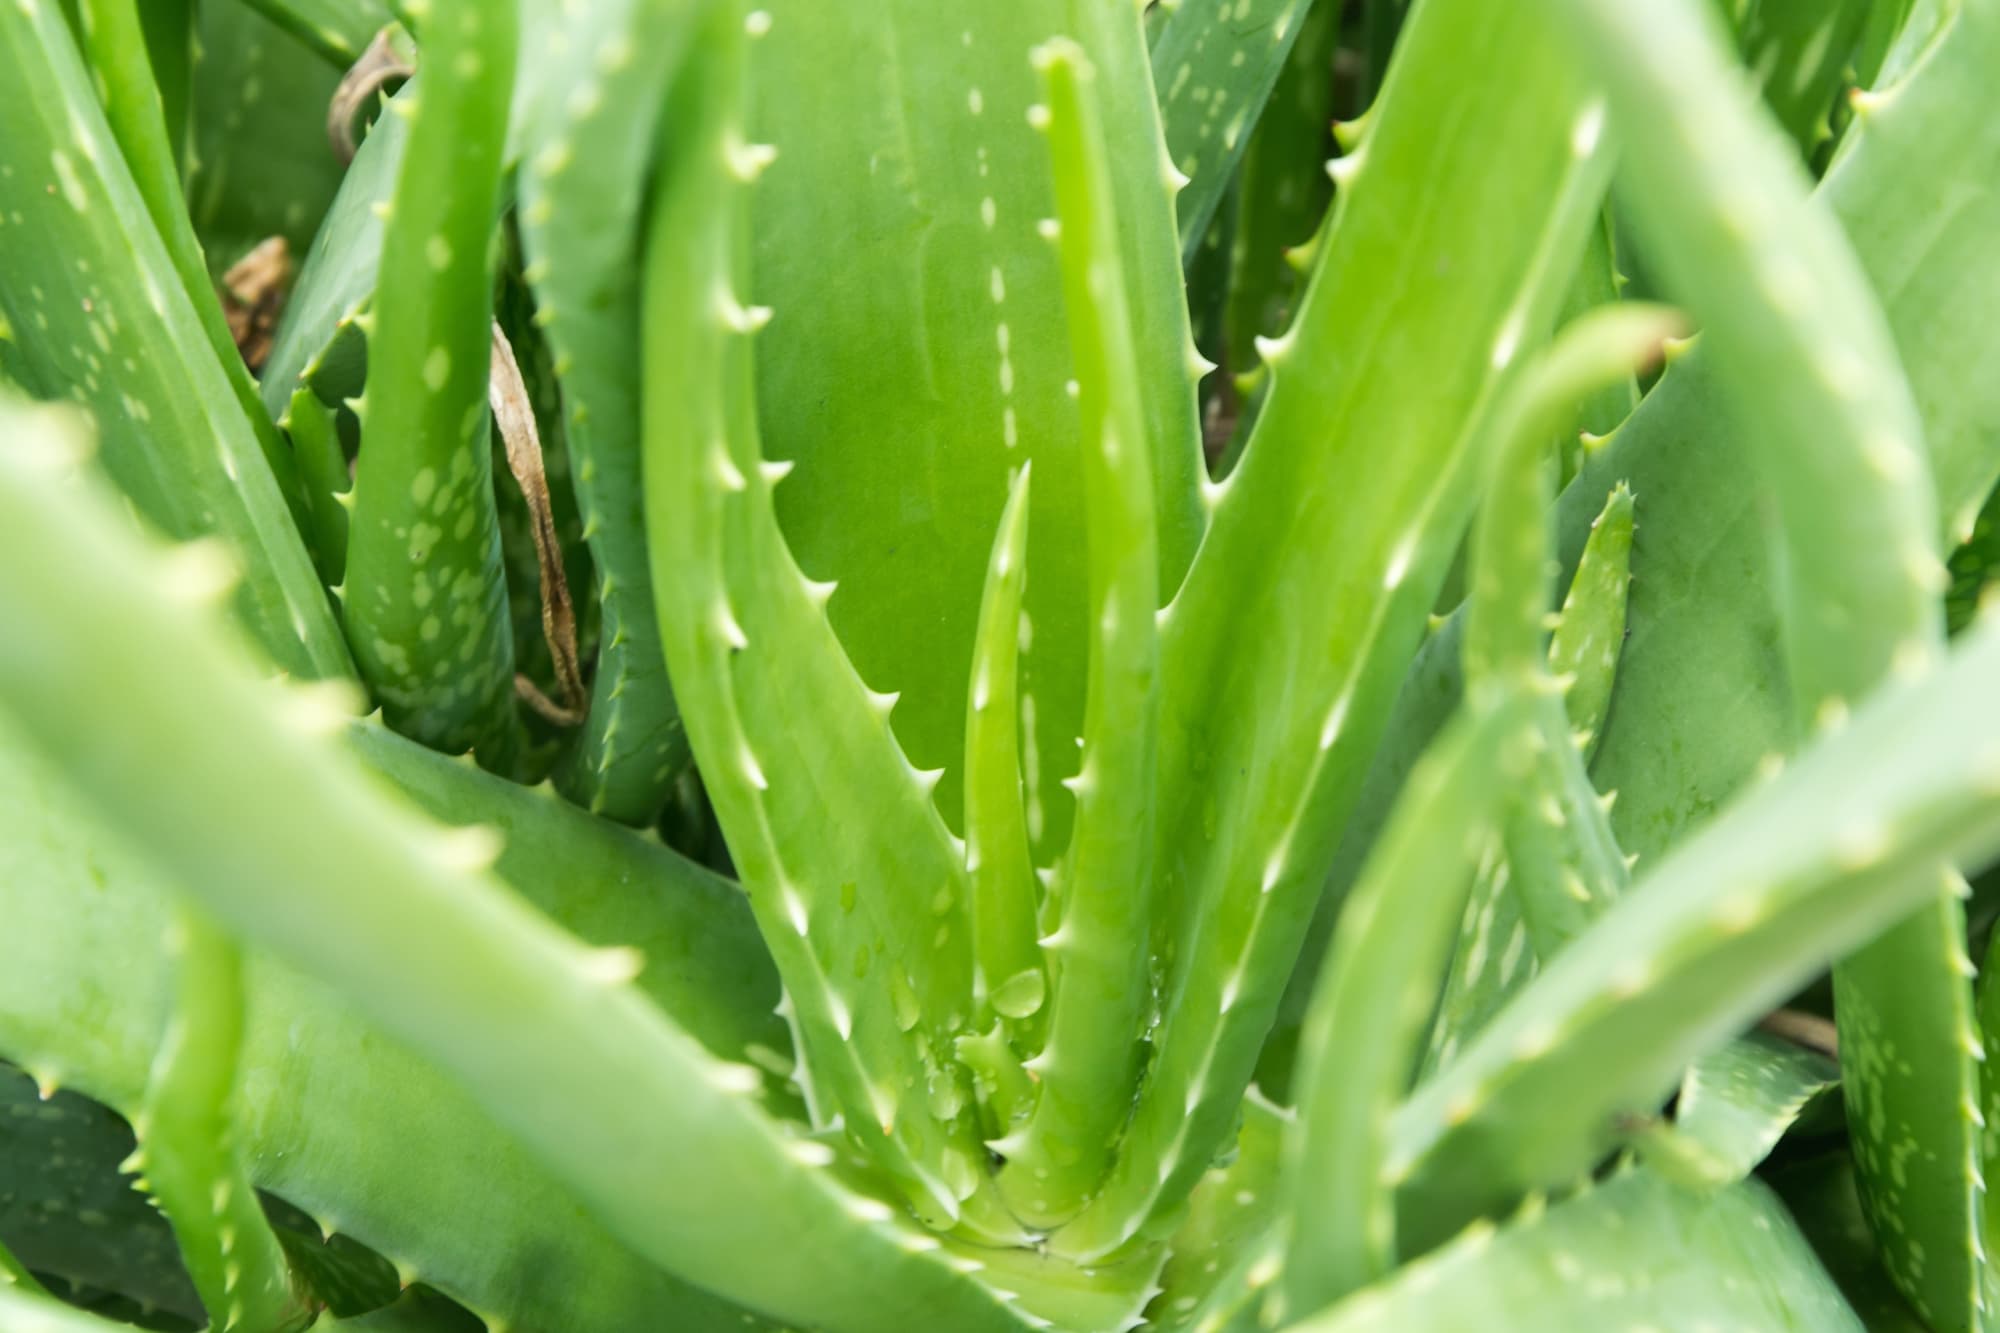
IN THIS GUIDE When To Water Aloe How Often Should You Be Watering Aloe? Signs Of Underwatering Signs Of Overwatering How To Water Aloe Correctly Aloe vera is a plant that is relatively easy to grow as a houseplant in the UK. It is pretty tolerant of some neglect and can handle someone who might not always remember to water it in a timely fashion. “When a plant isn’t growing or has died, the normal reason will be you’ve either watered it too much or not enough,” shares Les Pearcy from The Haworthia Society. “It is a mistake to think that they do not need watering because they are desert plants, however, an Aloe sitting in wet compost can easily lose its roots which will allow fungal diseases to set in.” Here are the basic watering guidelines for Aloe vera that you need to know: Aloe vera should be watered when the top few centimetres of the growing medium feel dry. Water Aloe vera more in summer and less in winter. How frequently you will water depends on a number of factors including temperature, humidity and light levels. There are signs to look out for that will tell you if you have watered too little or too much (see below). Water Aloe vera from above with rainwater where possible. “Watering is done for most the year, more in the warmer summer months and much less in winter,” adds Les. “This is very dependent on the growing conditions. Plants on a windowsill will probably want a bit more water in the winter months than those growing in a greenhouse. “Always allow the compost to dry out before watering again.” If you pop your Aloe container in a bowl, any water that drains from the bottom will collect, and soak slowly back into the soil. This is a good way of ensuring the plant has enough water: simply leave it to soak for 10-15 minutes each time you water, then discard any water that hasn’t been absorbed. With A. vera, vibrant green and a noticeable firmness when pushed indicate a healthy plant, full of gel. If your Aloe begins to droop, feels mushy to the touch, or develops crackly, dry, brown sections, this is an indication that you may not be watering enough. Let’s take a closer look at the watering guidelines to help you make sure you don’t make any mistakes. Difficulty Easy Equipment Required Watering can, aloe plant When To Water Every 1-2 weeks in summer, once a month in winter When To Water Aloe Aloe vera is a succulent plant that, once established, is very tolerant of drought. However, this does not mean that you should make the mistake of thinking that it does not need watering at all. Like most plants, even drought-tolerant ones, Aloe vera does need sufficient water to survive. “Watering, either too much or too little, is one of the most common issues I see with those growing succulents,” shares David Ennals, the Owner of Coach House Cacti. It is important to water when the growing medium is dry and to provide sufficient water so that the plant can replenish its reserves. Remember, as a succulent, the plant stores water within its tissues as a means of coping with prolonged dry periods in those areas where it grows naturally. It is best to water Aloe vera plants earlier in the day rather than later so that any water splashed onto the plant has the opportunity to dry off before the temperatures fall. How Often Should You Be Watering Aloe? “Like most succulent plants, water aloe more during the warmer months and less in winter, making sure they are in a free-draining compost,” says Les. As a rough rule of thumb, you might expect to water an Aloe vera kept as a houseplant indoors every week or two during the summer months, but far less frequently, perhaps only once a month, in the winter. However, it is not possible to give precise timings for when and how often to water an Aloe vera plant because this will be different for each location and each home. How frequently you will need to water your plant will depend on temperatures, humidity levels and how much sunlight the plant is receiving where it is placed in your household. The higher the temperatures, the lower the humidity and the brighter and sunnier the location, the more water these plants will typically require. So, rather than relying on the timings mentioned online or sticking to a strict watering regime, it is important to look and learn from the plants themselves to see whether you are watering correctly or whether some adjustment is required. Signs Of Underwatering If your Aloe vera is not getting enough water, the leaves will often become wrinkled and may shrivel up and turn a little yellow or brown on the ends. Signs Of Overwatering If an Aloe vera has been over-watered, its leaves may turn pale or yellowish and may ultimately become mushy and brown. You can also look at the growing medium and its feel, appearance and weight. If the growing medium is light and looks or feels dry, then it may be time to water once more. The key is to make sure that we add sufficient water without saturating the growing medium or leaving it waterlogged. Excess water must always be able to drain away freely. How To Water Aloe Correctly Water Aloe vera plants from above, to the surface of the compost, rather than bottom watering, as these plants can be susceptible to problems caused by mineral build-up in the growing medium. Always use rainwater where possible or filtered or distilled water if only treated tap water is available. “I like to use a watering can with a very long, narrow spout and no rose for watering cacti and succulents, including A. vera,” shares Peter Lickorish, a Horticultural Consultant. “This avoids the problem of heavy glugs of water compacting compost, squashing out air and reducing its ability to drain. “Also, it allows water to be directed to the compost, rather than accumulating on the leaves of the plant, where it can encourage rotting.” These are fairly tolerant plants and you can generally get away with some mistakes when watering them. However, make sure that you address any problems as quickly as you can to keep your Aloe happy and healthy.
Learn more
Delosperma Growing Advice From The Experts - 'They Require Little Care Once Established'
IN THIS GUIDE Overview Common Varieties How To Grow Delosperma Planting Guidelines Ongoing Delosperma Care References Delospermas, also known as ‘ice plants’, are grown as garden plants or in a greenhouse in the UK. There are 170 different species within this genus, some of which are attractive ornamental plants for gardens or for growing under cover.1 “I love growing Delospermas because of the annual food they provide for our pollinators,” shares Niamh Mullally from Southwold Succulent Co. “They can survive droughts and require little care from us once established.” Overview Botanical Name Delosperma Common Name(s) Ice Plant Plant Type Perennial Succulent Native Area East and South Africa Hardiness Rating H1B to H6 Foliage Evergreen Flowers Varies When To Plant Sow in spring, plant out anytime Delosperma hail mostly from eastern and southern Africa, so they can be ideal for a drought-tolerant planting scheme in hot and dry gardens.2 They are also frequently grown as houseplants indoors in the UK and in other cooler temperate regions. “I love the breadth of choice within this genus and the fact that the plant and the flower somehow don’t seem to match!” shares Peter Lickorish, a Horticultural Consultant. “Their cascading habit makes these a great choice for hanging baskets, where watering can be a challenge. “I’ve seen Delosperma nubigenum used to great effect as ground cover in a very narrow border near a driveway, where little else would grow well – other than weeds! “Remember to check that surfaces do not camber too much towards these plants when choosing a planting spot, lest waterlogging could occur.” Delosperma cooperi ‘Jewel of Desert Ruby’ If you are interested in growing these succulent plants in your garden, you will first have to narrow down your options and decide which Delosperma you would like to grow. There are options hardy enough to remain in milder gardens throughout the year, with hardiness ratings between H4 and H6, and some much more tender varieties that need to be grown as houseplants in our climate. Common Varieties Some of the most common Delosperma varieties to grow in gardens here in the UK are: D. aberdeenense (AGM) This is a low-growing evergreen shrub with succulent leaves and small, daisy-like flowers with a purple or pinkish-purple hue. It is H3 hardy. D. congestum A mat-forming perennial succulent with leaves that flush reddish in winter and bright white and yellow flowers like daisies in the summer months. This plant is H4 hardy and the cultivar ‘Gold Nugget’ is among our favourites. D. cooperi This species is H4 hardy and has succulent leaves and deep pink or purple flowers which bloom in mid and late summer. D. lavisiae (AGM) A little succulent growing to only 8cm tall with bright pink flowers which form from late spring to early autumn. It is H6 hardy. D. nubigenum A perennial succulent with leaves that go bronze in winter and flowers that have a lemon-yellow hue. This species is H5 hardy. D. sutherlandii (AGM) A H4 hardy succulent growing to 10-15cm tall, with prolific pinkish-purple flowers that have yellow eyes and are borne in summer. How To Grow Delosperma It is important to understand the environmental needs of these plants and to provide them with the conditions that they require when choosing where to grow them in your garden. Preferred Environment Delosperma typically requires as much sunlight as possible, so should be positioned in full sun. A sheltered and south-facing location will be ideal and allow you to stand a better chance of overwintering hardier types successfully. “One of the most common problems I see with succulents is that people don’t place them in the sunniest spot if they grow them in the house,” shares Peter Bint, the Secretary of the British Cactus and Succulent Society. “Delosperma and other succulents must be on a window sill with a southerly aspect, not on a table in the middle of the room.” Whether or not you can grow ice plants outdoors will depend on precisely where you live and on which variety you are growing. As we have already discovered above, Delospermas can vary greatly in the temperatures that they can cope with and have very different hardiness ratings. In less mild areas and with more tender types, it is likely that Delosperma will fare better within a greenhouse or polytunnel structure. Soil Requirements For these succulents, the most important requirements are related to the soil or growing medium. It must be free-draining if you wish to grow these plants successfully. If you are growing in pots, the soil or the growing medium must be light and not retain too much moisture or become waterlogged. Creating sufficiently free-draining conditions for Delosperma is the main challenge when growing these plants in our climate and waterlogged conditions are the main cause of these plants failing to thrive over the winter months when grown in UK gardens. Planting Guidelines Pot-grown plants can be planted out at any time, though spring is really the best time to plant them out in your garden. These plants might be good choices for greenhouse or polytunnel growing, or for a xeriscaping or low-water-use scheme in the garden alongside other succulents and reasonably drought-tolerant plants. They fare well in a gravel garden. Plant your Delosperma in a hole that is the same depth as the existing root system and a little wider or into a container filled with light and free-draining growing medium. Ongoing Delosperma Care These succulent plants are relatively easy to grow as long as you have selected the right growing position and should not take up too much of your time or attention. Sunlight These plants will thrive in full sun, so when you are choosing where best to place them, you should make sure that you place them in as sunny and sheltered a spot as possible. Watering As previously mentioned, these are not plants that can tolerate any level of waterlogging at all. This is something to remember not only when choosing where to position them but also is something to keep in mind while watering. It is always important to make sure that you do not overwater and that when you do, excess water can always drain away freely. Pruning Generally speaking, Delosperma will not need any pruning at all. Propagating Delospermas are typically propagated either by sowing the seeds or by taking softwood cuttings in spring. Seeds should be sown on the top of the growing medium because light is required for germination to take place. Cuttings can be taken throughout much of the summer, as well as in spring, but softwood cuttings taken earlier tend to root more successfully. Mature plants can also sometimes be divided. This is another propagation method to consider and, again, is something to do in the spring. Common Problems By far the biggest and most common problems when growing ice plants of this kind are issues relating to overwatering or poor drainage. Waterlogging can cause rotting and a range of other problems for these plants and avoiding this is generally the number one concern when growing them. Aphids, mealybugs and several other common pests can also occasionally become an issue when growing these plants. However, on the whole, problems tend to be related to unsuitable growing conditions. So, if you have a problem, look carefully at the situation to work out what might not be ideal and you will usually find the root cause of the issue. References 1. Delosperma. (n.d.). Kew Royal Botanic Gardens. Retrieved April 12, 2023, from https://powo.science.kew.org/taxon/urn:lsid:ipni.org:names:30416604-2#children 2. Delosperma nubigenum. (n.d.). Missouri Botanical Garden. Retrieved April 12, 2023, from https://www.missouribotanicalgarden.org/PlantFinder/PlantFinderDetails.aspx?taxonid=275482&isprofile=0&
Learn more
Only Feed A Venus Fly Trap During Active Growth Say Experts - These Guidelines Show How
IN THIS GUIDE How Venus Fly Traps Feed In The Wild When To Feed Dionaea How Frequently Should You Feed Venus Fly Traps? What To Feed Dionaea The Feeding Process References The Venus fly trap, botanically named Dionaea muscipula, is the most popular carnivorous plant to grow as a houseplant in the UK.1 For this guide, we’ve teamed up with two experts in carnivorous plants: Kevin Zhang – President of the Mid-Atlantic Carnivorous Plant Society. Kenny Coogan – Education Director at the International Carnivorous Plant Society. Most people are familiar with these fly-eating plants as a novelty often grown within the home. However, fewer people will truly understand how to care for them correctly and, unfortunately, many Venus fly traps grown as houseplants in the UK do not live for long. Feeding these plants correctly is one area where people often do not get it right, so in this guide, I will help you understand the basic feeding guidelines and delve a little deeper to understand when and how to feed these fascinating plants. Difficulty Medium Equipment Required Tweezers, small insects, fertiliser (optional) When To Feed During active growth (between spring and autumn) How Venus Fly Traps Feed In The Wild Venus fly traps come from the subtropical wetlands of North and South Carolina.2 In their natural environment, they catch their prey from the environment around them with the trapping structures at the ends of their leaves, which are triggered by tiny, sensitive hairs on their inner surfaces.3 Each plant has between 4-7 leaves arising from a short stem (a bulb-like object) below the ground. In order for the special traps to shut, two trigger hairs must be touched in rapid succession.4 This is a mechanism designed to ensure that the plant only expends energy on closing when there is worthwhile prey to digest. It typically takes just 1 to 3 tenths of a second for the trap to shut and once it does, the stiff hair-like protrusions on the edges mesh together and prevent the prey from escaping.5 “The mechanisms by which they capture insects are striking,” shares Kevin. “The Venus flytrap is capable of rapidly snapping its leaves and it is unusual adaptations like this that are what initially drew me to carnivorous plants.” In our homes, of course, these plants won’t necessarily have access to as many insects as they would in the boggy ground where they naturally belong. With this in mind, we must consider how we can help them to meet their nutritional requirements when we grow them indoors. Our aim should be to provide conditions that mimic as closely as possible the conditions in which these plants thrive in the wild and to try to help them feed in as natural a way as possible. When To Feed Dionaea When caring for Venus fly traps within your home, you should be aware that you will often have to be responsible for feeding them throughout the period when they are in active growth. This is usually between spring and autumn. In autumn, they will die back and remain dormant for the winter months, but they should spring back into active growth once the daylight hours increase the following spring. You will typically have to feed them in spring and during the summer, as it is unlikely that they will be able to catch enough prey naturally inside a home. However, these plants can sometimes be placed outside in the summer before they are brought back indoors for the colder part of the year. If you have adopted this strategy, the plant should be able to catch enough prey on its own in your garden and won’t need any additional feeding throughout this time. How Frequently Should You Feed Venus Fly Traps? Through the spring and summer, it is also important to understand how frequently a Venus fly trap will need to be fed in order to receive the sustenance it needs. This is where many growing these plants inside their homes will go wrong, as they will be tempted to feed far more frequently than is actually required. A Venus fly trap will only require a meal of a fly or other insect around once a fortnight and it is rarely a good idea to feed more frequently than that. Feeding once every few weeks will usually be enough to keep your plant healthy and happy. “The most common misconception is that carnivorous plants will die if they are not fed insects regularly,” says Kevin. “They can do well without being fed insects for weeks, although if you’re growing them somewhere where there are absolutely no insects, I would recommend feeding something every couple of months or so.” What To Feed Dionaea The best things to feed a Venus fly trap are akin to the plant’s wild diet, which largely consists of any insects small enough to fit entirely within one of the traps on the plant, such as different flies, gnats and mosquitoes. Feeding live prey is preferable where possible. If you feed dead prey (like pieces of mealworm, for example) then these should be hydrated before they are fed to the plant and you will have to move them a little within the trap to stimulate it to shut. Fertilisers can also be used, but should not act as a replacement to insects, as Kenny Coogan from the International Carnivorous Plant Society explains: “In addition to water, one important consideration for growing carnivorous plants is fertilisers. “Most carnivorous plants have evolved in low-nutrient environments, but random mutations have enabled plants like Venus fly traps to trap prey and have an advantage in these harsher conditions. “Historically, carnivorous plant growers would say to avoid fertilisers, as they would burn the roots and leaves of plants. “Recently we learned that some are safe for carnivorous plants. “If you grow your plants outside and they have access to insects or if you feed them insects, fertilisers are usually not necessary. “If you are growing them indoors, many genera can benefit from a seaweed-based fertiliser.” The Feeding Process To provide your Venus fly trap with a meal, you will have to find and catch a fly or another smallish insect around which a trap on the plant can close completely. Ideally, it should be smaller than half the size of the trap to prevent decay before the prey is digested. With a pair of tweezers, take this prey and place it into the trap. Remember, it is very important not to forcibly close the traps on your plants. Instead, simply let the trap close on its own. The trap should close and the process of digestion should begin as long as you let nature take its course. “Traps re-open after the digestion process, which takes around a week, and can repeat this process a couple of times,” shares Peter Lickorish, a Master Horticulturist. “You only need to feed one or two traps at once.” Make sure you do not close the traps or cause them to close without food within because this causes the plant to expend energy unnecessarily, which can lead to problems. Another key thing to remember is that you should not place foodstuff that is not part of these plants’ natural diets into the traps. Also, make sure that you do not place anything too large for the plants to handle in there. When it comes to feeding Venus fly traps, the most important thing of all to remember is that less is more. References 1. Venus Flytrap. (n.d.). National Wildlife Federation. Retrieved April 11, 2023, from https://www.nwf.org/Educational-Resources/Wildlife-Guide/Plants-and-Fungi/Venus-Flytrap 2. Gonzalez, S. (2022, September 2). The Venus Flytrap: A North Carolina Native. Homegrown: NC State University. Retrieved April 11, 2023, from https://homegrown.extension.ncsu.edu/2022/09/the-venus-flytrap-a-north-carolina-native/#:~:text=The%20Venus%20flytrap%2C%20one%20of,70%2Dmile%20radius%20of%20Wilmington. 3. Volkov, A. G., Adesina, T., Markin, V. S., & Jovanov, E. (2008). Kinetics and Mechanism of Dionaea muscipula Trap Closing. Plant Physiology, 146(2), 323–324. https://doi.org/10.1104/pp.107.108241 4. Villazon, L. (2020a, April 15). How do Venus flytraps know when to shut? BBC Science Focus Magazine. https://www.sciencefocus.com/nature/how-do-venus-flytraps-know-when-to-shut/ 5. Yang, R., Lenaghan, S. C., Zhang, M., & Xia, L. (2010). A mathematical model on the closing and opening mechanism for venus flytrap. Plant Signaling & Behavior, 5(8), 968–978. https://doi.org/10.4161/psb.5.8.12136
Learn more
When To Plant Gladiolus Corms Will Depend On The Species: Follow These 4 Steps
IN THIS GUIDE When To Plant Gladioli 1) Choose Your Variety 2) Decide Where To Plant 3) Prepare Your Planting Area 4) Plant Your Gladiolus Corms Gladiolus is the Latin name for Gladioli, which are popular corms that flower beautifully and make great cut flowers. When you will plant gladiolus bulbs (properly corms) depends on which type and variety you have chosen to grow. In order to plant gladiolus corms effectively you should: Choose which Gladiolus corms to plant. Decide where in your garden you wish to grow them, bearing in mind their preference for open, sunny ground. Prepare your planting area or container, amending the growing medium with organic matter as required. Plant corms at around 3 times their own depth (often around 10-15cm or a little deeper) and around the same distance apart unless growing in containers when they can be closer. Difficulty Easy Equipment Required Gladiolus corms, containers (if growing in pots), suitable growing medium When To Plant Varies by type When To Plant Gladioli This really depends on the type of Gladiolus that you have chosen to grow. The type we choose will dictate when we plant the corms, along with their correct placement and care. Typically, when considering when and how to plant, we will divide Gladiolus into: Summer-flowering hybrids commonly grown in gardens. Early-flowering types. Other gladioli that are commonly grown in gardens. (like G. mureliae & G. communis subsp. byzantinus). Specialist species of Gladioli grown in containers. Summer flowering hybrids, which account for many Gladioli commonly grown in our gardens, are typically planted between the middle of April and May. Gladiolus communis Successional planting of a few bulbs in batches fortnightly can stagger the crop, which can be useful for a prolonged period of blooms and for longer harvests of cut flowers in a cut flower garden. Early flowering types are typically planted between late March and the middle of April, to flower in June. However, these corms can be planted in the autumn in a cold frame to bring the flowers a little earlier. G. mureliae corms are typically planted in April, while G. communis subsp. byzantinus corms are typically planted a little earlier in the spring. Some early spring flowering species should be planted in the autumn; so it is always prudent to check the guidelines for the specific Gladiolus that you would like to grow. 1) Choose Your Variety Above, we have discussed the main types of Gladiolus that you might be interested in planting. Of course, you will have to decide which of the types listed above you will grow. Remember that each of the different types has some differences when it comes to the growing conditions that they require and how their care must be handled. In addition to this, you will have to narrow things down further and decide not only which type you will grow, but, within that category, which species or cultivar you would like to plant in your garden. There are many species and named gladioli varieties to choose from. 2) Decide Where To Plant Something to consider at the same time as thinking about choosing your corms is where to plant them. Where it will be best to grow your corms will depend on which options you are considering, but, as a general rule, most Gladioli like an open and sunny location, without too much shade or competition from nearby plants. Of course, you will need to know how hardy the gladioli you are considering are and also be familiar with the conditions in your garden, so you can do a little matchmaking and choose the right gladioli corms for the right location. This can be a location in the soil or in a suitable container. Many gladioli are ideally suited to container cultivation and will thrive in pots. Terracotta pots which have good drainage and dry out more quickly are far better than plastic pots for growing gladioli (and are a more eco-friendly choice too). Be sure to ensure that you cover the drainage hole with a crock to make sure that water drains freely. 3) Prepare Your Planting Area In general, it is important to remember that growing healthy plants always requires, first and foremost, a healthy soil or growing medium. When planning to plant corms in a container, make sure you select the right one, and fill it with a general purpose, peat-free potting mix. When planning to plant corms in the ground, make sure that you amend the area before planting with plenty of homemade compost, well-rotted manure or other organic matter. This will help retain moisture, provide nutrients, improve drainage and suppress weed growth to a degree. 4) Plant Your Gladiolus Corms Once you have prepared your container or the growing area for your gladioli, make holes for individual corms or make a trench if you plan on planting a row. “Plant the corms 6 inches (15cm) deep,” says Fred Miller from the Empire State Gladiolus Society. The holes or trench should be around a depth of around three times the height of the corms. Keep a width of around 10-15cm between corms and make sure you plant them the right way up, with the pointy end upwards. “[Always] make sure they are planted deep enough” says Fred when questioned on the most important growing factors. This is important, and you should not plant too shallowly, because if you do this can mean that the plants produce small offspring corms rather than one well-sized corm for you to plant next year. Gently cover over the bulbs (corms) with your compost or soil, and water them in. Top containers with a mulch to retain moisture, especially if growing in pots since these will dry out more quickly. Though gladioli like free-draining conditions, the medium should also remain moist through the growing season. “Place them in full sun, and water as needed, about 1 inch per week (12mm)” says Fred. “Once planted, do not disturb them as the roots are very fine and can break easily.” If you have sandy soil, you may even wish to plant the corms deeper, since this can help to improve the stability of taller cultivars in the wind. In containers, corms can certainly be placed much closer together. “Gladiolus can sometimes feel like they are using up valuable space in a border when they are not in flower,” shares Master Horticulturist Dan Ori. “I grow mine in pots and as they start to form flowering stems I sink the plants into the ground still in their pots. The plants can then be easily lifted back out again after flowering and something seasonal can be put in the spot.”
Learn more
Two Expert Buxus Growers Explain How To Care For Box Hedgerows And Topiary
IN THIS GUIDE Overview Commonly Grown Types How To Grow Buxus Planting Buxus Ongoing Box Care References Box is commonly used for neatly clipped hedgerows and topiary in the UK and is ubiquitous in some areas. However, there is good reason for its popularity, so in spite of its commonness, you may still find plenty of reasons to choose this popular plant. In this guide, we’ve worked with two Buxus experts who offer their top tips and tricks to help you successfully grow and care for box in your garden: Bill Irving – Director at Boxtrees Nursery. Darren Lerigo – Topiary Artist from Modern Mint. “There is nothing else like growing box,” says Darren. “The leaves are small, so you can get beautiful detail into any shape you clip them into, whether it is a classical, straight-edged plinth with a ball on top – or something serpentine and modern you might see in an Arne Maynard garden.” Overview Botanical Name Buxus sempervirens Common Name(s) Common Box, Boxwood Plant Type Shrub / Hedging Native Area West and South Europe, Northwest and Southwest Africa Hardiness Rating H6 Foliage Evergreen Flowers Pale yellow, insignificant When To Plant Best in autumn or spring When To Prune Summer Common box, Buxus sempervirens, is native to the southern reaches of England and is the only plant within its genus that is native to anywhere in the British Isles.1 Box is a common sight in many British gardens, where it is used for neatly clipped hedging and topiary forms. “Box trees are also great for wildlife, providing winter cover for garden birds and hedgehogs and are an important food source for bees early in the growing season,” says Bill. Unfortunately, while popular, Box is a shrub that can be susceptible to certain issues. The most problematic of these is box blight. This is a fungal infection that spreads easily and is just one of several fungal issues that can plague this plant.2 Boxwood shrubs can also be susceptible to insect infestations by box caterpillars. Commonly Grown Types Most box grown in the UK is B. sempervirens, though other Buxus are sometimes also grown, such as B. microphylla. B. microphylla Where box blight is a serious issue, B. microphylla is said to be somewhat less susceptible to this problem. “Look at some more unusual varieties like B. myrtifolia, which is so slow-growing, but looks lovely against gravel or a low wall,” shares Darren. “If you are worried about box blight, you could look at using the new hybrid varieties that are tolerant of the disease and another advantage is that the box tree caterpillar doesn’t seem to like them as much as Buxus sempervirens.” B. sempervirens ‘Elegantissima’ Some common box cultivars that are highly regarded include: B. sempervirens ‘Graham Blandy’ (AGM) B. sempervirens ‘Latifolia Maculata’ (AGM) B. sempervirens ‘Elegantissima’ (AGM) B. sempervirens ‘Suffruticosa’ B. microphylla ‘Faulkner’ (AGM) Of course, there are a number of other named cultivars to choose from. How To Grow Buxus Box is very easy to grow and care for in a garden, but the amount of upkeep required will depend on how and where you are using it. For example, neatly clipped hedging and topiary forms can take much more upkeep than when you’re growing box in a more natural shape and form. Preferred Site Boxwood shrubs need a site in full sun or partial shade. They will typically do best in a location with morning sun where they are sheltered from the heat at the height of the day, especially in warmer, more southerly areas. “Place them by doorways or gates or use them as waymarkers or punctuation points around the garden,” says Darren. “They can also amplify the end of a border or can change the atmosphere completely if used in just the right spot and clipped just the right way.” Soil Requirements Box requires soil that is moist yet free draining or free-draining. These plants cannot tolerate remaining in a waterlogged situation and this is one of the most important factors in determining where they will grow well. Box shrubs thrive when in neutral to very mildly acidic soil, though they can be tolerant of a range of pH levels and can be grown successfully in many different soils. Planting Buxus If you have decided that you would like to plant some box in your garden, you will need to think about where and how you will integrate the plants into your garden design before you source the plants or consider how to grow them. You can purchase bare root box for a hedge or when you need a larger number. This is a more affordable way of buying box than purchasing plants in pots. However, where you want a stand-alone specimen or want a jump start on a topiary form, you can purchase a pot-grown plant and perhaps one already cultivated and pruned into a specific shape. The latter option can be purchased at any time, while bare root plants are available throughout the colder half of the year. However, the best times to plant out new box is either in spring or autumn, when the conditions make it a little easier for the plants to establish themselves successfully. Plant box just as you would any other shrub or hedging plant in your garden. “When planting, mound up the soil so that the plant’s root crown is about 50mm above the surrounding soil level,” Darren recommends. First, prepare the area. Make sure you have amended the soil with plenty of organic matter to improve drainage and soil structure. Next, determine spacing. For box hedging, a spacing of around 5 plants per metre is generally recommended, though this may be varied somewhat depending on the specific type and your goals. Box makes great hedging, but remember that closer spacing is required for these hedging plants than for some others, as box is relatively slow-growing. Once you have determined the right spacing, dig planting holes or a trench following the hedge line if you are planting a greater number of plants. Place the new box plants into these planting holes or trenches and firm the soil back around each one. After planting, be sure to water the new additions in well and then mulch around the base of the plants with organic matter, such as homemade compost or leaf mould. Ongoing Box Care The key thing when growing box is to make sure that you choose the right location for planting in the first place. If you have found a spot suited to the environmental conditions that box requires, then you should find it an easy and hassle-free plant to grow. Light As mentioned above, box can grow in full sun or partial shade. If you are growing a type with leaf variegation, you will usually find that colours are more vibrant in full sun, though most box will also be happy in partial or dappled shade. “The leaves of box reflect light,” explains Darren. “In Britain the sunlight can be quite weak, so it’s useful to have evergreen leaves that bounce the sunshine back around the garden. “Where the sunlight doesn’t hit a leaf, you get a shadow, which adds texture to your topiary or hedge. “It’s really worth thinking a lot about how the sunlight moves and is filtered around your garden space, as boxwood helps with that enormously, giving you scope to play with light and shade.” Watering Box will typically need to be kept well-watered from planting through to establishment, especially if the weather is very dry. However, once established, box will survive with natural rainfall and will only require watering or irrigation during prolonged periods of drought or particularly warm weather. Propagating If you have existing box and would like to propagate more, you might consider growing box from cuttings. It is very easy to propagate box by taking semi-ripe cuttings in early to mid-summer. The process can be very quick and it will take only around 2 months for cuttings to root with bottom heat or in a heated propagator. However, without heat in a cold frame, polytunnel or unheated greenhouse, it can take around 8 months for the cuttings to be well-rooted. Cuttings can potentially also root well in a year or so when simply planted in the ground in a moist and partially shaded spot. Once the cuttings root, you can encourage bushy growth by regularly pinching out the shoot tips. It will typically take 3-4 years before plants grown from cuttings are ready to be planted out into their final growing positions. Growing from seed takes a little longer and it will be around 5 years before your new plants are ready to go into their final growing positions in the garden. However, this is also a relatively straightforward process. Seeds should be sown in autumn or early spring into small pots and placed in a cold frame or other covered space to germinate and grow. It is important to make sure that you don’t let the young plants dry out. Common Problems Unfortunately, as mentioned earlier in this guide, the downside to growing box is that it is prone to a number of disease and pest problems. Of these common problems, box blight is perhaps the best-known and most alarming. Sadly, this problem is prevalent in many parts of the British Isles.3 “Clean your tools, as this way you prevent blight from spreading if you have it,” says Darren. As well as box blight (which we have covered in detail in a separate guide) there are also other problems to which box can succumb, including other fungal problems. “If box blight is rampant in your area, it may be worth considering an alternative species,” shares Master Horticulturist Dan Ori. “The best alternative will depend on the soil and climate you have, so some homework and consideration is needed.” “Our box tree is not looking well at the moment due to the box caterpillar and drought is also really affecting our trees at the moment,” shares Lucy Hart, the Head Gardener at Fulham Palace Gardens. Box tree caterpillar is one of the most serious pests for these plants and these are unfortunately also common in many parts of the UK. “Look out for the boxwood caterpillar, especially in March, then take steps to predate it, as we don’t have the natural predators to do it for us here in the UK,” warns Darren. “Regular hand-picking is an option if you only have a couple of topiaries, but if you have lots, you will need to spray carefully with a product that controls caterpillars. “Make sure you read the instructions and spray when other garden beneficials aren’t around in the early morning or in the evening.” “Experiment with creative combinations of small-leaved evergreens,” says Bill. “There are many other plants that work well with Buxus and more diversity of plants within a garden will help minimise the impact of problems with plant health.” References 1. Trees and shrubs: native to Britain. (n.d.). Royal Horticultural Society. Retrieved April 3, 2023, from https://www.rhs.org.uk/plants/types/trees/native-tree-shrubs 2. Calonectria pseudonaviculata (Buxus blight). (2022). CABI Compendium. https://doi.org/10.1079/cabicompendium.17414 3. Box blight: managing outbreaks. (n.d.). Royal Horticultural Society. Retrieved April 3, 2023, from https://www.rhs.org.uk/prevention-protection/box-blight-managing-outbreaks
Learn more
Master Your Hoya Plant Care With Houseplant Nursery Owner Harriet Thompson
IN THIS GUIDE Overview Choosing A Hoya Variety Hoya Plant Care Reviving A Dying Hoya References Hoyas, also known as waxplants, are named after their flowers which have wax-like petals. These climbers are popularly used as houseplants in light, bright conservatories or other suitable locations inside UK homes. In this guide we’ve collaborated with Harriet Thompson, the founder of the specialist houseplant nursery Harriet’s Plants. “Houseplants like hoyas are such a pleasure to be around in our homes and have so many lifestyle benefits,” says Harriet. “Getting to grow them the way that I do means that I’m surrounded by fresh air and their goodness every single day.” Overview Botanical Name Hoya Common Name(s) Waxplant, Waxflower, Waxvine Plant Type Climber / Houseplant Native Area Asian Tropics Hardiness Rating H1A-H2 Foliage Evergreen Flowers Fragrant, waxy flowers When To Plant / Repot April to June When To Prune February Hoyas are a range of subtropical or tropical plants that can only really be grown as houseplants indoors here in the UK. Hoyas vary in their hardiness and some are potentially grown outdoors in summer, though they still tend to need to be undercover or indoors in a frost-free location over the winter months. H. carnosa ‘Krimson Queen’ Therefore, most are grown as houseplants here year-round. Hoyas that are commonly kept as houseplants in temperate climes include many cultivars that are notable for a variety of different coloured flowers and leaf shapes. Several different species and many different cultivars can be considered for UK households. Choosing A Hoya Variety According to the RHS, Hoya carnosa and Hoya lanceolata subsp. bella are the types most commonly grown here in the UK.1 One other popular option for use as a houseplant is Hoya kerrii. H. carnosa H. carnosa is a large climbing plant which will require some support and it is commonly grown on wires in a conservatory. H. lanceolata subsp. bella H. lanceolata subsp. bella is a trailing succulent plant which is a great choice for growing in hanging baskets or other hanging containers indoors. H. kerrii H. kerrii is a slow-growing evergreen vine with woody stems that will grow up to around 1m in height. “Hoya kerrii is a versatile plant as it will hang, creep, or climb depending on how you support it,” shares Horticultural Consultant Dan Ori. “It is very popular as a gift due to its heart-shaped leaves and you will often see these for sale online as a partially buried leave or two in a pot. This has caught out many a Valentine’s Day buyer as leaves eventually wilt and die or grow into their natural climbing form. “I advocate buying a plant with some vine to it as the leaves are just as lovely on their stems.” While these are the most common, note that there are plenty of other Hoyas that can be used as home unusual houseplants and many make great terrarium plants. Hoya Plant Care Hoya is certainly not the easiest houseplant to grow and, if you are a new houseplant parent, you might want to consider a less fussy option to begin with before you progress to growing plants like this. However, if the finicky plant does not deter you, then you will have to learn all about the conditions that they require and their basic care needs. Here are the key factors that you need to consider: Light Exposure Hoya need to be positioned in a light and bright location within your home. “Very few houseplants enjoy all day in direct sunlight,” says Harriet. “But, if cared for correctly, many Hoyas enjoy the late afternoon or mid-morning sun, as this encourages them to flower.” However, they should not be placed in direct sunlight for too long, especially in summer, or leaf scorching can occur. A bright a location as possible is important during the autumn and winter months. Humidity & Temperature When growing Hoya inside your home, it is crucial to remember that good levels of humidity are very important. Centrally heated spaces can tend to dry out, but you can increase local humidity by standing your hoya plant in a container on a tray filled with damp gravel or expanded clay granules, with the water just below their surface. Temperature is also important for Hoyas. Some Hoya, such as H. carnosa, will require nighttime temperatures in winter of above 10°C, but others need temperatures above 16-18°C to be maintained, so be careful when selecting a variety. Watering Through the spring and summer months, Hoya that is grown indoors as a houseplant needs to be watered regularly. Aim to keep the growing medium just moist whilst making sure that waterlogging does not occur. In autumn and winter, a Hoya will tend to need a lot less water and should be watered only moderately during this time. Aim to water when the soil is quite dry but do not let it get entirely dry and dusty. Growing Medium In order for these rather fussy plants to thrive, it is important to opt for a growing medium ideally suited to their needs. A mix of one-part peat-free compost, one-part orchid bark and one-part coarse perlite is sometimes recommended. A specialist cactus compost with added perlite can also be used. Feeding In spring and summer, you should feed a Hoya in a pot every fortnight or so. H. carnosa ‘Compacta’ Use an organic liquid plant feed that is high in potassium. Through the autumn and winter, feeding should continue but less frequently, typically around once a month until growth resumes in the spring. Repotting Hoyas really don’t like to be repotted and are usually best left in the same pot over a long period of time. However, if a Hoya really needs to be repotted, this should be done in the spring, and you should, after doing so, hold off feeding the plant for the next six weeks or so. Common Problems Most of the problems encountered when growing Hoyas arise because the plant’s environmental needs are not met. “[A] common problem with hoyas and other houseplants is keeping them warm during the winter,” says Harriet. H. carnosa ‘Krinkle 8’ If you discover that something is wrong, take a look at warmth, light levels, water and feeding levels before you look for anything else. Of course, as a houseplant, Hoya can also be bothered by common houseplant pests, such as scale insects, whitefly and mealybugs. Reviving A Dying Hoya As mentioned above, the most serious problems encountered when growing Hoyas relate to the wrong growing conditions or improper care. First things first, if a Hoya is dying, try to determine the cause of the problem. If the problem is overwatering or poor drainage, then you may be able to save a plant by repotting it. However, even if you have acted quickly, the results may be poor, so the best thing might often be to take cuttings to propagate your plant. Usually, semi-ripe cuttings are taken from a Hoya in the spring or early summer. These then will root readily in a growing medium or in water. References 1. Hoya / RHS Gardening. (n.d.-b). Royal Horticultural Society. Retrieved April 11, 2023, from https://www.rhs.org.uk/plants/hoya/growing-guide
Learn more
Sweet Potatoes: Growing, Starting Slips, Rooting And Nurturing With Andrew Hock
IN THIS GUIDE Overview How To Grow Sweet Potatoes Common Varieties When To Grow Sweet Potatoes Sweet Potato Slips Planting Guidelines Sweet Potato Plant Care A Note On Growing Alongside Regular Potatoes References Sweet potatoes always need a long growing season, which can potentially make them a little more challenging to grow in the UK than a range of other common crops. However, if you choose the right variety, grow them in an appropriate place and provide them with the right care, then it is possible to achieve abundant harvests of sweet potatoes at home. In this guide, we’ve teamed up with Andrew Hock, the Founder of The Sweet Potato Society. Andrew has many years of experience gardening and has a personal love of sweet potatoes. “Not only are they a beautiful plant to grow with lush and verdant foliage, but they are also a nutritional powerhouse,” says Andrew, when explaining why he is so passionate about these root vegetables. “The process of growing, starting slips, rooting and nurturing them until planting and then waiting months for the harvest and curing is a rewarding exercise of dedication and patience.” Overview Botanical Name Ipomoea batatas Common Name(s) Sweet potato Plant Type Vegetable Native Area South America Hardiness Rating H1C Foliage Deciduous Flowers Insignificant purple and white blooms When To Plant May to June Harvesting Months Late summer to early autumn Sweet potatoes, Ipomoea batatas, are vining plants with tuberous roots. This crop also produces leaves and young shoots as an additional yield, which potentially makes this an extremely productive plant to grow in your garden. Sweet potatoes can, in the right setting, grow like weeds. In fact, they are related to bindweeds, as they are also members of the Convolvulaceae plant family.1 However, it is important to remember that this plant is native to tropical climes and loves as much heat and as long a summer as possible, which is why we are often reliant on a good summer when growing them here in the UK. You can also grow sweet potatoes in a polytunnel, greenhouse or under cloche protection to see the best results here in the British Isles. How To Grow Sweet Potatoes “Rainy climates with shorter summers are a challenge for this type of crop,” warns Andrew. “Still, if you’re considering growing sweet potatoes, I’d say go for it! “Even a small yield is satisfying. It’s a very decorative plant, so just having all the pretty foliage is a nice addition to a garden.” In addition to this, growing sweet potatoes successfully begins with choosing the right variety or varieties for where you live. It is important to choose one of the varieties that has been specifically formulated for growing in the UK and that is suited to the growing conditions that gardeners in the UK can typically provide. Common Varieties Some common and well-regarded sweet potato varieties grown in the UK include: ‘Beauregard Improved’ ‘Bonita’ ‘Evangeline’ ‘Kaukura’ ‘Tahiti’ Ipomoea batatas ‘Margarita’ Sweet potatoes may not be the easiest of crops to grow in our climate, but choosing one of the above (or another variety suited to UK cultivation) will lead to a much higher chance of a successful harvest. When To Grow Sweet Potatoes Sweet potatoes are typically not grown from seed but from either unrooted or rooted cuttings (plug plants). The unrooted cuttings are known as sweet potato slips. Both of these are typically available from garden centres and plant nurseries from around late April onwards. They should be planted up into pots inside as soon as they are purchased, but will not be planted into their final growing positions until there is absolutely no risk of frost. Sweet Potato Slips Sweet potato slips, as mentioned above, are the unrooted cuttings from a sweet potato plant. They should be potted up into any good peat-free multipurpose potting mix. You might be able to gather your own sweet potato slips if you successfully manage to store tubers previously grown in your garden until the spring. They are best kept covered with clear plastic in a sunny, warm spot or kept inside a heated propagator until they root. Luckily, this will not typically take too long, as they tend to root readily. “You can easily grow your own slips from a sweet potato,” says Master Horticulturist Dan Ori. “For pest and disease prevention I recommend buying your first slips. Potatoes from your own harvest can be used to propagate if you are able to store them until spring.” Planting Guidelines Remember, sweet potatoes, whether they were purchased as plug plants or as slips, should only be planted out into their final growing positions once all risk of frost has passed. Remember to harden them off before transplantation. As mentioned above, it can often be easier to grow sweet potatoes in a greenhouse or polytunnel (though this need not be heated). In most areas, some form of cloche protection will be required at the very least when attempting to grow these plants outdoors. You can plant sweet potatoes in a container or a grow bag, or you can grow sweet potatoes in the ground, as long as the soil and positioning are appropriate. As a general rule of thumb, plants should be placed around 30cm apart. Sweet Potato Plant Care “The most important factors when caring for sweet potato plants are sun, soil and patience,” Andrew says. “You need a long, warm growing season and good, loose soil. “Otherwise, once properly established, in my experience, they are fairly worry-free.” So, if you have a suitable location to grow sweet potatoes, that is a major part of the job completed. These plants can romp away in the right location and take up a fair amount of space, though vertical growing with supports is an option where space is limited. However, finding the perfect spot to grow sweet potatoes is extremely important, as without its basic requirements being met, a sweet potato plant can certainly fail to thrive. Here are the key things to think about when it comes to sweet potato plant care: Preferred Soil Sweet potatoes are relatively hungry plants and require a fertile and humus-rich soil or growing medium. If growing in containers, any good quality peat-free multipurpose compost should work just fine. The soil or growing medium should be moisture-retentive yet free draining. When planting outdoors or in the ground in a greenhouse or polytunnel, it is a good idea to enrich the area before planting by top dressing with plenty of homemade compost or well-rotted manure. “Growing sweet potatoes in well-rotted manure can work well outside,” shares Dan. “However, I recommend not using animal manures and concentrated chicken manure fertilisers in greenhouses and polytunnels due to the smell and high ammonia content. “My alternative to manure is good-quality garden compost and leaf mould with seaweed feed watered on.” Position & Sunlight The most important thing when trying to grow sweet potatoes in the UK are the temperatures that you can provide. Remember, growing in a greenhouse or polytunnel or at least below row covers or cloches can make a big difference to how easy you find the undertaking. Choose as light, bright, warm and sheltered a spot as possible for the best results. A sheltered spot close to a south-facing wall might be ideal if growing sweet potatoes outside. Watering & Feeding Sweet potatoes need to be kept well watered at all times and it is especially important to think about their water needs when growing them undercover or in containers. If there is a water shortage, the tubers will not swell up as they should. Remember, plants in pots will typically dry out more quickly than those in the ground. However, even those growing in the ground outdoors will need to be watered or irrigated properly during any dry spells in summer. Mulching the plants after you have placed them in the ground or in containers with a layer of homemade compost or other organic material won’t just help to suppress weeds and retain moisture. It will also provide slow-release fertility for these hungry plants. Sweet potatoes growing in the ground typically won’t require any other feeding as long as there are sufficient nutrients in the soil. However, those in containers can benefit from the provision of a high-potassium organic liquid plant feed on a fortnightly basis throughout the summer months. Common Problems Sweet potato problems most commonly arise from trying to grow them in too cool or unsuitable a location. Low temperatures, exposure and water problems are far more likely to cause problems than pests or diseases, which is why it is so important to grow these plants in the right place. However, when growing sweet potatoes undercover you may well encounter common greenhouse pests such as whitefly or red spider mites. “The tender young leaves of baby plants are like candy to bunnies and groundhogs, so if they are around you’ll need to protect your young plants with some fencing or deterrent,” warns Andrew. “Once the plants are established though, the leaves are mostly safe. “Rodents will sometimes eat your tubers from underground, and you won’t even know until it’s too late! “Remedy this with deterrents and traps.” A Note On Growing Alongside Regular Potatoes “It’s a common misconception that sweet potatoes are similar to their named counterpart – sweet potatoes are actually an entirely different species than regular potatoes,” Andrew explains. “Potatoes are in the nightshade family and sweet potatoes are actually in the Morning Glory family. “You’ll notice this if your vines flower, as the flowers are almost identical to morning glories and are very beautiful and delicate! “While my experience growing regular potatoes is limited, I do know they take less time and are somewhat more susceptible to rot since the skins are more delicate. Sweet potatoes and regular potatoes are not ideal companions because they will be overly competitive for space and resources such as water and nutrients in the soil. Instead, I would recommend you grow sweet potatoes near nitrogen-fixing legumes to help meet their nutrient needs and with radishes, spinach and alliums to take up the space around sprawling sweet potato plants. These plants will also not shade them too much or become overly competitive. References 1. Broyles, S. (2012, November 15). In a Bind with Convolvulaceae. Whiteknights Biodiversity. Retrieved March 30, 2023, from https://blogs.reading.ac.uk/whiteknightsbiodiversity/2012/11/15/bindweed/
Learn more
Horticulturists Share How To Grow Hawthorn - The Native Shrub That Helps Support Wildlife
IN THIS GUIDE Overview Common Varieties How To Grow Hawthorn Planting Guidelines Growing As Hedging Hawthorn Plant Care References Hawthorns are beautiful, deciduous native shrubs that can make a great addition to many UK gardens. They are particularly useful for those who wish to attract plenty of wildlife to their gardens and are a great choice if you want to boost biodiversity where you live. “My favourite plant would have to be Hawthorn as the harbinger of spring, with its roots in ancient Britain and mythology,” shares RHS Horticultural Hero Sarah Eberle. Overview Botanical Name Crataegus monogyna Common Name(s) Hawthorn Plant Type Shrub / Tree Native Area Europe including the UK Hardiness Rating H7 Foliage Deciduous Flowers Creamy white flowers followed by dark red berries When To Plant November to March When To Prune Summer Hawthorn is a great plant for those who want to choose native plants to support our native wildlife. The young leaves are also edible to use too and the haws can be used in hedgerow preserves, making hawthorn a good choice for a food-producing garden too.1 Hawthorns are also useful in our garden designs. C. monogyna Darren Lerigo from the European Boxwood and Topiary Society loves growing Hawthorn as a topiary plant, as its fast-growing nature and beautiful flowering habits mean that it is a great native choice. They make excellent habitats for birds with their dense and thorny habit, but this also makes them useful for a secure boundary, a screen or a windbreak hedge. While very popular for use in hedgerows, they can also make great stand-alone specimen trees and, since they won’t grow too tall, they can be a good choice for smaller gardens. Common Varieties Arguably, the best type of hawthorn to grow in the UK is Crataegus monogyna, our native hawthorn and the focus of this guide. There are, however, also many other species within the same genus that can also be interesting choices for a UK garden. C. laevigata, C. tanacetifolia, C. persimilis, C. schraderiana and C. viridis are all good choices. C. laevigata Even once you have decided which hawthorn species to grow, you will need to consider whether a named cultivar will be right for you, as there are a number to choose from. C. tanacetifolia There are cultivars that grow into large trees, small trees or even dwarf types that grow into small trees or shrubs. Selecting the right cultivar and species for your particular garden can help suit your intended use for the plant. How To Grow Hawthorn Hawthorn is a plant that is relatively unfussy about its location and can find an appropriate place in many different gardens. Preferred Site Hawthorn can be grown in full sun or partial shade and in an exposed or sheltered location. They are relatively easy to find a place for in many gardens, whether you are creating a hedge or hedgerow, or finding a place for a stand-alone tree. Soil Requirements When it comes to the soil too, hawthorn has very few very firm requirements. It will grow well in a wide range of different soil types as long as it does not become waterlogged. It should be moist but free-draining or free-draining for the best results. If you have heavy clay soil, it is suitable for growing hawthorn but it should be amended with plenty of organic matter before planting. Hawthorn is fine with a range of pH levels too, doing well in most soils whether they are acidic, alkaline or neutral. Planting Guidelines Hawthorn trees or shrubs can be purchased as bare root plants or in pots. Choosing bare root specimens is typically the best policy when planting hawthorn in your garden or in hedging on your property. It is not only slightly more affordable but also typically leads to plants establishing more successfully and quickly. Hawthorns are best planted out during the dormant period between November and March, whether you choose bare-root plants or not. While plants in pots are available throughout the year, these may not establish as well when planted out in summer. When planting hawthorn, as when planting other trees or shrubs, first make sure that you have prepared the area, adding organic matter and clearing any persistent weeds . Next, dig your planting hole. Be sure to make this the same depth as the existing root ball and at least twice as wide. In some cases, it may be beneficial to add mycorrhizal fungi to the planting hole when planting hawthorn, as it can be when planting other trees and shrubs.2 Place the hawthorn plant into the hole, spreading out the roots within it, then fill the soil back in around the roots and firm it into place. Water in your new hawthorn, then mulch around the base of the plant with organic mulch, but take care not to mound it around the base of the trunk or stems. Growing As Hedging When grown as hedging, hawthorn is typically planted at quite a wide spacing, around 80-100cm between plants. It is often used in mixed hedgerows, with other native species interspersed. This is a great idea because it boosts biodiversity and attracts an even wider range of native wildlife than simply using hawthorn on its own. Hawthorn Plant Care Hawthorn can definitely be a great low-maintenance plant for a UK garden, generally requiring little care. However, this will only be true if you choose a suitable spot to grow this plant in the first place and provide it with the right care during the establishment phase. Sunlight Hawthorn, as mentioned above, is not too fussy about how much sunlight it receives. C. laevigata ‘Crimson Cloud’ It can do well in full sun or in dappled or partial shade. The only spots to avoid are those that are too deeply shaded, as hawthorn will not flower or fruit as well where there is deeper shade. Watering Hawthorn should be watered well upon planting and it is important to keep watering regularly during dry spells as the plant establishes itself in your garden. Once it is well rooted and has established well, in most areas natural rainfall will be sufficient for your hawthorn and you will not have to water anymore, except for during the most serious of droughts. The only exception to this is where you are growing hawthorn in a container, in which case you will need to water regularly to ensure that you keep your hawthorn happy and healthy. Feeding Hawthorns growing in the ground will require moderately fertile and healthy soil, but will not typically need additional feeding where the soil is adequate. However, if the growth seems poor during establishment, you can add a general-purpose organic fertiliser such as blood, fish and bone around the plants in early spring to boost their growth. This should not continue once the hawthorn is well established. Common Problems Hawthorn does not tend to be particularly prone to problems, but it can get a number of fungal infections or fall prey to certain pests like deer and rabbits, caterpillars and aphids on occasion. Encourage natural biodiversity in your garden and this will help to keep pest populations under control through natural predation. “One of the notable problems hawthorns can suffer from is fireblight, which is a bacterial disease (Erwinia amylovora) that mainly affects members of the Rosaceae family,” shares Master Horticulturist Dan Ori. “Plants that can be affected include apples and pears which is why it is often avoided as a hedgerow species in orchards.” References 1. Hawthorn. (2021, May 13). Wild Food UK. Retrieved March 31, 2023, from https://www.wildfooduk.com/edible-wild-plants/hawthorn/ 2. Mycorrhizal fungi. (n.d.-b). Royal Horticultural Society. Retrieved March 31, 2023, from https://www.rhs.org.uk/biodiversity/mycorrhizal-fungi
Learn more
Not All Lavenders Are Equally Hardy: Overwinter Yours With These Tips From Gardeners
IN THIS GUIDE 1) Determine Your Lavender Hardiness 2) Cutting Back Lavender For Winter 3) Provide The Right Care For Outdoor Lavender 4) Pot Up And Move Tender Types Inside References Lavender is a wonderful choice for many gardens and can provide us with many yields and rewards through the summer months while it is in bloom. However, being able to enjoy lavender in our gardens over the summer months means understanding how to prepare lavender for the colder months to come. To care for lavender correctly in winter: Determine whether the lavender you are growing is hardy and can withstand winter conditions. Prune lavender in August or September to reduce the chances of winter damage. Ensure good drainage for lavender that is hardy enough to remain in the garden. Pot up more tender species and bring them indoors or under cover. Below, we will delve just a little deeper into each of these steps and look at what we should do to prepare lavender for winter depending on their type. 1) Determine Your Lavender Hardiness The first thing to understand when it comes to caring for lavender in winter is that not all lavenders are equally hardy. Several different lavenders can be grown in the UK, and these vary somewhat in their hardiness ratings. The main types of lavender that you might grow are: English lavender (L. angustifolia – H5) English hybrid types (L. x intermedia – H5) French lavender (L. stoechas – H4) Hybrid lavender (L. x chaytoriae – H4) Broad leaf lavender (L. latifolia – H3) Spanish lavender (L. pedunculata and L. viridis – H3) Tender lavender (L canariensis, L. dentata, L. lanata and L. pinnata – H3) If you are unfamiliar with the hardiness ratings, these are the designations given by the RHS which help us to understand which plants can survive winter outside where we live and which cannot.1 H5 means that plants are hardy in most places throughout the UK even in severe winters. H4 means that plants are hardy throughout most of the UK (-10-5°C). H3 means that plants are only hardy in coastal and relatively mild parts of the UK (-5-1°C). “Most lavenders are hardy but really don’t like cold and wet soil conditions,” says Julia Snowball, the Head Gardener at Yorkshire Lavender. “Good drainage is essential, particularly in winter.” So, as you can see from the above, where you live and which lavender you are growing will determine whether lavender can survive outside all winter or will need to be brought into a frost-free location. “Though the species of lavender you grow will go some way to determining the plant’s hardiness, there are other factors to consider, including the age of the plant,” says Master Horticulturist Peter Lickorish. “It may be best to keep more fragile young plants containerised and bring them under shelter, before planting out in the spring.” 2) Cutting Back Lavender For Winter While some lavenders are hardy enough to withstand winter temperatures fairly easily, other conditions of winter, especially winter wet, can still pose a risk – even to the hardier species and hybrids mentioned above. Pruning lavender correctly in August or September, after flowers are faded but before colder weather arrives, can be important in making sure that, whichever lavender you are growing, they make it through the winter unscathed. We have covered pruning lavender in another guide, so check that out to make sure you are doing all you can to prepare your lavender plants for winter. The correct pruning, well before winter, can help avoid snow sitting on them and causing damage. 3) Provide The Right Care For Outdoor Lavender If the lavender you are growing can survive outside all winter where you live, then it is important to make sure that you have done all you can to ensure that your plants have the appropriate growing conditions. The most important thing is to be absolutely certain before winter begins that your lavender is in soil or a growing medium that drains well. “Water needs to be able to get away from the roots, especially in winter,” shares Charlie Byrd from Cotswold Lavender. Do all you can to improve drainage where possible, especially when growing lavender in the ground. Make sure your lavender does not get waterlogged or it may not survive the winter months. 4) Pot Up And Move Tender Types Inside If you are growing one of the more tender lavenders mentioned above or live in a very cold location, you may have to consider moving your plants indoors or under cover over the winter months. Plants in pots might best be moved to a drier and more sheltered spot in a greenhouse, polytunnel or cool part of your home. During the winter, when lavender enters a state of dormancy, it should not be watered at all when outside, as natural rainfall is typically more than enough. When growing indoors, you may need to water a couple of times through the coldest months before your lavender goes outside once more. References 1. Check how hardy plants are using RHS hardiness ratings. (n.d.). Royal Horticultural Society. Retrieved April 3, 2023, from https://www.rhs.org.uk/plants/trials-awards/award-of-garden-merit/rhs-hardiness-rating
Learn more


