

Growing

Add Foxgloves To Container Displays For Dramatic Height - But Watch Out For Overcrowding
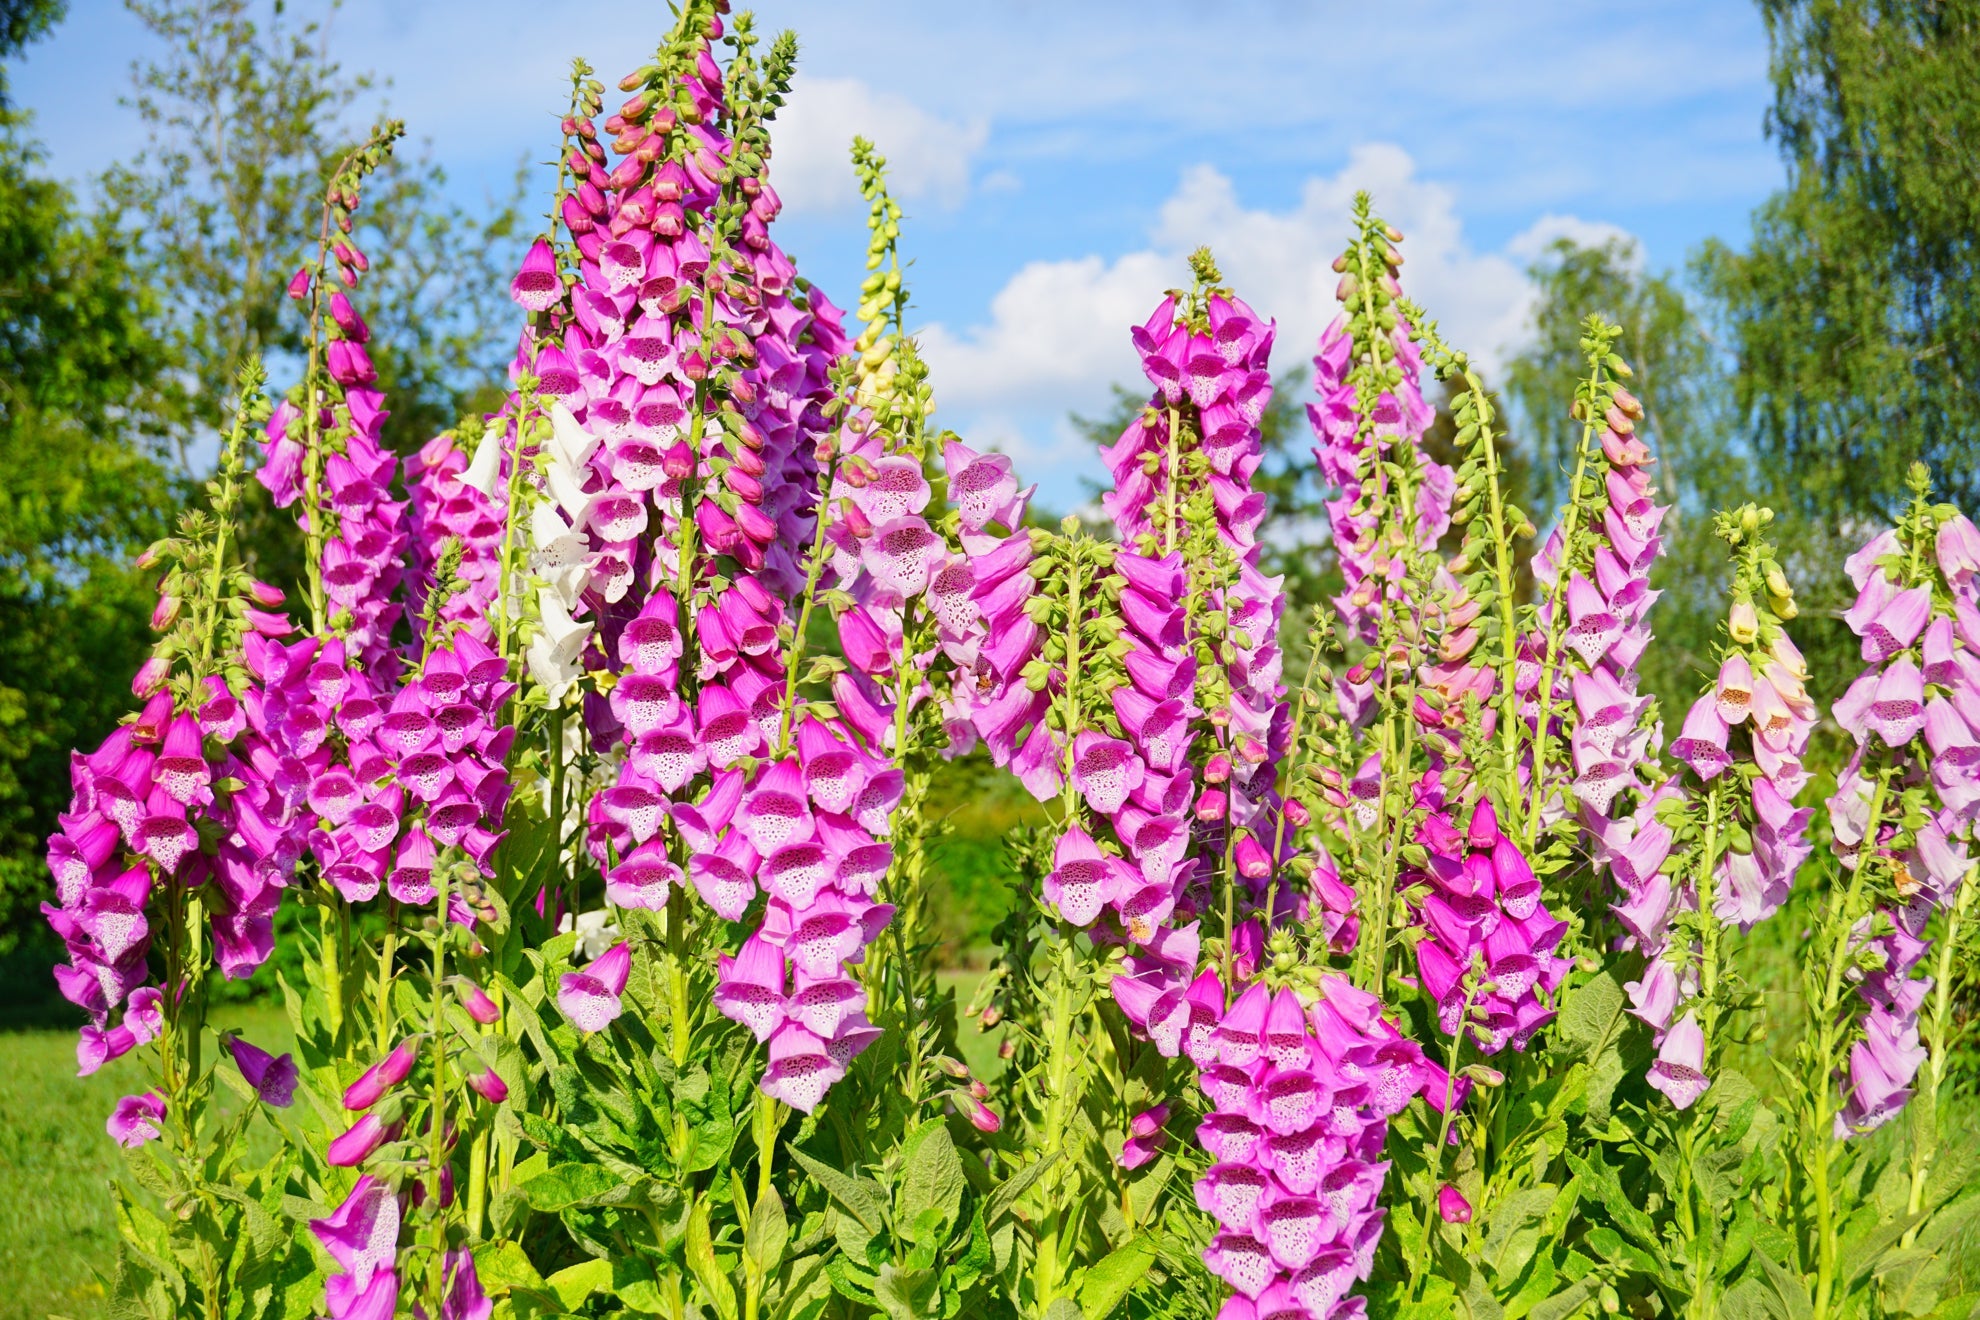
IN THIS GUIDE Can You Grow Foxgloves In Pots? Choosing Plant Pots Compost For Foxgloves Potting Up Foxgloves Potted Foxglove Care Foxgloves are woodland plants that work very well in the dappled shade below fruit trees or in other wild and natural planting schemes where you’d find relatively well-drained but humus-rich soil. However, if you do not have a large garden or cannot grow in the soil, you might wonder whether you can grow these useful biennial or perennial flowering plants in containers. Can You Grow Foxgloves In Pots? The good news is that you can indeed grow foxgloves in containers. They can, in fact, be very useful for container displays as they can give some dramatic height to elevate such displays. Hardier species can work well in containers, but container growing can be particularly beneficial (even where there are other areas of a garden to plant in) when growing more tender foxgloves that require winter protection. Growing these types of foxgloves in pots makes it easier for gardeners to move them undercover to a frost-free location for the winter months. Choosing Plant Pots When choosing a container for foxgloves, remember that these are plants that can grow rather tall, so it is important to choose a heavy, sturdy pot that will not easily tip over with the weight of the plants. For foxgloves, it is a good idea to choose a container that is as large as possible. Remember, foxgloves typically need to form rosettes 15-20cm across before they will send up flowering shoots, so it is important not to overcrowd them. The container needs to have drainage at the base to allow excess water to drain away. However, it is important to choose a container that will not dry out too quickly. A larger container will take longer to dry out and will be easier to maintain. Compost For Foxgloves Foxgloves are best planted into containers filled with a peat-free, loam-based compost that is rich in organic matter. You can purchase a loam-based, peat-free compost mix or you can blend your own. I mix 1/3 loam, 1/3 homemade compost and 1/3 leaf mould to great effect. Your goal is to fill your pot to mimic the natural humus-rich loamy soil found in woodlands where foxgloves naturally grow. Potting Up Foxgloves When potting up foxgloves, the best times to do so is in autumn or in the spring. If you have grown foxgloves from seed or purchased young plug plants, spring sowing is recommended, as young plants do best if placed in pots in a protected place over the winter – before then being potted into their longer-term containers. How Many Should You Plant Per Pot? In the ground, spacing foxgloves correctly is important and you should plant them at least 30-35cm apart to allow the rosettes to grow sufficiently. While you can get away with somewhat closer spacing in a container for most plants, you do need to make sure that the rosettes can grow large enough to allow flowering stalks to form in the plants’ second year when planting foxgloves in a container. If possible, it is best to plant in groups of 3-5 to create an impressive (and dramatic) impact, so choosing a container large enough to allow this will be best. Remember, foxgloves might also be planted with other plants for a container display. They make great focal plants at the centre of a pot, surrounded by other flowering plants that look good with them and which, of course, enjoy similar growing conditions. Potted Foxglove Care Place most foxgloves in containers in light or dappled shade and water them regularly throughout the growing season. Remember that container-grown plants will need to be watered more frequently than in ground-growing areas as they will dry out more quickly. Mulch the top of your container with an organic mulch when planting in order to help with moisture retention and fertility. In an exposed spot, foxgloves may benefit from staking to prevent the stalks from snapping, but in sheltered settings, support is not usually required. Some more tender perennial foxgloves will need to be moved to a frost-free location over the winter months. Even hardier types are more susceptible to frost damage when growing in containers, so it is a good idea to ensure that they are in a sheltered position or to take steps to add insulation around the pot to protect the roots of your plants. Growing foxgloves in containers does take more work than growing them in the ground, but it can still be a relatively easy and hassle-free option for a container garden. “Although I prefer to plant my foxgloves into the ground, in prominent positions that have to look show garden perfect I have a little trick,” adds Master Horticulturist Dan Ori. “As foxgloves start sending up flowering stalks, I sink plants still in their pots into the ground covering the pot edge with a little soil and when the flowering is done, I pull out the pots of foxgloves and pop something else in.”
Learn more
Nigella Is An Easy Annual To Sow, Even For Novice Gardeners - Here's How
IN THIS GUIDE 1) Collect Your Nigella Seeds 2) Prepare The Growing Area 3) Sow Seeds Liberally 4) Cover Seeds With Soil 5) Thin Out Seedlings Nigella, also known as Love-in-a-Mist, is a great plant for even novice gardeners, as it is easy to grow and can add a dreamy drift of delicate flowers to beds and borders. If you’d like some of these stunning annuals in your garden, you might be wondering how to sow nigella from seed – one of the quickest and easiest ways to grow them. Thankfully we’ve got you covered, and the process couldn’t be any easier: Obtain seeds of your chosen nigella variety – either by collecting old seed pods or acquiring them from a plant nursery. Prepare a suitable spot in beds or borders. Scatter the seeds liberally in spring or autumn. Cover the seeds with around 1cm of soil. Thin the seedlings to around 10cm apart. We explain each step thoroughly below. As you will see, this is a very easy process and could even be a fun project to take on with young kids. Difficulty Easy Equipment Required Seeds When To Sow March – April or September When To Plant Out May or June 1) Collect Your Nigella Seeds You can purchase nigella seeds, but if you already have this plant growing in your garden, it is very easy to collect the seeds for sowing. Here are some dried seed pods from Nigella I grew from seed in my garden border: In my experience just a few plants will ultimately produce an enormous number of seeds. Nigella will often also self-seed readily when happy in a specific location. There are plenty of different nigellas to choose from, with flowers of different hues, but Nigella damascena is the most common and popular. There are a number of different varieties of this species to choose from. 2) Prepare The Growing Area Nigella is a low-maintenance annual that will grow well in any soil which is free draining and in a sunny position. It can even do well in dry soils with low fertility, though it will not grow as tall nor have flowers as large when grown in such a position. Be sure to choose a location that is not shaded and where there is no heavy soil, and it should thrive. 3) Sow Seeds Liberally The best way to grow nigella from seed is simply to scatter the seeds on a suitable bed or border where they are to grow. Seeds are usually sown in spring, in March or April, but the seeds can also be sown in situ in September in milder areas, or where cloches or some other means of protection is provided. Nigella looks great when sown in drifts amid other plants in a perennial bed or border. Simply sow seeds wherever bare gaps can be seen to cover and protect the soil and fill out your displays. “Once Nigella flowers have flowered and set seed once, it will continue to germinate and flower year after year,” shares Master Horticulturist Colin Skelly. “I collect the seeds and broadcast them over areas where I want them to spread to or increase in number.” 4) Cover Seeds With Soil Once you have scattered the black seeds, simply cover them over with around 1cm of soil. Make sure that the soil is moist, but not saturated, then simply leave them for germination to take place. 5) Thin Out Seedlings Though not strictly essential, your nigella will grow into somewhat larger and healthier individual plants if you thin out the seedlings when they are large enough to handle. Space them out at around 10cm apart. Nigella is easy to grow from seed and will require very little ongoing care. It does not need to be deadheaded, as the ornamental seed pods are actually just as appealing as the flowers and it should bloom well in early summer without the need for much intervention from you as the gardener.
Learn more
Locate Healthy Bulb Offsets To Easily Propagate New Amaryllis Plants For Your Collection
IN THIS GUIDE When To Take Offsets 1) Locate Healthy Bulb Offsets 2) Divide From The Parent Plant 3) Pot Up Into Individual Containers 4) Care For Offsets If you don’t mind waiting 5-6 years for blooms, amaryllis can be grown from seed, but you might be wondering if there is an easier and slightly quicker way to propagate existing amaryllis plants. You cannot exactly take cuttings from amaryllis stems or leaves, but you can if you wish to propagate your plant by means of division. You can obtain new plants from an existing amaryllis by dividing the small bulb offsets from the main bulb. By separating these bulb offsets from the parent plant and potting them up into their own containers, you can obtain bulbs of flowering size, identical to the parent plant, in around 3-4 years. To propagate amaryllis by bulb offsets: Examine the offsets around the main bulb and look for ones with their own roots. Divide these from the parent bulb. Pot each one up into its own pot that is filled with a free-draining peat-free growing medium. Maintain a temperature of around 21°C year-round and water and feed your young plants. Read on for a step-by-step breakdown of the process in full: When To Take Offsets Typically, the division of bulb offsets from a parent plant is a job that you will do during the process of repotting a mature amaryllis plant between January and March. Mature plants usually need to be repotted with a new growing medium at least once every 2-3 years. 1) Locate Healthy Bulb Offsets The first stage involves looking at the existing plant. Remove it carefully from its existing pot and look for the small bulbs forming around the sides of the main one. Look to find one or more bulb offset that looks healthy and which has its own roots. 2) Divide From The Parent Plant Next, gently separate the bulb offsets that you would like to divide and replant from the parent bulb, taking care not to damage the roots. 3) Pot Up Into Individual Containers After potting up the mature plant as you usually would, pot up the bulb offsets into their own individual small containers. These containers should have drainage at the base and be just large enough to accommodate the bulb offsets that you have divided from the parent plant. Fill the containers with a peat-free multi-purpose compost or a homemade mix and water them, making sure excess water can drain away freely. Colin Skelly, an expert horticulturist, explains: “To avoid the risk of the offsets and young plants rotting, I add quite a sharp drainage, usually a horticultural grit or compost up to 50:50.” 4) Care For Offsets Now you simply need to make sure that you maintain the right care for the young plants as they slowly mature. Keep the temperatures at around 21°C throughout the year and don’t induce dormancy as you would for mature plants. Keep watering throughout the year and feed weekly with a compost tea or specialist organic liquid feed for houseplants between April and September. After 3-4 years, your plant should reach the bulb size required for successful flowering and, once it flowers, it can be treated the same as any mature amaryllis plant. Though growing mature amaryllis from an existing plant using bulb offsets will take time and patience, this is a way to obtain more of these beautiful winter flowering houseplants for free. So, this could be an interesting option to consider if you want to expand your pot plant collection.
Learn more
Don't Discard Your Amaryllis After Flowering - Repotting Can Bring Them Back To Life
IN THIS GUIDE When To Repot Amaryllis Key Considerations How To Re-Pot Amaryllis Many people will purchase Amaryllis (Hippeastrum) in a pot for the festive season and then discard it once it finishes flowering. However, with a little work, you can keep one of these plants over many years, repotting as required into a new container. Difficulty Easy Equipment Required Pots, growing medium, trowel When To Prune Late summer or early autumn When To Repot Amaryllis Some people will repot an amaryllis with a new growing medium each year, replanting bulbs after the period of dormancy that they require in the late summer or early autumn. Others, however, keep the bulbs in their pots, replacing only the top layer of growing medium annually and only completely repotting every 2-3 years. If your amaryllis has been grown from seed, the young plants are typically repotted a number of times before they reach maturity, being placed into a slightly bigger pot whenever the roots fill the existing one well. Key Considerations One of the main things to remember when repotting amaryllis is that these are plants that thrive when their roots are somewhat restricted. It is therefore important not to repot in too large a pot and to avoid repotting when the roots do not entirely fill the existing pot. “The type of pot can also make a difference,” explains Master Horticulturist Colin Skelly. “Plastic pots, which are waterproof, are great for moisture-loving plants but I prefer terracotta pots for bulbs like Amaryllis that don’t like to sit in compost that is wet. “Terracotta pots are porous, allowing evaporation through the pot, and can help to prevent over wet conditions.” Too much root-free compost around the roots can cause issues with waterlogging, and this can lead to the bulb rotting or cause other issues. Avoiding waterlogged conditions is one of the key considerations when growing these plants, which need reasonably free-draining conditions. Problems with amaryllis, like a failure to flower or fungal disease, are far more likely to be related to environmental problems than they are to be related to a plant that has outgrown its pot. However, as mentioned above, mature amaryllis is likely to require repotting into a new growing medium every 2-3 years to keep it in optimal health. How To Re-Pot Amaryllis The actual repotting process is very simple: Choose a new container and prepare your growing medium. Gently ease the plant from its existing pot. Place the plant into its new pot, remembering that it should sit at the same level as it was previously, with around two-thirds of the bulb above the surface of the growing medium. Ease some of your growing medium around the edges of the pot, firming it gently into place. Water the plant to settle it into its new container. Make sure that you place the pot back in a suitable location, indoors over the winter or outdoors in your garden throughout the summer months. Care for your amaryllis correctly throughout each year, repotting as required, and it will reward you with its beautiful flowers each winter or early spring over many years to come.
Learn more
Sow Amaryllis Seeds As Soon As Possible - They Won't Retain Viability For Long
IN THIS GUIDE When To Sow Amaryllis Seeds 1) Sow Your Amaryllis 2) Water & Feed Consistently 3) Prick Out And Pot On 4) Maintain Warm Temperatures 5) Wait For The Flowering Period Amaryllis plants are commonly purchased as potted specimens in the run-up to Christmas and are also grown from large bulbs that are planted in September or October to bloom over the winter indoors. However, if you are up for a challenge and do not mind being patient and waiting years for blooms, you might also consider growing these plants from seed. Just be aware that the seedlings may grow up to look rather different from the parent plant. To grow amaryllis from seed: Source fresh seeds and sow these in spring. After seedlings emerge, water to keep the medium moist but not waterlogged, and start feeding 5-6 weeks post-germination. Prick out seedlings into individual pots and pot up into slightly larger pots throughout the spring and summer every time the roots fill the current pot. Keep the plants growing indoors in moderately warm temperatures. The plants will typically reach a stage where they are mature enough to flower in around 5-6 years. After they flower, they can be treated like a purchased pot plant or bulb-grown plant. When To Sow Amaryllis Seeds Amaryllis seeds should be sown in the spring, as soon after collection or purchase as possible, since they do not retain viability for long. 1) Sow Your Amaryllis Amaryllis seeds should be sown into trays of moist but free-draining seed-starting compost. Master Horticulturist Colin Skelly discusses the soil he opts for when sowing: “For seed sowing, I use a peat-free John Innes seed compost as it is manufactured to have the right consistency, nutrients and moisture holding for most types of seed. “If I use my own compost, I use a riddle to produce fine compost and add some silver sand to the mix. “This ensures good contact with the seed whilst holding moisture but draining freely.” It is easiest to sow the seeds into a heated propagator, as you will get the best rates of germination if you keep the temperature consistently at 21°C. 2) Water & Feed Consistently Once germination has taken place, it is important to care for your amaryllis seedlings correctly. The most important factors in their care are watering and feeding during these early stages of their growth. Keep the seedlings indoors in a moderately warm environment and make sure that you water consistently, keeping the growing medium moist whilst ensuring that conditions do not become waterlogged. Around 5-6 weeks after germination has occurred, start to feed your amaryllis seedlings with a general-purpose organic pot plant feed. Keep feeding every week or so until September. 3) Prick Out And Pot On Once the amaryllis seedlings are large enough to handle, prick them out and pot each one up into an individual pot. During spring and summer, pot on the seedlings as required whenever the pots are well filled with roots. Do not pot into too large a container – one that is just slightly larger than the present one will be best. 4) Maintain Warm Temperatures Grow on the plants through the year in a moderately warm environment indoors. Maintain watering and do not induce a period of dormancy as you would with a mature plant that you want to rebloom. Keep the young plants in active growth throughout the year. 5) Wait For The Flowering Period Keep caring for the young amaryllis plants indoors until, typically after 5-6 years, they will reach a sufficient age and maturity to bloom for the first time. Enjoy these first blooms, making sure that you appreciate this as a reward for your years of work and waiting. Then, treat your plants as you would any plant purchased in a pot or grown from a bulb. Growing amaryllis from seed is not exactly a difficult process, but it will take a lot of time and it will be important to tend to the young plants correctly and to make sure that you provide them with the appropriate care. This might not be a job for experts only, but those lacking in patience may find this a challenging way to obtain more of these attractive flowering plants for their homes.
Learn more
Amaryllis Indoor Care: You Can Keep Growing This Plant As A Houseplant After Christmas
IN THIS GUIDE Is Amaryllis Grown Indoors? Indoor Amaryllis Care Amaryllis is the name given to Hippeastrum varieties grown indoors through the winter months, most commonly planted to bloom over the Christmas period. Their vibrant and showy blooms are highly prized for displays inside the home. Amaryllis is frequently purchased in the run-up to Christmas, and sadly, many plants are discarded once the blooms fade. However, with a little care, you can keep amaryllis going over many years and get it to rebloom each year over multiple seasons. Doing so does involve having an understanding of the cycle of this plant and the environmental conditions that this tropical perennial requires at each stage in that cycle. Is Amaryllis Grown Indoors? Amaryllis is indeed a popular houseplant that, while in bloom, will enjoy the conditions that can typically be provided within a home. These tropical flowering plants of South America won’t be able to survive the winter months in the UK outdoors. However, in summer, it is typical for plants in pots to be placed outdoors or in a greenhouse where they can get plenty of sunlight throughout the warmest part of the year. Master Horticulturist Colin Skelly suggests: “Before moving Amaryllis to the greenhouse for winter, I re-pot one pot size larger (and a full pot rather than a half pot used for winter flowering) but still using John Innes no.2. “I find this prevents the compost from drying out, which happens easily on hot summer days. “It also ensures enough nutrients through the main growing period so that plenty of energy can go into the bulb before dormancy.” They will then be brought back indoors in late summer or autumn to enter a period of dormancy before they are replanted the following autumn to bloom again 6-8 weeks later. Indoor Amaryllis Care Amaryllis is typically treated as a houseplant between early autumn and spring, and during this period it is important to provide it with the right conditions and care. Light After planting amaryllis bulbs, they should be placed in a dark spot until shoots emerge. Once a shoot emerges, the plant should be moved to a light bright location out of direct sunlight until it blooms and then be kept there until the flowering period has finished. Once the flowers have faded and been removed, making sure that the plant gets plenty of light is key, since the foliage that emerges needs to photosynthesise and store energy in the bulb for the next year’s blooms. Keep the plant in a bright spot indoors until you place it out in a sunny and sheltered spot in your garden or in a greenhouse, over the summer months. In late summer or early autumn, bring the plant indoors and allow the bulbs to enter a period of dormancy in a dark location, bringing them back to active growth and replanting bulbs in the autumn. Temperature When the bulbs have new shoots, keep them at a temperature of around 21°C until they flower. To prolong the flowering period once they are in bloom, it is best to keep them at temperatures between 15-18°C. After bringing the amaryllis back inside in late summer or autumn, place it in a spot that remains relatively cool, around 13°C, for the dormant period. Soil Fill your pots with John Innes No. 2, or a peat-free general-purpose compost mix. This can either be one that you purchase or a mix you create yourself at home. Make sure that the mix is relatively free-draining but that it can also retain some moisture. Watering Water well during the periods of active growth, keeping the growing medium moist whilst taking care to avoid overwatering. Make sure that excess water drains away freely and never leave the pot in a saucer or tray of standing water. When the plant is ready to enter the dormant phase, cease watering and only resume this after replanting the bulb. Before planting, it is a good idea to soak the bulbs to rehydrate them so they get off to a good start and grow well. Feeding Between when a shoot first appears from a bulb and the end of the flowering period, it is a good idea to feed your amaryllis around once a week with a balanced, organic liquid plant feed. Compost tea is one option, though there are several other organic, homemade liquid plant feed options that you might use. If you follow the process described above and make sure that the plant is provided with the right growing conditions throughout the different phases of its cycle, it should bloom well over many years.
Learn more
Potted Amaryllis: Leave 'No More Than 1cm' Between The Bulb And The Pot Edge
IN THIS GUIDE Choosing Containers Compost For Amaryllis Potting Up Hippeastrum Potted Amaryllis Care References Amaryllis is the name given to a genus of South American bulbous perennials, Hippeastrum, typically sold to bloom as houseplants over the winter months. The genus has been intensely cultivated and bred since the early 1800s to produce large, dramatic and colourful flowers.1 Amaryllis are almost always grown as container plants, and this is definitely the best way to grow them in the UK. Too tender to grow outside year-round, these plants are typically grown in containers so that they can be grown indoors in winter when they bloom before they are moved outdoors after the last frost. Grown in containers outdoors over summer, the plants are then typically brought back indoors for a period of dormancy before they then rebloom the following winter or early spring. Choosing Containers When choosing a container for an amaryllis bulb, the key is to find a pot that is only just large enough to accommodate it. These are plants that thrive when their root systems are somewhat restricted. “I try to find a pot that fits the Amaryllis bulb with ideally no more than 1cm of compost space between the bulb and the pot edge,” says RHS Master Horticulturist Colin Skelly. “This will vary with the species or cultivar and the size of the individual bulb, so a range of pot sizes is helpful. “Shallower half-pots are ideal as this restricts the amount of compost at the base of the bulb too.” Another important thing to remember is that these plants require free-draining conditions, so it is important to choose a pot that has good drainage at the base to allow excess water to drain away freely. Compost For Amaryllis The container for an amaryllis bulb should be filled with John Innes No. 2 or a peat-free multipurpose compost. Potting Up Hippeastrum When planting an amaryllis bulb, it is a good idea to soak it before planting. Place it in tepid water for a few hours prior to planting, as this will allow it to rehydrate – helping to ensure that it gets off to a good start and can somewhat speed up the rate of growth. When planting the bulb, make sure that around two-thirds of the bulb remains above the surface of the soil, gently firming the growing medium in around the lowest third of the bulb and around the edges of the container. Make sure that the medium is moist but excess water can drain away freely. How Many Can You Plant Per Pot? It is best to place a single bulb into a container just large enough to accommodate it. These are showy flowering plants that can enliven your home over the winter or spring months, depending on when the bulbs are planted. They are usually grown as stand-alone specimen plants rather than in mixed displays. However, sometimes three bulbs are planted together as a group within a larger container, again, one that is just large enough to accommodate all three. Potted Amaryllis Care Caring for amaryllis between planting and when the flowers fade is very easy. Getting one to rebloom is a somewhat more complex process, but one that is still relatively easy to undertake. After a shoot emerges, place the amaryllis in a bright spot indoors at around 21°C. Water sparingly until new leaves emerge, but then water regularly, making sure that the growing medium does not entirely dry out, but also ensuring that overwatering does not occur. Don’t let water remain in a saucer or another receptacle below the pot. It is a good idea to turn the pot regularly so that the plant does not become too lopsided due to growing towards the light. Some cultivars have very large flowers and these can benefit from some support, so should be staked. When the plant begins to bloom, typically 6-8 weeks after planting, move it to a slightly cooler location. Ideally, this should be one where temperatures remain between 15-18°C. Avoid a spot with extreme temperature variation and don’t place your plant in a draught. The cooler temperatures can slightly extend the blooming period. Many people buy amaryllis for the festive period and then discard it when the blooms are done, but with a simple process, you can get the plant to rebloom the following year and again over the number of subsequent years. After the plants have flowered, cut down flowering spikes to the base, near the bulb, making sure that the leaves are retained. Grow on the plants indoors, watering carefully and feeding with a balanced, organic liquid plant feed such as compost tea every week or so. During this period, it is important for the leaves to be able to catch and store as much energy as possible, so ensuring plenty of sunlight (or using a grow light where sunlight is scarce) can be key to getting the plant to rebloom. After the last frost date in your area, place the pot containing the amaryllis outside or in a greenhouse for the summer months. Make sure that they get plenty of light, but are protected from the scorching sun when the weather is very warm. Towards the end of the summer or in early autumn, bring the plant back indoors so that it can enter into a period of dormancy. This period of dormancy is crucial for the plants to be able to rebloom. Keep in a cool spot, and stop feeding and watering to induce dormancy. The foliage will die back and can be cut off; the bulbs can remain dormant in their pots or be lifted and moved for storage. After a month or two, you can repot the bulbs, plant as above and resume watering and feeding to encourage new growth. Again, the bulbs should rebloom around 6-8 weeks after replanting. Planting in late September should give certainty of blooms for the Christmas period. References 1. S. (n.d.-b). Amaryllis,. Wisconsin Horticulture. Retrieved March 9, 2023, from https://hort.extension.wisc.edu/articles/amaryllis-hippeastrum/
Learn more
Cut Back Amaryllis Flowers As Soon As They Fade, But Keep The Leaves Until Autumn
IN THIS GUIDE When To Cut Back Amaryllis Why Cut Back Flowers? When To Cut Back Foliage Why Cut Back Foliage? Amaryllis is treated by some as a seasonal home decoration, with many plants purchased in the run-up to Christmas and then discarded when the blooming period is over. However, these tropical plants are actually perennial, and when you provide them with the right conditions and care, you can enjoy their blooms in winter or early spring over many years. Cutting back amaryllis is a simple process and not much work is involved. However, making sure that you do this job in a timely fashion will help ensure that you can keep your plant going and blooming well over a number of years. Keep reading to discover all the basic things you need to know about pruning amaryllis. When To Cut Back Amaryllis Cut back the flowers on your amaryllis as soon as they begin to fade. In other words, cut through the flowering stems near the base once the flowers begin to wilt and turn brown. Make sure that you only cut the flowering stems and not any leaves, as the leaves are still very much required over the summer months. Why Cut Back Flowers? Cutting back the flowering stems after the blooms are done prevents the plant from putting any energy into producing seeds. For the plant to rebloom successfully the following year, you want it to put all its energy into producing foliage that is healthy and strong, able to photosynthesise and store energy that will remain in the bulb to produce new growth and flowers after the dormant period. When To Cut Back Foliage It is very important to leave the foliage on your amaryllis plant in place after the flowering period is over, so that it can harness the energy of the sun. It is essential for reblooming to make sure that the plant gets as much sunlight as possible. “Plants essentially eat sunlight, using the process of photosynthesis to create energy,” explains Colin Skelly, a Master Horticulturist. “Bulbs have evolved to store this energy for later use and, for Amaryllis, this energy is used to begin growth and flower after a dry season. “The energy used for the impressive flowers of Amaryllis has been stored during the previous growing season. “So, make sure your bulb has plenty of sunlight but also regular water and sufficient nutrients to enable the plant to use the energy created by photosynthesis.” Keep it in as bright a spot as possible indoors until after the last frost date in your area and then place it in a bright greenhouse or outdoors in a sheltered and sunny spot. However, towards the end of the summer or early autumn, you need to think about encouraging the plant to enter a period of dormancy. At this time, you should stop watering and allow the foliage to die back. Once the foliage has begun to die back naturally, you can cut it all off at the base. Then, the bulb can enter a dormant phase in a cool and dark location indoors. Why Cut Back Foliage? Removing the foliage from the plant entirely is a good idea for the period of dormancy because it mimics the conditions found in the plant’s native habitat when it enters the dry season and ceases active growth. Removing dead and dying leaves won’t affect the plant, since the energy gathered by the leaves will be stored in the bulb, and removing these dead and dying leaves will prevent any rotting issues that might otherwise arise. Cut back the flowers and foliage according to these instructions, as this is part of the care process that will enable the plant to rebloom annually over many years.
Learn more
Getting Your Amaryllis To Rebloom - 'Don't Allow The Bulb To Dry Out' Says Colin Skelly
IN THIS GUIDE Understanding The Natural Cycle 1) Remove Faded Flowers 2) Move To A Bright Location 3) Move Outdoors After The Last Frost 4) Water And Feed Over Summer 5) Move Indoors 6) Repot Bulbs After Dormancy 7) Wait For Your Plant To Bloom Amaryllis are popular Christmas houseplants for many homes, and when planted in September, the bulbs will bring some festive colour to their surroundings. Typically, these plants will bloom 6-8 weeks after bulbs are planted. But once amaryllis has flowered the first time, many people struggle to understand how to get the plant to rebloom. Fortunately, this process is not too complex, but it does involve an understanding of the lifecycle of these plants. Here are the key steps to follow for reblooming: After the flowers have withered cut them off just before seedpods develop or when they have started to develop. When the stalk turns yellow or starts to droop, cut it back to the soil (or ground if your bulb is in a bed). Let the leaves remain – water and fertilise the plant as usual through the summer for about six months as the bulb continues to sprout leaves. This phase is necessary for the bulb to rejuvenate and store reserves before it enters its dormant phase. Make sure that the plant gets plenty of light in the period after first flowering. After the last frost in your area, move the pot outside for summer. Water and feed your amaryllis over the early summer months. Later in summer, let the amaryllis die back naturally and enter the dormant phase (you will notice the leaves beginning to yellow). After the amaryllis has remained dormant for a time, repot the bulbs. Place bulbs indoors and continue care until the plant reblooms 6-8 weeks later. If the bulb is removed, store it in a dry, cool, and dark environment for about two months. Hippeastrum ‘Rilona’ The bulb can be stored in a drawer or closet provided it is dry and the temperature is between 7-10°C. After about two months your amaryllis bulb should be as good as new for re-planting. Continue reading to explore each stage of this cycle and the process of getting these plants to rebloom. Understanding The Natural Cycle Getting an Amaryllis to rebloom involves understanding that in its native surroundings, this plant is used to an environment with moist conditions through 9 months of the year – and a dry season of around 3 months, during which the flower enters a period of dormancy. Ensuring that the plant can enter that period of dormancy is crucial to getting it to rebloom. The idea is that after it has bloomed, the amaryllis must be given the best opportunity possible to photosynthesise and store energy in its bulb before it enters this period of dormancy, from which it can be awakened the following autumn. 1) Remove Faded Flowers For the best chance of success, you should remove spent flowers and their stems from the plant as soon as the blooming period is over. This ensures that the plant does not expend energy on going to seed and instead ensures that the energy goes into foliage growth; ensuring a healthy bulb for the following season. 2) Move To A Bright Location The next phase is crucial in ensuring that the plant is able to rebloom, as the phase after flowering is the growth phase of these plants. It is during this period that the plant stores energy for the blooms of the following year. During this phase, it is vital to make sure that the plants get as much sunlight as possible. This can be challenging in the winter, so a grow light may help, though, more often than not, you can simply place the plant on a sunny windowsill. Water to keep the growing medium moist but avoid overwatering, and provide an organic liquid plant feed such as compost tea. This helps make sure there is healthy growth and that the leaves can grow well, storing energy which is held in the bulb for next year. 3) Move Outdoors After The Last Frost After the last frost date in your area, move the plant in its pot outdoors to a bright, sunny position. During this transition, some leaves may die and fall off, but this is fine and new ones should grow. 4) Water And Feed Over Summer Water regularly, and continue to feed so that plant can store energy before it enters a period of dormancy. Colin Skelly, who has been awarded the status of Master Horticulturist by the RHS, has the following advise for your amaryllis bulbs: “Don’t allow the bulb to dry out, which can happen easily in hot weather with the bulb taking up so much of the pot space. “This is especially true in a greenhouse where the temperature can increase very quickly. “Otherwise, the bulb might be induced into dormancy too early.” In wetter areas, it may be necessary to provide some cover in order to avoid any waterlogging, as the bulbs can rot in overly damp conditions. 5) Move Indoors In August, if you wish to get your plant to bloom again for Christmas, bring your plant back indoors. Place it in a cool location with temperatures of around 10-16°C. Cease all watering and let the leaves die. Once the leaves die, move the bulb to a dark location. You can either keep the bulb in its present pot or remove the bulb and store it for the dormant period. 6) Repot Bulbs After Dormancy Once the plant has had a phase of dormancy, the bulb of an amaryllis can then be repotted and planted in its new container. Choose a container just large enough to accommodate the bulb, replant it in mid-September to October and you can expect blooms around the festive period. Soak the bulbs in tepid water for a few hours before you plant them into new containers. This helps to rehydrate them and can speed up the process of growth. 7) Wait For Your Plant To Bloom Once you have planted your bulbs, place them in a warm, dark place until a shoot appears. Then, once the shoot emerges, move the plant to the position in which it will flower, in a bright location, but out of direct sunlight, inside your home. Water sparingly and make sure excess water can drain away. The amaryllis should rebloom within 6-8 weeks. Repeat this cycle each year and you should be able to enjoy these plants blooming in your home for several years to come.
Learn more


