

Growing

Collect Daylily Seeds And Sow Them In Mid-Spring - They Should Flower In 2-3 Years
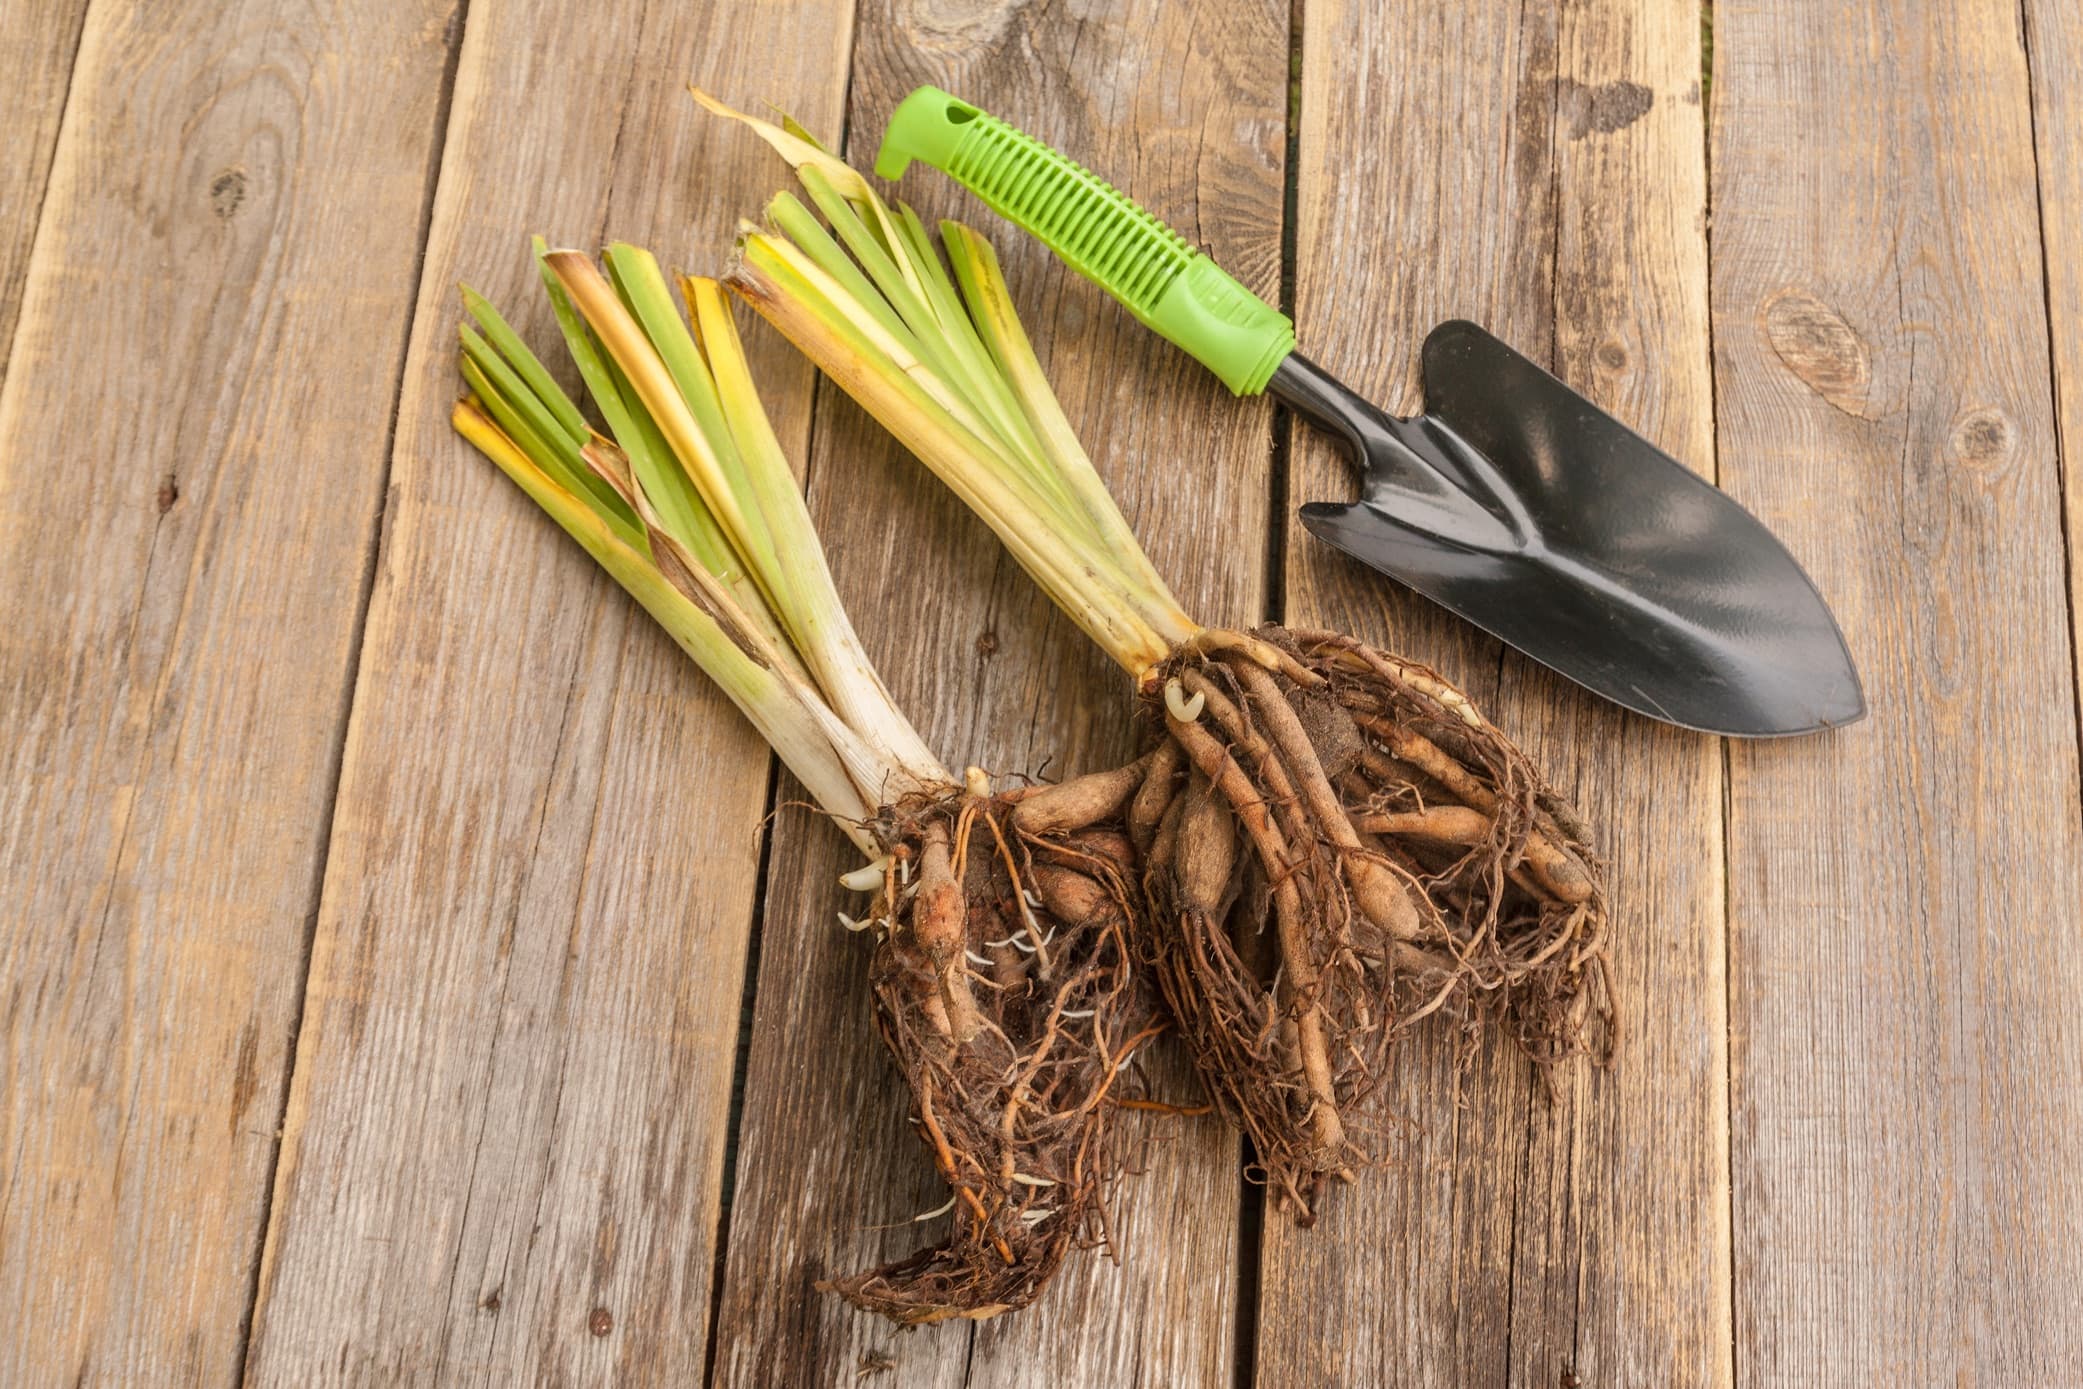
IN THIS GUIDE 1) Collect Seeds 2) Sow The Seeds 3) Harden Off & Plant Out 4) Wait For New Daylilies To Flower A daylily will bloom only for a single day, but the plants will flower abundantly in rapid succession over a number of weeks. These plants are a great choice because they are attractive hardy perennials which can grace UK gardens for many years. If you would like to grow daylilies in your garden, you will usually purchase plants in containers, or bare-root plants. Most of the plants grown in UK gardens are hybrids, and the plants grown from their seeds will not come true, with each growing into a unique new plant which may not resemble its parents. Those who do want to propagate new plants which look and perform the same will typically divide their plants. However, if you are interested in experimenting and creating new hybrid daylilies for your garden, then learning how to grow daylilies from seed could be an intriguing proposition. Difficulty Medium Equipment Required Seeds, seed tray or pots, growing medium, greenhouse or undercover area If you are interested in breeding new daylilies in your garden, here is a very brief overview of the process: Collect the daylily seeds. Sow seeds 1.5-2cm deep into pots or into the ground. If sowing indoors or undercover, harden off and transplant seedlings into the garden in spring. After 2-3 years, your new daylilies should produce flowers and you can see what new hybrids you have created. See more detail on each step below: 1) Collect Seeds If you want to experiment with creating new hybrid daylilies, then the first step is to cross-pollinate two parent plants with desirable characteristics, as Master Horticulturist Peter Lickorish explains: “If you have a plethora of lovely day lily varieties and would like to control which ones you combine, you will need to do the cross-pollination yourself. “You can use a cotton bud or even a pen, rubbed on clothing to generate static, as a way of collecting pollen and transferring it from the anthers of one flower to the stigma of a different plant. “This is a long pin-shaped piece, in the centre of the flower. The flower can then be covered, such as with a sock tied tight with string or a similar method, to prevent further pollination, though remember their flowers are short-lived anyway. “The genes will then mix in different proportions and some seedlings will grow on to be near copies of one parent, others varying mixes of the two.” Once you have done this, you can then wait for the flowers to fade. At this point, there is around a 50% chance that a seed pod will develop. If a seedpod develops and ripens successfully, you can then collect the black seeds and prepare to sow them. “Be aware that some of the bigger flowering Hemerocallis are tetraploids, meaning they have twice the normal number of chromosomes,” Peter adds. “This complexity in breeding means that you may be able to get seed from them, but you may not be able to collect viable seed from their offspring.” 2) Sow The Seeds Daylily seeds may be slow to germinate depending on temperature, but success rates can be good. Often, they will germinate successfully when directly sown into a suitable spot in a garden. However, in the UK, the best chance of success is to store seeds in your fridge for around six weeks and then sow them into pots or seed trays with peat-free potting mix, in a greenhouse or other undercover area in mid-spring. Sow them to a depth of 1.5-2cm and keep the medium moist. They should germinate within a couple of weeks if kept above 16°C. Once the seedlings are large enough to handle, these should be pricked out into individual pots. 3) Harden Off & Plant Out Grow on the daylilies by overwintering them for their first winter in the greenhouse. Then, harden them off and plant them out in spring, after the last frost date in your area. 4) Wait For New Daylilies To Flower While the process itself is fairly easy and simple, patience is required. You will have to wait for 2-3 years for the new plants to flower and reveal their secrets. So, it will be a long time before you learn the results of your hybridisation.
Learn more
Hardy Fuchsia Societies Share Their Growing Tips For Getting The Most Out Of Your Plants
IN THIS GUIDE Overview Common Varieties Planting Hardy Fuchsia Care Keeping Fuchsia Flowering References Fuchsias are widely loved for their jewel-like pendant flowers which can bloom from mid-summer well into the autumn. Contrasting tender fuchsia varieties, hardy fuchsias can not only survive a typical UK winter but bloom right up until the first frosts, often as late as November. For this guide we reached out and interviewed: Gail Barber – Secretary of the Sutton Coldfield Fuchsia & Gardening Guild. Terry Sykes – Member of the West Yorkshire Fuchsia & Pot Plant Society. “Fuchsias are such easy plants to propagate and grow”, says Gail, “but are also amazingly varied in their size, colour and capabilities”. Hardy fuchsias are much tougher than half-hardy types and are usually able to withstand our low winter temperatures without too much protection. Overview Botanical Name Fuchsia Common Name(s) Hardy Fuchsia, Lady’s Eardrops Plant Type Perennial shrub Native Area South America Hardiness Rating H4 Foliage Semi-Evergreen or Deciduous Flowers Pendant-shaped flowers When To Plant May-June When To Prune March-April Fuchsias are part of the Onagraceae family of plants and are widely grown here in the UK.1 They originate from parts of Central and South America and are thought to have been introduced to Europe in the eighteenth century, according to records from Kew.2 With their delicate flowers available in red, purple, pink and white they can brighten up any border or container, often flowering when other plants have finished for the year. Hardy fuchsias can also be an important late source of pollen here in the UK and even attract hummingbirds in warmer climates. “Hardy fuchsias are a must in any garden” says Gail. “Super easy to care for and the knowledge that the display will get better year on year”. Common Varieties Hardy fuchsias are available in a wide range of sizes and shapes ranging from compact varieties perfect for pots and containers to large shrubs and even small trees better suited to the back of a border. “There are literally thousands of fuchsias to choose from,” says Terry. “There’s something for everyone. Triphyllas, with their bunches of blooms at the end of their stems, to the tiny encliandras, with their diminutive flowers.” Some of Terry’s favourite hardy varieties include ‘Hawkshead’ (more below) and ‘Little Beauty’. All the varieties listed below have been awarded the Royal Horticultural Society’s ‘Award of Garden Merit’ (AGM) signifying that they have proven to perform reliably well in the garden. F. ‘Hawkshead’ ‘Hawkshead’ is a bushy shrub with dark green foliage and stunning single white flowers. Growing to an eventual size of 1m in height, it is ideal either for a border or a large container. F. ‘Lady Boothby’ This variety is a vigorous and upright shrub that can grow to an impressive 4m tall. With its typical red and purple flowers, it looks spectacular at the back of a border. F. ‘Alice Hoffman’ ‘Alice Hoffman’ is a more ornate variety with its semi-double pink and white flowers. Growing to only 50cm in height and spread, it is perfect for a pot or container or when grown near the front of a border where it can be seen and enjoyed. F. ‘Whiteknights Pearl’ This variety is an elegant fuchsia displaying slender two-tone pink flowers which contrast against its dark green foliage. Growing to a final size of 1.m tall and wide over time, it is best suited to a border. Planting Hardy fuchsias grow best when placed in either full sun or dappled shade. However, they may struggle when planted in a scorching south-facing spot, so a little shade suits them well, as Gail explains: “My own garden is very shady, getting very little sun even in the height of summer. Fuchsias grown both in pots and in the ground are more than happy with these conditions”. Hardy fuchsias struggle when exposed to prevailing winds, so it is recommended to site them in a sheltered spot where the stunning flowers won’t be blown off. Hardy fuchsias can be planted as an informal hedge that will not only provide a boundary but attract pollinators and provide summer and autumnal interest to the garden. When & How To Plant “If you buy a small plant, or obtain a cutting early in the year, grow it on, then plant it out in the garden in early summer”, advises Gail Barber. “This gives the plant plenty of time to get its roots established before the weather turns cold”. Be warned that hardy fuchsias tend to dislike being moved once planted, so it is worth trying to find the right spot the first time around. If planting directly into the soil, dig a hole twice as wide as the root ball and at least as deep, if not a little deeper, as hardy fuchsias can be planted a little lower than normal. “When planting, make a saucer shape in the soil, so that as you water it during its first season, the water will go where directed, and as the season progresses the soil will backfill”. Add lots of well-rotted organic matter to the hole and place the plant 3-5cm deeper than it previously was in its pot. By planting a little deeper, the plant will have some protection over its crown and thus a better chance of surviving a harsh winter. “Leave surrounding space open, this will slowly fill in during the summer,” says Terry. “Water as required in the first season and feed with a general fertiliser. In the late Autumn cut back by around a third to tidy the plant up.” Add a thick layer of mulch and water well until established, particularly during hot and dry spells. If growing in a pot or container choose one a size bigger and ensure drainage holes are present for any excess water to drain away. There is little need to plant deeply in a pot as they can simply be moved under cover if required. Pot up using a general-purpose peat-free compost and water well. Hardy Fuchsia Care “The best tip to growing beautiful plants is to speak to other people who grow them”, says Gail. “If you have a society in your area, go along and join in. Many groups have members with so much knowledge and experience who are more than willing share what they know”. If you don’t have access to these kinds of groups, we’ve summarised the most crucial Fuchsia tips below. Soil Conditions When it comes to soil, hardy fuchsias are not too fussy and will cope with most types. Nevertheless, they don’t do well in soil that becomes waterlogged or bone dry. In general, any moist and fertile well-drained soil will suffice. Light Hardy fuchsias can be rather particular about the amount of light they receive. They do well in full sun, yet do not like to be left exposed to the burning midday sun during the summer months. Most varieties will put up with some shade, as long as it is not too overshadowed which may reduce flowering, but any partial or dappled shade is ideal. Watering Hardy fuchsias require a moist soil and do not like to be allowed to dry out. This is especially true when grown in containers as these will require more frequent watering over the summer. “When you take your watering can out in the summer, if the water runs off the surface of the soil, it’s not getting to the plants roots”, offers Gail. “Dig in organic matter, well-rotted manure and mulch the soil’s surface to keep in the moisture”. Terry has an alternative tip to check the moisture levels of your plants: “You can buy a moisture probe to insert into the compost to give you an idea if the plant needs watering. “With smaller pots, a good idea is to lift the pot to see if weight tells you if watering is required.” Remember that fuchsia does not like waterlogged soil either. So, if planting into heavy soil, gravel, horticultural grit or organic matter can be used to improve the drainage prior to planting. Temperature & Humidity Hardy fuchsias are specified as H4 on the RHS hardiness rating scale. Essentially, this means that they are usually able to withstand temperatures down to -5-10°C. “I live in the southwest of the country and although we occasionally get winter temperatures down to -5°C, this is not enough to damage hardy fuchsias,” shares Master Horticulturist Colin Skelly. “Most coastal regions of western and southern UK should be able to grow fuchsias with only occasional winter damage. “Elsewhere, it would be best to grow in containers or at least to take annual insurance cuttings.” In the south and west of the country, this tends to imply that they will survive a typical winter without any protection. However, in the north of the country or in frost pockets, plants may need to be moved out of the worst of the weather or covered with fleece to provide extra protection. If growing hardy fuchsias as half-standards, it is advisable to either move these out of the worst of the winter weather or to protect them with fleece as their bare stems are said to be particularly susceptible to frost damage. Fertilising Preferring fertile soil, hardy fuchsias will benefit from some extra nutrients. If grown directly in the ground it is advisable to feed annually in spring as new growth emerges with a balanced fertiliser. If grown in a pot or container a high-potash liquid feed, such as a tomato fertiliser, can be applied throughout the flowering season to encourage more blooms. “In large outside pots, slow-release fertiliser is a good answer to feeding,” says Terry. Supporting Depending on the variety grown, metal, bamboo, wooden stakes or trellis supports may be required. When grown as a climber, fuchsias will require some training and tying in and as a standard, some staking. Pruning Fuchsias should be pruned either in autumn or in spring as new growth emerges. However, it is recommended to leave some growth on the plant to add some winter protection and to prune in spring, especially in colder parts of the country, as Gail shares: “When the winter kills off the top growth of your Fuchsias, leave the plants well alone until the end of March. This is when it can be given a good cutback”. To prune, using a pair of clean and sharp secateurs or loppers, remove any dead or long growth back to a new shoot or bud. In colder parts of the country, when all top growth has died back, it may be necessary to cut down the plant to soil level, after which new growth will sprout from the base of the plant. Pests “Keep an eye out for Fuchsia Gall mite, especially in the south of England,” warns Terry. “Cut out any affected tips, then place them into bags and bin them. Do not put them in your gardening waste bin or compost heap.” Propagating Due to their vulnerability to a harsh winter, it can be wise to take cuttings in autumn as backup replacements. Thankfully fuchsias are one of the easiest shrubs to propagate and readily take from hardwood cuttings. In autumn, take 10-15cm length cuttings of hardwood, which is brown rather than green. Make a square cut at the base of the cutting just below a leaf joint and place it in a pot of free-draining compost so half the cutting is covered by soil. Water well and place in a frost-free environment such as a cold frame or unheated greenhouse, keeping the soil moist. When new growth appears in spring, pot on and harden off before planting out in early summer. Companion Planting Where your hardy fuchsia is planted will decide on what other plants can be planted alongside, but presuming a partially shaded site, companion plants could include crocosmia, hardy geraniums and other fuchsias. “Spring bulbs give good colour to your fuchsia bed before it comes into life,” says Terry. Keeping Fuchsia Flowering Hardy fuchsias can bloom from mid-summer well into the autumn until the first frosts arrive. A healthy plant in the right spot and in moist, but well-drained and fertile soil should bloom pretty much continuously. However, periods of stress, such as very hot weather or drought may decrease the number of blooms. “Fuchsias, along with many plants, will always benefit from good soil. Enrich your garden soil at every opportunity, ensuring that the soil will retain moisture but be well drained”. Keep plants watered, especially if newly planted, and apply a regular high-potash liquid feed during the flowering season to those plants grown in pots. “Feeding your plants regularly will encourage flowers and healthy growth throughout the year” Gail argues. For those grown in a border, a balanced fertiliser applied every spring should help encourage blooms for months on end. References 1. A Systematic Revision of Fuchsia Sect. Quelusia (Onagraceae). (1989). JSTOR. Retrieved March 16, 2023, from https://www.jstor.org/stable/2399499 2. Fuchsia coccinea. (n.d.). Kew Royal Botanic Gardens. Retrieved March 16, 2023, from https://powo.science.kew.org/taxon/urn:lsid:ipni.org:names:277263-2
Learn more
Aeoniums Are Diverse And Easy To Grow - This Nurserywoman Explains How
IN THIS GUIDE Overview Why Grow Aeonium? Common Varieties Where To Grow Planting Aeonium Aeonium Plant Care References Succulents are very much on trend, and Aeoniums are among the popular succulents grown as houseplants in the UK and other temperate regions. Aeoniums are subtropical succulents that can be incredibly easy to grow, making them a good choice for those looking for a relatively low-maintenance houseplant. They can also potentially be placed outdoors in summer in a suitable spot. These plants look great when placed alone in pride of place, and can also look good in combination with other succulents and cacti which like similar conditions, such as Crassula, Kalanchoe and Echeveria. For this guide we’ve collaborated with Rosie Prosser, who helps run Corseside Nursery in Pembrokeshire, an online succulent retailer. “Aeoniums are extremely diverse in their size, colour and growth habit and we find them very easy to care for”, Rosie shares. “You can find Aeoniums in every colour of the rainbow and the genus features both dwarf and large varieties. “They also grow fast and produce the most wonderful flowers. What’s not to love about that!”. Overview Botanical Name Aoenium spp. Common Name(s) Aoenium; Tree Houseleeks Plant Type Perennial Succulent Native Area Africa and Canary Islands Hardiness Rating H1C Foliage Evergreen Flowers Pink When To Plant May-June When To Prune Whenever it seems leggy Aeoniums are mostly native to the Canary Islands, Madeira and Northern and Eastern Africa.1 These plants can vary significantly in height, from a few centimetres up to 1m or so in height. Sometimes, they are referred to as ‘Tree Houseleeks’. These plants have rosettes of glossy leaves, which often come in interesting shades of green or deep purple, with white, yellow and red variegation. They are monocarpic, or in other words, they die after they flower, but with branching varieties, it is only the rosette that produced the flower that will die, and the rest of the plant can live on. Why Grow Aeonium? Aeoniums are, as mentioned above, very easy to grow and in fact, thrive on neglect. So even if you are not the most green-fingered of gardeners, you should find it relatively easy to keep Aeonium alive. “I’ve getting into aeoniums at the moment,” shares Garden Broadcaster Martin Fish. “I’ve always grown them but I’ve got a little collection going now and it’s great!” These are attractive houseplants, which can look great in mixed succulent displays, or be kept as individual potted plants in your home. Though they are subtropical, Aeoniums can cope well with indoor conditions. They are varied plants which can add immense visual interest and, like other houseplants, improve your living environment. Common Varieties At Corseside Nursery, Rosie and her team have grown their own hybrid, aptly named the ‘Pembrokeshire Promise’, which is available to buy from their store. Many other Aeoniums cultivars have received an RHS Award of Garden Merit, so when choosing which Aeonium to grow, these options can be a good place to start. AGM Aeoniums to consider are: A. ‘Blushing Beauty’ A. haworthii ‘Kiwi’ A. haworthii ‘Variegatum’ A. ‘Sunburst’ A. tabuliforme A. ‘Zwartkop’ However, these varieties are just the beginning and there are plenty of other amazing cultivars to choose from. There are some lovely compact hybrid forms with unusual variations in colour and form to explore, including some, such as ‘Medusa’, ‘Meiya’ and ‘Superbang’, with deep red and vibrant crimson foliage hues. Start exploring the many cultivars and hybrids on offer and you may quickly need to find more space to house your ever-expanding succulent collection. Where To Grow Sunlight & Temperature Aeoniums thrive in bright and dry conditions. If they are grown indoors then it is important to give them a light and sunny spot. Place them on a sunny south or west-facing windowsill. While many houseplants will not appreciate direct sunlight, Aeonium doesn’t mind it and will appreciate a spot that is as sunny and light as possible. They can cope with low temperatures, though not frosts, and should not be exposed to temperatures below 5°C. “You will find very respectable collections of Aeonium in public and botanic gardens across the UK,” recommends qualified Horticulturist Dan Ori. “For those living in or travelling to Scotland, I can highly recommend a visit Inverewe – the National Trust For Scotland Aeonium collection.” Soil Requirements In certain parts of the UK, Aeoniums can be grown outdoors over the summer months. They will thrive in a very well-drained location, either in free-draining soil or in a gravel garden. These succulents can be a good choice in xeriscaping for dry areas where rainfall is low. In wetter regions of the UK, they may be better grown in containers, placed outside only in the rain shadow of a wall or fence where they still get plenty of sun, but are somewhat protected from excessive rainfall. Exposure In terms of exposure, Aeoniums are unfussy. They can cope with a windy location because their foliage is tough enough to withstand winds. This means that they can be a good choice for a coastal garden. Planting Aeonium Creating suitably free-draining conditions is the most important thing, whether growing in containers or in the ground. A lack of good drainage will cause issues for the plant and when the growing medium cannot dry out between waterings, the roots and stem may rot. If you are planting Aeonium in a container, choose a container which is porous, and which has good drainage to allow excess water to drain away. These and other succulents thrive in terracotta pots, which are permeable and allow the soil to dry out more between waterings. Of course, the pot you select should have a drainage hole at the base. A layer of crock, gravel or grit should also be added at the base of the pot to further aid in drainage. The container you choose for an Aeonium should be the same size as, or only very slightly bigger than the rootball of the plant you are planting. A larger pot will be more likely to become waterlogged since the roots will not permeate all the potting mix within it. To ensure adequate drainage, Rosie explains that the potting mix that you select is also very important: “A good free-draining pot and soil can also support good water management. It is important to make sure the water can drain away easily from the roots of the plants. “This can be achieved by mixing larger particles into your normal soil, such as grit, crushed eggshells or perlite”. Alternatively, you can look to mix 60% peat-free multipurpose compost with 40% horticultural grit or sand. Once you have placed your Aeonium within this growing medium, sprinkle a 1cm layer of horticultural grit on top. This will further help to ensure that the stem does not rot. If planting outdoors in free-draining soil, a similar layer of grit or gravel on the surface of the soil can also be beneficial. When moving pots with flat-topped Aeonium types outdoors, it is a good idea to place the pots at an angle so that any excess rainwater can drain off more easily. Aeonium Plant Care As we’ve already discussed, Aeoniums are very easy to care for, and keeping them as houseplants won’t take up a huge amount of your time. Watering When growing Aeoniums indoors, it is helpful to remember that in their native range, they experience long hot, dry periods, with occasional heavy downpours, as Rosie explains: “Overwatering is a big hitter when it comes to Aeonium care mistakes. Succulents store water in their thick juicy leaves. “In their natural habitat, they have evolved to deal with droughts and monsoons. “We encourage our customers to try and mimic that; give them a big dose of water, then leave them to dry out completely before watering again”. Watering well though infrequently is better than watering a little more frequently. Aeoniums plants are in active growth during the spring and autumn months when the growing conditions are ideal. In summer, during hot periods, and in the winter, they will typically go dormant, and so should be watered only sparingly during these times. If outdoors, Aeoniums should receive all the water they need from natural rainfall. Most Aeonium problems are caused by overwatering or insufficient drainage. Feeding It is not always strictly essential to feed Aeoniums, but plants can benefit from a half-strength organic liquid feed once a month from winter to late spring. Propagating Taking cuttings from an Aeonium plant is a great way to ensure survival post-flowering and to propagate new plants. Take Aeonium cuttings in spring, selecting some young and slender shoots which will be easier to root and have more vigour than older plant matter. Each cutting should be around 10cm in length. Take these cuttings and place them on a warm and dry windowsill for a few days until the cut has formed a callus. Next, insert your cuttings into pots with half potting compost and half grit, making sure that around half of the stem is above soil level. Sprinkle grit over the surface of the soil and leave the cuttings uncovered in a bright spot where temperatures between 18-20°C can be maintained. Water sparingly until the cuttings have rooted, which should be in a couple of weeks. As long as you get the conditions and watering right, your Aeonium plant should thrive, and be a hassle-free addition to your home or garden. References 1. S. (n.d.). Aeonium. Wisconsin Horticulture. Retrieved March 9, 2023, from https://hort.extension.wisc.edu/articles/aeonium/
Learn more
Croton: Bring The Tropics Of Asia To Your Living Room By Growing This Houseplant
IN THIS GUIDE Overview Common Varieties Where To Grow Ongoing Plant Care Common Problems References Codiaeum variegatum, or the croton plant as it is more widely known, is a spectacular houseplant that is guaranteed to be the focus of any room. Crotons are renowned for being a bit of a fussy plant to look after, but given some care and the right requirements, they can flourish and brighten up any indoor space. Overview Botanical Name Codiaeum variegatum Common Name(s) Croton / Joseph’s Coat Plant Type Ornamental Houseplant Native Area Asia Hardiness Rating H1B Foliage Evergreen Flowers Produces white flowers (very rarely) When To Plant Year-round When To Prune Year-round Originating from the tropics of Asia, crotons are a spectacular plant and their multicoloured leaves have earned their rather apt synonym, Joseph’s coat.1 With their origins and exotic, vibrant foliage, it is no surprise that they require warm and humid conditions, but they can be successfully grown indoors here in the UK. Common Varieties There are many varieties to choose from, with leaves ranging in colour from red and pink to yellow and purple. Most cultivated plants for sale do not grow as large as those found in the wild, but can still happily grow to an impressive 1.5m tall. Croton plants can sometimes be found for sale in garden centres, but for some of the rarer varieties, searching online will provide more options. More commonly available as relatively inexpensive young plants, mature specimens can be found at rather eye-watering prices. Here are some that are currently available here in the UK. C. variegatum var. pictum ‘Mrs Iceton’ This variety is a stunner, producing beautiful leaves ranging in colour from red and brown to yellow and green. Growing to an eventual height of 1m with half the spread, it certainly is a statement plant. C. variegatum var. pictum ‘Petra’ ‘Petra’ can grow even larger than ‘Mrs Iceton’, reaching an impressive height of 1.2m with a 0.75m spread, meaning it certainly does need some space. With its glossy green, yellow and orange leaves, it really is a magnificent plant. C. variegatum var. pictum ‘Excellent’ This cultivar is an unusual plant. With its dark green leaves highlighted by its contrasting red, gold and yellow veins, it certainly stands out. Grows to an eventual size of 1m tall with 0.5m spread. C. variegatum ‘Mammy’ ‘Mammy’ is one of the smaller varieties. Growing to only 0.5m in height and spread, it is perfect for a smaller room. The foliage of ‘Mammy’ can be slightly less vibrant than others but still packs a punch with its red, yellow and green leaves. Where To Grow Temperature & Humidity Croton plants require a constant minimum temperature of 18°C, which is why they are grown almost exclusively here in the UK as houseplants. When summer temperatures rise above this and once hardened off, they can be moved outside to a sheltered patio or terrace, but beware of a cold night which can seriously shock them. Coming from the tropics, high humidity is a must for crotons to flourish. This can either be achieved by placing them in a warm kitchen or bathroom or by misting regularly depending on how dry the atmosphere is. Sunlight & Exposure Preferring a sunny spot, crotons will cope with a small amount of shade, but too much shade can lead to muted colours. A bright spot receiving morning or late afternoon sunlight is perfect, as they don’t like the scorching midday sun of the summer months. Crotons hate a draught, so be mindful of this when picking a spot for them and avoid any cold or uninsulated windowsills during the colder months. Ongoing Plant Care Croton plants are rather particular when it comes to their growing conditions and will tell you by dropping their leaves if they are unhappy. Watering Watering crotons can be a game of trial and error. They need to have their soil damp at all times and they hate being allowed to completely dry out or sit in waterlogged soil. Placing some pebbles in between their plastic and decorative pot can lift them a few centimetres, thus reducing their chance of sitting in a pool of water. Watering with cold water can send them into a bit of a shock, which is why watering with lukewarm water is recommended. Feeding Crotons are hungry plants and will significantly benefit from being given a balanced liquid feed every 2-4 weeks during the growing season. Repotting With an average rate of growth, crotons will need repotting from time to time as they outgrow their current pot or when their roots protrude out of the bottom. Best done when actively growing in spring or summer, do not be tempted to use an overly large pot, but only one size up and use a specific houseplant potting mix. Pruning Pruning croton plants isn’t strictly necessary. However, dead leaves can be removed and dead branches can be cut back to the base of the plant. Pruning can also be performed to keep the plant to size and shape in spring or summer. Using a pair of clean and sharp secateurs or snips, a cut can be made just above a leaf node, taking no more than one-third off each stem. Deadheading Crotons can be known to flower during the summer months, although this is rather unlikely here in the UK. The small white flowers produced are rather insignificant in comparison to their wonderful foliage and are often removed so as not to detract from the leaves. Either way, if you are lucky enough to have a croton flower, they can either be cut off from the base or allowed to flower and then removed. Dusting Somehow, croton foliage seems to attract even more dust than other houseplants. Even a thin layer of dust can reduce the amount of light the plant receives and even reduce the plant’s ability to photosynthesise. Removing the dust is best achieved using a damp cloth, but don’t be tempted to try using a shiny product as these can damage the precious leaves. “Large, glossy leaved houseplants do tend to attract dust,” shares Colin Skelly, a Horticulturist with experience working as a Head Gardener. “An easy way to wash this off is to stand the plant in a shower and wash it off with cold or tepid water. “This will also water the plant and boost the humidity around the leaves for a time.” Propagating Propagating croton plants from a cutting is relatively simple, and who wouldn’t want to try and grow more of these spectacular plants for free? During the growing season, using a clean and sharp pair of secateurs, take a cutting of new growth 10-12cm long, just above a leaf joint. Remove all but the top 3-4 leaves, place in a pot full of a free-draining potting mix and water well. To prevent the cutting from drying out, it is advisable to cover the pot and cutting with a clear plastic bag, but do not allow the bag to touch the leaves. Keep the cutting warm and moist and out of direct sunlight and check for signs of root growth after 4-6 weeks, after which it can be potted on. Common Problems Croton plants tend not to be troubled by diseases, but they can be susceptible to some pests and other problems. Leaf Drop A croton plant dropping its leaves is its way of telling you that its environment isn’t quite right. If yours begins to drop its leaves after being repotted or after being in transit, do not be too alarmed, as it may just be adjusting to its new environment having suffered a little stress during the packaging and delivery process. However, once happy in its new home, a croton plant may drop its leaves as a result of either the soil being allowed to completely dry out, from overwatering or from experiencing low temperatures or draughts. Foliage Losing Colour Sometimes croton leaves can lose some of their colour and intensity, leading to a rather dull-looking plant. This can be caused by either low light levels in winter or when exposed to too much direct and strong sunlight. During winter it can be advisable to place the plant near a south-facing window so it can receive as much light as possible. However, if this is not an option it may be worth looking into grow lights. Glasshouse Spider Mites Spider mites can be one of the most problematic pests to croton plants. A tiny sap-sucking arachnid which thrives in warm and dry conditions, it’s almost no surprise that houseplants can be so susceptible. Spider mites are difficult to spot due to their tiny size of less than 1mm and the fact that they tend to hide underneath the foliage. Often the first noticeable signs of them being present is the mottling of the leaves and webbing on the plant, which if not dealt with swiftly, can lead to leaf drop and the demise of the plant. In the case of red spider mites, prevention is better than control. This can be aided by checking the plants regularly for signs of them from spring onwards, increasing airflow and increasing humidity levels. However, if red spider mites are confirmed, then biological and pesticidal controls are available. References 1. S. (n.d.-d). Croton, Codiaeum variegatum. Wisconsin Horticulture. Retrieved March 14, 2023, from https://hort.extension.wisc.edu/articles/croton-codiaeum-variegatum/
Learn more
Gardeners Suggest 3 Options For Growing Godetia From Seed, Including Sowing In Autumn
IN THIS GUIDE When To Sow 1) Directly Sow Seeds 2) Sow Indoors In Spring 3) Sow Undercover In Autumn Godetia grandiflora is a hardy annual worth considering for UK gardens, as it produces flowers in summer that are lilac or pink, sometimes with white centres. They will thrive in full sun or partial shade, in moist but well-drained loam or sandy soil with an acid pH. If you would like to grow these annuals from seed, there are three different options to consider: You can directly sow the seeds in a prepared bed in early-mid spring, or potentially in autumn in areas with milder winters. Sow seeds indoors 6-8 weeks before the last frost date in your area, and then transplant them to the garden after the last frost in your area. You can also sow the seeds under glass in autumn, overwintering them with protection for flowers a little earlier than typical for spring sowing the following year. When To Sow Godetias are typically sown in either early spring or in autumn. When precisely you sow them will depend on where you live and also on whether you have chosen to directly sow the seeds where they are to grow in your garden or are growing them indoors for later transplantation. I’d recommend sowing the seeds of godetia directly into a prepared bed or border where they are to grow, in early to mid-spring or in autumn if you live in a milder area. However, depending on the conditions where you live, you may find it easier and have better germination rates if you sow a little earlier in spring, indoors or under cover, and transplant the young godetia to your garden once all risk of frost has passed. Difficulty Easy Equipment Required Seeds, seed tray or pots, growing medium When To Sow March-April or September When To Plant Out April (if not directly sown) Here are three different options to consider depending on the growing conditions where you live: 1) Directly Sow Seeds If you decide to directly sow godetia seeds, then the first and most important thing is to choose a suitable place to grow godetia and then to prepare the growing area. This plant grows best in slightly acidic, moist but well-drained, and poor to moderately fertile soil. It can be grown in full sun or partially shaded conditions. The main thing to avoid is overly hot or humid conditions. Make sure the area is not over-fertilised too, and avoid sowing close to legumes or other nitrogen fixers. Make sure the area is clear and weed-free, then sow your seeds as desired, making sure that you place the seeds on top of the soil since these seeds need light to germinate. Sow sparsely, and thin the seeds as required to leave an eventual spacing of around 15-20cm between plants. 2) Sow Indoors In Spring If direct sowing proves challenging where you live, you can sow indoors around 6-8 weeks before the expected last frost date in your area. The reason that direct sowing is recommended for godetia is that they can be susceptible to damping off, so indoor sowing can be trickier than it is with many other seeds. Ensuring good hygiene with tools and containers, choosing a suitable seed-starting compost with added vermiculite or grit, growing under bright light in a well-ventilated space, keeping temperatures at 12-21°C, and watering from below can all help to prevent issues. If you choose this option then you should transplant the young godetias to their final growing position in the garden (after hardening off) after the last frost date where you live. 3) Sow Undercover In Autumn Another option that people sometimes take when growing godetias from seed is sowing under glass in autumn. “Sowing in autumn and then transferring to a ventilated cold frame can be a good way to minimise damping off as it allows a good amount of airflow around the seedlings,” shares Colin Skelly, Horticulturist and Consultant. “Being careful not to overwater is important as temperatures cool down.” Again, ensuring good hygiene and providing the right growing conditions is crucial to avoid problems before germination or when seedlings are small. Overwinter the young plants and these can then be planted into their growing positions in spring.
Learn more
Emily Cupit's 5 Step Process For Planting Autumn Crocus In September
IN THIS GUIDE When To Plant 1) Choose Your Bulbs 2) Find A Suitable Location 3) Prepare The Growing Area 4) Make Holes For The Bulbs 5) Cover Over Crocuses are beautiful flowers that can really brighten up the garden, usually early in the year – in late winter or early spring. If you would like to plant crocus bulbs then you will need to know how and when to do so. Crocus bulbs should be planted in August or September for autumn flowering. Here is a simple outline of the process to follow: Choose and source your crocus bulbs. Choose a suitable location for planting. Prepare the growing area or containers. Make holes for crocus bulbs or partly fill a pot. Put the crocus bulbs in place and cover them over. A more detailed explanation of the process above, and some more hints and tips about this simple garden job, can be found below. Difficulty Easy Equipment Required Hole dibber or trowel, pots if needed When To Plant Out August-October When To Plant Crocuses, like daffodils and hyacinths, are best planted early in autumn. Ideally, it is best to plant them by the end of September, but you can still keep planting them the following month if you don’t get around to it. Just try to plant them as soon as you can. 1) Choose Your Bulbs Of course, if you have decided that you would like to grow crocuses but have not yet purchased any bulbs, then the first decision you will have to make is which type and which specific variety you would like to grow. Broadly speaking, crocuses are typically divided into two main categories – spring-flowering and autumn-flowering types. “Crocus ‘bulbs’ are botanically corms, but whether a true bulb, corm, tuber, tuberous root or rhizome, they are all a means for a plant to store energy underground before emerging,” shares Horticultural Consultant Colin Skelly. However, there are also some specialist crocuses grown as alpine plants in very specific conditions. 2) Find A Suitable Location When you are choosing crocus bulbs, you need to think not only about what the crocuses will look like and when they will bloom, but also about where you plan to plant them. You might plant crocuses in a bed or border, a lawn or as part of a meadow planting scheme. You can also grow them in a container, either on their own or alongside other spring bulbs in a layered planting sometimes referred to as a bulb lasagne. Note that some crocuses will be better than others for growing in containers or naturalising in grass, so make sure you understand the needs and environmental preferences of the particular crocus variety that you have chosen to grow. 3) Prepare The Growing Area Once you have decided where to grow crocuses, you may need to do some work to prepare before you can actually get planting. If you are planting crocus bulbs in a bed or border, you should clear the area so it is free from weeds, and if you are planting in grass, make sure that it is cut short. It is also important to make sure that the conditions are suitably free-draining as bulbs can rot if they end up in overly waterlogged conditions. If you plan on growing crocuses in containers, you will need to select a container, and fill it with a suitable peat-free compost mix. Some added grit can be beneficial in the mix to improve drainage. When choosing a container and growing medium, you should also think carefully about what else you might like to add to the same pot. One idea is to create a bulb lasagne, as mentioned above. You might have 3 layers, with the latest-flowering, largest bulbs close to the bottom of the container, followed by mid-season spring bulbs in the next tier up, and then crocus bulbs closer to the top. 4) Make Holes For The Bulbs The next step will of course depend on where you are planting your crocus bulbs. If planting in a container, part fill the container with your chosen growing medium. If you are planting other spring bulbs in layers with your crocuses, you will place these first, covering them over with a layer of growing medium before starting on planting the next tier. The key thing to remember when placing the bulbs is that for each layer, you should make sure that the bulbs are not placed directly above those in the layer below. If you are planting bulbs in a bed or border or in an area of grass, you will make holes for your bulbs. While you can simply use a small trowel, if you are planting a larger number this will be quite laborious and you may wish to use a bulb hole digger or a bulb planter. How deep the bulbs should be planted depends on the specific cultivar and the size of the bulbs. Typically, crocus bulbs are planted around 7-12cm deep. 5) Cover Over Now all that remains is to check over the bulbs to make sure they are healthy and place them into the positions prepared for them. Finally, when the bulbs are in the position where you have chosen to grow them, fill back the soil or growing medium over them, gently firming them into place.
Learn more
Sowing Ammi Majus Into Greenhouse Pots With Emily Cupit's Video Tutorial
IN THIS GUIDE When To Sow 1) Prepare The Growing Area 2) Sow Your Seeds 3) Pot Up 4) Transplant To The Garden Also known as ‘Bishop’s Flower’, Ammi majus is popular with florists and floral artists for its dainty white flowers and lacy foliage. This annual looks great in the middle of beds and borders, or in an informal wildflower meadow. This plant is great for attracting bees and other beneficial insects and when the plants are left after flowering, birds like goldfinches will love the seeds. If you would like to grow this annual in your garden, the good news is that it is very easy to grow from seed. The seeds are sown between March and May, either indoors, undercover, or directly where they are to grow. Prepare a seed tray filled with seed-starting compost, or a suitable area of fertile and free-draining soil if direct sowing. Sow seeds, covering lightly with compost or soil. Once the seeds have germinated and have their first true leaves, if growing indoors, transfer each to its own pot. If not directly sown, transplant seedlings into your garden towards the end of May or in early June. Whether sown indoors or directly, the plants should flower the same year, blooming between June and August. Difficulty Easy Equipment Required Seeds, seed tray or pots, greenhouse or a cold frame When To Sow March-May When To Plant Out May-June When To Sow Ammi majus seeds can be sown in late February indoors, but are usually sown in March. However, expert Horticulturist Colin Skelly has a different approach: “I sow half of my Ammi majus into pots in my greenhouse in autumn (late September/early October) and the rest in March. “This is partly insurance by not putting all of my proverbial eggs in one basket, but also produces two waves of flowering as the autumn or spring sown plants will flower in two waves, in April to May and then May to June.” Alternatively, from around mid-April onwards, seeds can be directly sown into a well-prepared area of soil in your garden. 1) Prepare The Growing Area When growing Ammi majus from seed, the first thing you will need to decide is whether you will directly sow or sow indoors. Sowing indoors is best if you have heavier, clay soil. It can also be a better strategy if you have a lot of slugs and snails or other pests to contend with. If sowing indoors, prepare a seed tray or soil blocks and fill these with a suitable peat-free seed-starting compost mix. 2) Sow Your Seeds Sow the seeds on the surface of the growing medium and cover them over lightly, firming them in gently and making sure that the medium is moist but not saturated. The seeds should germinate quite quickly. Keep them in a greenhouse or cold frame, or on a sunny windowsill until they develop their first true leaves. 3) Pot Up Once the Ammi majus seedlings have their first true leaves, prick them out and pot them into their own individual pots. You can then continue to grow them in a greenhouse or under a cold frame. 4) Transplant To The Garden The young plants can then be transplanted into their final growing positions in your garden towards the end of May or in early June.
Learn more
8 Ravishing Red Cyclamen Varieties Including Elizabeth Waddington's Favourites
IN THIS GUIDE 1) C. persicum ‘Latinia Scarlet Red’ 2) C. persicum ‘Success Bright Red’ 3) C. persicum ‘Verano Red Improved’ 4) C. persicum ‘Rainier Scarlet’ 5) C. persicum ‘Sterling Scarlet’ 6) C. persicum ‘Laser Synchro Wine’ 7) C. persicum ‘Midori Synchro Scarlet’ 8) C. persicum ‘SeeWhy Scarlet’ Cyclamen varieties belong to two different groups; hardy cyclamen for growing outdoors, and more tender types which are typically grown as houseplants in the UK. When choosing a cyclamen variety to grow, it is important to think about where you would like to grow it and to choose the right option for that location. Of course, other considerations will also come into play, and one of those things is colour. Cyclamen of the hardy types are usually in shades of pink or white, and even those with the ‘rubrum’ suffix are usually a deeper pink rather than a true red. However, when it comes to indoor-grown cyclamen, there are several which do have truly red flowers. Here are some red cyclamens that you could consider growing as houseplants in your home, or as bedding plants towards the end of the season with frost protection. “Red Cyclamen make a festive statement indoors or out,” shares Master Horticulturist Colin Skelly. “I usually use pots of hardy Cyclamen outside of my front door at Christmas time, which provides a warm festive floral welcome alongside seasonal foliage and berries.” Note that all cyclamen in this list should be planted in a sheltered location and will grow to less than 0.5m in height and spread. 1) C. persicum ‘Latinia Scarlet Red’ HARDINESS RATING: H3 FLOWERING SEASON(S): Winter SUNLIGHT: Part Shade SOIL PREFERENCE: Any soil type; any pH The Latinia Series of cyclamen is a highly regarded series of cultivars which come in a range of different hues, including, for those who love true red blooms, the ‘Scarlet Red’ cultivar. There is also attractive variegation on the leaves. This series consists of compact plants with large flowers. Flowering is uniform, abundant, and fairly early. These cyclamens are known for their ease of growth and good performance. 2) C. persicum ‘Success Bright Red’ HARDINESS RATING: H3 FLOWERING SEASON(S): Winter SUNLIGHT: Part Shade SOIL PREFERENCE: Any soil type; any pH Another trademarked cultivar with the ‘Outstanding Cyclamen’ label is ‘Success Bright Red’. This is another true red cyclamen variety which can be an excellent houseplant for your home. It is also a part of the Latinia Series. These plants have marbled, deep green foliage which perfectly complements the stunning red blooms. 3) C. persicum ‘Verano Red Improved’ HARDINESS RATING: H3 FLOWERING SEASON(S): Autumn / Winter SUNLIGHT: Full Sun / Part Shade SOIL PREFERENCE: Any soil type; any pH The Super Verano Series is another popular series of cyclamen available in the UK. ‘Verano Red Improved’ is the option for those who love true red flowers. The flowers on this variety bloom abundantly above the heart-shaped leaves. This series of F1 cyclamen can be grown indoors, or, in the south, may sometimes be grown outdoors. This series was developed to avoid the flowering delay caused in other cultivars by high temperatures. 4) C. persicum ‘Rainier Scarlet’ HARDINESS RATING: H2 FLOWERING SEASON(S): Autumn / Winter SUNLIGHT: Full Sun / Part Shade SOIL PREFERENCE: Loam or sand; acidic / neutral pH This red-flowered cyclamen from the Rainier Series can make an excellent houseplant, bringing a cheery splash of red colour to your home over the festive period and brightening the place up for Christmas. Kept in a cool, bright room they should flower for several weeks and may even be coaxed into flowering in subsequent years if cared for correctly. 5) C. persicum ‘Sterling Scarlet’ HARDINESS RATING: H2 FLOWERING SEASON(S): Autumn / Winter SUNLIGHT: Part Shade / Complete Shade SOIL PREFERENCE: Any soil type; any pH This red cyclamen is in the Sterling Series and is another F1 option with beautiful red blooms. 6) C. persicum ‘Laser Synchro Wine’ HARDINESS RATING: H1C FLOWERING SEASON(S): Autumn / Winter SUNLIGHT: Part Shade SOIL PREFERENCE: Any soil type; any pH Another offering from the Synchro range, this flower is great for uniformity. It has medium-sized flowers, flowering early and slightly more vigorously than some other cultivars. 7) C. persicum ‘Midori Synchro Scarlet’ HARDINESS RATING: H1C FLOWERING SEASON(S): Summer / Autumn / Winter SUNLIGHT: Full Sun / Part Shade SOIL PREFERENCE: Any soil type; any pH This is another early flowering red flowered option from the Synchro range and is a mini cyclamen option with early flowering which is also good for uniformity. This variety is suitable for late summer to early autumn production. 8) C. persicum ‘SeeWhy Scarlet’ HARDINESS RATING: H2 FLOWERING SEASON(S): Summer / Autumn SUNLIGHT: Full Sun / Part Shade SOIL PREFERENCE: Any soil type; any pH This is another red flowering mini cyclamen for flowering in late summer to autumn, with small flowers and leaves and a pleasing round habit. It can work very well for greenhouse cultivation and is the earliest and most uniform in this cyclamen segment.
Learn more
7 Important Tips To Help Grow Tender Cyclamen As Houseplants Indoors
IN THIS GUIDE 1) Choose Your Cyclamen 2) Pot Up Your Plant 3) Place In A Suitable Spot 4) Water Sparingly 5) Feed During Active Growing Season 6) Remove Dead Foliage 7) Move To A Cool Spot Tender cyclamen cannot usually cope with outdoor conditions in the UK, but they can make great houseplants if you care for them correctly. Tender cyclamen are grown as houseplants over the autumn and winter months, then placed outside or in a cool, dry spot until they start to grow once more. To grow and care for cyclamen indoors, there are a number of simple steps that you must follow: Choose a suitable cyclamen to grow as a houseplant. Pot up your cyclamen in an appropriate container. Place your cyclamen in a suitable spot. Water your cyclamen correctly, following a strict routine. Feed sparingly with a suitable organic feed. Gently tug away dead flowers or leaves. Move the plant to a cool spot over summer to get it to re-flower. Read on for a more detailed explanation of each of these steps: 1) Choose Your Cyclamen The most important thing to remember if you wish to grow cyclamen as a houseplant indoors is that only certain species will be suitable for this type of treatment. Most commonly, when growing cyclamen indoors, you will be growing a cultivar of C. persicum. “Cyclamen persicum originates from rocky slopes in North Africa and the Eastern Mediterranean,” says Colin Skelly, a Horticulturist with 15 years of experience in the industry. “These are the conditions that you are trying to replicate – free draining and warm but not hot. In spring and summer, they enter dormancy due to the hot-dry conditions they evolved to deal with before reemerging and flowering into winter as cooler conditions return.” There is a range of options with different bloom colours to choose from. 2) Pot Up Your Plant Most commonly, cyclamens will be purchased as potted plants, though these plants can also be planted as tubers, or grown from seed. When the plant arrives or has grown large enough to handle, pot it up into an individual container, filled with loam or soil-based multi-purpose compost mixed with grit and leaf mould for best results. These plants like fertile and free-draining growing mediums. Make sure that the pot has adequate drainage and that the top of the tuber sits just above the surface of the growing medium. Be gentle when potting up to disturb the roots as little as possible. 3) Place In A Suitable Spot You need to place indoor cyclamen in a cool, bright spot out of direct sunlight. Ideally, a cool room with temperatures of between 10-15°C should be chosen. Make sure that you do not place your cyclamen where it will be too warm or it may stop flowering and enter dormancy too early. 4) Water Sparingly When watering cyclamen grown as a houseplant, it is important to make sure that you do not over-water, and that excess water is able to drain away freely. It can be beneficial to water from below so that you do not wet the leaves. Stand the cyclamen in a shallow container of water for an hour or so, then when the medium is moist but not saturated, let excess water drain away. Water during the active growth and flowering period whenever the medium begins to feel dry, but in the dormant period, stop watering when the leaves turn yellow in spring. 5) Feed During Active Growing Season Cyclamen do not need much feeding, as excess feeding can cause problems with foliage growth at the expense of flowers. However, to keep cyclamen going as a houseplant over multiple years, feed every couple of months over the active growing and flowering period with an organic feed suited to use with houseplants. 6) Remove Dead Foliage To keep your houseplant looking good, remove dead flowers or leaves with a gentle tugging motion. Just remember to leave the flowers to mature and produce seeds if you wish to try propagating your plant. However, this is a somewhat challenging job which can require patience, so is perhaps not the best job for beginners. 7) Move To A Cool Spot In spring, the leaves of cyclamen are meant to turn yellow. This is the beginning of the dormancy phase which is a part of the plant’s life cycle. Once this occurs, place the cyclamen somewhere cool and dry – a sheltered and shaded spot outdoors is ideal. The compost should be kept moist, so if you live in a wet area, consider laying the pot on its side to prevent waterlogging due to excess rainfall. In September, your cyclamen should begin to grow again, and you can bring it back indoors, resuming watering as soon as you see new growth.
Learn more


