

Growing
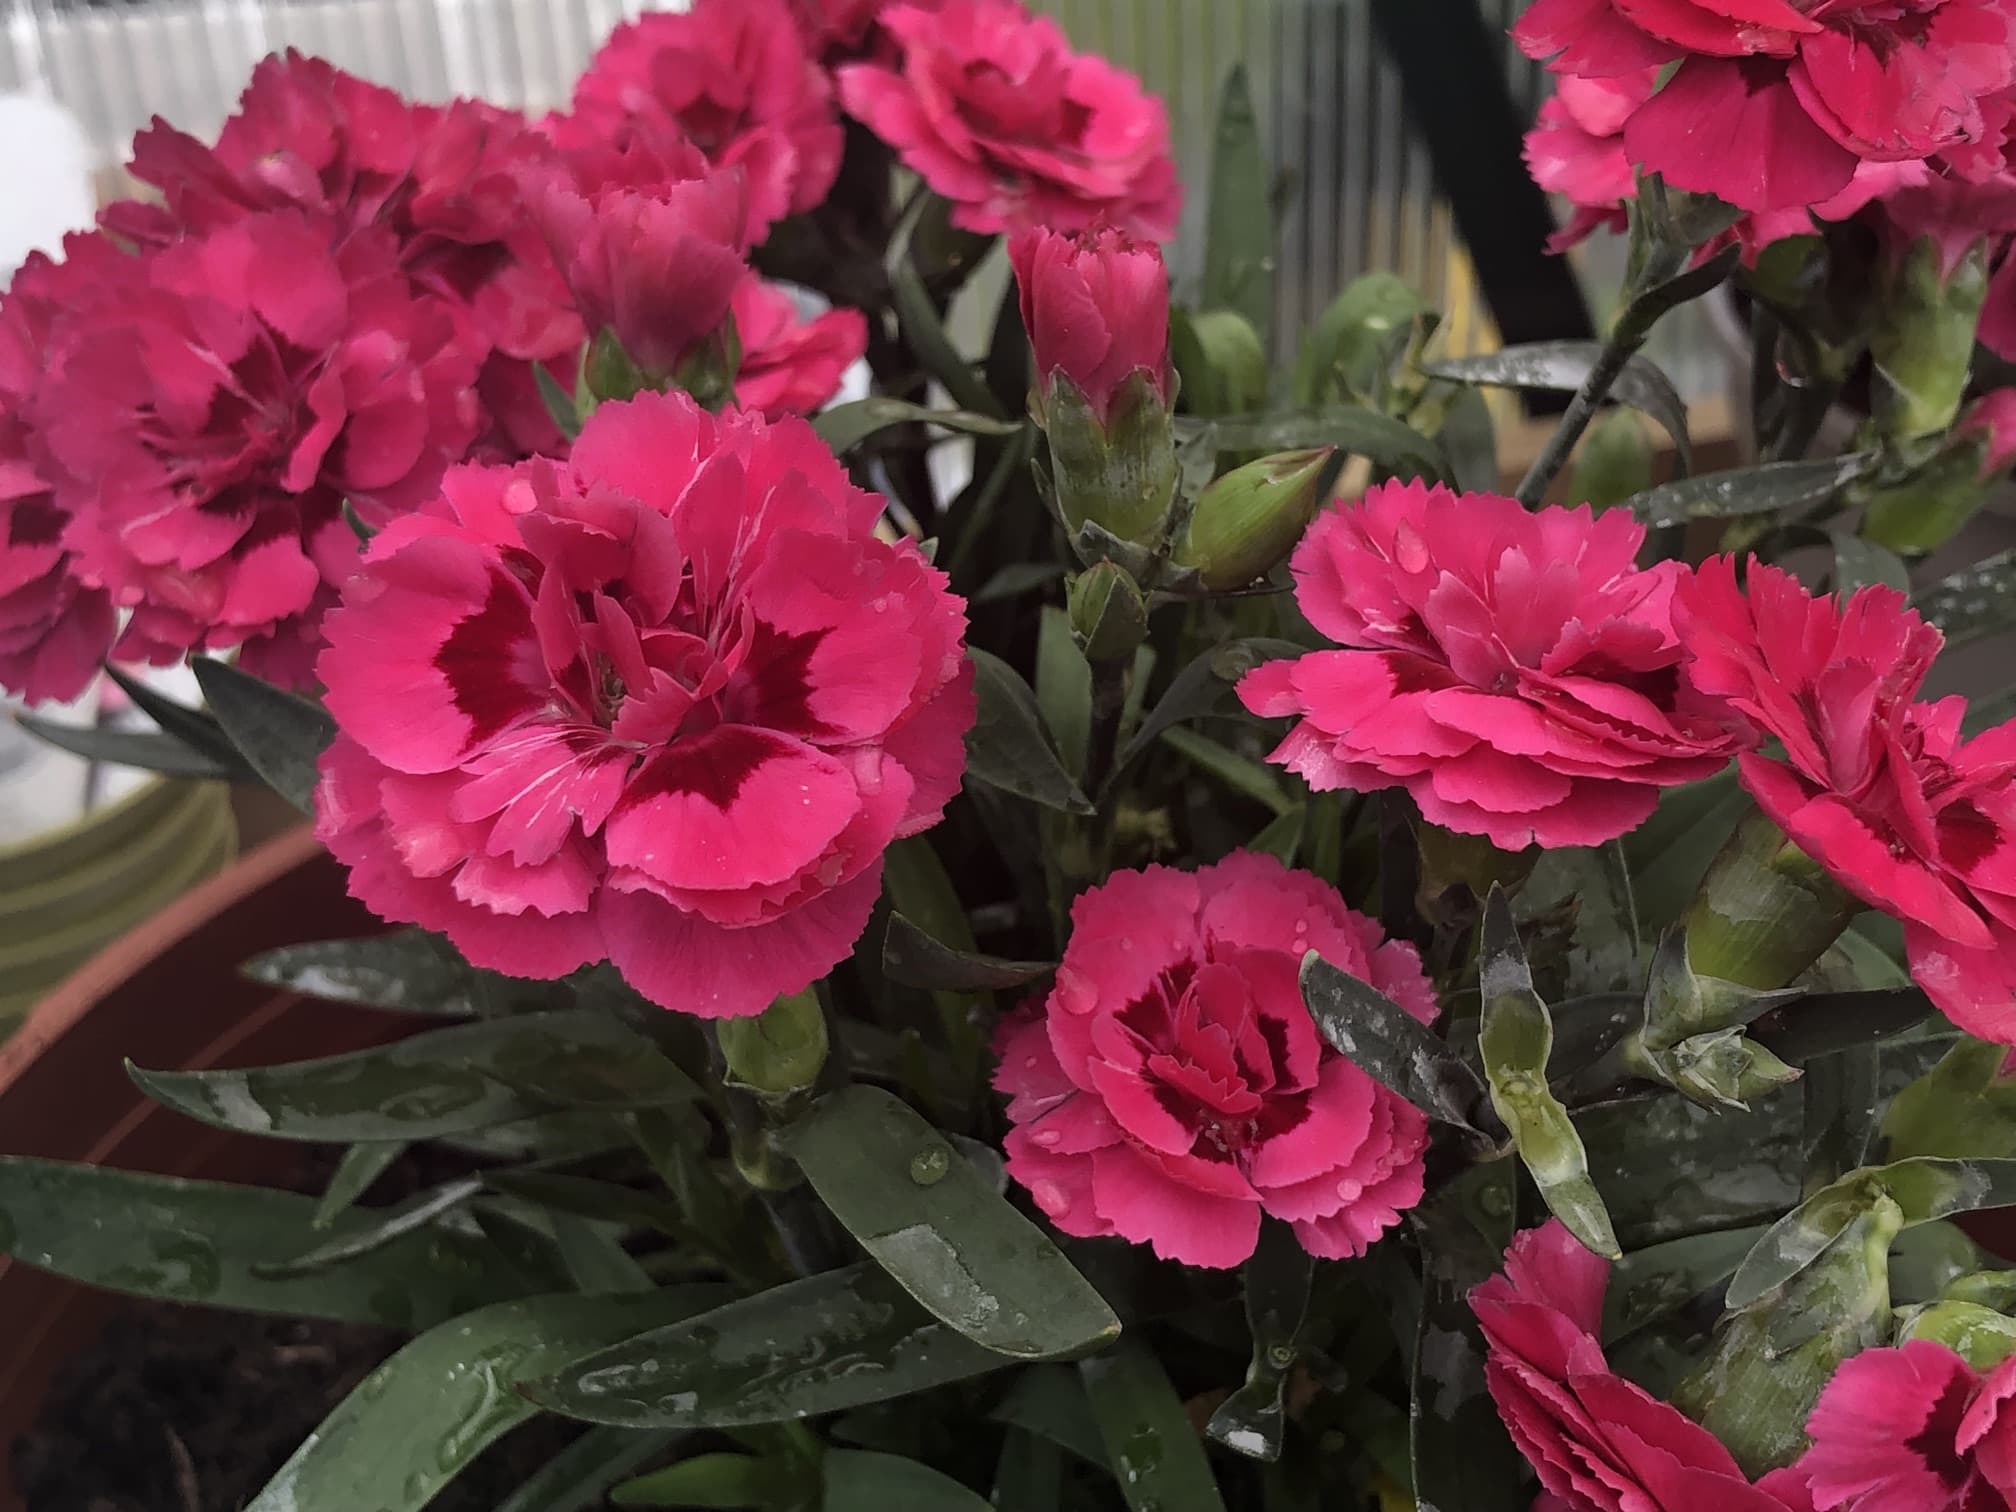

Dianthus Needs Replacing After 5-6 Years: Propagate From Cuttings To Keep Them
IN THIS GUIDE 1) Take & Prepare Your Dianthus Cutting 2) Place Cuttings Into A Pot 3) Cover The Cuttings 4) Wait for Rooting Then Repot 5) Overwinter Under Cover 6) Plant Out In Spring Dianthus is a genus which offers a wide range of beautiful flowers for your garden. However, they are often only relatively short-lived plants. After a time, pinks will tend to sprawl and become woody at their base. Difficulty Easy Equipment Required Knife or secateurs, compost mix, pots, rooting powder (optional) When To Take Cuttings June – September How long they will thrive in your garden will very much depend on which type of Dianthus you are growing, but many may need to be replaced after 5-6 years or so. This means that if you want to continue growing the Dianthus you love over a longer time, you will need to propagate existing plants to maintain their presence in your growing areas. “An easy method for propagating Dianthus is to use the layering method,” shares Master Horticulturist Roy Nicol. “This is where a stem from an existing plant is scored slightly with a knife and pinned down into the surrounding soil or compost. “After a couple of months, the stem will have rooted and can be cut away and potted up separately.” Fortunately, it is also pretty easy to propagate a Dianthus that may be nearing the end of its life, or beginning to look a little less attractive by taking cuttings (also known as pipings) from a mature plant. To grow Dianthus from cuttings: Choose a healthy non-flowering shoot and take a cutting around 6cm long, then prepare it for planting. Place the cuttings into a pot of moist cutting medium. Place a cover over the cuttings and place them on a sunny windowsill. Once cuttings have rooted (usually in 4-6 weeks) pot them on into their own separate pots. Overwinter in a cool greenhouse or cold frame and plant the cuttings out in the garden the following spring. Below, we explain this process in a little more depth – read on to understand a little more about the process involved in growing Dianthus from cuttings. 1) Take & Prepare Your Dianthus Cutting Any time between June and September, examine any mature Dianthus – especially one that you feel may be past its best. Look for a healthy, non-flowering shoot, and take off a cutting of around 6cm, cutting just below a node, using a clean and sharp gardening knife. Prepare the cutting by removing the lower leaves. Optionally, you might also consider dipping the end in rooting powder, which could increase the chances of a cutting rooting successfully. Though this step is not strictly essential and often you will find that the cuttings take perfectly well without this option. 2) Place Cuttings Into A Pot Once you have prepared your cuttings, you should insert them immediately around the edges of a pot filled with a suitable peat-free cutting compost or home-made medium. Make sure that the medium has been watered before you insert the cuttings, and that it is moist and yet not saturated. Ensure that water can drain away freely. 3) Cover The Cuttings In order to prevent the cuttings from drying out, it is a good idea to over the cuttings over with a propagator lid, or a plastic bag secured with an elastic band around the top of the pot. The covered cuttings should be placed on a bright windowsill out of direct sun. 4) Wait for Rooting Then Repot Your cuttings should have rooted within a month to six weeks. You’ll know when the cuttings have rooted when fresh growth is visible. 5) Overwinter Under Cover Once the cuttings have rooted well, carefully remove the cuttings from the pot, gently separate them with their own roots and plant them into their own individual pots with a peat-free multipurpose compost. Water in the cuttings and then place them into a cool greenhouse, polytunnel or cold frame where they will be able to overwinter. Keep them watered, but take care not to overwater and always allow excess water to drain away. 6) Plant Out In Spring You will usually then plant out your new Dianthus plants into their final growing positions in spring of the following year.
Learn more
From 'Clove' To 'Rockin Red' - Here Are 18 Dianthus Varieties With Many Award Winners
IN THIS GUIDE 1) D. ‘Leon Tautz’ 2) D. ‘Jean Knight’ 3) D. ‘Chesswood Margaret Alison’ 4) D. ‘Mambo’ 5) D. ‘Pixie Star’ 6) D. ‘Dainty Dame’ 7) D. ‘Pinball Wizard’ 8) D. ‘Rhian’s Choice’ 9) D. ‘Auricula-Eyed Mixed’ 10) D. ‘Sooty’ 11) D. ‘Maiden Pink’ 12) D. ‘Clove’ 13) D. ‘Rockin Red’ 14) D. ‘Rose De Mai’ 15) D. ‘Pink Kisses’ 16) D. ‘Georgia Peach Pie’ 17) D. ‘Oscar Pink’ 18) D. ‘Kawaranadesiko’ References Dianthus comprise an assortment of thousands of varieties – of which 114 have been awarded the RHS’s Award of Garden Merit.1 Underneath we present a mere taste of what this wonderful genus has in store for gardeners. All the carnation and garden pink varieties exhibit the classic greyish-bluish-green foliage that is such a well-known attribute of these two species’ varieties. All the carnation and garden pink varieties are evergreen perennials while the two Sweet William varieties are biennials. 1) D. ‘Leon Tautz’ A tall border carnation that can reach 75cm. It has a bushy habit. It flowers only during part of the summer but no matter how brief the flowering season may be, the brilliant and stunning bloom, up to 6cm in diameter, makes up for it. It has a pure white ground with vivid purplish-crimson flecks, splashes and edging. 2) D. ‘Jean Knight’ Also a border carnation, this variety grows up to 50cm. It has a bushy habit and blooms during the summer. The flower is 7-8cm wide, and is one for the manor garden, being pure white with purplish-crimson edging that bleeds over into flecks and streaks. RHS Award of Garden Merit. 3) D. ‘Chesswood Margaret Alison’ Another tallish border Carnation that blooms during summer. Its foliage has a very bluish tone. The double flowers are large at about 7cm and are a remarkable cerise rose pink, call it ‘Slate Rose.’ It possesses a feature that Dianthus are famed for: a spicy fragrance. The flowers have a strong clove-like scent. RHS Award of Garden Merit. 4) D. ‘Mambo’ A perpetually flowering variety that is grown year-round under glass for floriculture and exhibition. This bushy variety attains a height and spread of over 1m. The large, fully double flowers are in gorgeous tones of orangeish-yellow with the colouration being gently gradated. RHS Award of Garden Merit. 5) D. ‘Pixie Star’ A dwarf variety at only about 20cm with a similar spread. The foliage has an obvious bluish tinge. The blooming season starts from mid-spring and continues into summer. The small single flowers are most charming; they are candy pink with a lipstick red central ring. RHS Award of Garden Merit. 6) D. ‘Dainty Dame’ Another dwarf variety at only about 25cm with a similar spread. The small single flowers are pure white with a very contrasty maroon central ring. These upbeat flowers have a suitably strong scent that carries a hint of spice. RHS Award of Garden Merit. 7) D. ‘Pinball Wizard’ A mid-height variety that reaches around 40cm. It has a bushy habit. Blooming during the summer, its double flowers are of the palest pink with flecking and feathering of a vivid pink. These comparatively refined and elegant Pinks have a mildly spicy scent. 8) D. ‘Rhian’s Choice’ This variety grows to about 30cm and has a bushy habit. Even by Dianthus standards, this variety’s foliage is markedly bluish-grey. The double flowers are 5-5.5cm in width, and bloom during summer. They are truly eye-pulling stunners by virtue of their striking hue which varies from intense red to blood red. 9) D. ‘Auricula-Eyed Mixed’ Grows to about 45cm and has an upright habit. This Dianthus’s foliage is neither greyish nor bluish but is very green. It bears merry clusters of bright pink, magenta, and purplish flowers with white or pale eyes. These blooms are quite fragrant and bloom from late spring through summer. 10) D. ‘Sooty’ Grows to about 45cm and has a bushy, mounding form. It has intensely green foliage. It bears clusters of small flowers during the summer, and they are seriously (yes, again) stunning. The hue varies from maroon-black to violet-black, and the intense effect is heightened by a velvety sheen. 11) D. ‘Maiden Pink’ 12) D. ‘Clove’ 13) D. ‘Rockin Red’ 14) D. ‘Rose De Mai’ 15) D. ‘Pink Kisses’ 16) D. ‘Georgia Peach Pie’ 17) D. ‘Oscar Pink’ 18) D. ‘Kawaranadesiko’ We hope you enjoyed this list of our favourite dianthus. If you didn’t find a variety that piqued your interest then keep looking – there are literally thousands to choose from! References 1. See RHS lists of top AGM garden-worthy plants, fruit & veg. (n.d.-b). Royal Horticultural Society. Retrieved May 15, 2023, from https://www.rhs.org.uk/plants/trials-awards/award-of-garden-merit/agm-lists
Learn more
Seed Sowing Geraniums Is The Best Option If A Large Number Of Plants Are Required
IN THIS GUIDE When To Sow Geranium Seeds 1) Prepare Suitable Containers 2) Sow Geranium Seeds 3) Wait For Germination 4) Prick Out & Pot On Geranium Seedlings 5) Plant Out From Late Spring Both tender Geraniums (technically Pelargoniums) and hardy Geraniums are popular additions to UK gardens, and both can be grown from plug plants or cuttings. “Cuttings or divisions are the easiest means of propagating Pelargonium and Geranium, but seed sowing is the preferable option if a large number of plants are required, such as for summer bedding,” says Colin Skelly, a Master Horticulturist. Many Geranium types can also be cultivated from seed by following this simple process: Sow Pelargonium seeds in late winter indoors or in another frost free location. Sow hardy Geranium seeds in autumn or in spring. Prepare suitable seed trays or pots filled with a seed starting compost. Sow the seeds on a firmed surface, and cover lightly with compost/ grit. Wait for germination to take place. Prick out and pot up seedlings once they are large enough to handle. Grow on and then plant out in late spring. If you are looking to grow Pelargonium in your garden from seed, Zonal bedding type Pelargoniums and species like Pelargonium odoratissimum can relatively easily be grown or propagated in this way. Difficulty Moderate Equipment Required Seeds, pots or seed trays, potting medium, heated propagator (optional) When To Sow February – April, September – October When To Plant Out May – June Hardy Geraniums can often also be sown from seed. However, this is a long and time-consuming business and is not usually the easiest way to obtain these plants for your garden. It is worth noting that some Geranium species and cultivars will come true from seed while others will not. Hardy types grown from seed can usually take a couple of years to reach their full potential. Hardy Geraniums often self-seed readily, and volunteer seedlings can easily be potted up and placed elsewhere in your garden. Read on for more information about this process – just remember that there will be a lot of variance depending on which specific type and cultivar of Geranium you plan to grow. When To Sow Geranium Seeds Pelargonium seeds should be sown in late winter (late January/ February) indoors or under cover. For many types, a heated propagator will be required to provide sufficient temperatures for good germination rates. Typically, seeds of tender types will germinate best between 22-26°C and as much light as possible. Hardy Geranium seeds can be sown either in autumn or in spring. 1) Prepare Suitable Containers Geraniums can all be sown into seed trays or small pots. These should be filled with a suitable seed-starting compost or growing medium, which is moist yet free-draining. Using a soil-less potting medium can be a good idea as Geraniums can sometimes be prone to fungal issues like damping off. Make sure that you practice good hygiene to reduce the chances of an issue of this type. 2) Sow Geranium Seeds Both pelargonium and hardy Geranium seeds should be pressed evenly into the firmed surface of the moist growing medium, then covered over only lightly with a mix of compost and grit. 3) Wait For Germination In a bright location, indoors or under cover, in suitable conditions, Pelargonium seeds can be expected to germinate within a few weeks, and most types should flower around 16 weeks from sowing. With hardy Geraniums, it is important to make sure that the medium does not dry out completely. Hardy Geraniums may germinate at different rates after a period of cold stratification, but usually, the main flush of germination, whether the seeds are sown in autumn or early spring, is expected in late spring. Most species flower a year after germination, but some take two years. 4) Prick Out & Pot On Geranium Seedlings Once Pelargonium or Geranium seedlings are large enough to handle, these can then be pricked out and potted into pots filled with a good quality peat-free compost. 5) Plant Out From Late Spring Once they have rooted strongly, Geraniums can be planted out from late spring. With tender types, it is of course of paramount importance that you do not plant out too early, as a late frost could kill these plants. Make sure that you harden off plants sown and grown on indoors before planting out. Also, ensure that you choose a planting position for your new plants that is suited to the particular species or cultivar that you have chosen to grow.
Learn more
Choosing The Best Hardy Geranium Varieties With Gary Carroll From Cranesbill Nursery
IN THIS GUIDE Expert-Chosen Varieties 1) G. ‘Gerwat’ 2) G. robertianum 3) G. maculatum 4) G. ‘Melinda’ 5) G. x cantabrigiense ‘Karmina’ 6) G. cinereum 7) G. arboreum 8) G. ‘Danny Boy’ 9) G. ‘Dreamland’ 10) G. clarkei ‘Kashmir White’ 11) G. ‘Orion’ 12) G. ‘Mavis Simpson’ 13) G. ‘Ann Folkard’ 14) G. nodosum 15) G. pratense ‘Mrs. Kendall Clark’ References The Geranium genus consists of hundreds of species and cultivars. First, though Geraniums themselves are very easy to grow and care for, many varieties make life tough for weeds, tending to stifle them! Next, the habits and forms of the many varieties cover the gamut of mat-forming, creeping, mounding, clumping, bushy, spreading, erect, and upright; naturally, therefore, varieties’ heights range from a mere 12cm to well over a full metre. Finally, a thumping 57 varieties have been awarded the Royal Horticultural Society’s Award of Garden Merit. In this list we share fifteen of our favourite varieties to grow in the UK, but first – here are some of our expert’s favourites to grow: Expert-Chosen Varieties “I love Geranium psilostemon for its punch of colour, shape and height,” shares award-winning Garden Designer Manoj Maldé. “It also gives a second flush of blooms, which I love.” We also spoke with Gary Carroll from Cranesbill Nursery and Suzie Dewey from The Hardy Geranium Nursery to ask which of the many Geranium varieties they grow stand out as their favourites. “There are some types that are a bit more fussy than others; for example the cinereums which are the little alpine types, really need good drainage and need to be in full sun to thrive.” says Gary. “The pratenses need to be in full sun, but they need consistently moist soil, as do the phaeums, however these can tolerate sun or shade. “But it’s really not difficult to find the ideal plant for your situation and there’s usually plenty of choice.” So which are Gary’s favourites? G. himalayense ‘Kaya’ Himalayan Geraniums “My overall favourite Geranium is one called ‘Kaya’. “It’s a himalayense type but it has red/bronze and green foliage. The flowers are a lovely deep blue and I think the contrast is just gorgeous.” G. wlassovianum “I also love the wlassovianums for their foliage. They have nice purple flowers but the foliage is a copper-tinged green and the shape of it is very architectural. “Plus it feels nice and soft to the touch! There’s wlassovianum itself and varieties like ‘Lakwijk Star’ and ‘Crug Farm’.” G. sanguineum Then my other favourite type are the sanguineums. These come in a variety of colours from white to pink and many shades of cerise/magenta. They’re a simple plant but very pretty and really easy to grow, plus their foliage is quite different to most other Geraniums and I find it very handsome! Probably my favourite varieties of these would be ‘Hannelore’, ‘New Hampshire Purple’ and the variation striatum. Suzie’s favourites are the Phaeum species: G. phaeum “It’s hard for me to pick specific favourites, there are so many geraniums I enjoy for many different reasons. “[But] I love the whole of the phaeum species. The flower colours range from dark red (almost black) to the palest of pinks, they are vigorous and take no time at all to bulk up and provide a great springtime display taking over from your winter bulbs. “I especially like ‘Wendy’s Blush’. Her flowers are delicate pale pink, almost white, with a purple halo in the centre, as the flowers mature they turn to a beautiful blush pink. “A gorgeous geranium bred by Andre Ekkelbloom and named for his wife.” G. renardii “Another that I really enjoy and for me, I feel like it heralds spring, is G. renardii. “Its glaucous, heavily textured foliage is unusual compared to the majority of geranium species and when the large white flowers open it feels like they’re making an announcement ‘Winter is almost over, spring is coming’.” Here are 15 further varieties which are favourites of our editorial team: 1) G. ‘Gerwat’ Why not open our run-through of selected varieties with one of the most renowned and most-desired varieties of any plant, G. ‘Gerwat’, also known as G. ‘Rozanne’. A winner of awards on both sides of the Atlantic, it is a recipient of the RHS Award of Garden Merit. Getting on the shortlist for the RHS Plant of the Centenary at the Chelsea Flower Show for the decade 1993-2002, it was the outright winner of the public vote.1 It was also the Perennial Plant Association’s Plant of the Year for 2008.2 Even by exalted Geranium standards, this variety is a vigorous and trouble-free variety and is known as a prolific bloomer over an unusually long flowering season that begins in spring and continues through autumn. It has a matching height and spread of 50-60cm. The remarkably pretty 5cm flowers have a whitish centre, and purple venation running through true violet petals. 2) G. robertianum ‘Herb Robert’ is known by numerous colloquial names. “Often removed as a weed from the garden, I always leave a few because it really is a very attractive plant and often looks ‘right’ where it sows itself,” says Colin Skelly, a Consultant and Horticulturist. It is a very important species in Naturopathy and is native to the British Isles. The leaves are unusual in being so heavily dissected as to be palmate. The small disk-shaped flower is a magenta-pink with scarlet-puple veins, sometimes broad or blotchy. It grows to about 30cm high and wide. 3) G. maculatum This variety has a clumping form and grows to about 50cm with a width of about 40cm. Though it has a relatively brief blooming season by Geranium norms, the breathtakingly lovely flowers make up for it. The salver-shaped blooms have a white centre and are a pale, baby pink shade on which the yellow anthers deliver a striking contrast. It is native to the United States and several wonderful cultivars have been developed from it, like G. maculatum ‘Elizabeth Ann’, an RHS Award of Garden Merit recipient. 4) G. ‘Melinda’ This also has a clumping form and with the same height and width as G. maculatum. It blooms in summer and autumn. Its purple venation is so unusually prominent and patterned on the pinkish-white petals that it lends the flower a classical delicacy and fragility, bringing to mind Victorian Era porcelain showpieces. 5) G. x cantabrigiense ‘Karmina’ This geranium variety makes do with full sun to full shade, has a prolonged blooming season, and has a mat-forming habit, growing to only 15-20cm. As such it is a top choice for groundcover, especially as the disk-shaped flowers of a solid bright lilac-pink hue are both acutely pretty and fragrant. 6) G. cinereum Another mat-forming variety with a height similar to G. x cantabrigiense ‘Karmina’ and nearly matching its long blooming season, making it too a top choice for groundcover and rock gardens. But flower-wise it is similar to G. ‘Melinda’ as its blooms too are very fragile and refined. The petals’ distal ends have a deep notch and on their pinkish-white base runs a delicate network of purple veins. As with G. maculatum – to repeat ourselves – several wonderful cultivars have been developed from it, for example, G. cinereum ‘Ballerina’, an RHS Award of Garden Merit recipient. 7) G. arboreum Otherwise known as ‘Hawaii Red Cranesbill’, this is an endangered species that has an official status of ‘Critically Imperilled’ and, sadly, is on the road to extinction, at least in the wild.3 It grows only in a few gulches in Maui. At 2-3.7m in height, it is a giant among Geraniums. The flower is even more unusual; it is of a brilliant magenta-red hue with curled and furled petals, the only ones to exhibit this trait among Geraniums. 8) G. ‘Danny Boy’ Exhibits an extraordinary spreading habit that is open and not dense. Though it is a respectable 50cm high, it spreads to 1.5m and may span even 2m. It blooms throughout summer, putting on a colour spectacle with its vivid and vibrant purple flowers whose venation comprises of mere streaks in a shifted tone of purple. Other varieties that are well worth looking into include: 9) G. ‘Dreamland’ 10) G. clarkei ‘Kashmir White’ 11) G. ‘Orion’ 12) G. ‘Mavis Simpson’ 13) G. ‘Ann Folkard’ 14) G. nodosum 15) G. pratense ‘Mrs. Kendall Clark’ A few of these are RHS Award of Garden Merit recipients while others are under-rated and unsung, but all feature breathtakingly beautiful flowers. References 1. RHS plant of the centenary. (2013, April 24). The Guardian. Retrieved March 16, 2023, from https://www.theguardian.com/lifeandstyle/gallery/2013/apr/24/rhs-plant-centenary 2. Perennial Plant Of The Year. (n.d.). Perennial Plant Association. Retrieved March 16, 2023, from https://perennialplant.org/page/PastPPOY 3. Hawai’i Red Cranesbill (Geranium arboreum). (n.d.). iNaturalist Canada. Retrieved March 16, 2023, from https://inaturalist.ca/taxa/163254-Geranium-arboreum
Learn more
Rhubarb Can Be Grown In Containers Where Space Is An Issue - Just Don't Let Pots Dry Out
IN THIS GUIDE Can You Grow Rhubarb In Pots? Choosing Your Container Choosing Compost Potting Up Rhubarb Potted Rhubarb Care Forcing Rhubarb In Pots Rhubarb is a perennial vegetable that is well suited to container growing in the UK climate. Grown for its delicious and colourful stems, it is easy to care for and will provide a harvestable crop for many years to come. Can You Grow Rhubarb In Pots? Rhubarb is typically grown in the ground and is a staple of allotment and vegetable patches nationwide. However, if space is an issue, it can grow well in a large pot or container as long it is well watered, as pots tend to dry out more quickly, especially during the warmer months. A benefit of growing rhubarb in a container is that it can be moved to a spot where it will receive full sun during the growing season and out of sight when it is dormant. Along with if necessary, providing some protection from late frosts, which even though rhubarb is hardy, can damage the young stalks. Choosing Your Container Rhubarb is a large plant and can grow up to an eventual size of H1m x W1m producing a deep and wide root system as it matures. When choosing a container to grow rhubarb in, it needs to be at least 50cm wide and deep and preferably larger in order to accommodate the size of the plant. The material of the container is not as important as its size. Terracotta is often preferred for aesthetic reasons, although it can be prone to frost damage. Wine or whiskey half-barrels are often used for growing rhubarb due to their large size and will often last longer than the plant. Whatever container is chosen, rhubarb thrives in well-drained soil, so any pot or planter must have adequate drainage holes present for any excess water to drain away freely. Choosing Compost Rhubarb plants are hungry feeders and choosing the right compost is important to give them the nutrients they require to produce good size stems to harvest. That being said, rhubarb is relatively unfussy about where it is grown and can tolerate almost any soil, as long as it is not waterlogged which can lead to the crowns rotting. When growing rhubarb in a container, a rich soil-based compost such as John Innes no. 3 with some well-rotted manure added will help encourage a bountiful crop of stems to harvest. Potting Up Rhubarb Rhubarb can either be bought as dormant plants in the winter or when in leaf from spring onwards and can be planted on purchase either way. Dormant plants are best planted straight away, unless the soil is frozen or waterlogged and temperatures are below freezing. Actively growing plants can be planted at any time, although it is recommended to avoid planting them out during the peak of the summer, when the plants may struggle. To plant up a dormant crown, fill the chosen container with the prepared soil mix and plant the crown so that the growing tip is just below or at the desired soil level. Gently firm in the soil around the crown and water thoroughly to avoid any air pockets. To pot up an actively growing plant, the method is the same except that the plant should be planted at the same depth it previously was. How Many Can You Plant Per Pot? Advice on spacing between rhubarb plants when grown in the ground is generally from 70cm to 1m, as the plants can grow quite large. When grown in containers it is generally recommended that one plant per pot is enough, unless you have a large raised bed that could accommodate several plants at the spacing recommended for the variety. Potted Rhubarb Care Looking after rhubarb grown in containers is not dissimilar from when they are grown in the soil. However, the availability of moisture and nutrients may be limited and should be supplemented when grown in a pot. Rhubarb like moist but not waterlogged soil, you can help avoid crown rot by planting the crown at soil level and not mulching over the crown. Plants need to be watered regularly, especially during the summer months when the rhubarb is actively growing. As previously mentioned, rhubarb requires fertile soil to produce a good crop. As with ground-grown plants, container-grown rhubarb will benefit from an annual mulch of well-rotted manure in spring, which will help feed the plant and conserve moisture over the warmer months. Along with mulching, a general-purpose fertiliser can be applied in spring when the plant is growing to give it a boost for the growing season ahead. Forcing Rhubarb In Pots Forcing rhubarb is essentially the process of excluding any light from the plant, in order for it to produce an earlier, sweeter and softer crop of stalks. Container-grown rhubarb can be forced as if it is grown in the ground. However, once forced, the plants need a break from being harvested for the rest of the summer and even the following year. So, unless you have multiple rhubarb plants to rotate forcing between, it may not be worth it.
Learn more
How Deadheading Dahlias Can Prolong Their Flowers Right Up Until November
IN THIS GUIDE When To Deadhead Dahlias 1) Identify Spent Flower Heads From New Buds 2) Remove The Spent Flower Heads Dahlias are a popular perennial plant that has seen a huge resurgence in recent years and for good reason – they bring a variety of colours to the garden for months on end. Whether you grow the large and ornate dinner plate or the bountiful single varieties loved by pollinators, all dahlias need deadheading to look their best and grow well. “Dahlias are a show-stopping flower and are still a firm favourite for exhibiting on the show bench at National shows,” says dahlia expert David Hall, the director of specialist nursery Halls of Heddon. “We are still seeing a regular attendance of dahlia enthusiasts from all over the country exhibiting their (hopefully) prizewinning blooms.” Difficulty Easy Equipment Required Secateurs or snips, gloves When To Deadhead July, August, September, October, November Deadheading dahlias can keep them blooming from mid-summer right up until the first frosts, often as late as November here in the United Kingdom. Deadheading dahlias is a straight-forward process and should be undertaken from when the first flowers finish onwards: Identify spent flower heads from the new blooms Use a sharp implement such as secateurs to remove the spent flower heads This process is explained in more depth below: When To Deadhead Dahlias Dahlias should be deadheaded as soon as the first flowers finish, which can be as early as July and until they finish flowering at the beginning of winter. 1) Identify Spent Flower Heads From New Buds The trick to successfully deadheading dahlias is to first identify the spent flower heads from the new flower buds, as once the spent flowers’ petals have finished and dropped, they can look rather similar. However, there is thankfully a sure-fire way to help differentiate between them. New flower buds are slightly flat and round, a bit like a miniature satsuma, whereas finished flower heads are cone-shaped and almost pointed. Remember, if you want to try growing dahlias from seeds, you should not deadhead your plants, as this will cut short this process. However, note that “dahlias will not come true from seed,” David warns. “For that, you either need to divide the tubers or take cuttings.” 2) Remove The Spent Flower Heads Once the spent flower heads have been identified, use a clean and sharp pair of secateurs or snips and cut off the dead flower and its stem just above a leaf or where it joins a main stem. Otherwise, the flower’s stem will be left in place to die back and look unsightly. “You can distinguish a new Dahlia flower bud from a spent flower as new flower buds are tight balls on a stem that sometimes have a flat top to them, with the top gradually opening up into a bloom,” explains Dan Ori, a Master Horticulturist. “With spent flowers, the petals droop and the sepals of the flower will close back up, looking very similar to new buds but more cone-shaped. “So, new buds look like balls and spent flowers look like little strawberries.” Tiny new buds may be seen just below where the cut is to be made, which will encourage these new buds to burst forth. To promote continuous flowering, dahlias need to be deadheaded regularly, especially the smaller flowered varieties that produce copious amounts of blooms all at once. Every 2 – 3 days is ideal or once a week at the very least. Deadheading dahlias for months on end can seem a bit of a chore, especially when planted en masse. However it’s worth it to have them bloom all season, especially into the autumn when most other perennials have finished, and the spent blooms are perfect for adding to the compost.
Learn more
Deadheading Geraniums: Following This Process Forces Their Energy Into Future Growth
IN THIS GUIDE Do You Need To Deadhead Geraniums? Deadheading Pelargoniums Deadheading is one of those ridiculously easy garden jobs that can actually be rather confusing. It can be difficult to determine which flowers will benefit from deadheading, and which will not – and it can also be confusing where exactly to remove the flower. Should you remove the bloom itself, or the entire stem that supports it? Difficulty Easy Equipment Required Secateurs When To Deadhead July, August When we talk about deadheading geraniums, we first have to understand whether we are talking about true geraniums (also known as hardy geraniums) or tender geraniums, which are technically Pelargoniums and not geraniums at all. Follow these hard and fast rules when deadheading geraniums: Deadhead Pelargoniums, as this can encourage repeat blooms. Depending on which cultivar you are growing, some repeat bloom, while others will bloom only once a year. Also note that this is not usually the case with true geraniums, which do not usually benefit from deadheading at all. Deadhead Pelargoniums when the flowers fade and begin to turn brown. Cut or pinch off the dead or dying flowers along with the stem down to the next leaf node. Do You Need To Deadhead Geraniums? Deadheading is not strictly essential – most plants which repeat bloom will do so with or without your intervention. However, certain hardy Geraniums do appreciate being cut back after the first flush of flowers because it allows them to put their energy into future blooms and growth. Often, a second flush of flowers appears later in the summer. Tender geraniums, or Pelargoniums, will benefit from this care. Whether or not deadheading will do much good and bring more blooms very much depends on which cultivar you are growing. Some only bloom once a year whatever you do, while many are repeat bloomers and you will see better results by deadheading. Deadheading Pelargoniums Deadheading pelargoniums is a simple job. You just need to wait for the first flush of flowers to fade, then nip or snip them off with your fingers or a pair of secateurs or gardening knife. Make sure that rather than just taking the bloom, you take also a section of the stem down to the next leaf node. The removal of this material will spur the growth of new stems, which can soon bud and flower. So deadheading does not only promote repeat-flowering, but also makes for bushier, healthier-looking plants. “Deadheading also improves the appearance of the flower display immeasurably as brown, faded blooms detract from the beauty of fresh and emerging blooms,” says Master Horticulturist Roy Nicol.
Learn more
Geraniums Will Look Better Later In The Season If They're Given A ‘Chelsea Chop’
IN THIS GUIDE Pruning Pelargonium (Tender Geraniums) Pruning Hardy Geraniums Geraniums, both tender geraniums (Pelargoniums) and hardy geraniums, can be relatively easy and trouble-free plants to grow. The hardy types especially can be great low-maintenance plants for a garden. However, there are some jobs that it is important not to neglect, and pruning is one of them. Difficulty Moderate Equipment Required Secateurs When To Prune Varies by type According to expert Horticulturist Colin Skelly: “many hardy geraniums, particularly taller or flop-prone species and cultivars, will look better later in the season if given a ‘Chelsea chop’ – so-called because it is typically carried out in May around the flower show time. “Following the first flush of growth, cut back by one-third to one-half. “This will ensure a tidier plant and flowers into late summer.” That being said, how you prune geraniums will depend on which type you are growing, and, if growing tender types, how you plan to overwinter them. Here are the basic rules to follow: Prune Pelargoniums which have been overwintered as bare-root dormant plants back to around 10cm in spring. Prune Pelargonium overwintered in pots, which will be kept in a dormant state to 10cm in autumn. Prune Pelargonium overwintered in pots and kept in active growth in autumn (cutting back by one-third to one-half) – or hold back until spring. Pinch back growing tips of Pelargonium to encourage bushy growth on new or overwintered plants. Take a centimetre or two off every stem. Cut hardy geraniums back after they have finished flowering. Cut back to just above ground level to rejuvenate a plant that is becoming woody or straggly. Otherwise, cut back by around one-third as required. Pruning Pelargonium (Tender Geraniums) When you should prune Pelargoniums depends largely on how you have (or plan to) overwinter them. Remember, these are plants which cannot survive the winter outdoors in our climate. Pelargoniums can be kept for more than one year, if you do not wish to dispose of them at the end of the season by: Taking cuttings in summer. (If you take cuttings, you may then dispose of the parent plant, and each of the cuttings will grow into a clone of the parent.) Overwintering bare-root as dormant plants. Overwintering in pots, in a dormant state. Overwintering in pots, in active growth. The pruning time and the extent to which the plants are cut back will depend on which of these options you have chosen. If you decide, at the end of the growing season, that you would like to keep your Pelargoniums in a dormant state in pots, then you should cut back the plants to around 10cm above the surface of the growing medium in autumn, when you bring them into a frost-free location. You might also prune in autumn if you plan on keeping your plants in pots in active growth. Remove any yellowing or browning leaves and any straggly growth, and, if the plant looks a bit leggy, you can also consider cutting back stems by around one-third to one-half. However, this may not be necessary and you may wait until spring. Pelargonium which are overwintered as bare-root plants should typically be cut back to 10cm in spring. Regardless of which option you have chosen, with most Pelargonium it is also a good idea to pinch off the growing tips after fresh new growth emerges in spring. This simply means nipping or snipping off the top 1-2cm from all the stems just above a leaf node. Where the tips have been pinched off, this will encourage new branching to occur, which leads to a bushier and fuller plant. Pruning Hardy Geraniums Hardy geraniums are low maintenance and don’t always need much pruning at all. But it can be a good idea to keep them healthy and prevent straggly or woody plants by pruning back by around one-third after they have finished flowering, as Gary Carroll, owner of Cranesbill Nursery, explains: “Most hardy geraniums will benefit from being cut hard back halfway through the season. “They will then bounce back with fresh foliage and, usually, a second flush of flowers. “The plant will tend to give you a hint when to do this, as it will start to look a bit tired, and the flowers might diminish.” If a plant is not looking as good, you can hard prune back to just above the ground to give your plants a new lease of life. However, be aware that not every geranium variety can cope with hard pruning. “The two main types that are a bit different as regards cutting back, are the G. x cantabrigienses and macrorrhizums,” says Gary. “These can be cut back, but they have thick stems from which the foliage sprouts, which you shouldn’t cut into, as these stems form the structure of the plant.”
Learn more
Geraniums In Pots - Choose A Loam-Based Compost And Ensure Good Drainage At The Base
IN THIS GUIDE Choosing Containers For Geraniums Choosing Compost / Potting Mix Potting Up Geraniums Potted Geranium Care Aspect Watering & Feeding Compost Both true Geraniums and Pelargoniums (commonly known as tender Geraniums) are popular garden plants. However, it is important to note that these plants can have different requirements and care needs, depending on which type you have chosen. Both hardy Geraniums and Pelargoniums can be good choices for a container garden. There are a staggering array of different cultivars ideal for container growing. Pelargoniums are great as bedding plants for summer containers, or as houseplants to be grown in pots indoors year-round. Summer bedding plants can also be potted up and grown in containers indoors over the winter months. While Pelargoniums tend to be most popular for container growing, hardy Geraniums can also be placed in perennial displays for a garden. As long as they are given sufficient moisture they can be very happy over multiple years. Choosing Containers For Geraniums Before choosing a container for a Geranium or Pelargonium it is important to think about the specific type and cultivar that you are planning to grow. There is such a great variety within each genus, and they include plants with a wide range of different heights, spreads and growth habits. It is also important to consider whether you plan on keeping your plants in the containers short-term, or longer-term to reach their full potential and full size. Terracotta pots can be a perfect choice – just make sure these have good drainage at the base. However, you can also consider a range of reclaimed items to use as containers or even grow some Geraniums in an innovative planting solution, such as a vertical garden – great for small spaces. Choosing Compost / Potting Mix Fill containers for most Geraniums and Pelargoniums with a general-purpose peat-free potting mix which is moist yet reasonably free-draining. It is best to choose a soil-less mix for younger plant seedlings to reduce the chances of damping-off and other fungal issues. Mature plants will benefit from a mix with loam/soil incorporated, though any good quality, peat-free compost should work well. “If it’s intended hardy Geraniums or Pelargoniums will be in the container longer term, it’s best to choose a loam-based compost such as the John Innes formula mixes,” says Horticulturist Roy Nicol. Potting Up Geraniums Most Geraniums, when grown in a fertile medium with plenty of organic matter, and watered well, can tolerate close spacing within a container. They can look great when planted in mixed container displays with other bedding plants which like similar conditions. How Many Can You Plant Per Pot? This will of course depend on which type you are growing, and how long-term a display you hope to create. How many plants you can fit into a container can be determined by taking a look at the typical size and spread for a variety that you wish to grow. But individual plug plants are typically potted up into 9cm pots and can then later be transplanted out into the garden, or grown on in larger containers. See our video above for guidelines on re-potting geraniums. Potted Geranium Care Aspect Decide where to position your Geraniums in containers. Will you grow Pelargonium indoors year-round, or place them outside in summer? Most Pelargoniums need a light, bright location indoors, or a spot in full sun, but some, depending on type, do like light shade. Some hardy Geraniums are fine in full sun or partial shade, and some are even more shade tolerant. Watering & Feeding Water hardy Geraniums regularly and Pelargoniums only moderately throughout the summer months when growing in containers – but remember it is crucial to avoid overwatering and to ensure good drainage. Feed Pelargonium every 10-14 days through spring with a balanced organic liquid feed, then feed every couple of weeks with a high potassium organic liquid feed once flowers form and throughout the summer. Compost A good quality nutrient-rich compost should be sufficient for hardy Geraniums, though you should top dress each spring with organic matter to retain fertility in the growing medium. Remember that Pelargonium growing outdoors will need to be brought inside to be overwintered or propagated using cuttings which will be grown indoors over winter. “Pelargoniums which have developed woody stems can also be overwintered as bare root plants by lifting before frosts, drying and wrapping in newspaper in a frost-free place,” says Roy. “The plants are then brought into growth in the spring by soaking in water for a few hours and then potting up.”
Learn more


