

Growing

10 Rudbeckia Varieties Including Compact, Space-Filling And Colourful Options
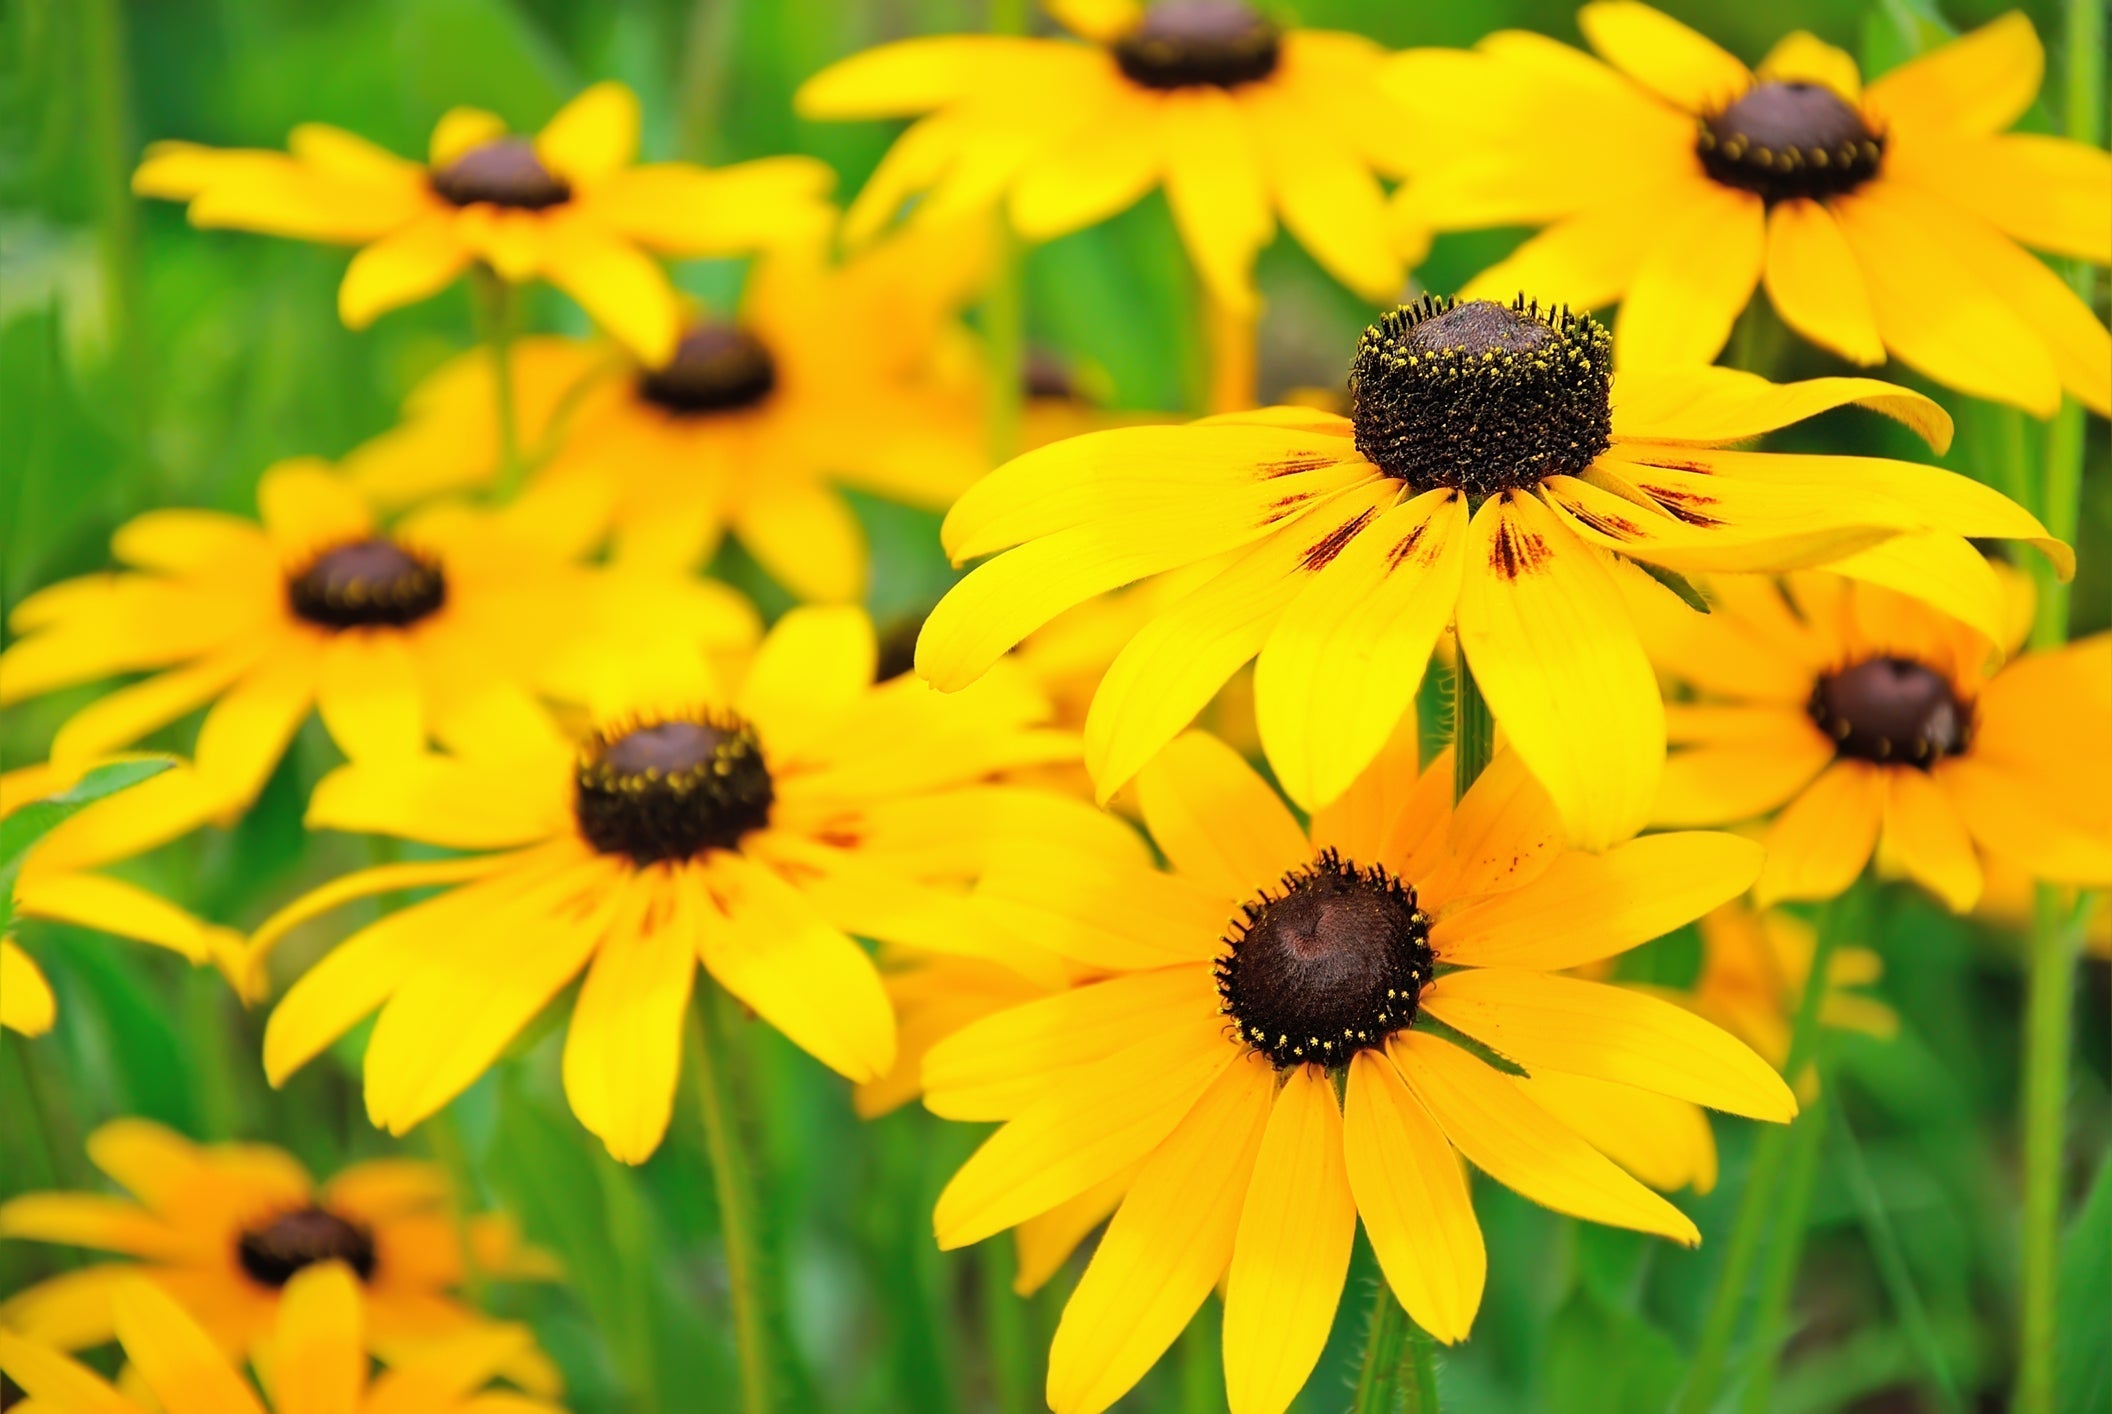
IN THIS GUIDE 1) R. hirta ‘Indian Summer’ 2) R. fulgida ‘Little Goldstar’ 3) R. hirta ‘Cherokee Sunset’ 4) R. hirta ‘Toto’ 5) R. hirta ‘Irish Eyes’ 6) R. hirta ‘Prairie Sun’ 7) R. hirta ‘Cherry Brandy’ 8) R. laciniata ‘Herbstsonne’ 9) R. fulgida var. sullivantii ‘Goldsturm’ 10) R. ‘Aries’ A favourite throughout the British gardening scene, rudbeckias offer a plethora of advantages to horticulturalists both amateur and commercial. They’re easy to cultivate, produce infectiously cheerful flowerheads and their blooming season extends well into autumn. What’s more, they’re also available in a range of different styles and sizes, with cultivars reaching between 0.5-2m in height and spanning a spectrum of different shades of yellow. R. ‘Golden Glow’ There are a number of different rudbeckia varieties too, including R. hirta, R. fulgida and R. laciniata. When selecting a species for your outdoor display, it’s important to consider the space available to you, the other plants already in situ and the overall effect you’re trying to create. Here’s a list of some of our favourites to give you some inspiration. All varieties in this list can be grown in full sun or part shade and in an exposed or sheltered location. 1) R. hirta ‘Indian Summer’ COMMON NAME(S): black-eyed Susan ‘Indian Summer’ HARDINESS RATING: H3 FLOWERS: Yellow and purple FLOWERING SEASON(S): Summer / Autumn SOIL PREFERENCE: Clay or loam; Any soil pH SIZE: 0.5-1m in height, 0.1-0.5m spread Perhaps the classic example that most people think of when they hear the word rudbeckia, ‘Indian Summer’ boasts bright yellow petals clustered around a dark brown stigma, typical of the R. hirta variety from which it hails. The plant is capable of growing up to 90cm in height and will self-seed freely if allowed to do so unchecked, making for effortless propagation. However, you should be careful to thin out seedlings to allow adequate space between them so as to improve air circulation and prevent the development of mildew. 2) R. fulgida ‘Little Goldstar’ COMMON NAME(S): black-eyed Susan ‘Little Goldstar’ HARDINESS RATING: H6 FLOWERS: Yellow, gold and brown FLOWERING SEASON(S): Summer / Autumn SOIL PREFERENCE: Clay, sand, loam; Any soil pH SIZE: 0.1-0.5m in height, 0.1-0.5m spread Something akin to a miniature ‘Indian Summer’, ‘Little Goldstar’ reaches just 50cm in height, making it one of the most compact rudbeckia varieties available. “Rudbeckia ‘Little Goldstar’ is a great compact option where you don’t have the space to create the archetypal herbaceous border with short, mid and tall plants running front to back (although it could play the role of front of border very well),” shares Colin Skelly, a Master Horticulturist. That means it’s a perfect choice for gardens where space is at a premium and it’ll do a great job in filling space in beds and borders. With slightly thinner petals and a more purplish hue to its centre than its larger counterpart, ‘Little Goldstar’ looks especially impressive when planted in drifts. Due to its smaller dimensions, it can also perform well in baskets, pots and other containers. 3) R. hirta ‘Cherokee Sunset’ COMMON NAME(S): black-eyed Susan ‘Cherokee Sunset’ HARDINESS RATING: H3 FLOWERS: Yellow, orange and gold FLOWERING SEASON(S): Summer / Autumn SOIL PREFERENCE: Clay or loam; Any soil pH SIZE: 0.5-1m in height, 0.1-0.5m spread One of the showstoppers of the rudbeckia world, ‘Cherokee Sunset’ boasts flowers in a variety of different colours, from burnished toffee to burnt copper to deep mahogany. Capable of reaching a height of up to 75cm, it’s a medium-sized rudbeckia which will bring in bees, butterflies and other pollinators by the bucketload. It can also come in single or double-flowering styles, making it an excellent choice as a cut flower. Indeed, there are those who say its ruffled flowerheads make it more reminiscent of a member of the dahlia family than their humbler coneflower counterparts. 4) R. hirta ‘Toto’ COMMON NAME(S): black-eyed Susan ‘Toto’ HARDINESS RATING: H3 FLOWERS: Yellow and purple FLOWERING SEASON(S): Summer / Autumn SOIL PREFERENCE: Clay or loam; Any soil pH SIZE: 0.1-0.5m in height, 0.1-0.5m spread At a maximum height of around 40cm, ‘Toto’ is one of the most diminutive rudbeckia species on offer. However, its 8cm-diameter flowerheads are somewhat oversized in proportion to its body and when planted in drifts, provide a delightful bobbing carpet of yellow and brown blooms. That’s because the flowers blossom so profusely during the summertime that they virtually obscure the lush green foliage below. Like other rudbeckias, you can encourage them to bloom for even longer by deadheading regularly. 5) R. hirta ‘Irish Eyes’ COMMON NAME(S): black-eyed Susan ‘Irish Eyes’ HARDINESS RATING: H3 FLOWERS: Yellow, gold and green FLOWERING SEASON(S): Summer / Autumn SOIL PREFERENCE: Clay or loam; Any soil pH SIZE: 0.5-1m in height, 0.1-0.5m spread Somewhat unusually for rudbeckias, ‘Irish Eyes’ is a black-eyed Susan without a black eye. Instead, it boasts a light green stigma at the centre of its flowerhead, which complements the buttery yellow petals surrounding it and serves as an unmissable beacon for any passing pollinators. It can reach up to 1m in height and will look best when planted alongside other plants that accentuate its finer features. For example, you could highlight the unusual green centres by planting them alongside ferns and foliage, or else next to green flowering plants. 6) R. hirta ‘Prairie Sun’ COMMON NAME(S): black-eyed Susan ‘Prairie Sun’ HARDINESS RATING: H3 FLOWERS: Yellow, gold and green FLOWERING SEASON(S): Summer SOIL PREFERENCE: Clay or loam; Any soil pH SIZE: 0.5-1m in height, 0.1-0.5m spread Like ‘Irish Eyes’, ‘Prairie Sun’ also forgoes the black centre of its flowerhead in favour of a light green alternative, although its stigma is more domed and less conical in structure. Nonetheless, it’s every bit as attractive to bees and birds, meaning it’s a great option for boosting biodiversity in your area. The other way in which ‘Prairie Sun’ differs from ‘Irish Eyes’ is the gorgeous variety of yellow in its petals. Starting out as a deep honey colour, they fade to a light lemon at the tips, making them a great addition to a cut display. 7) R. hirta ‘Cherry Brandy’ COMMON NAME(S): black-eyed Susan ‘Cherry Brandy’ HARDINESS RATING: H3 FLOWERS: Red and brown FLOWERING SEASON(S): Summer SOIL PREFERENCE: Clay or loam; Any soil pH SIZE: 0.5-1m in height, 0.1-0.5m spread If you grow tired of all the yellow blooms on your rudbeckia selection, it might be time to opt for something completely different in the shape of ‘Cherry Brandy’. As the name suggests, this exquisite specimen boasts flowerheads that are a mixture of burgundy and chocolate, making for an eye-catching end result. The dark tones of their blossoms look particularly attractive when paired with more traditional rudbeckia varieties, or even against the yellow-greenish tones of the two cultivars mentioned above. Grows to just 60cm in height. 8) R. laciniata ‘Herbstsonne’ COMMON NAME(S): coneflower ‘Herbstsonne’ HARDINESS RATING: H6 FLOWERS: Yellow FLOWERING SEASON(S): Summer / Autumn SOIL PREFERENCE: Clay, chalk, loam; Any soil pH SIZE: 1.5-2.5m in height, 0.5-1m spread This monster of a rudbeckia can reach up to 2m in height, meaning it’s a perfect choice for the back of a border or to spruce up a fence, wall or other border perimeters. The sturdy stems bear their flowerheads aloft, which are characterised by drooping yellow petals around a green stigma darkening to brown as it matures. ‘Herbstsonne’ is a late bloomer even among a genus that’s famed for its extended blooming season, meaning you can expect to see blossoms even into October. What’s more, its healthy mid-level foliage remains robust as long as the flowers do, meaning it’s still a sight to behold after all around it has faded. 9) R. fulgida var. sullivantii ‘Goldsturm’ COMMON NAME(S): coneflower ‘Goldsturm’ HARDINESS RATING: H6 FLOWERS: Yellow and brown FLOWERING SEASON(S): Summer / Autumn SOIL PREFERENCE: Clay, chalk, loam; Any soil pH SIZE: 0.5-1m in height, 0.1-0.5m spread Like ‘Indian Summer’ mentioned above, ‘Goldsturm’ is another of the rudbeckia varieties which inevitably spring to mind when hearing the name. However, it’s smaller than its relative, reaching just 60cm in height, while its petals are more elongated and separated, too. With these sword-like appendages shooting out from a bulbous brown centre, it’s a cultivar of the R. fulgida variety that has proven hugely popular around the country. 10) R. ‘Aries’ COMMON NAME(S): coneflower ‘Aries’ HARDINESS RATING: H3 FLOWERS: Yellow, brown and orange FLOWERING SEASON(S): Summer / Autumn SOIL PREFERENCE: Clay, sand, loam; Any soil pH SIZE: 0.5-1m in height, 0.1-0.5m spread ‘Aries’ cultivars boast semi-double blooms that are instantly recognisable by the reddish-brown staining around the central stigma, fading into a bright yellow at the outer tips of the petals. The yellow-tipped anthers on its dark brown stamen only complete the effect, making for one attractive rudbeckia. With a maximum height of 75cm, it’s a versatile option that will do just as well in a mixed border as it will in its own container. Especially popular among birds and bees.
Learn more
Rudbeckia Are Generally Problem Free - But There Are A Few Issues To Look Out For
IN THIS GUIDE 1) Rudbeckia Leaf Spot 2) Mildews 3) Pests Rudbeckias are well-loved by gardeners around the globe and have become a staple in the British country garden. Not only do gardeners love them but they are also beloved by helpful pollinators like butterflies and bees and are a source of food and shelter to many animals. Rudbeckias are particularly popular because they are so easy to grow and take care of. “Rudbeckias are the proverbial ‘bullet proof’ garden plant,” shares Horticultural Consultant Colin Skelly. “The only problem I have ever had with Rudbeckia is slugs and snails on young plants. Once established, they look after themselves and only need dividing every few years.” Like any plant though, there are a few problems you may run into. The most common issues gardeners experience when growing rudbeckia include: Rudbeckia leaf spot Mildews Pests See guidelines for dealing with each of these common problems below. 1) Rudbeckia Leaf Spot Rudbeckia can suffer from both bacterial and fungal leaf spot diseases. Bacterial Leaf Spot Bacterial leaf spot disease will usually present itself as red-brown or brown spots on the leaves which will sometimes have yellow borders around them. This type of disease can also cause the leaves to become malformed. Fungal Leaf Spot With fungal leaf spot diseases, you will often find tiny dark spots. You will see this disease start at the base of the plant and gradually work its way upwards. Preventing And Dealing With Leaf Spot As with any problem, ideally, we want to prevent it from happening in the first place. You can avoid leaf spot diseases by watering the plants at the base over the soil rather than watering them overhead. If you find you have a leaf spot disease in your rudbeckias, we advise removing and destroying the affected areas or the whole plant if the disease is widespread. Be sure to sterilise any equipment you use before and after to avoid the further spread of the disease. 2) Mildews Powdery and downy mildew are both common problems with Rudbeckias. Powdery Mildew Powdery mildew usually becomes a problem in summer. If you spot powdery white growth on the upper side of the leaves then powdery mildew is probably the culprit. Left untreated the leaves will become yellow and eventually drop off. If you notice powdery mildew on your plant you should remove and destroy the affected areas. Downy Mildew If you notice greyish-white, velvet-like growth on the underside of your leaves then you are probably dealing with downy mildew. You may also notice dark spots on the upper areas of the plant. Downy mildew can cause leaf drop and eventually kill the plant entirely. To prevent downy mildew do not use overhead watering but rather water directly over the soil at the base of the plant. 3) Pests Rudbeckias are usually untroubled by pests, however, aphids are quite partial to them. To get rid of aphids you could start by setting natural enemies on them that eat aphids. These can be bought at gardening centres or you can try and encourage them into your garden by planting their favourite plants. If this doesn’t work we advise using a low-strength insecticidal soap and apply liberally to the plant. As you can see rudbeckias are generally low-maintenance, making them perfect for novice gardeners!
Learn more
Crocosmia In Pots Will Require More Attention, But They Make Magnificent Displays
IN THIS GUIDE Choosing A Container Choosing A Compost Potting Up Container Care Crocosmia is an attractive flowering plant from South Africa which can enhance and brighten up your garden during the latter part of the growing season. Luckily, crocosmia can also be a great choice for container growing. You can grow any crocosmia variety in a pot, however, it is important to note that some are larger than others. So, if you are planting mixed displays, make sure that you choose a smaller cultivar to grow. Some crocosmias are very vigorous and can spread dramatically, and a more invasive type is often best grown in a container in order to prevent its spread. Crocosmias can look great in dedicated containers or in mixed container displays along with other late-bloomers like rudbeckia, penstemons, salvias, and ornamental grasses. Choosing A Container For a long-lasting display, it is best to choose a container of at least around 30-40cm across, so that you can plant several crocosmia corms or plants together. Crocosmia looks best when planted in larger clumps or drifts in a garden. Make sure that you choose a container which has adequate drainage at the base, and yet which will not lose moisture too quickly. Crocosmia needs a moist yet free-draining position, ideally in full sun, though these plants can also cope with some light shade. Choosing A Compost Crocosmia should do well in any peat-free, multipurpose potting compost, or a homemade blend. Just make sure that the compost or potting mix is moist yet free-draining, and that it contains plenty of organic matter for moisture retention and for fertility. A soil or loam-based compost is generally best for perennial plantings. Potting Up Compact crocosmia varieties can be potted up from containers in which they came as potted plants, or planted as dormant corms in spring. If you have purchased a potted plant, this can be potted up at any time of the year. It is best, however, to pot up when the conditions are not too hot and dry, as heat and drought can increase the chances of transplantation stress. “Crocosmia can make good container plants but ensure that you select shorter varieties and allow plenty of space for them to multiply,” says Mark Wash, Owner of Trecanna Nursery. The best time to pot up crocosmias and other perennials is in early spring, so they stand the best chance of becoming well-established before the flowering period and the following winter. How Many Can You Plant Per Pot? If planting corms, these should be planted at a depth of around 3 times their height, space in small groups, 10-20cm apart to ensure a fast maturing and attractive display. If planting potted plants, how many you can plant per pot will depend on the size of the specimen you have chosen, and the variety. Make sure that you understand the eventual height and spread which is to be expected for the cultivar you have chosen, and give it room to grow. Remember that these are plants which will spread out, forming larger clumps each year. Crocosmia can later be divided so you can fit them in fairly snugly into the pot you have chosen, as long as there is some growing medium around each one for the plants to grow into. Remember, this plant looks wonderful in mixed container displays. “I like to grow Crocosmia alongside Dahlias in large pots as I find that the foliage and flower stem compliment each other,” says Colin Skelly, a Master Horticulturist. “Crocosmia × crocosmiiflora becomes too vigorous a spreader and has become a problematic garden escapee into surrounding landscapes. “However, most cultivars are far less likely to present overly vigorous spreading. Growing is a great way to make sure.” When choosing other plants to place alongside them, look at the size of the root system of each of those plants and take care not to overcrowd the space. Container Care “When growing in containers, crocosmia will require more attention to watering and will need to be divided more often, maybe every two years,” explains Mark. Water crocosmias that are growing in pots well throughout the growing season and check regularly to make sure that the growing medium does not dry out. Feed with a potash-rich feed every couple of months through the growing season. Replenish an organic mulch over the top of the container each spring for moisture retention and fertility. Cut down dead foliage to the base in early spring. Though usually hardy, make sure crocosmias in pots are not placed in an overly cold or exposed location for the winter months. Consider insulating the pots to protect the corms in particularly cold areas. Lift and divide congested clumps every 3-5 years to keep the display flowering well.
Learn more
Most Crocosmia Corms Should Survive Winter - Follow These Steps To Be Sure
IN THIS GUIDE What Happens To Crocosmia In Winter? 1) Cut Back Dead Foliage 2) Mulch Your Corms 3) Insulate Potted Crocosmia Crocosmias are hardy plants which can generally cope well with UK winter conditions. As herbaceous perennials, their foliage will die back over the winter months before the plants burst into new growth in the spring. Crocosmias vary slightly in hardiness depending on the variety that you have chosen to grow. Some are H5 hardy, which means that the corms will survive the winter across the UK, even during extreme winters. Some are H4, and while they will usually be hardy, damage may occur to the corms during extreme conditions or in the coldest parts of the British Isles. To care for crocosmia in winter: Wait for foliage to die back naturally at the end of autumn or early winter and then cut back foliage any time after die back, ideally in early spring. Mulch crocosmias in the ground with an insulating layer of compost or other organic material. Consider insulating pots to protect corms in containers in colder locations. Read on to learn a little more about the above, and to make sure that your crocosmia corms make it through the winter months unscathed: What Happens To Crocosmia In Winter? As colder weather arrives, and winter approaches, the foliage which, after flowering, has continued to photosynthesise and collect energy which is stored in the corms below the ground over the winter, will begin to die back naturally. The green leaves will turn brown and begin to dry up and the energy gathered by the leaves will be stored in the corms, which will remain dormant over the winter months. Winter care is all about making sure that the corms are safe, and won’t be damaged, as damaged corms may result in poor growth and flowering the following year. Here are the steps you need to follow to overwinter your crocosmia successfully. 1) Cut Back Dead Foliage Any time after the leaves have died back naturally, you can cut back the dead foliage to the ground. As long as the leaves are brown, cutting back should not cause any problems, but make sure that you do not cut back green foliage, as cutting back too early can cause issues with flowering and growth next year. However, while you can cut back in winter, it is usually best to leave the dead foliage in place over the coldest months. For one thing, the dead foliage makes a great habitat, providing shelter for garden wildlife during the coldest part of the year. For another, the dead foliage will also help a little in providing protection to the corms below the ground. However, if you prefer to keep things neat and tidy in your winter garden, or if there has been a problem with disease, you can cut back and remove the material as soon as winter arrives. “I suggest that you cut crocosmia back late in the year, leaving around 30cm which will protect young growth in early spring,” recommends Mark Wash from Trecanna Nursery. Remember, crocosmia cuttings can be added to your composting system, as long there is no disease. If there is an issue, you should dispose of the material so that the problem does not spread. 2) Mulch Your Corms Even though crocosmias are hardy plants, it can be a good idea to add an insurance policy and make sure the corms in the ground remain safe from winter cold by replenishing the mulch above the corms before winter arrives, as Master Horticulturist Colin Skelly: “Crocosmia will struggle to thrive in very dry or very wet soils. “If these are an issue, then an annual mulch will also help to alleviate these soil conditions as well as provide winter insulation.” A thick layer of homemade compost or other organic material will help keep the corms protected if it is very cold. “A good bark mulch will protect the corms over winter and help cap-in moisture in the soil for next year,” says Mark. 3) Insulate Potted Crocosmia If you are growing crocosmia in containers, it is a good idea to think about insulating pots – especially if you live in a colder area. Corms in pots are more exposed to winter cold than those growing in the ground. You can wrap fleece, bubble wrap or other materials around the pot as an insulating layer. You might also move container-grown plants to a less exposed location in colder regions. You should also make sure that waterlogging does not become an issue. Ensure that drainage holes are draining freely and during wet spells over winter, consider raising pots up off the ground. As you can see from the above, crocosmias are easy to care for and won’t require much work, during the winter. They are just as easy to care for in winter as they are during other seasons of the year.
Learn more
15 Knockout Crocosmia Varieties With Advice From An Experienced Grower
IN THIS GUIDE 1) C. × crocosmiiflora ‘Babylon’ 2) C. × crocosmiiflora ‘Citronella’ 3) C. × crocosmiiflora ‘Coleton Fishacre’ 4) C. × crocosmiiflora ‘Emily McKenzie’ 5) C. × crocosmiiflora ‘George Davidson’ 6) C. × crocosmiiflora ‘Harvest Sun’ 7) C. ‘Hellfire’ 8) C. × crocosmiiflora ‘Honey Angels’ 9) C. ‘Lucifer’ 10) C. masoniorum 11) C. ‘Paul’s Best Yellow’ 12) C. × crocosmiiflora ‘Saracen’ 13) C. ‘Severn Sunrise’ 14) C. ‘Spitfire’ 15) C. × crocosmiiflora ‘Star of the East’ References Crocosmias are beautiful flowering perennials that come in a range of different sizes and lots of warm, fiery hues. When choosing a crocosmia to grow, it is important to note that some spread far more widely and quickly than others. C. × crocosmiiflora can actually become invasive, both in the garden and in the surrounding countryside.1 Some are shorter and more compact, others far taller. It is important to choose the right variety for your needs and also to prevent the spread of more invasive types into the surrounding environment, where they can become a problem for local plant life. It is also important to consider the hues of the flowers, and how the particular cultivar will long alongside the other plants you are growing in your garden. Mark Wash, the owner of Trecanna Nursery, shared his thoughts on the varieties of crocosmia: “What a difficult question to answer!” Mark said after being asked to choose a favourite. “If it’s an orange flower you’re after, I’d go for ‘Columbus’ with its purple buds followed by apricot flowers. C. x crocosmiiflora ‘Columbus’ “For yellow flowers ‘Lemon Spray’ is a beautiful primrose-yellow and for red, maybe our own ‘Tamar Double Red’, which was recently awarded an RHS Award of Garden Merit. “All three of these varieties are really beautiful plants, producing a reliable display year after year.” With Mark’s choices in mind, I’ve put together my own list of 15 varieties. Here are some of the best and most interesting crocosmias to consider growing in your garden. All of the varieties in this list can be grown in any moist but well-drained soil with any pH, and can be positioned in either full sun or partial shade, in an exposed or sheltered location. 1) C. × crocosmiiflora ‘Babylon’ COMMON NAME(S): montbretia ‘Babylon’ HARDINESS RATING: H4 FLOWERS: Red and yellow FLOWERING SEASON(S): Summer SIZE: 0.5-1m in height, 0.1-0.5m spread This crocosmia grows to an eventual height of around 1m, with a spread of 0.1-0.5m. It has large, orangey-red flowers, with a golden yellow inside, surrounded by a dark ring. This option is H4 hardy and is a recipient of the RHS AGM. 2) C. × crocosmiiflora ‘Citronella’ COMMON NAME(S): Crocosmia citronella HARDINESS RATING: H5 FLOWERS: Yellow FLOWERING SEASON(S): Summer / Autumn SIZE: 0.5-1m in height, 0.1-0.5m spread This fresh and zesty choice has upright light green leaves and small soft yellow flowers. It has an eventual maximum height and spread of around 60cm. The lively yellow flowers look great alongside more orange or red crocosmia and also with other late summer or autumn flowers, like Rudbeckia ‘Herbstsonne’, or Canna ‘Semaphore’. 3) C. × crocosmiiflora ‘Coleton Fishacre’ COMMON NAME(S): montbretia ‘Coleton Fishacre’ HARDINESS RATING: H5 FLOWERS: Yellow FLOWERING SEASON(S): Summer SIZE: 0.5-1m in height, 0.1-0.5m spread This is another yellow flowering crocosmia, but this one has flowers with a richer, more golden yellow hue. The plants grow to around 60cm tall, with a spread of 0.1-0.5m. This option is H5 hardy and is a good choice for a partially shaded spot. 4) C. × crocosmiiflora ‘Emily McKenzie’ COMMON NAME(S): montbretia ‘Emily McKenzie’ HARDINESS RATING: H4 FLOWERS: Red and orange FLOWERING SEASON(S): Summer SIZE: 0.5-1m in height, 0.1-0.5m spread A great choice for container growing or small spaces, this is one of the more compact crocosmia. It grows to around 60cm in height but will spread to only around 8cm, forming small, dense clumps. The blooms are bright orange, with a mahogany hue in the throat. Try growing this alongside Achillea ‘Terracotta’, or Echinacea ‘Irresistible’ for beautiful late summer and early autumn displays. 5) C. × crocosmiiflora ‘George Davidson’ COMMON NAME(S): montbretia ‘George Davison’ HARDINESS RATING: H5 FLOWERS: Yellow FLOWERING SEASON(S): Summer SIZE: 0.5-1m in height, 0.1-0.5m spread This is another yellow crocosmia which has golden yellow flowers, like those of freesias, which bloom well into autumn. This grows to around 60cm in height and spread, holding its own alongside other dramatic flowering plants like kniphofia (Red Hot Pokers) or ornamental grasses. 6) C. × crocosmiiflora ‘Harvest Sun’ COMMON NAME(S): montbretia ‘harvest sun’ HARDINESS RATING: H5 FLOWERS: Red and yellow FLOWERING SEASON(S): Summer SIZE: 0.5-1m in height, 0.1-0.5m spread This is a fairly new crocosmia hybrid, which has upright form, fresh green foliage, and large red-orange flowers that are great for a tropical planting scheme with exotic-looking dahlias. It grows around 90cm tall with a spread of around 45cm. 7) C. ‘Hellfire’ COMMON NAME(S): montbretia ‘Hellfire’ HARDINESS RATING: H5 FLOWERS: Red FLOWERING SEASON(S): Summer SIZE: 1-1.5m in height, 0.1-0.5m spread This is another taller crocosmia, with bright red flowers on arching stems which can reach a height of around 1m, or even a little more. The plant has a spread of around 0.1-0.5m. It is H5 hardy and can be grown in full sun or partial shade. The petals of these flowers open up more than those on many other cultivars and are large and dramatic. A recipient of the RHS Award of Garden Merit. 8) C. × crocosmiiflora ‘Honey Angels’ COMMON NAME(S): montbretia ‘Honey Angels’ HARDINESS RATING: H5 FLOWERS: Yellow FLOWERING SEASON(S): Summer SIZE: 0.5-1m in height, 0.1-0.5m spread This RHS recipient is a charming and somewhat more delicate variety – it has creamy yellow flowers. It grows to a height of around 75cm and has a spread of 0.1 to 0.5m and is H5 hardy. This cultivar looks great in gentle prairie planting schemes alongside grasses and other late-flowering perennials, like salvias. 9) C. ‘Lucifer’ COMMON NAME(S): montbretia ‘Lucifer’ HARDINESS RATING: H5 FLOWERS: Red and orange FLOWERING SEASON(S): Summer SIZE: 1-1.5m in height, 0.1-0.5m spread A famed crocosmia cultivar, ‘Lucifer’ is a UK garden favourite with vibrant red flowers. It grows up to 1.2m in height with an eventual spread of less than 0.5m. This is one of the earlier crocomia to flower, doing so from around July, and it is great for the back of a border. “C. ‘Lucifer’ might be an older cultivar, but it is tried and tested and, to my mind, not bettered, particularly for early flowering,” shares Master Horticulturist Colin Skelly. “The length and arch of its flowering stems makes it a real eye-catcher.” It is well known for its vigour and resilience. 10) C. masoniorum COMMON NAME(S): giant montbretia HARDINESS RATING: H4 FLOWERS: Red and orange FLOWERING SEASON(S): Summer SIZE: 1-1.5m in height, 0.1-0.5m spread Also known as giant crocosmia, this is another great taller plant for the back of a border. It has bright orange-red, upward-facing flowers, born on stems which can reach around 1.2m in height. It has a spread of 0.1-0.5m and is H4 hardy. This plant has received the RHS Award of Garden Merit. “I really like C. masoniorum for its height and drama in late summer, although I find that it needs dividing every three years or so to keep it where I want it!” adds Colin. 11) C. ‘Paul’s Best Yellow’ COMMON NAME(S): montbretia ‘Paul’s Best Yellow’ HARDINESS RATING: H4 FLOWERS: Yellow FLOWERING SEASON(S): Summer / Autumn SIZE: 1-1.5m in height, 0.5-1m spread The beautiful bright golden yellow flowers of this cultivar are borne on stems that can tower to 1.5m, with a spread of up to 1m or so. The tall flowering stems can make this a great choice for larger gardens and the flowers are great for cutting for household displays. 12) C. × crocosmiiflora ‘Saracen’ COMMON NAME(S): montbretia ‘Saracen’ HARDINESS RATING: H4 FLOWERS: Red, orange and yellow FLOWERING SEASON(S): Summer SIZE: 0.5-1m in height, 0.1-0.5m spread The thin strap leaves of this cultivar are a mid-green tone, flushed with a bronze hue. The flowers are bright reddish-orange, with yellowish throats. They are borne in mid to late summer on stems which grow to around 75cm high. It is H4 hardy and spreads to 0.1-0.5m. 13) C. ‘Severn Sunrise’ COMMON NAME(S): montbretia ‘Severn Sunrise’ HARDINESS RATING: H5 FLOWERS: Orange and pink FLOWERING SEASON(S): Summer SIZE: 0.5-1m in height, 0.1-0.5m spread The beautiful flowers on this plant start out a vibrant orange and fade to a pinker hue, giving the effect of a sunrise with their warm colouration. They can bring a tropical and exotic flair to your garden and look great alongside vibrant daylilies, dahlias and gazanias. This cultivar has a height of 0.5-1m and a spread of 0.1-0.5m. It is H5 hardy and best in partial shade. 14) C. ‘Spitfire’ COMMON NAME(S): montbretia ‘Spitfire’ HARDINESS RATING: H4 FLOWERS: Red and orange FLOWERING SEASON(S): Summer SIZE: 0.5-1m in height, 0.1-0.5m spread Reaching 0.6-1m in height and bearing vibrant reddish-orange flowers in the later half of summer, this cultivar is a fairly compact crocosmia with a well-behaved dwarfing growth habit, which is easy to keep in check in your garden. This, along with the better-known ‘Lucifer’, was introduced in 1966 and has been gracing UK gardens for many years.2 15) C. × crocosmiiflora ‘Star of the East’ COMMON NAME(S): montbretia ‘Star of the East’ HARDINESS RATING: H4 FLOWERS: Orange FLOWERING SEASON(S): Summer / Autumn SIZE: 0.5-1m in height, 0.1-0.5m spread This cultivar has light orange flowers with paler yellow centres, which can grow to around 10cm across. These are born on stems around 0.5-1m high in late summer. This is a H4 hardy cultivar which can grow well in full sun or partial shade. While the options on this list are amongst the most highly regarded crocosmia that you can grow here in the UK, there are, of course, plenty of other options to consider. By looking at size, growth habit, colour and size, you can choose an option which might work best in your own particular garden. References 1. Crocosmia x crocosmiiflora (montbretia). (2022, January 7). CABI Compendium. https://doi.org/10.1079/cabicompendium.55282 2. Plant Stories. (2020, August 15). Essex Gardens Trust. Retrieved March 14, 2023, from https://www.essexgardenstrust.org.uk/plant-stories
Learn more
Why Pinching Off Dead Or Damaged Begonia Flowers Will Keep Your Plant Looking Good
IN THIS GUIDE Why Deadhead Begonias? When To Deadhead Begonias How To Deadhead Begonias References Originally from South and Central America, Africa and southern Asia, begonias have delighted British gardeners for hundreds of years. And with over 2,000 species to choose from, in a multitude of colours, it’s no wonder this plant has become so popular.1 With different species growing from 0.1-0.5m in height, there’s a begonia for every garden, regardless of space or size. They also flourish indoors, so there really is an option for everyone. Another reason begonias are so favoured among gardeners is that they are so easy to care for. These plants need very little attention, however, one thing you must not forget about is deadheading. Difficulty Easy Equipment Required Gloves, secateurs (or snips) When To Deadhead September Why Deadhead Begonias? Technically, you don’t need to deadhead begonias as they naturally drop their flowers. That said, removing dead and wilted flowers will help your begonias bloom in abundance, help your plant produce more stems and just make everything look a bit more neat and tidy. “Pinching off dead or damaged flowers will help to keep your begonia plant looking attractive,” explains Janeen Randle, President of the Melbourne Begonia Society. When To Deadhead Begonias Your begonia’s flowers will all start to die out towards the end of September, or when the first frost hits, so you will definitely need to deadhead then. But, throughout the blooming period, if you see any dead or wilted flowers, it’s important to start deadheading to increase further flowering. How To Deadhead Begonias Deadheading your begonias is quick and easy: Examine your begonias every couple of days, looking out for wilted, discoloured or dead flowers. Once you notice flowers that need to be deadheaded, don your gardening gloves and, if you wish to use them, grab a pair of secateurs. Take hold of the stem about 1.5cm down from the flower. Either pinch the stem so you can break off the flower, or make a cut at that point with your secateurs. If there is a new bud growing beneath the dying flower, be sure to cut above it. Dispose of the flowers. Leaving them at the base of the plant can encourage diseases. Keep an eye on your begonias throughout summer – and repeat this process when needed. As mentioned above, “it is imperative that you do not leave dead flowers and leaves that have dropped around your begonia plants, as they can harbour disease,” Janeen explains. “If you want larger flowers, particularly with tuberous begonias, remove the female blooms.” You will find you will need to deadhead your begonias more frequently as summer progresses because every time you snap off a flower, 2 new stems will begin to grow and flower. Horticulturist Colin Skelly advises: “Once you’ve mastered the technique, consider sourcing a pair of snips (in-between scissors and secateurs).” “They are more agile and should speed you up if you have many plants to deadhead. “But, from experience, mind your fingers when you start using a new (and usually sharper) tool!” Deadheading will allow your begonias to channel their energy into growing fuller and more healthily. Just take care not to snip too close to the flower head as this will prevent new stems from growing and will make the plant look barren and ugly. References 1. Begonia L. (n.d.). Kew Royal Botanic Gardens. Retrieved March 28, 2023, from https://powo.science.kew.org/taxon/urn:lsid:ipni.org:names:327437-2#children
Learn more
Using A Polybag, Begonia Tubers Can Be Started Indoors 8 Weeks Before Last Frost
IN THIS GUIDE Types Of Tubers When To Start Begonia Tubers How To Start Tubers Planting Tubers If you want bright, bold, colourful flowers in your garden then begonias are just the ticket. Whatever you use your begonias for, growing them is easy, and in this article, we will look at how to start begonia tubers in your garden. Tuberous begonias are called such because they grow from a tuber. The tuber is a large organ used for storage and grows just below the surface of the soil. Throughout the summer months, the tuber grows and stores energy which will help the plant bloom the following year. Types Of Tubers While most tuber begonias are of the upright growing variety, there are also types of begonia that can be used in hanging baskets. If you are looking for trailing begonias, have a gander at the ‘Golden Balcony’ type. Begonias also come with a wide range of flower size and style. For single-flowered plants, check out the ‘Bertinis’. For smaller flowers, the ‘Nonstop’ varieties won’t let you down. There are also a few options with much bigger flowers such as the ‘Roseform’ and ‘Ruffled’ varieties which come in a few choices of colour. When To Start Begonia Tubers If there’s one thing begonia tubers don’t like – it’s the cold. Pre-start your begonia tubers inside, 8 weeks before the last frost. How To Start Tubers As previously mentioned, begonia tubers won’t survive in cold weather so you will want to start them indoors. Follow these easy steps to give your begonia tubers the best start in life: You can buy your tubers in garden centres between January and April. Once bought, store them in a dry place, safe from frost until you are ready to start planting. Fill a polybag with damp multi-purpose compost. Plant your tubers in the polybag and seal it. Place the polybag in a warm, dry place. We recommend using an airing cupboard. Check the tubers every day to see if their buds have started breaking. When the buds break, remove them from the polybag. When the begonia tubers’ buds have started breaking, it’s time to move them outside. Planting Tubers Follow these easy steps to start your begonia tubers on the next leg of their journey: Fill pots or containers with about 15cm of multi-purpose compost. Leave the pots or containers in the airing cupboard or somewhere warm for at least 24 hours so the compost can warm up. Take the tubers out of the polybags. Place the tubers on the surface of the soil, making sure the side with the wispy, white roots is touching the soil. Push the tubers gently into the soil so that only the hollow side remains above the compost. Cover the pots with clear plastic for a few days to encourage root growth. Remove the plastic and water every couple of days and feed once a month with general feed. You can either leave them in their pots or transplant them straight into the garden. If you do plant them in the garden, choose a spot in full sun or partial shade.
Learn more
Growing Begonias In Pots? Follow These 5 Essential Rules To Avoid Going Wrong
IN THIS GUIDE Can You Grow Begonia In Pots? 1) Choose A Pot At Least 40cm Wide 2) Use A Free Draining Potting Mix 3) Space Plants Or Tubers Equally 4) Only Plant A Few Per Pot 5) Provide Suitable Growing Conditions Some begonias are ideal for growing outdoors in summer, while others make great houseplants year-round. If you are thinking about growing begonias, you might be wondering whether they make good container plants. Can You Grow Begonia In Pots? The good news is, when growing indoors and in a garden, begonias are often an excellent choice for container growing. There is a wide range of different types of begonias and a staggering array of cultivars, which work very well in pots. Tuberous begonias are a great choice for pots placed outdoors in the summer, and fibrous-rooted begonias can also be grown as annuals outdoors in pots or other containers over the summer months. There are also several different types of begonias ideally suited to growing in pots indoors. 1) Choose A Pot At Least 40cm Wide When choosing a container for begonias, remember that it should allow water to drain away freely at the base, as these are not plants which like waterlogged conditions. With this in mind, there are a wide variety of different containers that you could choose from. It is worth considering the eco-friendly and affordable option of using reclaimed items or materials to make new planters for your garden. While individual plants can often be placed in smaller containers, choosing a container at least 40cm across will usually make for impressive displays. “Use a pot that is only slightly larger than the root ball,” says Janeen Randle, the President of the Melbourne Begonia Society. “Make sure to sterilise the pot before planting.” 2) Use A Free Draining Potting Mix Begonias like fertile and free-draining conditions. Any peat-free multi-purpose compost will generally be fine. Mulching around the top of containers with homemade compost, leaf mould or other organic mulch will help retain fertility and moisture. “I use an open mix for my begonias,” explains Janeen. B. ‘Glowing Embers’ “My mix contains a good potting medium, perlite, pumice, small orchid bark for drainage and a sprinkle of slow-release fertiliser.” 3) Space Plants Or Tubers Equally When potting up begonias, you will typically either be dealing with tubers, which should ideally be placed first into small individual pots, or, more commonly, with young plants. Space these equally around the container, being sure to bear their growth habits and eventual size in mind. Remember that there are begonias with trailing or cascading and more upright forms. 4) Only Plant A Few Per Pot Typically, 3-4 begonias will create a full and lush display in a container 40cm across. However, there is plenty of flexibility in this and you may plant fewer. This is especially true when you grow a more vigorous cultivar or plan to include other flowering or foliage plants in your summer display. 5) Provide Suitable Growing Conditions Place containers in full sun or partial shade (depending on which type you are growing and the conditions where you live). Water well throughout the growing season, trying to make sure water reaches the roots and does not wet the foliage and flowers. However, do not overwater and make sure excess water can drain away freely. Feed your begonias with a potassium-rich liquid feed every 4-6 weeks during the summer. Fibrous-rooted types are generally treated as annuals, but with tuberous types, you may wish to lift the tubers in early autumn, before the first frosts, and store these in a frost-free location so that you can enjoy them over subsequent years. “It is rare to see fibrous-rooted begonias used in indoor containers but I strongly recommend trying them indoors,” shares Master Horticulturist Dan Ori. “When fibrous-rooted begonias were first introduced to the UK, they were grown as houseplants. “After the frosts have passed in spring, I start with a young plant grown from cuttings or seed and plant them outside in beds or small potted arrangements. “Just before the first frosts hit in autumn, I dig out all the plants and take cuttings for next year and with any good quality plants, I pot them up and use them as houseplants. “However, when spring comes around again, I plant the indoor plant back into containers outside to fill beds and planted arrangements.”
Learn more
Did You Know It's Possible To Overwinter Any Type Of Begonia? Here's How
IN THIS GUIDE Caring For Houseplant Begonias Caring For Tuberous Begonias Caring For Hardy Tuberous Types Begonias are varied plants; there are some which make great houseplants, whereas others grow well outdoors over the summer months, and a few may even be hardy enough to remain outdoors all year round. In order to understand how to care for begonia in winter, you need to be clear about which type you are growing. Houseplant begonias are kept indoors year-round, with reduced winter watering. Most tuberous begonias are usually grown outdoors in summer, but cannot survive winter outdoors. Hardy tuberous begonias may be able to survive winter outdoors in very mild areas. Keep reading to understand how to care for each of these types over winter. Difficulty Easy Equipment Required Container, sand or soil, heated spaces or undercover growing areas Caring For Houseplant Begonias When caring for indoor begonias in winter, there are two main factors which will determine your success during the coldest months. The first thing to do is to make sure that you are providing the right temperatures for the specific begonias you are growing. Rhizomatous begonias and semi-tuberous types can sometimes cope with temperatures as low as 10°C, but they will prefer it a little warmer. Fibrous-rooted types need a minimum of 13°C, and cane-stemmed begonias will not like it if temperatures drop much below around 15°C. You will also need to reduce watering over the winter months if growing your begonias indoors. This is so the soil they are growing in does not become waterlogged. Caring For Tuberous Begonias If you wish to keep your tuberous begonias for another year, then it is usually necessary to lift the tubers from the soil or from their containers before the first frosts arrive. The tubers should be left to dry out, then placed into boxes or other containers filled with just-damp sand or soil. The box or container of tubers should be put in a frost-free location, and the temperature should ideally be kept around 7°C. Caring For Hardy Tuberous Types Hardy tuberous begonias can sometimes be kept outside year-round. The hardiest can cope with temperatures down to around 0°C, though most within this category can cope with 2-4°C. If you do plan to leave tubers in the ground, it is a good idea to cover them with a thick mulch of organic material, such as dry leaves or straw, to insulate them from the cold. Otherwise, lift the tubers as above, and keep them at temperatures above 2-4°C.
Learn more


