

Growing

Cornus ‘Dogwood’ - How Experts Grow This Plant For Year-Round Colour
IN THIS GUIDE Overview How To Grow Dogwoods Dogwood Care Tree Pruning Common Problems Want an ornamental tree for a postage-stamp-sized landscape in your garden? One that will provide virtually year-round colour? Well, a flowering Dogwood will offer richly-hued de facto flowers for a couple of months. Bright scarlet berries, most of them edible, will follow. Autumn will produce blazes of reds and purples, and winter will bring lovely branching forms or highly-textured bark into view. Overview Botanical Name Cornus Common Name(s) Dogwood Plant Type Trees / Shrubs / Hedging Native Area Eurasia, Indo-China, North America, Central Africa Hardiness Rating H5/H6 Foliage Dark-green, deciduous, ovate leaves Flowers Distinctive white flowers When To Sow May, June, July, August, September Flowering Months March, April, May When To Prune March If you want several garden landscape trees with notable ornamental value and which will provide year-round interest, look no further than Dogwood trees. Some species are even appreciated for their eye-pulling, textured bark. And this is only a general outline – virtually each variety of Dogwood brings its own very special ornamental value and visual appeal to the garden. Dogwood trees belong to Genus Cornus but not all Cornus are Dogwoods as such, for Dogwood trees are a subset of this genus which is further composed of much-branching shrubs and also a few rhizomatous subshrubs. However, there is no hard-and-fast line between Cornus trees and Cornus shrubs because several species or cultivars can be either a tall shrub, or a small tree, depending on whether or not the specimen is pruned, and how it is pruned. “Some Cornus shrubs have brightly coloured stems and are normally coppiced annually for a winter display,” says Master Horticulturist Roy Nicol. “This is a different group of plants to the Flowering Dogwoods described in this article.” Most Dogwood trees are quite slow-growing even though they are not overstorey trees or particularly tall trees. Many Dogwood varieties including very popular C. kousa and cultivars reach heights of only about 7m and even most of the taller ones usually attain heights of 10-12m. Some species take ‘only’ 20 years to attain their ultimate height while others take 30 and even 40 years. As a result Dogwood wood is of a superb quality, being strong and dense – it is also desirable for its pretty grain patterns. How To Grow Dogwoods Where To Plant As understorey trees, Dogwoods are quite comfortable in part-shade locations. However, the sun-shade preference depends on the particular variety and also the climatic zone that that variety is planted in. In most regions of England, siting Kousa varieties in dappled sunlight or afternoon shade would be preferable over full sun. At the same time, do not plant them in full shade which would be worse than full sun. American-native Cornus varieties should be sited in full sun, otherwise partial sun. As smaller trees with shallow roots, Dogwood trees need to be watered. The sunnier their location and the hotter the weather, the greater their requirement for water, both in amount and frequency. Dogwood trees may be called landscape-ornamental trees; they are not shade trees and certainly not tall trees, and should be sited accordingly. Depending on the particular variety of Dogwood tree, it can be planted in front of a dwelling or behind it, at the boundary of a property, or at the rear of flowering bushes. With hardiness ratings of Zone H5 or H6, all Dogwood trees are hardy throughout the United Kingdom. Propagation Cornus trees can be propagated in any number of ways: from seed, softwood cuttings, semi-hardwood cuttings, hardwood cuttings, grafting, and even suckers, each method in the season-appropriate and suitable to it. Virtually every variety of these trees can be propagated by at least two of these methods. Propagating Dogwood trees from seeds is troublesome and is a method best left to experts; also trees grown from seeds take several years to mature. Grafting is the method of choice but this method also requires expertise. Though you can grow some Dogwood tree varieties from cuttings without much difficulty, you will have to match the method to the variety as well as the season, after which you will need to prune correctly and watch over it patiently as it will take years to mature. Amateurs and home gardeners will typically get Dogwood trees as a potted plant or bare root plant. If you have a choice between the two, opt for a potted plant even though it will cost more, as these can be planted year-round as opposed to bare-root which must be planted in winter. Dogwood Care Soil Requirements The best soil for Dogwood trees is a loose, fertile one that drains very well. Densely-packed or heavy soils are unsuitable. Sandy loam amended with organic humus, compost, peat, or some combination thereof would be perfect. It may have a layer of gravel or perlite. Dogwood trees prefer acidic soils. Cornus florida and other American-originated varieties require acidic soils; they will not thrive in close to neutral pH soil. C. controversa Soil pH in the moderately acidic to slightly acidic range should work well – 5.6-6.5 (which may be a little lower but not a little higher). C. kousa and its cultivars also prefer acidic soil but the slightly acidic to neutral range is best for these varieties. Ideally, potted Dogwoods should be transplanted during mid-winter to mid-spring. Do not transplant them in autumn. Grafting Many potted Dogwoods are grafts. Try to spot the graft and plant the tree so that the graft line is well above the soil level otherwise the tree will revert to the rootstock or may even die. The most straightforward way to go about it is to plant it to a soil level matching that at which it was in the pot. Otherwise, if you get a bare-root tree, plant it to about three-fourths of the root ball, keeping about a quarter of it above ground. Do not store a bare root Dogwood after you receive it. Unpack it immediately, examine the root system for problems, and set it in a large bucket of water for the root system to soak for 12-15 hours prior to planting. Watering After transplanting a potted tree give it a heavy watering. Give a bare root specimen whose roots had been soaked a moderate watering. Keep in mind that Dogwoods are shallow-rooted trees; therefore, they should be watered periodically and consistently. They are not drought-tolerant trees. The amount of sun and extent of the heat would dictate the amount and frequency of watering. You will need to be more attentive to the water needs of developing and young trees than mature and established ones. At the same time be sure that the roots do not get waterlogged and that the soil drains well. Fertilising Dogwood trees do not need fertilising, especially if your soil is fertile and has organic content, but if you must, fertilise only from its third year. Fertilise in early spring using a lighter-than-recommended application of 12-8-8 liquid fertiliser. Mulching around the base will be helpful no matter what region you are in. In warm, sunny climates, it will keep the soil moist for longer; in frigid climates it will protect the roots during hard frosts. Tree Pruning Dogwood tree varieties require little, if any, pruning and some should not be pruned at all. Shrubs on the other hand do require a stricter pruning regimen. Be aware, though, that if you wish to grow a Cornus shrub as a miniature tree, you will need to choose a leader, pinch out competing stems, and let the leader develop to the fullest. For the most part, all you need to do is to prune dead, broken, or diseased branches (such branches must be removed). Other than that, you should prune when two branches are crossed and touching one another. If you see a branch emerging from the base of the tree, this too should be pruned for cosmetic reasons. All pruning should be done in winter and no later than early spring. Larger branches should be pruned using the Three-Cut Method. Be very careful about removing any suckers attached to the trunk of the tree as you do not want to cause a wound on the trunk. Suckers observed on the nearby ground may be removed in winter or the sucker shoots may be mowed over during any season. Common Problems Dogwood trees are generally very pest-free trees. The Asiatic varieties plus C. nuttallii and, particularly, C. florida and its cultivars (but not other American species) are susceptible to cornus anthracnose. It is a fungal disease that causes blotches on leaves and defoliation, and dieback of stems. Cornus anthracnose cannot be treated by the hobbyist gardener; this disease calls for the attention of a professional botanist or horticulturist. Fallen leaves and affected parts of the tree should be removed and destroyed. You can avoid fungal diseases, root rots, and such by ensuring that the tree is planted in the right type of soil, that the soil pH is not alkaline, it is not sited in full shade, and the soil does not stay damp or waterlogged.
Learn more
Azalea Japonica - How To Grow This Compact Shrub (Plus Some Interesting Varieties)
IN THIS GUIDE Overview Why Grow R. japonicum? Japanese Azalea Varieties Where To Grow Japanese Azalea Planting Plant Care Guidelines Watering Mulching Pruning References Rhododendron japonicum is a compact Azalea, in the Rhododendron family which can work well in beds or border, or containers with acidic conditions. Rhododendron japonicum, known as Japanese Azalea, is a flowering shrub – usually evergreen – with a relatively compact form, glossy deep green leaves and flowers which come in a wide range of colours. It is a type of evergreen Rhododendron (though some cultivars can be semi-evergreen and lose leaves in cold winters), within the Ericaceae plant family.1 Overview Botanical Name Rhododendron japonicum Common Name(s) Japanese Azalea Plant Type Shrub / Houseplant Native Area Japan Hardiness Rating Often H4 Foliage Lobed, evergreen leaves Flowers Various hues, commonly pink When To Sow March, April, May, June, September, October Flowering Months March, April When To Prune April, May These plants have smaller leaves than deciduous Rhododendrons. Azaleas have been cultivated for centuries and more than 10,000 vibrant cultivars have been created, which means that there are plenty of options to consider when choosing one of these plants for your garden.2 Azaleas are categorised under two sub-genera – Tsutsusi and Pentanthera. Japanese evergreen Azalea fall within the former sub-genus.3 Shimogamo Shrine in Kyoto City Azaleas are important in Japanese culture and Azalea festivals take place across the country each year, which are attended by many visitors. The plants are a common sight in Japanese (and Japanese-inspired) gardens around the world. R. japonicum is sometimes also used for bonsai, carefully and delicately trained – and sometimes used as container plants or even houseplants. Why Grow R. japonicum? Rhododendron japonicum is ideal for a low-maintenance garden. They are one of the most vibrant spring-flowering shrubs that can be grown in the UK, and provide their beautiful blooms for several weeks in April, May or June. Because of their spring flowering, they are also popular gifts for Mother’s Day and Easter. These are a popular range of shrubs for acid-soil gardens, since these are ericaceous plants that like a more acidic soil pH. They can help you make the most of a garden with acidic soil conditions. Even where there is not acidic soil, these small shrubs are pretty easy to grow in pots. Japanese Azalea Varieties There is a huge range of Japanese Azaleas to choose from. Some popular types to consider include: ‘Kurume’ Semi-dwarf Azalea hybrids which bloom prolifically. ‘Satsuki’ Compact Azaleas which bloom towards the end of spring. These Azaleas have dwarf tree shape, with beautiful gnarled trunks. They were originally hybrids of Rhododendron indicum and Rhododendron eriocarpum, and have been cultivated in Japan for centuries, but in the UK only since the beginning of the 20th Century.4 These are not particularly hardy, but can be grown outdoors in milder parts of the UK, or as container plants to take indoors in winter in cooler regions. Encore Azaleas Bloom from spring right through the summer months. These were developed by Robert C Lee in Louisiana.5 Gartrell & Robin Hill Hybrid Azaleas These are a group of larger flowered hybrids developed by Robert Derby Gartrell in the late 20th Century.6 Some interesting cultivars to consider include: ‘Hot Shot’ – variegated leaves and striking red flowers. ‘Silver Queen’ – variegated leaves and bright pink blooms. ‘Summer Sun’ – Satsuki variety, rich red flowers. ‘Robleza’ – Encore type, deep, intense red blooms. ‘Robles’ – Encore, purple flecked lilac flowers. R. x amoenum – Kurume variety, magenta-purple flowers, red autumn foliage. ‘Hino Crimson’ – RHS AGM, small, deep red flowers. ‘Mother’s Day’ – RHS AGM, bright red blooms. ‘Addy Wery’ – RHS AGM, deep, rich red flowering. ‘Iro Hayama’ – RHS AGM, white flowers with graduation to lavender or mauve. Though of course there are many, many more Japanese Azaleas to consider. Where To Grow Japanese Azalea Japanese Azalea is definitely a good houseplant to consider growing in a container inside your home. Many more compact cultivars are perfect for container growing, indoors, or outdoors with winter protection. However, many Japanese Azaleas can also be a great choice for a UK garden. Many cultivars are H4 hardy, but take note that there are many Azaleas which are not as hardy and which are only options for outdoors cultivation in very mild and protected southern gardens. Hardier cultivars will grow well in a fertile, rich, sandy or loamy soil which is moist and relatively moisture-retentive, without becoming waterlogged. They will thrive in a sheltered spot, in partial shade or full sun. Whether it is best to grow R. japonicum in full sun or partial shade will depend on your location, and the type and cultivar you have chosen to grow. Of course, the most important thing to remember is that, like other ericaceous plants, R. japonicum does require acidic soil. The optimal pH is between 5 and 6 for most Azaleas. Japanese Azaleas can work well in a planting scheme alongside other Azaleas, Rhododendrons, and Camellias. By selecting cultivars carefully you can enjoy blooms over a much longer period – some can even work well as hedges. With Japanese Acers and other Japanese plants which like acidic conditions, they can be perfect for a Japanese-inspired garden. Planting When planting R. japonicum, it is important to take care not to damage the roots. It is also important to plant the shrubs at the same level that they were at in their previous pot. Avoid planting them too deeply as they are intolerant of this. The top of the root ball should be above the soil – take care to ensure that this is not buried or the Azalea may fail to thrive or even die. If growing Japanese Azaleas in containers, make sure you choose a container that is of a sufficient size, and one which allows free drainage. Place crocks at the base to make sure water can pass through freely. Of course, you also need to make sure that you fill your container with ericaceous compost. Plant Care Guidelines ‘Konigstein’ A. japonicas are varied plants and some are much easier to care for and lower maintenance than others. Once established, hardy types in your garden can be more or less left to their own devices. Less hardy types grown in containers, or indoors, will require a little more care. Watering Once established, most Japanese Azaleas can be relatively drought-tolerant. However, it is very important to water well during establishment, and to make sure that the soil (or potting mix in containers) does not dry out during dry spells. When Azaleas are subjected to drought, they tend not to flower as well – since they are shallow-rooted, they do need the soil to be kept moist. “Rhododendron japonicum, when established, can tolerate periods of dry weather but can take some time to recover from drought,” shares Colin Skelly, Horticultural Consultant. “I focus on the planting position, such as avoiding areas that dry out in summer or providing dappled shade (but not dry shade). “Just as important is a thick layer of annual mulch (being careful not to mound against the stem) to hold moisture close to the shallow root system. “Also, I don’t clear away leaf litter as this helps to create a moisture-holding soil layer where the roots need it.” Remember that you will have to water container-grown plants more frequently than those grown in the ground. Mulching As Colin highlights above, it is a very good idea to mulch well around your plants to protect the shallow roots of these shrubs and reduce moisture loss. Choose an ericaceous mulch such as pine bark or pine needles to do so. Mulching will also provide all the fertility Japanese Azaleas need. It is not usually necessary to provide any other fertiliser for these plants. In fact, fertilising too much can be counterproductive and these shrubs may not perform as well if you do so. Pruning Azaleas typically only need light pruning and Japanese Azaleas may not really need to be pruned at all. As mentioned above, however, some Azaleas are used as bonsai, and trained and trimmed into ornamental, decorative forms. If light pruning is required, this should typically be undertaken just after the end of the flowering period. Make sure you do not prune after buds for next year’s flowers begin to form, as this would mean fewer flowers the following year. There is more to discover about Japanese Azaleas, but this guide should help you with the basics of choosing and growing these beautiful flowering plants. References 1. Rhododendron – Azalea or Rhododendron. (n.d.). Plant Facts. Retrieved March 10, 2023, from https://plantfacts.osu.edu/pdf/0247-943xx.pdf 2. Azalea Society of America. (2018, August 14). Learn about azaleas. Retrieved March 10, 2023, from https://www.azaleas.org/about-azaleas/ 3. Rhododendron and Azalea Classification Information. (n.d.). The American Rhododendron Society. Retrieved March 10, 2023, from https://www.rhododendron.org/classification.htm 4. Kennedy, C. (2022, June 28). Satsuki Evergreen Azaleas Extend the Blooming Season of the Genus Rhododendron. Seattle Japanese Garden. Retrieved March 10, 2023, from https://www.seattlejapanesegarden.org/blog/2022/6/28/with-their-elegant-late-may-and-june-flowers-satsuki-evergreen-azaleas-extend-the-blooming-season-of-the-genus-rhododendron 5. Borden, J. (2021, September 1). Meet the Man Behind the South’s Iconic Encore Azalea. Southern Living. Retrieved March 10, 2023, from https://www.southernliving.com/garden/flowers/encore-azalea-buddy-lee 6. A Guide to the Notebooks and Papers of Robert Gartrell. (n.d.). University of Virginia Library. Retrieved March 10, 2023, from https://ead.lib.virginia.edu/vivaxtf/view?docId=uva-sc/viu04020.xml
Learn more
Did You Know 'Dwarf' Buddleja Are Now Available? They're Perfect For Small Gardens
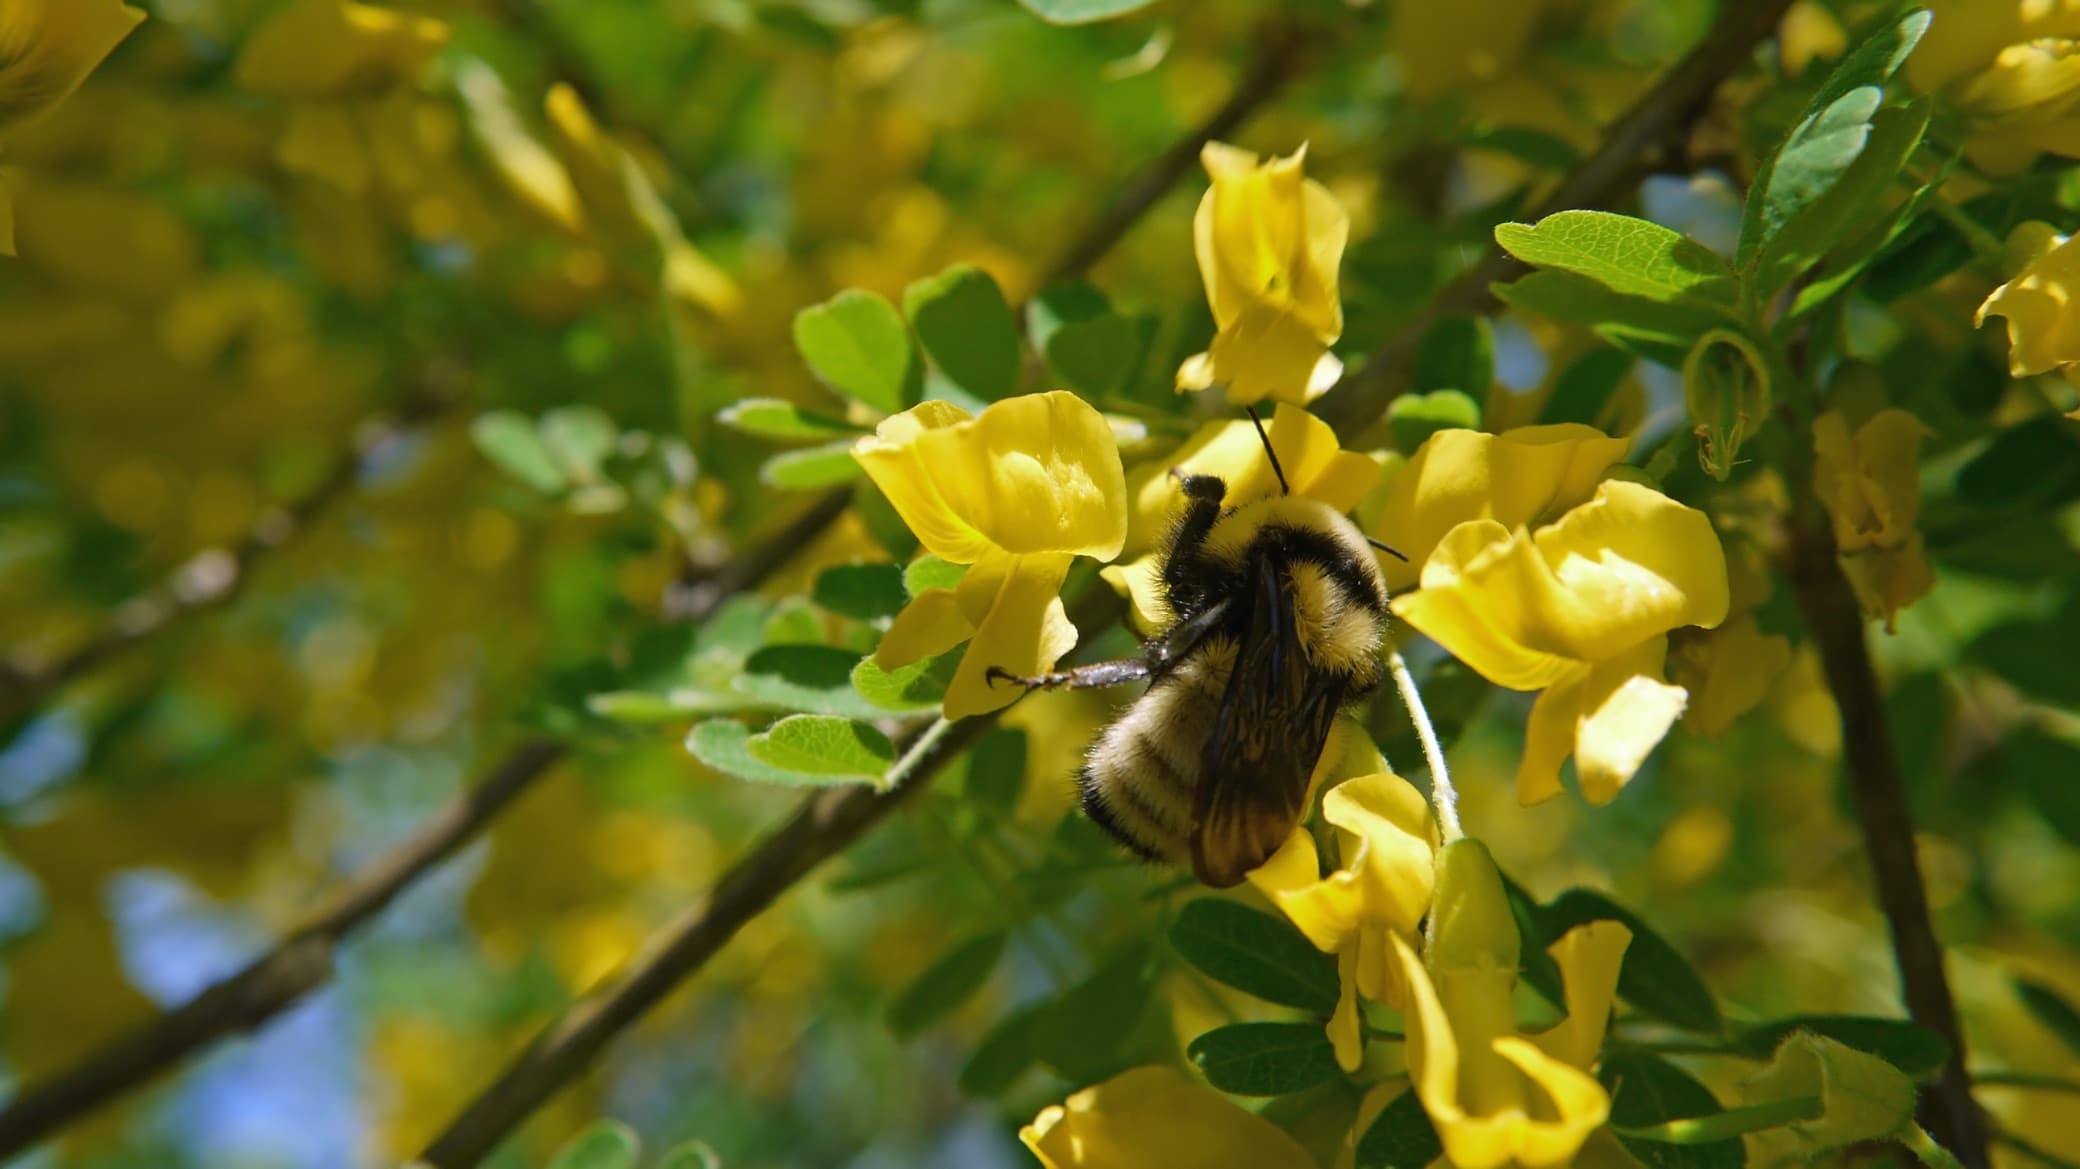
IN THIS GUIDE Overview What Is Dwarf Buddleja? Dwarf Buddleja Cultivars Why Grow Dwarf Buddleja? Dwarf Buddleja Alternatives How To Grow Dwarf Buddleja Dwarf Buddleja Care References Buddleja is a wildlife-friendly plant that can thrive in many settings and a dwarf option could be perfect for small spaces. A native of China, Buddleja davidii is now an extremely popular garden plant.1 Its appeal for butterflies means that it is sometimes referred to as ‘Butterfly Bush’. But care should be taken over planting and caring for Buddleja, or ‘Buddleia’, since it is a non-native plant and some species can become invasive in some areas.2 If you grow a non-sterile Buddlejia davidii in your garden, it is always best not to let it go to seed – cut back after flowering to prevent its spread. Overview Botanical Name Buddleia davidii: Dwarf cultivars Common Name(s) Dwarf Buddleia, Dwarf Butterfly Bush Plant Type Shrub Native Area China Hardiness Rating H6 Foliage Serrated edges and dark leaves Flowers Long taped clusters in various hues When To Sow March, April, May, September, October, November Flowering Months July, August, September When To Prune March, April Buddleia davidii can spread its seed far and wide if given the chance. Even when not allowed to go to seed, Buddleia is not always a good choice for smaller gardens. Most grow into huge, towering plants, over 2m tall, which means that they are not always the best choice for small spaces. However, there are now Dwarf Buddleja available, which could be a better choice for small gardens. What Is Dwarf Buddleja? Dwarf buddleias are cultivars of Buddleja davidii, many of which grow to only around 60-90cm tall. Since they are restricted in size, they can be a much better choice for small spaces, or for container cultivation. The good news is that there are several series of Dwarf Buddleja which have also been developed to be sterile, so they cannot set seed and become invasive. “Dwarf Buddleja could be used in the garden like a herbaceous perennial and planted in a mixed border, combining different flower colours,” says Peter Lickorish, a Professional Gardener who also lectures in horticulture. “When other herbaceous perennials die down, low domes of dwarf buddlejas will add height and structure, with many retaining some of their silvery-green foliage over winter.” Dwarf Buddleja Cultivars ‘Buzz Magenta’ Dwarf Buddlejas to consider are: B. davidii ‘Buzz Magenta’ B. davidii ‘Buzz Ivory’ B. davidii ‘Buzz Candy Pink’ B. davidii ‘Buzz Indigo’ B. davidii ‘Buzz Sky Blue’ B. davidii ‘Buzz Velvet’ B. ‘Blue Chip’ B. ‘White Chip’ B. ‘Lilac Chip’ B. Flutterby Petite Dark Pink B. Flutterby Petite Blue Heaven B. Flutterby Petite Snow White B. Flutterby Petite Tutti Fruitti B. Flutterby Flow Lavender The above options are sterile, and so will not cause the problems potentially caused by planting other Buddleia davidii in your garden. Why Grow Dwarf Buddleja? Dwarf Buddleja could be a good choice for your garden. It is overall a wildlife-friendly option and certainly will attract butterflies and other insects to your garden – and when you choose a sterile cultivar you need not worry about invasiveness. However, before you proceed with a Dwarf Buddleia, it is certainly worth considering other alternatives, which can also do a great job of attracting butterflies and other wildlife to your garden. Downsides While Buddleja is a great source of nectar for adult butterflies and other insects, as a non-native plant it has little or no value for the larvae of native butterflies and moths.3 This tradeoff means that opinions are mixed as to its growth in UK gardens. If you want to do as much as you can for native wildlife, you should also consider planting plenty of native plants. Dwarf Buddleja Alternatives In the UK and Europe, some native shrubs and small trees are far better for a truly butterfly-friendly garden, because they provide for Lepidoptera throughout their lifecycle and not just for nectar. Guelder rose You can consider, for example: Blackberries Buckthorns Currants Dogwoods Elder Gorse Hawthorn Native Roses Native Viburnums Willows If you want to aid butterflies and attract them to your garden, you should also plant fruit trees (remember that there are dwarf fruit trees that you can grow in containers). Fallen fruits are a food source for butterflies, and trees often also give moth and butterfly species shelter and a place to see out the winter.4 Place perennial herbs and nectar-rich perennials in pots nearby, or in guilds around these trees – many herbs and flowers are great for attracting butterflies and other beneficial insects to your garden. You should also consider growing climbers like ivy and honeysuckle against a wall or fence. These can provide nectar when there is not much around, and serve as a place for butterflies to lay their eggs. If you would like to consider other flowering shrubs for your small garden or a patio container garden, there are also other non-native options to consider. Caryopteris Some other good nectar sources for adult butterflies include: Caryopteris x clandonensis Deutzia Hebes Lilac Weigela How To Grow Dwarf Buddleja If you do decide that you would like to plant a dwarf Buddleja, then remember that where you place your new plant (whether in the ground or in a container) is important. Buddleia needs full sun, and a south-facing or west-facing aspect is ideal. The plant is H6 hardy however, and can cope with a wide range of different growing conditions. Soil Requirements If growing in the ground, remember that your plant will prefer a chalk, loam or sandy soil, and any pH is fine. Dwarf buddleja may struggle a little in heavy clay – although this plant does like some moisture, it generally prefers well-drained conditions. One interesting option to consider could involve growing dwarf buddleia as a low-growing hedge, either along a border of your property or between different garden ‘rooms’. Container Growing Of course, these are also great for growing in reasonably large patio pots. When growing in containers, choosing a free-draining growing medium, and ensuring that the container drains freely, is key. “They do, however, still require generous watering to prevent large leaves from wilting,” shares Peter. While you can get away with a smaller pot initially, for plants that typically come in 2-3 litre containers, ultimately, a Dwarf Buddleja will require a container that is around 60cm wide. It is best to fill your container with a peat-free multipurpose potting compost with added John Innes (or a homemade equivalent). Planting Dwarf Buddleja You should find it easy to source a Dwarf Buddleja from a garden centre online or in your local area. If someone has a buddleia that you admire, you may also be able to propagate it to make a new plant by taking semi-ripe cuttings in summer. When planting dwarf buddleia, place the plant in a hole in the soil or in a container at the same level that they were at in their previous pot. This can be done at any time, but spring or autumn is generally best, to reduce the shock of transplantation. Dwarf Buddleja Care Dwarf buddleja is generally very easy to care for and even in containers is pretty low maintenance and a trouble-free shrub, but there are a few things to remember: Watering Remember that Buddleia like free-draining conditions, and do not like waterlogging for any length of time. Plants grown in the ground should be watered for the first 18 months or so during establishment, but should not require any watering after that except during prolonged periods of drought. Container plants will need to be watered more frequently than those growing in the ground. Water when the growing medium dries out during dry periods. Remember, whether growing in the ground or in containers, a layer of organic mulch will help to retain moisture. Feeding Feed your container-grown Buddleia in spring with an organic, high-potassium feed to encourage good-quality blooms. If growing in containers, you should also use a potash-rich organic liquid feed like comfrey tea when watering over the summer months. Plants grown in fertile soil should only need an annual mulch of organic matter, and will not need additional feeding. Deadheading When flowers on your Buddleia begin to fade over the summer, deadhead them to encourage new smaller blooms to form. At the end of the season, leave the faded flower heads in place (when growing sterile varieties) to give more cover for wildlife over the winter months. Pruning Like other types of Buddleja, Dwarf Buddleja should be pruned back hard over the first couple of years to a low framework (around 20-30cm above the ground or surface of the growing medium) in the spring. It is best to prune in March or April, just as the first new growth is starting to show. After around 2 years, prune back to leave around two buds on the growth of the previous year. You should also make sure that you also remove any dead, damaged or diseased stems – be sure to mulch around your shrubs with organic matter and feed well after this spring pruning. See more buddleja pruning tips in this guide. Repotting If you are growing your Dwarf Buddleja in a container, it should typically be repotted every couple of years. Dwarf Buddleja will typically be relatively trouble-free, and you should find that if you do choose one, and take care of it correctly, it will grace your garden for many years to come. Just remember that if butterfly attraction is high on your list, the ‘butterfly bush’ is not actually the best plant to choose in the UK. References 1. Ebeling, S., & Tallent-Halsell, N. (2009). Buddleja davidii (butterfly bush). CABI Compendium, CABI Compendium. https://doi.org/10.1079/cabicompendium.10314 2. Invasive Shrubs to be Aware of in Your Garden. (n.d.). The RSPB. Retrieved March 13, 2023, from https://www.rspb.org.uk/birds-and-wildlife/advice/gardening-for-wildlife/plants-for-wildlife/shrubs-for-gardens/invasive-shrubs/ 3. Position statement on Buddleia and its planting in the UK. (n.d.). Butterfly Conservation. Retrieved March 13, 2023, from https://butterfly-conservation.org/sites/default/files/1.bc-position-statement-on-buddleia-updated-2015.pdf 4. 10 ways to help butterflies and moths this autumn. (n.d.). Butterfly Conservation. Retrieved March 13, 2023, from https://butterfly-conservation.org/news-and-blog/10-ways-to-help-butterflies-and-moths-this-autumn
Learn more
Blueberry Shrubs: Nursery Owner Lorraine Summers Shares Her Tips For Tasty Fruit
IN THIS GUIDE Overview Why Grow Them in Your Garden? How To Grow Blueberries Blueberry Plant Care References Blueberries are delicious fruits that can be grown in many gardens as long as you provide the acidic conditions they need to thrive. In this guide, we will take a closer look at these berries, why growing them could be a great idea and where and how to grow blueberries in your garden. We have collaborated with Lorraine Summers across our blueberry growing guides, the owner of Trehane Camellia and Blueberry Nursery, a specialist plant nursery based in Dorset. “Blueberry plants are easy to grow and they produce lovely, tasty berries,” Lorraine says when asked why she enjoys growing these tasty fruits. Blueberries grow on shrubs native to North America which are classified as Vaccinium (typically Vaccinium corymbosum or ‘highbush’ type).1 Overview Botanical Name Vaccinium Common Name(s) Blueberry Plant Type Fruit / Shrub Native Area North America Hardiness Rating H6 Foliage Lobed, deciduous leaves Flowers Small white or pale-pink flowers When To Sow (Bare Root) January, February, March, November, December In Europe, related species, bilberries, are sometimes described as blueberries – and these also sit within the Vaccinium genus – usually Vaccinium myrtillus (often referred to as the ‘European Blueberry’).2 These are closely related to North American blueberries, but though they grow prolifically in the wild in acidic, nutrient-poor soils in temperate and subarctic regions, they are challenging to grow – and so are not usually grown commercially or cultivated in gardens. If you are thinking about growing blueberries in your garden – rather than foraging for bilberries in the wild – then you will be likely be looking for berry bushes which often come from hybrid cultivars, which were developed around the beginning of the 20th Century.3 The plants you can buy for your garden typically derive from these North American types. Why Grow Them in Your Garden? Though blueberries are not a native berry bush, they can still be a very useful and interesting addition to your home-growing repertoire. By growing these at home, you can take advantage of the useful properties of these berries without having to buy them. In the long term, this can save you money and reduce the amount of fruit you need to buy from the supermarket. How To Grow Blueberries Blueberries require a sunny location to fruit well. Though some can cope with dappled shade, most cultivars will require at least 6 hours of sunlight a day to achieve the best yields. They will also do best in a relatively sheltered spot, shielded from strong winds and colder temperatures. Maintaining Soil Acidity The most important thing to remember when it comes to growing blueberries relates to their soil requirements – blueberries are very fussy when it comes to soil pH. They are ericaceous and require an acidic pH of below 5.5 in order to avoid any issues.4 So unless you have acidic soil where you live, blueberries are best grown in containers or raised beds. If you have a heavy clay soil, you should also grow blueberries in a raised bed or container, since blueberries like light and moist (yet free-draining) soil. When To Plant Blueberries can be purchased as bare-root plants in the autumn and planted during the dormant period. You can also buy pot-grown blueberries from garden centres and nurseries all year round. For best results, these should generally be planted out or repotted in the spring or autumn. Avoid planting out during particularly hot and dry periods to reduce plant stress. Note that not all blueberries are self-fertile – even those varieties which are self-fertile will generally produce better yields if grown with at least one companion. You should usually, therefore, grow more than one blueberry plant, whether in pots or containers, raised beds, or in your acidic soil garden. Planting Out Once you have sourced your blueberries and chosen a site, prepared the soil if suitable, built raised beds or prepared containers with ericaceous compost – you should plant your blueberries at the same depth they were previously planted. Firm the soil or potting mix around your plants – take care not to create large air pockets but also make sure that you do not compact it too much. Water in well, then mulch around your blueberry bushes with a fresh mulch of pine needles, oak or beech leaf mould, conifer wood chip or bark chippings. Companion Plants Blueberries can of course be grown in pots on their own. However, you can achieve better yields if you companion plant blueberries with other acid-loving plants which can attract pollinators during the spring when the bushes are in blossom, and attract other beneficial insects which help keep pest numbers down. Some good choices are: Azaleas Camellias Spring flowering Irises Grape hyacinth (Muscari) Heathers (Erica) Lilac Lithodora diffusa Papaver cambricum (Welsh Poppy) Red campion (Silene dioica – can cope with a variety of soil pH conditions) Rhododendron Trillium erectum (Birthroot) Blueberries can also be grown alongside other berry bushes which like acidic conditions, like cranberries, for example. They also look good when planted alongside conifers, small Acers and/or holly. Note however that blueberries have shallow roots, so companions should be placed outside the area of their root zone – and should not have invasive roots. Around the sunny side of blueberries, you can also consider planting strawberries (which should be fine at a pH of around 5.5) and aromatic herbs like thyme and rosemary. These are good companion plants which should be able to tolerate acidic conditions. Blueberry Plant Care As long as you meet the acidic conditions required, blueberries are generally relatively easy and trouble-free to grow. Watering Remember that blueberries grown in containers will need to be watered more frequently than those grown in the ground. Tap water can reduce acidity, so be sure to always use rainwater when watering your blueberry plants. Protection Blueberries do not usually have a lot of pest issues. However, birds can be an issue, and may eat all the berries before you get the opportunity. If birds are a problem, you can consider protecting your blueberries with bird netting, or in fruit cages, polytunnels or other covering structures, as Colin Skelly, a Gardening Consultant and Horticulturist shares: “The birds in my garden seem to be adept and judging the ripeness of my blueberries, such that they will strip them before I get the chance to harvest them. “I have tried various bird-scaring ideas, such as CDs tied to a cane or fans that twirl in the wind, but the birds seem to scoff at these efforts. “The only viable option that I have found (not wanting to erect a permanent fruit cage) is to construct temporary netting around the bushes using canes.” Companion planting (ideally with plants which attract sap-suckers such as Nasturtium) should help you deal with aphids and other pests which can sometimes plague berry bushes. Companion plants should attract predatory insects to keep their numbers down. References 1. Vaccinium corymbosum. (n.d.). Kew Royal Botanic Gardens. Retrieved March 13, 2023, from https://powo.science.kew.org/taxon/urn:lsid:ipni.org:names:261823-2 2. Bilberry. (n.d.-b). The Wildlife Trusts. Retrieved March 13, 2023, from https://www.wildlifetrusts.org/wildlife-explorer/trees-and-shrubs/bilberry 3. History of Blueberries. (2021, August 4). US Highbush Blueberry Council. Retrieved March 13, 2023, from https://blueberry.org/about-blueberries/history-of-blueberries/ 4. Acidifying Soil for Blueberries and Ornamental Plants in the Yard and Garden. (2003, April). Oregon State University. Retrieved March 13, 2023, from https://catalog.extension.oregonstate.edu/sites/catalog/files/project/pdf/ec1560.pdf
Learn more
Are Your Rhododendron Leaves Wilting And Drooping? Horticulturists Explain Why
IN THIS GUIDE 1) Cold Or Windy Weather 2) Broken Stems 3) Water Shortage 4) Waterlogging / Excessive Watering 5) Fungal Infection 6) Vine Weevils Or Other Insect Pests References Rhododendron are typically easy to care for and low maintenance, but there are a range of issues that can cause leaves to start wilting and drooping. In this article, we will explore some of the most common issues which can cause rhododendron leaves to wilt and droop. “In addition to producing every possible flower colour, many rhododendrons are fragrant and have beautiful foliage,” says Katrina Clow, Hon. Secretary of The Scottish Rhododendron Society. “They can become trees or remain diminutive little plants and so can suit many types of garden.” 1) Cold Or Windy Weather Many rhododendron are hardy and can easily make it through the winter in the UK. However, some cultivars may well show signs of stress in cold temperatures, especially in windy weather over the coldest months. They will sometimes simply recover after milder conditions return. If leaves are curling in on themselves this may just be the plant’s natural response to cold, exposed conditions, known as thermotropism.1 Rhododendrons curl leaves inwards so that less of the leaf surface is exposed to drying cold winds. This is the plant’s defence mechanism to prevent too much water evaporating from the leaves. The rhododendron may need water, if conditions have been dry, and you should make sure that you conserve that water by laying an organic mulch around the base of the plant. “We cannot control the weather!” exclaims Katrina. “Moist, humid and mild conditions will help prolong flower life. A late May frost or a sudden gale can destroy all the loveliness of your rhododendrons.” Despite this, if you encounter this issue frequently, you may need to consider replacing your shrub with a more cold-hardy cultivar better suited to your location. 2) Broken Stems If the leaves are wilting and drooping only on one side or a certain portion of the plant, the first thing to check for is broken or damaged stems. Of course, leaves will wilt and droop if water and nutrients cannot pass up the stems to reach them. Katrina recommends foliar feeding your rhododendrons in the growing season to make sure your plants get all the nutrients they need. Physiological damage may have been caused not by a more pernicious issue but simply by storm damage or other extreme weather conditions – especially if your shrub is in an exposed location. Be sure to prune out the damaged section as soon as possible to avoid putting excess strain on the rest of the plant. But note, if water is not reaching the leaves effectively, there can be a range of other reasons for this – which we will cover below. 3) Water Shortage Another common reason that leaves on a rhododendron will wilt and droop is issues relating to water. In dry summer months, you may find that water shortage is the culprit. Rhododendrons have shallow roots and require moist soil. Make sure that you are watering sufficiently, and with sufficient frequency during dry periods. “Spray the foliage with rainwater if required,” Katrina suggests. Remember that smaller cultivars growing in containers will have higher water needs. Moisture is especially critical in the middle of summer to help flower bud production for the following year. A dry summer can seriously hinder flowering. “Large rhododendrons may be more prone to a lack of water in pots,” adds Master Horticulturist Peter Lickorish. “If potting into something larger or planting out is not an option, they can be pruned to help them manage water. “However, as they flower on older stems, pruning must be carried out minimally over several years to avoid a dent in blooming.” 4) Waterlogging / Excessive Watering Wilting and drooping leaves can also unfortunately be a sign that you have watered too much. Rhododendrons do need moist soil, as mentioned above – but they will not do well when the soil or growing medium becomes waterlogged. During heavy rains, soils that do not drain freely may cause a problem for rhododendrons. Make sure that you improve the soil structure with the regular application of organic mulch, which will aid in building a healthy, aerated, moisture-retentive yet free-draining soil. If growing rhododendron in pots or containers, make sure that you have chosen an appropriate moisture-retentive yet free-draining ericaceous mix. Make sure that the container you have chosen is allowing water to drain out the base. 5) Fungal Infection Unfortunately, waterlogged conditions can increase the likelihood of a fungal infection taking hold, and fungal infection could also be the cause of your rhododendron leaves wilting and drooping. Phytophthora Root Rot One of the most common fungal infections is Phytophthora root rot. Spores come in with plants introduced to your garden, or on the wind. Sadly, once you see this problem in the leaves, the disease is likely to be quite advanced in the roots. If you unearth the roots you will likely see much evidence of decay if this is the problem. However, it may be difficult to tell whether prolonged waterlogging alone has caused this issue, or whether fungal disease is present. Honey Fungus Rhododendron may also suffer from honey fungus. This is another fungus that attacks the roots of a number of woody perennial plants. If this fungus is present, this will also cause root death before you are aware of wilting and drooping leaves. If you look at the roots and find a white mycelium (which smells strongly of mushrooms) around the roots and the base of the shrub, this is likely to be the problem. When one of these fungal diseases is present, you should carefully dispose of the plant and replace the topsoil from the root area. Susceptible plants should not be grown in the same area and you should replant with more resistant species. 6) Vine Weevils Or Other Insect Pests Vine weevils and other insect pests can also cause rhododendron leaves to wilt and droop. This can be a problem, especially, for rhododendrons which are grown in containers. Adult vine weevils will nibble the edges of rhododendron leaves, but it is the grubs that pose a more serious problem – they feed on plant roots over the autumn and winter months, causing wilting and eventually death of the plant. You can deal with vine weevils by picking the grubs from the compost or potting soil by hand. This may be time-consuming but try to make sure you remove as many larvae as you can. There are also biological controls available. You can introduce nematodes: Heterorhabditis megidis, H. bacteriophora and Steinernema kraussei are amongst those commonly used. These are usually applied in August or early September, but may also be applied in late spring. If your rhododendron leaves are wilting and drooping, the problem usually relates to water. For some reason, the leaves are not getting the water and nutrients they need. Rule out environmental problems before deciding whether disease or pest species are causing the issue. Working through the list above should usually give you an answer to your question. References 1. Van Zanten, M., Ai, H., & Quint, M. (2021). Plant thermotropism: an underexplored thermal engagement and avoidance strategy. Journal of Experimental Botany. https://doi.org/10.1093/jxb/erab209
Learn more
Pieris Can Be Left Alone, But Follow These Steps If You Decide To Prune Yours
IN THIS GUIDE Pieris Can Be Left Alone Why Prune Pieris? How to Prune Pieris Simple Maintenance Pruning Hard Pruning Deadheading Maintaining Shape and Size When To Prune Pieris Post-Pruning Care Pieris are useful evergreen shrubs for your garden, but understanding their care includes learning how and when to prune. One of the reasons that Pieris is such a popular garden plant is that it is a great low-maintenance option for your garden. Pieris japonica and ‘Forest Flame’ are two incredibly popular shrubs in the UK and neither requires too much effort from gardeners. One job that you might like to think about each year, however, is pruning your plant. Pieris Can Be Left Alone Pieris shrubs may not necessarily have to be pruned at all. If you are happy for them to grow more naturally and grow to their full potential, you can more or less leave them to their own devices if you prefer. If you are a proponent of natural gardening then this may be the approach you decide to take. Pieris is usually only ever pruned lightly, and this is often more for the sake of appearances than for the health of the plant. Why Prune Pieris? Leaving your Pieris largely unpruned can often be the best choice for wildlife, and if you do decide to prune your Pieris, less is usually more. However, pruning Pieris shrubs correctly can sometimes be beneficial. It can allow you to maintain their shape and size, and deadheading after flowering might not be strictly necessary, but it will often be a good decision for the appearance of your garden and may make new foliage even more impressive and spectacular. You might prune Pieris: Simply to remove dead, damaged or diseased material if there is any. Because it has grown large and has outgrown its location. To improve its shape and form if it has become lopsided or unappealing aesthetically. To gently restrict its growth and keep it in check. To remove dead flowers to keep your garden looking neat. How to Prune Pieris Pieris falls into RHS pruning group 8, which includes early flowering evergreens. Simple Maintenance Pruning Most of the time, Pieris will only require pruning to remove any dead, damaged or diseased material. Take a good look at your shrub and aim to take out anything which seems to have any problems with a clean, sharp pair of secateurs, loppers or another pruning tool. Often, this will be enough. Hard Pruning If your Pieris is very large and overgrown, you can undertake hard pruning to rejuvenate it entirely, by cutting out around 1/3 of the old wood and, if necessary, cutting back hard to the required size and shape. Hard pruning will likely lead to loss of flowering the following year, and perhaps the year after that. However, the flushes of new colour and the size restriction can mean that this is still a good bargain. And Pieris, though they do not regularly require it, do tend to respond pretty well to hard pruning if they are otherwise healthy and in the right location. Another thing that you might consider with a mature and large Pieris is pruning it into a standard form (making it look more like a tree than a shrub). With some types of Pieris, you may be able to remove lower stems around the main trunk, starting at the ground and working upwards, to turn it from a shapeless shrub into a more attractive garden feature. So this is something else to consider for a mature and currently unappealing Pieris shrub. Deadheading You may also wish (largely for aesthetic reasons) to deadhead your Pieris, even if you do not need to do any other pruning. Removing flowers as soon as they have faded can help keep flowers coming. And when the plant has finished its blooming period and the later flowers are beginning to go to seed it can keep your shrub looking neater and more appealing. Simply snip off each of the spent flowering stems to a healthy bud. Do not confuse the flowers for the colourful young leaves. One thing to note however is that deadheading is not really necessary – if you leave the flowers in place, they will usually fall off of their own accord. And deadheading and being too neat and tidy in your garden is not always, in general, the best thing to do for wildlife in your garden. However, deadheading may also help plants focus on creating beautiful new foliage growth. It is also worth noting that Pieris are usually grown mostly for their attractive foliage rather than for their flowers. Maintaining Shape and Size At the same time as deadheading after the flowering period, you can also trim branches lightly here and there to maintain a desired shape and size. Just make sure that you do not cut into too much of the new growth which will produce next year’s blooms unless you have decided on hard pruning. When To Prune Pieris Since Pieris are in pruning group 8, they should always be pruned immediately after flowering, in spring. Most Pieris will bloom between March and May. So May or early June is a good time to prune in the UK – and also a good time to take any cuttings for plant propagation. Like other shrubs in this group, they require little pruning and as mentioned above, you may not need to do much pruning at all. Certainly, it is important to avoid pruning Pieris after the end of the summer, since this can spur new tender growth which can be damaged by frost and cold temperatures in winter. Post-Pruning Care Pieris with mulch Pruning correctly does not end with cutting off the plant material. After pruning your Pieris, you should also take care of it by adding a good quality organic mulch. Replenishing a layer of leaf mould, compost or well-rotted manure, or other organic material each spring will make sure there are plenty of nutrients for the shrub to uptake throughout the rest of the growing season. “If you have a pine in your garden or somewhere nearby if you can get permission, collect the needles and use these to mulch your Pieris,” advises Colin Skelly, a Horticultural Consultant. “Repeated annually these can be a great way to maintain a low soil pH and soil moisture as well as to suppress weed germination.” You should also think about feeding your Pieris (especially if growing in a pot or container) with a good general-purpose organic liquid fertiliser (a homemade compost tea, for example). This will give plants a boost after pruning and help make sure they respond well to the pruning with healthy new growth.
Learn more
Why Growing Magnolias In Pots Allows You To Easily Meet Their pH Requirements
IN THIS GUIDE Can Magnolia Trees Be Grown In Pots? Potted Magnolia Varieties Positioning Potted Magnolia Choosing Containers For Magnolia Potting Mix For Magnolia Planting Magnolia In Pots Caring For Potted Magnolia You might think of Magnolias as a plant for larger gardens, but some can be grown in pots. In this article, we will talk about which magnolias to grow in pots in a container garden, and the choices you will have to make to keep them healthy and happy. Can Magnolia Trees Be Grown In Pots? In short – yes! If you grow magnolia trees in the ground, you will obviously be able to choose from a wider variety of plants, and they will take a lot less work. Container gardens are generally higher maintenance for the gardener. However, there is one very good reason why you might wish to grow Magnolia in containers, and that is because of their pH requirements. Magnolia trees like neutral or acidic soil conditions. While some can cope with more alkaline conditions, if you have very alkaline soil, it is often best to grow Magnolias in containers rather than fighting to amend the pH and grow them in the ground. Fortunately, magnolia trees have rather shallow roots, which can make them a good candidate for growing in larger containers. Some types have fragrant flowers which makes them great for positioning in pots close to a seating area or outdoor leisure space. Potted Magnolia Varieties M. stellata ‘Rosea’ Magnolia trees can be full-sized trees or larger shrubs. If you plan on growing Magnolia in a container then it is important to choose the right variety. Those with smaller forms and less vigorous growth habits are generally easier to grow in pots. Some options to consider which can be good for container gardening include: M. ‘George Henry Kern’ M. ‘Susan’ M. stellata ‘Jane Platt’ M. stellata ‘King Rose’ M. stellata ‘Royal Star’ M. stellata ‘Rosea’ M. denudata ‘Sunrise’ M. denudata ‘Yellow River’ M. x loebneri ‘Mag’s Pirouette’ M. x loebneri ‘Merrill’ M. x loebneri ‘Merill’ Make sure that you understand how large the Magnolia you are considering will eventually grow, and remember that while some Magnolias can be grown in containers, not all can. Even those which are good for container growing will need a sizeable pot and the right conditions to thrive. Positioning Potted Magnolia Magnolias, whether grown in the ground in a garden or in pots, will require a site that is as sunny and sheltered as possible. Magnolias are actually usually pretty hardy in the UK, however, the flowers of magnolias can easily be damaged by early spring frosts. Choosing Containers For Magnolia Magnolias are usually purchased as pot-grown trees, though they can come in a range of containers of different sizes. It is best to repot your Magnolia as soon as it arrives into larger, heavy containers which can support the weight of a small tree or shrub and which will not tip over easily. You can purchase containers, but there is also a range of reclaimed items you could consider. Remember to choose a container that will not dry out too quickly during the summer months. Inadequate water over the summer is one of the common reasons why a magnolia might not flower as expected. Remember that a black or dark-coloured container will heat up and dry out more quickly. The material from which a container is made is also important – glazed pots are better than terracotta for water retention, for example. It is also important to make sure that your container has drainage holes and allows for good drainage too. Magnolia trees grow root systems very quickly and intricately, so it is important to choose a container that will suit the ultimate size of your tree. Look at the girth of the trunk to get an idea of how wide the container needs to be. A Magnolia with a trunk that is 2cm wide, you will need a container at least 60cm wide and 60cm tall. For each centimetre around the diameter of the trunk, the container should be 30cm wider and taller. So if a mature magnolia tree trunk is 5cm around, it will need a container or planter 1.5m wide and 1.5m tall. Larger containers will be needed to grow Magnolia to maturity in pots. Potting Mix For Magnolia As mentioned above, Magnolias can thrive in neutral or acidic soils. Many magnolias will grow perfectly well in a general multi-purpose compost with added John Innes (or a homemade equivalent). However, certain varieties will thrive in more acidic conditions and so it can sometimes be beneficial to fill your pots for Magnolia with an ericaceous potting mix. Whichever potting mix you choose, make sure it is light and free-draining, yet moisture retentive, to keep your magnolia tree as healthy and happy as possible. Planting Magnolia In Pots When you are planting a magnolia into its new pot or container, it is important to take care not to damage the root system as you do so. As is usual with trees and shrubs, it is important to make sure that you bury the magnolia to the same level that it was in its previous pot. Make sure the graft point is not below the surface of the growing medium. After planting, water well around the base of the plant, and top the growing medium in the container with a leaf mould or another good quality organic mulch. This will help to retain water in your pot and stop weeds from growing up as much around the base of your tree. Of course, it will also help add fertility, providing nutrients as the materials decompose slowly over time. Caring For Potted Magnolia Watering Remember that a magnolia grown in a container will need to be watered more frequently in dry weather than one which is grown in the ground. Keep the soil moist throughout the summer months to keep magnolias healthy and flowering well. “Ideally water in the morning when plants begin to use it, although evenings are also okay,” advises Colin Skelly, an RHS Master of Horticulture. “To ensure that water is available to the plant throughout the pot soil, watering thoroughly less frequently is better than frequently but less thoroughly.” Feeding Magnolias grown in the ground will typically require only mulch, and will not need additional feeding. When grown in pots, however, some additional liquid feed may be helpful. Feeding magnolias grown in containers in early spring with a high phosphorus and potassium liquid feed can promote healthy growth and encourage more abundant flowering. Pruning Magnolias should only be pruned lightly, and after flowering. Remove any branches which are dead, damaged or diseased and any which are crossed and rubbing against one another. You can also prune to restrict size somewhat, but should be circumspect as these trees do not like or respond well to hard pruning. If you prune too much, flowering may be reduced or cease the following year. As long as you choose the right magnolias, place them in the right containers, with the right potting mix, in the right location, growing magnolia in pots is not too much of a challenge. Just make sure you do not let them dry out. Replenish mulch to add fertility each year, and your magnolia tree should be content in your container garden for many years to come.
Learn more
Why Hydrangea With Relatively Compact Shrub Forms Are Best For Growing In Pots
IN THIS GUIDE Container Hydrangea Varieties Placing Potted Hydrangea Choosing Containers For Hydrangea Container Potting Mix Potting Up Hydrangea Potted Hydrangea Care Most hydrangea can grow perfectly well in pots, though dwarf varieties are better suited. In this article, we will tell you everything you need to know to grow hydrangeas in pots or containers with good results. Read on to find out more about making the right initial choices, planting up your hydrangea, and caring for your potted hydrangea over time. Container Hydrangea Varieties The first thing to think about if you are considering growing hydrangea in pots is which type of hydrangea you would like to grow. Hydrangeas can be climbing plants, or shrubs. Those with relatively compact shrub forms are best for growing in pots. Some good compact hydrangeas to consider growing in pots include: H. macrophylla ‘Masja’ H. macrophylla ‘Paraplu’ H. macrophylla ‘Mini Penny’ H. ‘Miss Saori’ H. ‘Selma’ H. paniculata ‘Early Sensation’ H. paniculata ‘Little Lime’ H. paniculata ‘Bobo’ H. serrata ‘Shojo’ H. quercifolia ‘Sike’s Dwarf’ These are just some of the options to consider. You might also choose to grow climbing hydrangeas such as the evergreen H. seemannii in pots, as long as these are positioned correctly, and of sufficient size and stability. Remember to consider the colour and type of foliage and flowers that you would like from your hydrangea, since one varietal can look very different to the next. Of course, it is also important to consider where you would like to place your hydrangea in pots since this will also be vital in determining which type and cultivar of hydrangea to grow. Placing Potted Hydrangea Hydrangeas in pots can be placed in a range of different locations. You might place them on a patio or decking area, beside a doorway or window, or in rows of container shrubs to create division between different parts of your garden. Hydrangea are hardy and versatile shrubs that can work in many different garden settings – from spaces with a traditional cottage garden feel, to much more modern, contemporary designs. Most hydrangeas will do best in an area of partial shade or full sun. Most will not flower as well in deeper more pronounced shade. A west-facing spot could be ideal as most hydrangeas seem to thrive where they have shade in the morning followed by sun in the afternoon. However, one important thing to consider is that you do not want to place hydrangeas in pots in an area where they will dry out too quickly. Not providing enough water is one of the most common reasons why problems creep in when people grow hydrangeas in pots. Hydrangeas, no matter which type, tend to like to be grown in relatively moist conditions. “In the summer months, even large pots will need watering regularly to ensure that the soil moisture is sufficient,” shares Master Horticulturist Colin Skelly. “The most efficient way to water is through a drip irrigation system if this is possible, preferably with a moisture sensor. “Provide regular top-ups and check the soil moisture every night (pushing your finger into the top 5-10cm of soil). “If it is dry to 5cm or below, water more thoroughly, allowing it to soak away, then reapply.” Choosing Containers For Hydrangea Once fully grown, a hydrangea will typically require a large container, such as a half-barrel, trough, or another large reclaimed item. However, it is not usually a good idea to take a small hydrangea purchased in a pot and plant it up into a large container right away. This is because waterlogging can be an issue where there is excessive space around the plant roots. Choose a container that is just a little larger than the pot in which it came. Alternatively, choose a large planter or container and place a hydrangea in it alongside some other perennial plants which enjoy similar conditions, before thinning, pruning and transplanting these to new containers once the hydrangea grows. Make sure that you choose a pot or container which is relatively good at retaining moisture, and yet which has drainage holes at the base to allow excess water to drain through. Make sure that the container is heavy and sturdy enough to support the size and weight of your shrubs, and that it will not blow over or be toppled easily. Container Potting Mix Hydrangeas are not particularly fussy when it comes to the potting mix or medium in which they are grown. A general-purpose, loam-based potting mix is generally best. Hydrangeas can grow in mixes with a range of different pH levels. However, remember that if you are growing a blue type, you will need to choose an ericaceous compost, and maintain acidity over time. Potting Up Hydrangea The best time to purchase and pot up hydrangea into their new containers is either in spring or autumn, when the soil is warm and moist and transplantation will go smoothly. However, you can buy and pot up hydrangea at any time over the summer – as long as you make sure that the conditions are moist and that you keep watering consistently until the shrub becomes established. Take care not to place your hydrangea deeper in its new container than it was in its original pot. Water the shrub in well, and then be sure to mulch around the top of the new container – leaf mould is ideal, though you can also use a homemade compost or well-rotted manure. For hydrangeas grown in ericaceous potting mix, consider mulching with oak leaf compost or pine needle mulch. Monitor the size of your hydrangea and pot up into a larger container as soon as it begins to outgrow its old one. Potted Hydrangea Care Watering When it comes to caring for hydrangea in pots, the most important thing is watering. It is very important to ensure that the growing medium remains moist (but not waterlogged) throughout the growing season. Feeding You should also replenish the mulch around your pot grown hydrangea each spring. No additional feeding will usually be required. It is important not to provide excessive nitrogen as this can encourage leafy growth and flowering may not be as prolific. One thing to note, however, is that if you are growing a hydrangea that you are trying to keep blue, feeding in summer with low phosphorus, high potassium organic feed can help. You should also water with rainwater where possible. Pruning When and how you prune your hydrangea will depend on which variety you are growing. H. quercifolia will usually only require light pruning in spring – to remove old or damaged stems and old flowers, and perhaps to restrict size a little. H. paniculata should be cut back early in the spring. Pruning is not essential, however, cutting back will restrict growth and keep your plant neater and more compact. This type of hydrangea produces flowers on new wood, so you can prune back quite heavily on last year-s growth. Aim for a healthy framework 30-60cm high. Prune each stem just above a pair of healthy buds. H. macrophylla should be pruned in the middle of spring. They produce their flowers on old growth, so pruning back too hard could mean that you lose the flowers for the year. Leave the dead heads over winter, to protect the new growth, then cut these back carefully to the buds which are forming underneath each one – this is where the new flowers will form. If your plant is overgrown, you can also cut some stems back to the base.
Learn more
Don't Damage Your Choisya Plant - Only Prune Once All Risk Of Frost Has Passed
IN THIS GUIDE Why Prune Choisya? Deciding When To Prune How Far Back Can Choisya Be Pruned? How To Prune Choisya ternata Choisya is a beautiful bush bursting with adorable white flowers. The delicate yet confident colour palette makes this plant a popular choice for British gardeners for a couple of reasons. Firstly, they’re charming to look at. Second, they pair well with all sorts of colours and shapes thanks to their non-dominating aesthetic, making them a flexible and versatile choice when planning your garden. With so many flowers though, some gardeners find themselves wondering how best to prune this buoyant bloom. If you’ve got a choisya and you’re unsure how to prune it without causing damage, or just need a little more info on the best time of the year for your pruning session, read on. We’ve pulled together some fantastic tips to help you take the best care of this luxurious plant. Why Prune Choisya? This is a common question amongst gardeners with choisya. First, let’s take a look at the reasons why you might want to prune this plant – Your choisya is getting too big, and is encroaching into other areas of your garden. Perhaps over pathways, making them tricky to walk on comfortably. Your choisya is growing out of its desired shape. As a shrub, keeping this plant a certain shape is not only possible but maybe even desirable. If you’ve got topiary ambitions, you’ll find yourself pruning more often. If neither of these concerns is relevant, you won’t really need to prune choisya much. The plant can do without it (unlike some other ornamental varieties that suffer if left unkempt). This plant can get a little unruly! Deciding When To Prune There are a couple of things to keep in mind when pruning: firstly, new growth will occur at the pruning site. Because one of the goals of pruning is to reduce the size of the plant whilst encouraging fresh new growth, you need to ensure you prune at a time of year where this will take place. This leads us to our second consideration: frosty spells will damage newly pruned sites, potentially killing off any new growth. With this in mind, the answer to the question of when to prune choisya becomes “after any risk of frost has passed!” How Far Back Can Choisya Be Pruned? This plant can take quite an aggressive pruning, up to a maximum of half of its size. It’s usually recommended to prune more frequently and less drastically, but you do have options if you’ve left it longer than the ideal amount of time between haircuts. How To Prune Choisya ternata Now we’ve looked at the whens, let’s take a look at the how. Pruning choisya isn’t too different from pruning other evergreen shrubs. You’ll just need a sharp gardening tool like pruning shears, secateurs – or, if you don’t have those, a good pair of scissors. Take care to use one clean cut where possible rather than hacking away. The more exposed the cut, the more likely it is that disease will take hold; a clean-cut has the smallest possible incision site. Once pruned, your choisya will appreciate a bit of fresh compost around the roots. “I always like to mulch a tree or shrub when I’ve completed a pruning job,” shares Master Horticulturist Colin Skelly. “Although not always strictly necessary, it feels right and ensures that plants that aren’t in a regular routine of annual mulching receive some organic matter over time. “On free-draining soils, it will help with moisture retention, whilst on clay soils, it will help with drainage.” It’s not just human visitors that will find this plant charming! This nutritional boost will expedite new growth, and should lead to a friskier, healthier bloom.
Learn more


