

Growing

Here's A Blend Of Native And Non-Native Shrubs Best Suited To Garden Borders
IN THIS GUIDE Shrubs For Spring Natives Non-Natives Shrubs For Summer Natives Non-Natives Shrubs For Autumn Shrubs For Winter Choosing Flowering Shrubs For Your Garden References There are so many beautiful flowering bushes for UK gardens that it can be difficult to know where to begin. In this article, we will explore some native options, before looking at some of the best non-native plants that look beautiful and will thrive in many different gardens. The reason why you might want to first consider native flowering bushes is that native plants will often be best suited to local growing conditions. They can also be a boon for native pollinators, and other native wildlife, which has long evolved alongside these species. However, non-native species can be good for pollinators too, and can thrive as long as the right plants are chosen for the right places. “In geological time, the UK is only just recovering from the last ice age,” says Horticultural Consultant Colin Skelly. “Its native flora is therefore quite small, restricted to those species that have spread there in the last 10,000 years or so. “Whilst some species of bugs are specialists and will favour native plants, many are generalists and will happily utilise non-native plants, many of which extend the resources typically available when restricted to native species alone. “A blend of native and non-native shrubs is, therefore, a good approach to take for supporting biodiversity in the garden.” Shrubs For Spring In the UK, there are a number of small trees and shrubs that can be grown as bushes as part of a hedge, or towards the back of a garden bed or border. These all flower in the spring, and can be very attractive, but the main reason to grow these is for their utility to native wildlife. All of the below except broom have edible uses, and broom is an attractive and useful nitrogen-fixing plant.1 Natives Blackthorn / Sloe Broom Elder Hawthorn Hazel Non-Natives Great non-native options to consider are numerous, but some which I personally favour are: Forsythia Prunus triloba Ribes sanguineum Skimmia japonica Weigela Shrubs For Summer Summer is, of course, a time of plentiful blooms – and shrubs can flower, either conspicuously and showily, or more quietly over this period. Aside from native roses, the flowers of native bushes at this time of year are, perhaps, not really show-stoppers – but these blooms can look pretty, and be of benefit to all the insect life in your garden. These native bushes can also provide ornamental value throughout other seasons of the year. Natives Buckthorns Dogwoods Viburnums Wild Privet If you are looking for more showy and extravagant blooms from your summer flowering bushes, then non-native options will be the way to go. There are of course a staggering number of summer flowering bushes to choose from. Non-Natives Some of my own favourite non-native summer flowering options are: Buddleja Ceanothus Deutzia Lavender Non-native roses Rosa rugosa Shrubs For Autumn Many of the native bushes, though they do not flower in autumn, look great in the autumn months. Many of the options listed above have beautiful (and sometimes edible) berries, nuts or fruits and many have attractive autumn foliage. That adds plenty of interest throughout the year. However, if you would like bushes that can flower well into autumn, non-native options to consider include: Abelia x grandiflora Ceratostigma willmottianum Clerodendrum trichotomum Fuchsias Hebe (e.g ‘Autumn Glory’) Shrubs For Winter Gorse is one native bush that will flower in the winter and into spring. (It is also a nitrogen fixer).2 Dogwoods are also great for winter interest with their colourful branches. Other winter flowering shrubs include: Chimonanthus praecox Mahonia japonica / Mahonia x media Stachyurus praecox / S. chinensis Viburnum (e.g. V. tinus or V. x bodnantense ‘Dawn’) Winter Flowering Jasmine Choosing Flowering Shrubs For Your Garden The list above is a highly selective one – there are many more shrubs to consider. But when choosing flowering bushes for your garden, it is important to pay attention to the conditions in your bed or border, and to choose plants accordingly. When choosing flowering bushes for garden borders, be sure to look at: The climate and microclimate in your garden, and whether shrubs you are considering are hardy enough to cope. Whether you need shrubs for full sun, partial or deeper shade. The soil type, conditions and pH in your garden, and whether this suits the bushes you are considering. Whether the site is sheltered or exposed. The space available, and how large the flowering bushes you are growing will become. It can also be a great idea to think about how flowering bushes in your garden can be useful as well as beautiful. Consider those with edible fruits, nuts or berries, for example – some bushes can also usefully be pruned or coppiced for their wood, and can generate biomass for composting and mulches in your garden. It can also be helpful to think about flowering bushes in terms of how they will look, and how they will fit in with the general and overall look and feel of your garden. Are you looking for flowering bushes to give a wild and natural look? Or do you prefer your garden to feel much more manicured and tamed? Some flowering bushes will best suit the former, while others are neater in form and better suited to the latter. You should think about how your choices for flowering bushes will fit in with the other flowers and plants you wish to grow, or are already growing. Think about the above and you should be able to find the perfect flowering bushes for your garden borders, no matter where you live, and no matter what exactly you are looking for. References 1. Wassilieff, M. (2007, September 24). Story: Forest succession and regeneration. The Encyclopedia of New Zealand. Retrieved March 15, 2023, from https://teara.govt.nz/en/photograph/11900/root-nodules-on-native-broom 2. Gorse Tales – Ranger’s Blog. (2022, February 4). Kyle and Lochalsh Community Trust. Retrieved March 15, 2023, from https://www.lochalsh.uk/gorse-tales/
Learn more
How To Grow Erica Arborea ‘Tree Heather’ With Some Interesting Varieties Worth Trying
IN THIS GUIDE Overview Why Grow Tree Heather? Tree Heather Varieties How To Grow Tree Heather Tree Heather Care Common Problems References There’s heather, then there’s tree heather. And although the names are similar, the two plants are very different in terms of appearance and habit. Whereas heather keeps a low profile and bursts forth in an exciting array of pinks and purples, tree heather cultivars riff on a theme that’s close to our stereotypical expectation of what an evergreen should look like: proud, green, and angular. Between the varieties available you can find some truly astounding specimens, at home in any garden. Tree heather, also called tree heath (a useful way to distinguish it from regular old heather) goes by the Latin name of Erica arborea. It’s an evergreen, and the family includes shrubs and small trees. Overview Botanical Name Erica arborea Common Name(s) Tree Heather Plant Type Shrub / Hedging Native Area Southern Europe, North Africa, Central & Eastern Africa Hardiness Rating H4 Foliage Evergreen Flowers Small fragrant white flowers in long panicles When To Sow March, April, September, October Flowering Months February, March, April, May When To Prune May, June The plant originally hails from various parts of Africa and Southern Europe, but has now become naturalised in other parts of the world.1 It’s popular as an ornamental plant in British gardens thanks to the aesthetic variety on offer. Why Grow Tree Heather? Tree heather is a hardy and attractive plant with varieties coming in a wide range of shapes and sizes. If you’re looking for something to bring a little visual interest to your garden, and you’re attracted to the general evergreen aesthetic, then tree heather could be right up your street. Tree heather wood – also called briar – is also incredibly hard, and lends itself excellently to woodworking. Tree Heather Varieties Here are three varieties that showcase the best the plant has to offer. These cultivars have all been awarded the Royal Horticultural Society’s Award of Garden Merit (AGM), indicating that they are well suited to growing in the UK. E. arborea ‘Albert’s Gold’ In our opinion, ‘Albert’s Gold’ aligns most closely with the image that comes to mind when someone mentions evergreen trees. It boasts triangular fronds of light green leaves, with spikes that carve a space for themselves in your field of vision. They’re like a scaled-down version of the enormous fir trees you’d expect to see in a rugged Canadian landscape. E. arborea ‘Alpina’ ‘Alpina’ shares many visual characteristics with ‘Albert’s Gold’, except the leaves generally weigh in quite a bit darker on the green spectrum. Grown together with ‘Albert’s Gold’, ‘Alpina’ showcases the rich variety of colours offered by tree heather. Grown alone, it’s another way to capture and replicate the rugged flora that can be hard to achieve in UK gardens. E. arborea ‘Estrella Gold’ ‘Estrella Gold’ is a little daintier, compared to the rugged varieties we’ve shown already. Each leaf has a small white centre, creating a speckled, almost snow-like effect when seen from afar. This cultivar also grows to a far smaller maximum height than Albert’s Gold and Alpina, demonstrating the versatility available between the different types. How To Grow Tree Heather Generally speaking, tree heather is hardy and sturdy; being able to take whatever British climate sees fit to throw at it. There are many things you can do to give your plants the best chance at a long and healthy life, however. Where To Grow Choose a spot with acidic soil that can drain freely. Soil that retains moisture, or is neutral or alkali, will stifle or even kill off further tree heather growth. This plant likes full sun or partial shade, and will do well growing under the canopy of a bigger tree. In fact, the shelter offered by another tree will promote better growth because, while hardy, E. arborea prefers not to be fully exposed to the elements. Planting Tree heathers are grown from younger plants, rather than from seed. Planting yours out is simply a case of finding the right spot in your garden (see the next section), and taking the following steps. First, dig a hole a couple of times wider than your rootball, to a depth that allows the top of the rootball to align with the soil surface. Next, remove your well-watered plant from its pot, tease apart the roots from the clumped root ball and plonk it into the hole. Depending on the variety you’re growing, you may want to place a stake at this stage. This is a structure made of wood or similar that provides support for the growing plant, making up for the strength that the root system would provide to a fully-established plant. Finally, fill in the hole, ensuring that the soil is packed down tightly enough to fill air pockets, but not so tightly that you crush the plant. Tree Heather Care Feeding When planting out your tree heather, we advise working a few centimetres of compost well into the soil in the area your plant will go. Be generous with the compost, taking into account the eventual size of the mature plant. Enriching the soil with nutrients early on will give the developing root system the best possible shot at getting what it needs to grow big and strong. Watering With evergreens, you need to stay vigilant. In the first season, check in often to see whether the roots are moist. You’ll want to keep them well-watered to promote the strongest growth. Then, through winter, you need to take into account the water lost through the leaves – much more of a consideration for evergreens than other plant types. Keeping your tree heather well-watered throughout the year, rather than waiting for it to show signs of thirst before watering, will best set you up for success. Pruning As a shrub, tree heather will do well with regular annual pruning to keep it in shape. The best time of year to do this is late spring: after the frosts that may damage freshly cut areas, and with enough time to allow new growth to cover up most of the visual evidence of pruning. This said, however, pruning isn’t required to keep the plant alive – tree heather falls into RHS Pruning Group 8, meaning it can do without.2 If you do decide to prune, do so after flowering. Remove any diseased or damaged shoots, and then thin out sections that may have become crowded. “Tree heathers can become straggly, especially if not annually pruned,” shares Master Horticulturist Colin Skelly. “Branches can be pruned back to around 30cm from ground height if required after flowering. “Plants will respond by putting on fresh growth, which should be tip-pruned to develop bushy growth.” Common Problems Tree heather is a hardy plant that’s not likely to attract any pests or prove particularly problematic. The most likely issue is a thirsty plant struggling to thrive, but if you follow the steps in the watering section, you should be able to control against that. Phytophthora Root Rot No, that’s not a typo. Phytophthora is a species of fungus that can wreak havoc on the roots of certain tree heather varieties. Rot caused by phytophthora is hard to distinguish from that caused by overly-moist soil – over time, rot reduces the roots’ ability to draw nutrients from the soil, leading to wilting, discolouration, and general poor health. Unfortunately, once you see symptoms above ground, things are usually too far gone below ground to salvage the plant. Keeping soil well-drained to control against rot caused by waterlogging should help you be more certain that any rot you do encounter is Phytophthora. In this instance, you need to remove and destroy the plant, then to replace the topsoil in the affected area. While drastic, this is the best solution in ensuring that future outbreaks do not occur. Whether you go for the forest-in-miniature ‘Albert’s Gold’, the daintier and more delicate ‘Alpina’, or one of the many other E. arborea varieties, tree heather is sure to make a good impression. We can assure you that you won’t look back, whatever the heather. References 1. Erica arborea. (n.d.). Kew Royal Botanic Gardens. Retrieved March 14, 2023, from https://powo.science.kew.org/taxon/urn:lsid:ipni.org:names:328204-1 2. Shrubs: pruning evergreens. (n.d.). Royal Horticultural Society. Retrieved March 14, 2023, from https://www.rhs.org.uk/plants/types/shrubs/evergreen-pruning-guide
Learn more
Growing Potentilla ‘Cinquefoils’: A Shrub Suited To A Wide Range Of Garden Backdrops
IN THIS GUIDE Overview Why Grow Potentilla? Potentilla Varieties How To Grow Potentilla Plant Care Common Problems References Some plants have so many names that it can be hard to keep track of them, and potentilla is one such candidate. You’ll see this plant variously referred to as potentilla, cinquefoil, five fingers, silverweeds, and more. Throwing further confusion into the mix is that many varieties are visually similar, centred on a theme of being small, green shrubs with vigorous bouquets of yellow flowers. What is certain, however, is that potentilla makes a pretty addition to any garden. Overview Botanical Name Potentilla Common Name(s) Cinquefoils Plant Type Perennial, Annual, Shrub Native Area Northern Hemisphere Hardiness Rating Mostly H7 Foliage Deciduous Flowers 5 petalled flowers appearing over a long period When To Sow March, April Flowering Months June, July, August, September When To Prune August, September This genus contains an undefined number of plants – with estimates ranging by source from three hundred to over five hundred – and there’s contention about the characteristics which should define membership. As a current guide, Kew lists 501 species of Potentilla.1 Some potentillas have small berries which resemble strawberries – a plant to which they’re closely related – but the fruit is small and inedible. All varieties have an elegant floral bloom, yet while the majority are yellow, the overall colour palette varies wildly. Why Grow Potentilla? For a budding British gardener, this is the more important question. We advocate growing potentilla because it is attractive, varied, and well-suited to a wide range of garden backdrops. P. erecta Their low shrub profiles lend themselves nicely to borders, while their bold colouration adds visual interest to flower beds and displays. Potentilla Varieties There are potentially hundreds of different types of Potentilla. Each of the three varieties below have been awarded the RHS Award of Garden Merit: an accolade indicating particular suitability to growth in British gardens. If you’re wondering which potentilla to grow, you won’t go far wrong with one of these. P. fruticosa ‘King Cup’ What do we think of when we think of royalty? Bold, regal colours, confidence, and more than a smattering of gold. With these criteria in mind, it’s not hard to see where ‘King Cup’ got its name. The rich yellow bloom that bursts forth in summer and sticks around well into autumn sets the potentilla scene perfectly. P. fruticosa ‘Medicine Wheel Mountain’ Here we have a mat-forming shrub which spills intriguingly out onto the ground, leaving a green-yellow covering. The dimensions and overall aesthetic of the mat would work well with a rock display, or to provide attractive ground cover somewhere in your garden that doesn’t require much of a vertical contribution. P. fruticosa ‘Primrose Beauty’ This variety of potentilla has white flowers with bright yellow centres, rather than fully yellow flowers. With ‘Primrose Beauty’ you can get a good idea of the variations available within the potentilla colour palette. Not every garden needs more yellow, but we think that any garden could do with a dash of potentilla. How To Grow Potentilla If you’re sold on potentilla and want to get one growing in your garden, the next sections are for you. We’ll outline where to plant it, how often to water it, methods of propagation, and much more. Where To Grow The answer to this question will depend on the variety you choose. Potentillas range in height from a few inches to several feet, and have a similarly broad range of widths. Take time to understand how big your variety is likely to get and choose a space in your garden accordingly. P. fruticosa ‘Tilford Cream’ In terms of preferred climate and prospect, potentillas are very hardy and can withstand lots of buffeting from the elements. This makes them popular choices for beachfront properties, or gardens that are very exposed. Your potentilla will do best in soil that can drain well, with neutral or slightly acidic pH levels. A spot with full sun will help to nurture more flower growth, so bear this in mind if you’re growing potentilla especially for its floral bloom. Plant Care Watering To encourage strong root growth keep your potentilla well watered during its first year. After that, the plant is sturdy enough to tolerate drought, but will appreciate watering in particularly dry conditions. To insure against various potential health problems (addressed in detail later), try your best to water the roots and soil only, rather than spraying the entire plant. Damp foliage and leaves can cause problems if they’re unable to dry out fully. Pruning You don’t need to deadhead the flowers on your potentilla, as they’re able to take care of themselves. Because of their shrubby nature, potentillas lend themselves well to pruning to keep them in shape. Don’t do this until your plant is at least three years old, however, to ensure it’s strong enough to withstand the treatment. Prune back older plants by a third of their total growth every few years to keep them tame and healthy. “As well as the shrubs, there are many species and cultivars of perennial Potentilla,” shares Colin Skelly, a Master Horticulturist. “These look fantastic in borders mixed with other perennials and they are popular in cottage garden-style planting. “Flowering from late spring, these perennials will benefit from deadheading, which will help them to flower right through summer and even into early autumn.” Propagation In the height of summer you can take cuttings from your potentilla which, when cared for properly, will flourish into new plants. Keep an eye out for new growth free of flowers with woody stems but around 15cm of soft, green growth. Then simply plant the cutting a few centimetres into a pot filled with compost, taking care that the leaves don’t touch the compost. Cover with a plastic bag for the first few weeks, and then remove the bag once the cutting has had a chance to put out roots. In the next growing season your potentilla will be ready to be transplanted into your garden, following the steps outlined above. Common Problems While generally very hardy, there are a few problems that can affect potentilla. Here’s what to look out for: Mildew / Leafspot If you’re too enthusiastic with watering your potentilla, it’s possible the plant will not be able to dry out properly. Damp leaves and foliage are particularly susceptible to mildew and similar types of rot. Removing affected parts of the plant before the problem spreads is your best means of control, but in this instance, prevention really is the best cure. Root Rot In a similar vein, if the soil is unable to drain properly, your potentilla’s roots may begin to rot. If this happens, it’s very hard to reverse the course of the rot, and often the plant must be discarded. Aphids These pesky green critters love to feast on the sweet fluids inside the leaves and stems of pretty much any plant they can get their hands on (figuratively speaking). If you notice an unwelcome gathering of green fiends on the leaves of your potentilla, here’s what to do: Attempt to remove them by hand, staying vigilant for the next few days to see whether they return. Introduce predatory bugs like ladybirds or similar, who will keep the aphid populations in check while not eating your plants. Use a pesticide to remove existing populations and discourage further visits. We recommend going for something gentle and humane, although you have a wide range of options when choosing such a product. The myriad plants under the potentilla banner offer an exciting and rewarding set of blooms for your garden. Thanks to their hardiness, flexibility, and comprehensive range of shapes, sizes, and colours, there’s a member of the potentilla family well-suited to the needs of any and all gardeners. Take care to choose the right spot and nurture your plant to health, and you’ll be rewarded with a mature bloom that largely takes care of itself. References 1. Potentilla. (n.d.). Plants of the World Online. Retrieved July 31, 2023, from https://powo.science.kew.org/taxon/urn:lsid:ipni.org:names:30000237-2#children
Learn more
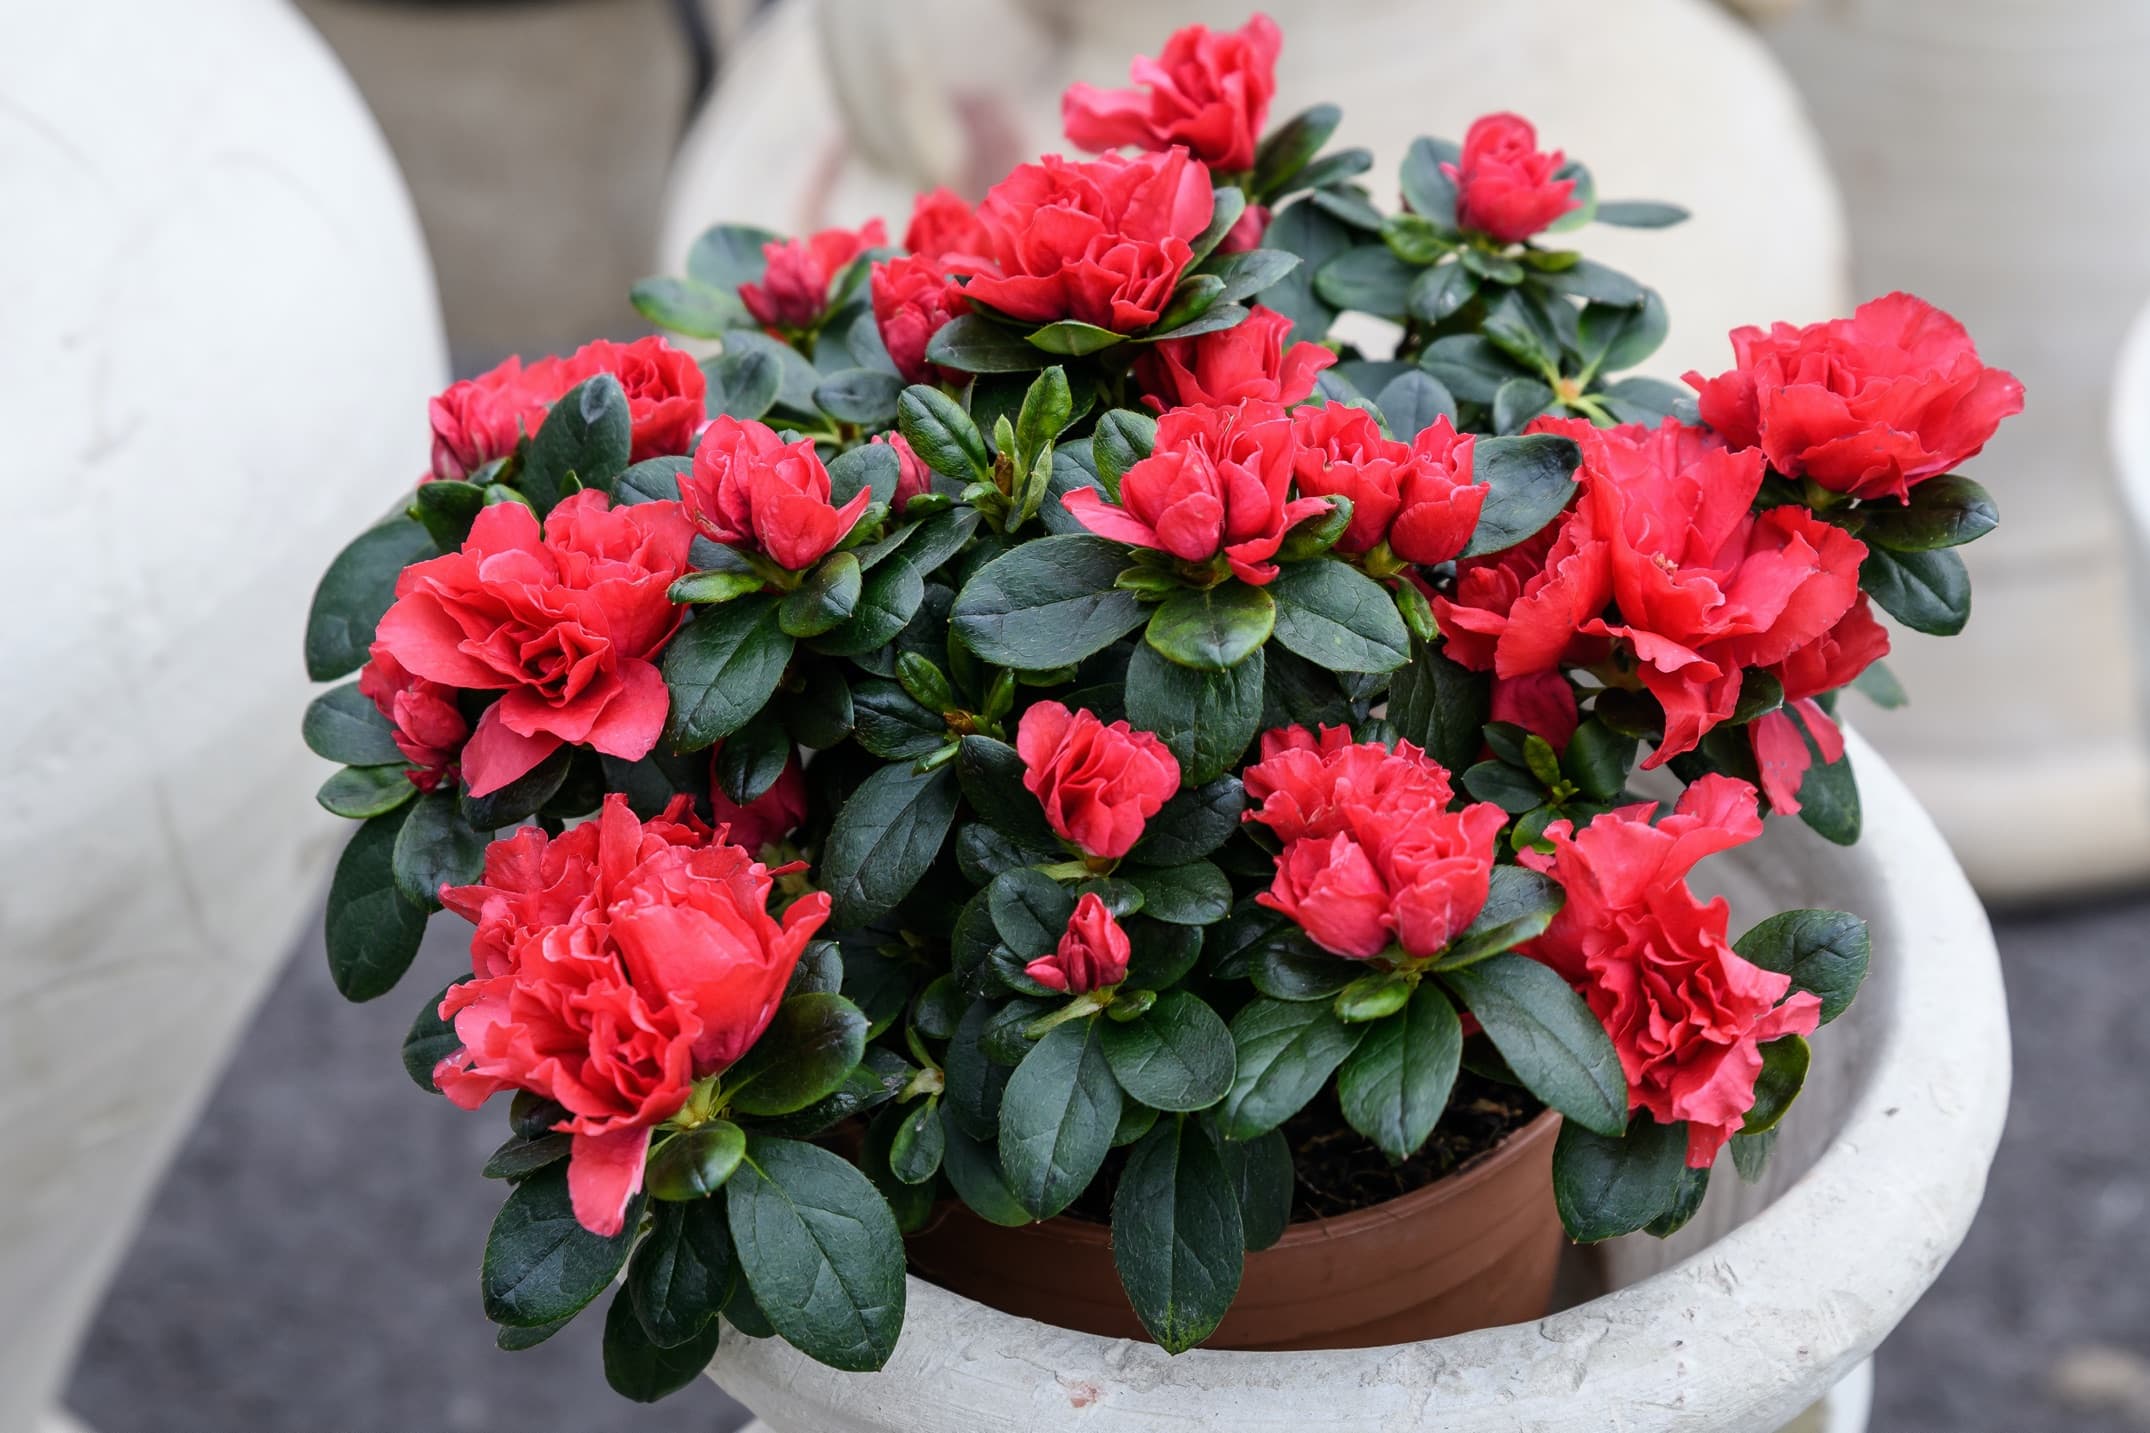
'Keep The Soil Moist' - Gardeners Share Important Azalea Growing Advice
IN THIS GUIDE Overview Hardiness How To Grow Azaleas Azalea Plant Care Soil Requirements Watering Sunlight Pruning References Among the most prized and celebrated of flowers, many would say that an Azalea in full bloom represents the Floral Ideal. Azalea is a much-loved plant in the Deep South, many other American states, Japan, China, and the Koreas. In fact, the Azalea is an important and integral part of both the landscape and the culture in each of these very different regions. It is a shrub, deciduous or evergreen, that bears among the most diverse, attractive, and showiest flowers of all. Overview Botanical Name Rhododendron Common Name(s) Azalea Plant Type Shrubs (some are Houseplants) Native Area Asia, North America Hardiness Rating Varies by type Foliage Evergreen Flowers Bright blooms in Spring When To Sow March, April, May, September Flowering Months March, April When To Prune June Azaleas have been hybridised and cultivated for centuries in China and Japan, and the species are not of as much importance to gardeners as the pre-eminent groupings, series, and cultivars. Although Azalea flowers are considered decorative and ornamental, these gorgeous things are themselves decorated and embellished. To begin with, no matter what hue the colour may be, it is almost always marvellous, from the palest flush of pink to the most saturated vermilion-red hue. The form and shape of the flowers is second to none with gently-curved but somewhat different tube-funnel shapes. As for those decorations and embellishments, we see curled petals, frilled petals, and ruffled petals; hose-in-hose and true double form; deep-hued flecks, contrasting streaks, and all manner of gradating, blotching, flaring, and sectoring. Hardiness Azaleas are very wide-ranging genera of plants with different characteristics. As hybridisation and cultivation have proceeded, newer and newer Azalea varieties combine traits from different parental or genetic lines. In sunny regions, a majority of Azalea species set up shop under and alongside larger trees where they can enjoy sun in the morning and avoid it in the afternoon. These plants also like filtered sun and dappled sunlight through tall trees. Azaleas grow in quite a range of habitats: some species grow in cool, dry regions on mountainsides in China and Japan. Large swaths of Japan’s Mount Katsuragi and Mount Tokusenjo, to name just two, get covered with Azaleas every spring.1 Other species grow in warm and moist regions – for example, Swamp Azalea and ‘Mountain Azalea’ grow in and along the swamps and waterways of Lousiana, Florida, and other South-Eastern States. Given this variance, the USDA Hardiness Zones of the various Azalea varieties range from down to 3 up to 11 (RHS Zones H1C to H7). How To Grow Azaleas As an exceptionally diverse set of plants, Azaleas can be used for nearly every single home, garden, and landscaping purpose from an accent in a rock garden and a single plant in a decorative container to wide boundary hedges and large landscaping bushes. An azalea that bears a good-sized multi-hued flower can be a superlative single specimen plant; other Azaleas can be just as terrific for mass plantings. A particular Azalea may be selected (or rejected) for a specific purpose as suggested by the characteristics of that variety. Besides the hardiness zone, factors that you need to take into consideration include: Rate of growth Ultimate size of the plant Habit Evergreen/deciduous Size of the flowers Fragrance/scent Colour and patterning of the flower Azaleas are shallow-rooting plants with evergreen varieties particularly so, and planting any Azalea even a little too deep in the soil can actually cause the plant to die. Indeed, plant an Azalea so that the top of the root ball is 2-3cm above the surface of the soil. Azalea Plant Care Soil Requirements In general, all Azaleas need well-drained soils. A sand- and humus-based loam with little clay or silt would work very well for all Azaleas – these plants will not flourish in heavy clay soils. All Azaleas thrive in acidic soils, ranging with a pH Slightly Acidic to Moderately Acidic. Watering In sunny or warm regions in the summer, the soil should not be allowed to dry out; it should be kept moist. Mature Azaleas of most cultivars are fairly drought-tolerant but if they go for a significant period without water, they will not bloom profusely or may not flower at all. Prolonged drought will cause them to shed their leaves and wilt. Though you may read that Azaleas are ‘drought-tolerant’ be aware that they are not properly or strictly drought-tolerant plants; after all, they are shallow-rooted. Azalea varieties that are just barely cold-hardy to your region should be mulched up to soil level before the onset of winter. Sunlight Though Azaleas are considered ‘shade-loving plants,’ in cool and cloudy regions, like much of the United Kingdom, Azaleas can be grown in full sun. In warmer, sunnier regions Azaleas are best placed in locations where they get shade from the strong afternoon sun. However, they must get sun in at least the morning or late afternoon. In the United Kingdom, full sun is preferable for Kurume and Mollis Azaleas. In most geographic regions dappled sunlight filtering through tall trees is a very good option for most Azaleas. In any region, white and light-coloured Azaleas should be protected from full sun or the afternoon sun. Pruning You may deadhead Azaleas for three reasons: encouraging new blooms, for aesthetics, and if you wish to avoid self-seeding. Of course, if you would like to see new and unexpected Azalea varieties sprouting up in your garden, allow some withered blooms to go to seed. In general, all Azaleas – all groupings – need no more than light pruning and trimming. For the most part they have ‘neat’ habits and form well-branched plants or bushes. Severe pruning – unless necessitated by some unavoidable reason such as pest infestation – will probably negatively affect the aesthetics and growth habit of the plant. By all means trim overgrown areas, or straggly or stray branching, doing so judiciously to the extent of one-third to one-half of the length of the branch. Some deciduous varieties do require such pruning albeit infrequently. “Whilst Azaleas generally require little pruning, if your Azalea is old and becomes straggly, you can opt to regenerate it using renovation pruning,” shares Colin Skelly, Master Horticulturist. “The most cautious option, which I would use in most situations, would be to remove one third of the branches to around 30cm of the ground in winter. “You should see some new growth emerge during the spring and summer. “This is a green light to remove a further third of the branches each of the next two years, completing the regeneration. “If new shoots do not emerge in year one, cease further pruning and focus on mulching and irrigating to promote new growth.” Azaleas start to develop buds in about two months from the end of flowering season for the following season’s flowers so pruning Azaleas at or after this time would cause a reduction in the flowers you see the following year. If you have grown an Azalea hedge or bush, you may wish to trim it as you would any other hedge or bush using hedge trimmers but Azaleas are not amenable to such trimming or shaping. If this is attempted, flowering will be negatively impacted and the least-desired outcome will be affected as subsequent plant growth will be unpredictable and unaesthetic. An Azalea hedge will need to be pruned and trimmed as would a plant, that is, by picking and choosing branches, and then either very selectively pruning them or cutting them back by no more than half their respective lengths. References 1. Japan National Tourism Organization. (n.d.). Mt. Katsuragi Azalea. Travel Japan. Retrieved March 10, 2023, from https://www.japan.travel/en/spot/43/
Learn more
Growing Salix Integra: 'Perfect For A Small Garden, With Great Autumn Colour'
IN THIS GUIDE Overview Why Grow Salix Integra? How To Grow Salix integra Common Problems Integrating A Hakuro-Nishiki References This intriguing deciduous shrub is a dwarf member of the Salix genus, more commonly known as willow. If you’re captivated by the willowy aesthetic but are in the majority of Brits whose garden is far too small to accommodate one, then it’s time to get yourself acquainted with Salix integra. “Salix integra is perfect for a small garden, providing the horticultural highlights of the Willow family but taking up a fraction of the space of other species,” shares Master Horticulturist Colin Skelly. “As well as spring catkins and attractive young growth, it has good autumn colour too. “If you have moist soil or a stream bank, this is an ideal shrub or small tree. The only downside is that it isn’t really suitable for dry and sandy sites unless irrigation is on standby in summer.” Boasting small white catkins, and with its canopy held proudly aloft by strong branches, this shrub makes a fantastic visual and ambient contribution to any outdoor space. Grown alone, or incorporated into displays with other flowers and plants, you’re sure to enjoy the visual treats it offers, with the main season of visual interest taking place in late April and early May. Overview Botanical Name Salix integra ‘Hakuro-nishiki’ Common Name(s) Flamingo Willow Plant Type Shrub / Tree / Hedging Native Area North-East Asia Hardiness Rating H5 Foliage Deciduous Flowers Colourful foliage, yellow catkins When To Sow September, October Flowering Months April When To Prune February, March This dwarf willow cultivar is known as ‘Hakuro-nishiki’, which translates from Japanese as ‘Dappled Willow’. The name references the pink and white dappled markings on the leaves, which are a real treat to behold. The species is a native of northeast Asia, including Japan, Korea and Mongolia.1 Visually, it aligns well with a stereotypical Oriental floral aesthetic: gentle pinks and whites, with delicate leaves and petals. Why Grow Salix Integra? Many gardeners choose to grow a Hakuro-nishiki because of its size and appearance. The willow family has some strongly characteristic members, including the weeping willow that we’re all familiar with. Most varieties, however, are far too big to grow in the average British garden, meaning that those wanting to incorporate a willow are left to choose from just a small set of suitably sized varieties. S. integra sits comfortably within this bracket. S. integra’s popularity as a dwarf willow, along with how well-suited it is to grow in British conditions, has earned it the Award of Garden Merit from the Royal Horticultural Society. So, if you’re looking for an attractive, easy-to-grow, and captivating shrub for your garden, S. integra is the way to go. How To Grow Salix integra Hakuro-nishiki is most often sold grafted onto the stem of another willow, because its own stem growth is prone to be relatively weak. Grafting combines the beauty of S. integra with the structural integrity of a stronger plant, giving your shrub the best chance at sturdy growth. Once planted, the shrub is fairly easy to care for. You’ll need to prune occasionally and keep an eye on soil moisture levels, but there are no quirks to be aware of that make this plant hard to grow. Where To Grow When you’ve bought your grafted Salix plant, you’ll want to find a spot in your garden that sits in full sun or partial shade. Full sunlight isn’t required, but you will get to enjoy the most attractive colouration if your plant gets more sunlight. These trees grow naturally near flowing water, so they can tolerate more moisture than some others, but the soil they’re planted in must be able to drain well to prevent damage to the root system. In terms of pH level, this plant isn’t fussy. It will grow in acidic, alkaline, or neutral soil. Planting Tips When you’ve found the right spot in your garden, remove your grafted shrub from its pot, and place into a hole about twice as wide as the root ball. The hole should be about the same depth. To prepare the hole, add some blood, fish, and bone fertiliser before planting the Salix. Gently pack the soil in around the plant, ensuring it’s packed tightly enough to prevent much movement. The plant should be about the same depth in the ground as it was in the pot, to reduce the risk of shock. Leave around 60cm clear in each direction from the S. integra to give it space to grow. You can grow plants in the soil around and beneath your shrub, but let it get established first. Fertilising We mentioned adding blood, fish, and bone to the soil in the hole you plant your S. integra in. This will ensure good nutrition for the fledgling shrub. For ongoing care, S. integra likes a couple of inches of mulch each spring. Apply this around the base of the shrub, leaving a small ring clear immediately next to the trunk. Mulch will nourish your plant, but more important is the role it plays in conserving moisture and cooling the soil slightly. For additional nutrition, you can work some slow-release fertiliser into the ground surrounding your plant. Watering This plant can be sensitive to drier conditions, so keep an eye on the moisture levels. Once established, the weather should provide enough moisture to keep it healthy, but during particularly dry spells you may want to water it yourself. Immediately after planting, water the soil around the base of your S. integra. This has the combined benefit of providing moisture, and in helping to pack the new soil down, keeping the plant stable. Pruning It’s possible to get a second yearly burst of beautiful pink bloom if you prune your S. integra properly. The first thing to keep in mind is that you should avoid pruning in the first spring after you plant out your shrub. Pruning this soon after planting will cause more harm than good, and you’ll see much better results if you wait until the plant is established before taking the secateurs to it. Prune properly, and you’ll get two beautiful annual displays The first time you prune your Salix, in the spring two years after the autumn you planted it, cut back by a third. Remove sections that are touching the ground. The next two times, cut back by half and again remove sections touching the ground. Thereafter, you’ll be working with a plant with a fully developed root system. At this stage in its lifespan, the S. integra can tolerate the most pruning. Trim back your shrub to 60cm in height – while it may feel severe and even counterproductive to trim away so much, doing so will encourage the largest amount of growth the following spring. On top of this annual spring pruning session, you can cut back each stem by 30cm each July. This mini-prune will encourage another beautiful bloom later in the year. Common Problems While unlikely, this plant is liable to experience various problems. Familiarise yourself with the pests and diseases in this section to ensure quick and effective action should your plant be unlucky enough to experience problems. Aphids These suckers will quite literally suck the sap right out of the leaves of your shrub or tree, causing ongoing stress. They’re small and green, but visible to the naked eye if you look carefully. Try to brush away individual aphids or small groups, but if you notice them persevering on the plant nonetheless, consider moving on to more drastic measures. Such measures include introducing ladybirds or other predatory bugs to eat the aphids, or using pesticides to kill them off. Caterpillars Baby butterflies are far less majestic and attractive than their more mature cousins. Instead of fluttering daintily near your S. integra, they’ll have no shame munching its leaves and damaging its growth. If you notice caterpillars, follow the same steps outlined above for aphids. With caterpillars you also have the added advantage of being able to remove them before they hatch, preventing any damage to the vigilant gardener’s plant. Canker This malady is caused by fungal spores, which invade a plant and cause spots and scabs. If you see black spots in spring or summer on an otherwise-healthy looking shrub, it may be indicative of infection. As the disease progresses, the blemishes make their way along stems and toward the main trunk. Each blemish puts forth spores in autumn which are then spread around the plant and to surrounding plants, causing further damage. Sadly it’s not possible to treat existing cankers, but you can prune away infected sections and apply fungicides to nearby growth to reduce the risk of spread. When it comes to canker, vigilance and quick action is of paramount importance. Rust Another fungal disease, this time causing rust-colour patches on leaves and plant damage as a result. By picking off infected leaves as soon as you see damage, you may be able to stop the spread. If you weren’t quick enough, however, various fungicides are available to keep things in check. With rust, prevention is the best cure; avoid elevating the nitrogen content of the soil around your S. integra, as this promotes the type of growth most prone to rust. Integrating A Hakuro-Nishiki While subtle, having a dwarf shrub in your garden that evokes similar themes to a full-size tree contributes a very distinct visual element. The shape and form of a S. integra can act as the basis or backdrop for all manner of visual displays. Its white-pink blooms look great against a wide array of colours – and a well-cared-for, mature shrub will make a fine centrepiece for your garden. References 1. Salix integra. (n.d.). Kew Royal Botanic Gardens. Retrieved March 23, 2023, from https://powo.science.kew.org/taxon/urn:lsid:ipni.org:names:777860-1
Learn more
How To Grow And Care For Hebe According To Professional Grower Charlie Bewley
IN THIS GUIDE Overview Habitat & Growing Conditions Planting Hebe Plant Care & Growing Tips Classification References Hebe is a plant known to be bushy and sprawling to upright and trim, with foliage ranging from greyish blue-green to a brilliant emerald hue. With inflorescences in all kinds of shapes including spires, sprays, and ‘puffballs’, and in colours ranging from pastel pink to deep purple, this shrub spoils you for choice. These immensely likeable plants are low-care evergreens; they are easy as 1-2-3: Plant, Gaze, and be Delighted! We reached out to Charlie Bewley from Hic Bibi Wholesale Nurseries to contribute to this guide. Pressed on his love for these plants, Charlie answers: “Hebes are evergreen, have a good range of foliage and flower colour and bees love their flowers – we get plenty of bees and other insects visiting our crops.” Overview Botanical Name Hebe Plant Type Shrub / Hedging Native Area New Zealand, Rapa, Falklands, South America Hardiness Rating H3/H4 Foliage Evergreen Flowers Racemes or spikes of small flowers When To Sow April, May, June, July, August, September Flowering Months July, August, September When To Prune April, May Hebe is a genus of evergreens that is native to New Zealand. They are evergreens and are technically shrubs, most of which are of a bushy habit though there is variation in size; two or three species can reach even 2-2.5m in height. Some species have a mat-forming habit and a few have an erect habit. Though Hebe varieties’ leaves are simple and paired, quite a number of varieties are interesting for – besides other properties – the foliage, as their leaves display unusual textures, hues of green, or eye-catching variegation. As for the flowers, their delightful inflorescences come in a diversity of shapes – tubular, sprays, spires, rays, salvers, ‘puffballs’ – and a range of colours across the blue-red spectrum, from the palest pastel to the deepest tone. Adding to their charms, they flower all through summer and autumn with some varieties producing blooms in winter as well! These wonderful plants are not only diverse and delightful, but they are also easy-care, trouble-free, tough, and well-suited to the British Isles as evidenced by the fact that RHS has accorded its Award of Garden Merit to thirty Hebe varieties.1 Charlie cites Hebe pinguifolia ‘Pagei’ as one of his favourite varieties because of its unique foliage shape and subtle colour. “Hebe ‘Pagei’ has delicate little globular foliage in a silvery colour. It is a spreading variety, so it is great for ground cover.” If you’re a gardener who takes pleasure and joy from Nature’s boon of flowering plants in all their diverse beauty, then Hebe is one of your top picks. Habitat & Growing Conditions All but a few species of Hebe are native to New Zealand.2 Though they grow throughout the island country, one cluster of species is partial to riparian zones and another grouping is concentrated in the country’s sub-alpine locations. Sunlight & Aspect In the wild these plants are found in open, unsheltered areas where they get full sun and also ‘full wind’, so to speak. Therefore, these fuss-free plants are happiest in full sun but also do well in partial shade. As a bonus, aspect has no bearing on these plants. They are more tolerant of stiff winds than other similarly-sized plants. “With many Hebe being mounded and possessing tight, leathery leaves, it is not surprising that they can stand up to strong winds,” says Colin Skelly, Master Horticulturist. “This makes Hebe great for coastal regions, but the hardier alpine varieties are also suitable for colder, windy areas.” The variance and diversity in Hebe extends to their Hardiness Zones which range from a low of USDA 7 to a high of 11 – or H3/H4 by RHS classifications. Planting Hebe When To Plant April to June is the best time to plant (or transplant) Hebe plants outdoors. This would allow ample time for their roots to get established before the onset of winter. You can help along new plants’ root systems by watering them but not giving them any fertiliser. Where To Plant Hebe can be planted in almost any type of soil including poor soil. What they value more than anything else is sun and light, so put them in a location where they get full sun or the maximum amount of sun. This should not be misunderstood to mean that Hebe prefer high heat; in fact, they do best where the summers are cool to temperate. You don’t have to plant Hebe by the seaside or in a coastal area but this is one plant that you can grow without any anxiety in locations which have that tang of sea-salt – sea spray – in the air. Hebe plants should be planted in the appropriate location depending on the size, habit, foliage, and flowers of the variety in question. Though Hebe plants are considered – with justification – ideally suited to informal gardens and cottage gardens, their enormous diversity means that a few varieties would be top choices for architectural plantings, e.g. H. ‘Emerald Gem’ and Hebe salicifolia, while some varieties would be top choices for balcony pots, e.g. H. ‘Red Edge’ and H. ‘Youngii.’ H. ‘Emerald Gem’ Plant Care & Growing Tips Soil Soil may be virtually any type at all except for heavy, dense, clay soils. Slightly Alkaline pH is ideal though the pH may be anything from Neutral to Moderately Alkaline. These plants should have well-drained soil but even here what is a ‘must’ for the vast majority of plants is a ‘nice to have’ for most varieties. Feeding Hebe does not need or even really benefit a great deal from being fed. That said, they can certainly be given some general fertiliser or bone meal in spring. Where Hebe and fertilising are concerned, experiment but be conservative and cautious. Winter Care The one area that Hebe do require a watchful eye, and care as needed, is where the winter weather is concerned. Be aware of the hardiness zones of your Hebe varieties because most of them are right on the border for United Kingdom locations. If you live in a cold region and you feel your Hebe may not be hardy, play it safe, mulch the plant, and shelter it from the weather. Classification It is necessary to mention that the Botanical classification and taxonomy of genera and species are subject to disagreement and revision, and Hebe is a prime example of such disagreement.3 For instance, even as Genus Hebe was subsumed within Genus Veronica by some scientists, others segregated a species group from Genus Hebe to its own, new, genus!4 Even the number of species in the genus is in dispute because there is no consensus as to which species belongs where. In our overview we treat Hebe as a genus, i.e. Genus Hebe. It has about 189 species and about 800 cultivars. Of the 189 species only 15 are officially accepted!5 Although the genus Hebe has been subsumed within the genus Veronica by botanists6, many plants continue to be sold as Hebe.7 After much hybridisation and cultivation, quite a staggering variety of Hebe plants have been developed. Partly as a result of these efforts they are – at least superficially if not morphologically – wonderfully varied and disparate. References 1. See RHS Award of Garden Merit (AGM) plant, fruit & veg award winners. (n.d.). Royal Horticultural Society. Retrieved March 16, 2023, from https://www.rhs.org.uk/plants/trials-awards/award-of-garden-merit 2. Hebe. (n.d.). Oregon State University. Retrieved March 16, 2023, from https://landscapeplants.oregonstate.edu/hebe 3. Wagstaff, S., Bayly, M., Garnock-Jones, P., & Albach, D. (2002). Classification, Origin, and Diversification of the New Zealand Hebes (Scrophulariaceae). JSTOR. Retrieved March 16, 2023, from https://www.jstor.org/stable/3298656 4. Garnock-Jones, P. (n.d.). Heliohebe (Scrophulariaceae – Veroniceae), a new genus segregated from Hebe. New Zealand Journal of Botany, 31(4), 323–339. https://doi.org/10.1080/0028825X.1993.10419510 5. International Register of Hebe Cultivars. (n.d.). Royal New Zealand Institute of Horticulture. Retrieved March 16, 2023, from https://www.rnzih.org.nz/Book_Reviews/Hebe_Register-2.htm 6. Plants of the World Online. (n.d.). Kew Royal Botanic Gardens. Retrieved June 13, 2023, from https://powo.science.kew.org/results?q=Hebe 7. Hebe. (n.d.). Royal Horticultural Society. Retrieved June 13, 2023, from https://www.rhs.org.uk/plants/hebe
Learn more
How To Grow Forsythia As A Reliable, Low-Care Ornamental Shrub
IN THIS GUIDE Overview Habitat & Growing Conditions Planting Forsythia Plant Care Common Problems Sourcing Forsythia References Forsythia bushes are very popular as they fulfil a dual role. These low-care shrubs are ideal for privacy screens and separation walls from one to three metres tall. They are also high-quality ornamentals, especially through spring when they put on a stunning show with leafless branches bedecked with brilliant yellow bell-like blooms, and to some extent also in autumn with rich fall colours. Overview Botanical Name Forsythia Plant Type Shrub Native Area Mostly East Asia Hardiness Rating H4-H7 Foliage Deciduous Flowers Tubular bright yellow flowers When To Sow March, April, September, October Flowering Months March, April, May Forsythia is a genus of what are technically deciduous shrubs but informally are flowering bushes. Considered an ornamental plant, it is a member of the Oleaceae family which includes Olive trees, Jasmine, and Lilac.1 Most species grow from one to three metres tall. While two metres is just about right for privacy screens, taller varieties of Forsythia make very good backdrops for a flower bed or at the far end of your garden, and the smallest varieties are equally good for borders. The principal attraction of this bush is the profusion of yellow blooms it starts to wear from early spring, well before it sprouts leaves. As a result, one sees a lattice of spreading, rangy, slim, leafless branches covered with an abundance of yellow flowers, which in turn, are often covered with bees and butterflies! Forsythias retain their foliage all autumn long, if the climate is cooperative, and are one of the last shrubs to shed their leaves. These no-nonsense bushes are strong and tough, and with next to no care or maintenance you can count on them as a ‘living wall’ to act as a border, backdrop, boundary marker, or privacy screen. “Forsythia in the right position (full sun) and pruned regularly will produce an abundance of flowers year after year,” shares Horticulturist and Consultant Colin Shelly. “I tend to use it as a dense screen or at the back of a border where its early flowers are a highlight and its later foliage form a foliar backdrop to later flowerers.” Habitat & Growing Conditions In general, Forsythias are hardy to RHS Zones H4-H7 (USDA Zones 5 to 9) depending on the particular variety. As most European Forsythia cultivars descend from species that grew and grow wild along streams and waterways in Southern and Eastern China, Japan, and the Koreas, the best growing conditions should mimic their native habitats. So the most suitable climate for Forsythia varies from temperate-warm to cold, the soil needs to be moist but well-drained, and while the aspect may be to any direction the exposure should be full sun or mostly sunny. They prefer a little moistness in the soil and some moisture in the air; very dry weather conditions affect flowering. They are perfectly content in soil varying from slightly acidic to slightly alkaline; pH 6.0 to 8.0. Planting Forsythia Almost all Forsythia are very easy to grow in late summer and early autumn from semi-hardwood (or semi-ripe) cuttings. In late spring they can be grown from greenwood cuttings. Forsythia may be planted wherever the soil and weather conditions, as outlined above, are suitable. The taller varieties can be planted at the rear of the garden as a backdrop or used as separation walls and privacy hedges. The shorter varieties are ideal for borders and edges, but also as companion plants in a bed if they are kept pruned. The medium-sized varieties can be used as elements of a formal garden (as they are in Japanese Gardens). A variety of weeping Forsythia is perfect for growing on a trellis or for planting right beside a pergola. Plant Care Forsythia is a no-fuss plant that demands virtually no feeding or care. Mature Forsythia bushes have a strong root system and make do with moisture in the soil and water from rainfall. They will also tolerate a period of drought but if you get a prolonged dry spell, it is much better to water them than to rely on their drought tolerance. Fresh cuttings, layerings, and immature plants should regularly be watered. What Forsythia can’t do without is ample sun. Though they fare very well in partial shade, this does have a negative impact on flowering. Therefore, full sun is best for this plant, particularly in the United Kingdom. These bushes will also benefit from an application of a general-purpose fertiliser once at the onset of spring and once more at the beginning of summer. Common Problems Forsythia flowers are, fortunately, a hit with butterflies and bees; the buds are, very unfortunately, also a hit with birds, so you may have to watch out for finches, sparrows, and other such naughty birds. Otherwise, all you need to be concerned about with these pest-resistant plants is Forsythia Gall and Crown Gall. These are bacterial diseases that cause abnormal, tumour-like growths. These diseases can affect any part of the plant and often escape detection and are difficult to diagnose. Very unfortunately, they are contagious and spread via soil; treating them is best left to a professional horticulturist or arborist. Sourcing Forsythia Quite a selection of Forsythia varieties are sold as bare roots or as potted plants by numerous nurseries in the UK. They can be bought on-site or ordered for home delivery. However, you don’t have to buy Forsythia if a friend or a neighbour has a variety you want, or vice versa. You can start off a new Forsythia plant any time from late spring to early autumn by rooting an appropriately-taken cutting in a rich planting soil that includes peat moss. You will – of course – have to take proper care of the cutting until it is established. You could also watch for a branch that has touched the ground and put down roots. Once it has developed into a plant in its own right by putting out shoots and branches, it can be removed and transplanted. Take good care not to damage the tap root. Finally, if you know the technique of layering, you can get new Forsythia via this fourth option as well. References 1. Oleaceae. (n.d.). Plant Facts. Retrieved March 16, 2023, from https://plantfacts.osu.edu/resources/hcs300/olea.htm
Learn more
Ceanothus ‘California Lilac’ Growing Guide: This Plant Is An Absolute Bee Magnet!
IN THIS GUIDE Overview Why Grow Ceanothus? How To Grow Ceanothus Ceanothus Care Common Problems References Break down the Greek word that gave rise to the name of this plant, and you’ll find it translates to “spiny plant” – a label that sidesteps the truly defining characteristics of the flower: big panicles of colourful florets, which bring bold bursts of beauty to any garden. If you’re looking for an attractive and versatile plant, then look no further. “The glossy leaves and the hum of bees on pale blue flowers are the main highlights of Ceanothus for me,” says Horticulture Technician Peter Lickorish. Varieties of ceanothus flower in spring, summer, and autumn. It has glossy leaves, with flowers in a range of calming colours – and is suited to hedges, ground cover, or even as a source of scent in your garden. Overview Botanical Name Ceanothus Common Name(s) Californian Lilac; Soap Bush; Buckbrush Plant Type Shrub Native Area United States Hardiness Rating H4 (for most species) Foliage Evergreen Flowers Small blue, white or pink flowers in terminal clusters When To Plant March, April, May Flowering Months May, June, July, August, September, October As we said earlier, the name translates simply as “spiny plant” in Greek.1 You’ll also see common names used, including ‘Soap Bush’, ‘California Lilac’ (alluding to the west coast of America, where this plant is most diverse) and ‘Buckbrush’.2 The genus contains about 55 species of plant, ranging in size from shrubs to small trees.3 Originally hailing from North America, from coastal areas to mountaintops, ceanothus has become a popular candidate for British gardens thanks to its versatility and beauty.4 Why Grow Ceanothus? This genus of plants includes a spectrum of cool and pastel colours, and offers enough variety in preferred growing conditions that most gardeners will be able to find at least something compatible with their outdoor space. What’s more, the majority of Ceanothus are rated as having hardiness of H4, meaning they can thrive in temperatures down to -5°C – making them great for most of the UK. I actually have a Ceanothus at the bottom of my garden that has been there since we moved in (see the picture above). During its main flowering season in late spring and early summer I have never seen so many bees on one plant – the tree itself seems alive with a constant ‘buzz’ from the sheer number of different types of bees harvesting pollen from its fuzzy blue blooms. It makes me really happy to know that this one plant is providing so much to the local ecosystem – especially our pollinators. Not only that but we also get a second flowering in late autumn which, while not quite so prolific, provides a welcome burst of late colour in the garden. How To Grow Ceanothus The growing and care tips given below are indicative of some plants in the genus, but not all of them. With so many varieties available, we recommend checking the specific requirements of each and every ceanothus you decide to grow. Where To Grow Hailing from the West coast of America, this plant can tolerate a lot of sunlight. For best growth, plant somewhere with full sun exposure, and with a little shelter against the harsher winds and frosts they’ll experience in the UK. C. thyrsiflorus ‘Millerton Point’ Somewhere facing west or south should do the trick. In terms of soil, the general rule is most but well-drained, with neutral or alkaline pH level. Some varieties can tolerate acidity, but as mentioned, double-check the specific varieties you’re planning to grow to avoid disappointment. Planting Best planted in spring to avoid frost damage while it establishes, or if you have particularly well-draining soil, you can plant in autumn. Digging in leaf mould or well-rotted manure aids with drainage on heavy soils, and increases the chance of your Ceanothus taking. Ceanothus Care Fertilising Ceanothus rarely require feeding, but can benefit if you decide to do it. Sprinkle balanced fertiliser around the base, leaving a ring of around 3-5cm from the plant. This helps to avoid rotting, which can occur if you fertilise too close to the plant. Watering You’ll want to water your ceanothus fairly frequently during dry weather until the roots are established, which can take a few years. When your ceanothus is established, it won’t need much watering unless you’re experiencing drought conditions. Training Certain varieties of this plant are well-suited to training up walls and other vertical surfaces, such as Ceanothus azureus. Use twine to gently tie new shoots onto supporting structures, like trellises or chicken wire. This should encourage vertical growth without causing damage to the plant. Common Problems I find that my Ceanothus is generally free from pests and diseases, making it a forgiving choice for gardeners who don’t have lots of time to spend monitoring the health of their plants. There are a couple of things to keep an eye on, however. Exposure Damage As alluded to, this plant’s West Coast origins mean it may not cope so well with some of the harsher conditions the UK throws at it. If you’re not able to find a sheltered location for your ceanothus, try to control against damage from wind and frost. Wind scorch is caused by cold winds pulling moisture from plants and soil, putting them in a position where they struggle to replace the water quickly enough. As a result, leaf edges – or entire leaves in particularly bad cases – may turn brown. If your ceanothus is growing in an exposed position and strong winds are forecast, do your best to erect a windbreak – either manmade or in the form of another plant. I am lucky in that my Ceanothus is growing at the end of our garden where it is very well protected from the wind by the surrounding fencing and houses. The area around its base is also mulched extensively to protect the roots of the plant. Though ceanothus is hardy, it will struggle in some UK temperatures. If you live in a particularly exposed area, using horticultural fleece to cover the plant, as well as mulch, or some other insulating medium around the root of the plant can protect against frosty spells, and pruning damaged sections can control the damage caused. Scale Insects These pests like to make their home on ceanothus leaves and stems, feasting on the sap contained within. You’ll see bumpy ridges on leaf undersides, and possibly black fungus atop the leaves that grows on the insects’ excretions. At first you can remove the insects by hand, although this won’t work against higher numbers. You can encourage predators such as ladybirds to visit your garden to eat the insects or, failing that, a range of pesticides are available to curb more persistent visitors. This colourful and striking plant, with its bundles of brightly coloured flowers vying for attention and providing beautiful backdrops for medleys of other flowers, makes a fine addition to any garden. We’re sure you’ll enjoy incorporating them into yours! References 1. Ceanothus, Versatile California Native. (n.d.). ANR Blogs. Retrieved March 14, 2023, from https://ucanr.edu/blogs/blogcore/postdetail.cfm?postnum=49058 2. Ceanothus. (n.d.). California Native Plant Society. Retrieved March 14, 2023, from https://calscape.org/loc-california/Ceanothus(all)/np-1/vw-list?view_style=list 3. Ceanothus. (n.d.-b). Oregon State University. Retrieved March 14, 2023, from https://landscapeplants.oregonstate.edu/ceanothus 4. Ceanothus thyrsiflorus. (n.d.). The University of Texas at Austin. Retrieved March 14, 2023, from https://www.wildflower.org/plants/result.php?id_plant=CETH
Learn more
These Gardeners Have Been Growing Camellias For 75 Years - Here Are Their Tips
IN THIS GUIDE Overview Habitat & Growing Conditions Planting Camellia References An elegantly ornamental plant with great cultural significance in the Far East, the Camellia used to be a firm favourite of the European High Society in the mid-Nineteenth Century.1 Then the American South made the Camellia its own. Camellias are – of course – highly valued in their native lands of East Asia and South-East Asia where they are not only popular but are an element of the cultures of the nations.2 In our Camellia guides, we feature: Patricia Short – UK Membership Representative of the International Camellia Society. Lorraine Summers – Owner of Trehane Camellia and Blueberry Nursery. “By carefully selecting camellia varieties, you could have a garden full of blooms from October to May, when their colour can provide some much-needed happiness and pollinators can use them in abundance”. “Additionally,” says Patricia: “camellias can be left to grow into trees – nice specimens for a garden – or pruned to suit one’s needs. “One doesn’t have to fuss over camellias.” Overview Botanical Name Camellia Plant Type Shrub Native Area East / South Asia Hardiness Rating H5 Foliage Evergreen Flowers Solitary or clustered flowers Flowering Months January, February, March, April, May, October, November, December In general, Camellia plants are evergreen shrubs, mostly of upright habit though a goodly number are rounded or spreading. Their heights typically range from 2-5m though old, well-cared-for plants are much taller. The simple leaves are usually thick, glossy and of a deep green colour. Many, though not all, Camellia varieties present very well as both the plant and the flower have a neat, manicured, and symmetrical appearance, especially the varieties of upright habit and flowers of Formal Double form. Jeju Island, South Korea The flowers are large and showy and single-form flowers have prominent yellow stamens. Many cultivars, including the most-prized ones, have semi-double or double corollas. The double forms are divided into a further three sub-forms but the ‘real’ double form is ‘Formal Double’. C. japonica ‘Nuccio’s Gem’ Formal double-form flowers do not display stamens. Their colours include white, off-white, and various shades of pink, rose, red, and fuchsia. Some varieties are double-coloured, these coming in striped, variegated and dappled styles. When other plants are dormant or dead, Camellia comes into its own and blooms. A smartly-chosen mix of Camellia varieties will reward you with colourful flowers from at least October through March. Habitat & Growing Conditions In the wild, both C. japonica and C. sasanqua are found at elevations of up to 1,000m in the wooded and forested regions of China, South Korea, and the south of Japan. They grow in acidic soils. In Japan, C. japonica is adapted to freezing temperatures and snow. They rejuvenate and flower after the passage of winter. Aspect Camellia species do not favour full sun though most species will grow and even thrive in full shade. Their preference is for part-sun, part-shade exposure where they are sheltered from the mid-day and afternoon sun. Indeed, they are accustomed to this type of shelter in their native woody and forested habitats where they are also shielded from strong, cold winds. Hardiness The vast majority of Camellias are H5 hardy in the United Kingdom – meaning they are able to survive in all but the coldest areas of the British Isles. Camellia cultivars that are hardy in sub-freezing temperatures are identified by the word ‘Winter’ in their names. Planting Camellia Camellias may be planted in pots but at some point these long-lived plants will need to be transplanted to larger containers or into the ground. Where To Plant Whilst care should be taken to stake young camellias and to limit exposure to cold easterly winds, mature camellias can withstand windy conditions,” explains Horticultural Consultant Colin Skelly. “When camellias first arrived in the UK, they were considered glasshouse plants, but we are slowly realising that they are far hardier and tougher than first thought.” They are best grown in a location of partial shade where they are shielded from the afternoon’s hot sunshine though they will happily thrive in shadier locations too. Seedlings and growing plants need such sheltering even more than mature plants. Plants should also be protected from stiff, cold winds. In view of their preferences, Camellias should be planted under the shade of larger plants or trees or close by some structure or a wall. Optimally these plants should be shielded from the southern sun in the summer and from north winds in winter. When To Plant The ideal time to grow Camellia is in spring for a ‘triple play’. The flowering season is over, the cold winter has departed, and new plants can get established before the return of winter. References 1. Europe. (n.d.). International Camellia Society. Retrieved March 13, 2023, from https://internationalcamellia.org/en-us/our-organisation/europe 2. Camellia japonica. (n.d.). Kew Royal Botanic Gardens. Retrieved March 13, 2023, from https://powo.science.kew.org/taxon/urn:lsid:ipni.org:names:828524-1
Learn more


